
Bulk Adjustment allows you to update inventory quantities for multiple SKU-bin mappings in a single operation. Instead of opening each inventory record individually, you can filter the inventory you want to modify, edit quantities in bulk, review the changes, and confirm the adjustment with an inventory adjustment reason.
This guide covers how to select inventory records, perform bulk edits, review your changes, and complete the adjustment.
Example Use Case
Suppose you complete a cycle count for BIN-001 and find that several SKU quantities need to be corrected. Rather than opening each SKU-bin mapping individually, you can filter the inventory for BIN-001, select all the affected records, make the required quantity updates in a single workflow, review the changes, and confirm the adjustment.
Step 1: Filter the inventory you want to adjust
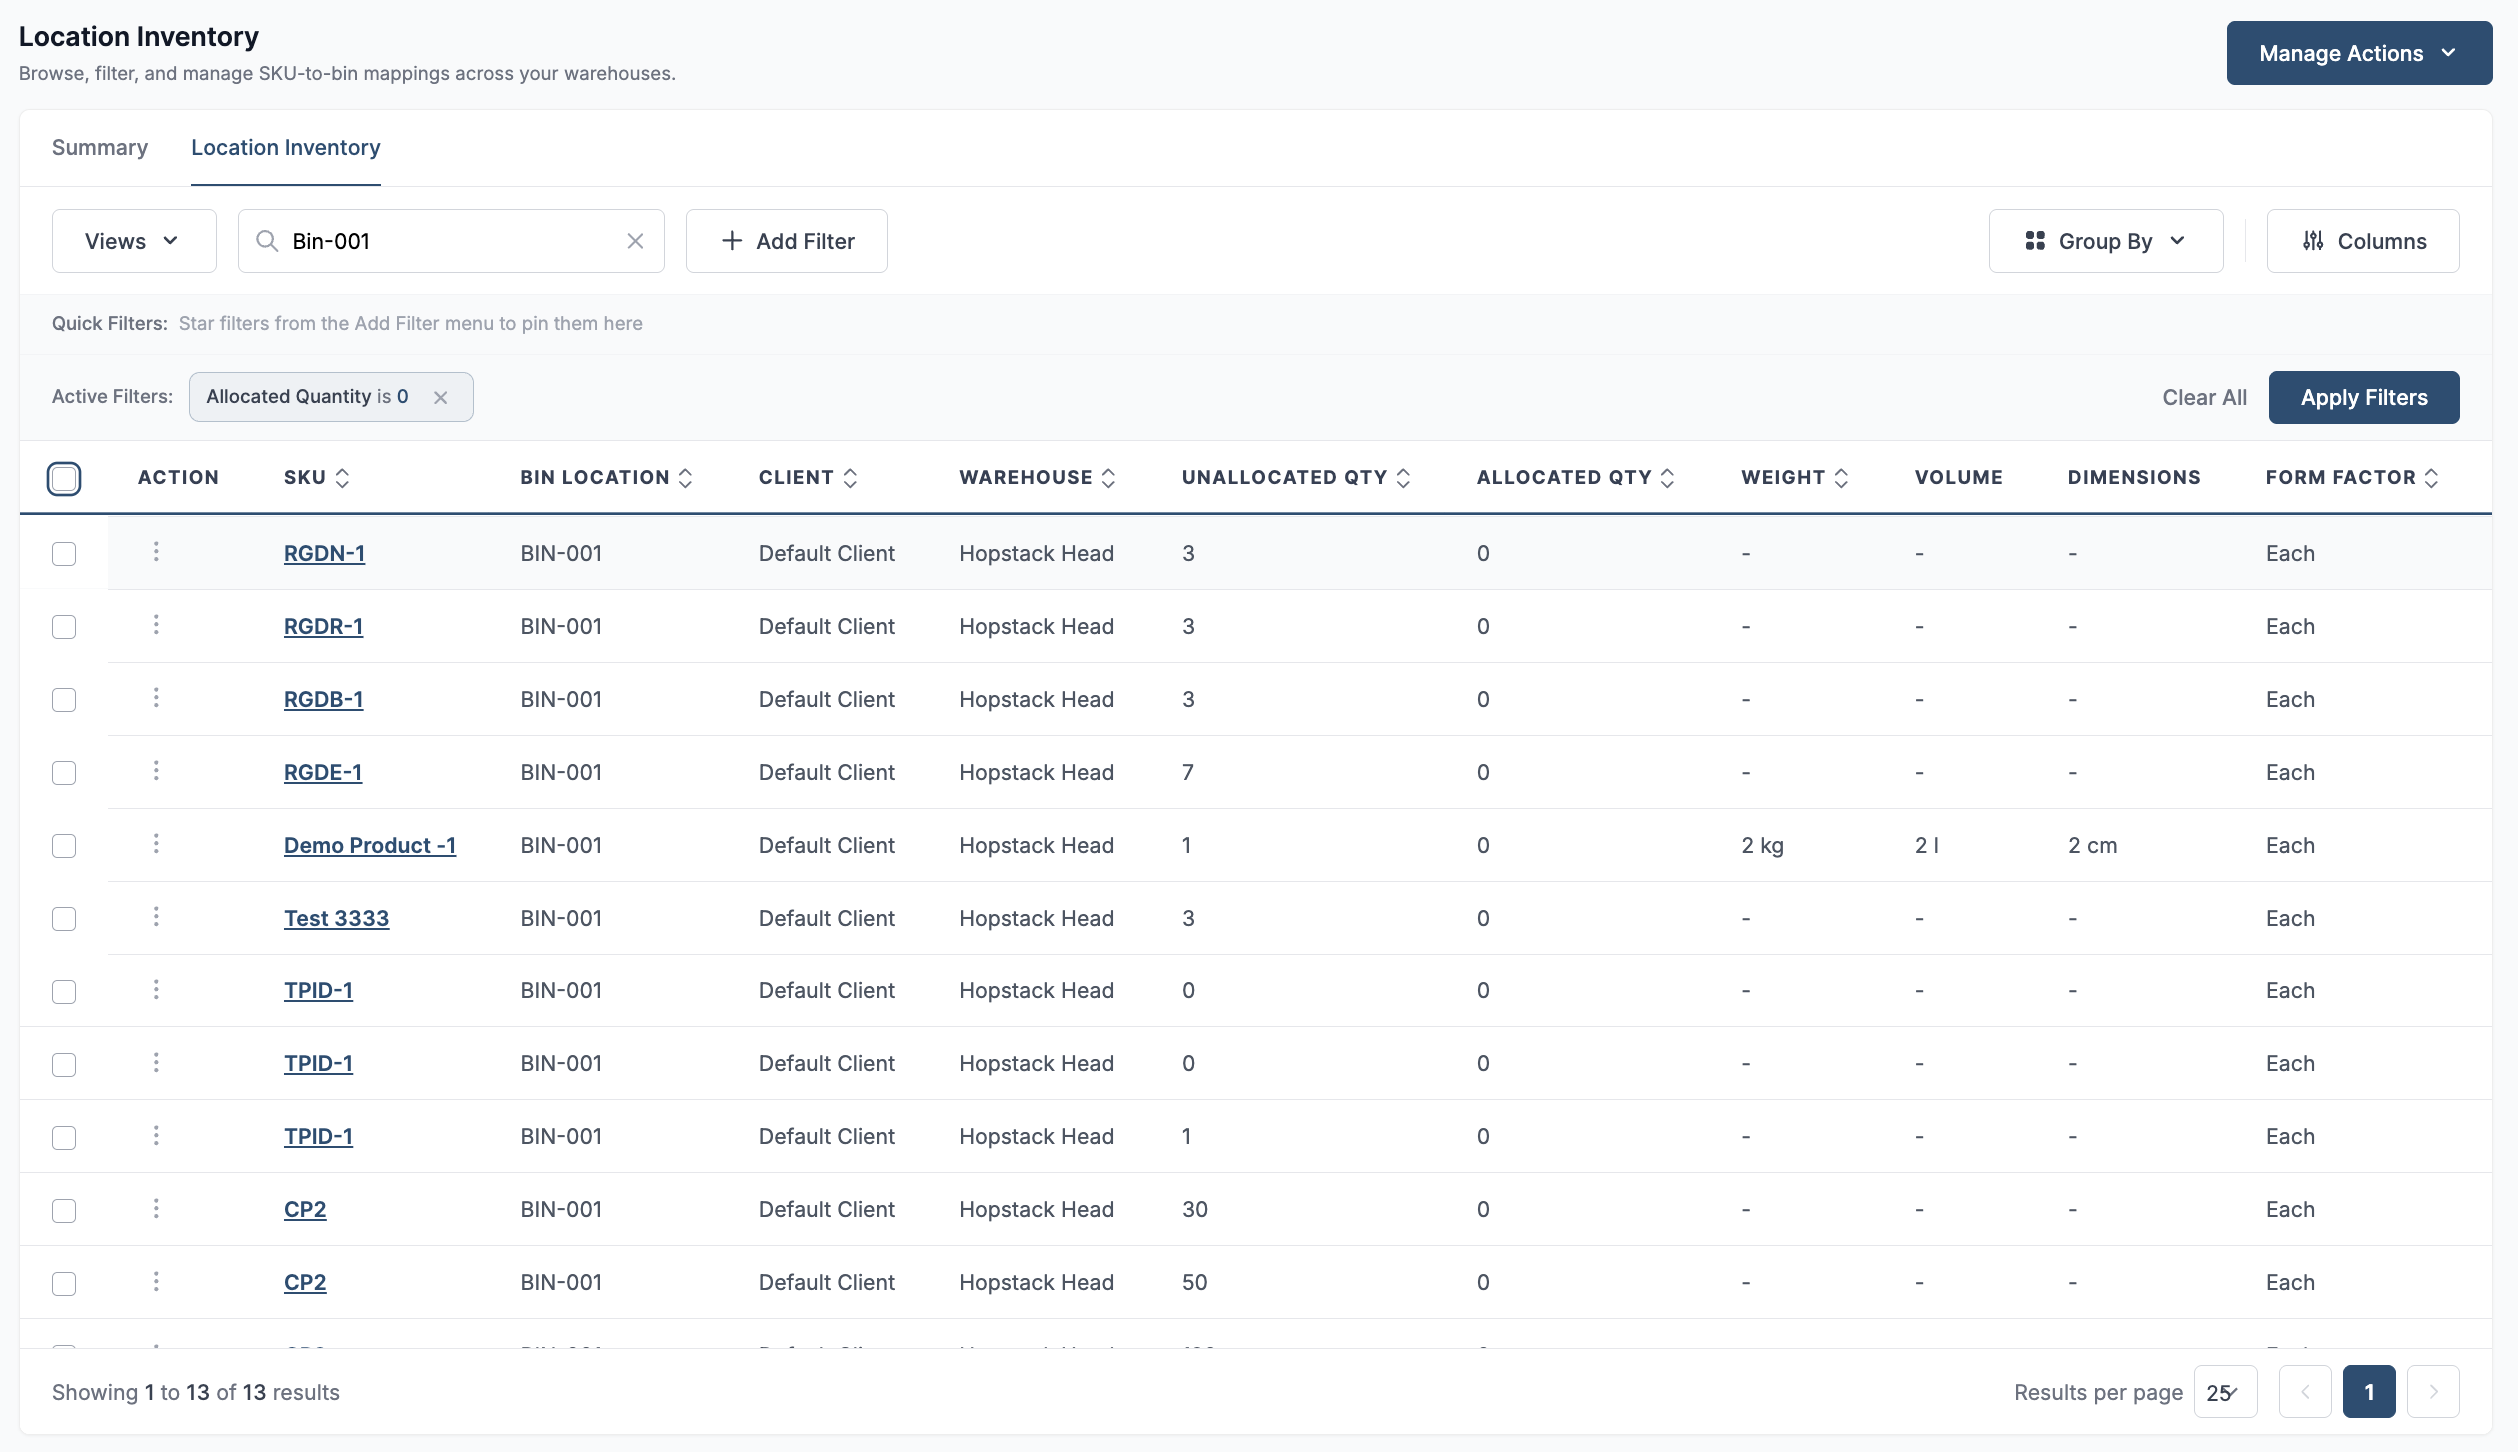
Use the Search bar and Filters to display only the SKU-bin mappings you want to update.
For example:
-
Search for BIN-001
-
Filter Allocated Quantity = 0
-
Apply additional filters such as Warehouse, Client, SKU, Lot, or Storage Unit as needed.
This helps narrow the inventory list so that only the relevant records are displayed.
Step 2: Select the inventory records
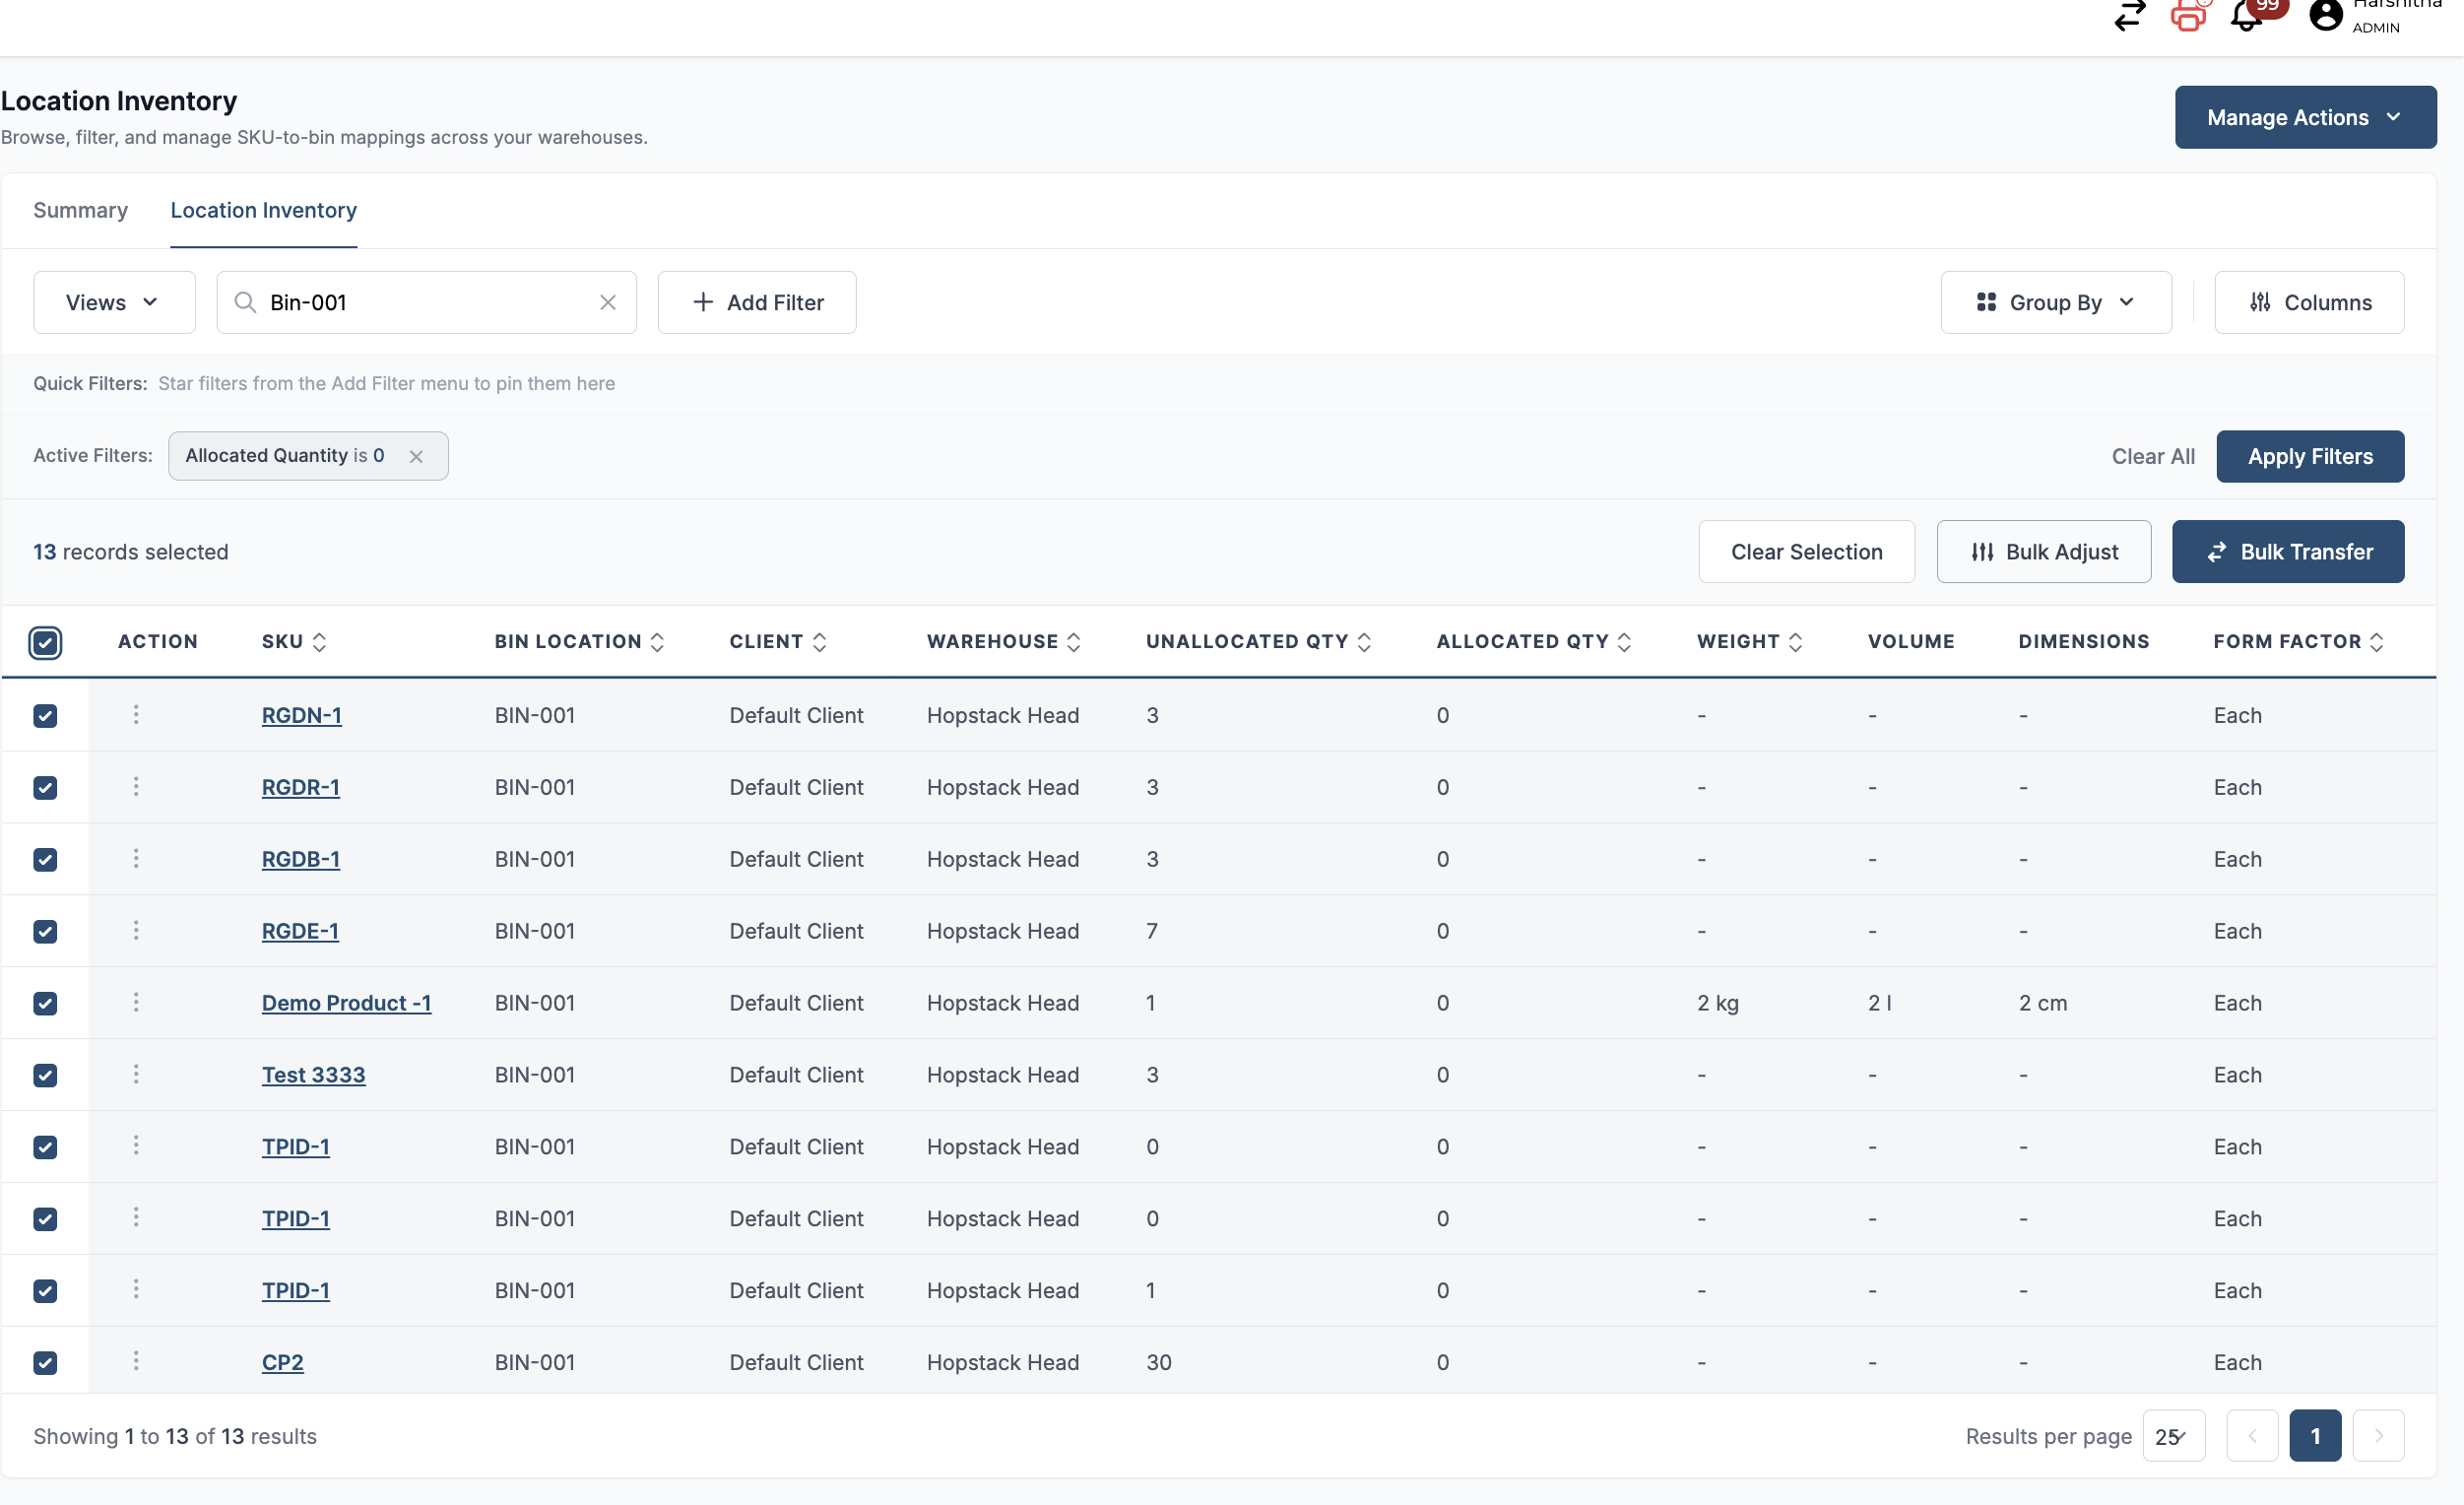
Select the SKU-bin mappings you want to adjust using the checkboxes on the left side of the table.
Once one or more records are selected, additional bulk action buttons become available.
Click Bulk Adjust to start the adjustment process.
Step 3: Review Scope
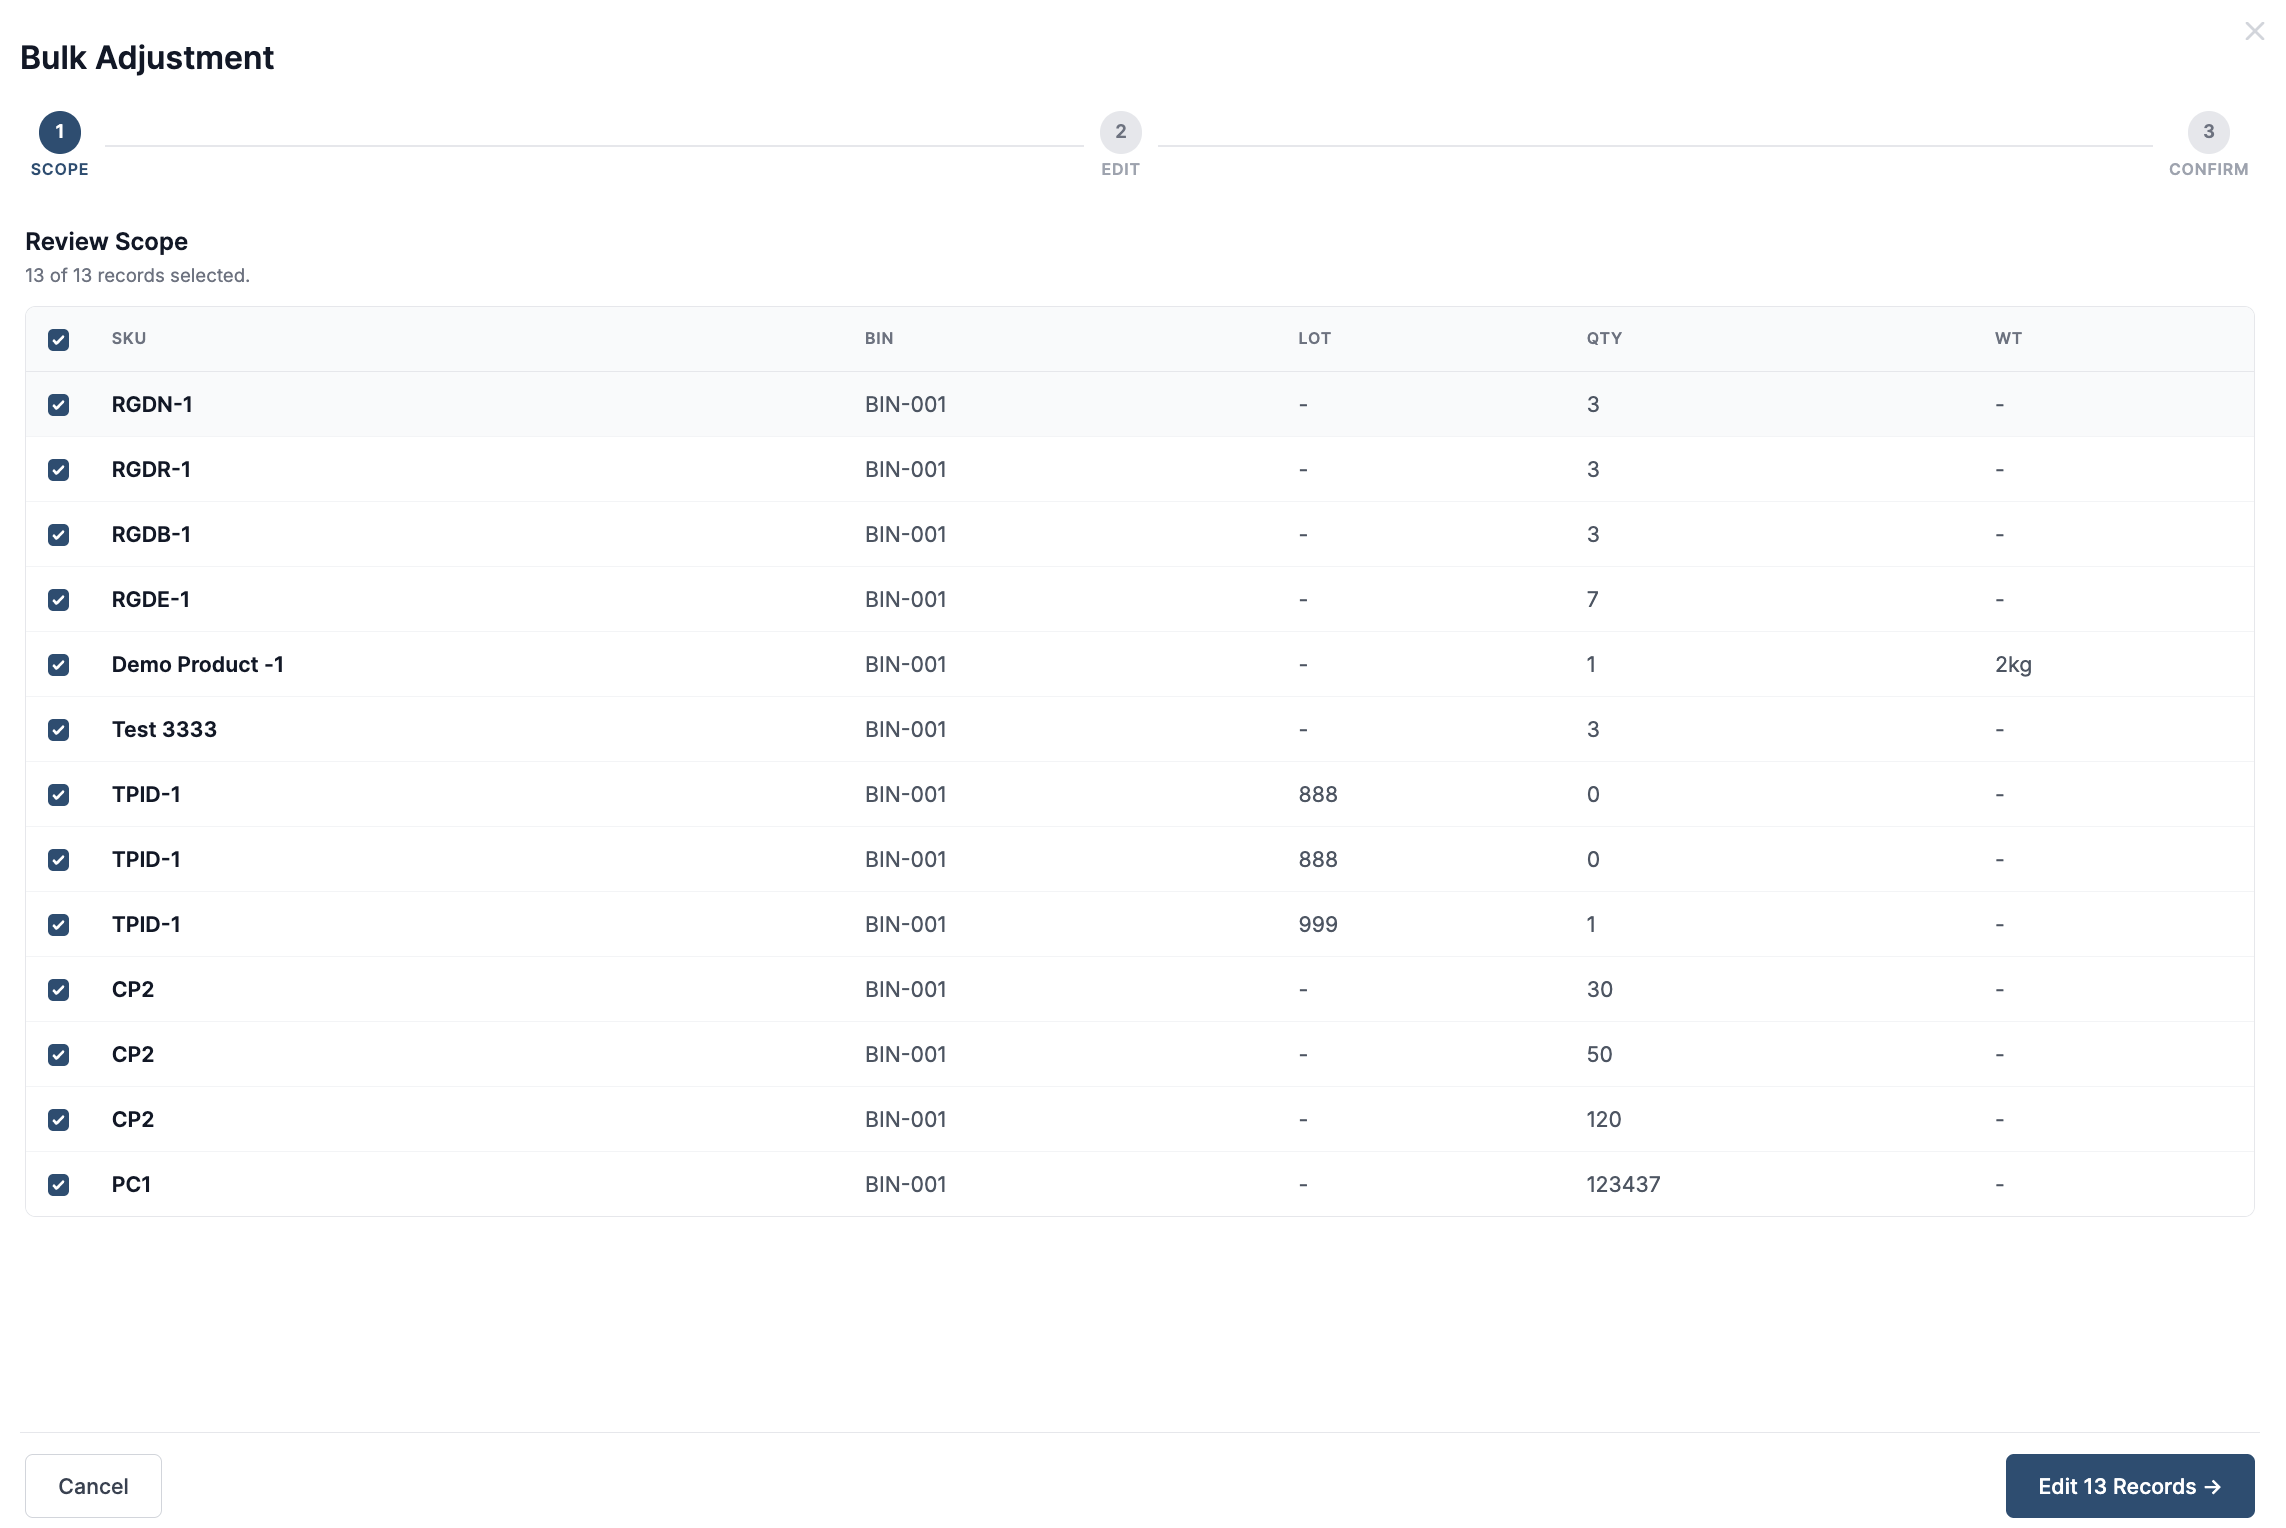
The Bulk Adjustment panel opens.
The first step displays every selected inventory record that will be included in the adjustment.
For each selected record you can review:
-
SKU
-
Bin
-
Lot
-
Current Quantity
-
Weight (if applicable)
Use this page to verify that the correct inventory has been selected before making any changes.
Click Edit Records to continue.
Step 4: Edit Records
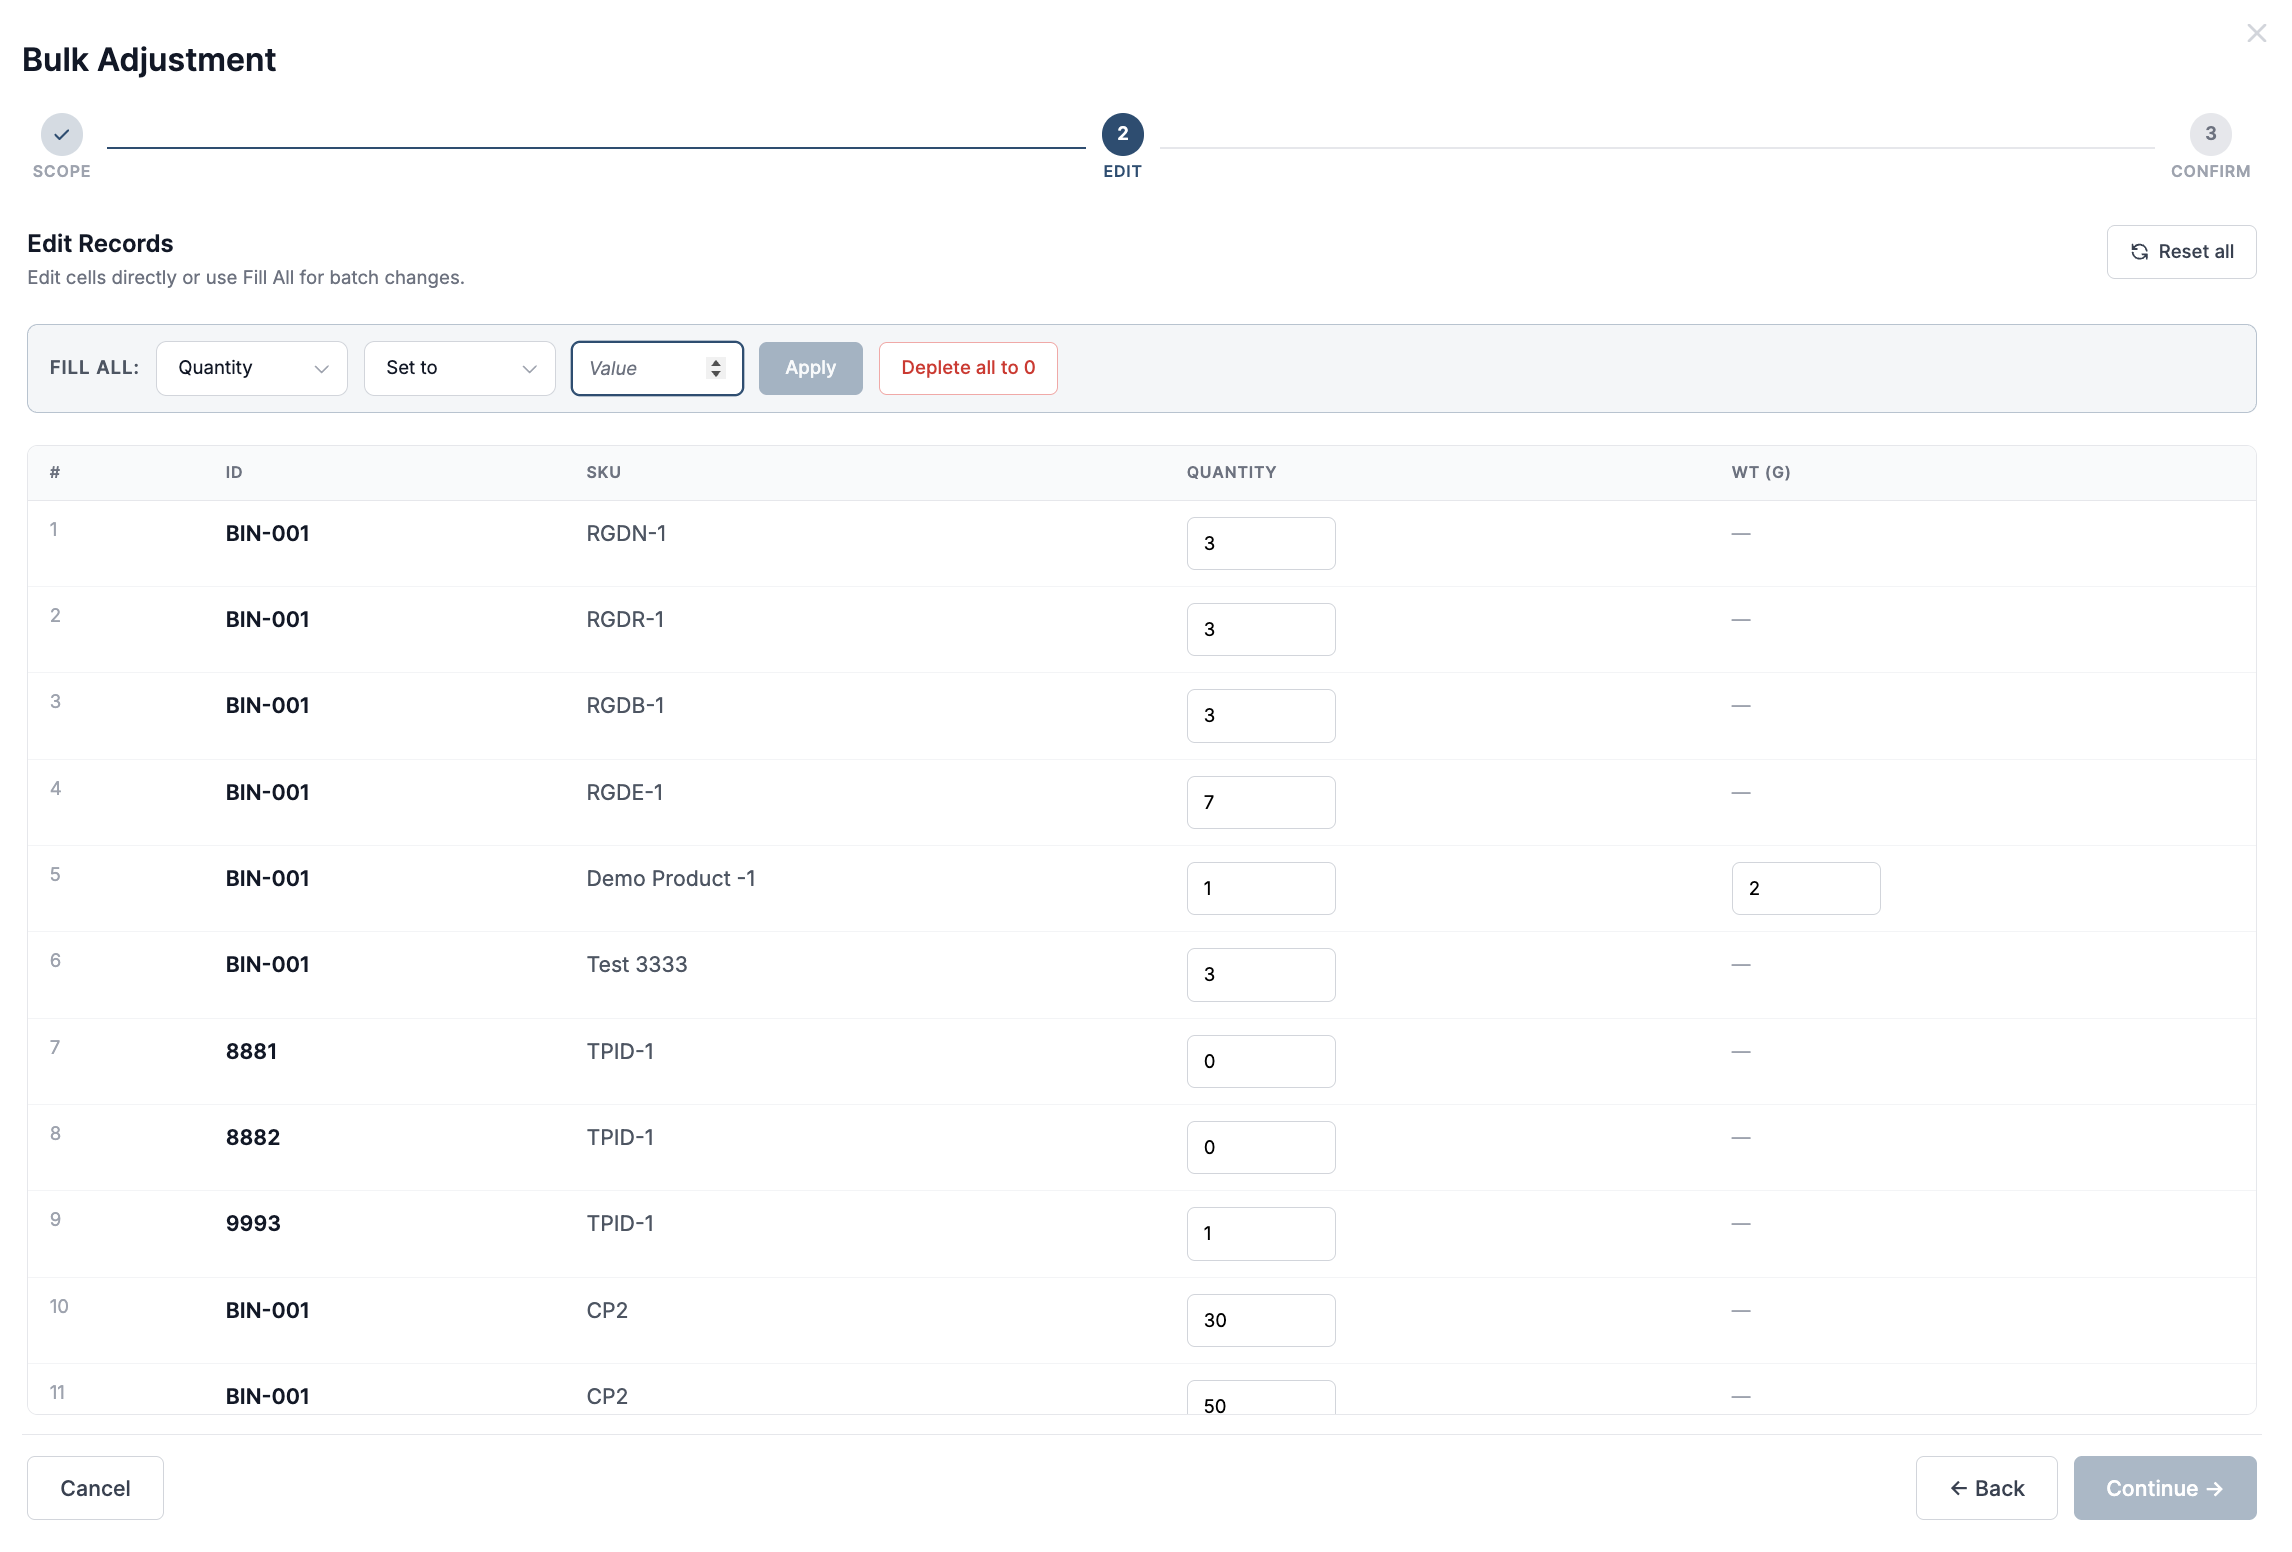
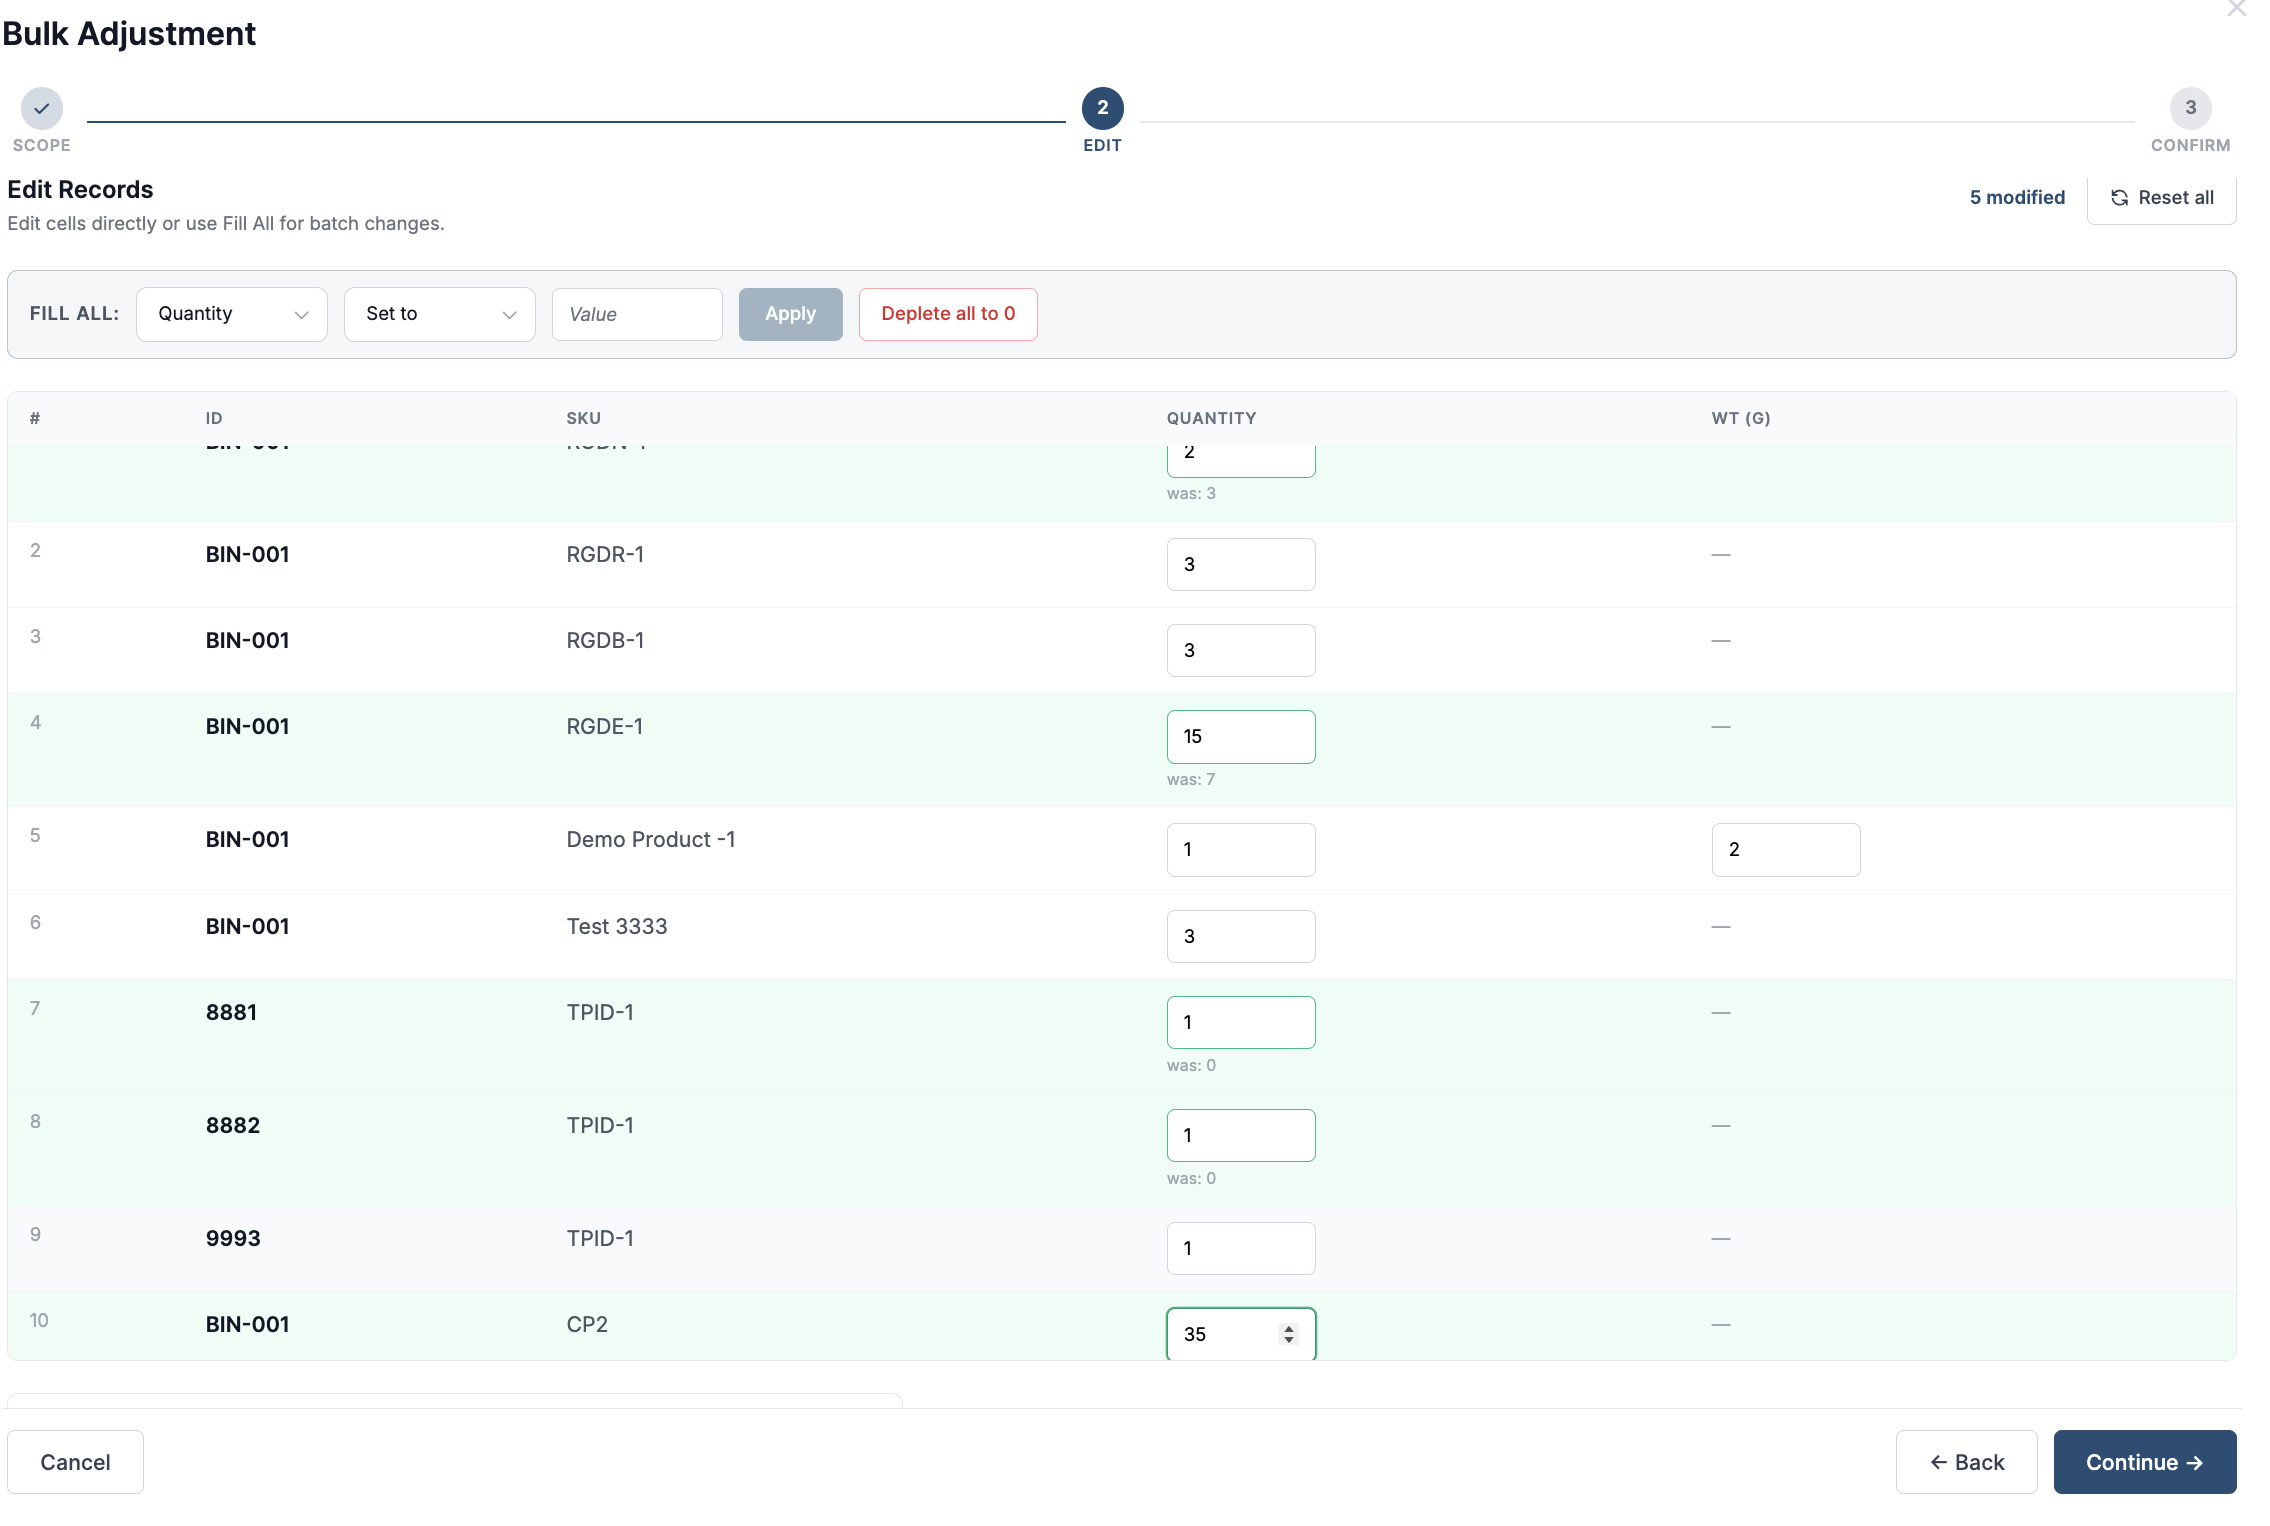
The Edit step lets you modify inventory quantities either individually or in bulk.
Edit individual records
Modify the Quantity or Weight field for any SKU-bin mapping.
This option is useful when different inventory records require different quantity corrections.
Simply replace the existing quantity with the corrected value.
Fill All (Batch Update)
Use the Fill All section at the top of the page to apply the same change across multiple selected records.
Choose:
-
Field (for example, Quantity)
-
Operation
-
Value
Then click Apply.
Example
If every selected SKU should now have a quantity of 10:
-
Field = Quantity
-
Operation = Set To
-
Value = 10
Click Apply, and all selected records will be updated.
Deplete all to 0
Click Deplete all to 0 to set the quantity of every selected SKU-bin mapping to 0.
This is useful when inventory has been completely removed from the selected storage locations.
Reset all
Click Reset all to discard every modification made during the current editing session and restore all values to their original quantities.
Modified records
After making changes:
-
Edited rows are highlighted in green
-
The previous quantity appears below the edited field as "was X"
-
A Modified counter at the top of the page shows how many records have been changed
This provides a clear visual confirmation of every inventory adjustment before you proceed.
Step 5: Review Changes and Confirm
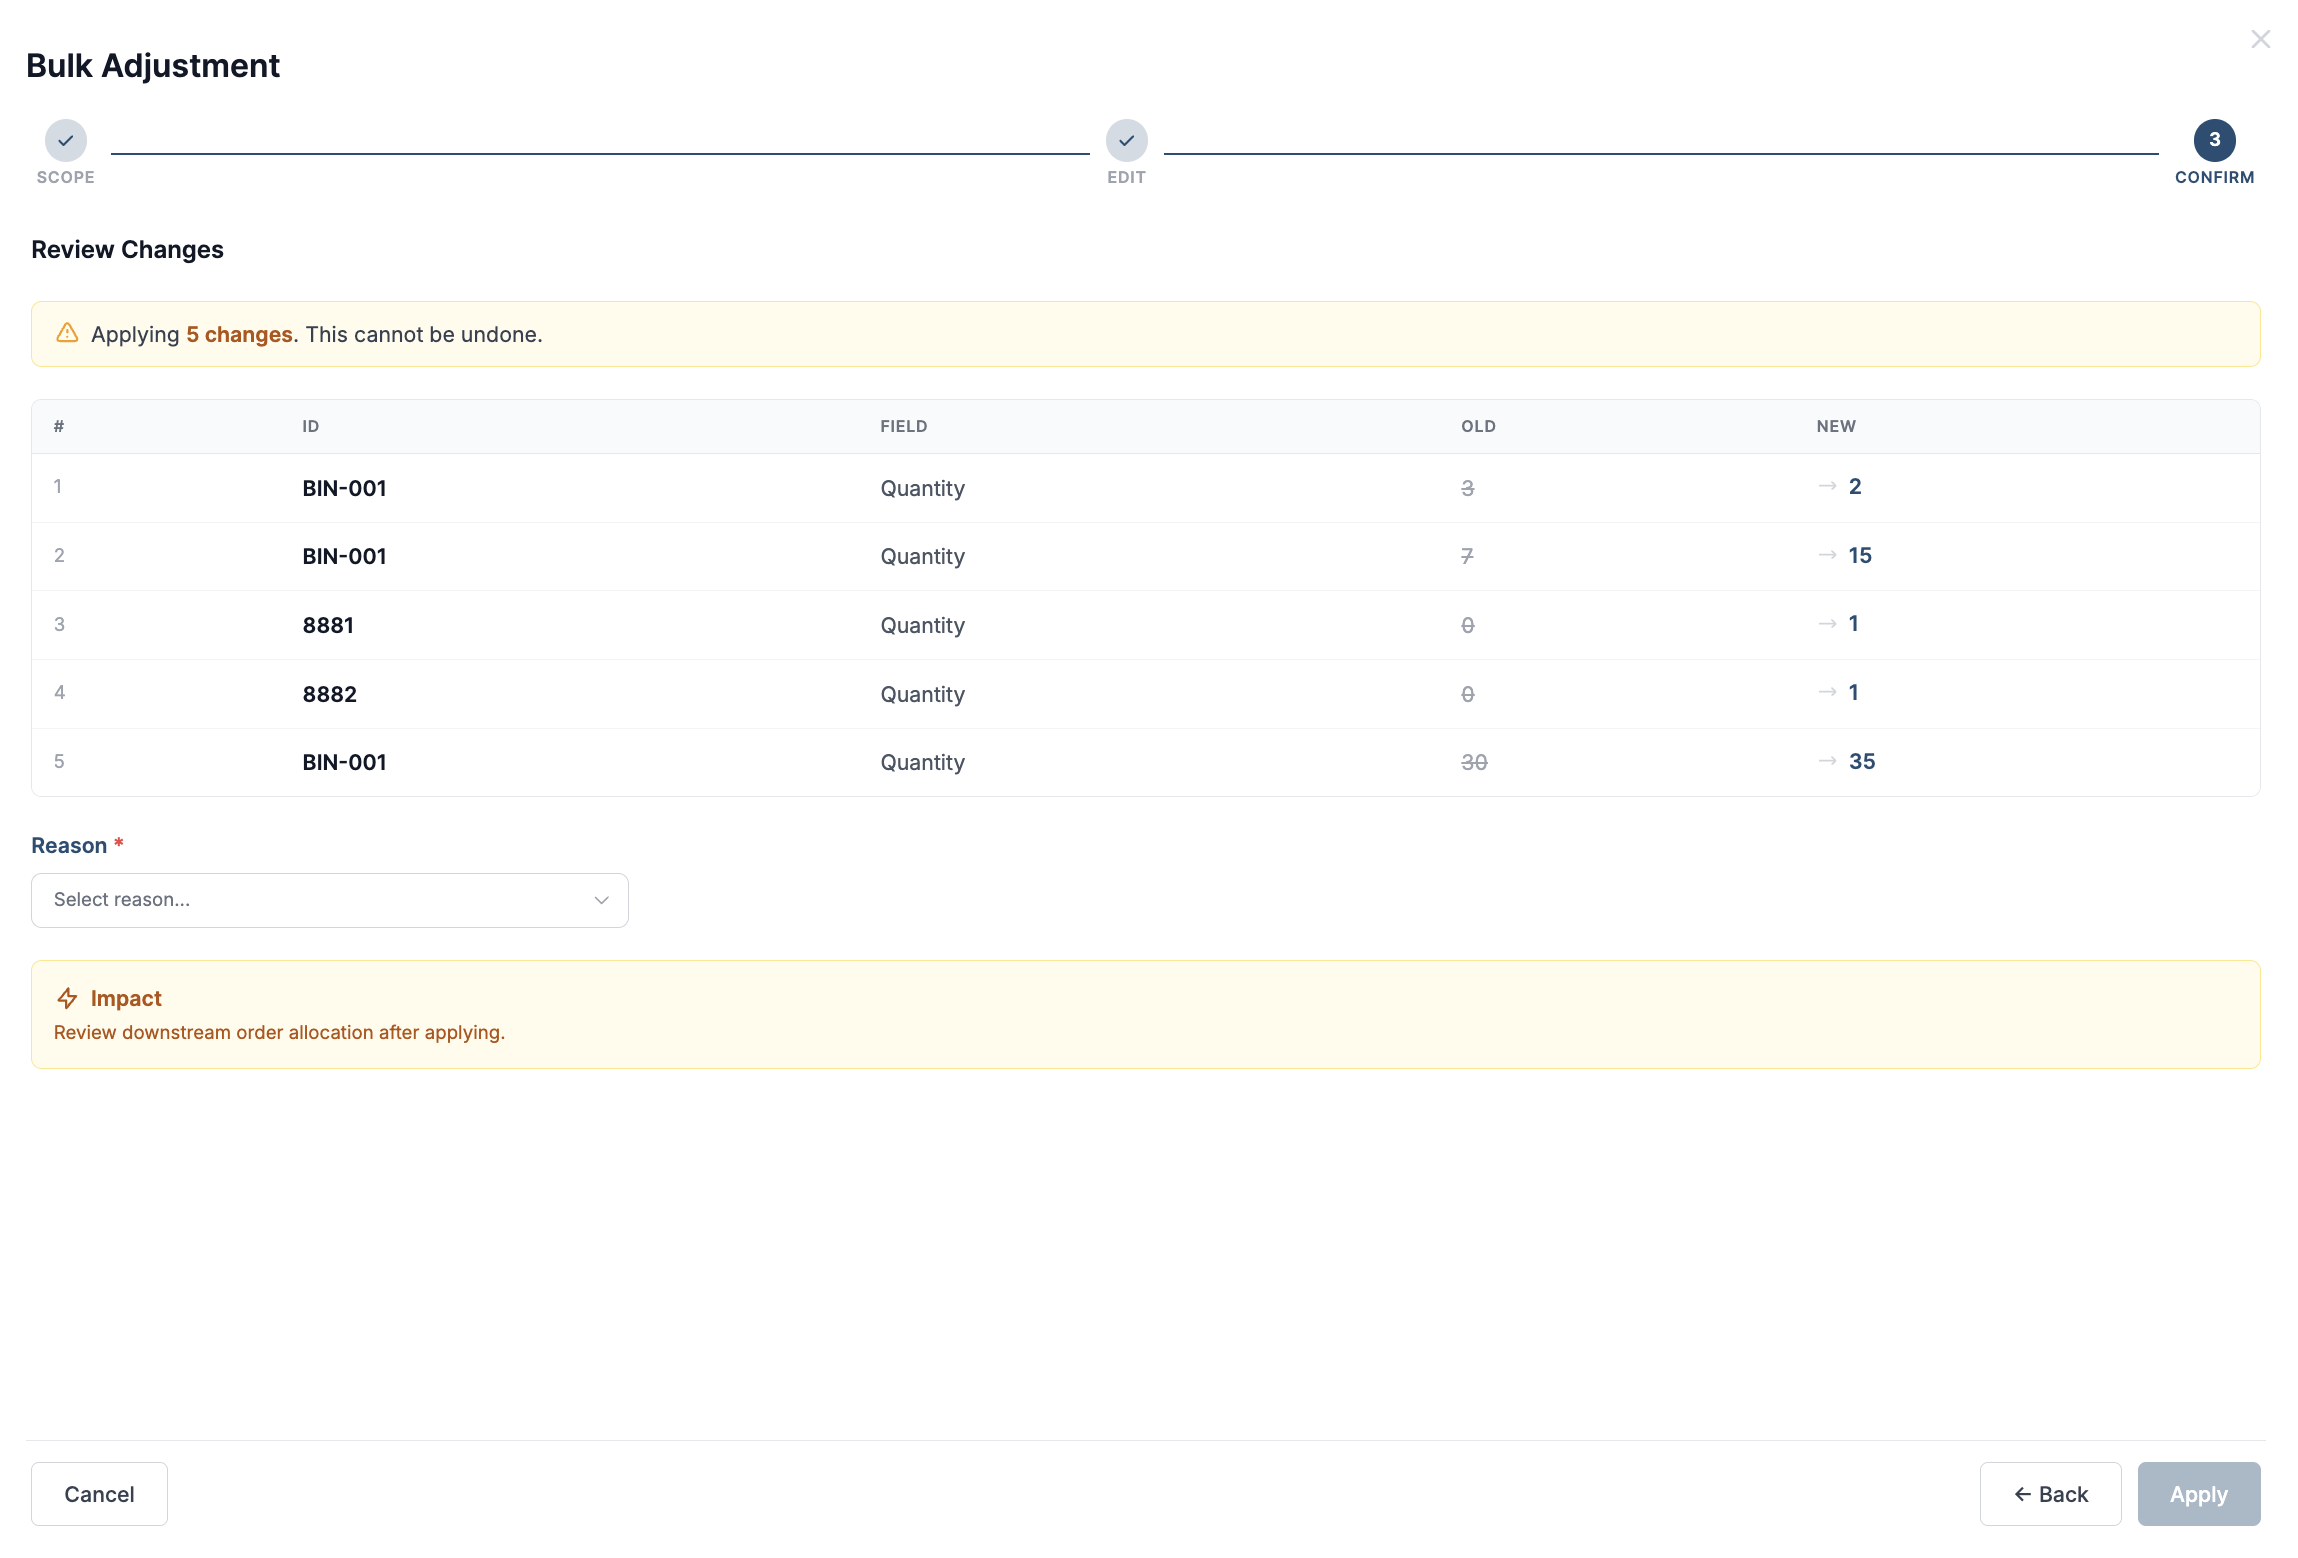
After completing your edits, click Continue.
In the confirmation step:
-
Review all inventory changes.
-
Verify the updated quantities.
-
Select an Adjustment Reason.
-
Add remarks if the “Other” option was selected as Reason.
-
Click Confirm to complete the inventory adjustment.
Once confirmed, the inventory quantities are updated immediately for all selected SKU-bin mappings.
Using Bulk Adjustment helps warehouse teams quickly perform cycle count corrections, stock reconciliations, and inventory updates across multiple records at once. By combining powerful filtering, batch editing, and a review-and-confirm process, it reduces manual effort while maintaining clear visibility into every inventory change.