The bulk transfer feature in Location Inventory moves multiple inventory items or groups at once, with safeguards to prevent moving ineligible stock and a review screen to avoid mistakes.
Step 1: Open the Location Inventory Screen
Navigate to the Inventory section and then open Location Inventory.
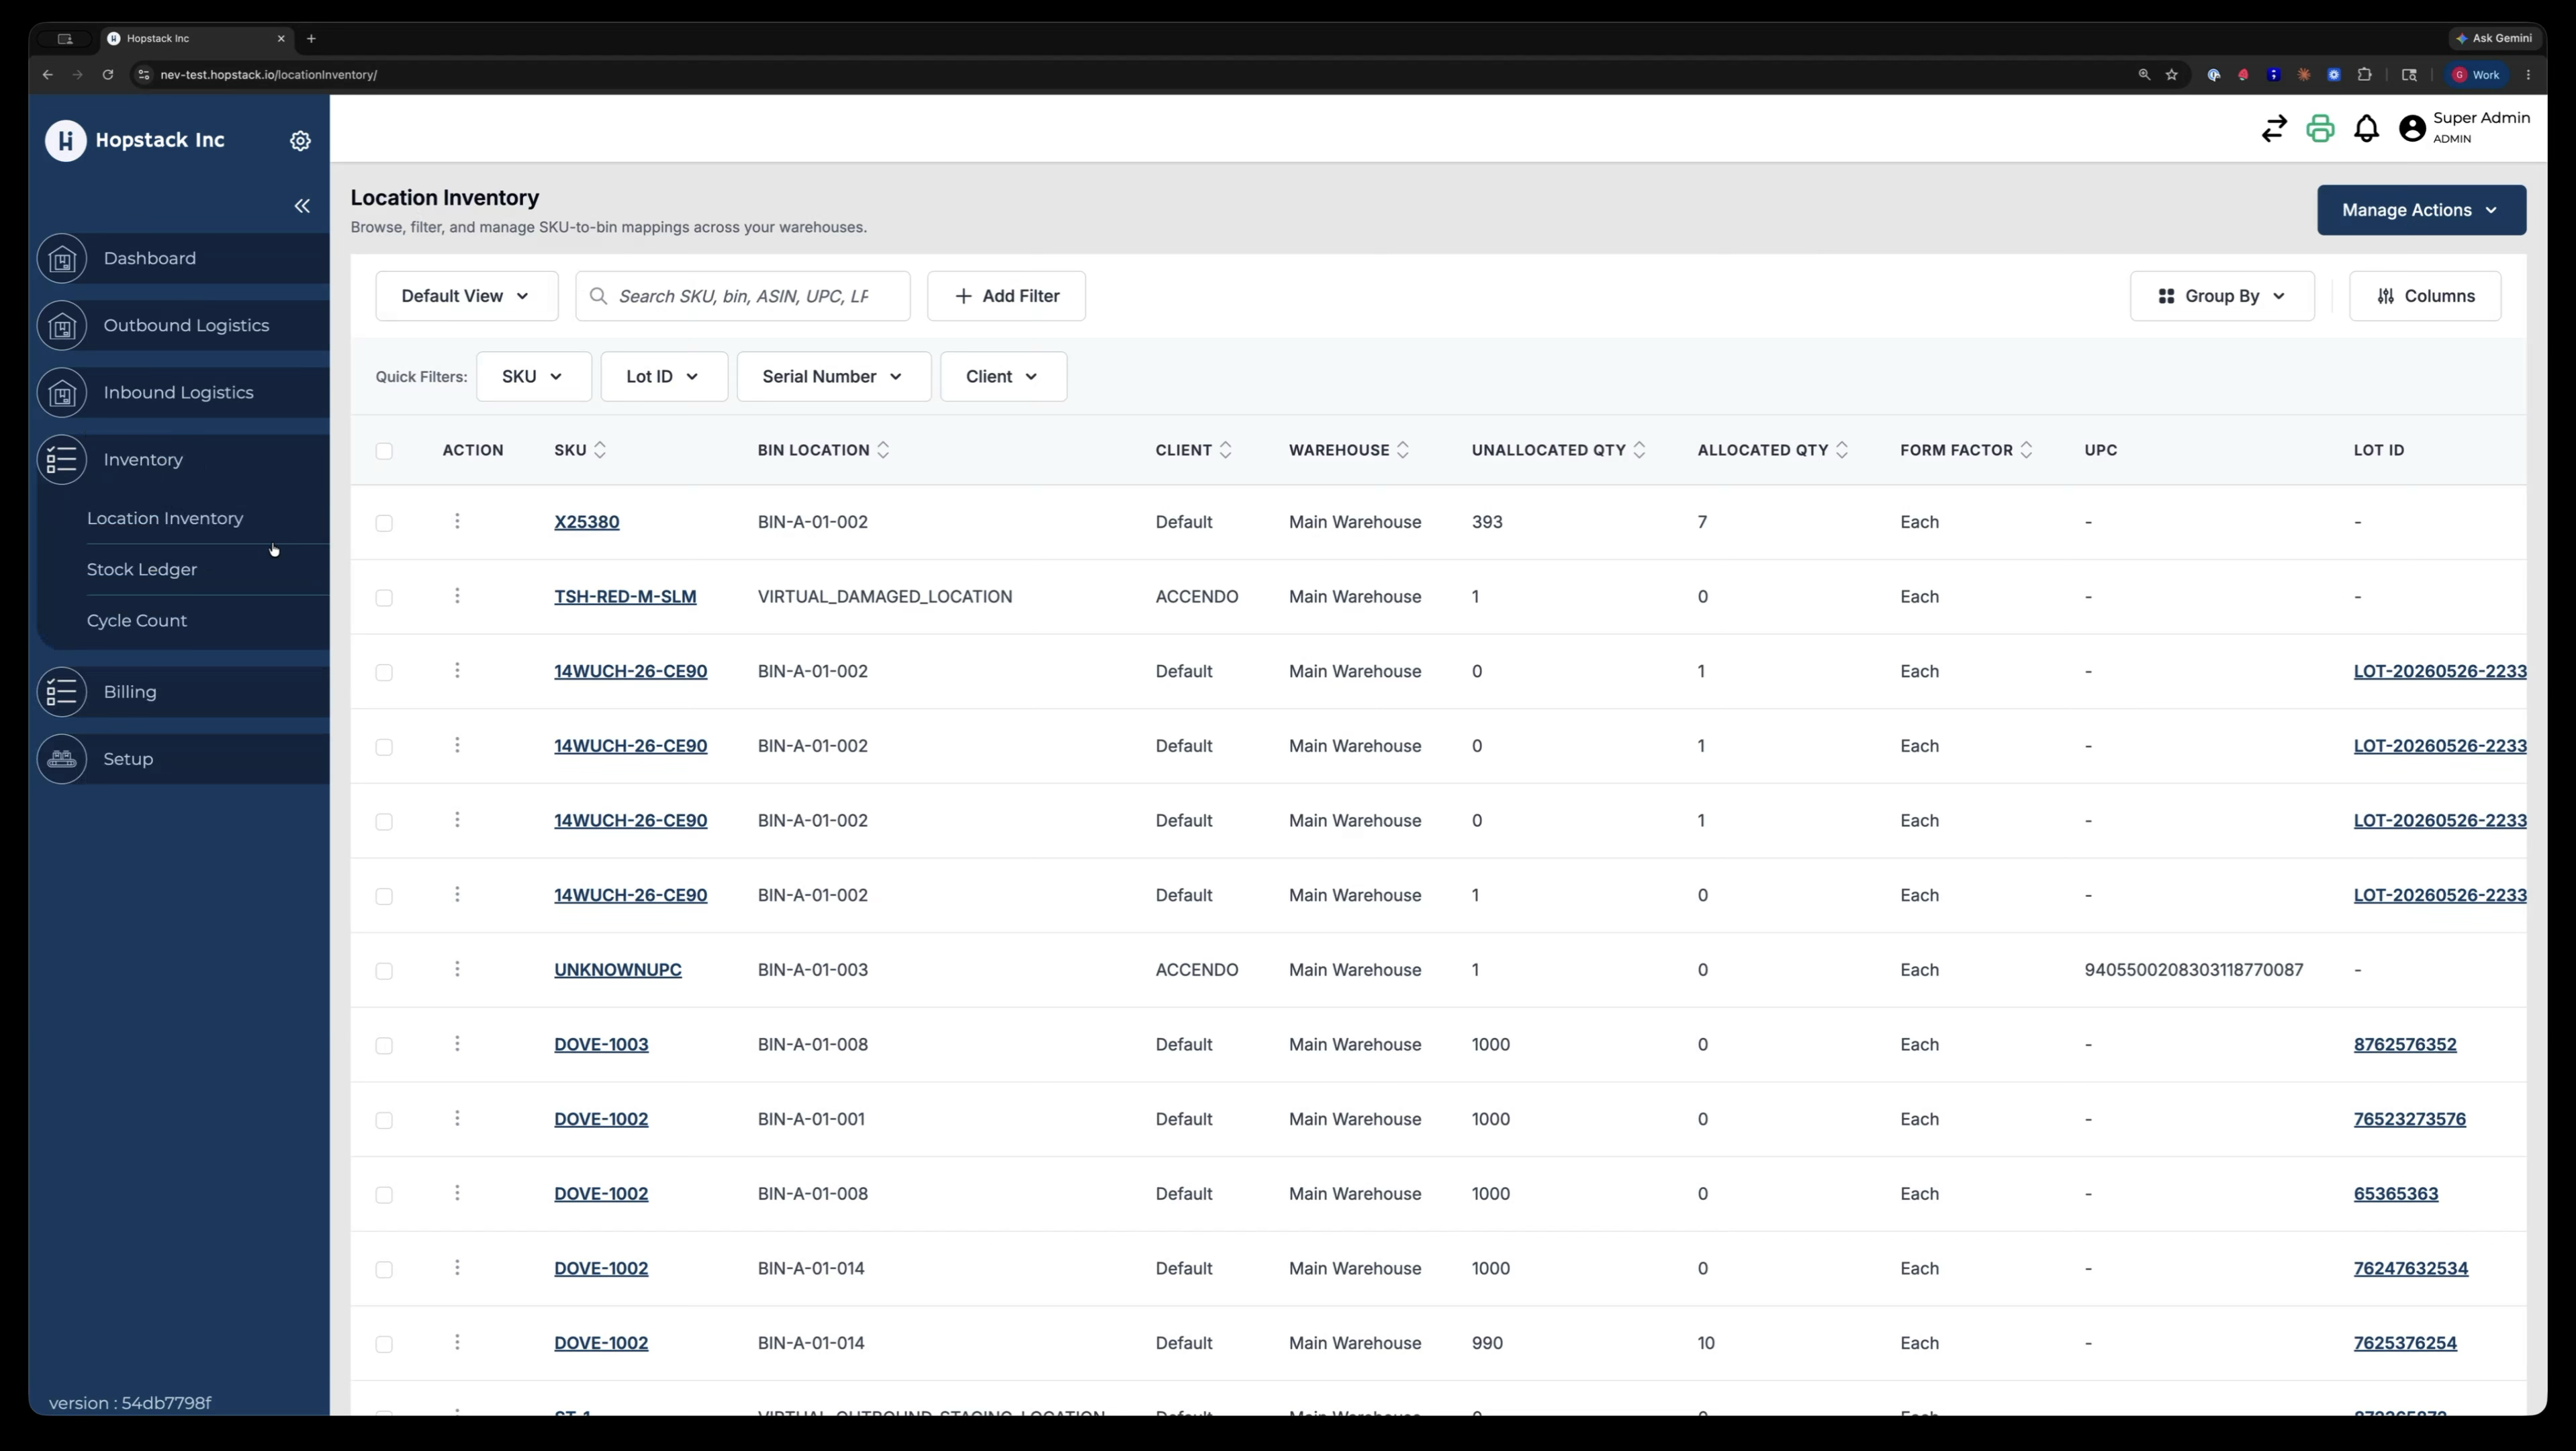
This screen is where you can perform both single and bulk inventory transfers.
Step 2: Review Existing Single-Item Transfer (Optional)
In the current interface, transfers can be done in a single-item capacity.
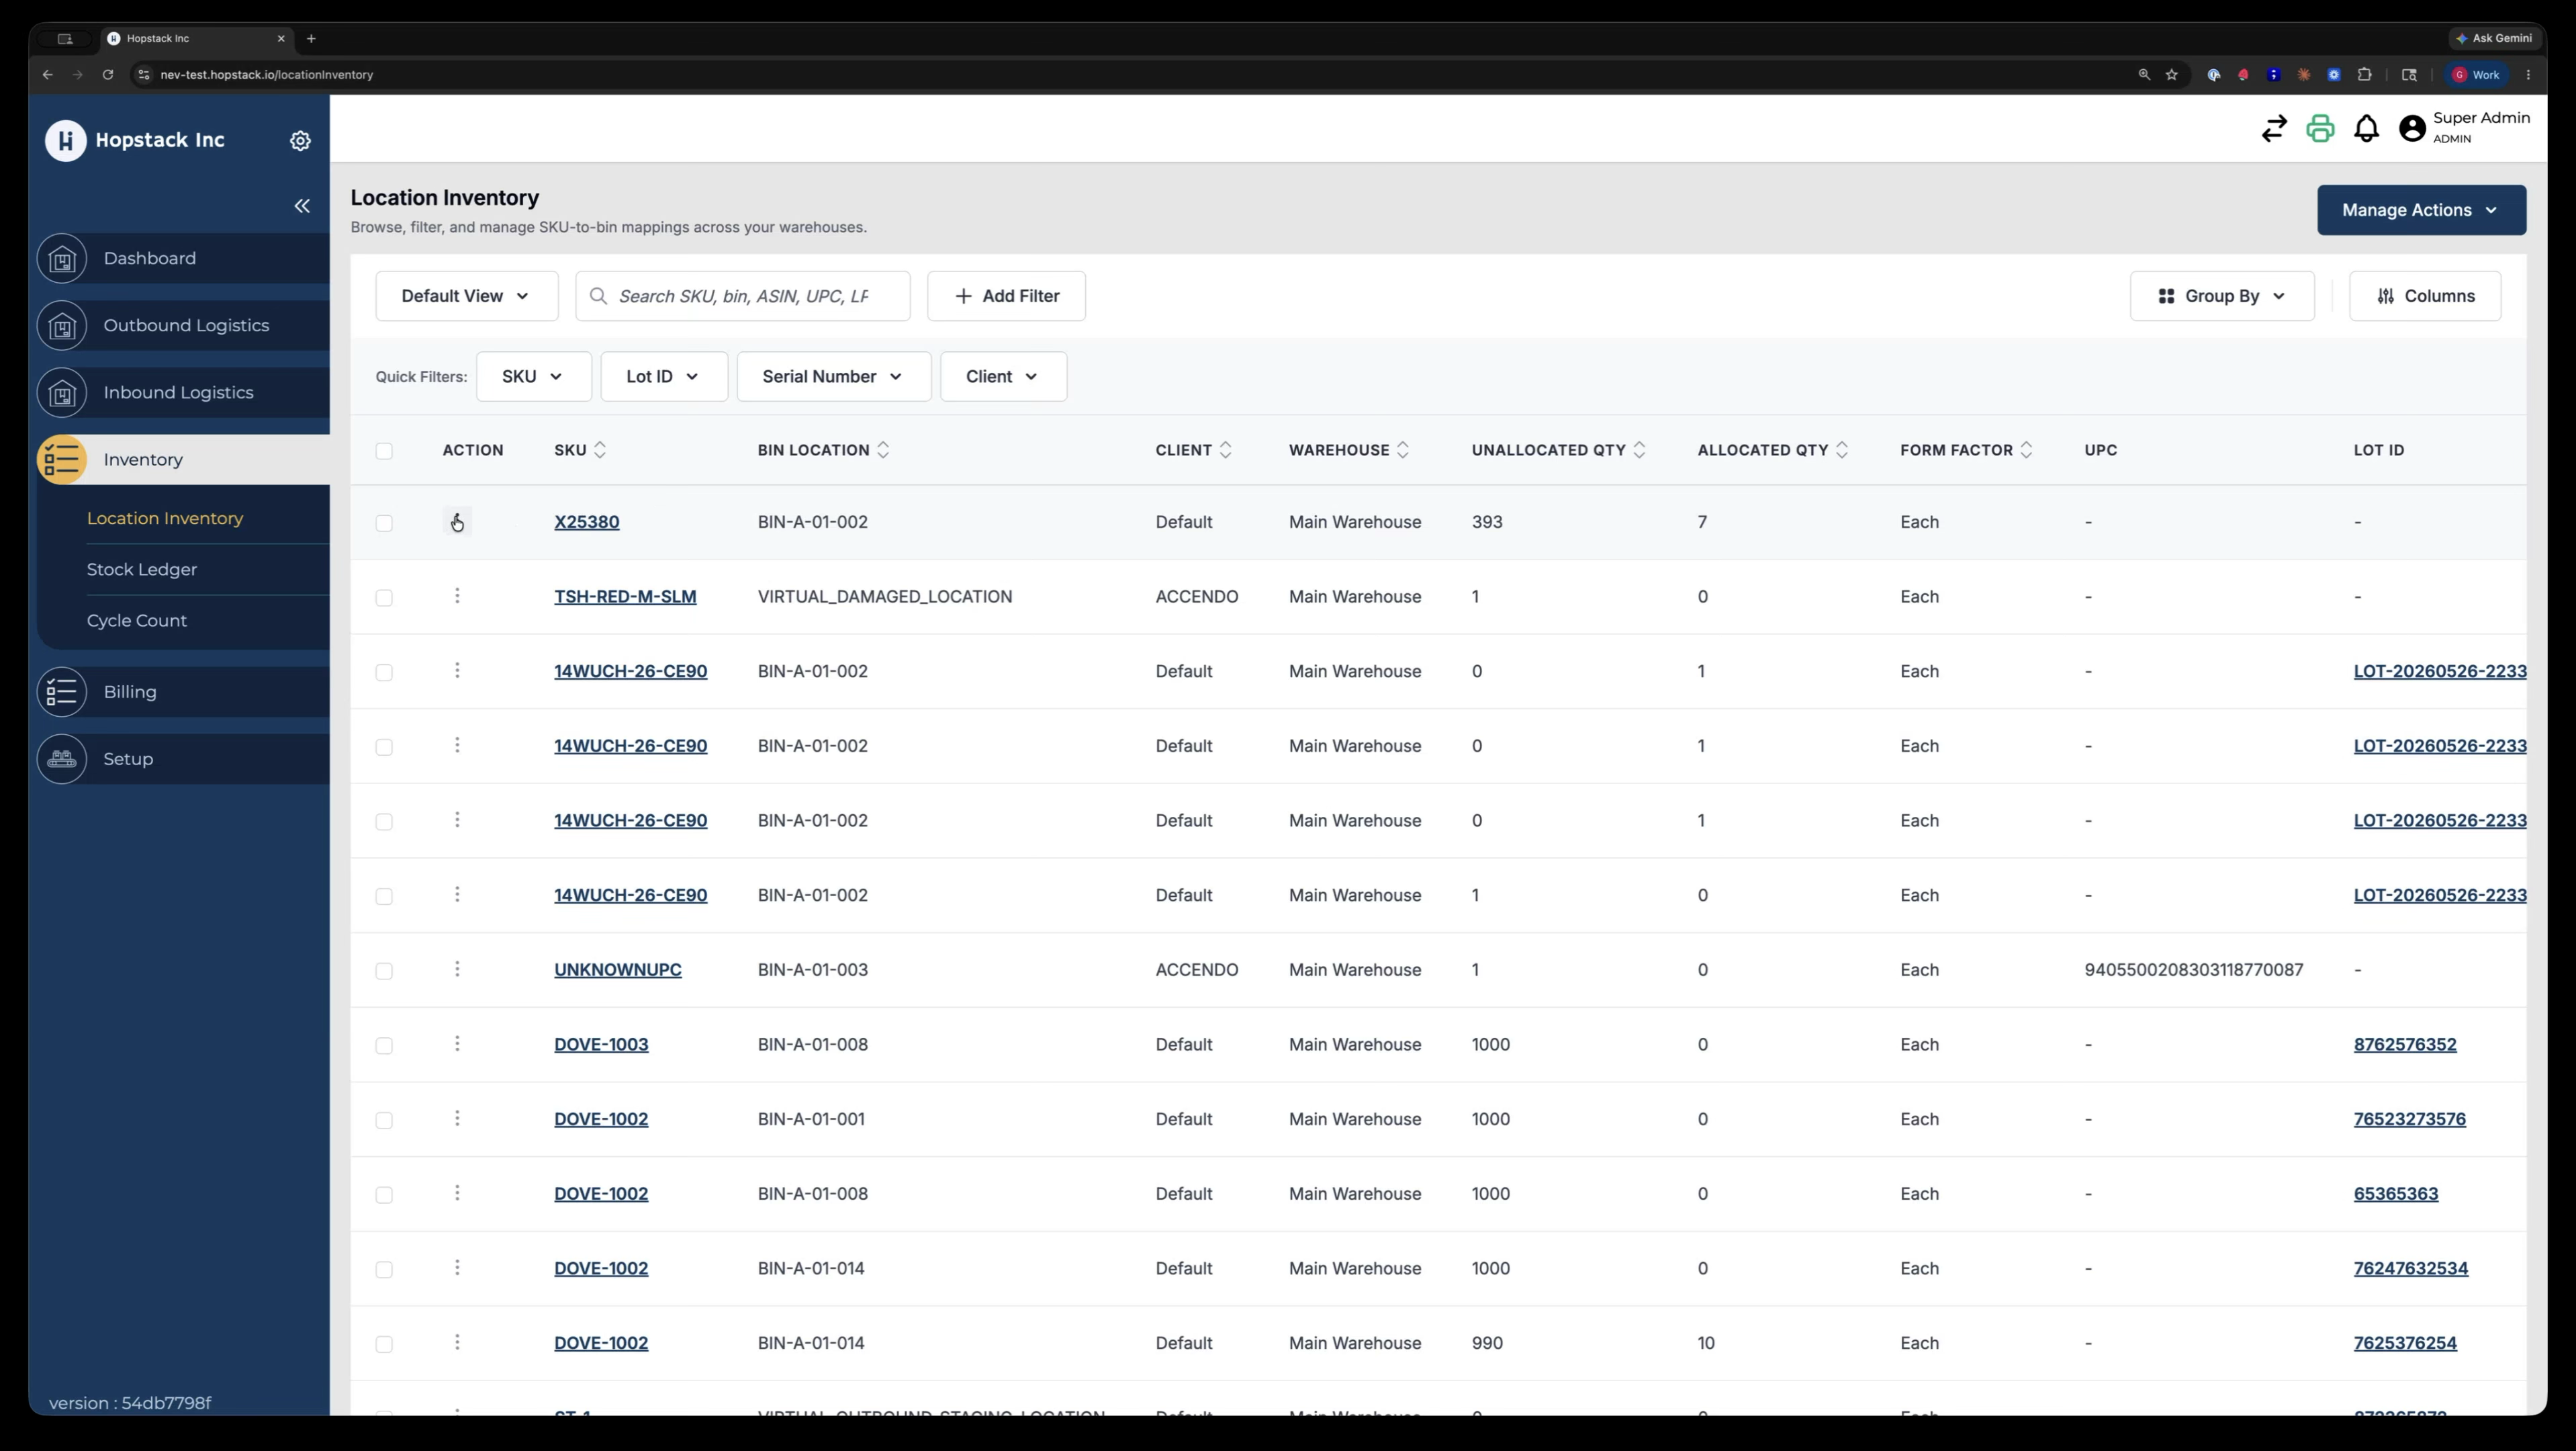
Open the row-level options menu for an inventory line.
From the menu, select Transfer.
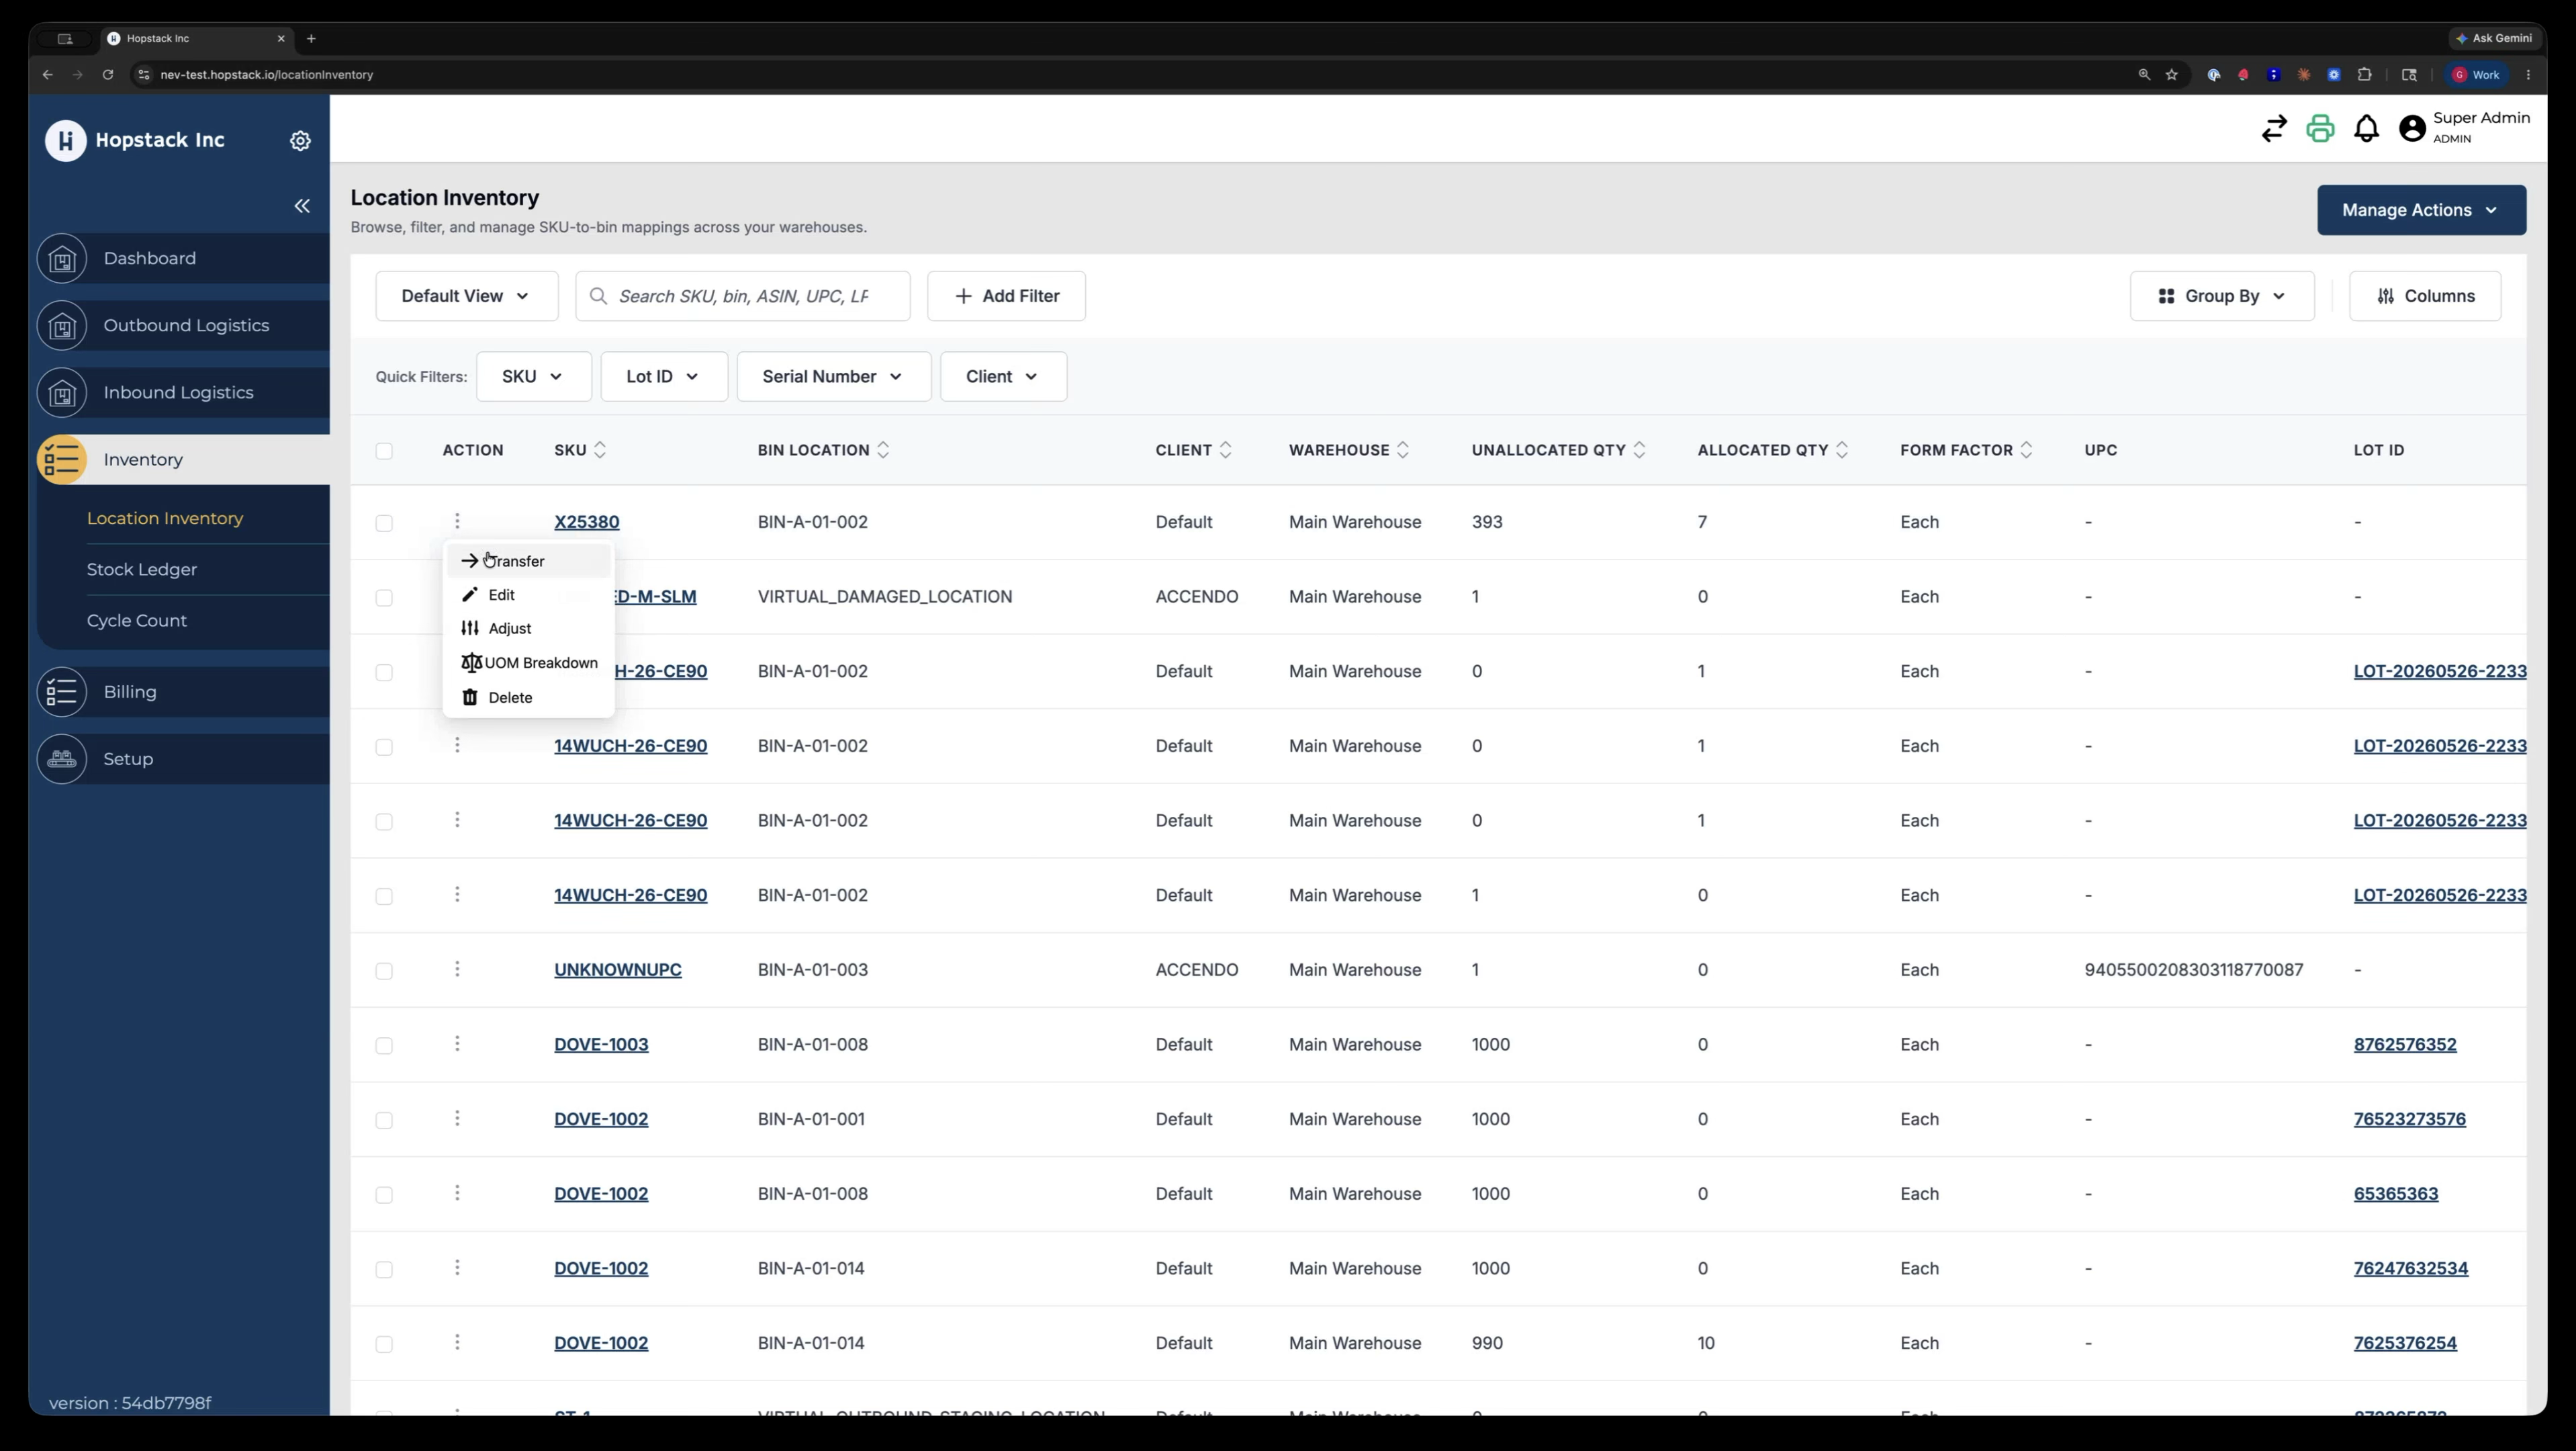
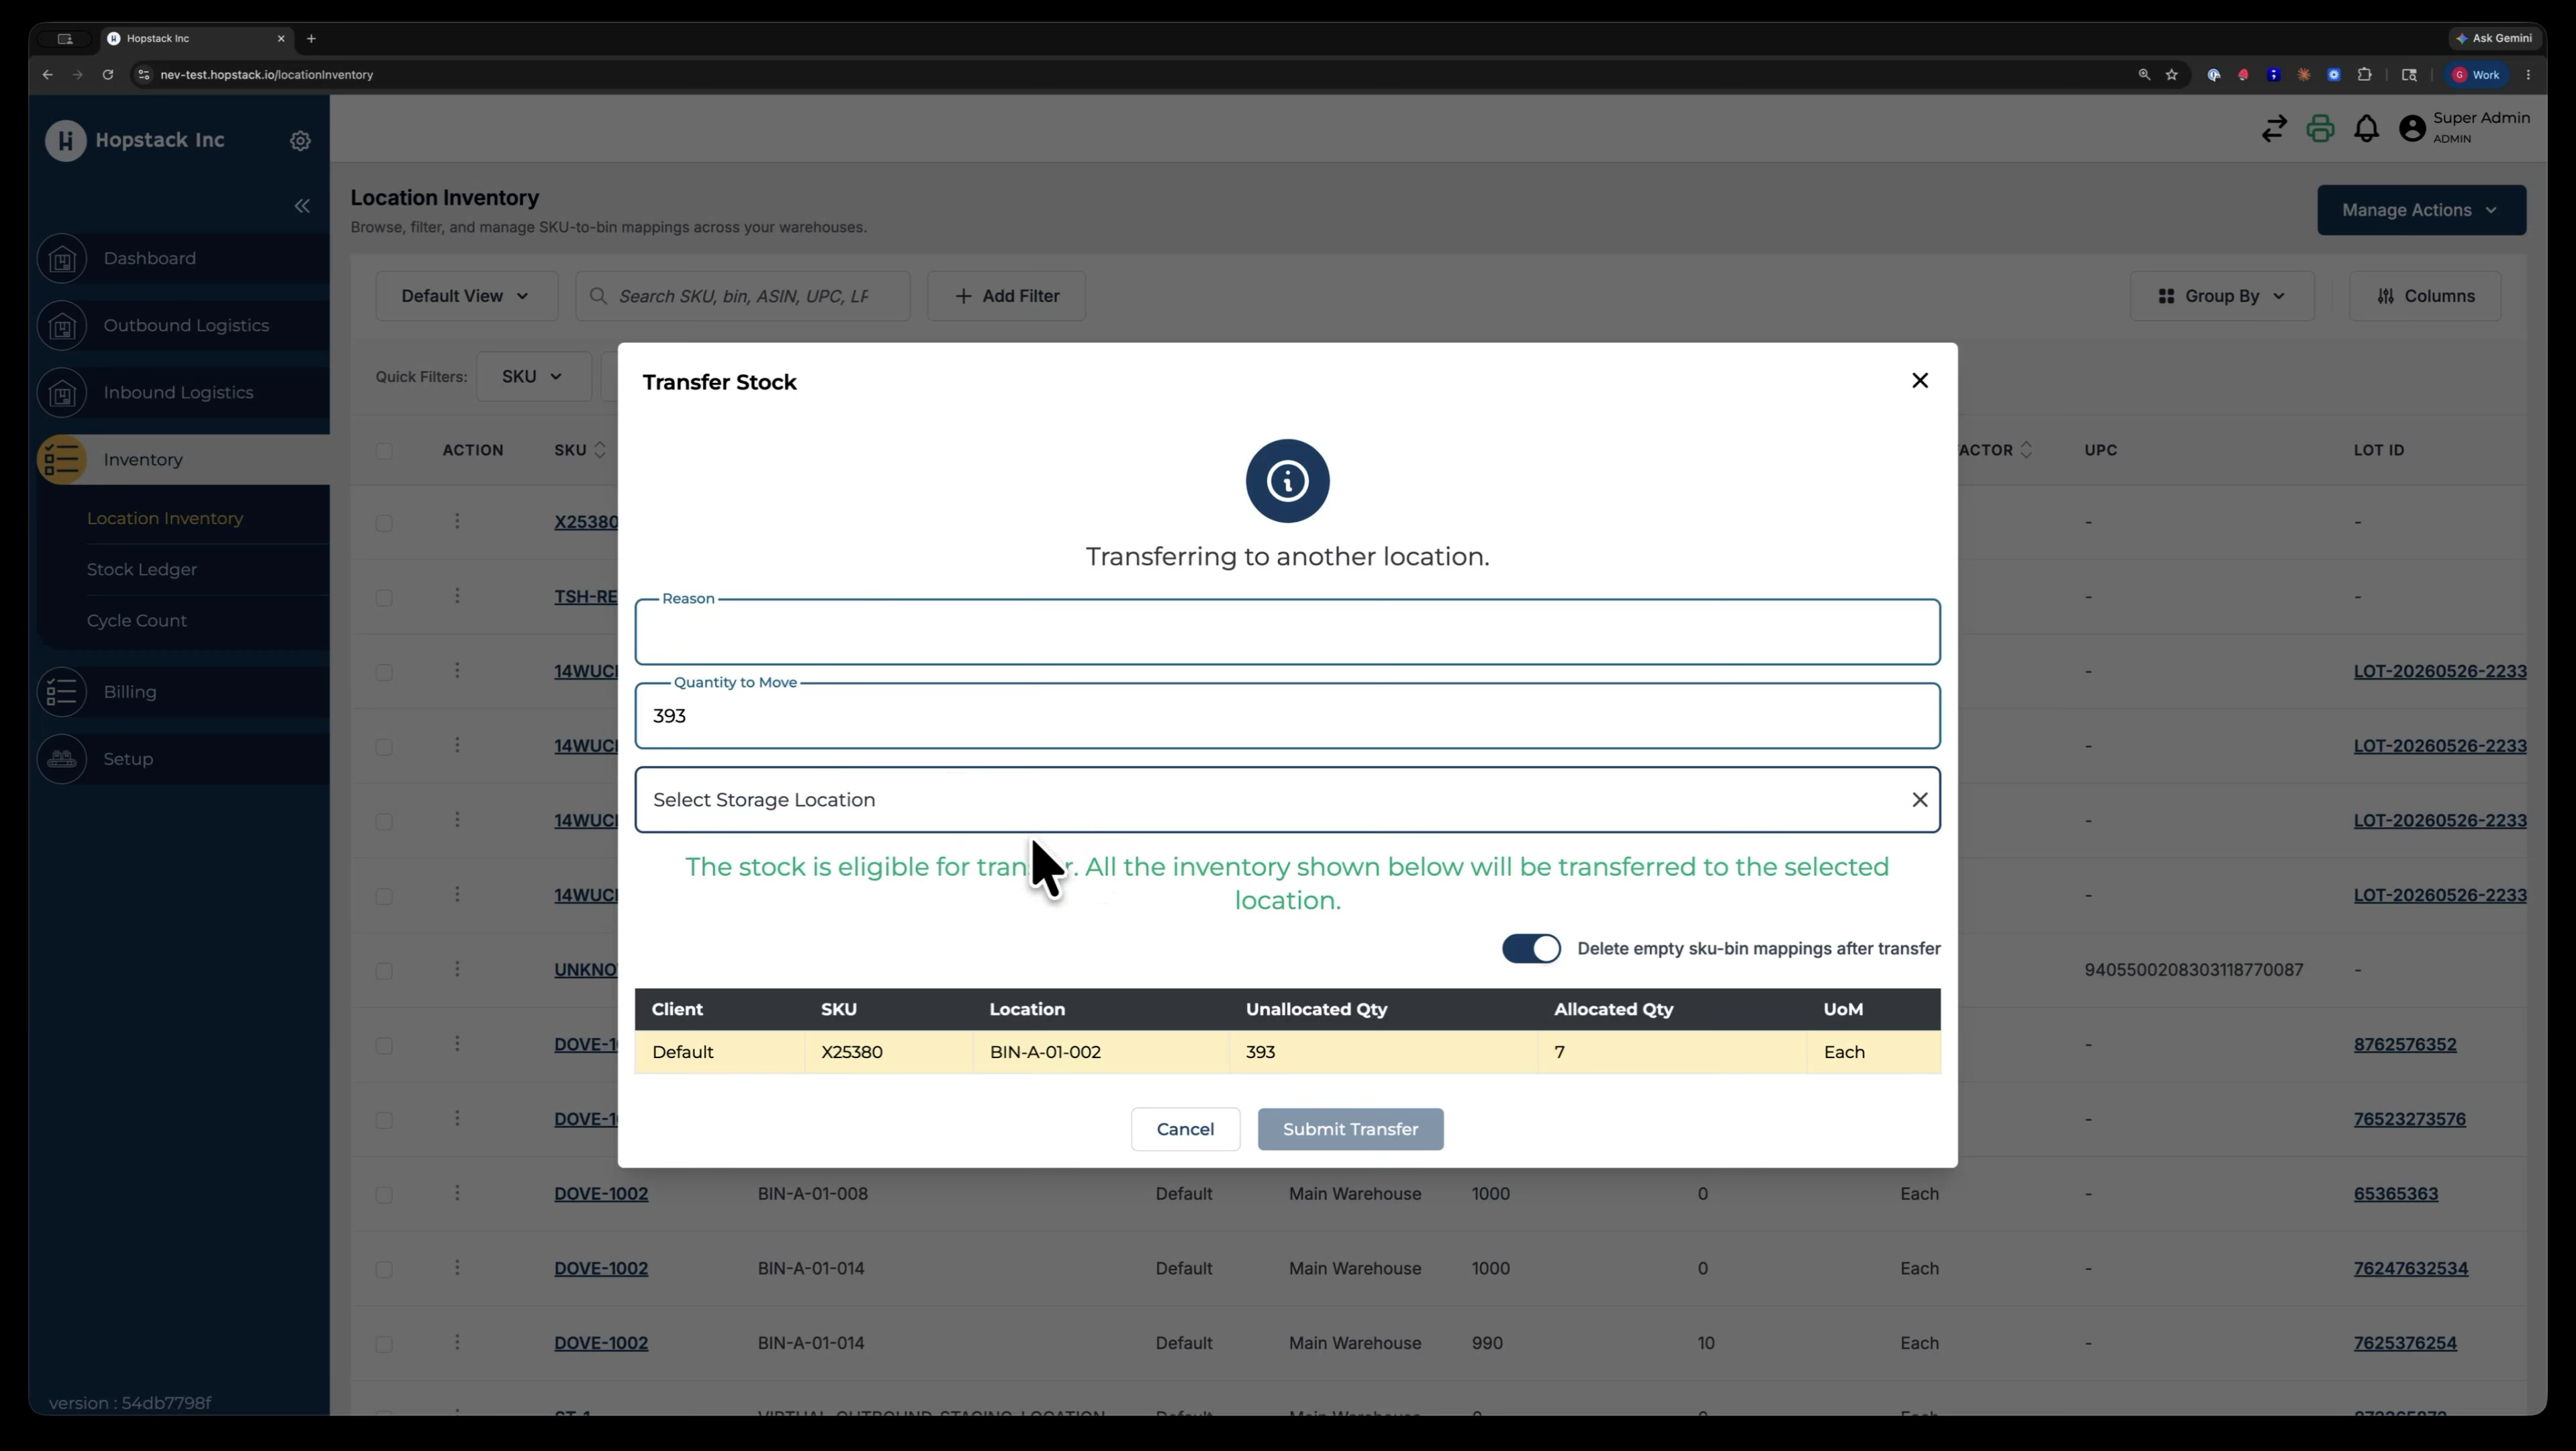
A modal appears showing what is being transferred, the reason for transfer, and the quantity to move.
This works well when you want to move one item at a time.

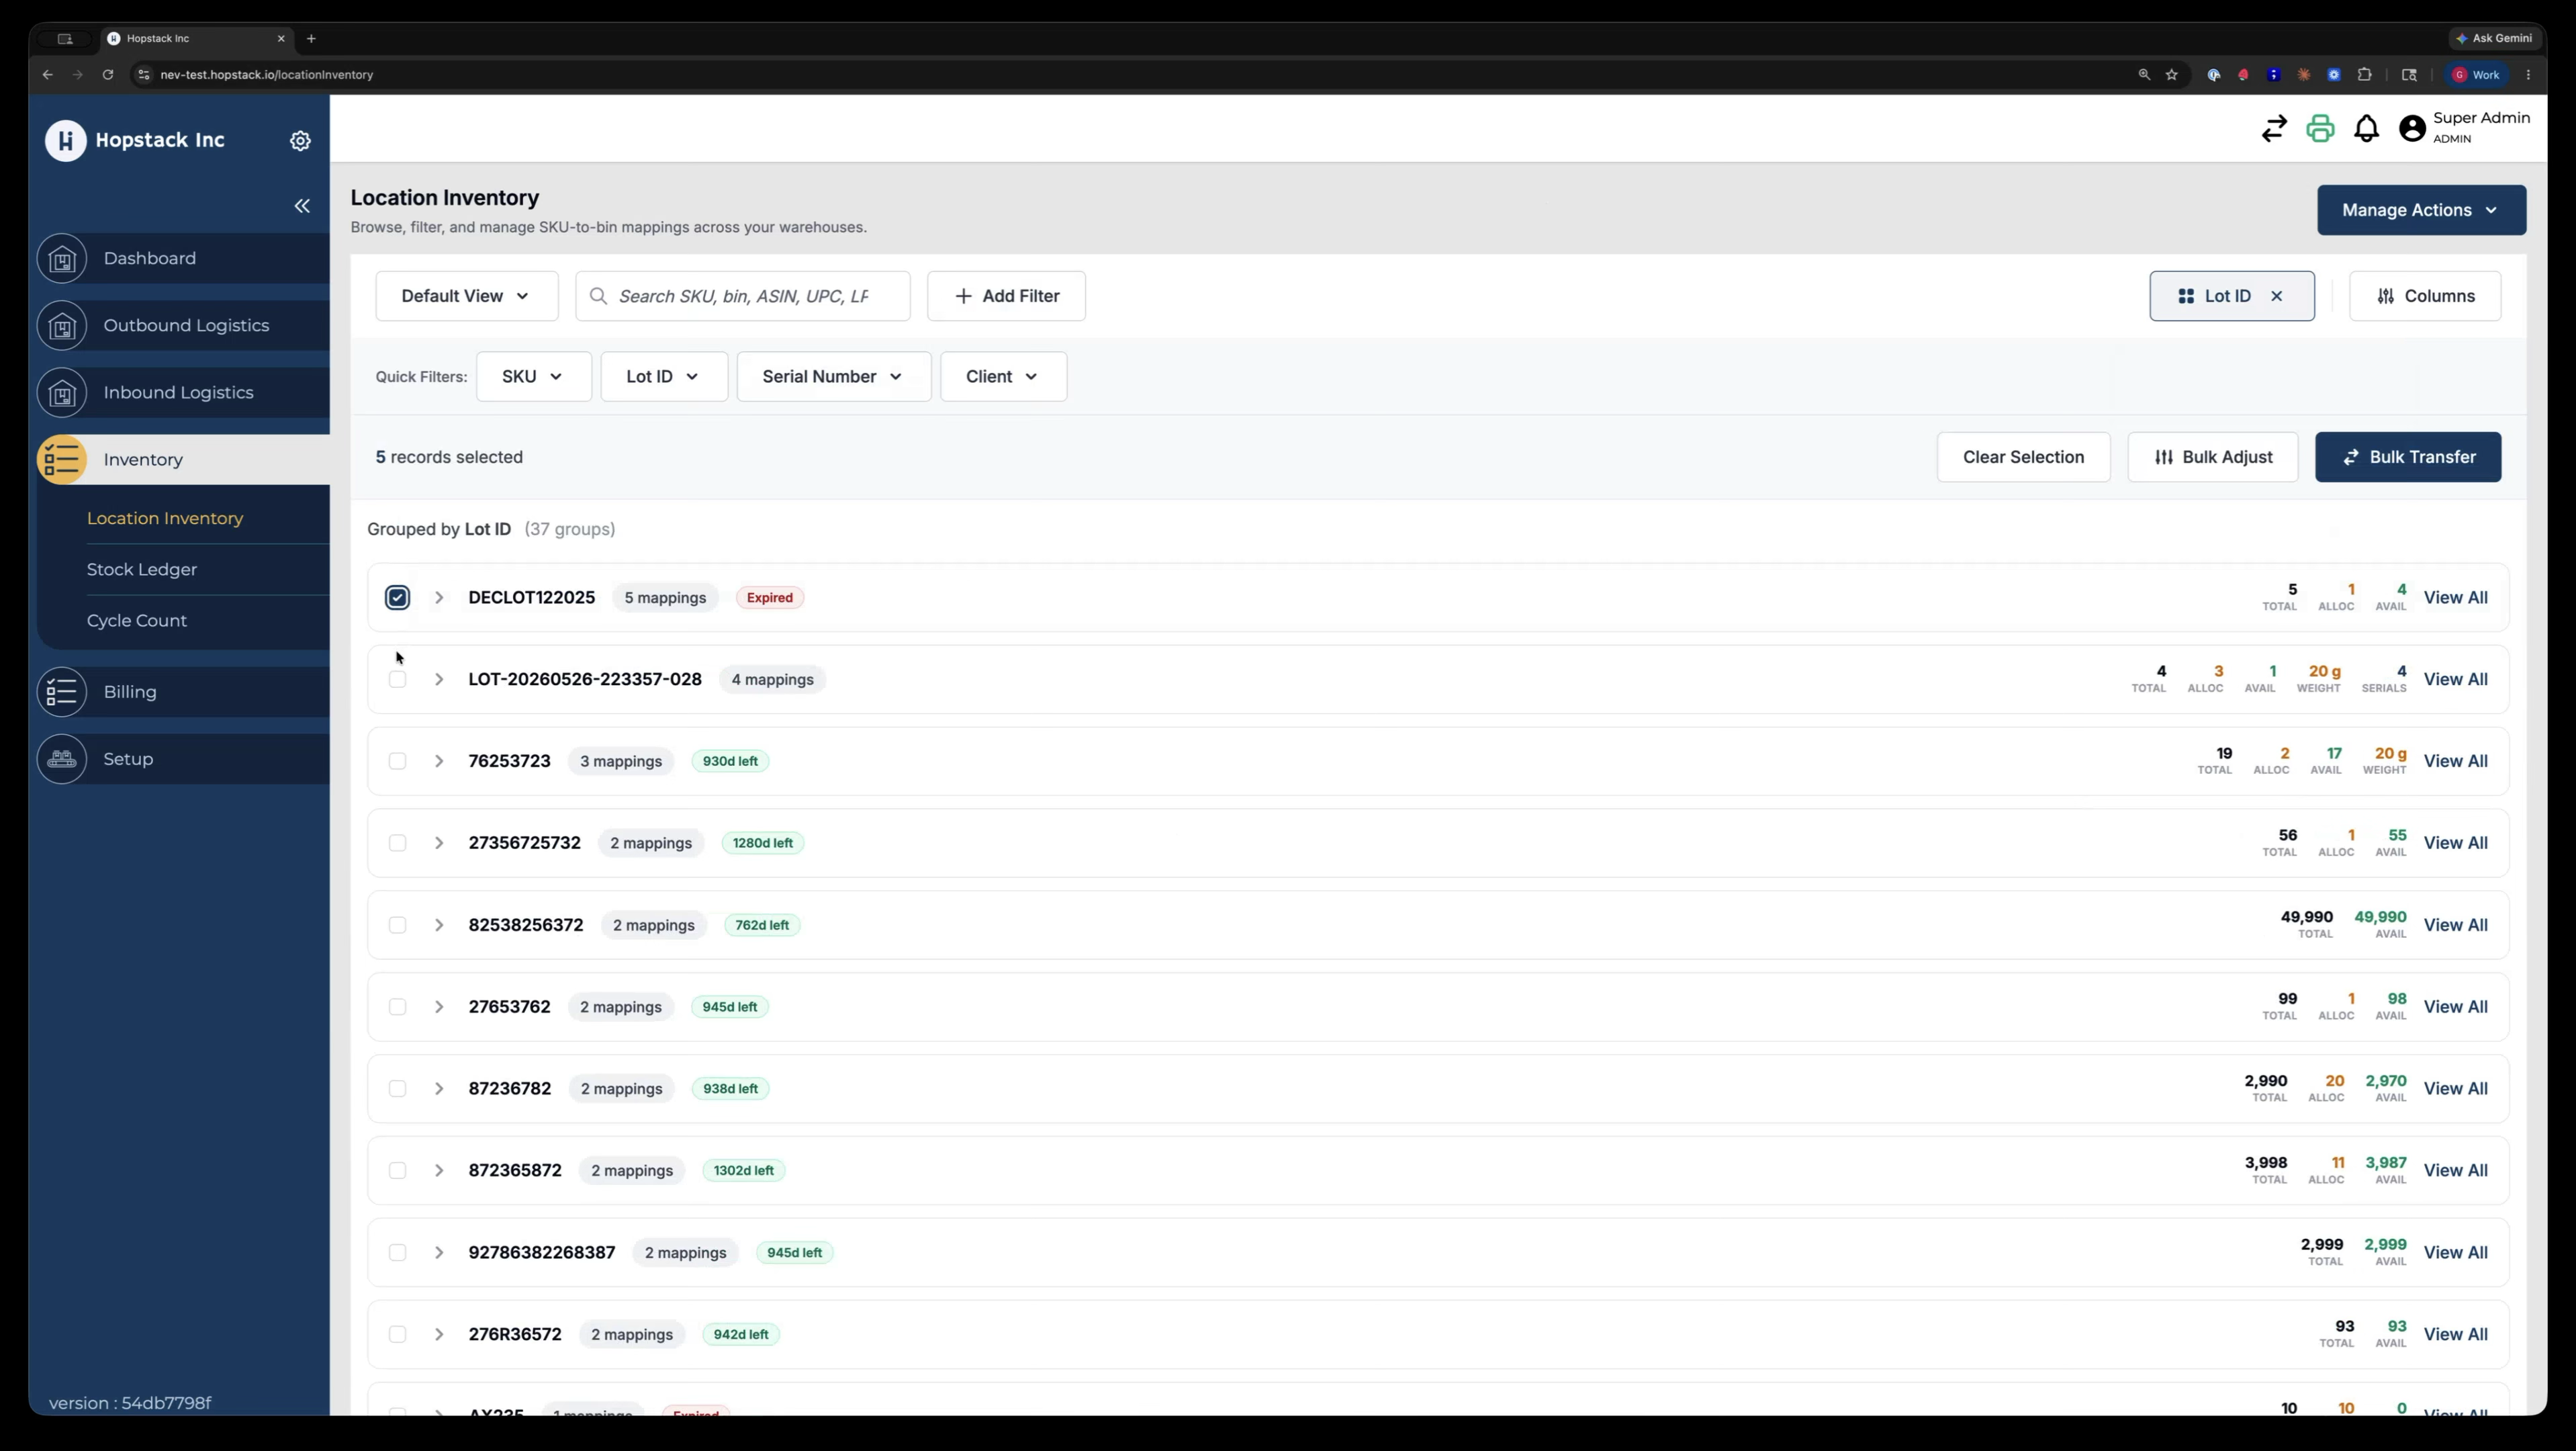
Step 3: Select Multiple Rows for Bulk Transfer
To transfer in bulk, start by selecting multiple inventory rows you want to move.

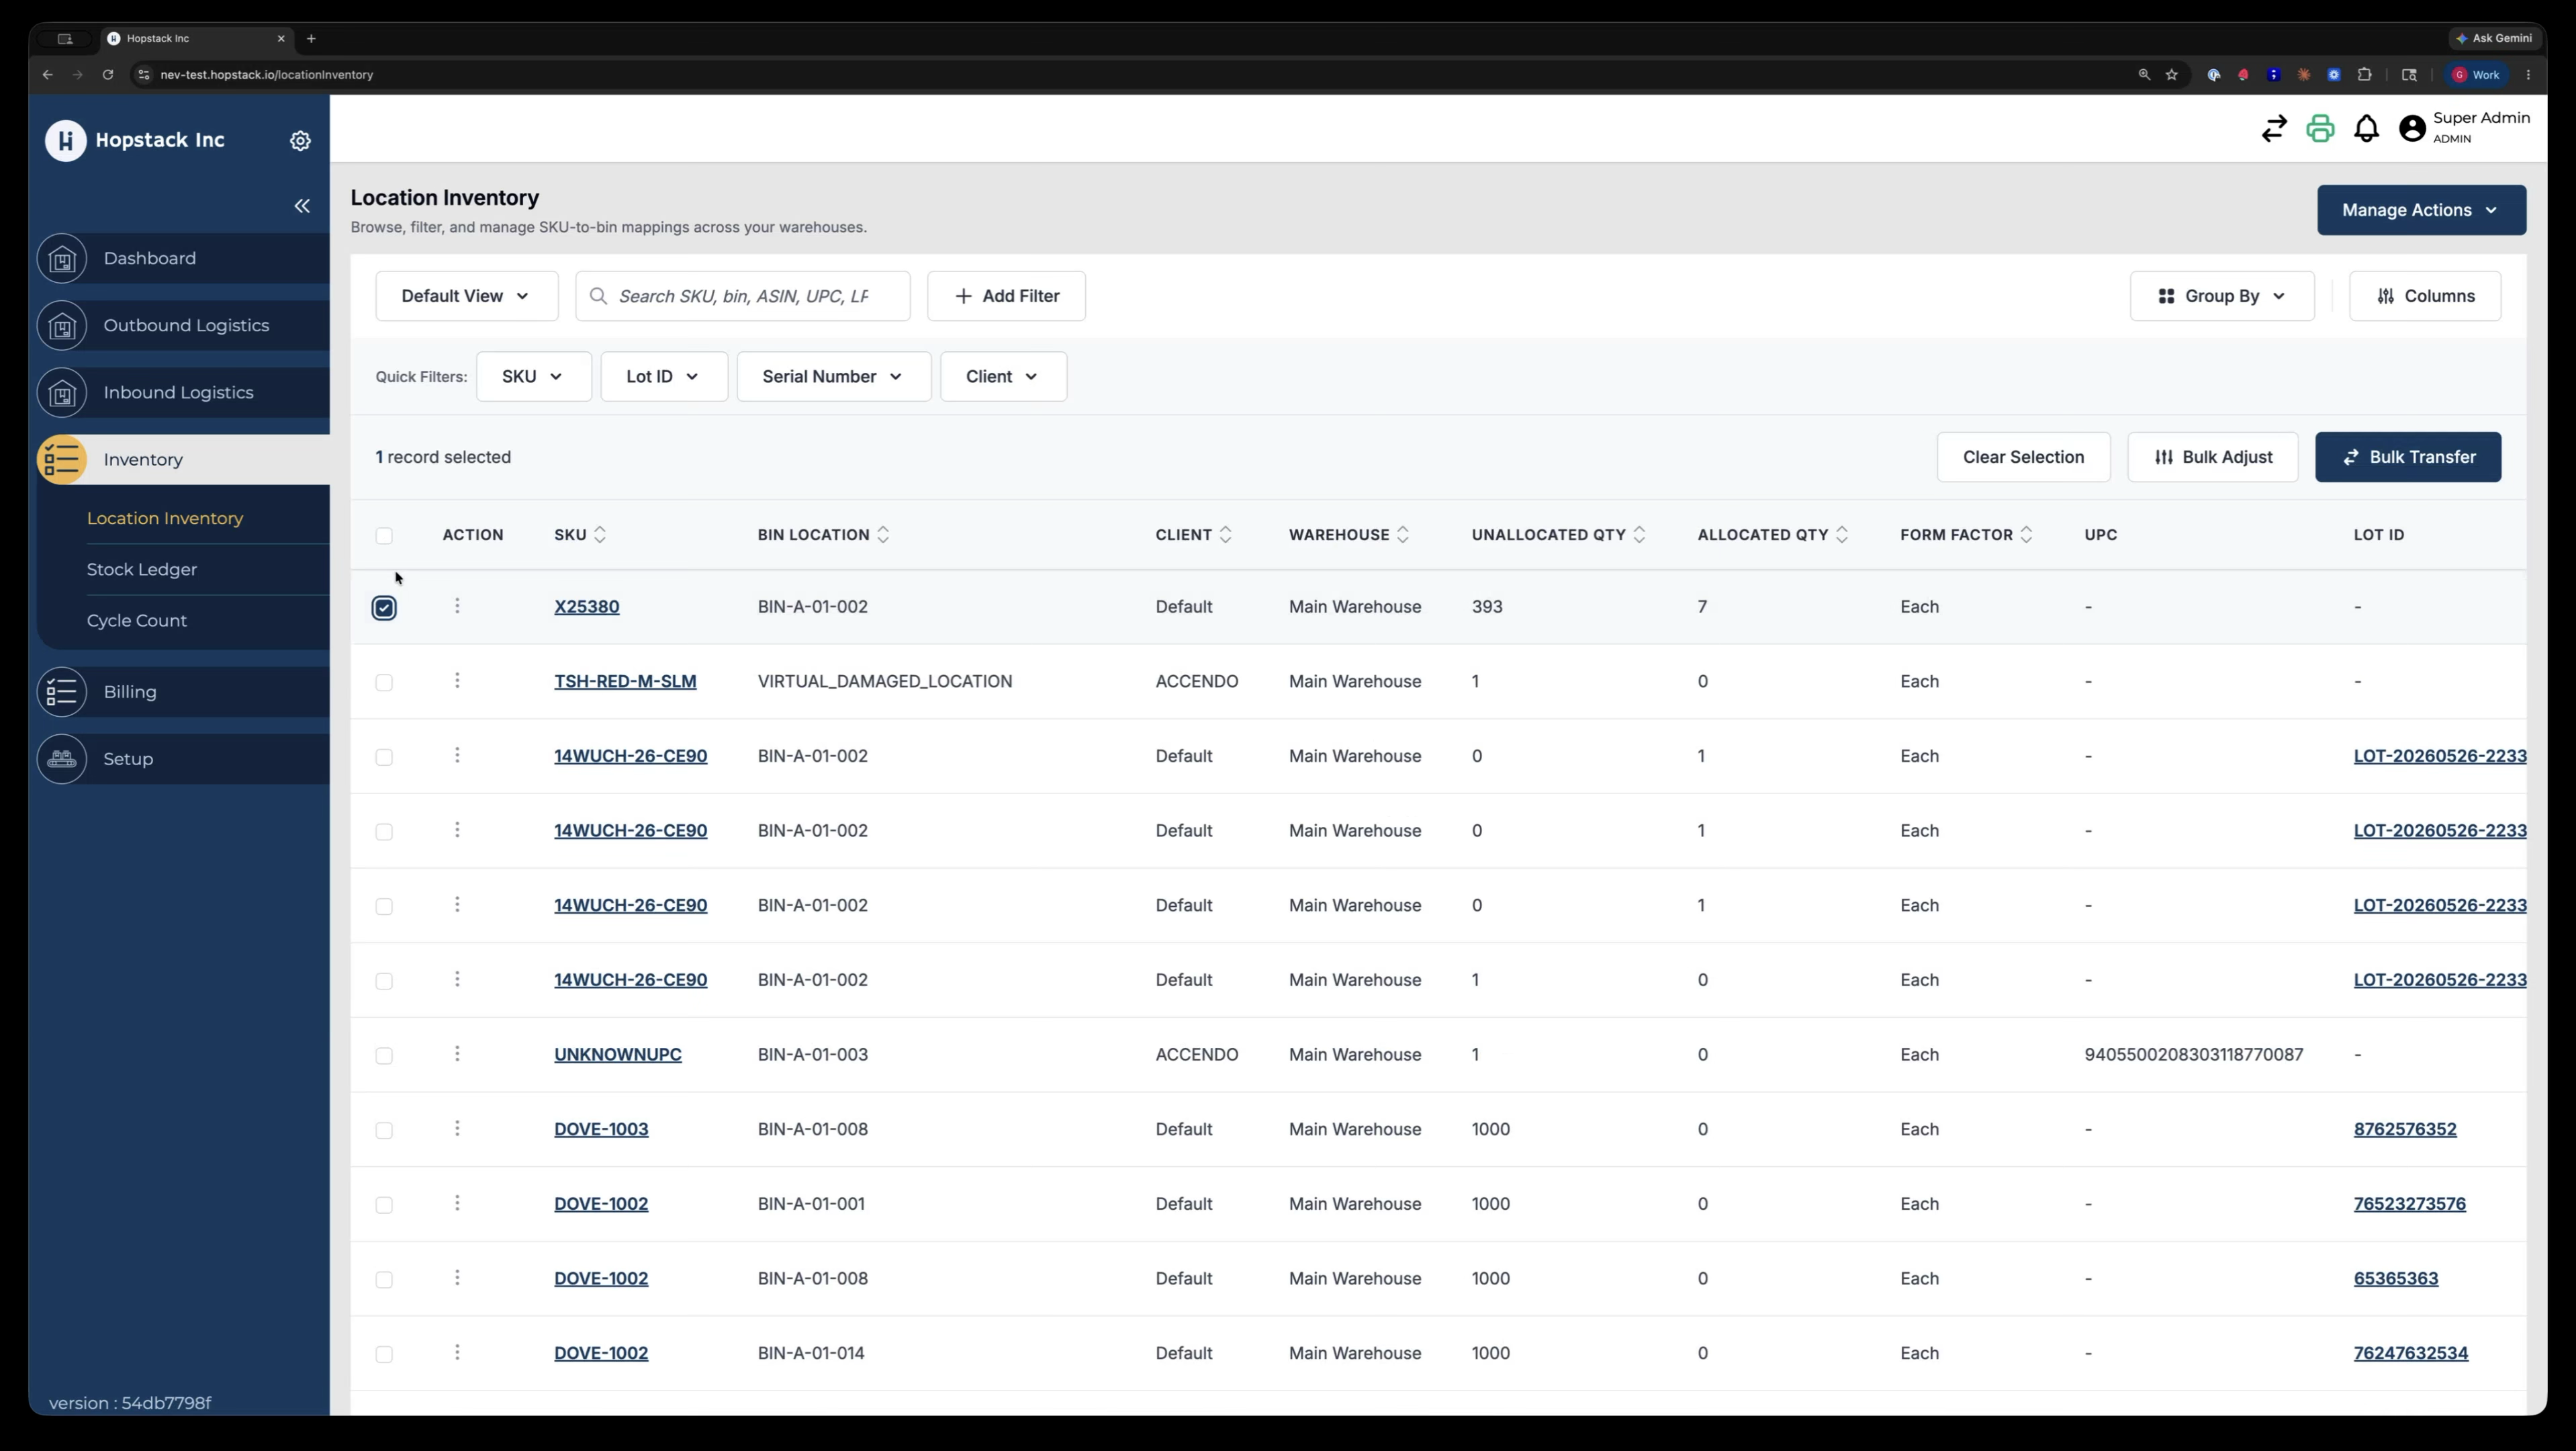
After selecting the rows, click the Bulk Transfer button.
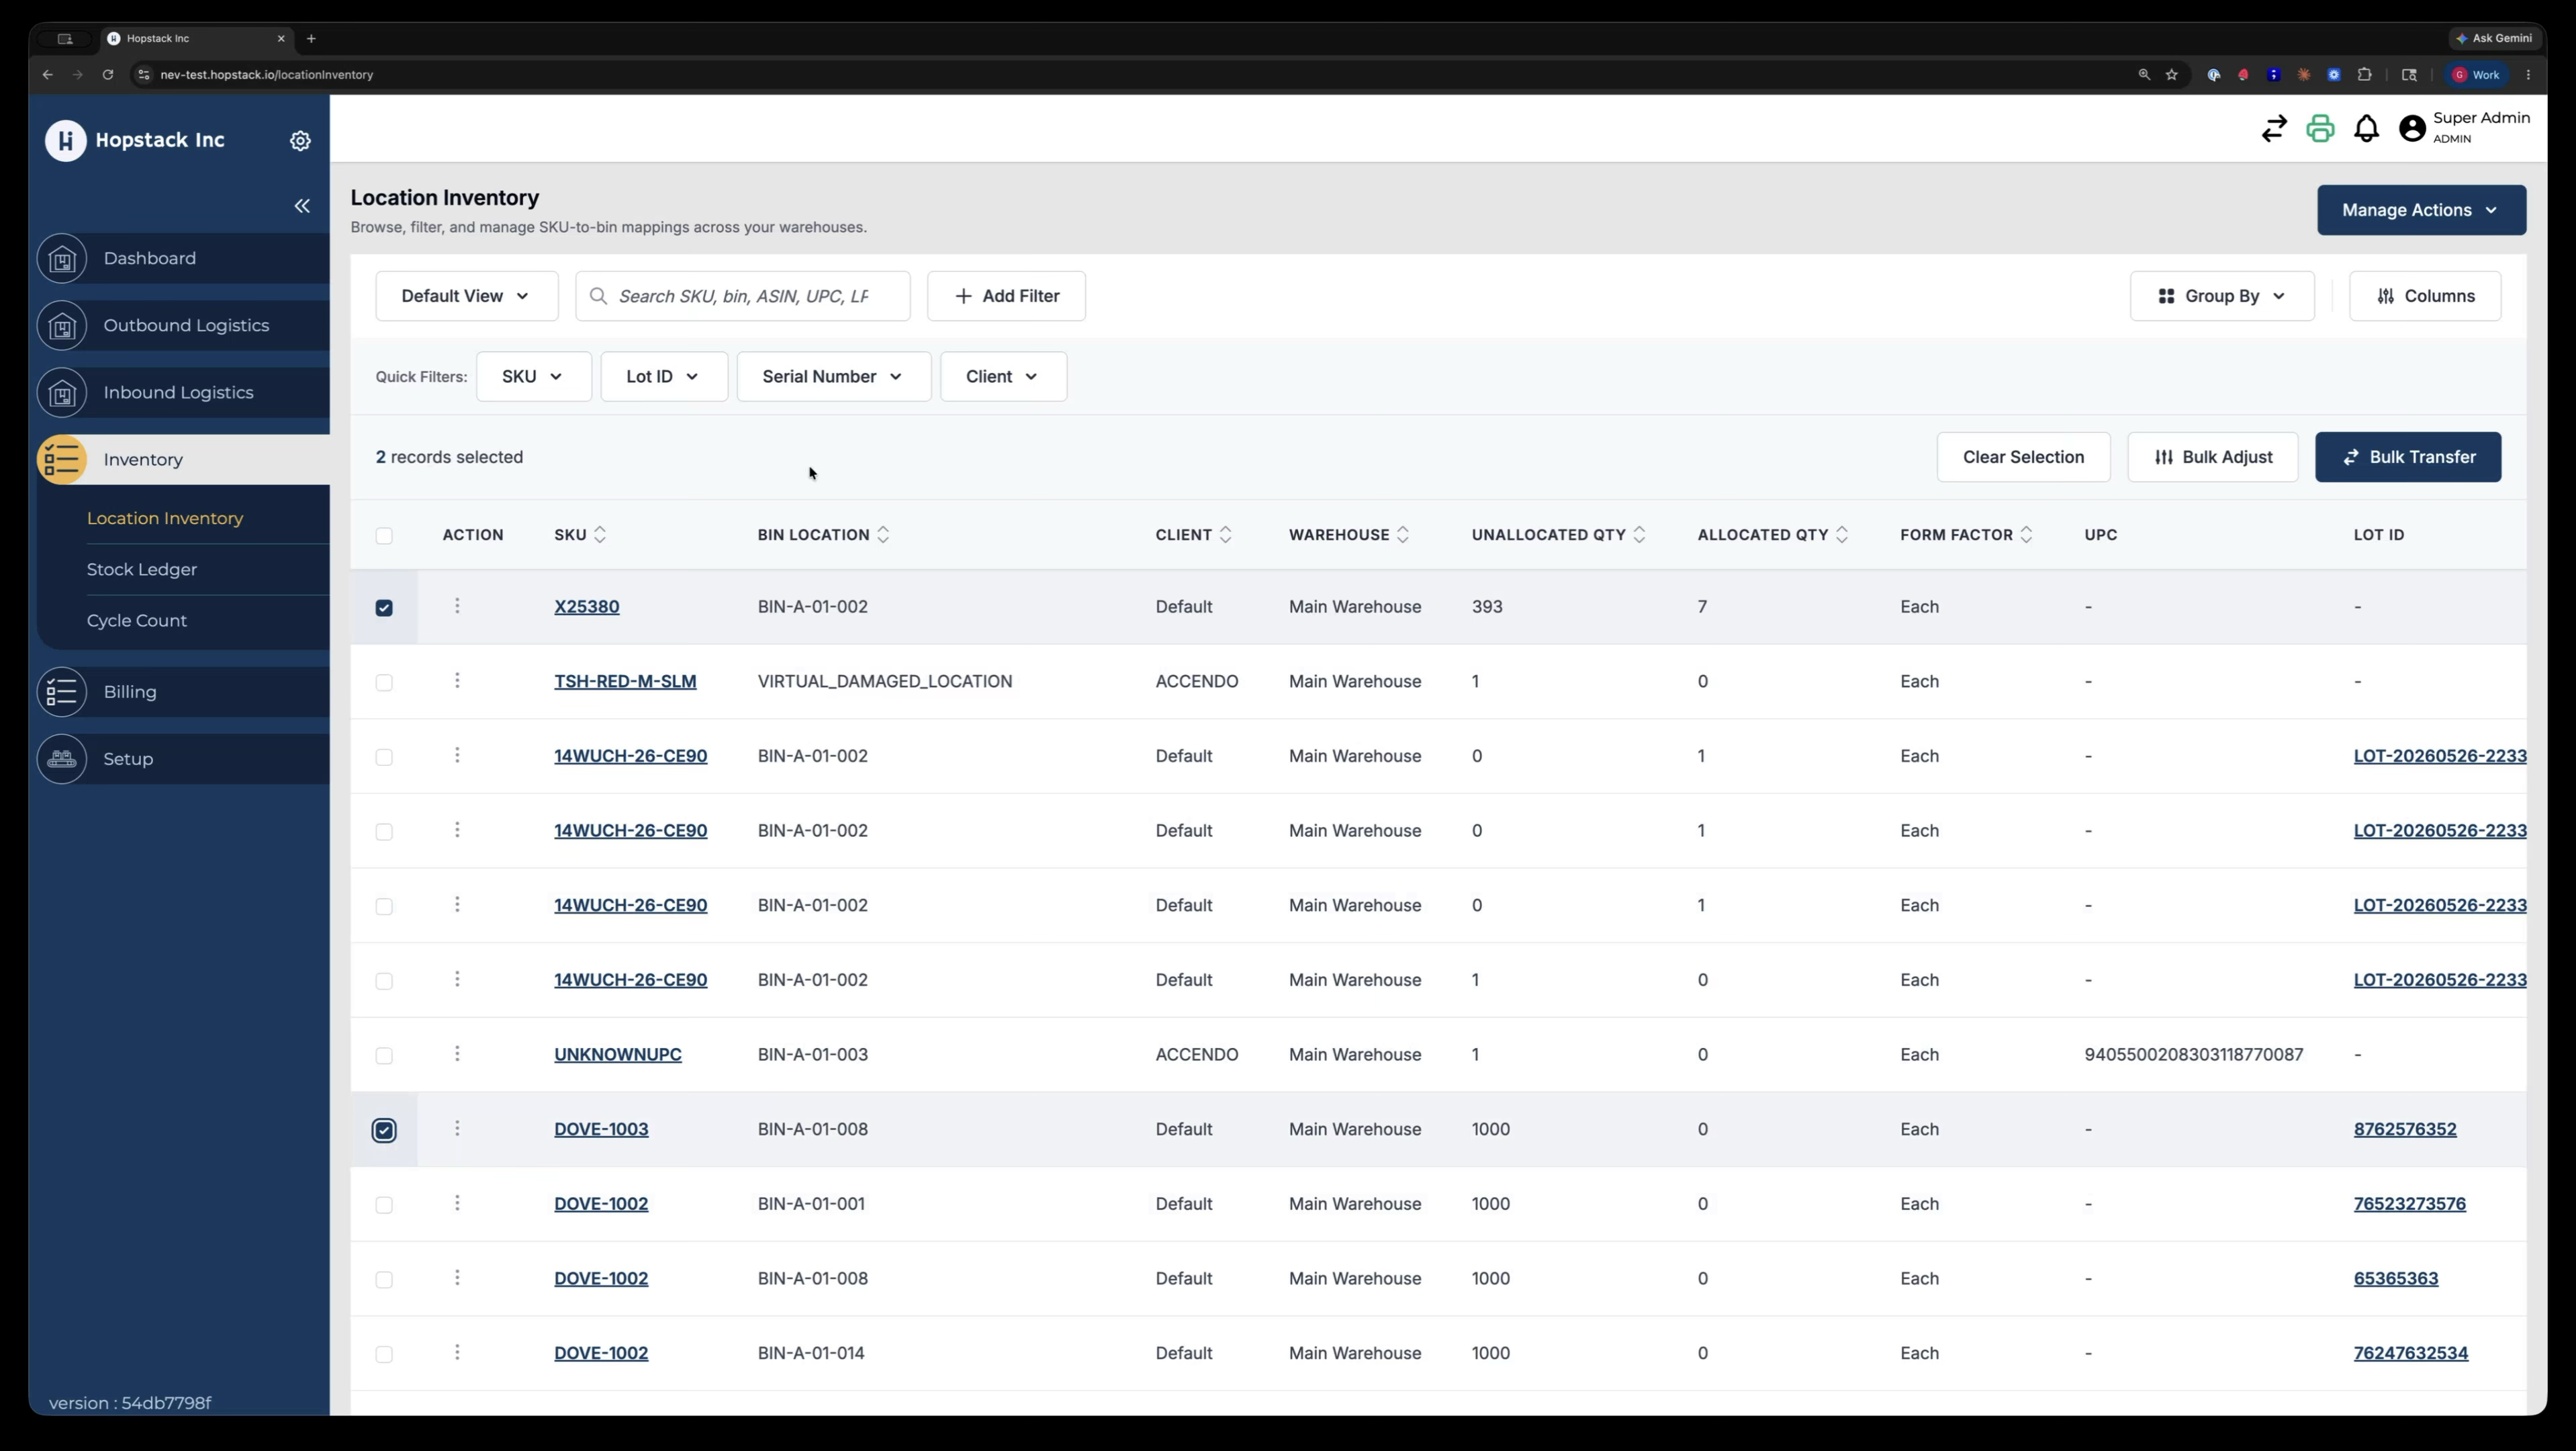
A bulk transfer modal opens, showing all selected items, including the type of units (loose pieces, storage units, pallets, etc.), so you can verify what needs to be transferred.
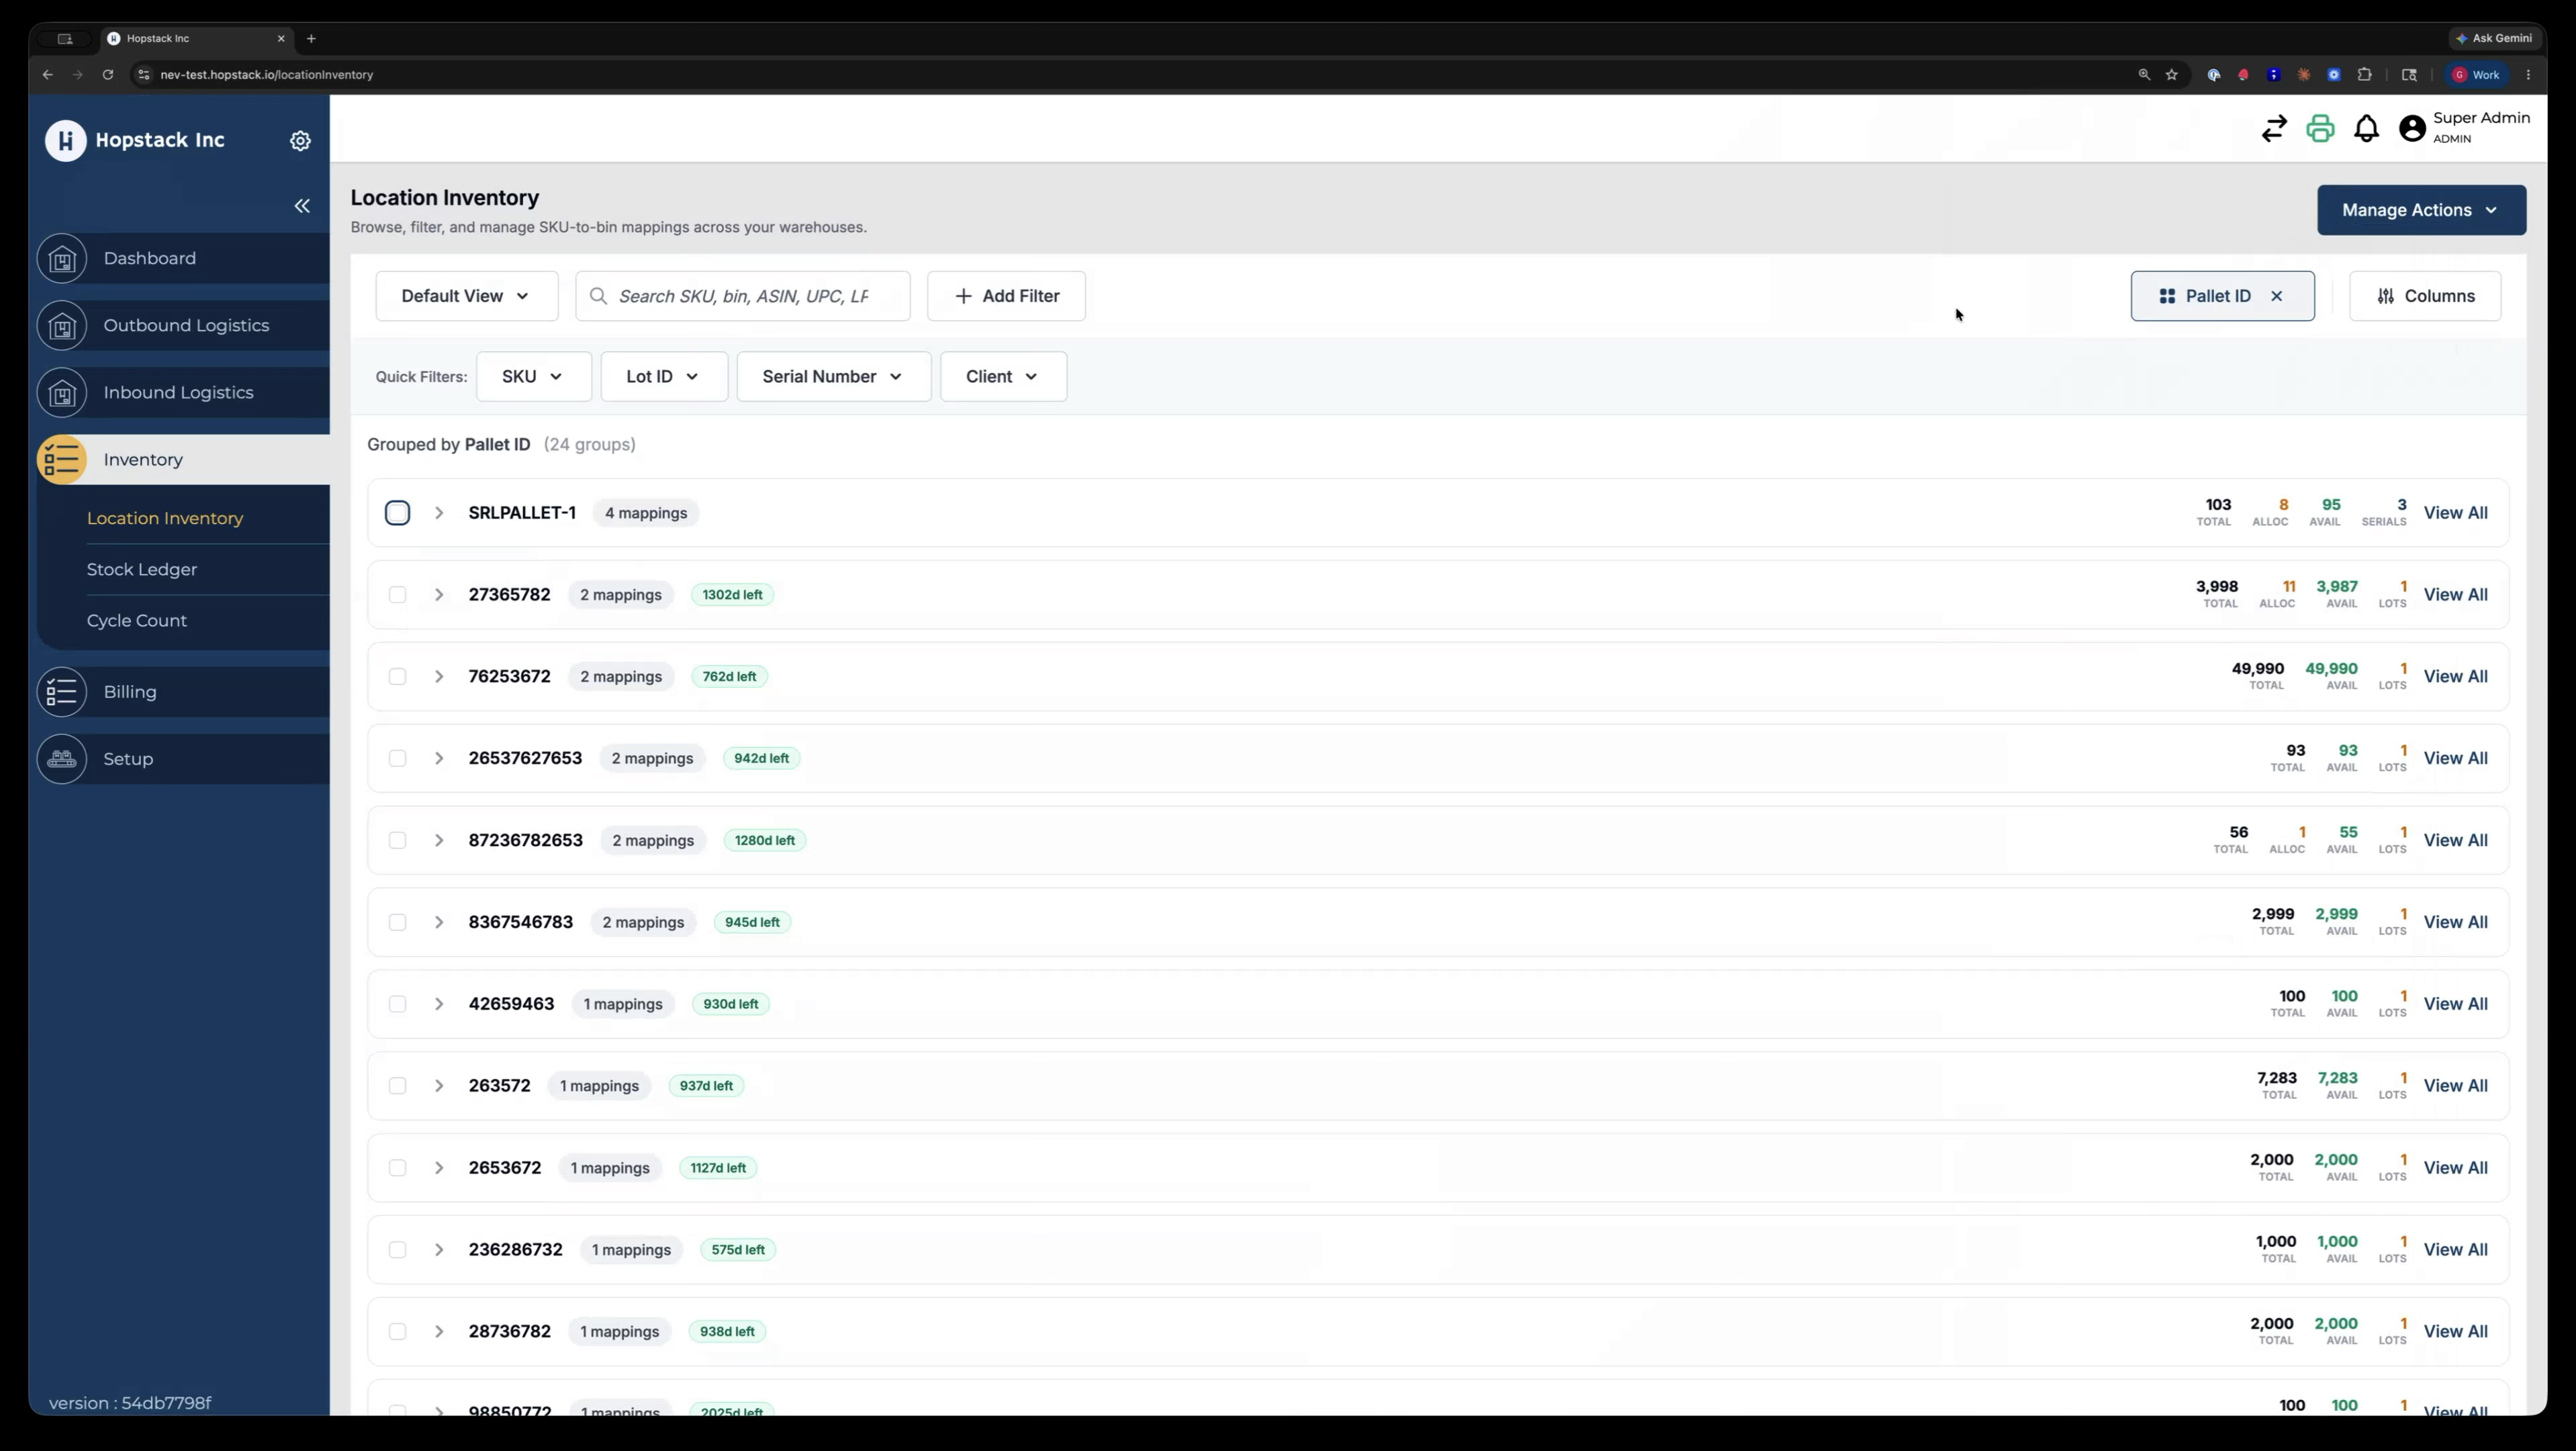
Step 4: Use Grouping to Select Entire Groups for Transfer
Another way to select items is by using the grouping functionality.

With the new grouping feature, you can transfer whole groups at once.

For example, choose to group the inventory by Pallet.

If a pallet has four rows and you want to transfer that entire pallet, select the pallet grouping.

Then click Bulk Transfer for the selected pallet.

If the pallet contains tracked or allocated inventory that cannot be moved, the system will prevent the transfer and enforce all protections so that ineligible inventory does not travel.
Step 5: Bulk Transfer by Different Groupings (Including Multiple Groups)
You can perform bulk transfers using any available grouping.

For example, change the grouping to Lot ID.

Apply the grouping.

You can also select multiple groupings at once (e.g., several lots or pallets) to transfer them together.
After selecting the desired groups, click Bulk Transfer.

The bulk transfer modal now shows a mix of what can and cannot be transferred, giving you an overall view of eligible and ineligible inventory.
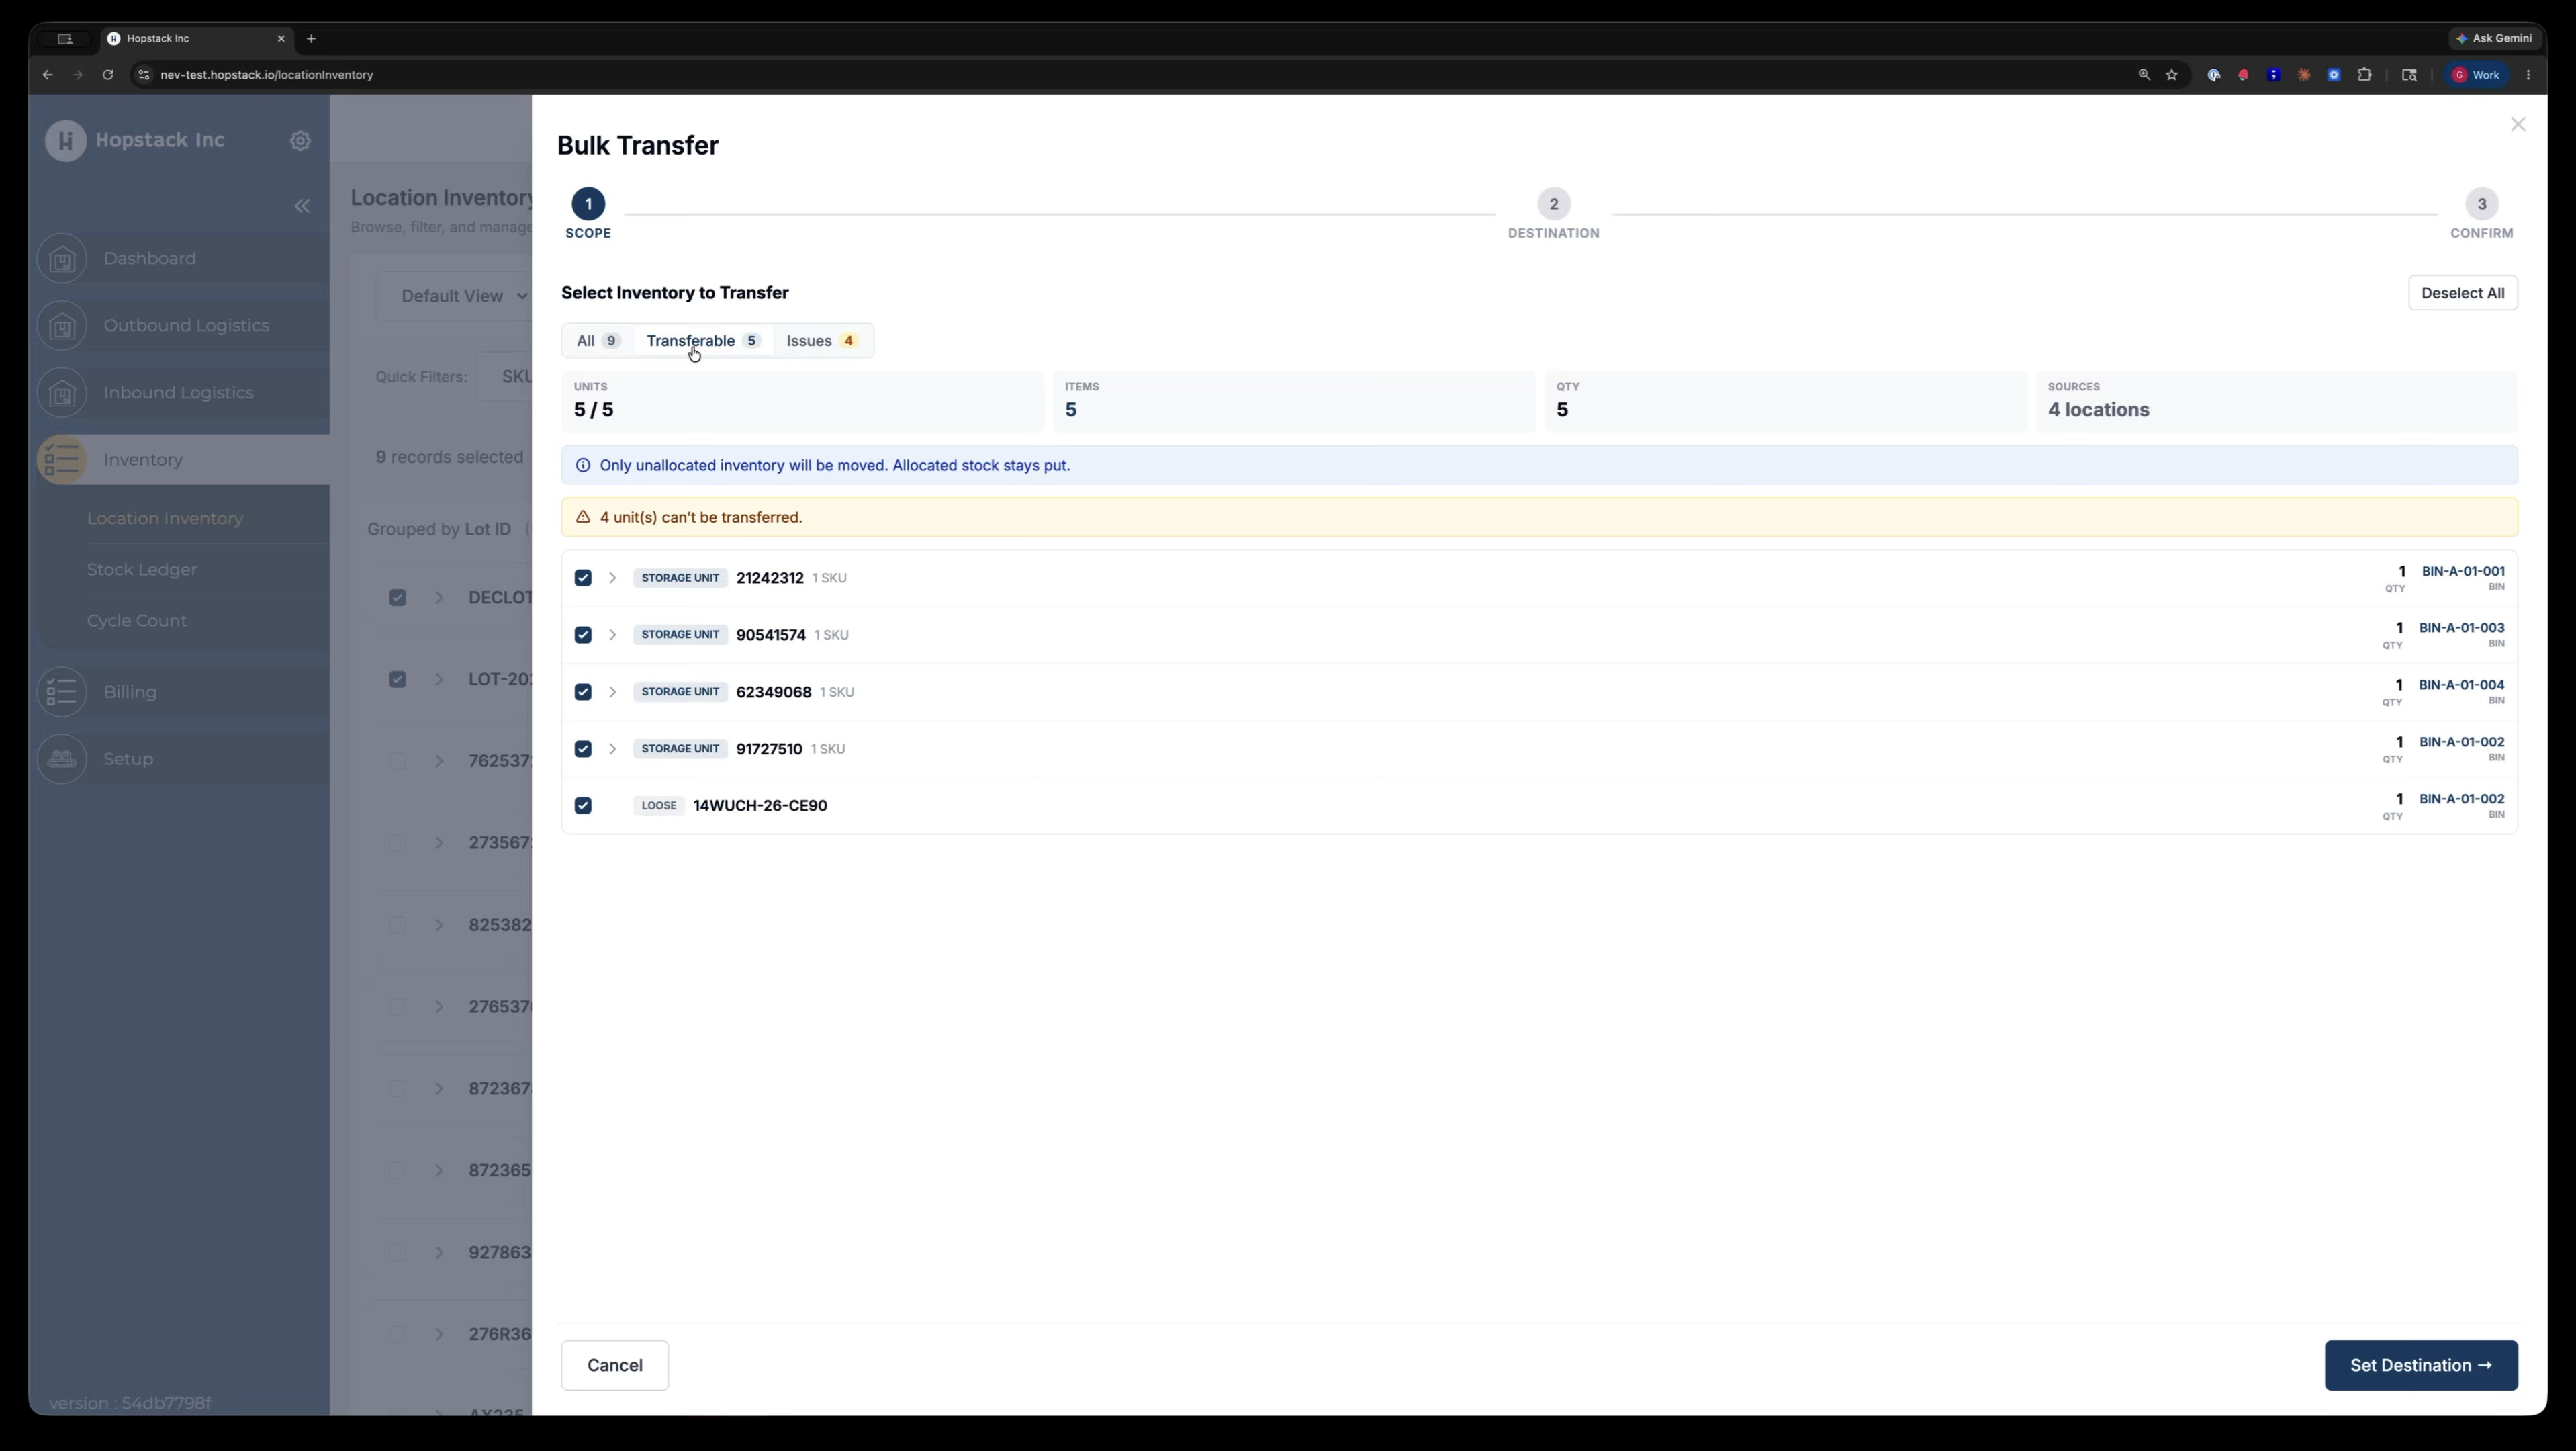
Step 6: Review Transferable vs. Non-Transferable Inventory
Use the quick tabs within the bulk transfer modal to analyse the selection.
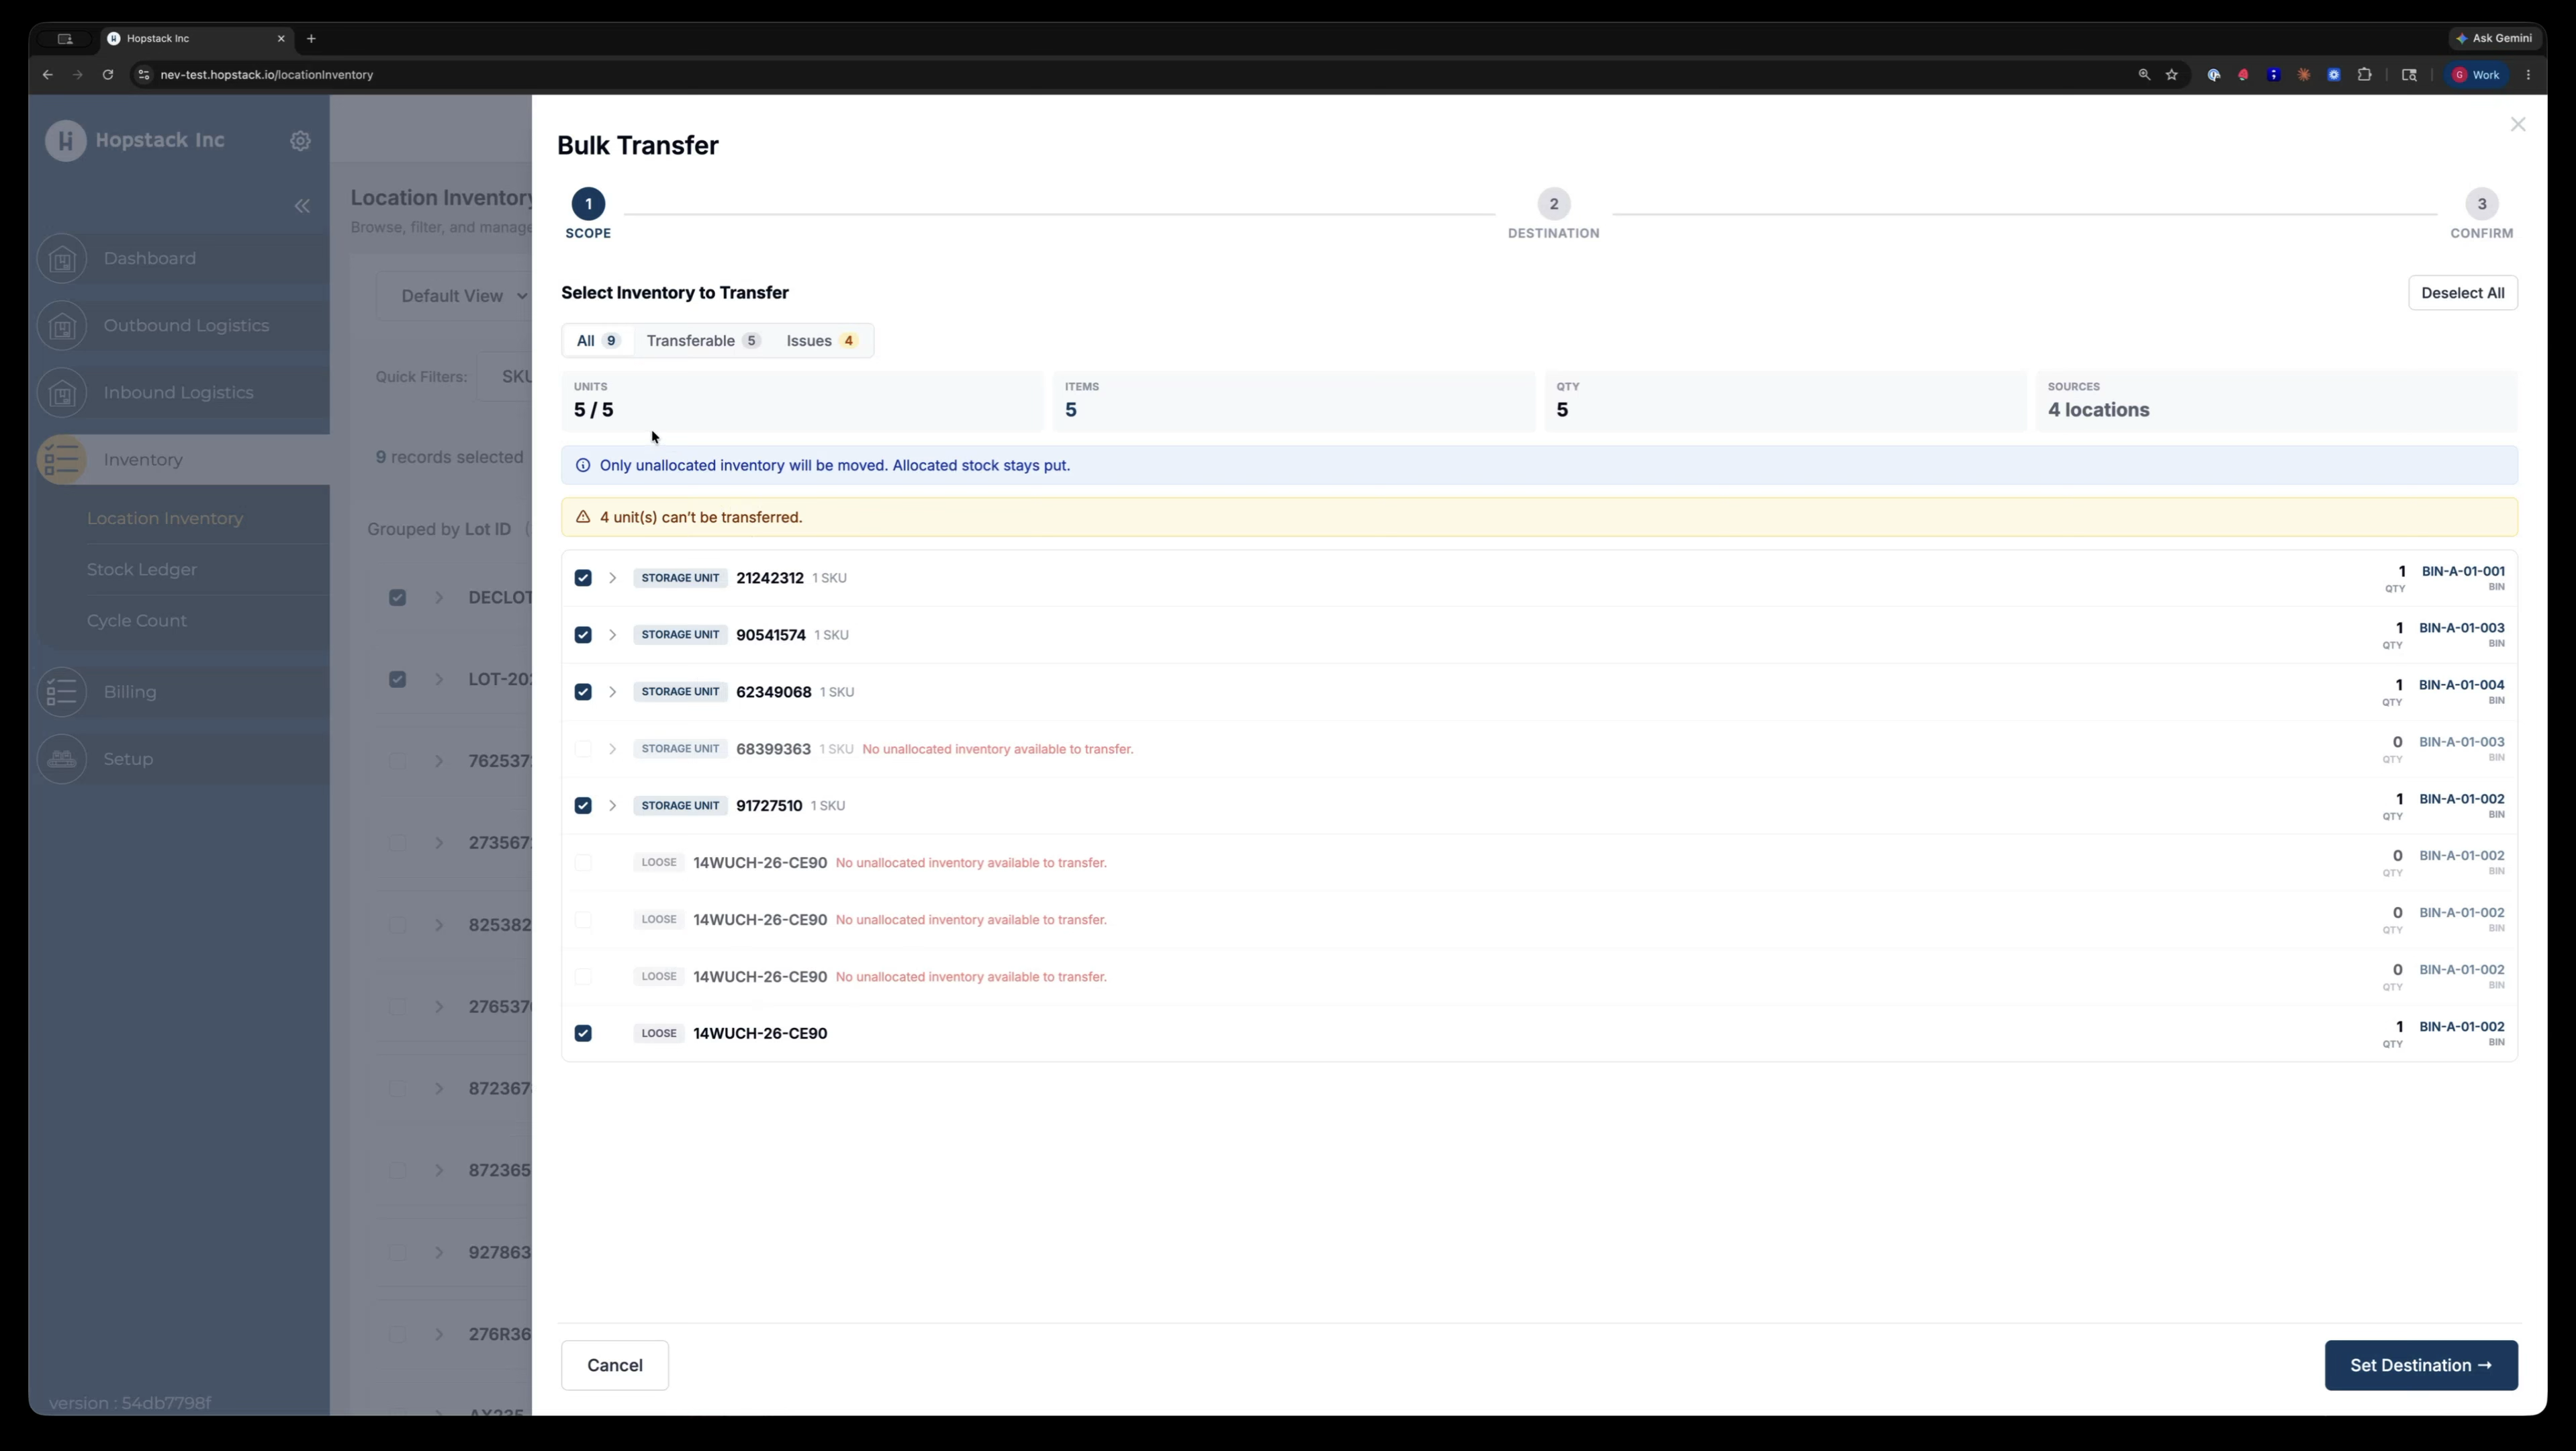
These tabs help you see:
-
What is transferable
-
What has issues and why
For example, if there is no inventory available to transfer, it will be clearly indicated. The modal will also list detailed reasons for issues, such as allocation or other constraints preventing transfer.
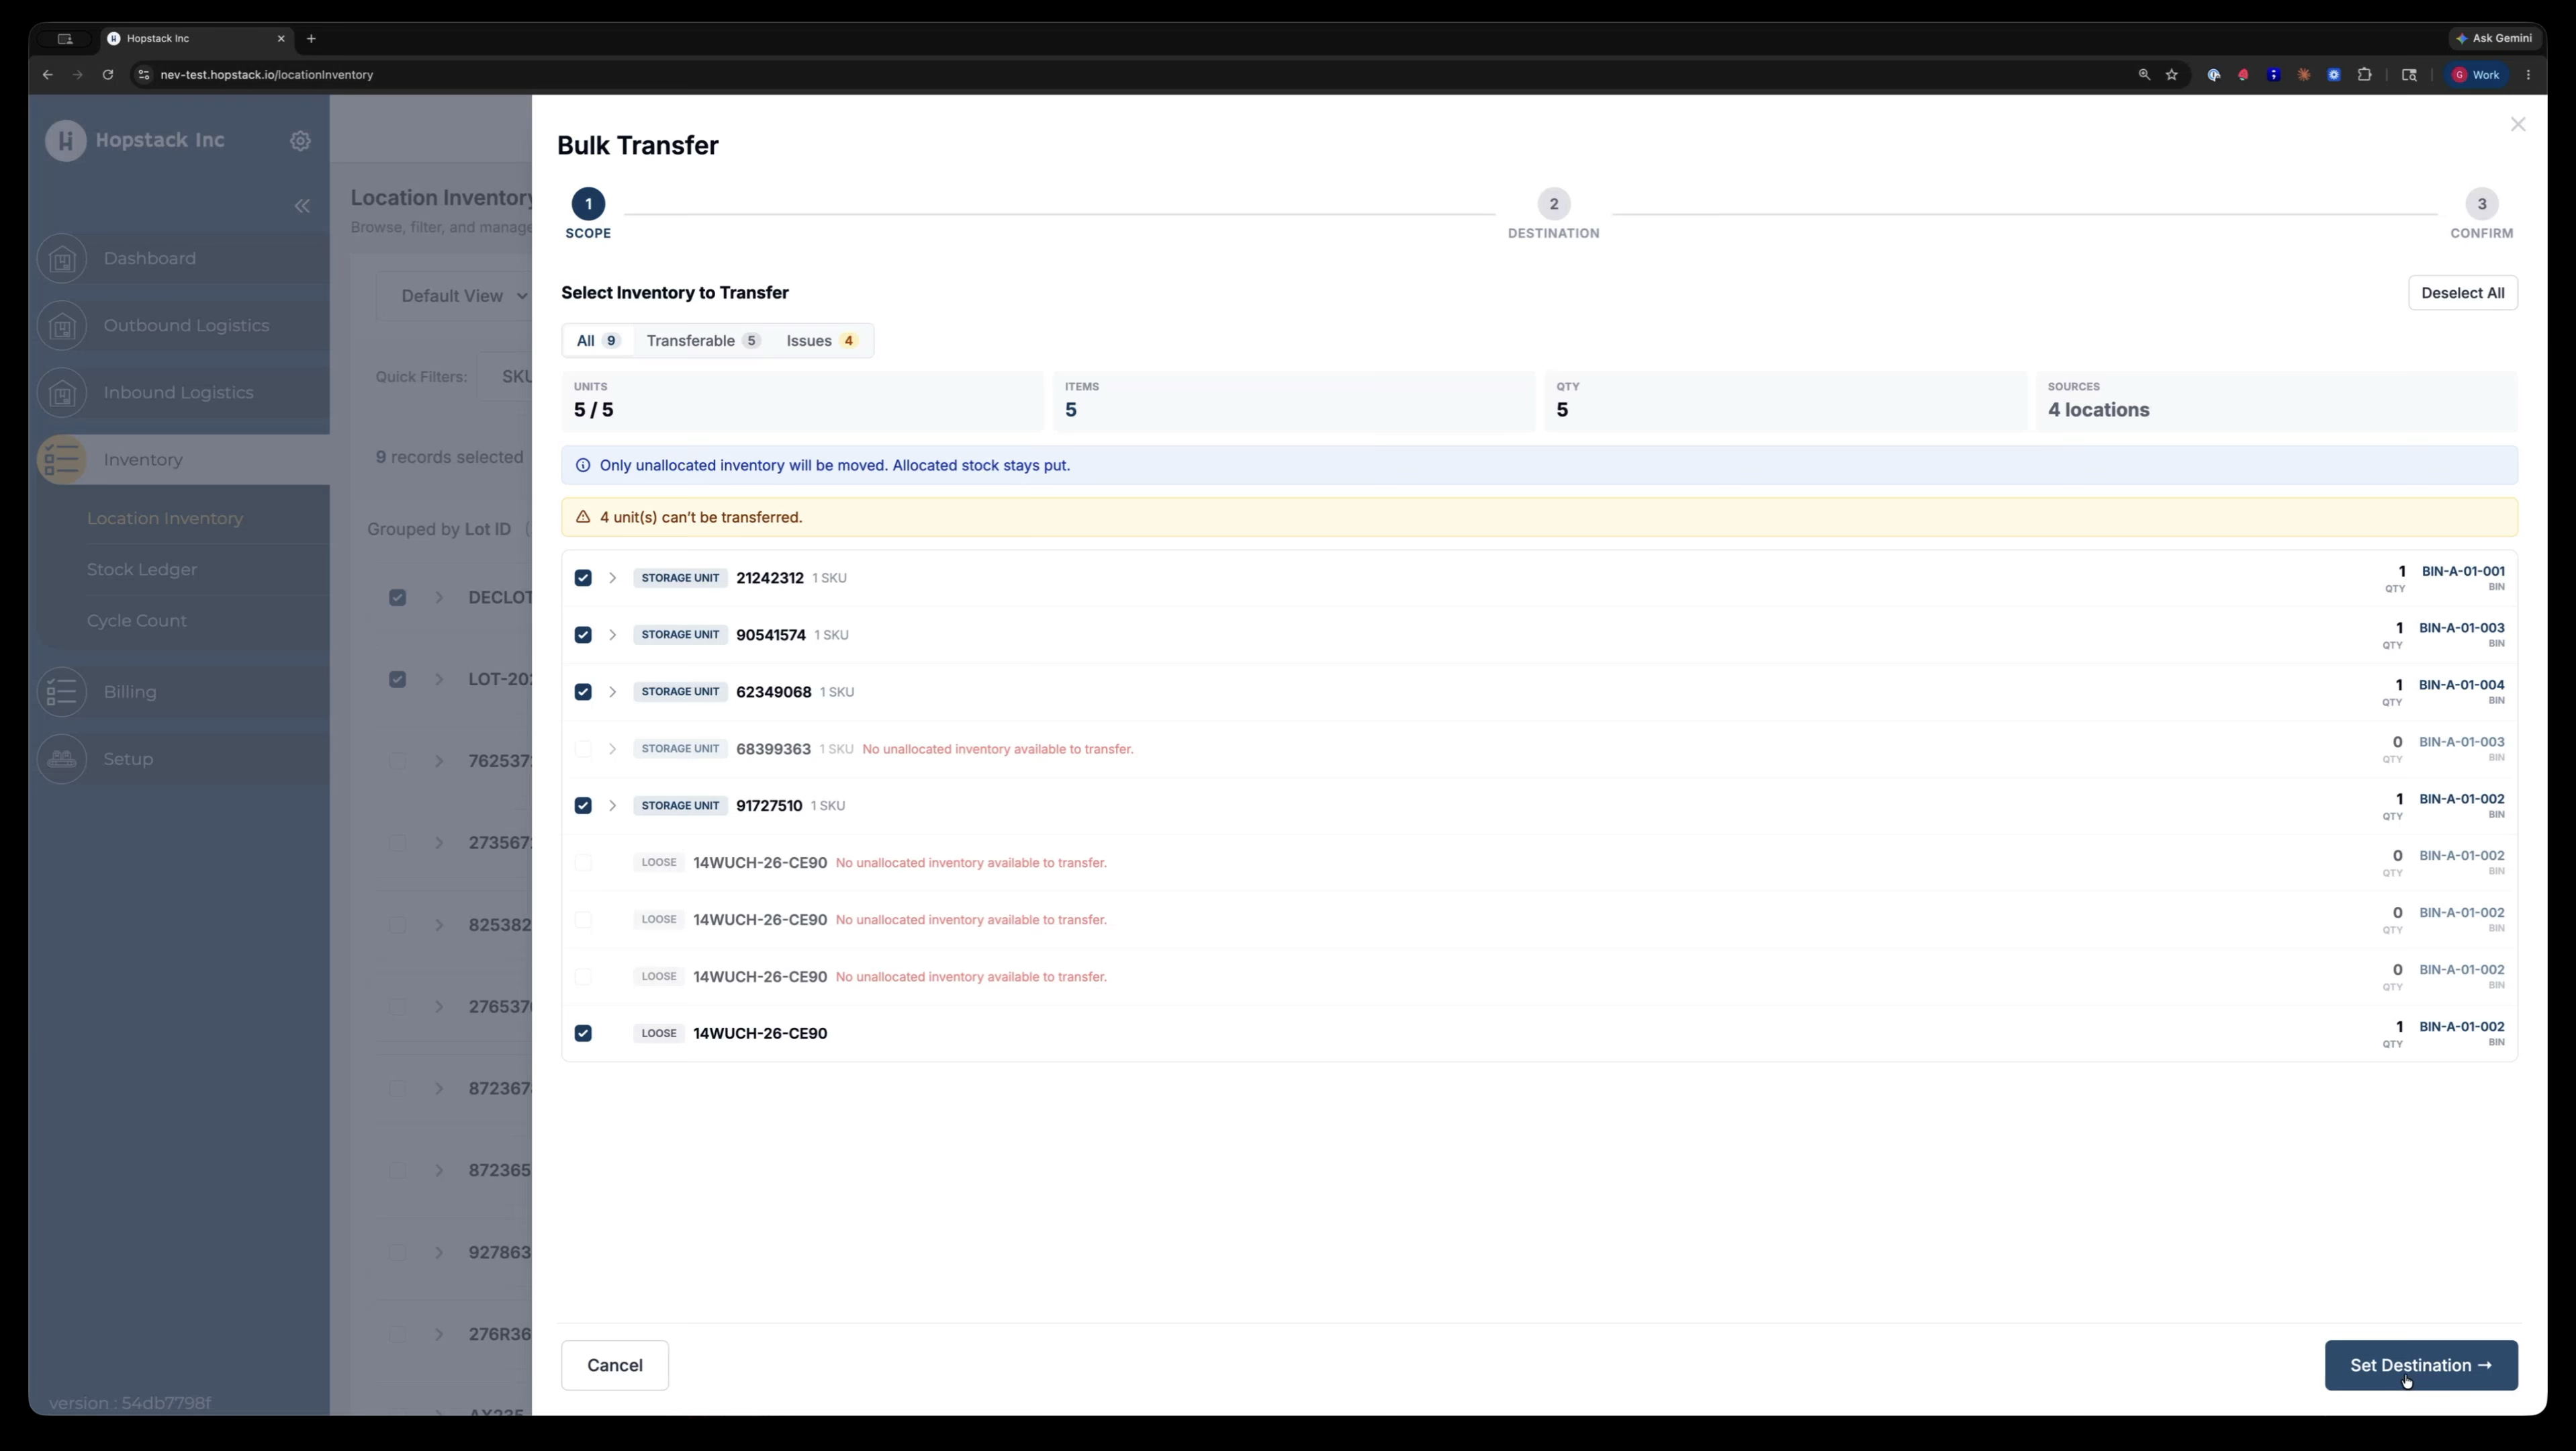
Step 7: Choose Destination and Transfer Reason
Once you are satisfied with the items selected for transfer, choose the destination location for the inventory.
This destination selection is part of an enhanced transfer flow. Previously, only a basic transfer reason was captured; now you can select from standard warehouse transfer reasons.
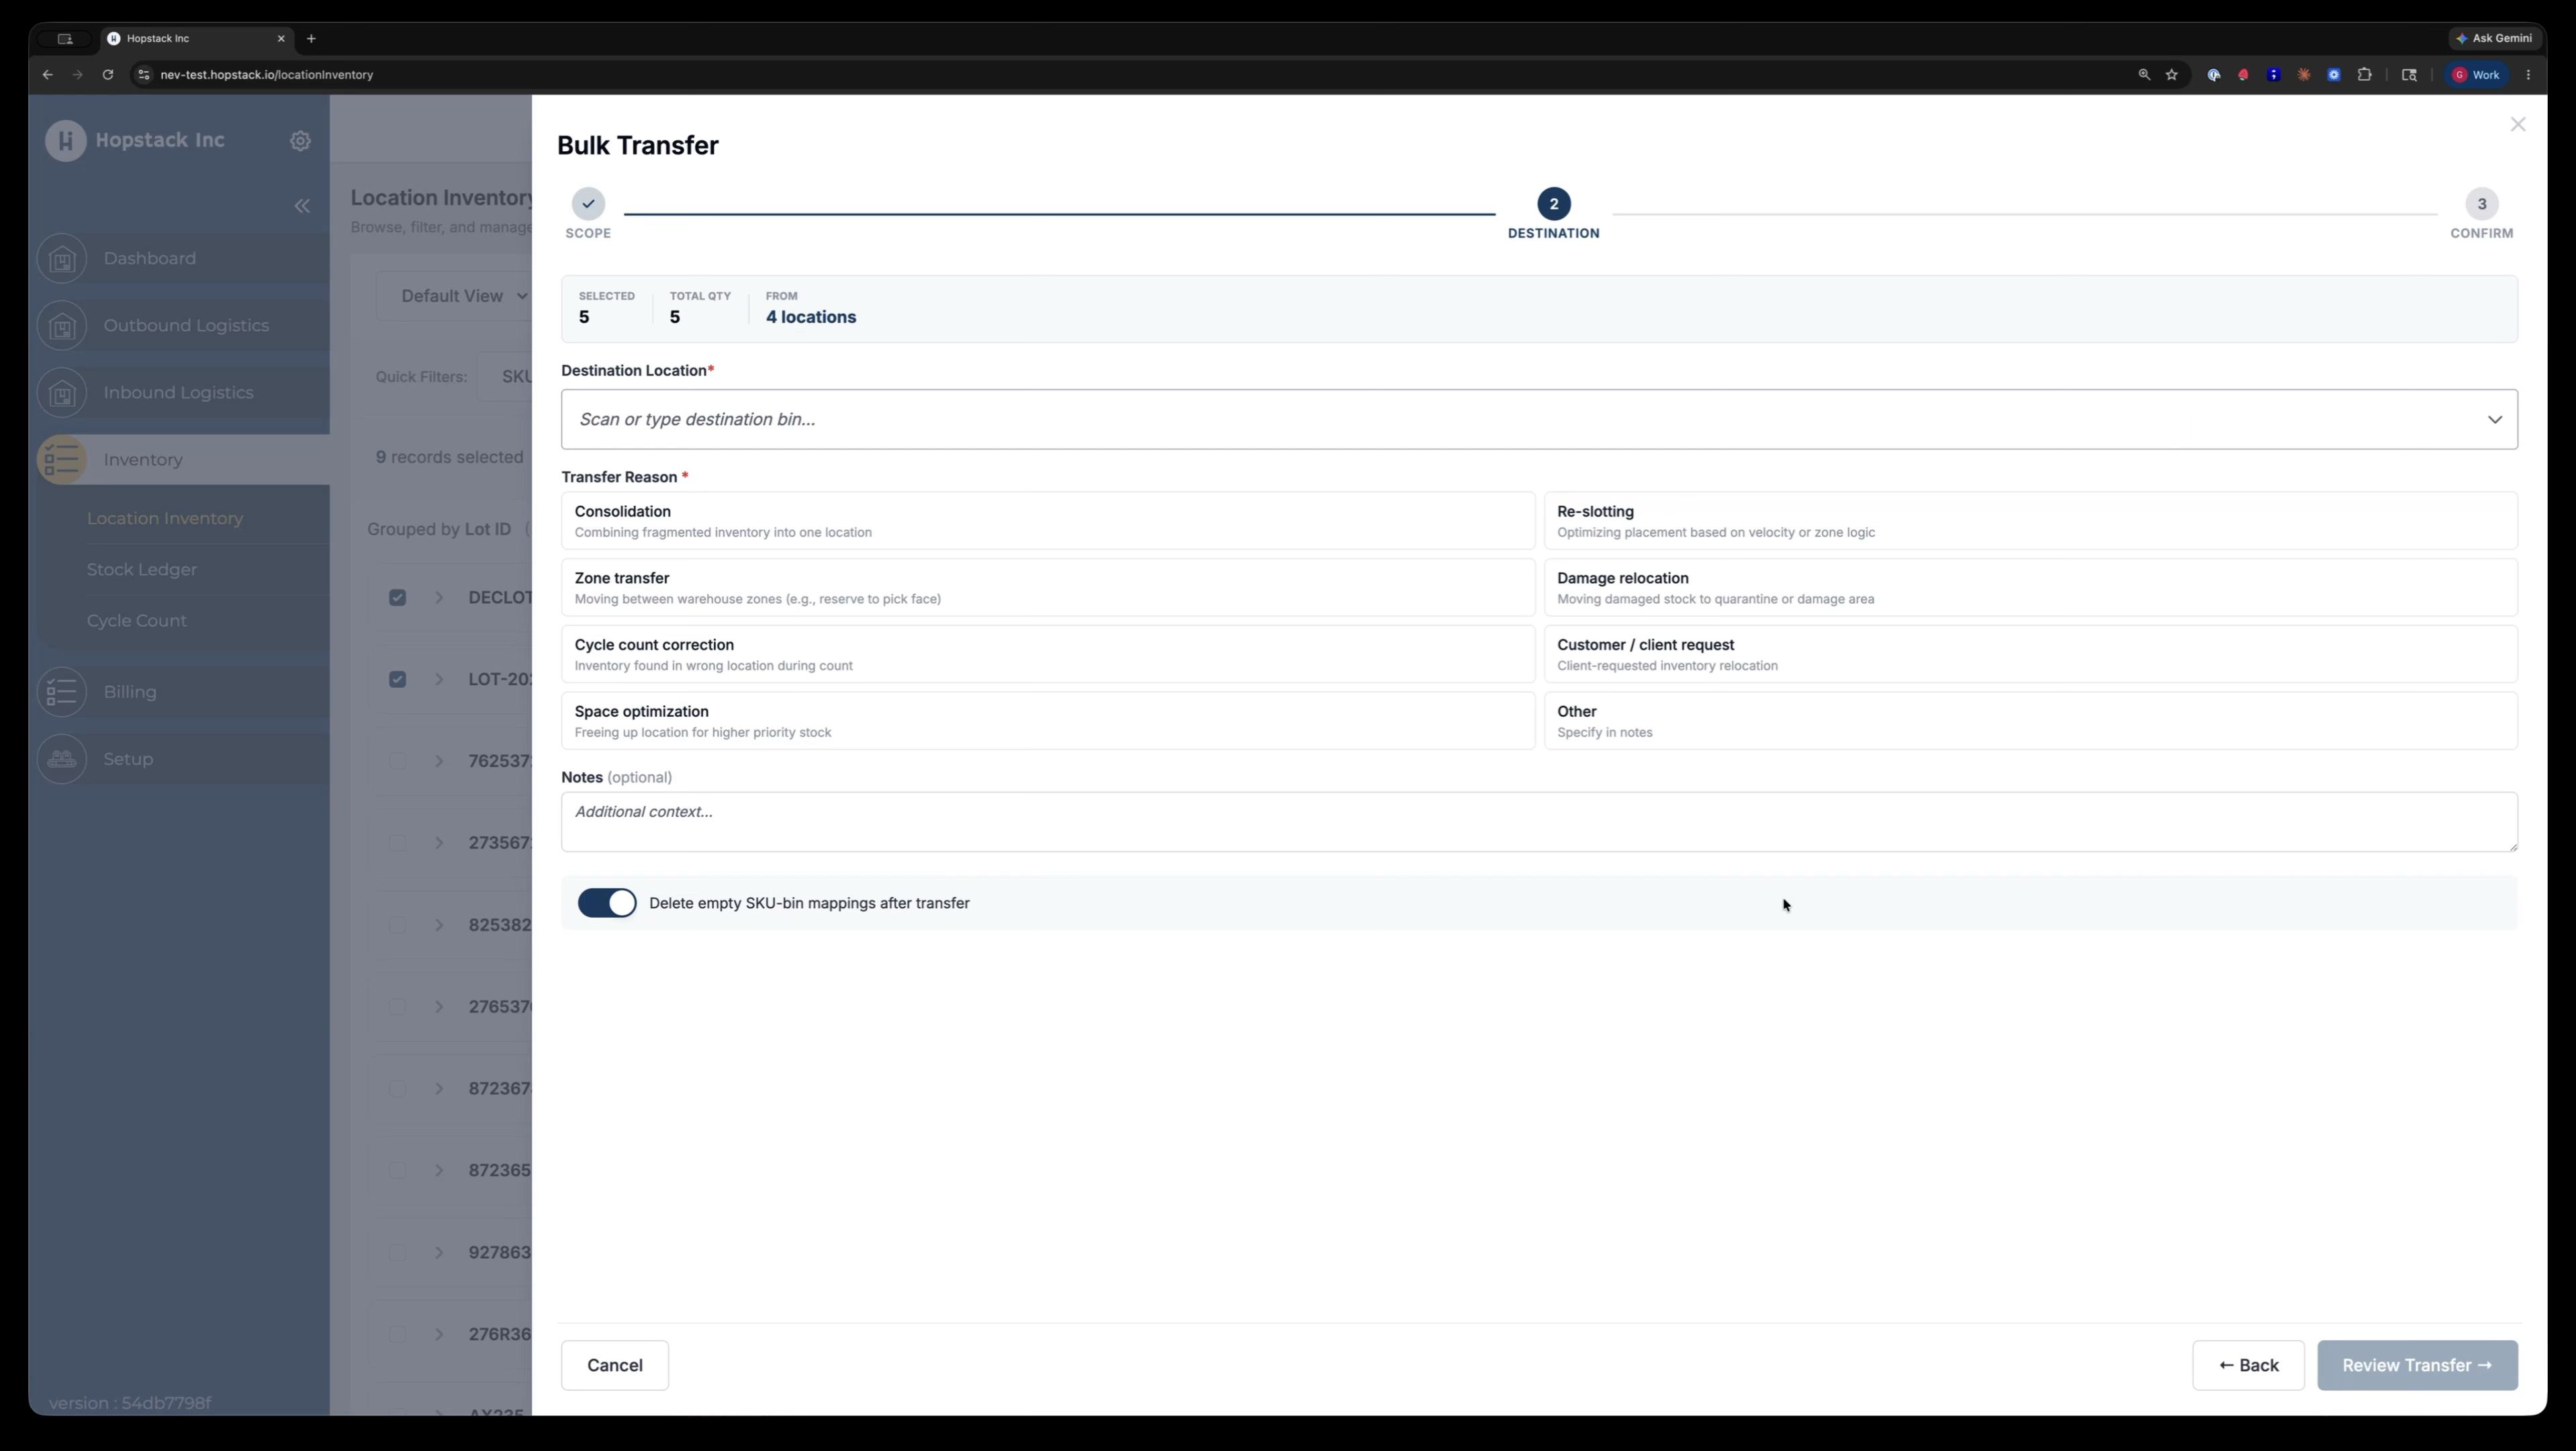
Choose an appropriate transfer reason, such as Reslotting.
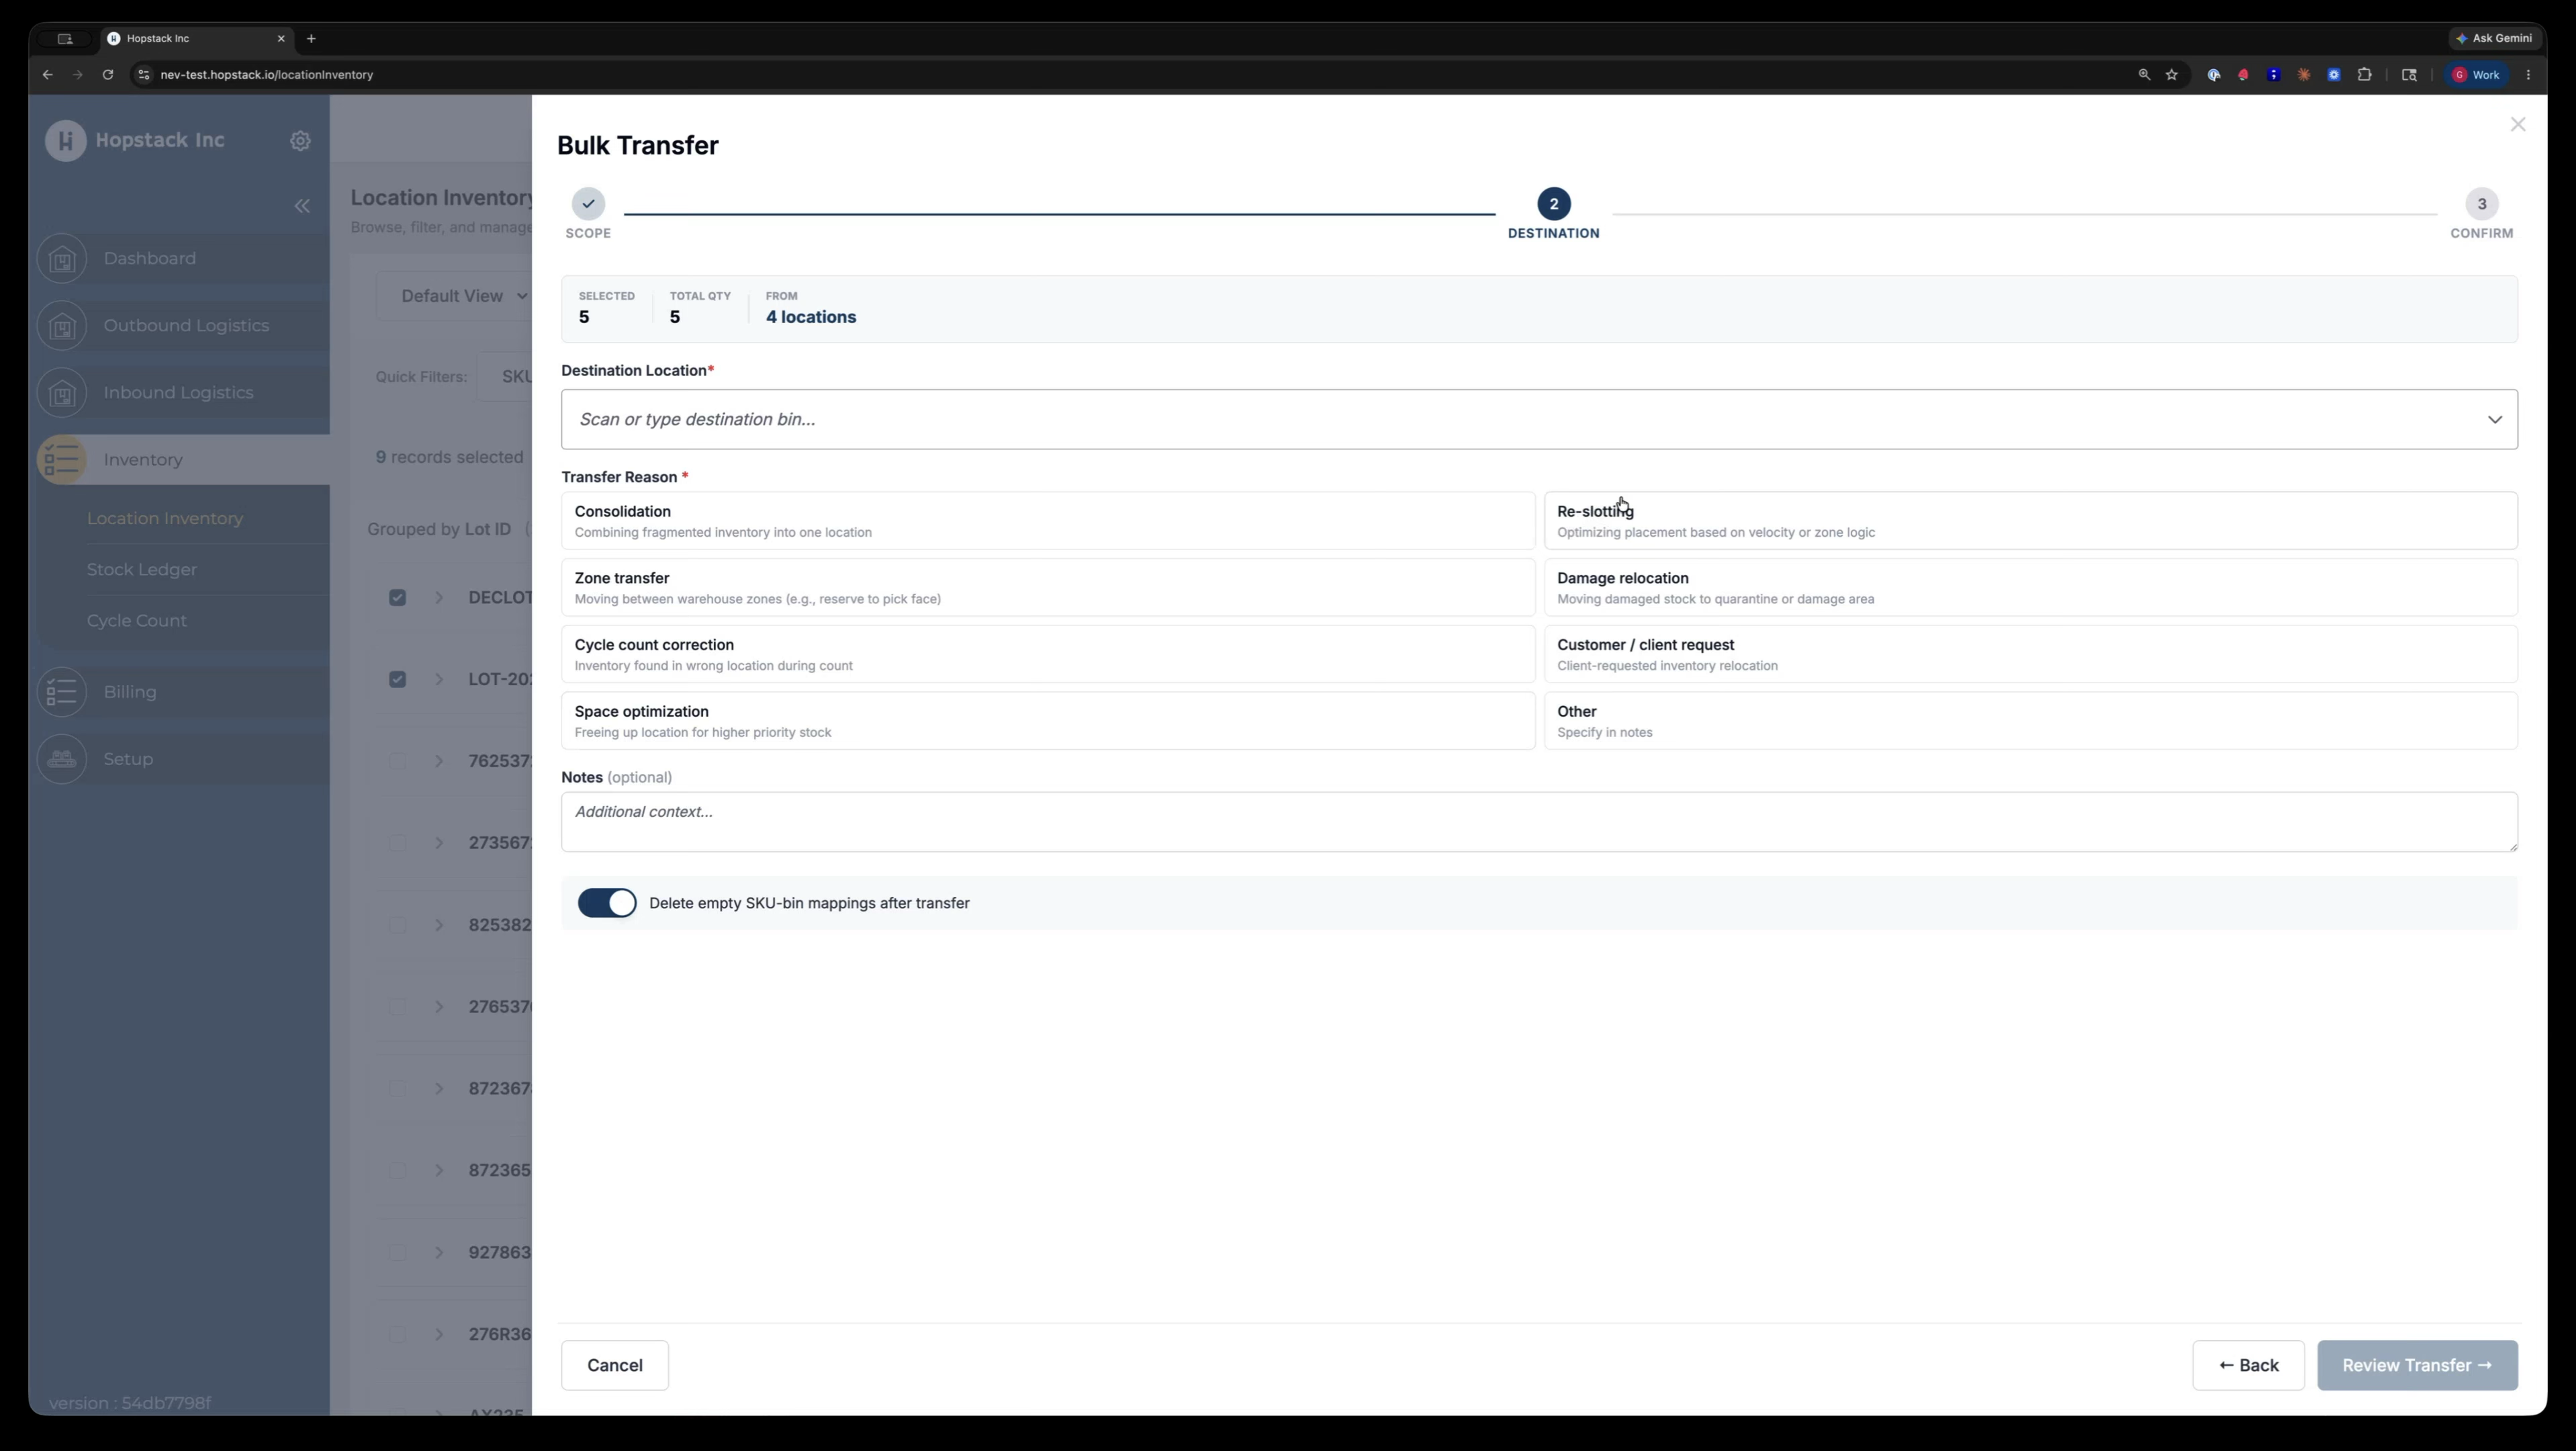
If none of the predefined reasons fit your use case, select Other and use the Notes field to describe the purpose of the transfer.
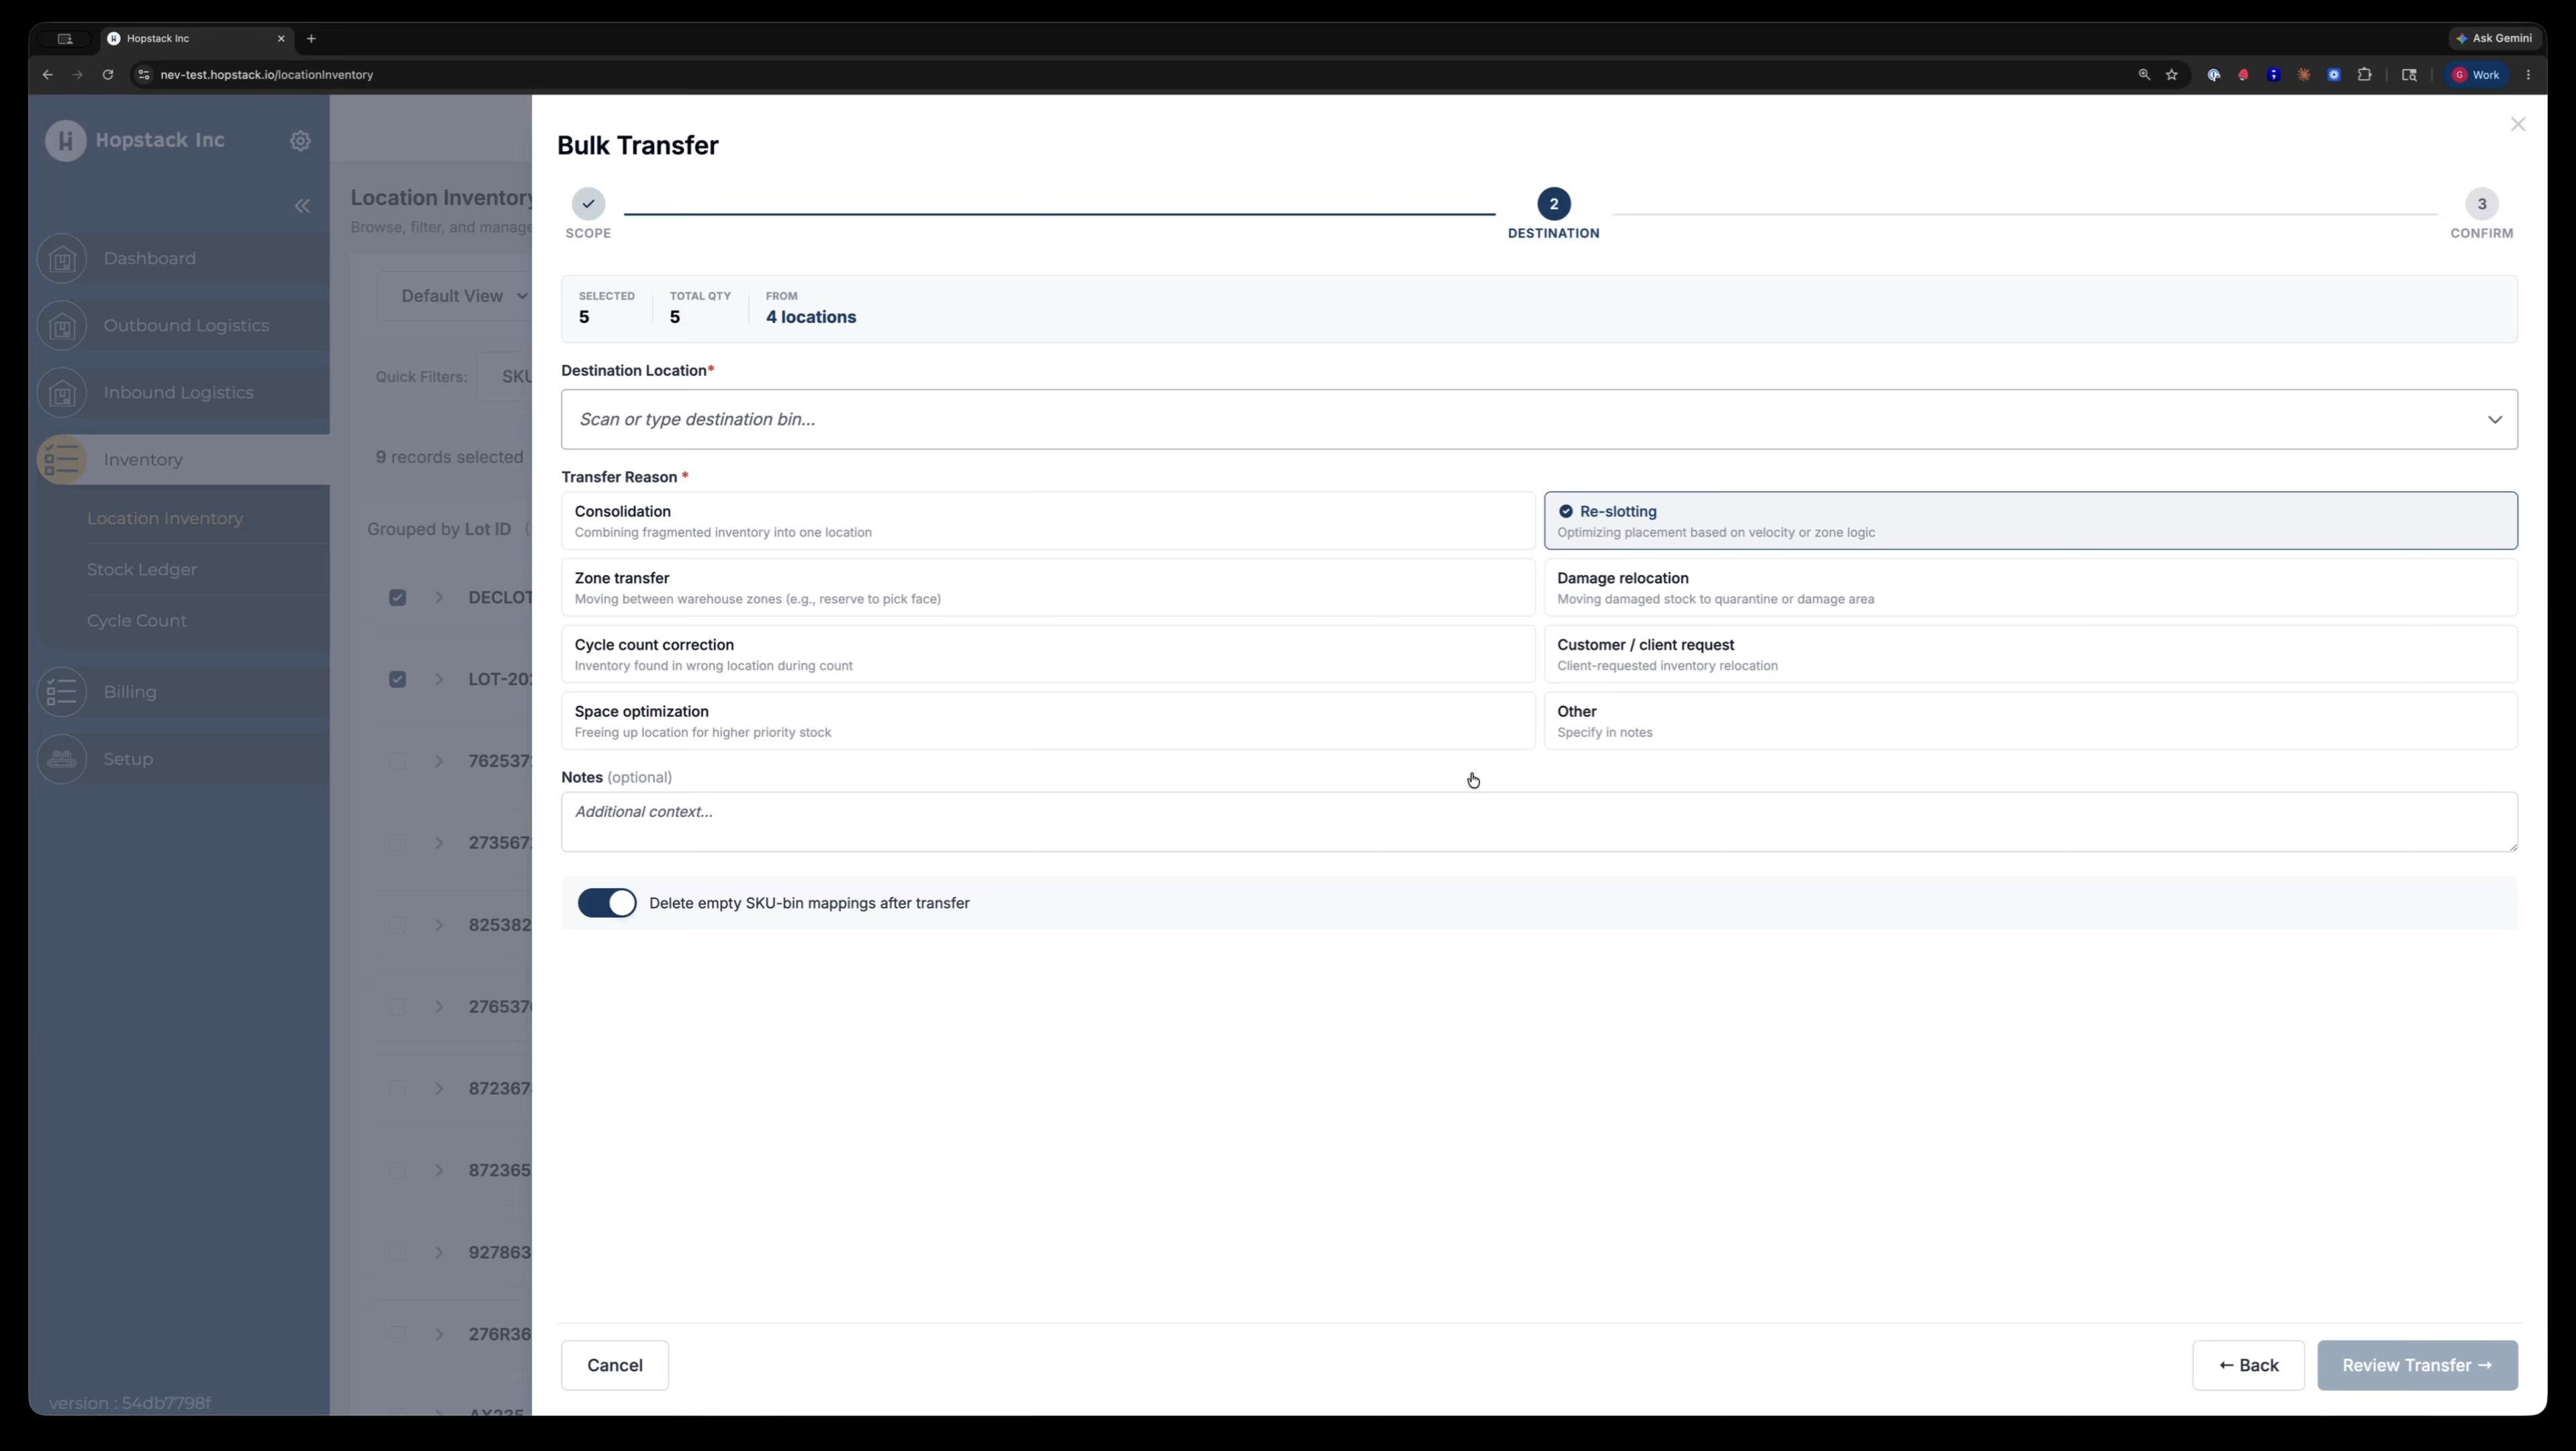
For example, select Reslotting and enter a note such as “Transfer to some other bin.”


You can also choose to automatically delete empty “these queue” bins after the transfer by keeping the corresponding option ticked, similar to the single transfer flow.
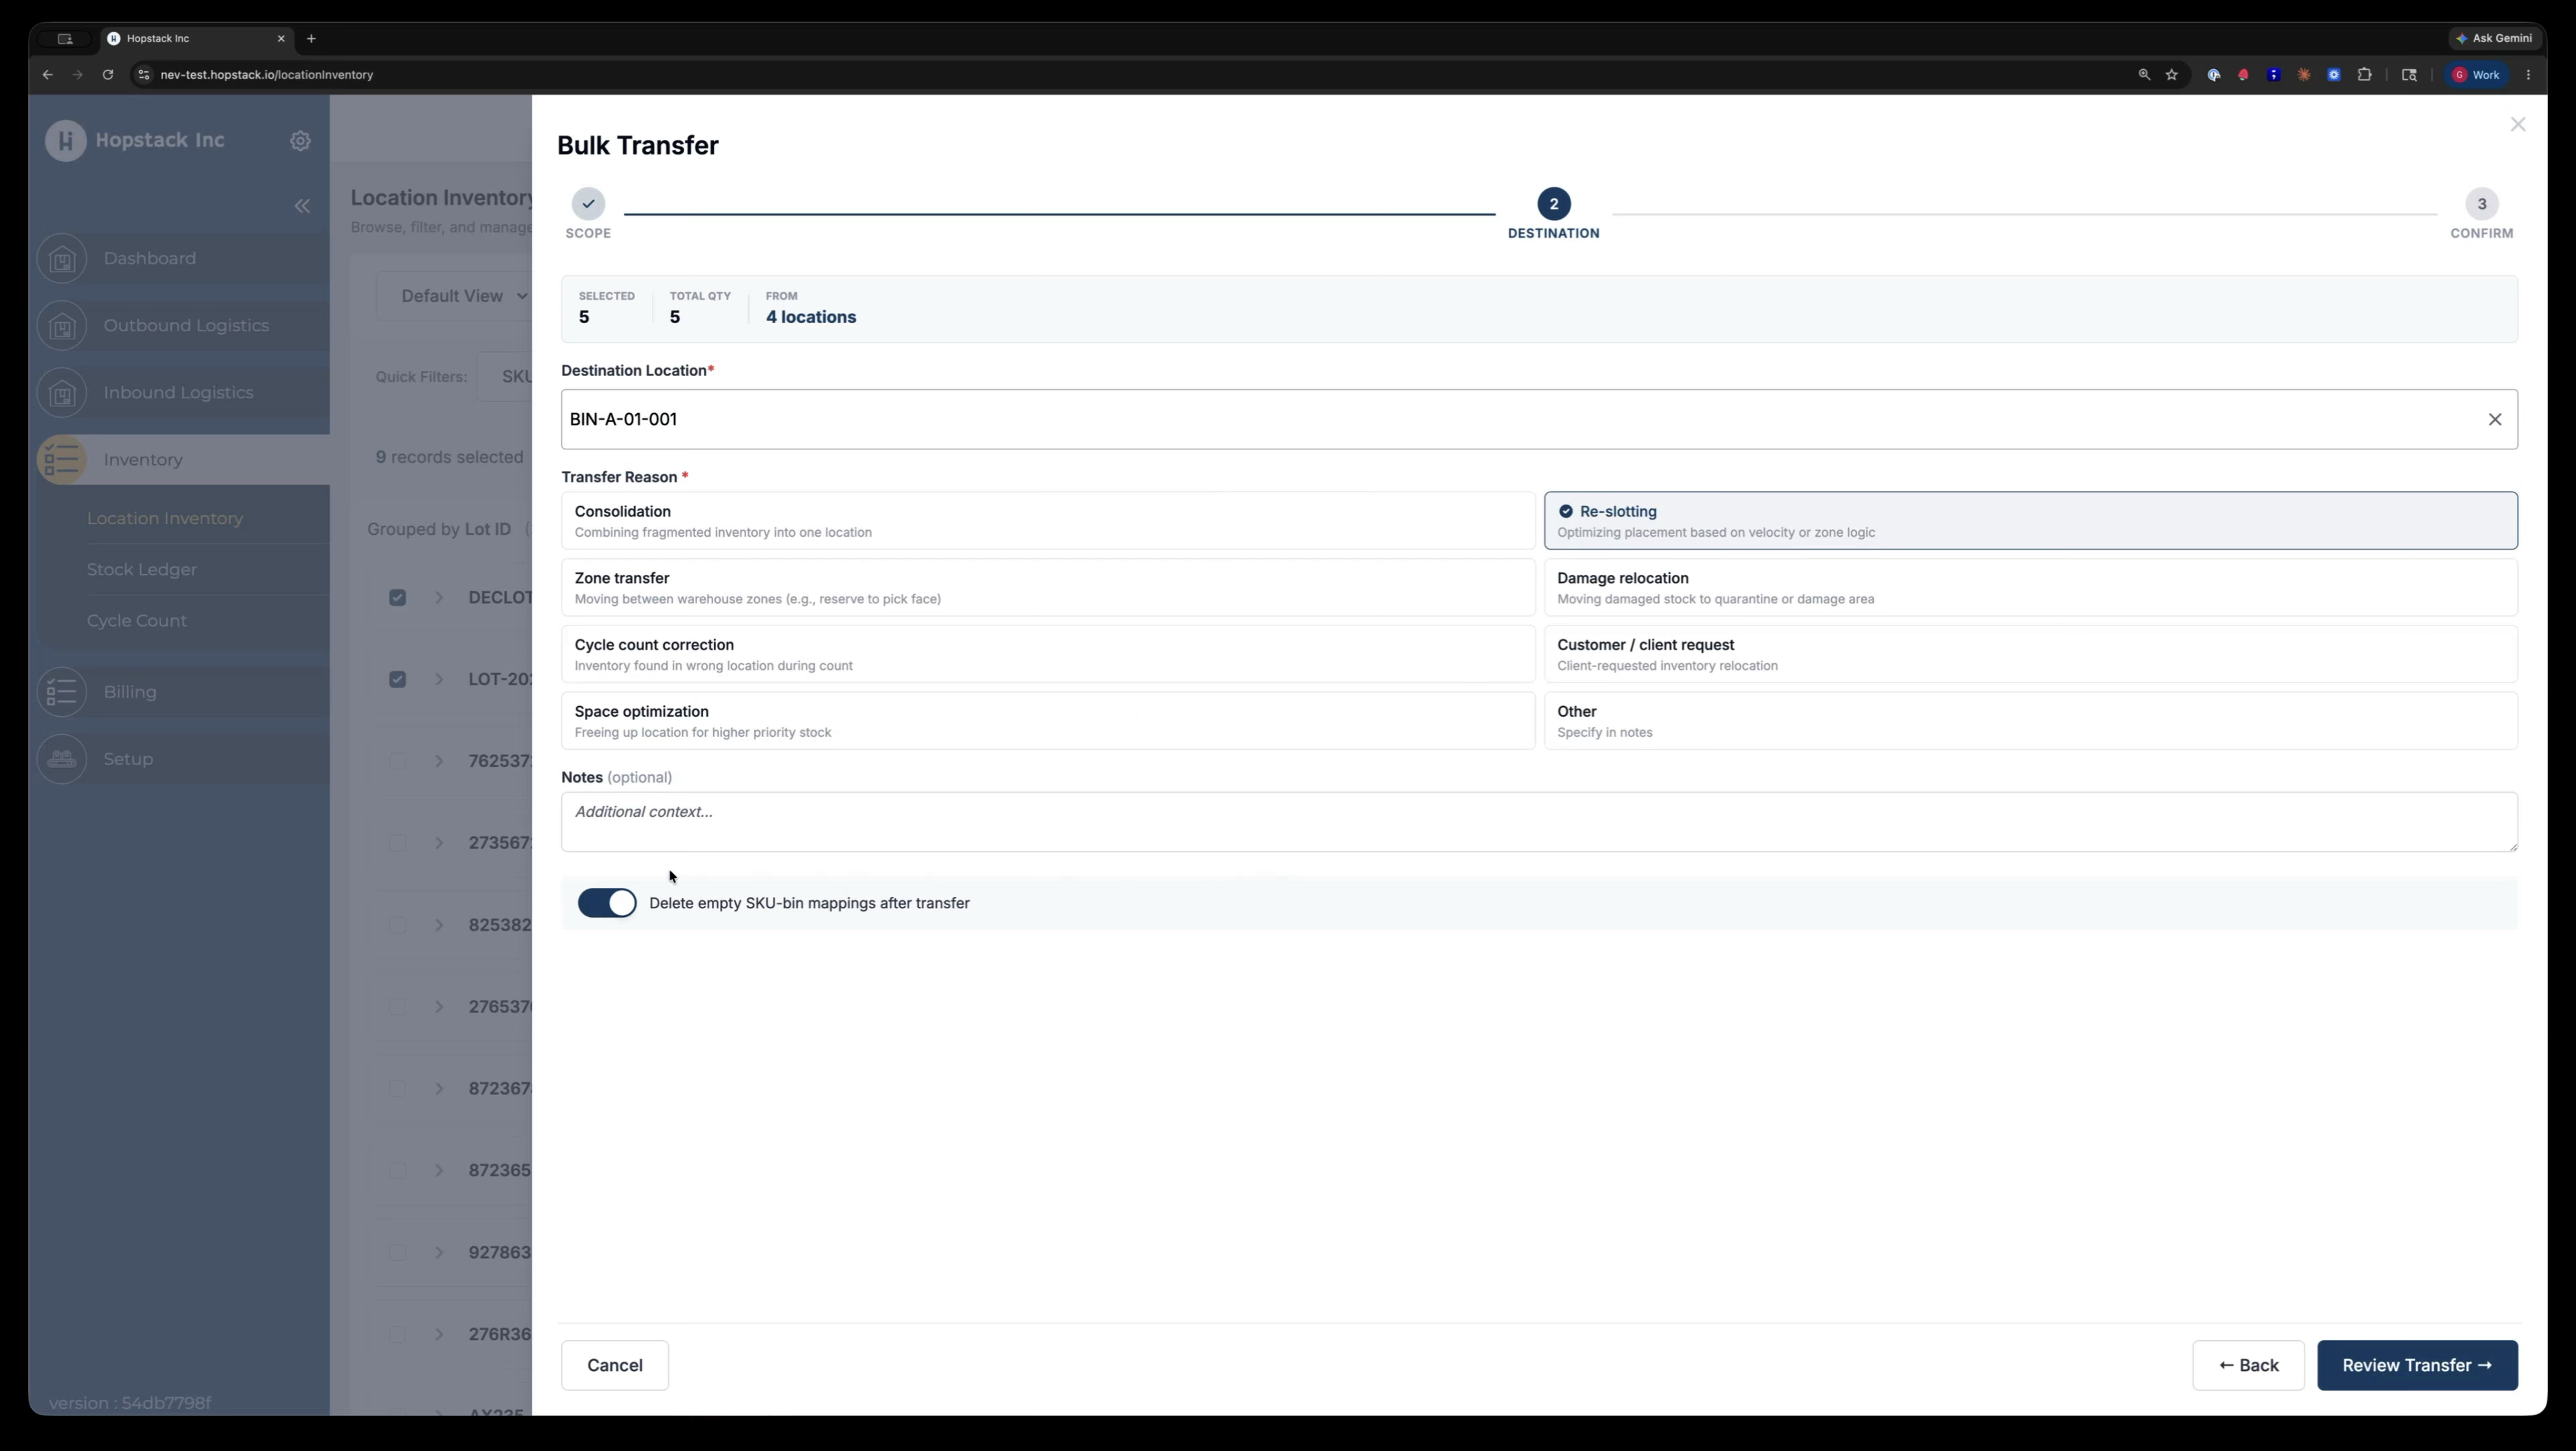
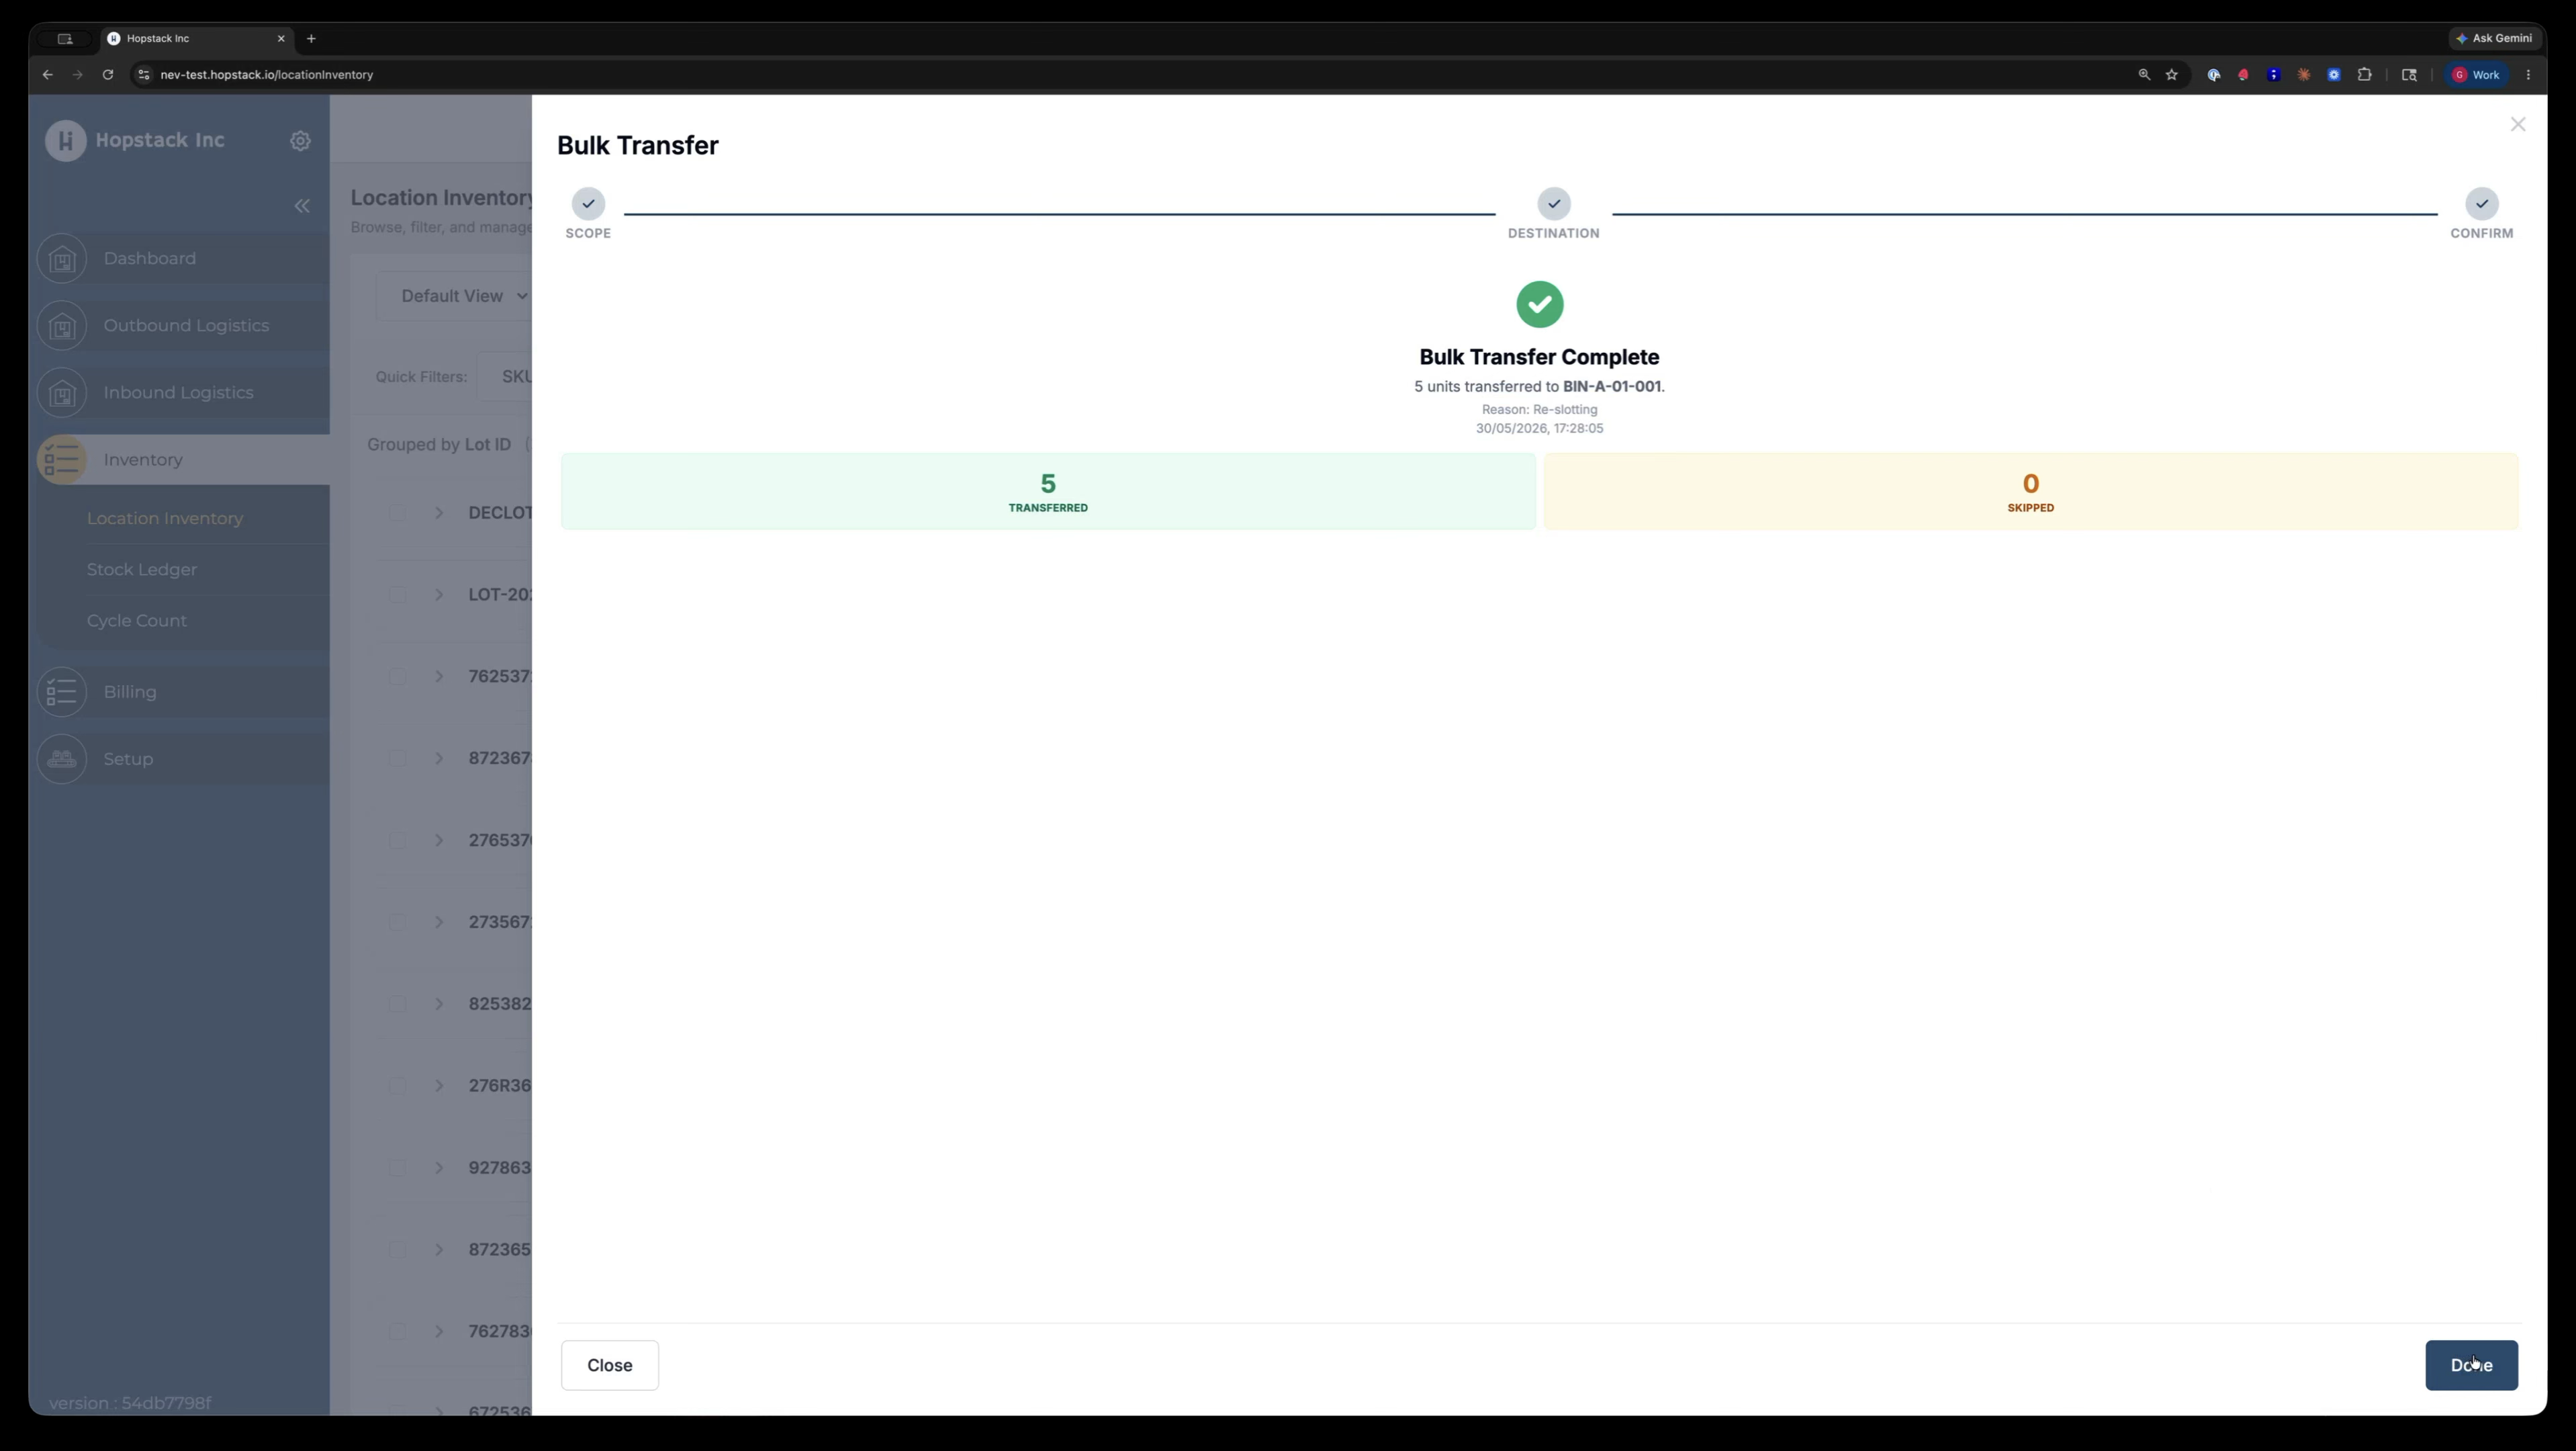
Step 8: Review and Submit the Bulk Transfer
After configuring the destination, reason, and options, proceed to the Review screen.

On the review screen, confirm all details: what is transferring, from where, and to where. When everything looks correct, click Submit to finalise the transfer.
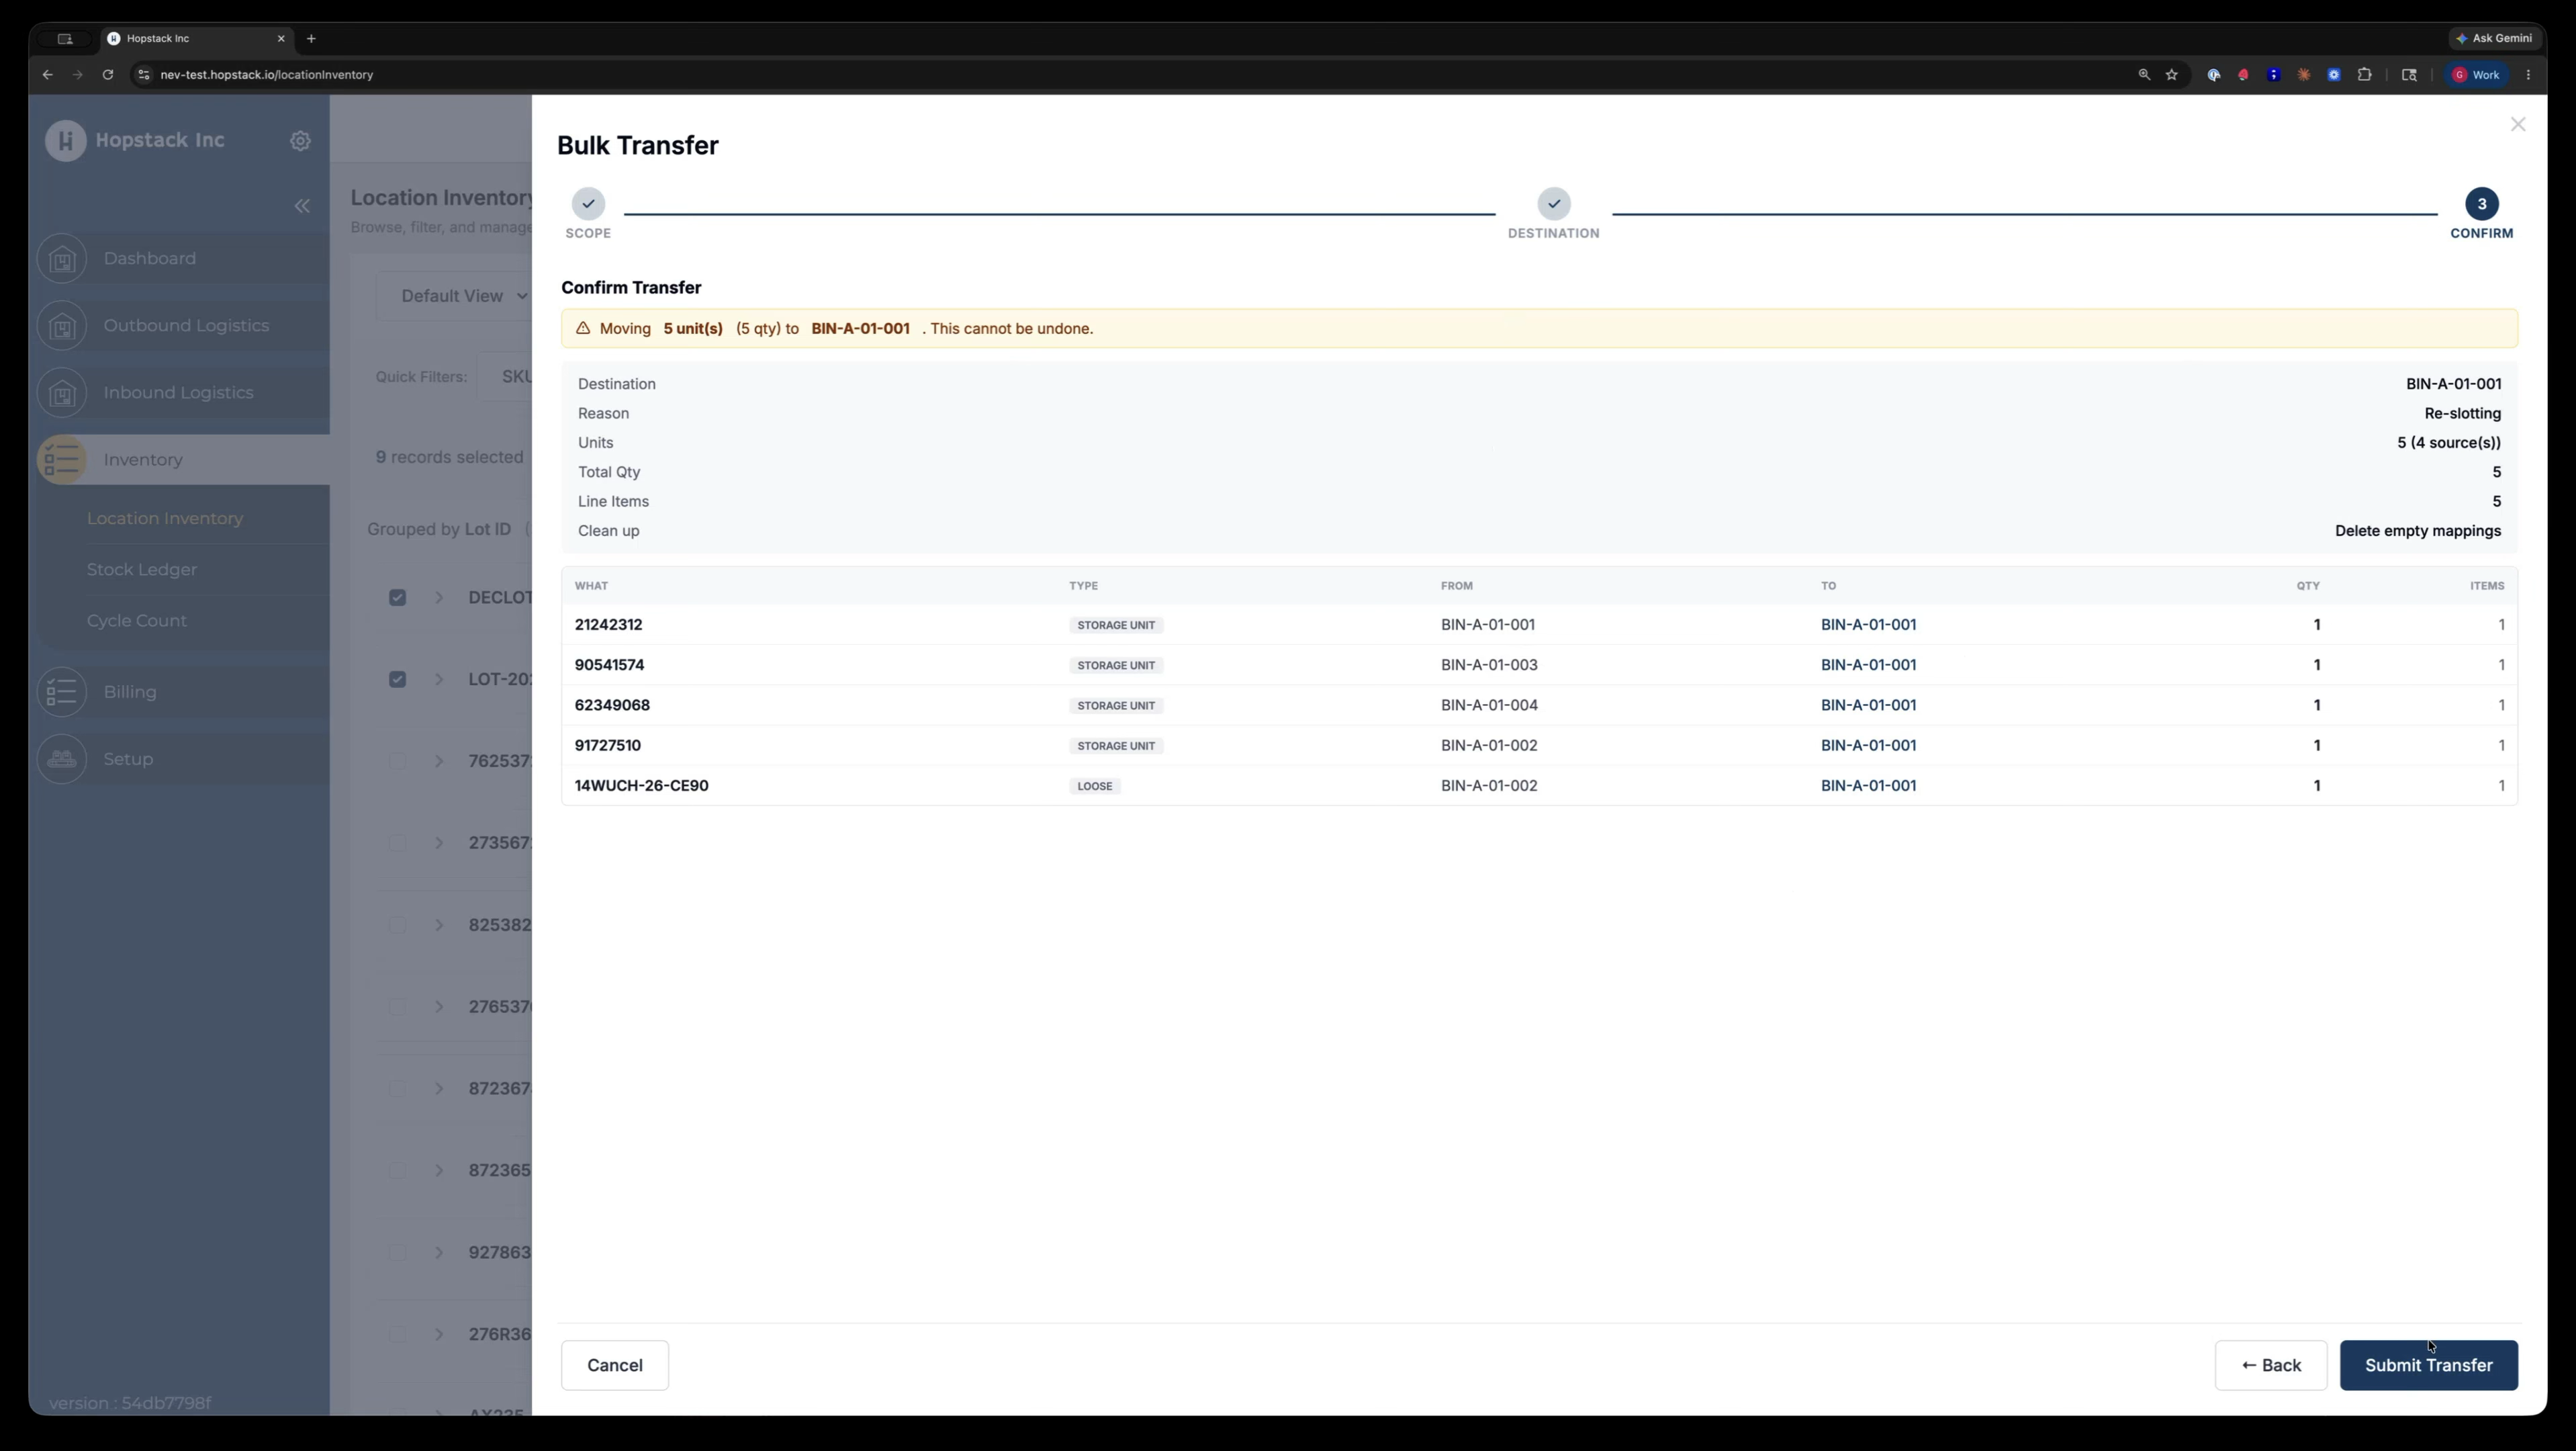
Once submitted, the system processes the bulk transfer and shows the results, including how many units were transferred (e.g., five units), and any errors encountered. All transfer details—reason, timestamps, and audit information—are captured for reference.