
Note: The Bin to Bin transfer is a gated feature. This feature will be replaced by improved bin-to-bin transfer feature in near future.
To know more about implementation, please contact your account manager.
This guide provides step-by-step instructions for transferring stock from one location to another using Hopstack via the SKU-BIN management Page.
Accessing SKU Bin Management Screen:
-
Navigate to the main dashboard of your inventory management system.
-
Locate and click on the SKU Bin Management option to access the screen.
Selecting the SKU:
-
Within the SKU Bin Management screen, search or scroll to find the specific SKU you wish to transfer.
-
Click on the SKU to select it.
Adjusting the Stock:
-
With the desired SKU selected, locate the Actions menu.
-
Choose the Transfer option.
Choose Action for Stock:
-
You will see a right arrow button that says: Transfer.
-
Select Transfer if you wish to transfer the stock from one bin to another.
Providing a Reason and to select storage Location
-
You will be prompted to provide a reason for the stock transfer.
-
Please provide a reason.
-
Once the reason is defined, a text box will appear as “Select Storage Location” where you can define the location(bin) where you want to transfer the stock.
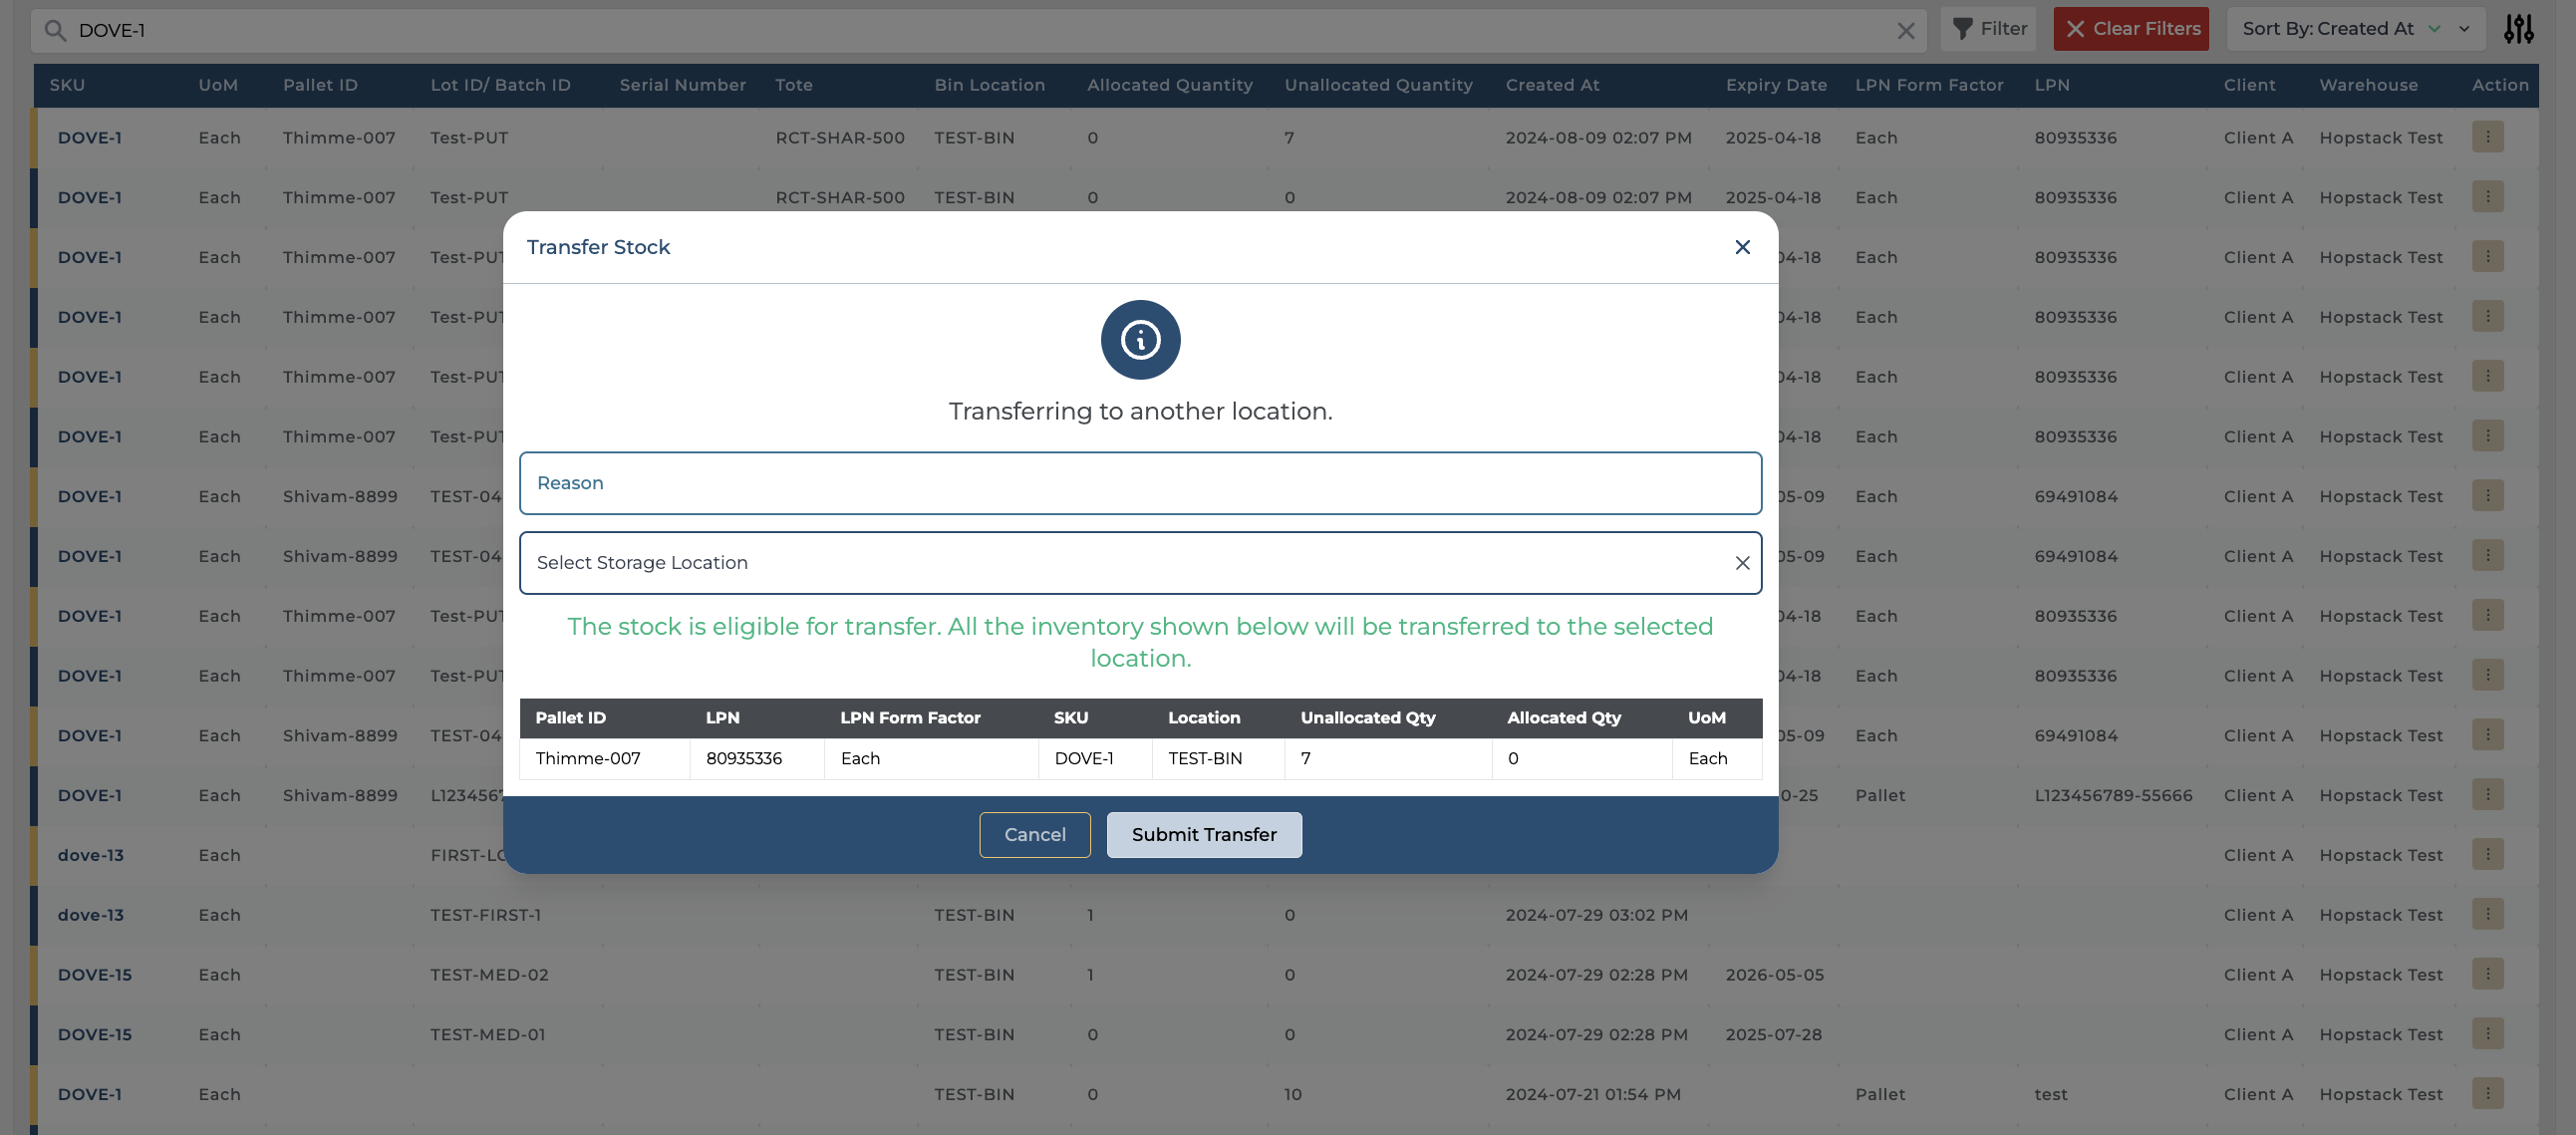
Please note you can’t transfer the stock if quantities are allocated for an order. A notification will be displayed on the screen stating “The stock is not eligible for transfer because there's allocated quantity for some of the inventory affected by this transfer”.
-
After updating the location details and reason, click on the Submit Transfer button to complete the transfer.
This feature follows a specific hierarchy in its model. This is to ensure that every transaction can be tracked and to maintain data sanity.
The hierarchy follows as the below:
-
Pallet ID: If an SKU has a Pallet ID associated with the quantities being in unallocated status. When the transfer is initiated all quantities of the same Pallet ID which are in the same location will be moved to a new location.
-
LPN: If an SKU has a LPN associated with the quantities being in unallocated status. When the transfer is initiated all quantities of the same LPN which are in the same location will be moved to a new location.
-
TOTE: If an SKU has a TOTE associated with the quantities being in unallocated status. When the transfer is initiated all quantities of the same TOTE which are in the same location will be moved to a new location.