
PART 1: Creating private Amazon App Seller Account
-
Login into your Seller Central account through this link https://sellercentral.amazon.com/
-
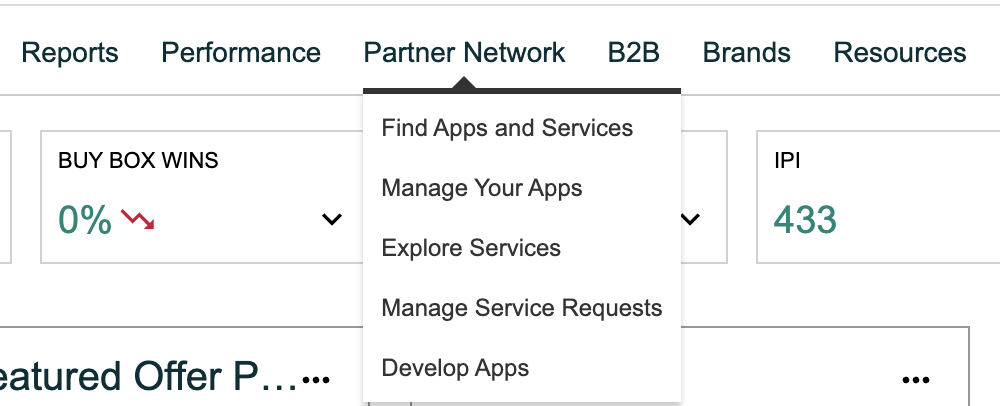
In the Top navigation bar look for the "Partner Network" menu and expand it similar to the screenshot below
-
Click on "Develop Apps" from the "Partner Network" menu
-
Choose/Create your own profile while redirecting to a partner network
-
You'll need to register for a developer profile and fill the following details:
-
Organization name - name of your business
-
Organization home country - country
-
Primary contact name - name of account admin
-
Contact email - email of account admin
-
Contact country code | Contact phone number - phone number of account admin
-
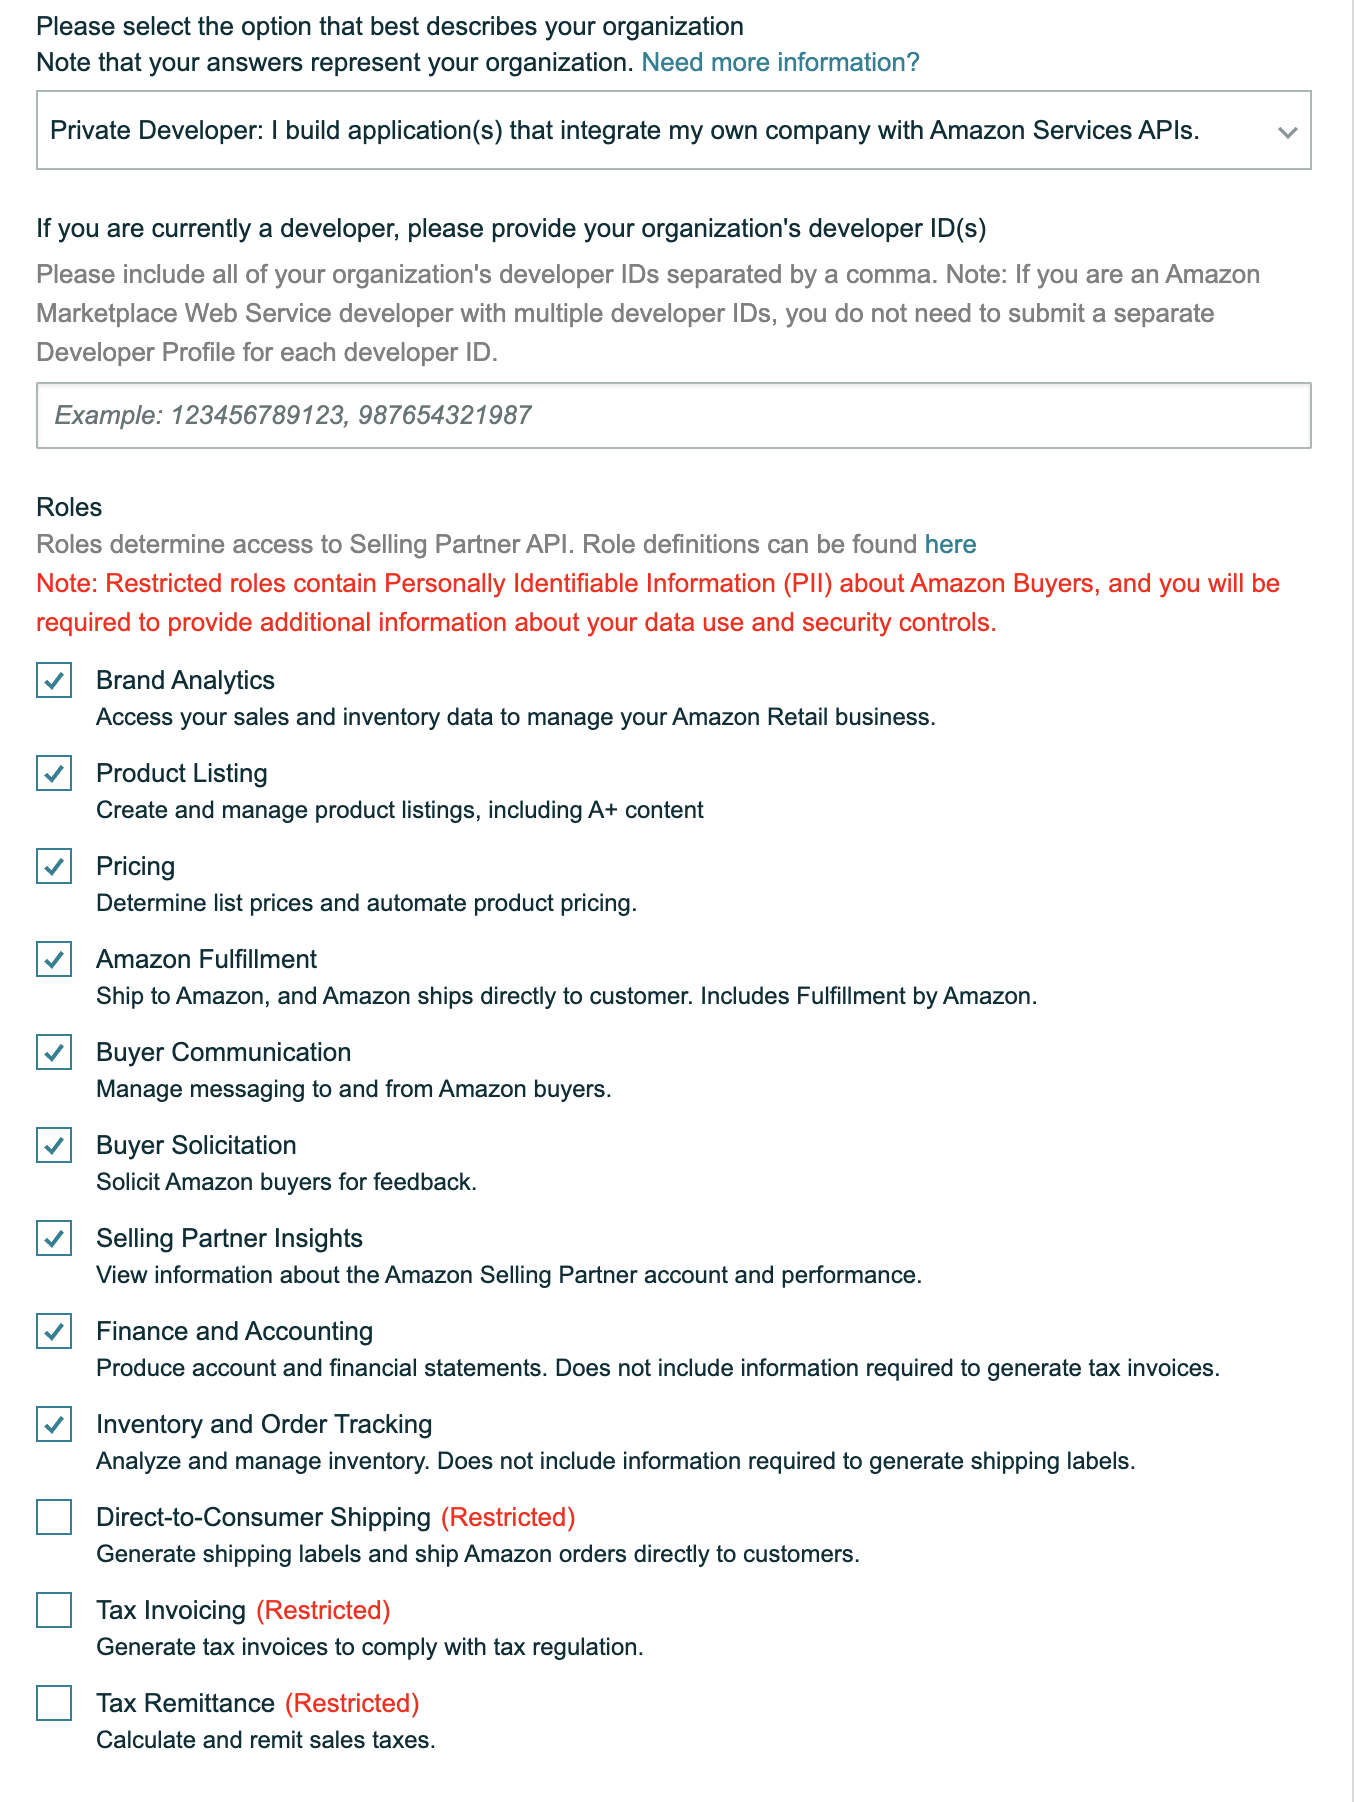
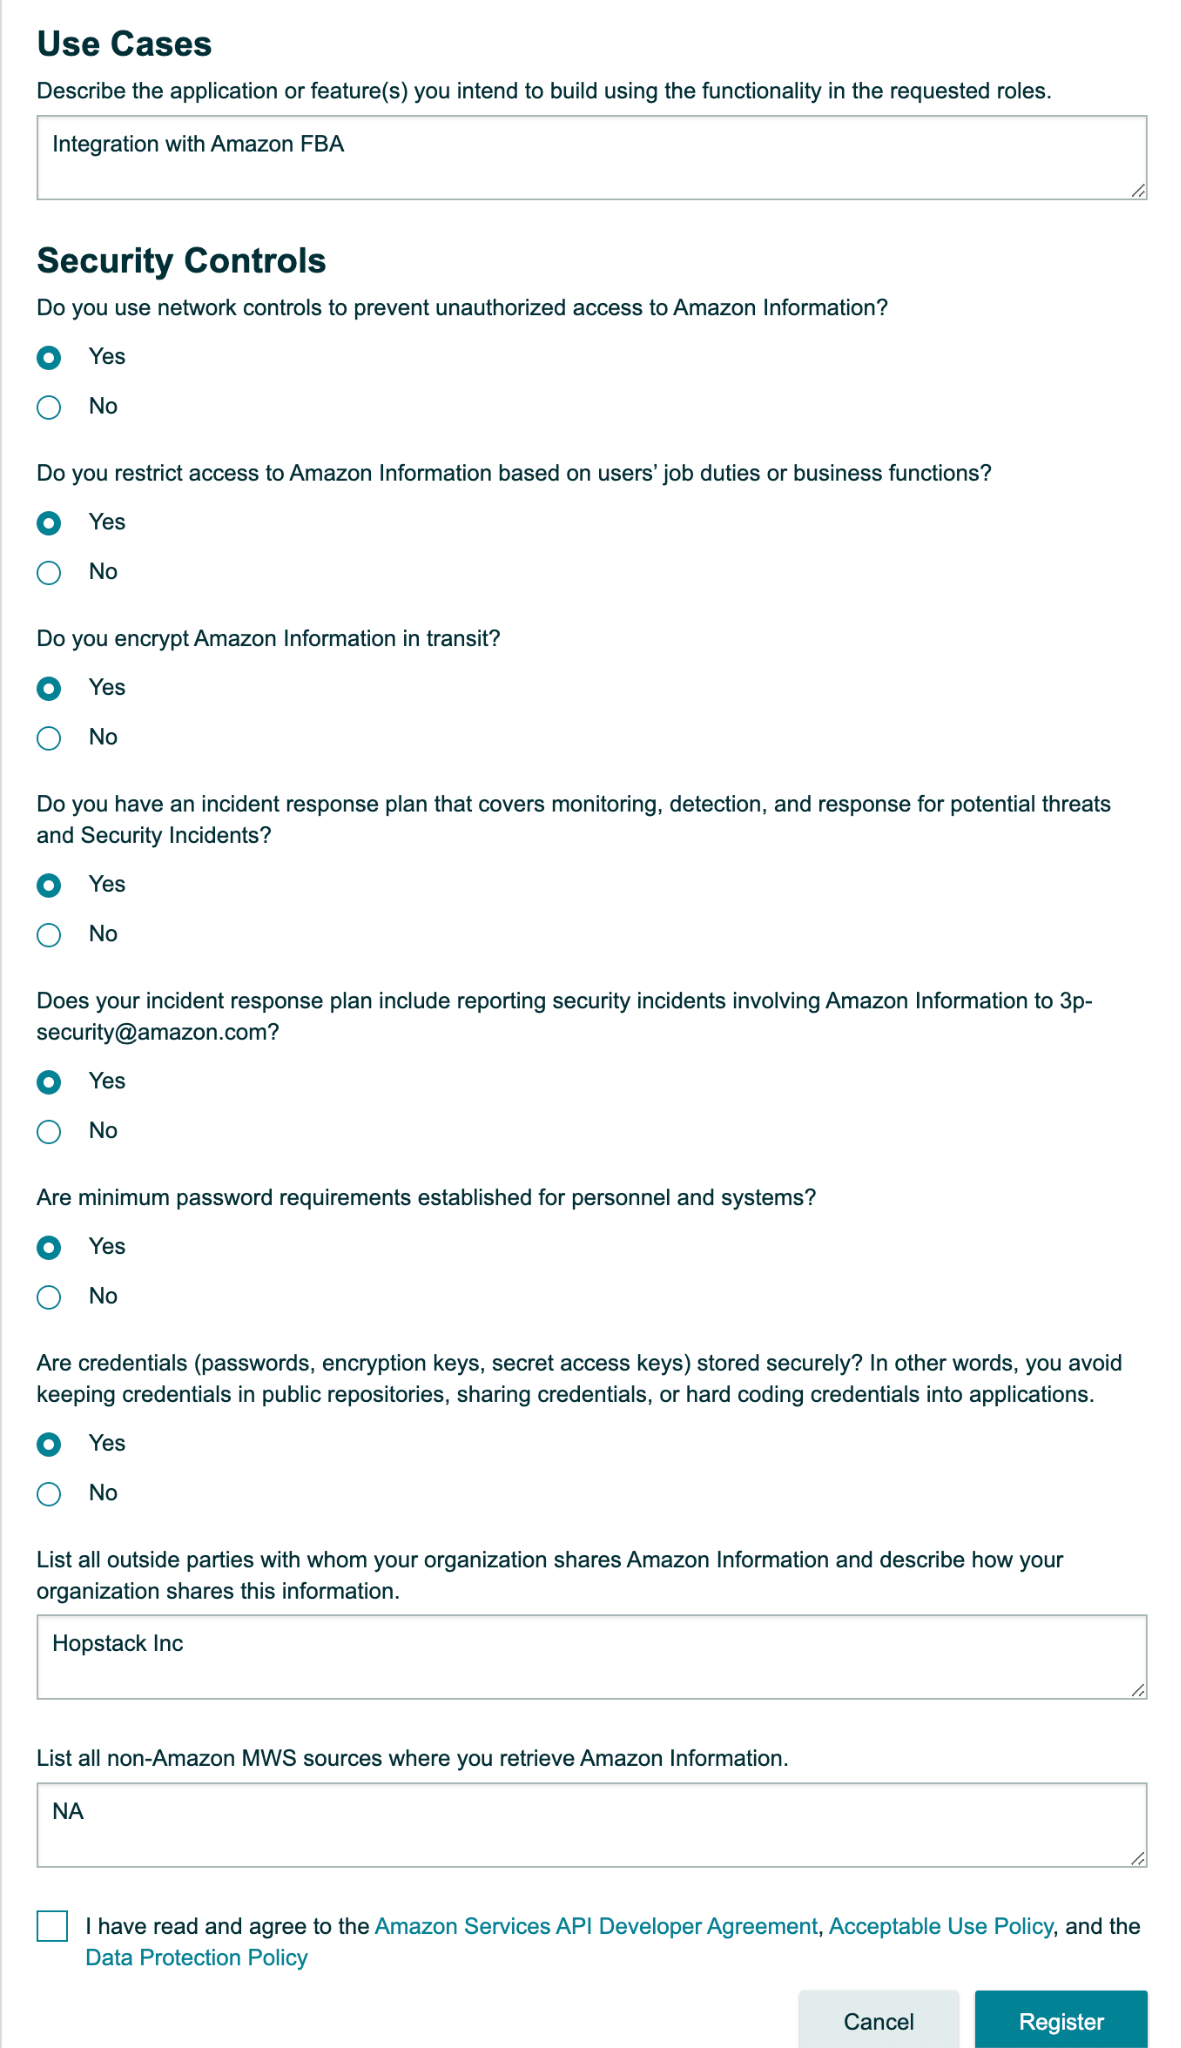
Data access section - Please enter the values as per the screenshots below
-
Explain your primary business activity on Amazon and how your business will utilize Selling Partner API in its operations
-
A: We want to use SPI API to develop in-house solutions for managing warehouse inventory. We would like to send inventory to amazon using FBA, Coordinate shipping and BOLs, Manage returns
-
-
Describe the application or feature(s) your organization intends to build using the functionality in the requested roles
-
A: Ability to send and manage inventory with FBA - Ability to manage returns - Ability to generate shipping labels and BOL for FBA
-
-
-
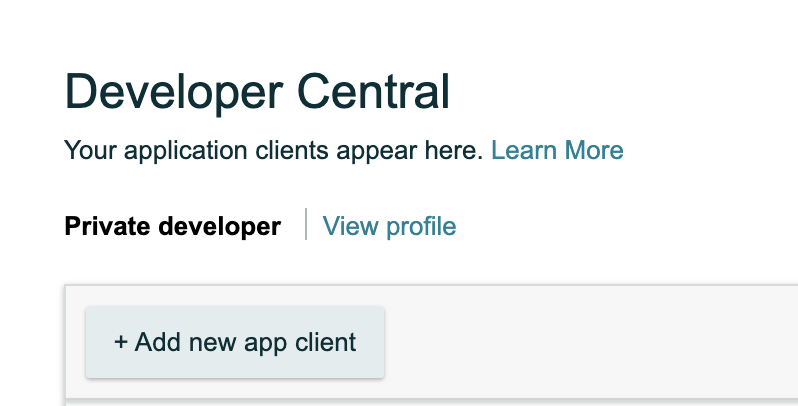
Once you register for the developer profile, your profile would be "Under Review". This will last up to 10 minutes before the profile is auto-approved.
-
Once the developer profile is approved click on the "+ Add New App Client" button similar to the screenshot below
-
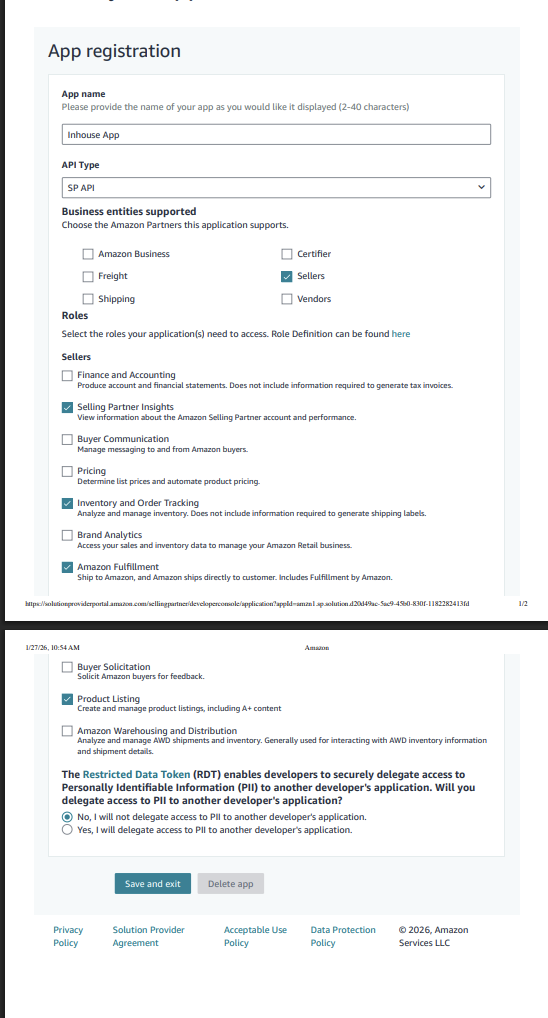
Please enter the details of the app as follows and click "Save and Exit":
-
App name - Hopstack app
-
API type - SP API
-
-
-
On the developer screen against the newly created "Hopstack" app click on the downward arrow next to the Edit App button as shown below

-
Click on "Authorize App" within the relevant marketplace as shown below
-
IMPORTANT: Once Authorized there would be a long "refresh token" generated. Please copy and store that securely. We will need it in a subsequent step.
-
Go Back to the developer screen and click "View LWA Credentials" as shown below
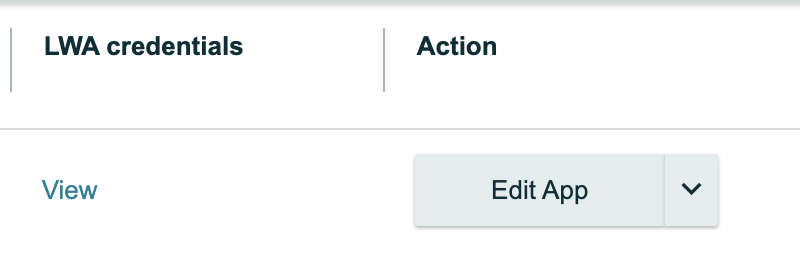
-
Copy the "Client Identifier" and save it securely
-
Expand the "Client Secret" section and copy the code, save it securely
-
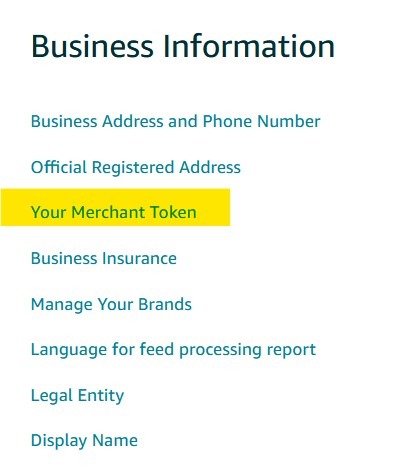
Obtain “Merchant Token“
You can view your merchant token by following these steps:
-
From the Settings drop-down menu, select Account Info.
-
Select the Business Information section.
-
Click on Your Merchant Token.
-
-
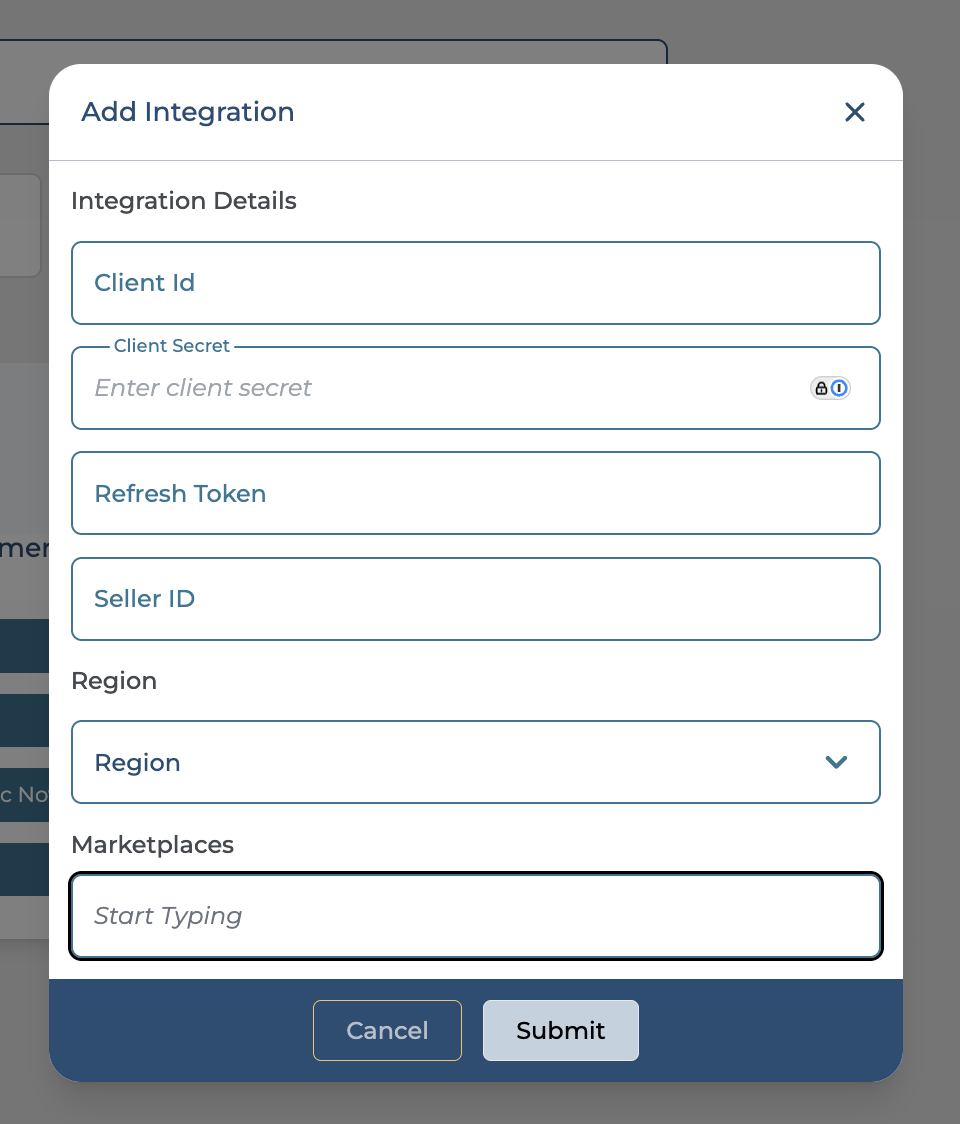
At this point, ensure you have the following three pieces of information. If any of these details are missing kindly verify all steps of this document have been followed:
-
Refresh Token
-
Client Identifier
-
Client Secret
-
SellerID/Merchant Token
-
Part 2: Onboarding a Customer to the Hopstack Platform and Connecting the Amazon Seller Account
-
Login to Hopstack Portal through the link and credentials provided
-
Navigate to "integration management" as shown below
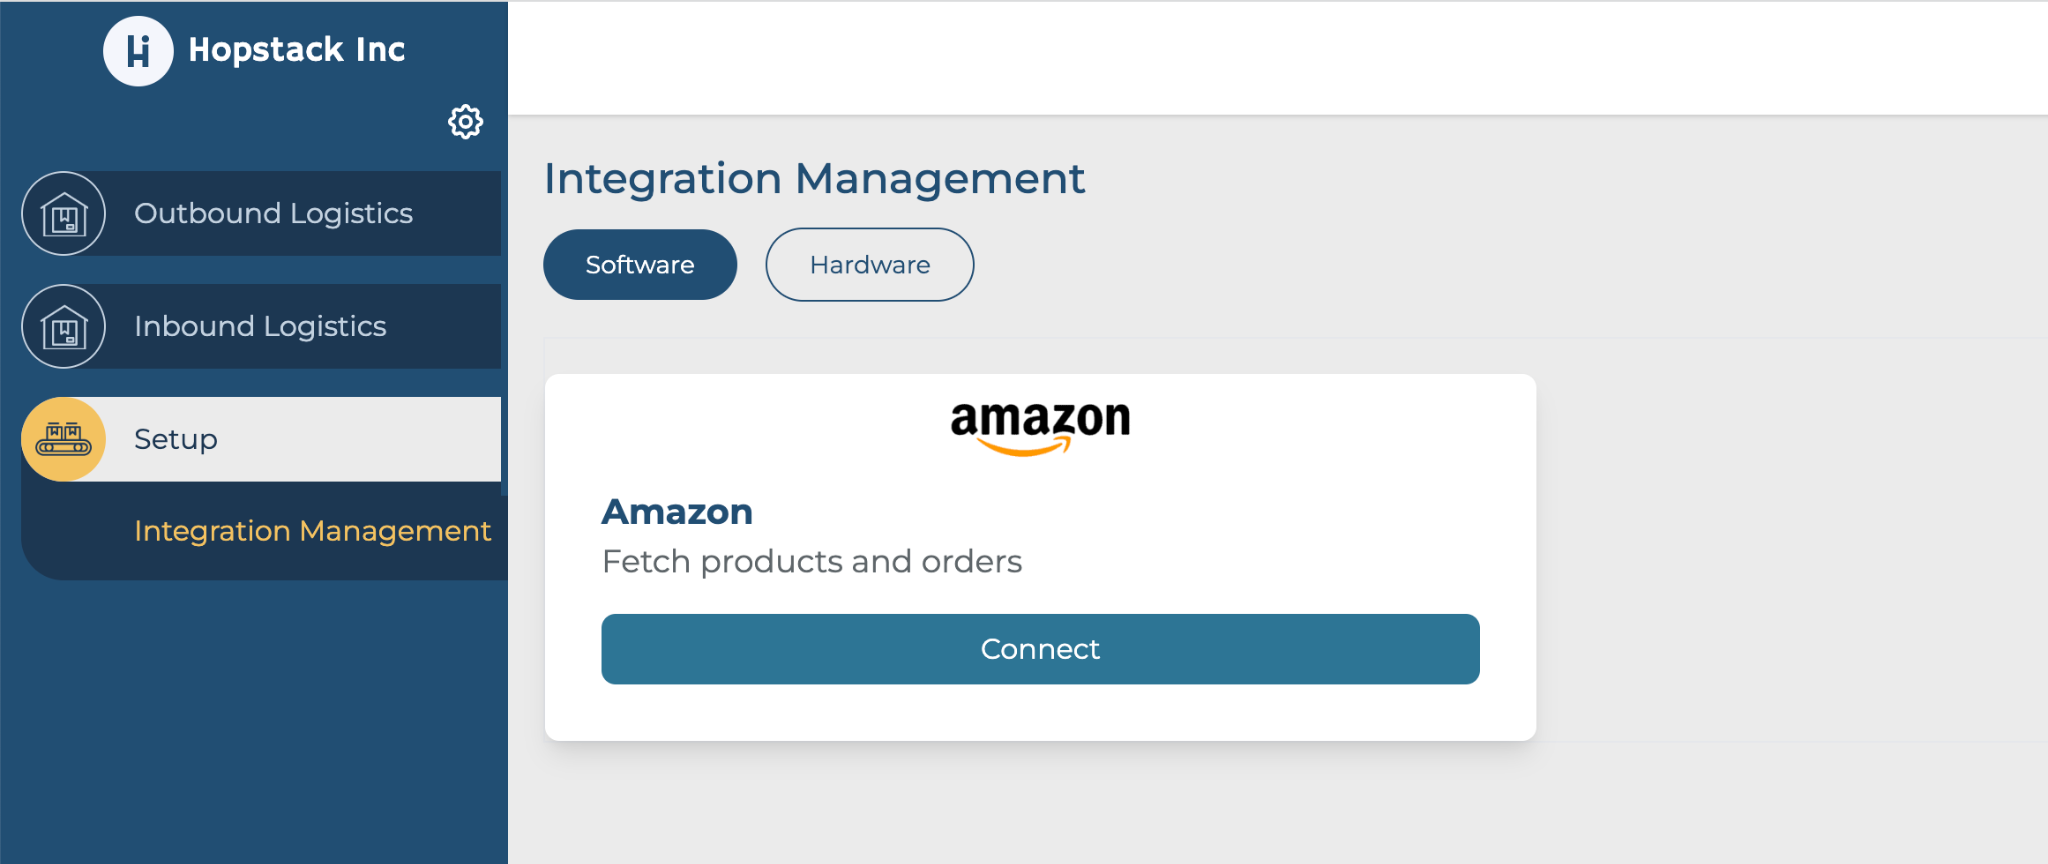
-
Click on "Connect" on the "Amazon" integration. Enter the details that were stored securely earlier in this document
-
Once you "Submit"
-
You're completely set up and good to go
Support
If you have any questions or face any issues in the implementation, please email: support@hopstack.io