
FBA- LTL Workflow
Overview
This document provides a detailed guide on creating and completing an Outbound Plan for FBA LTL in Hopstack. It covers the entire process—from plan creation to picking, prepping, packing, palletization, and final label generation.
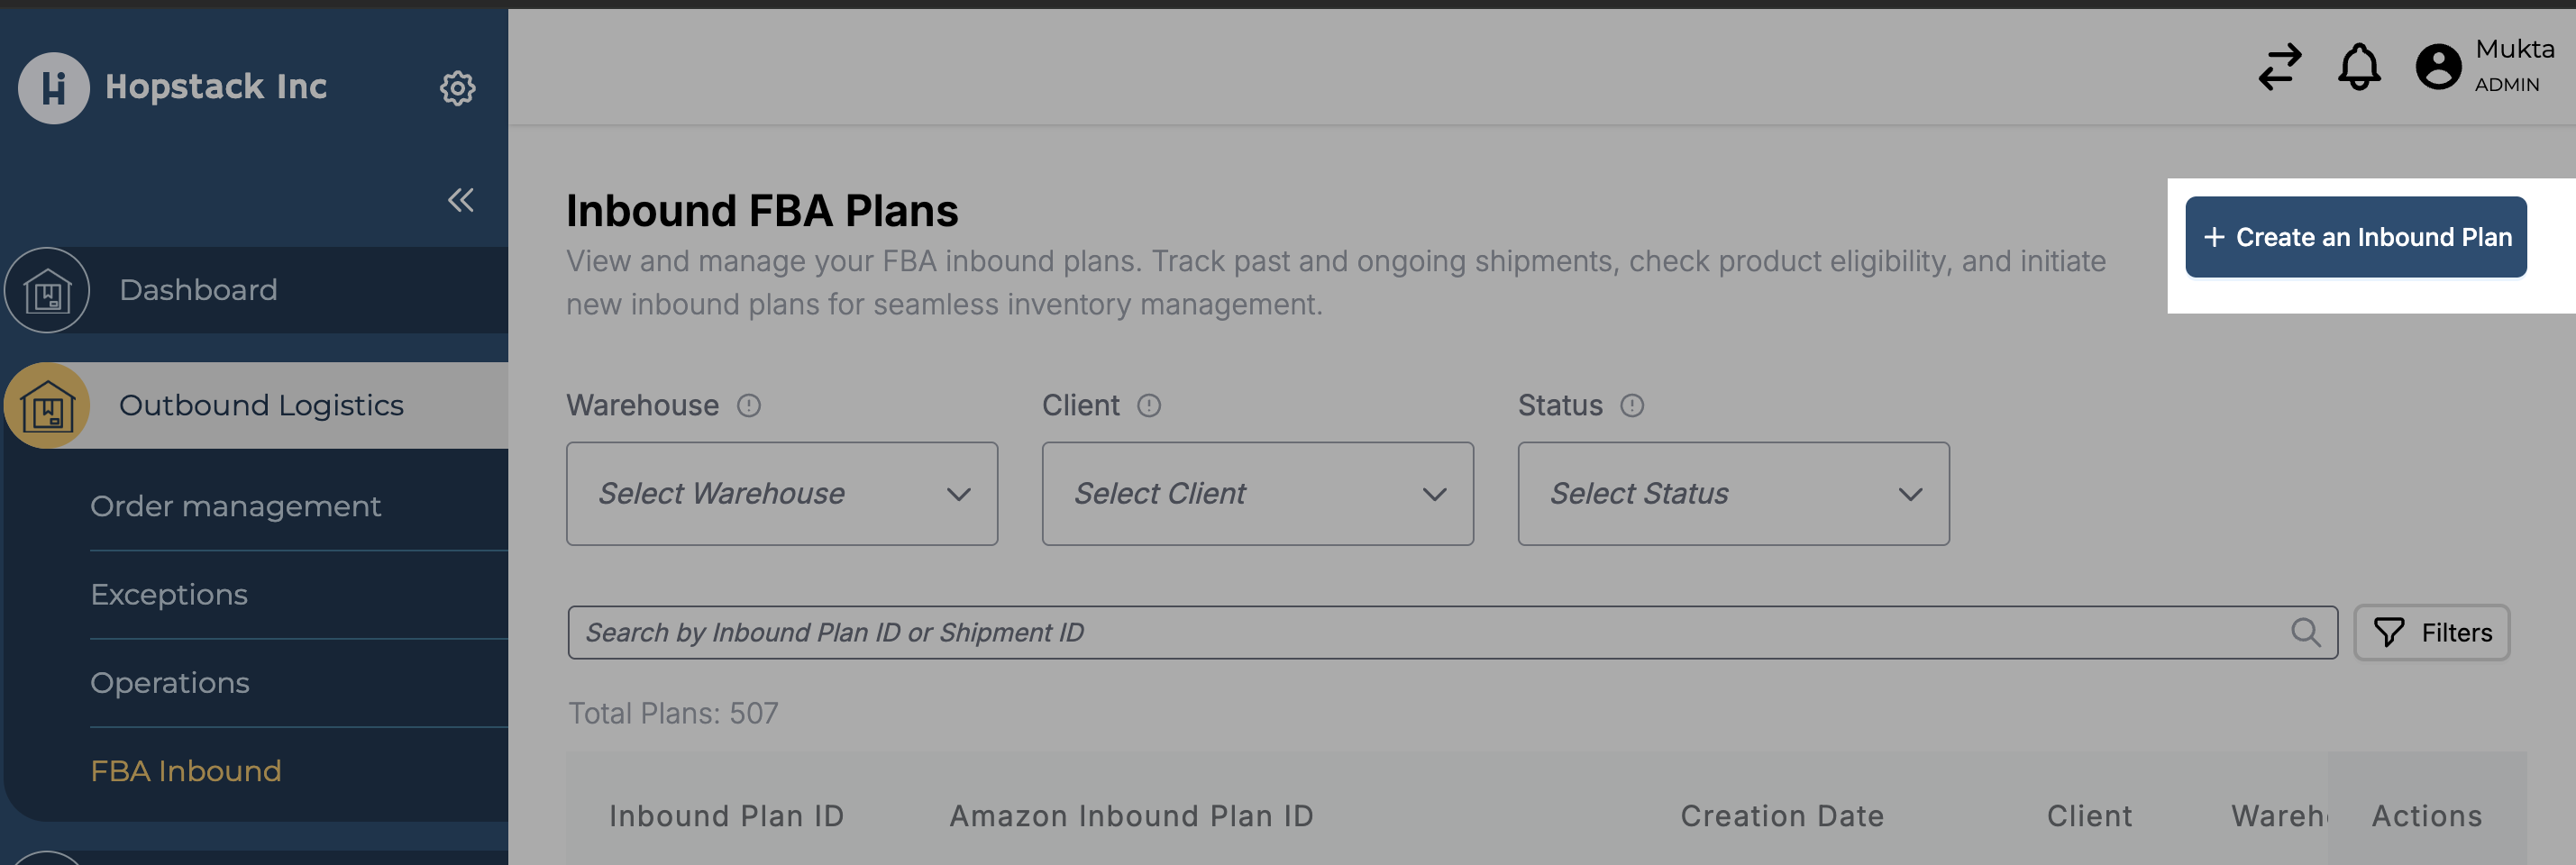
1. Navigating to FBA Inbound
Go to Outbound Logistics in the Hopstack platform.
Navigate to FBA Inbound.
Click on Create Outbound Plan.
2. Creating an Outbound Plan
Select Client: Choose the client for whom the plan is being created.
Review Details: Verify details and click Create Plan.
Choose Inventory: Select the appropriate inventory items for the order.
Run Eligibility Check:
If items are eligible, the status will display Eligible.
If not, the system will throw an error along with the reason(s) that need resolution before proceeding.
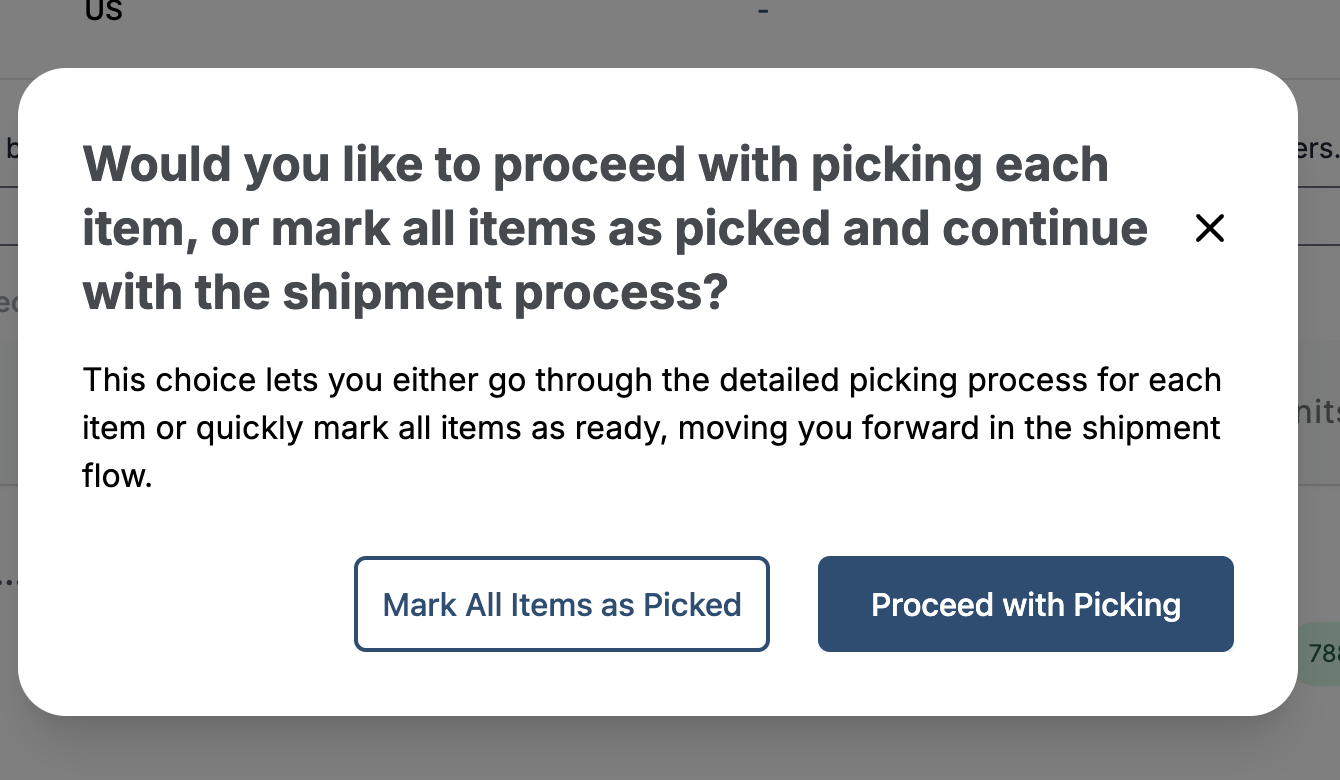
3. Picking
Once the plan is eligible, move to the Picking Stage.
You can either:
Mark Items as Picked directly, or
Use the Picking Workflow for guided picking.
Select the required items from your inventory based on the shipment plan.
4. Prepping
Prepare the items for shipment by following Amazon’s packaging and labeling requirements.
5. Packing Workflow
Go to Packing Workflow.
Choose a Station and Tote to start working with the order.
Verify Item Details on the page, then click Proceed with Packing.

LTL or Standard Options:
If you have box details for LTL, select Yes.
Otherwise, the standard packing options will be triggered.

Placement Options: The system will generate placement options with available shipping rates. Choose the best rate to proceed.
6. Box Details
On the Box Details page, click Add Box.
Choose a predefined box or add a Custom Box if required.
Scan the Item Code to associate items with the box.
Enter Weight and Dimensions in the box details.
Box Labels:
Print and download box labels directly from this page.
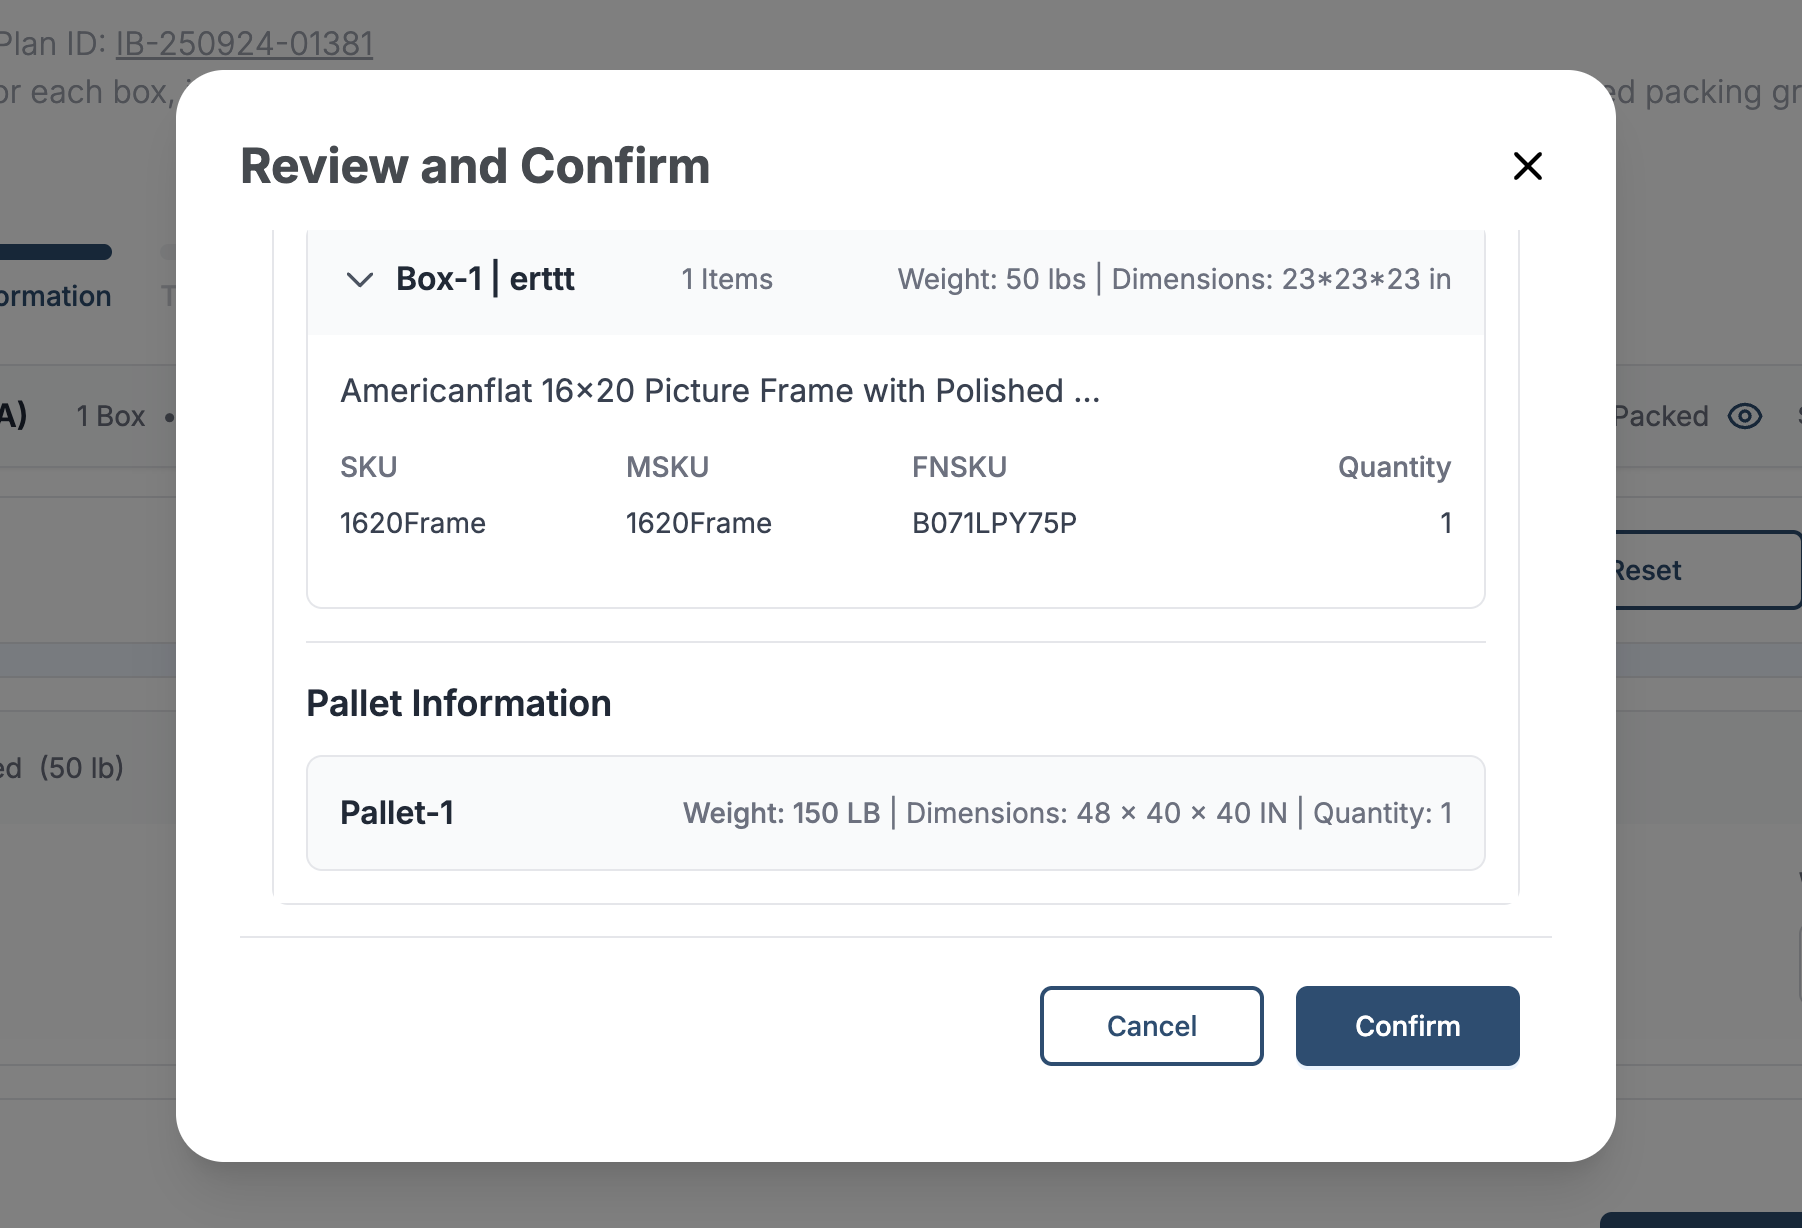
7. Palletization
Add pallet details in the window provided.
Each pallet added will display Edit and Remove options for modifications or deletions.
8. Transport Options
Click on Proceed to Transport Options.
Review all shipment details.
Choose one of the following:
Select a Carrier: Confirm to proceed to label generation.
Add Tracking Number Manually:
Enter Delivery Window, Carrier Name, and Tracking Details on the label generation page.

9. Label Generation and Confirmation
If a carrier was selected, the system will direct you to the Label Generation Window.
Generate, print, and download all Labels (box and pallet).
Confirm packing and finalize the outbound shipment.
Summary of Workflow
Create Outbound Plan → Run Eligibility Check.
Picking → Prepping → Packing.
Add Box Details → Palletization.
Transport Options → Carrier/Manual Tracking.
Generate and Download Labels → Confirm Shipment.