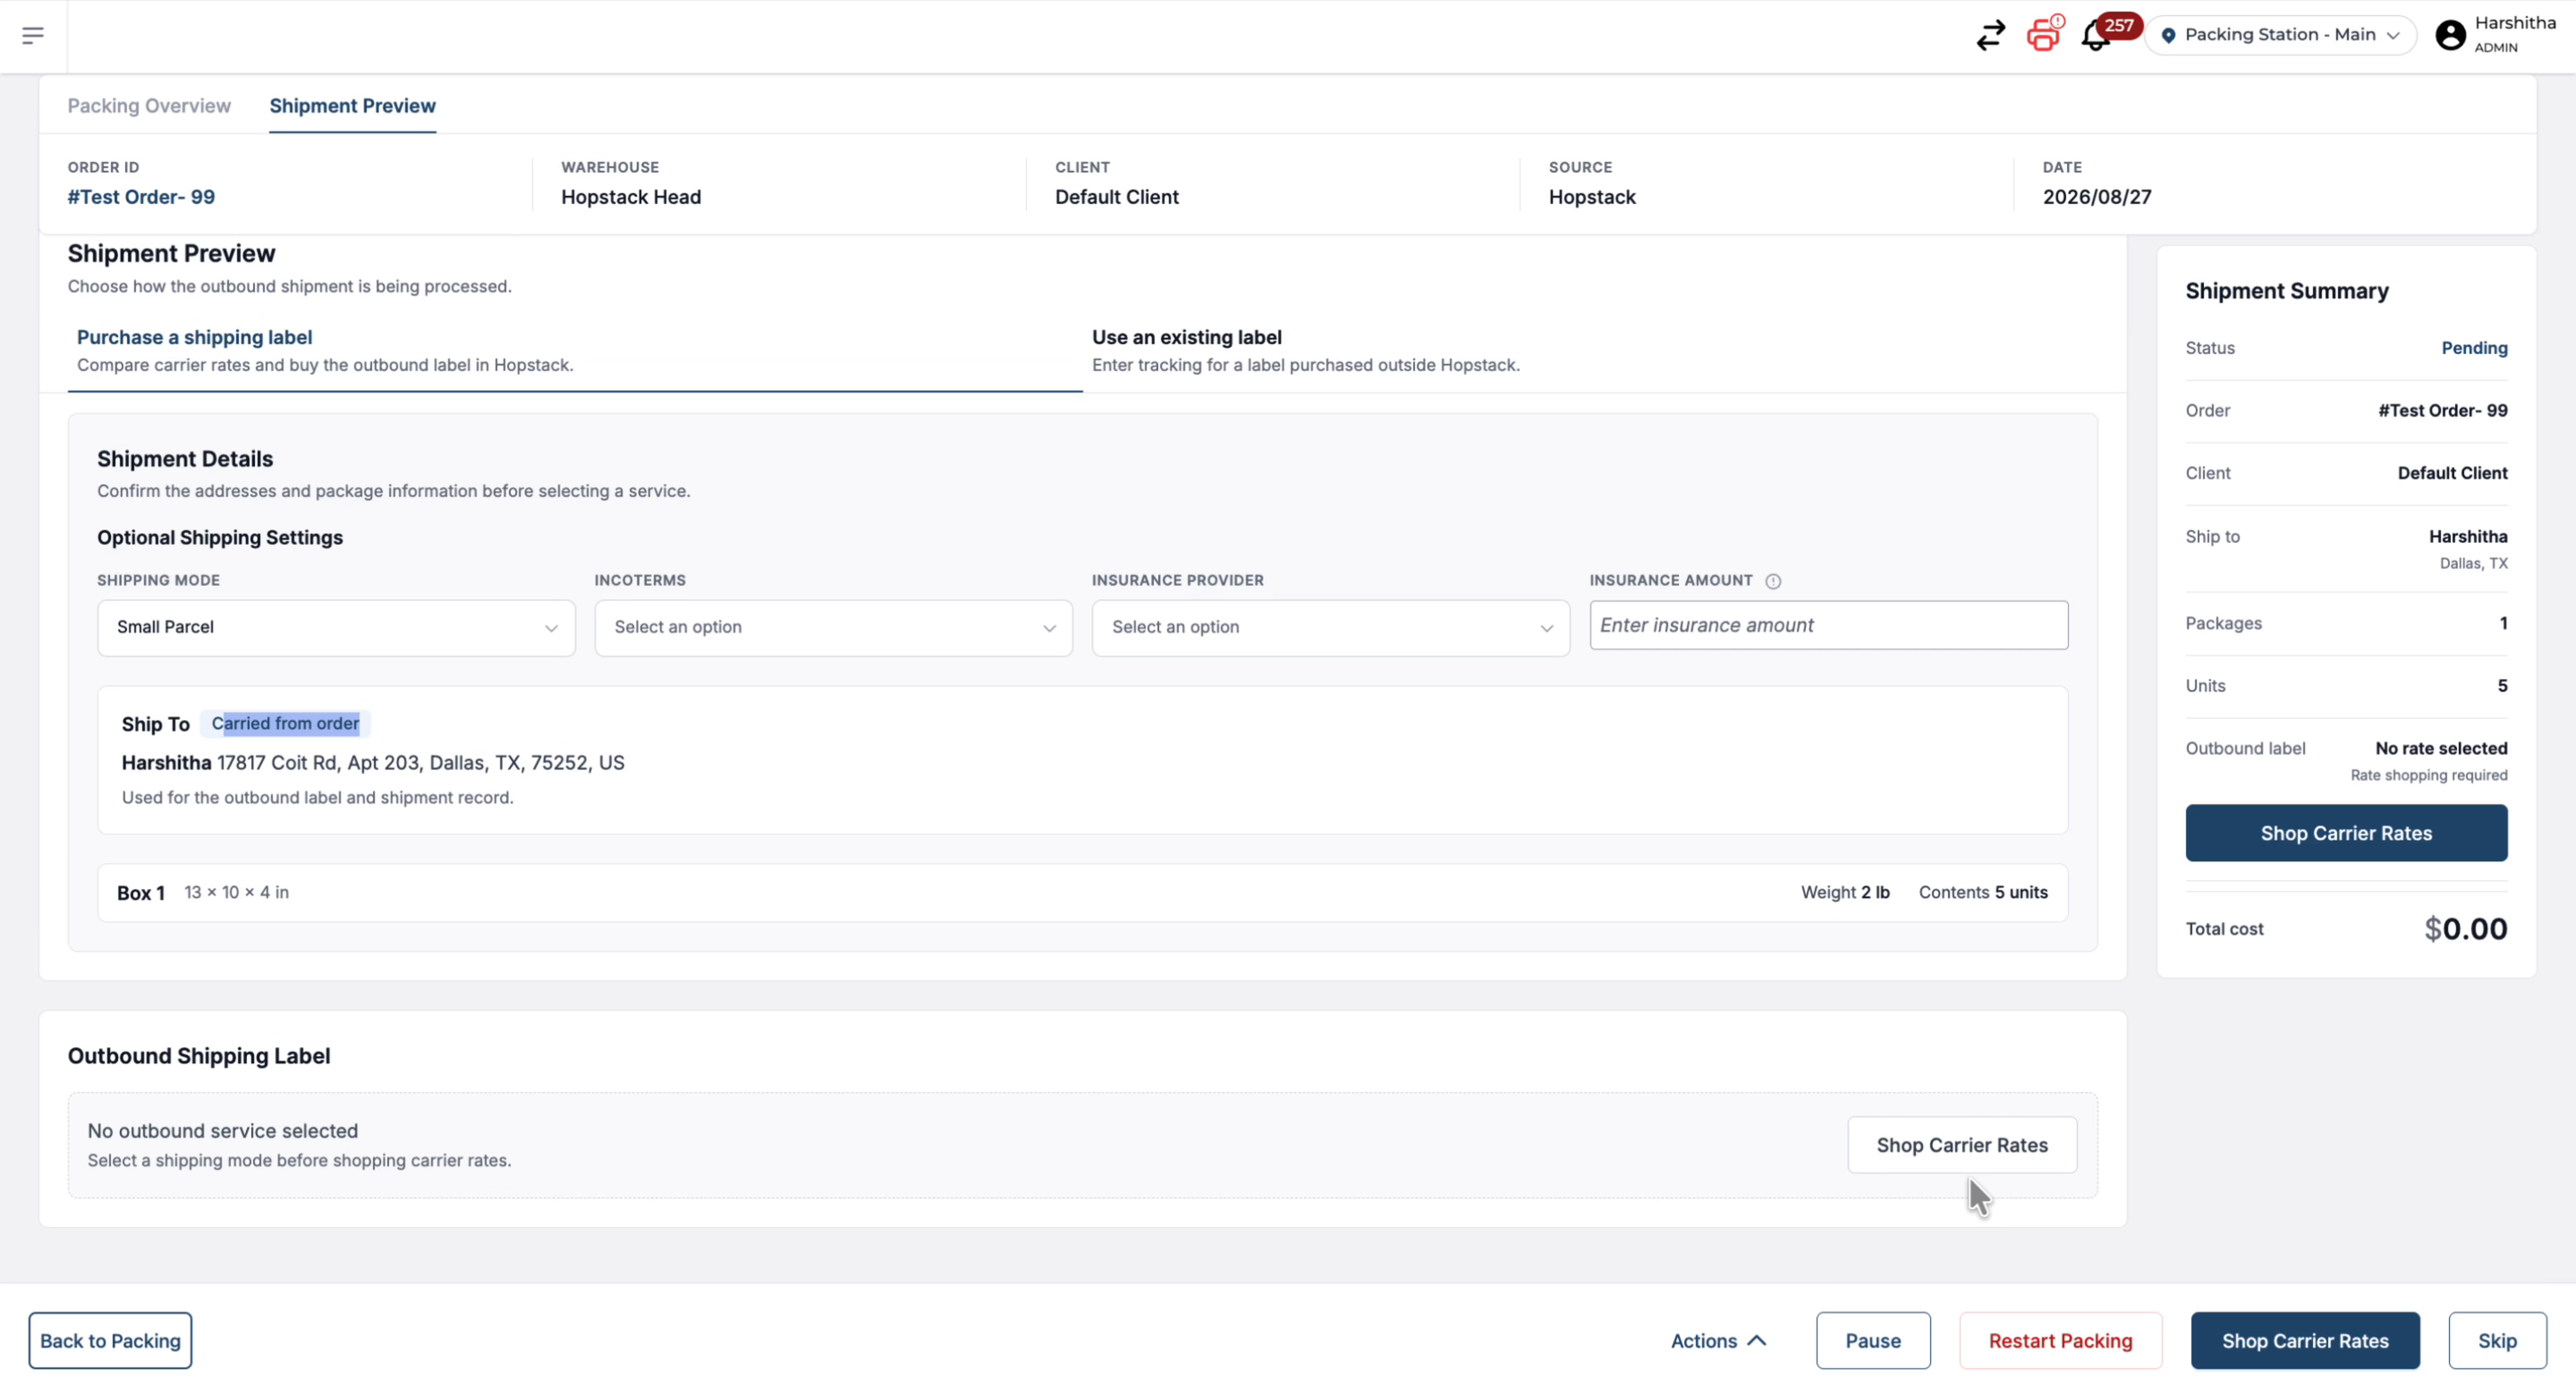
The Shipment Preview screen lets users review shipment details and choose how the shipping label should be handled to complete packing flow.
-
Purchase a shipping label: Compare rates fetched from integrated carriers and purchase the outbound shipping label directly in Hopstack.
-
Use an existing label: Enter the carrier and tracking number, then upload an existing shipping label.
-
Skip shipment review: Continue without reviewing the shipment when labels are managed outside Hopstack.
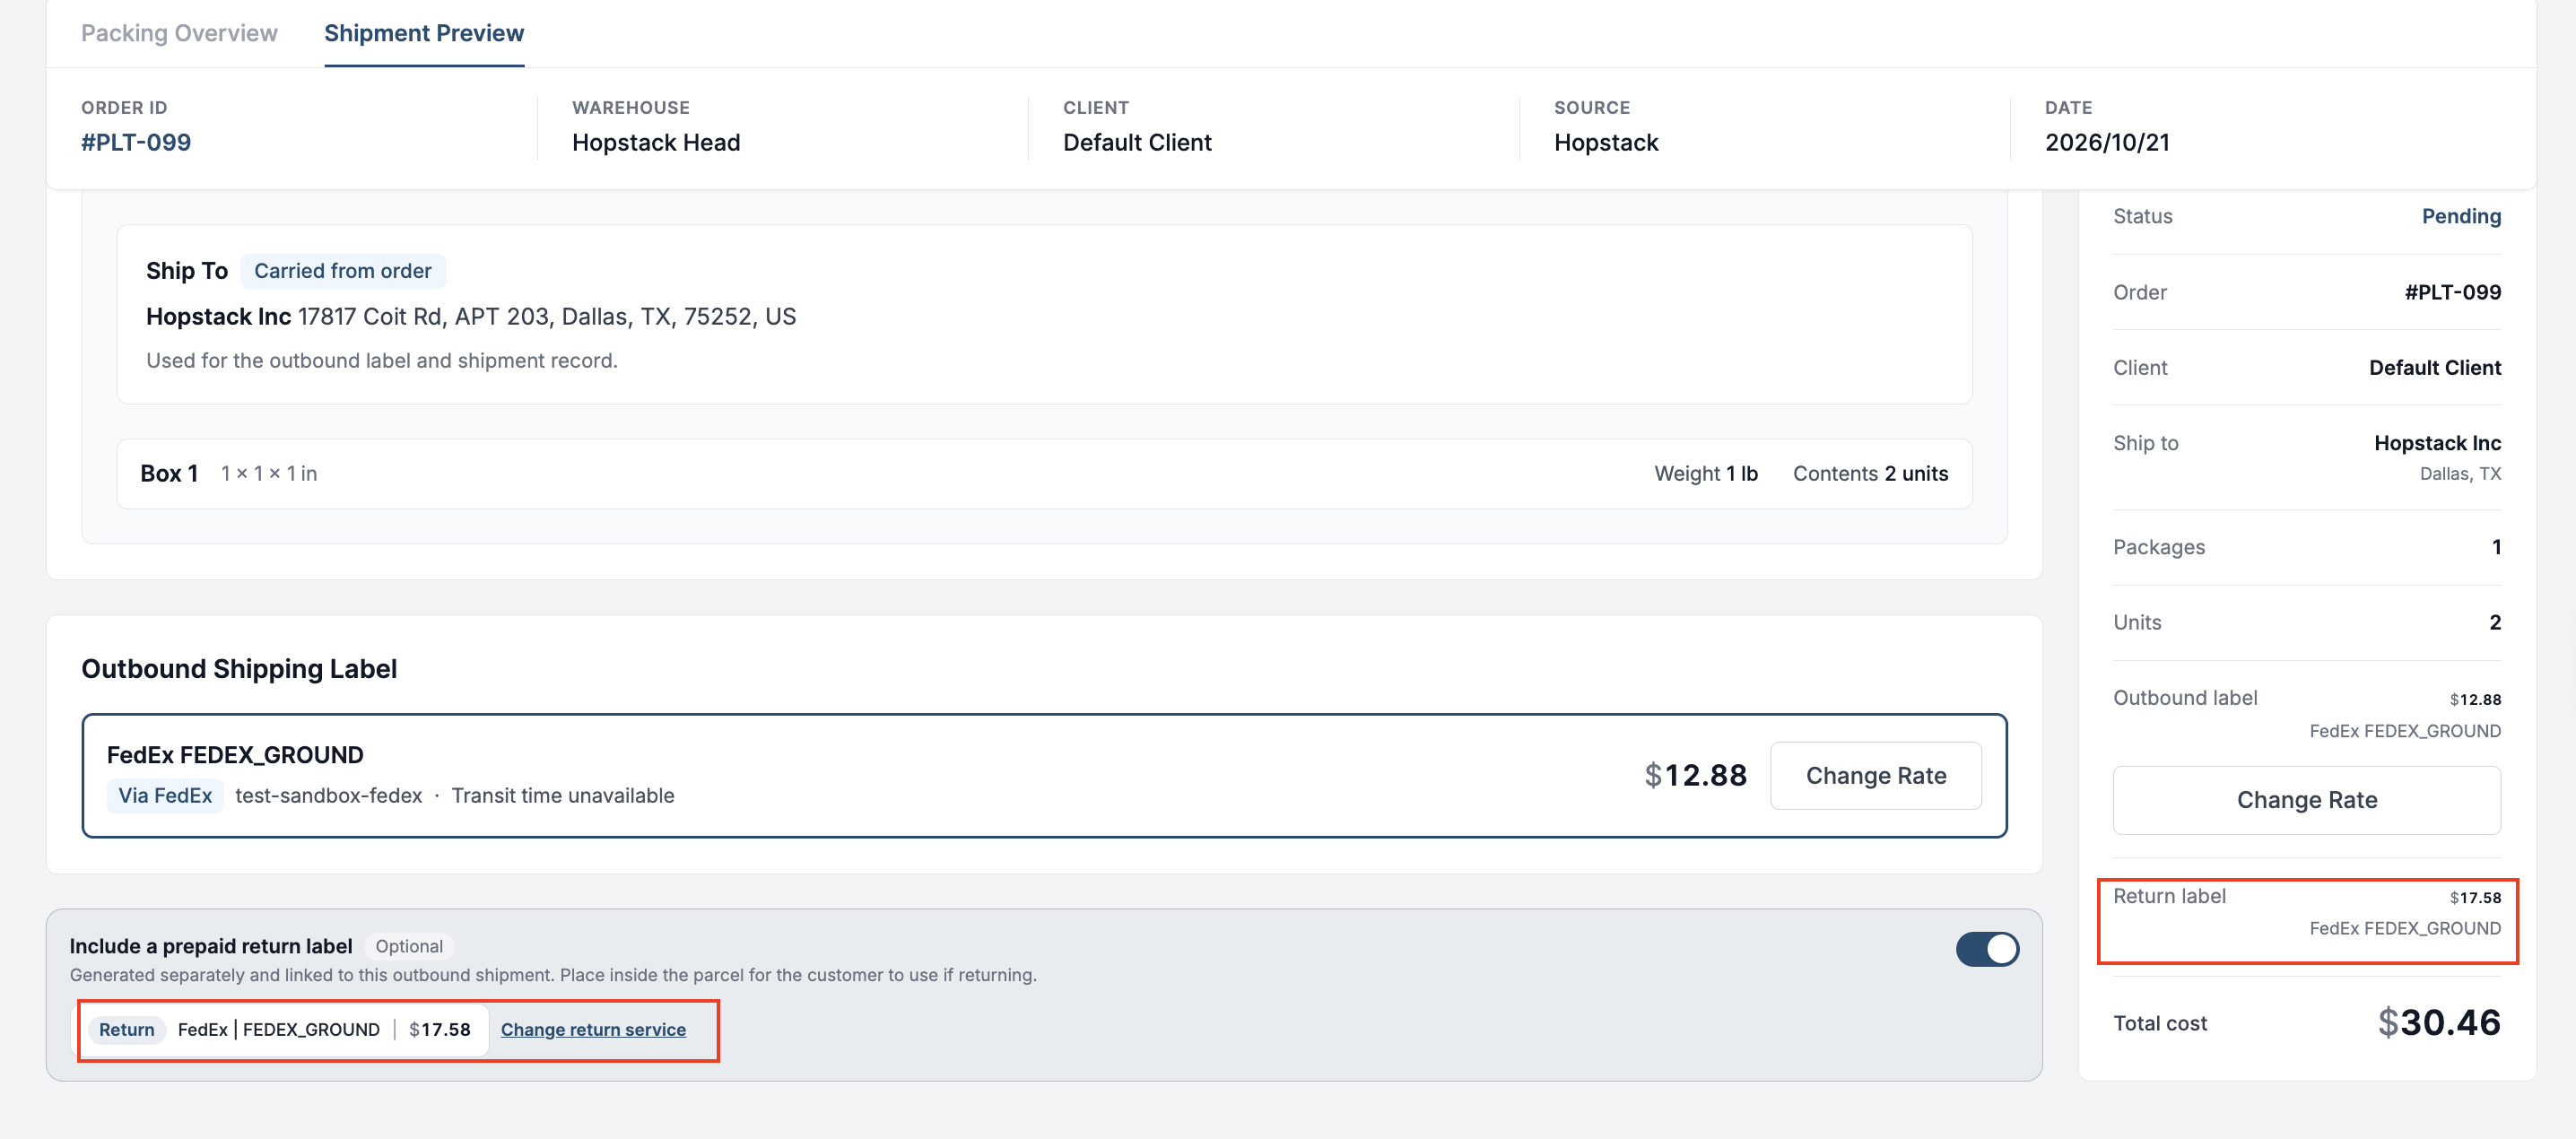
If prepaid return labels are enabled for the client, you can also buy a return label for the customer together with the outbound label. See Prepaid Return Labels at Packing.
1. Purchase a shipping label
This process explains how to review shipment details, compare carrier rates from integrated providers, select the best option, and purchase and generate a shipping label from the Shipment Preview screen in Hopstack.
Step 1: Review Shipment Details on the Shipment Preview Screen
On the Shipment Preview screen, start by reviewing all shipment details before purchasing a label.
Optionally choose shipping settings from the dropdown, such as Incoterms, insurance, or forward insurance mark (if available for this shipment).
Verify the box details, including dimensions, weight, and the number of units inside the box.
Also confirm the shipping address and its source to ensure everything is correct before proceeding.
Step 2: Open Carrier Rates from the Shipment Preview
When you’re ready to shop for a label, click Shop Carrier Rates in either the Outbound Shipping Label section or the Shipment Summary.
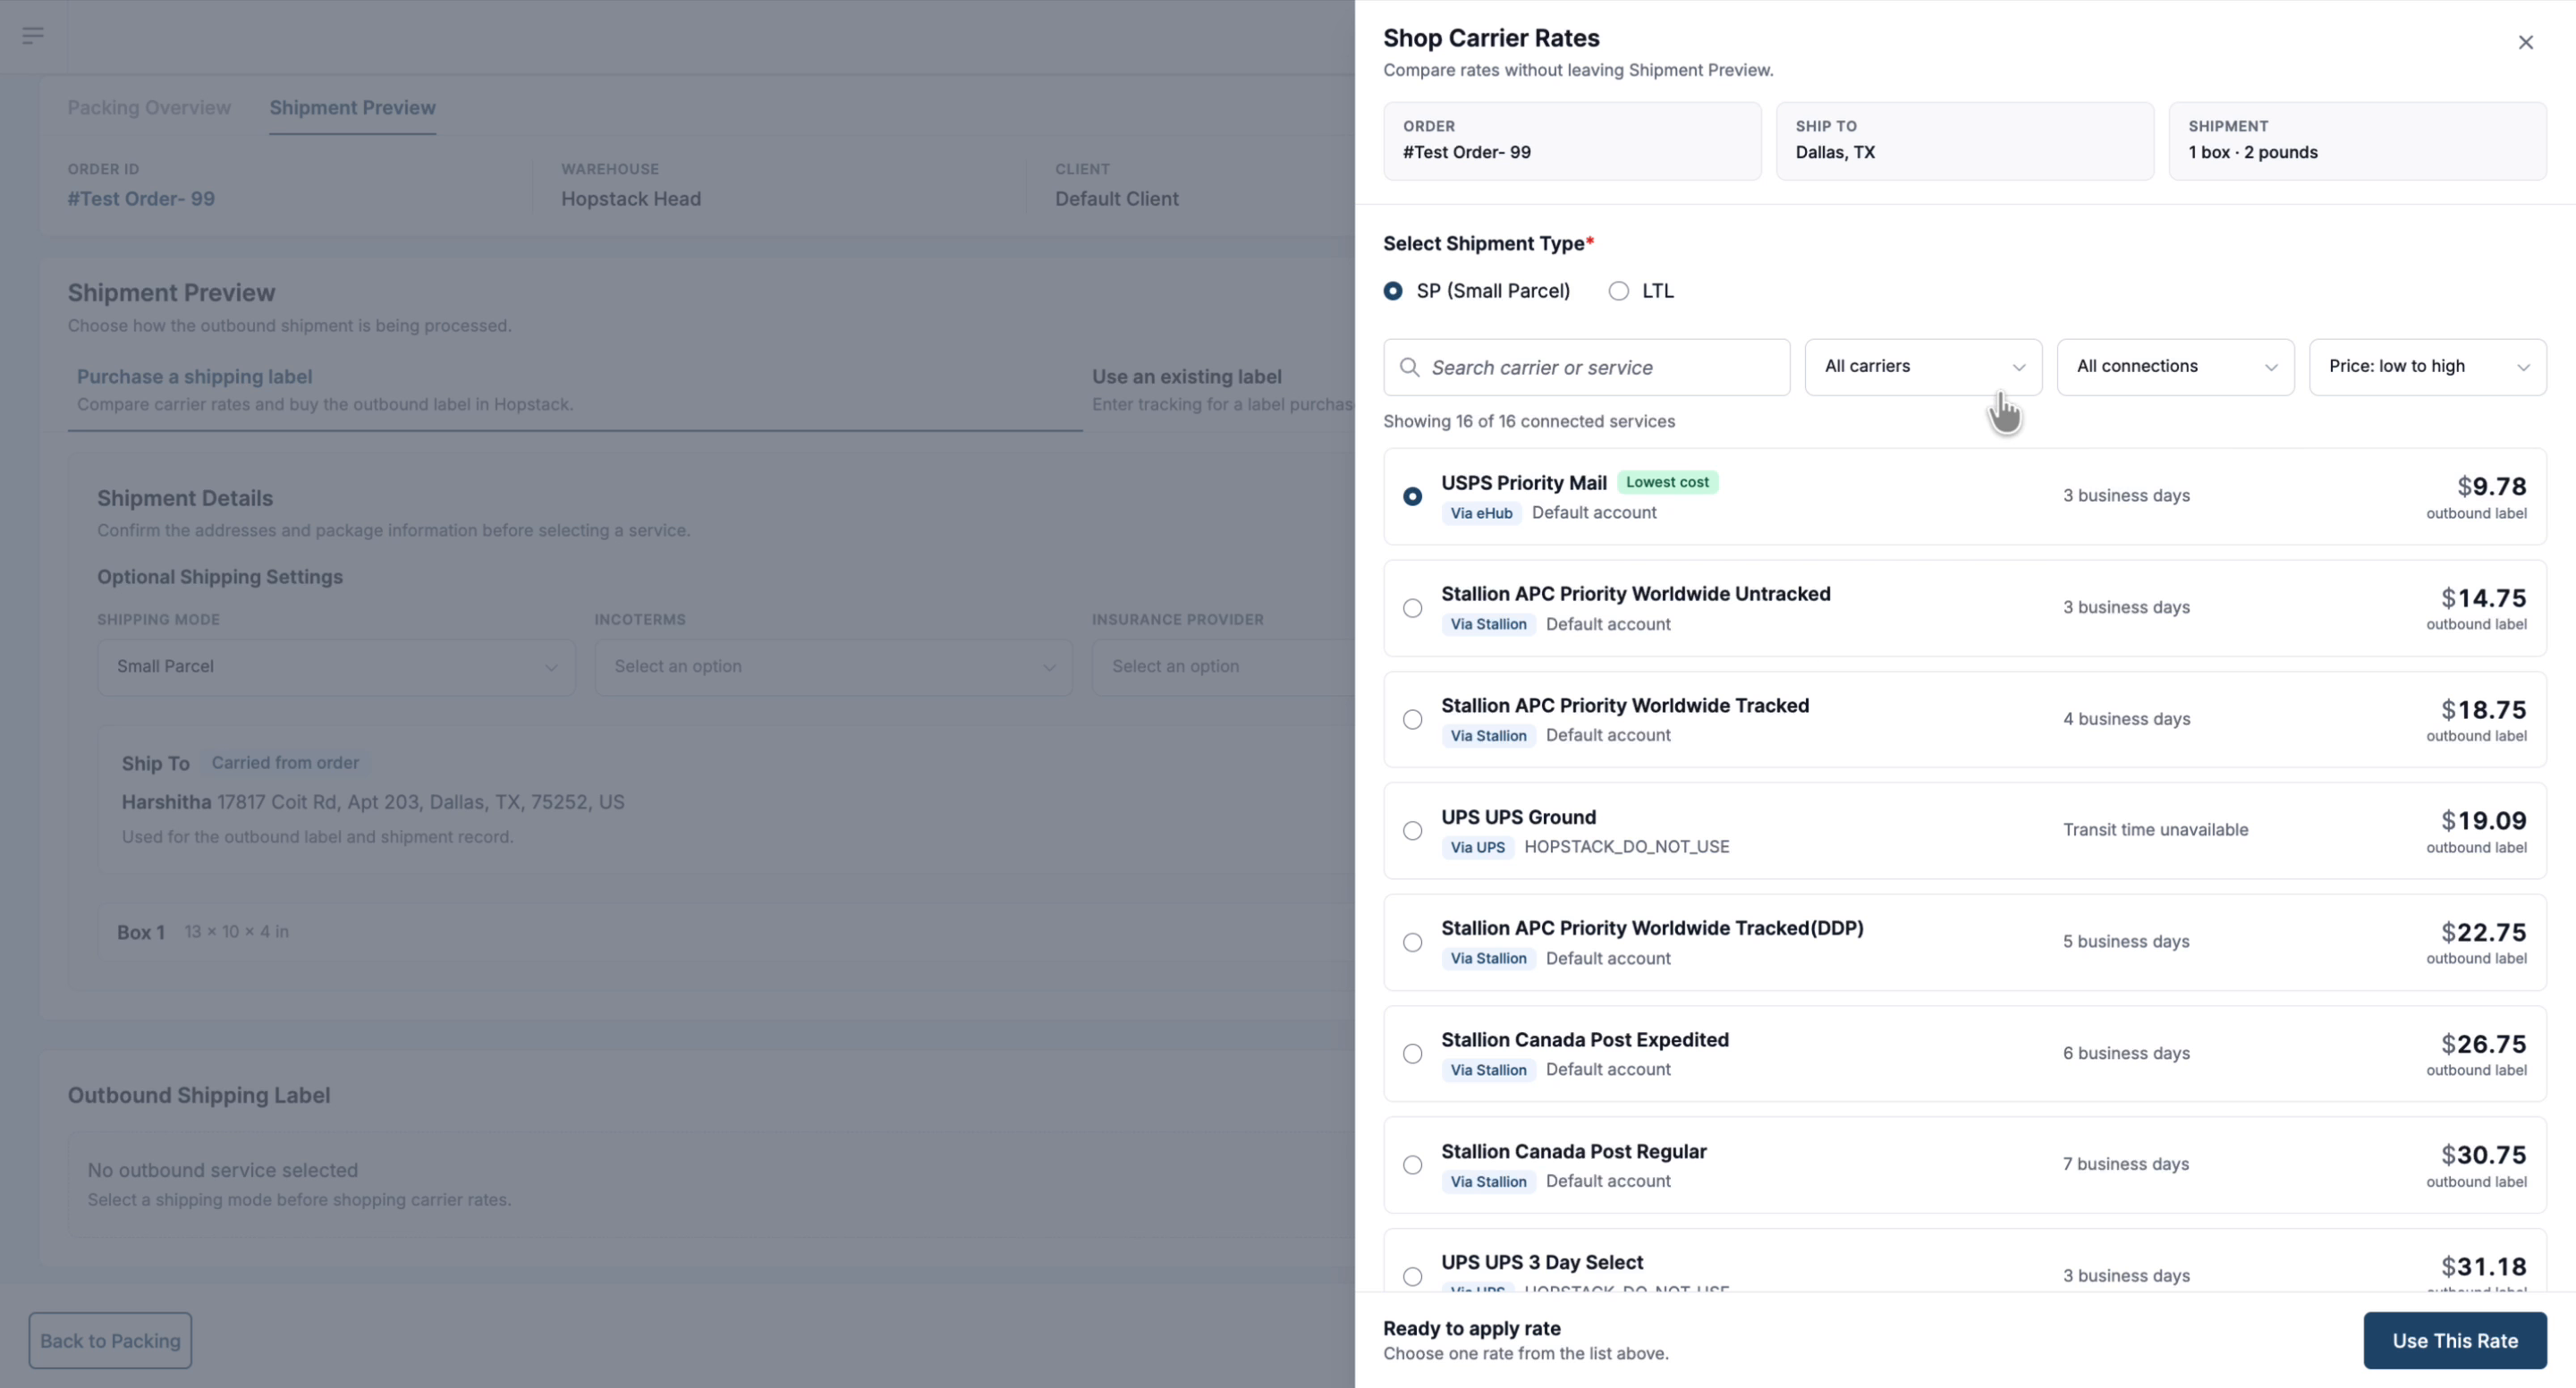
This loads all rates available from the carrier integrations configured in Hopstack.
You will see rates from integrations such as eHub, Stallion, UPS, and others, depending on what’s enabled in your account.
Step 3: Sort and Filter Available Carrier Rates
Use the sorting options to organize the list of rates by Low to High, High to Low, or Fastest Delivery, depending on your priority for this shipment.
You can also filter the results by selecting specific carriers you want to see.
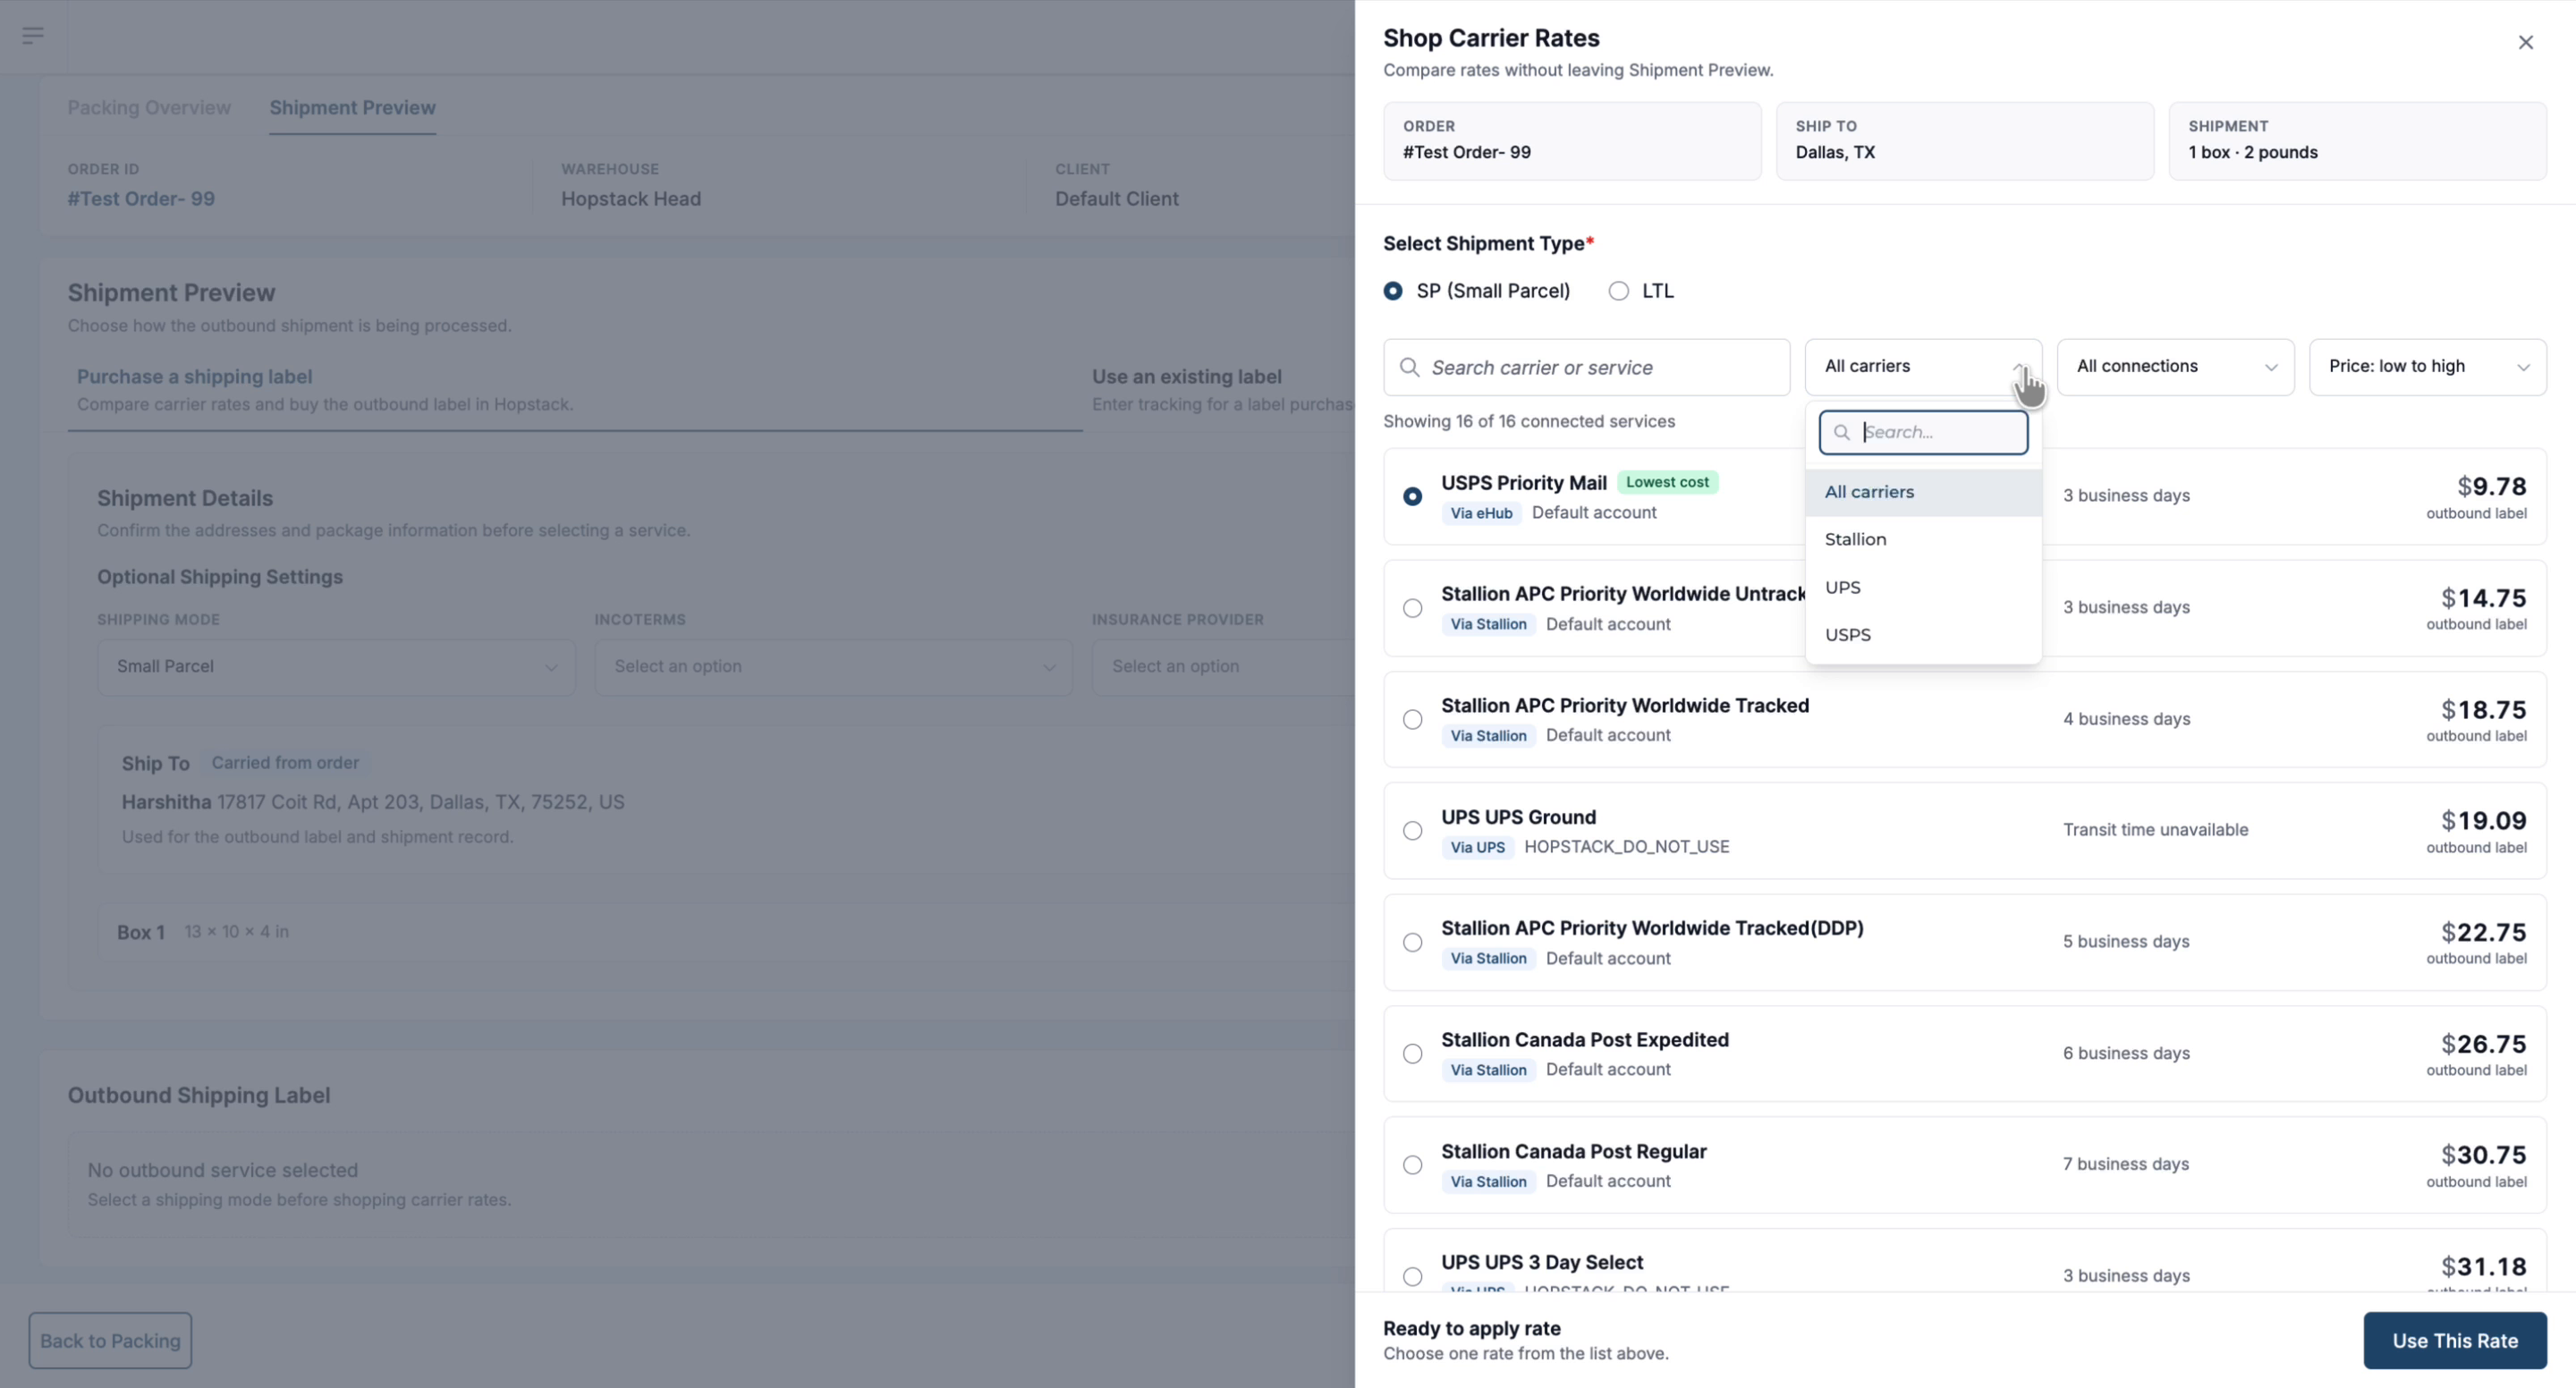
Additionally, you can use the carrier integration filter to limit results to a single integration.
For example, if you want to see only eHub rates, click on eHub to display only those options.
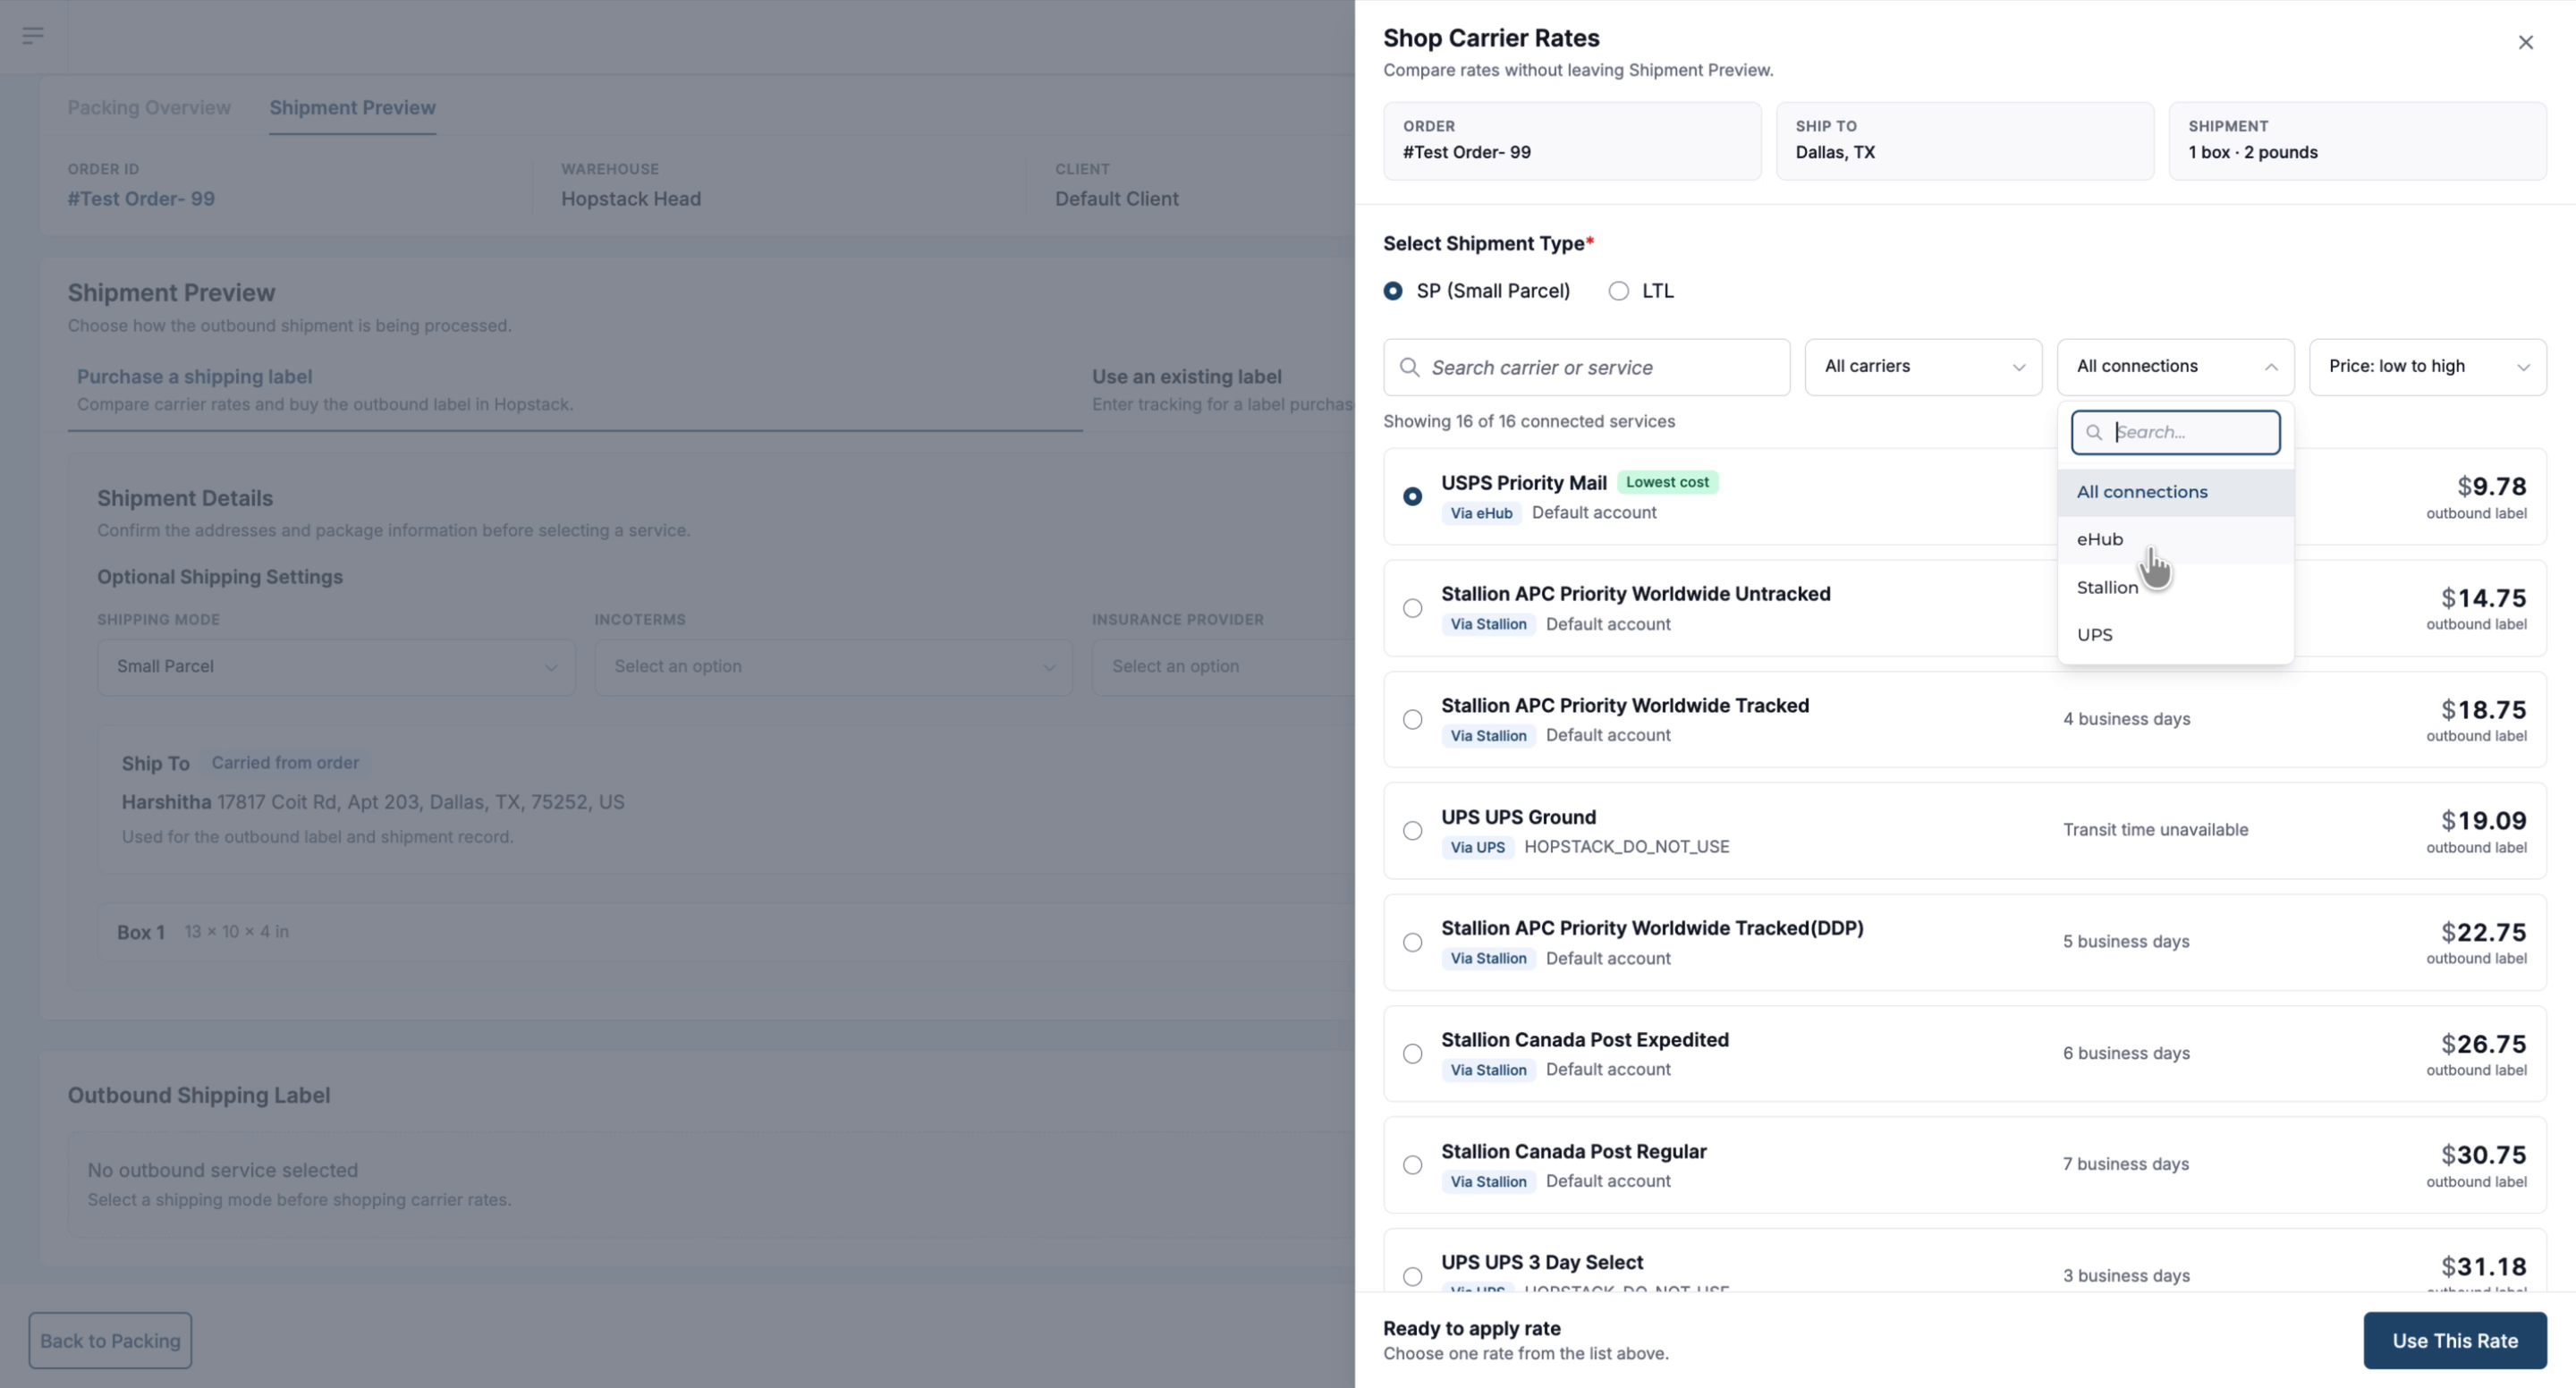
Combine search, filters, and sorting to compare pricing, delivery speed, and carriers, then choose the option that best fits the shipment.
Step 4: Select a Rate and Apply It to the Shipment
After reviewing the options, select the desired rate and click Use This Rate.
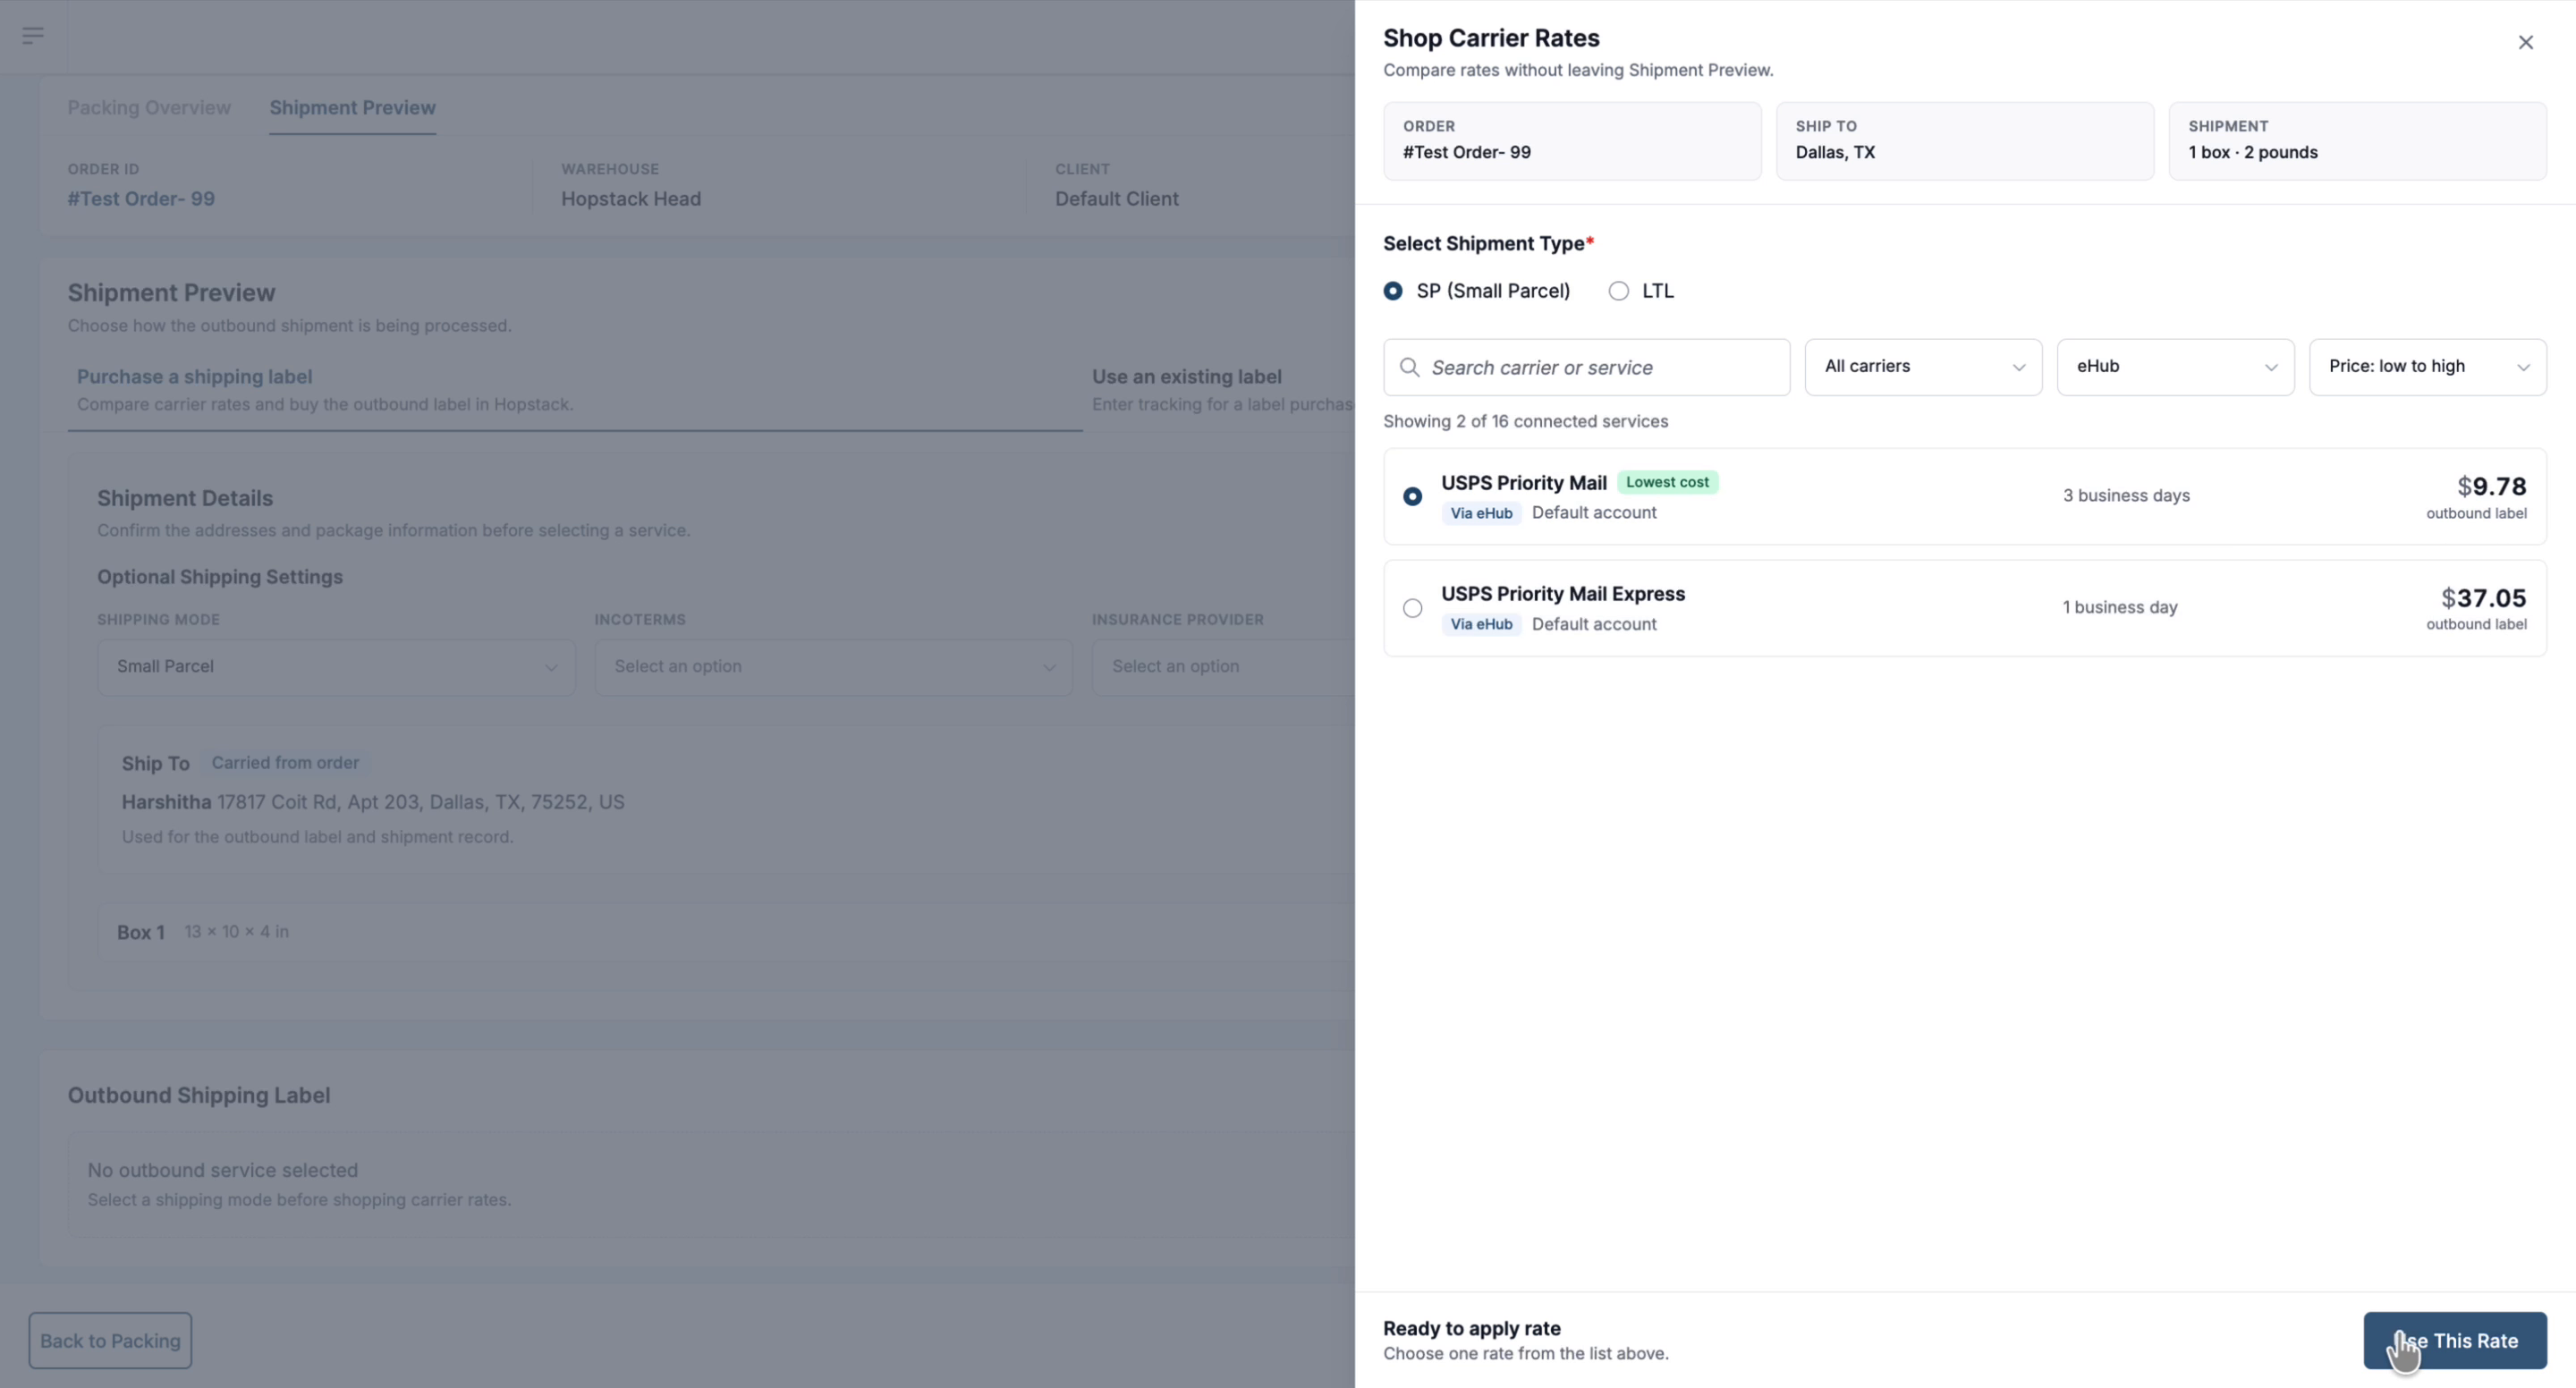
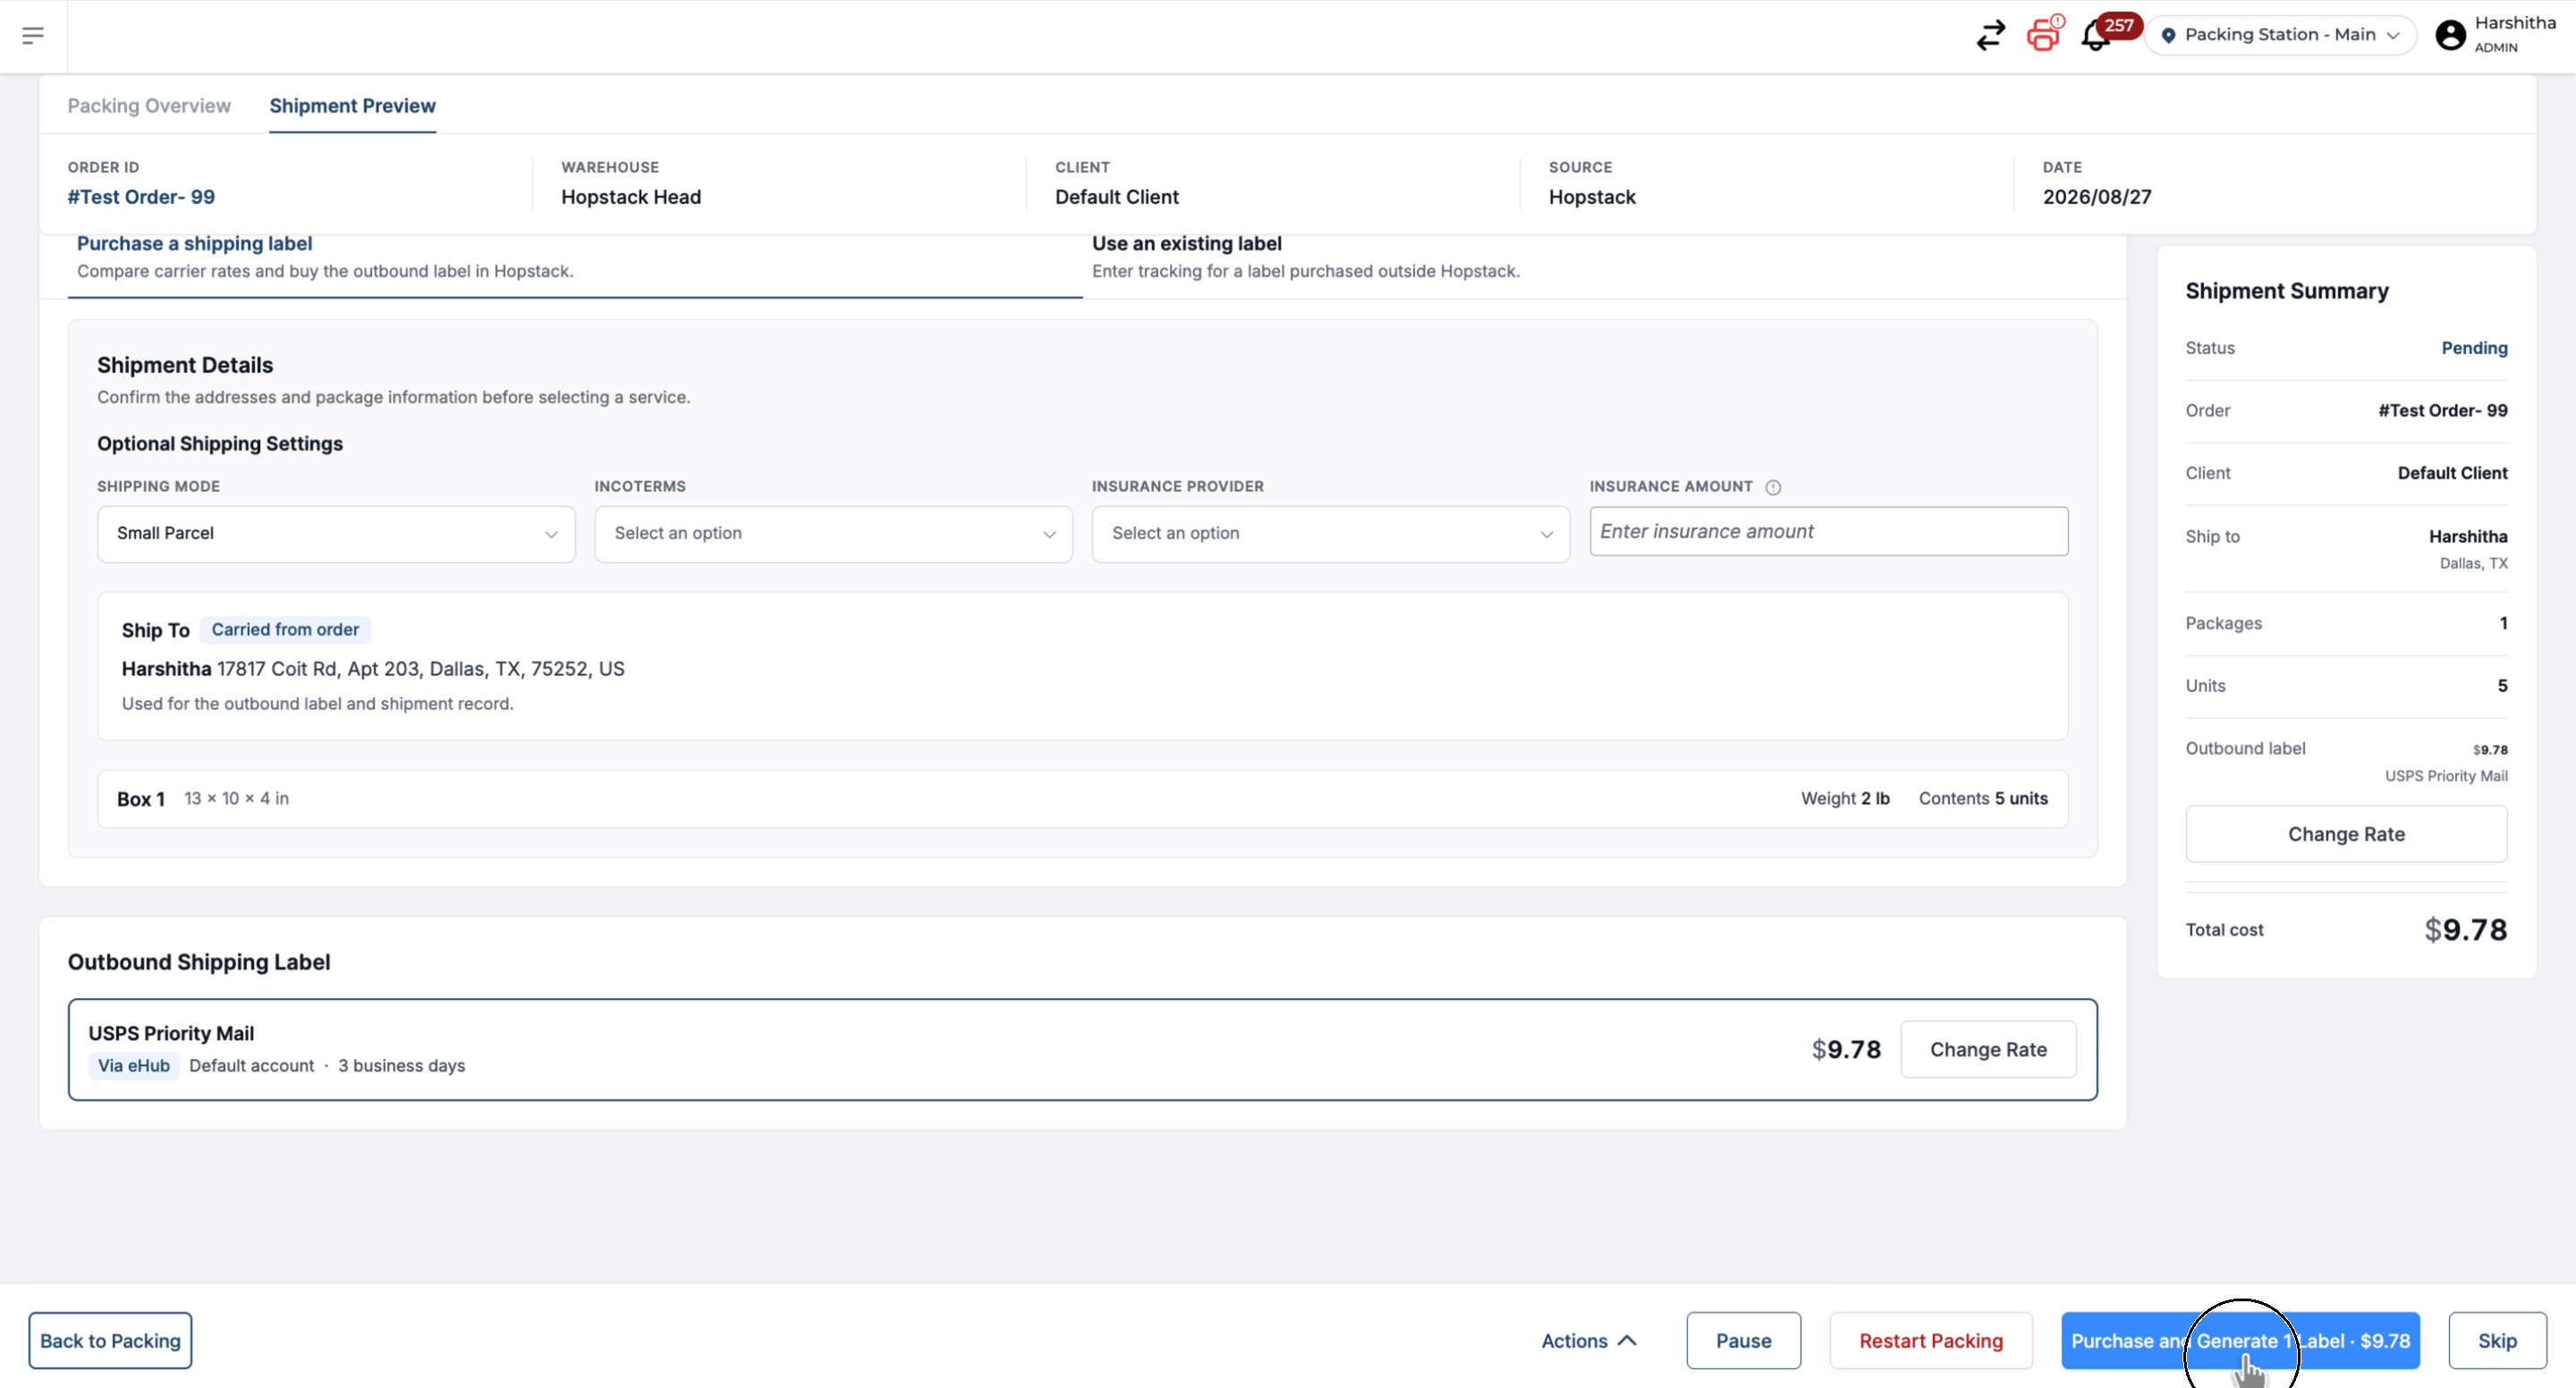
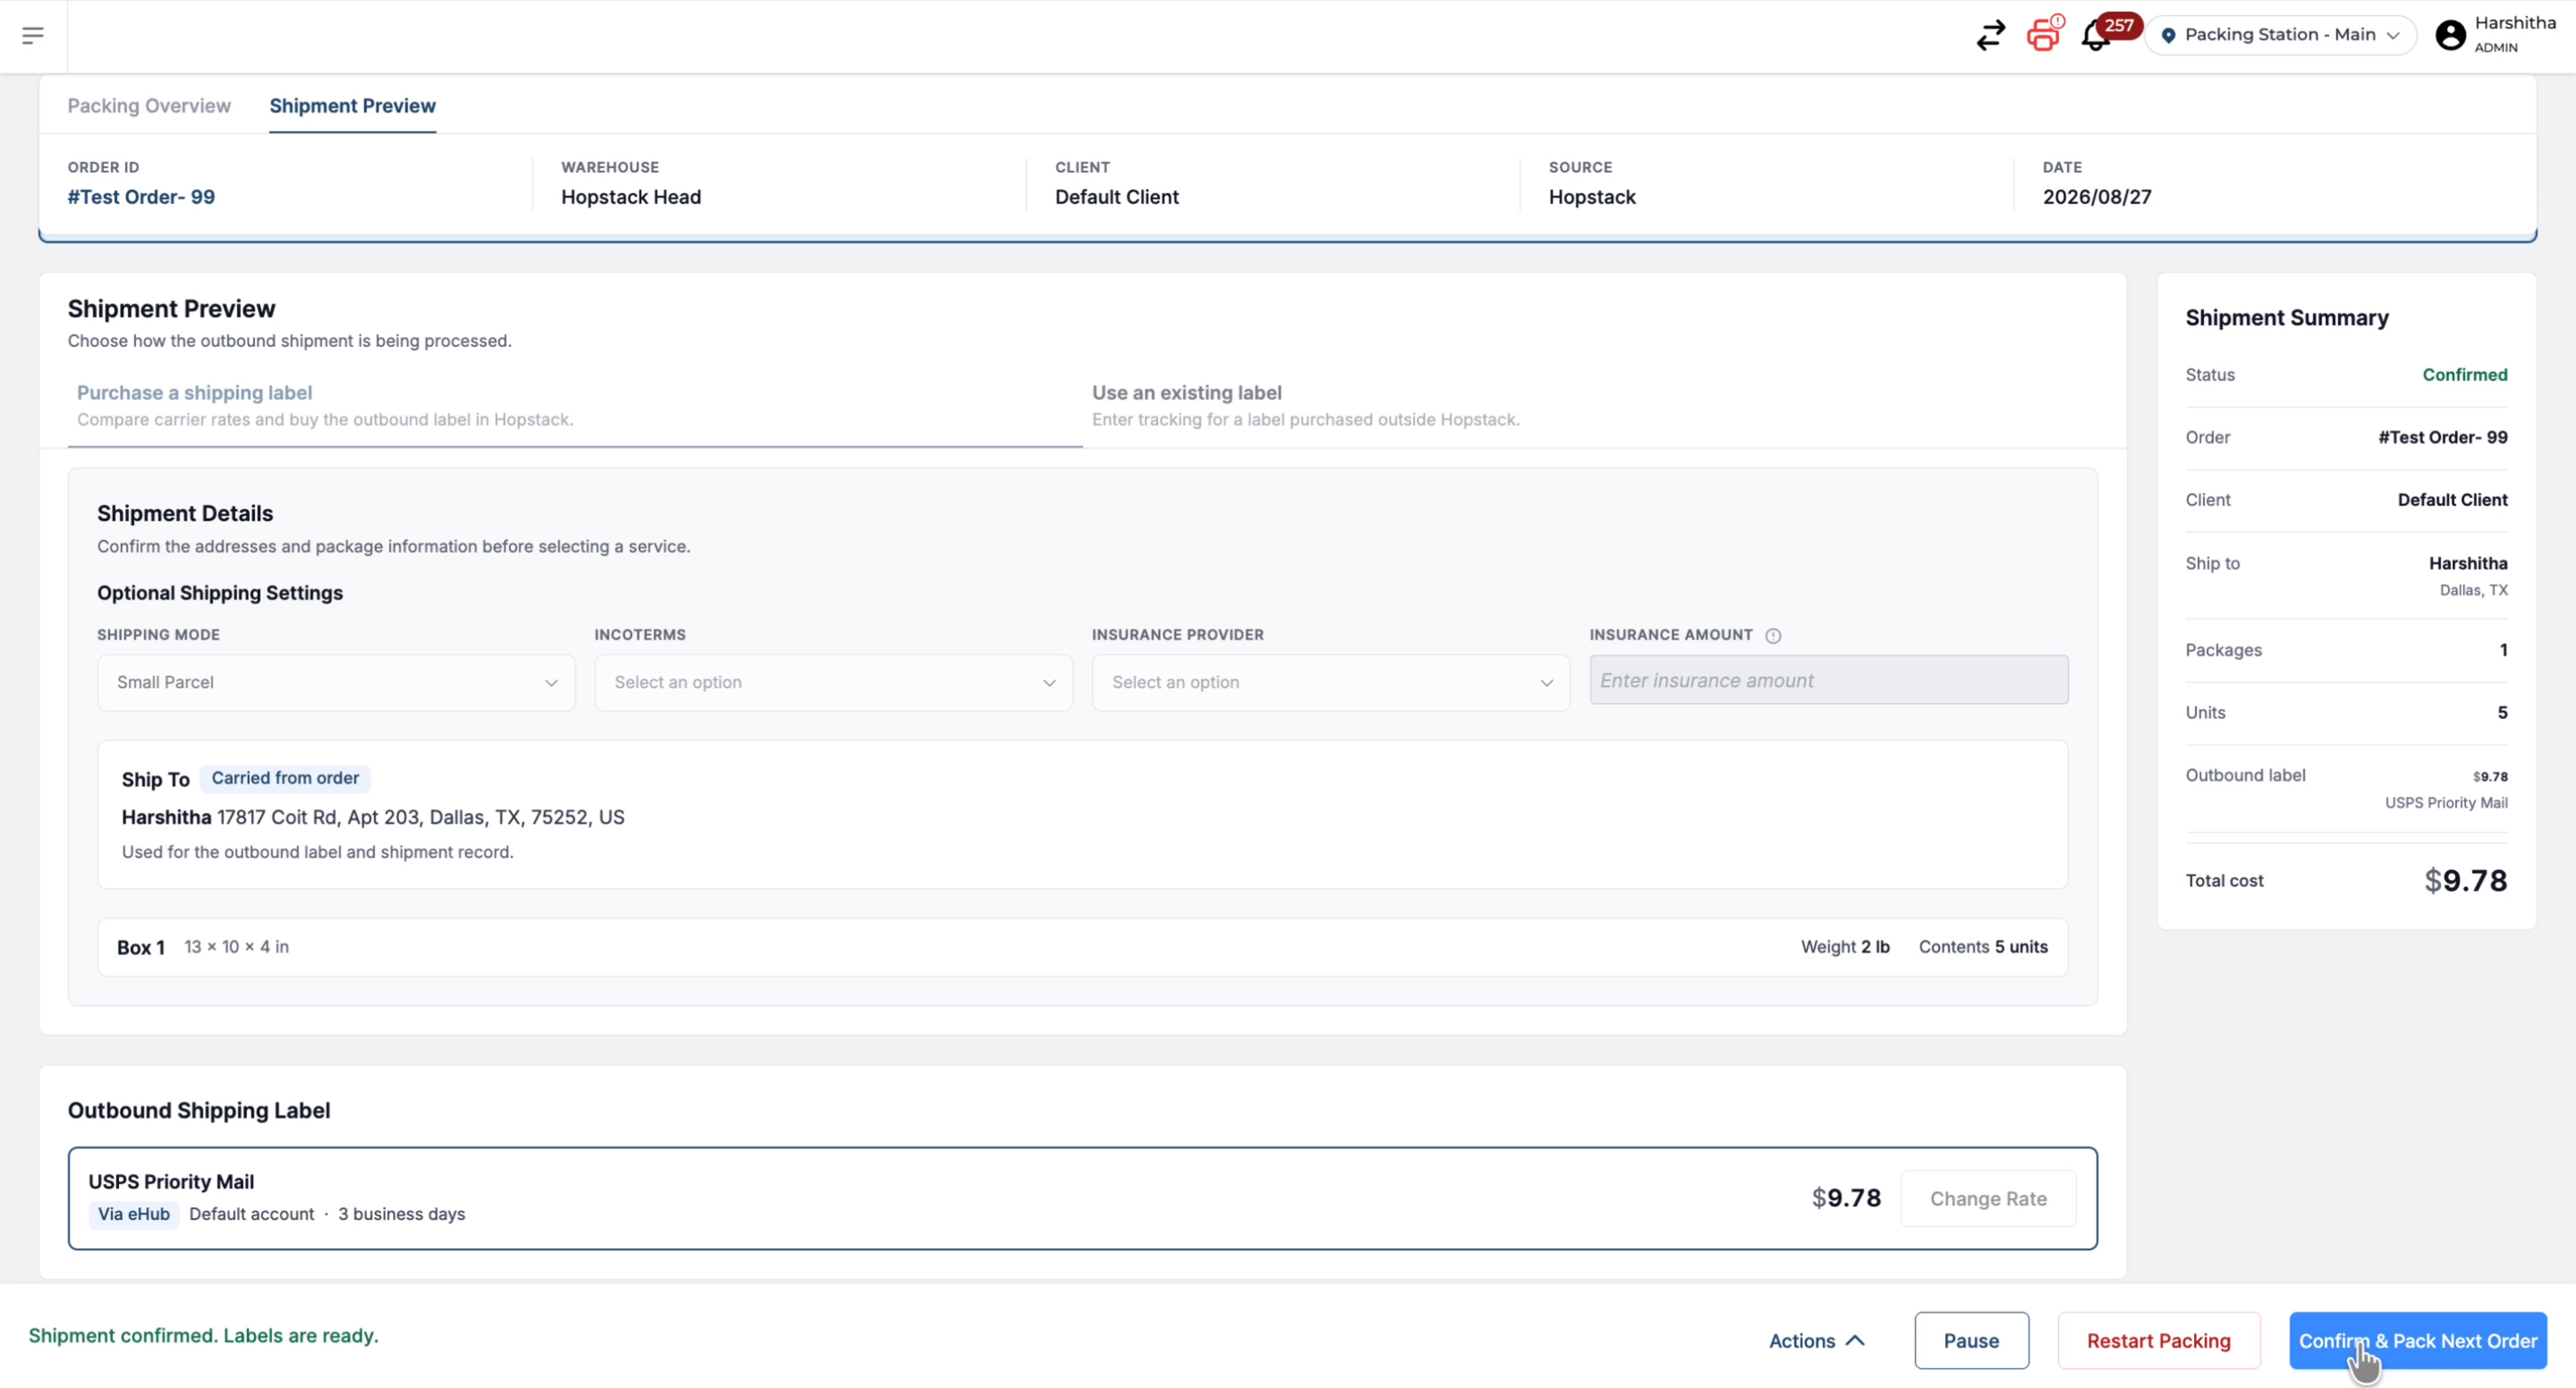
Once applied, the Shipping Summary and Outbound Shipping Label sections update with the selected rate, service level, and carrier details. Review these updates to confirm they match your intended selection before continuing.
Step 5: Purchase and Generate the Shipping Label
When you’re satisfied with the selected rate and shipment details, click Purchase and Generate Label.
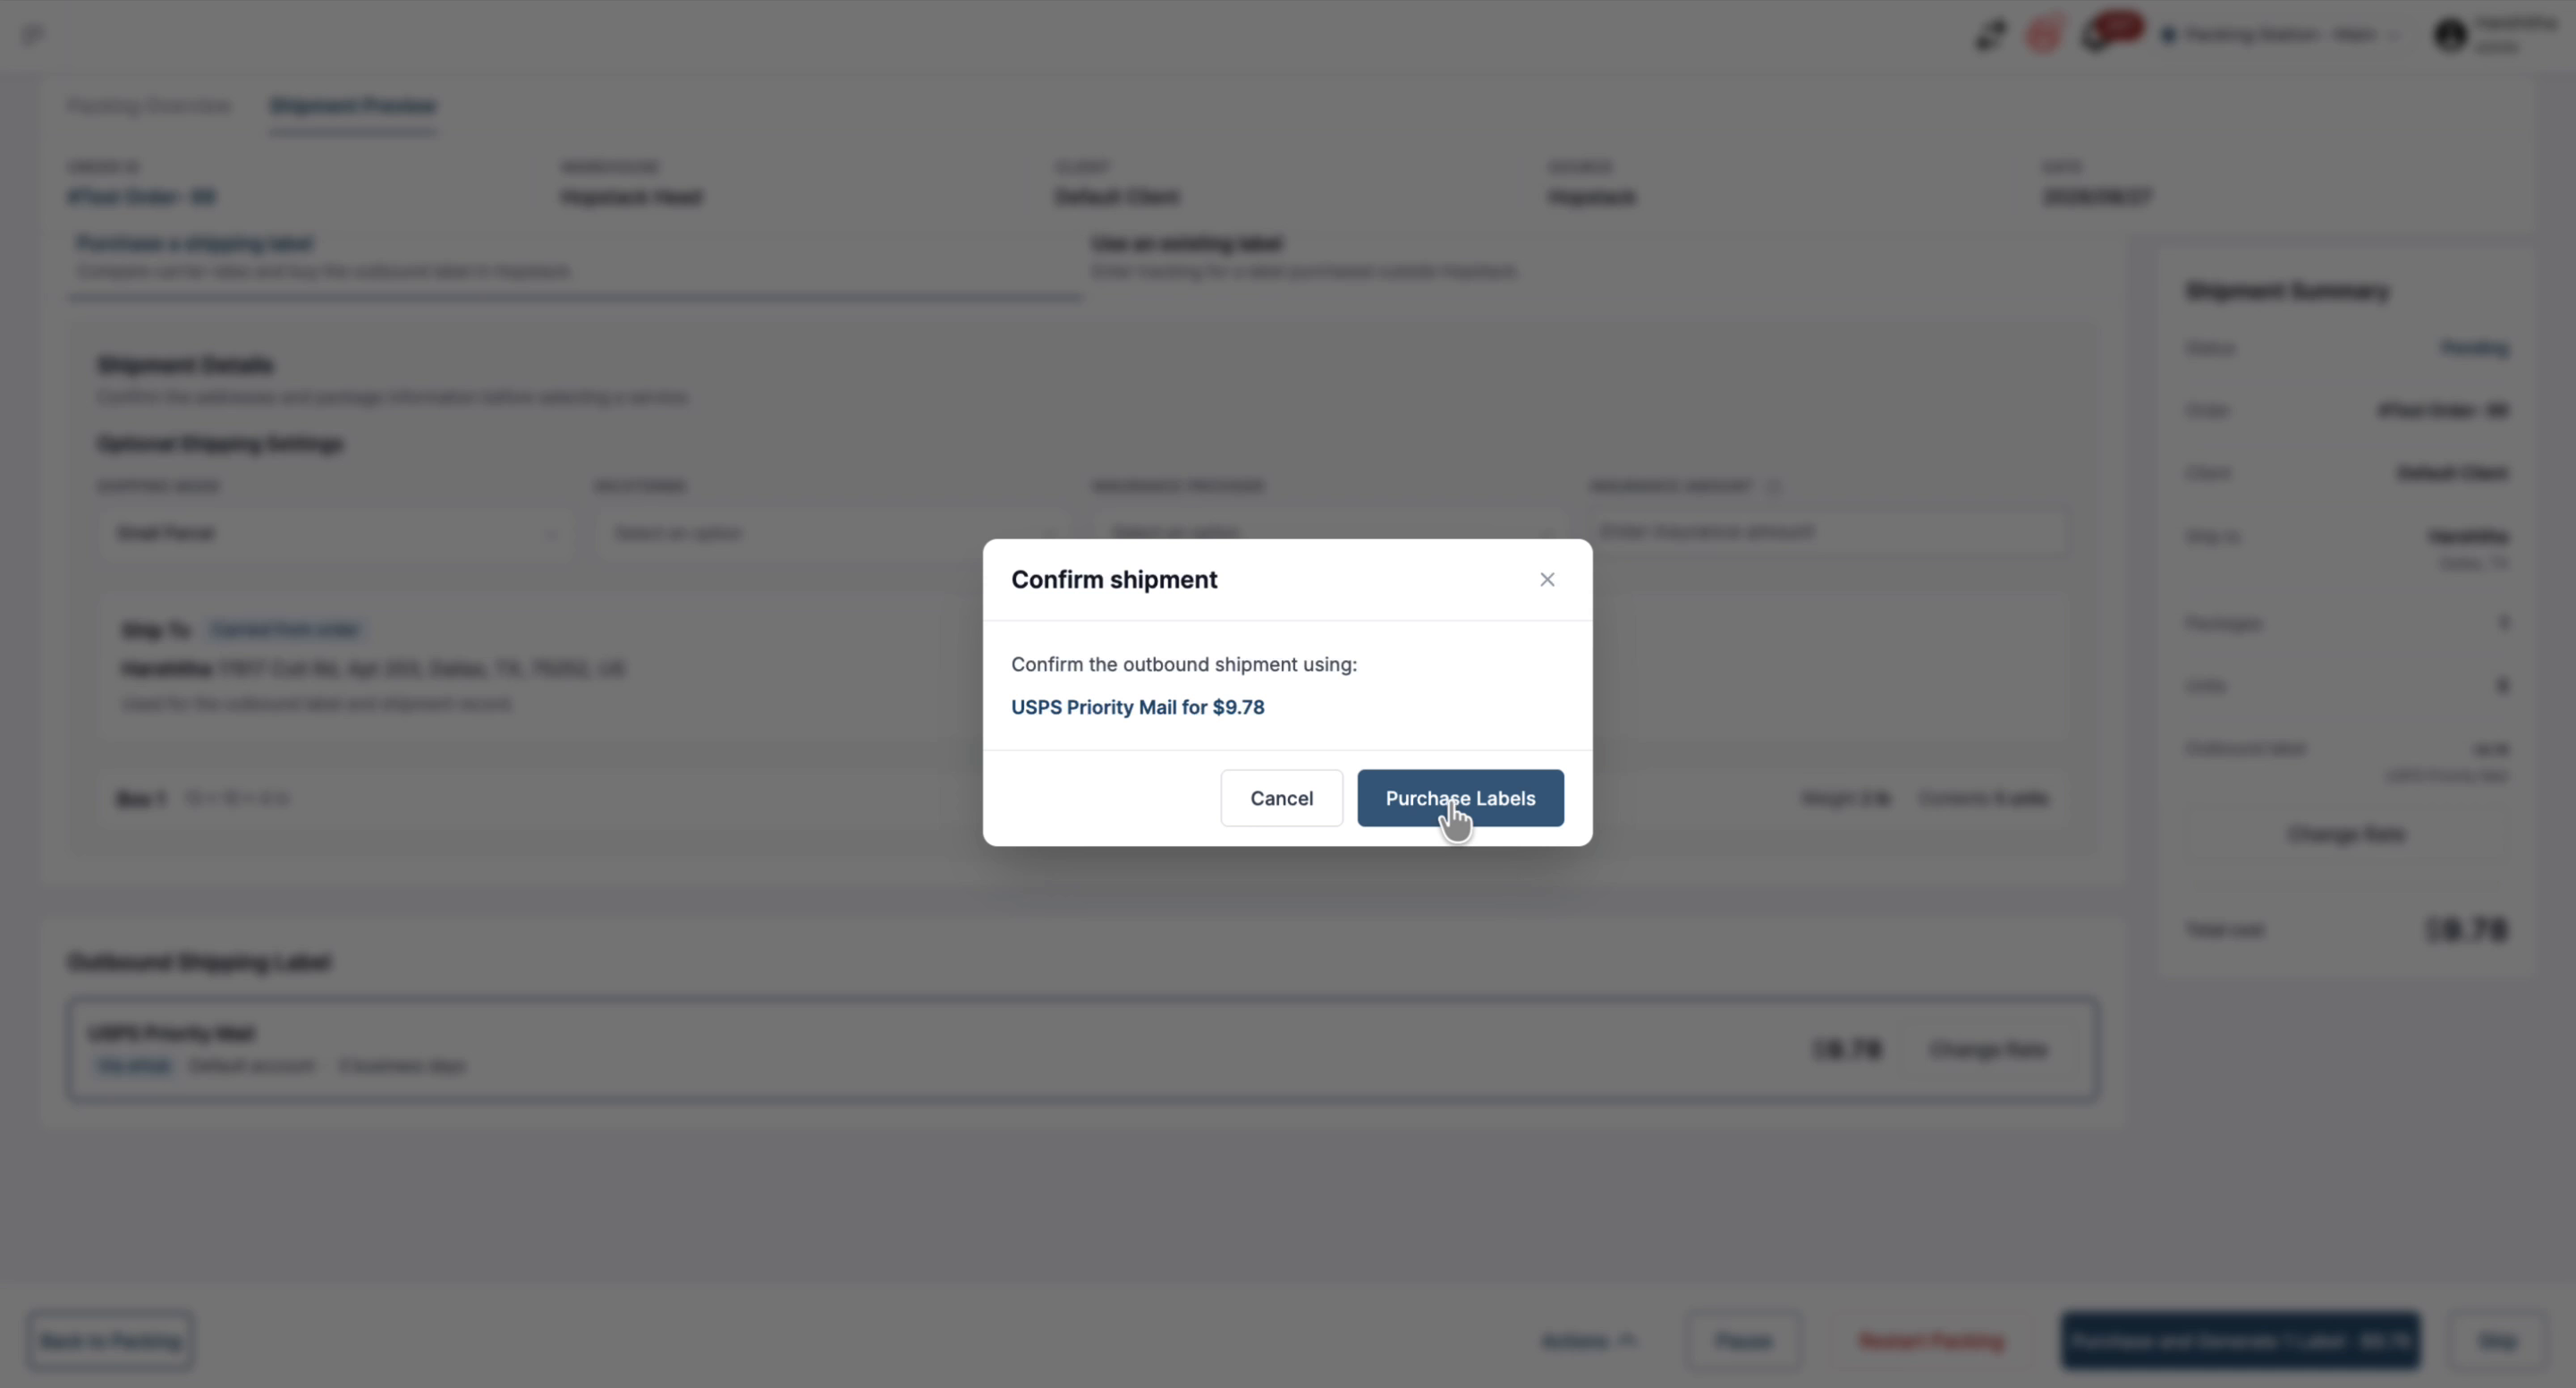
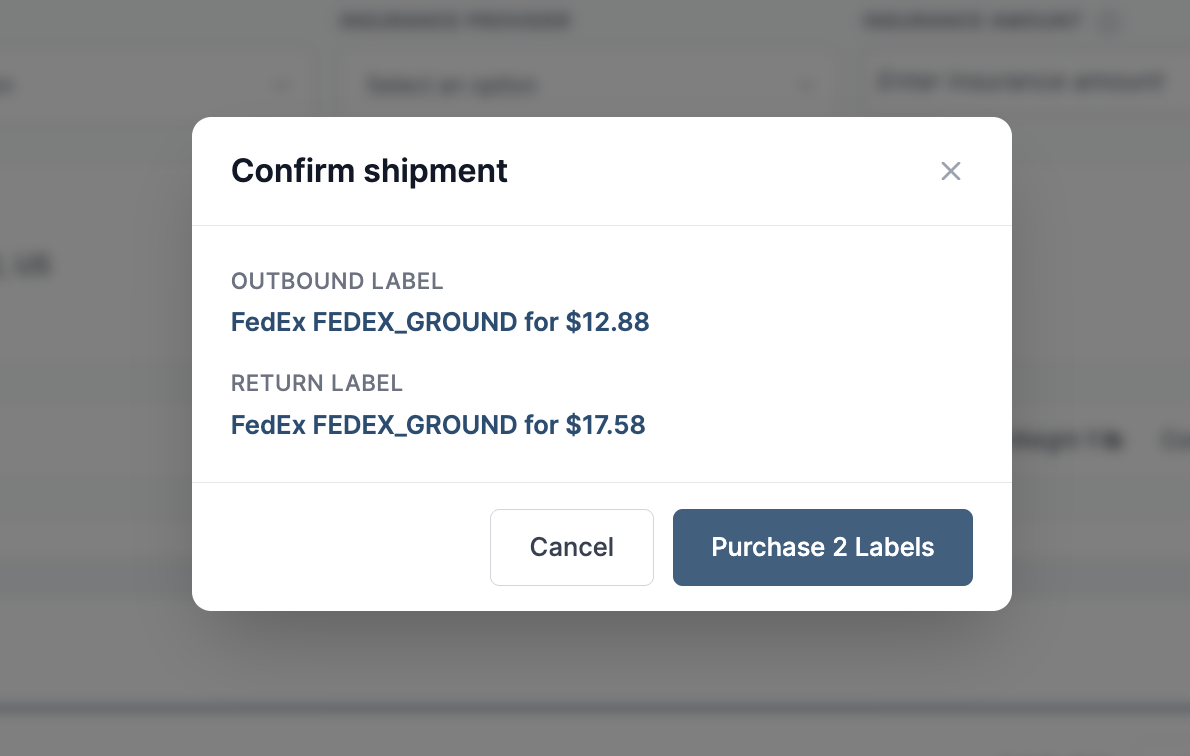
A confirmation prompt appears asking if you want to proceed with purchasing the label. Confirm to continue.
After confirmation, the shipping label is generated and automatically printed if a printer is connected and configured.
If a prepaid return label is included, the button counts both labels and shows their combined price. See Prepaid Return Labels at Packing.
Once printing is complete, you can confirm the shipment in Hopstack and move on to pack and process the next order.
2. Use an existing label
Use this process when you have already purchased a shipping label outside Hopstack and want to attach it to an order from the shipment preview screen.
Step 1: Choose to Use an Existing Label
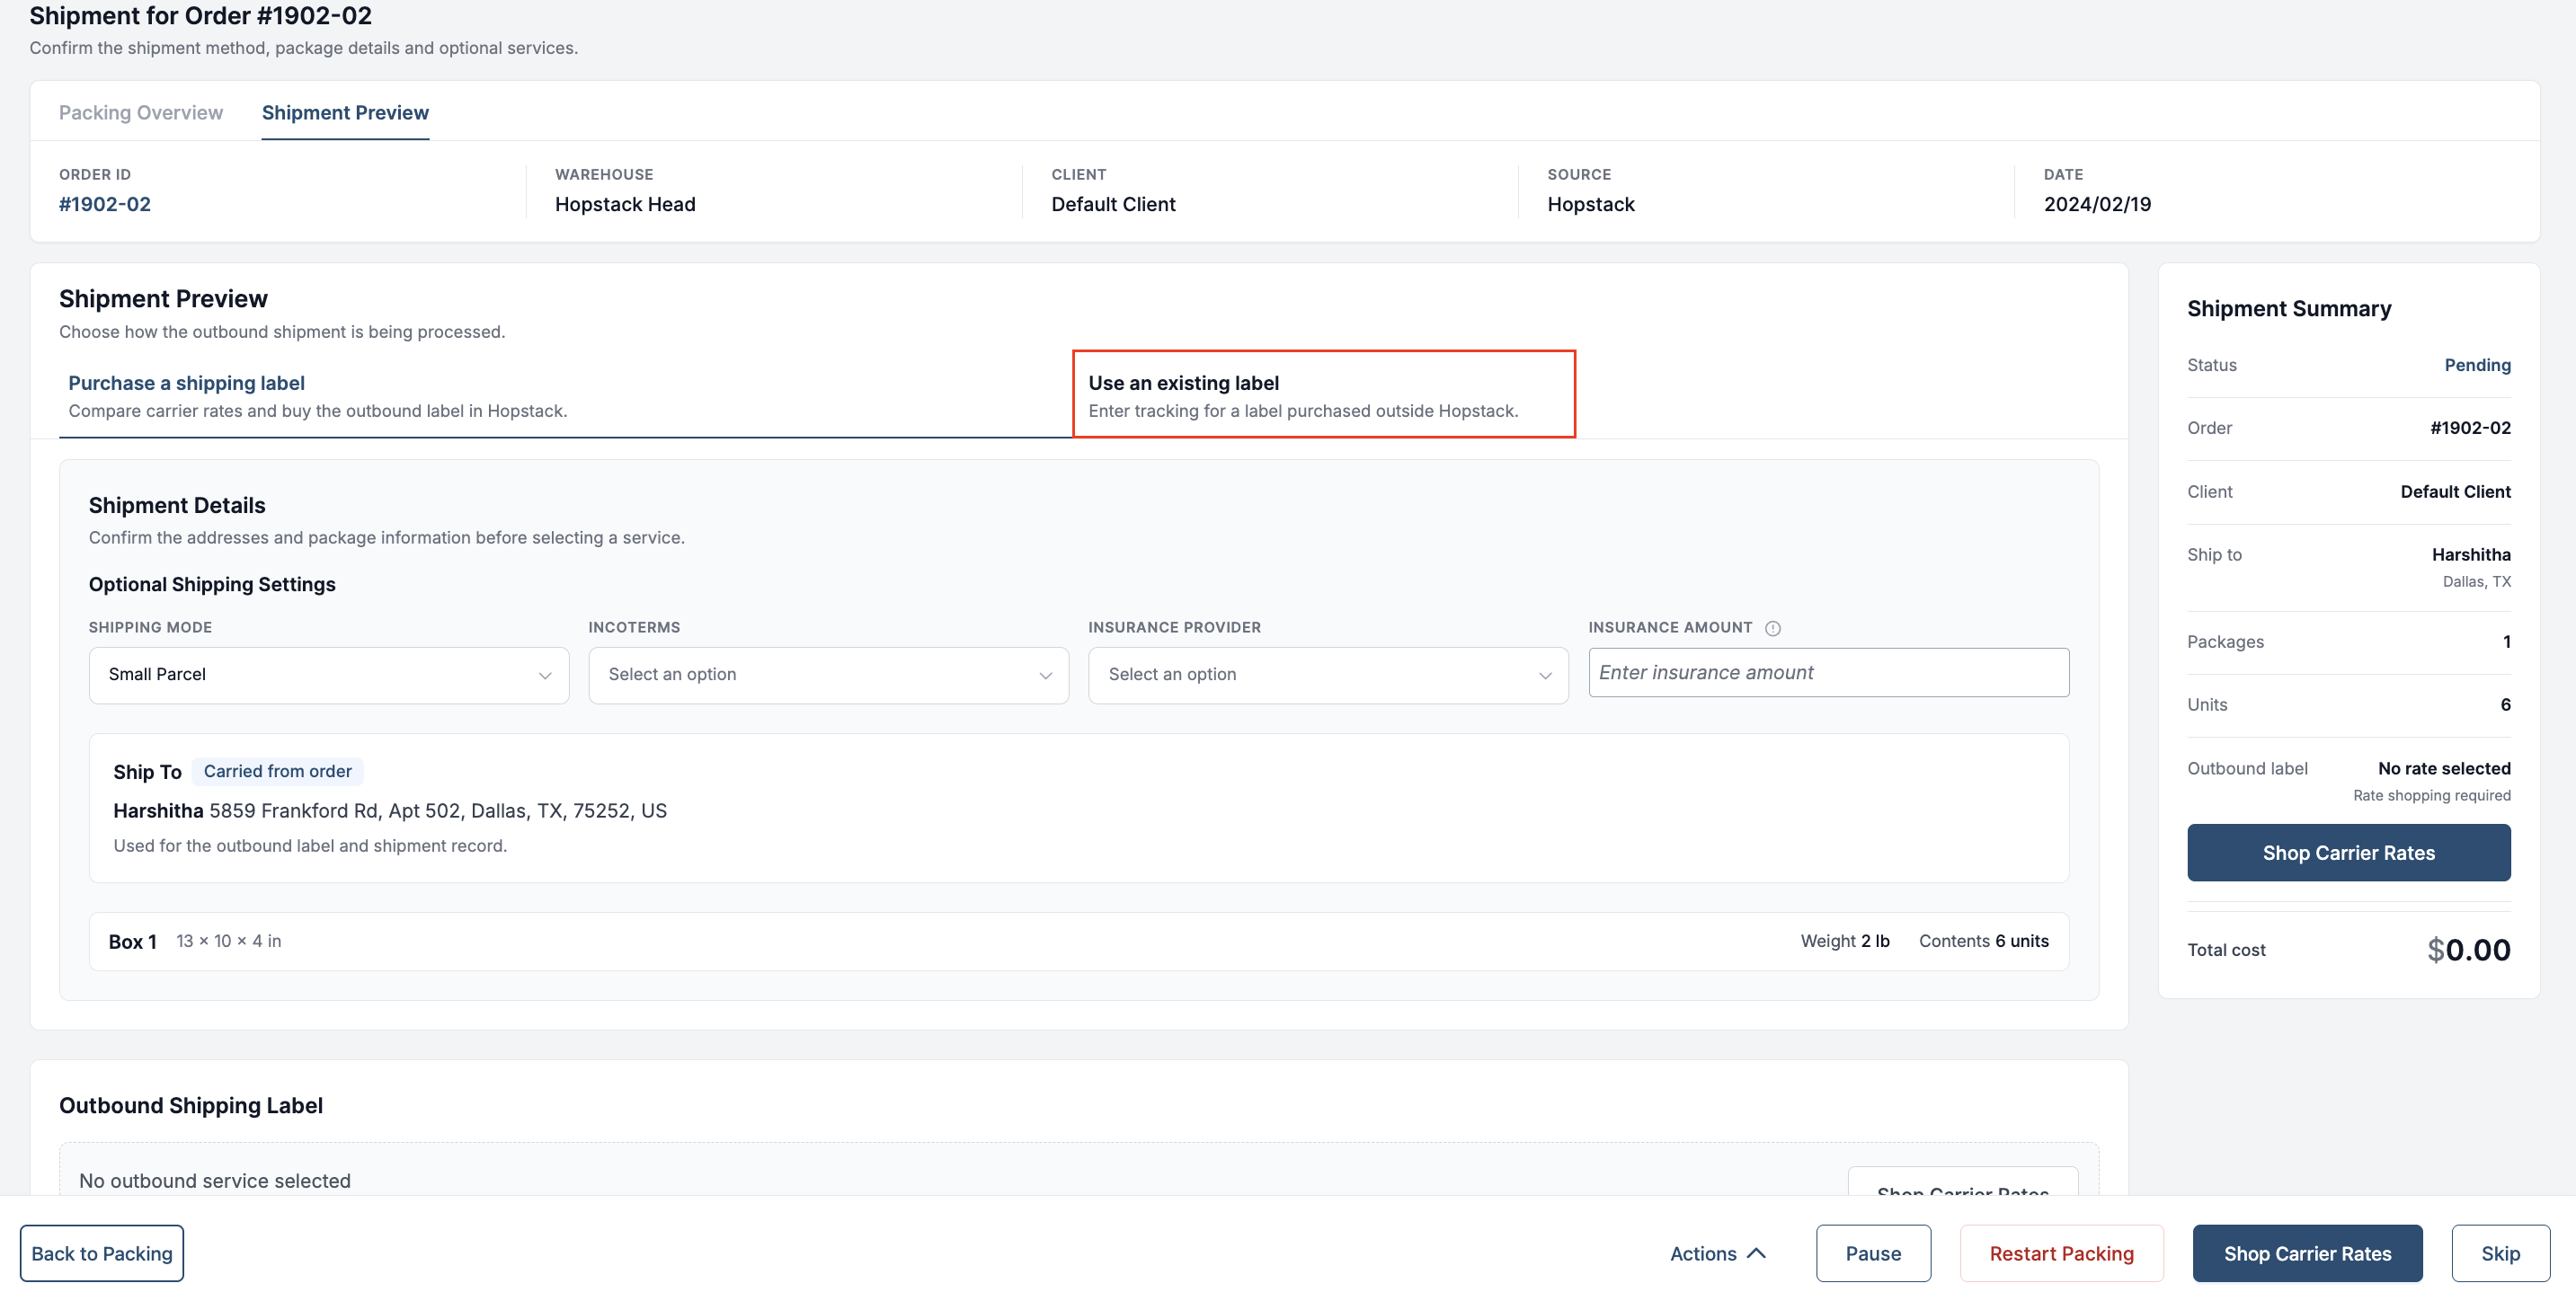
On the shipment preview screen, click Use an existing label to indicate that you already have a label generated outside Hopstack.
Step 2: Enter Carrier and Tracking Details
From the Carrier dropdown, select the appropriate shipping carrier. Then, enter the Tracking ID associated with your existing label.
Step 3: Attach the Existing Label File or URL
If you have the label file, upload it using the file upload option.
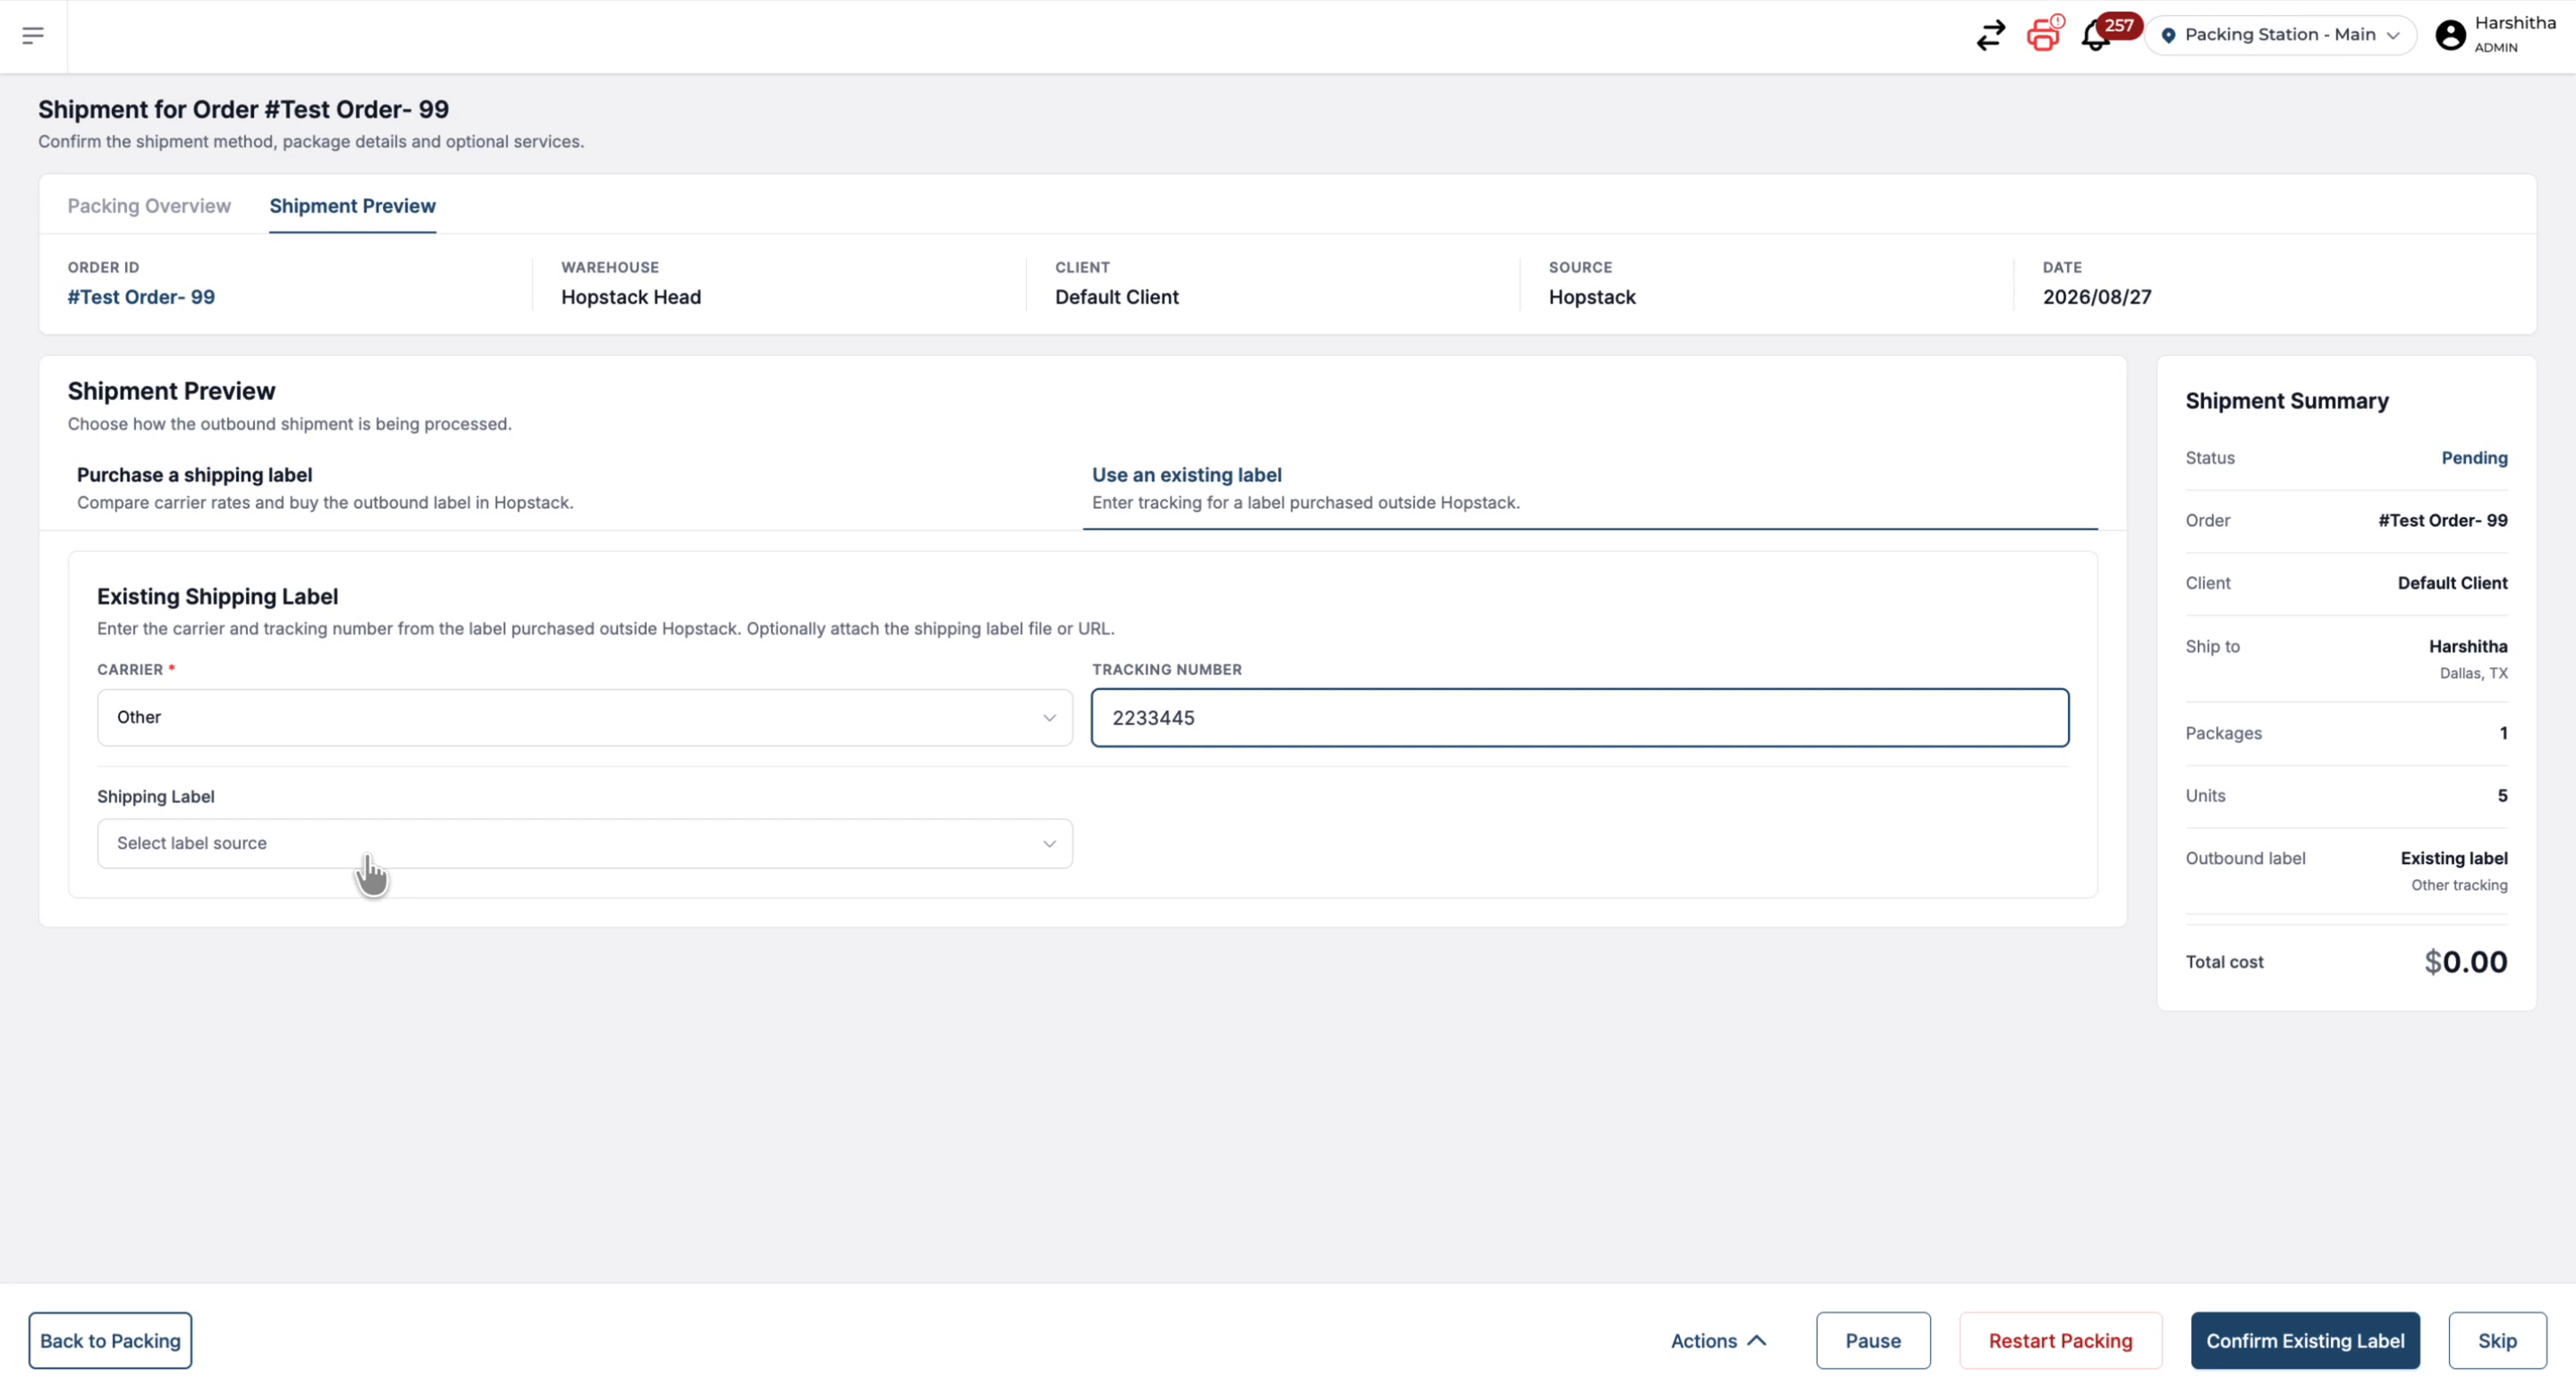
Supported file formats are JPG, PNG, and PDF.
Alternatively, you can paste a public URL for the label, which will be saved to the order.
Step 4: Confirm the Existing Label and Complete Packing
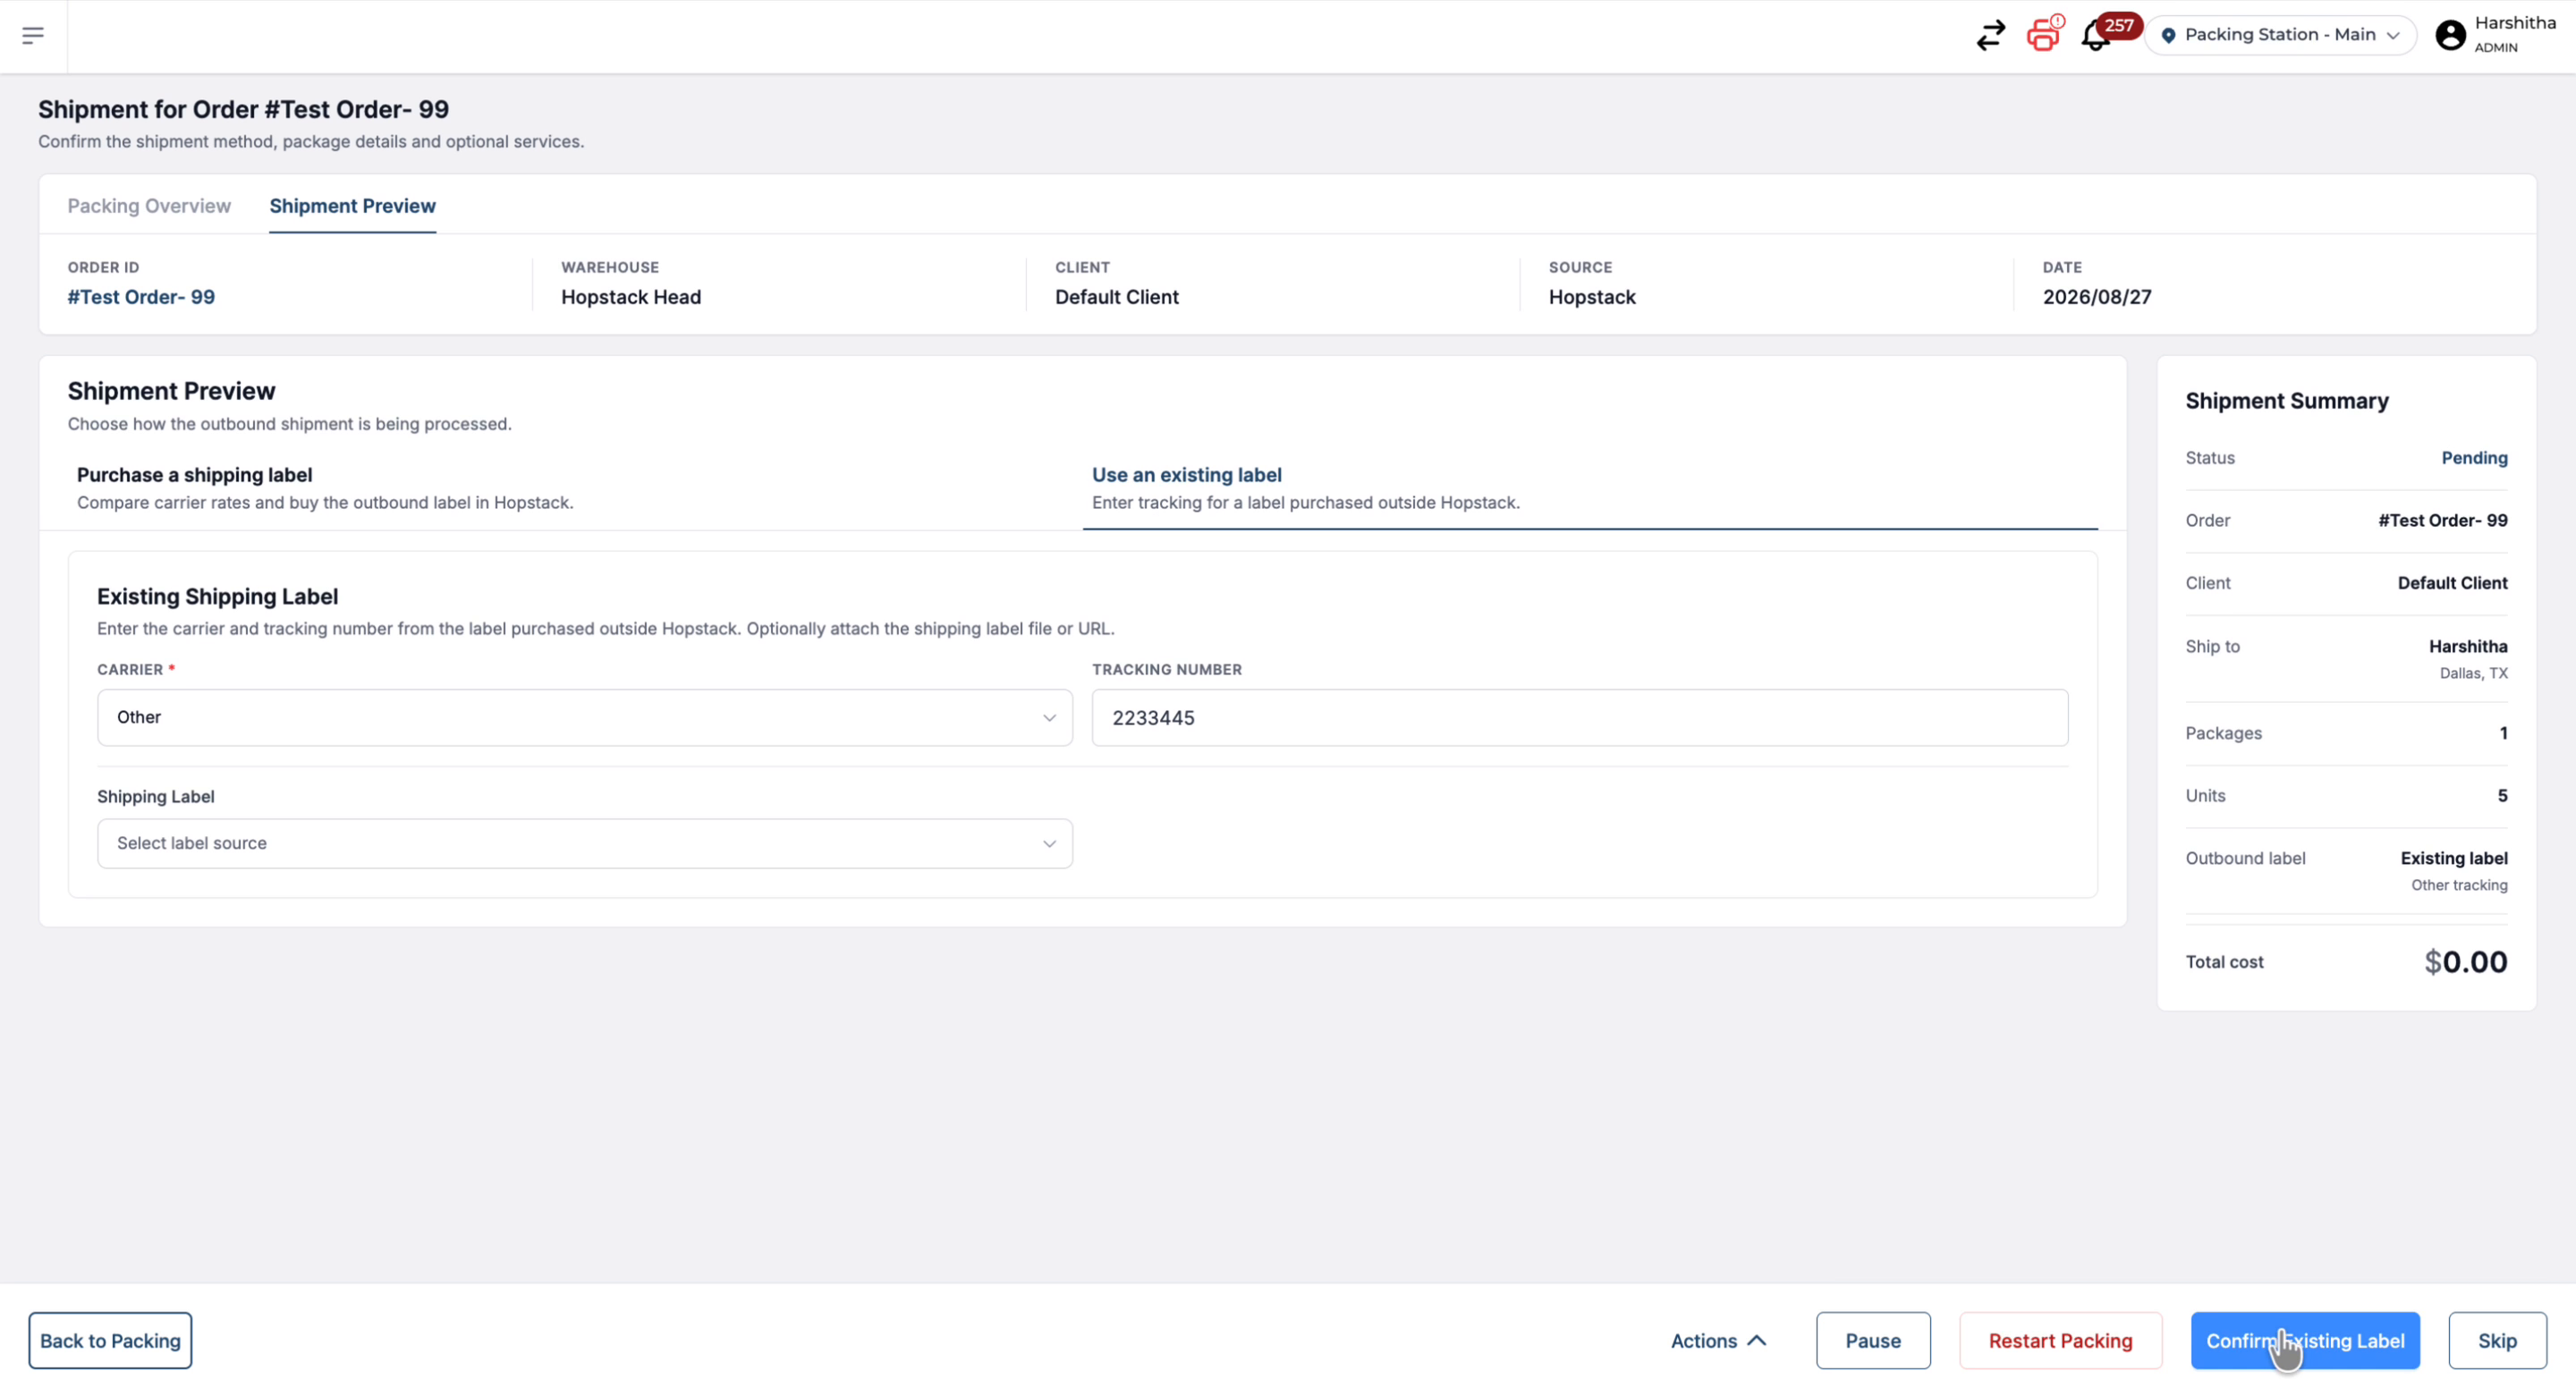
After providing the carrier, tracking ID, and label (file or URL), click Confirm existing label to finalize attaching the label and complete the packing process.
3. Skip shipment review
Use this flow if shipping is handled outside the hopstack platform.
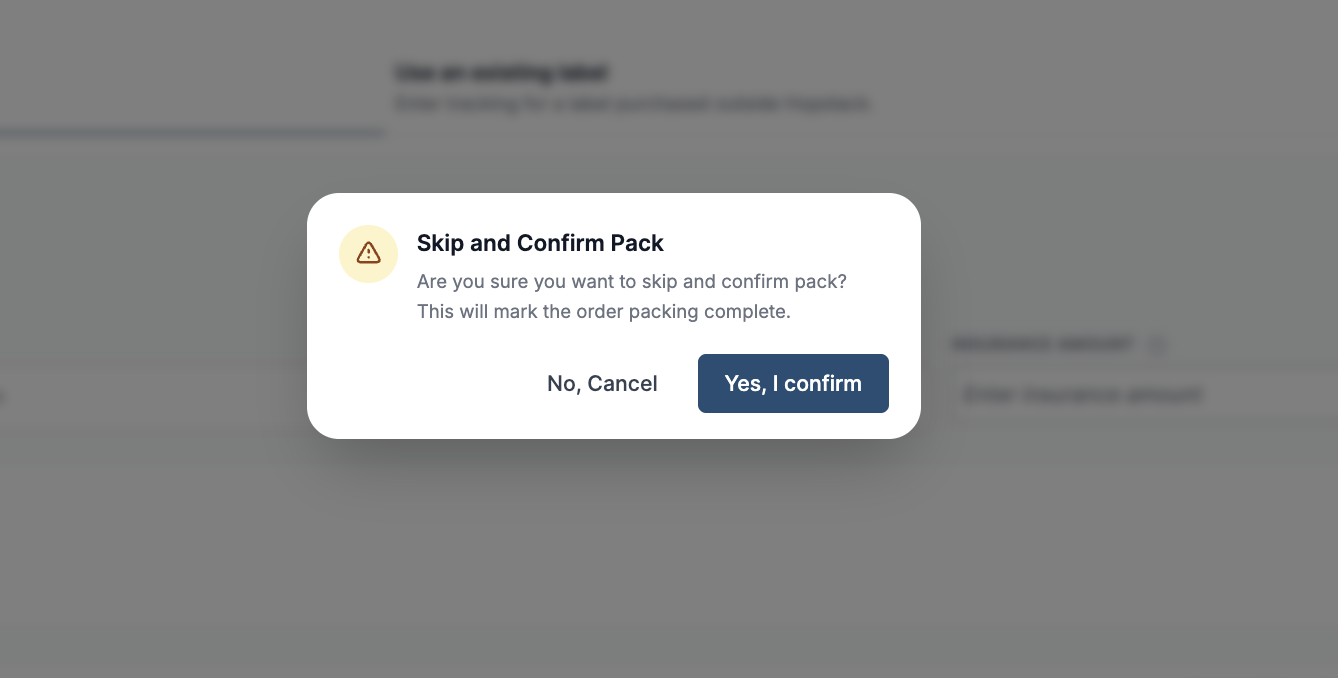
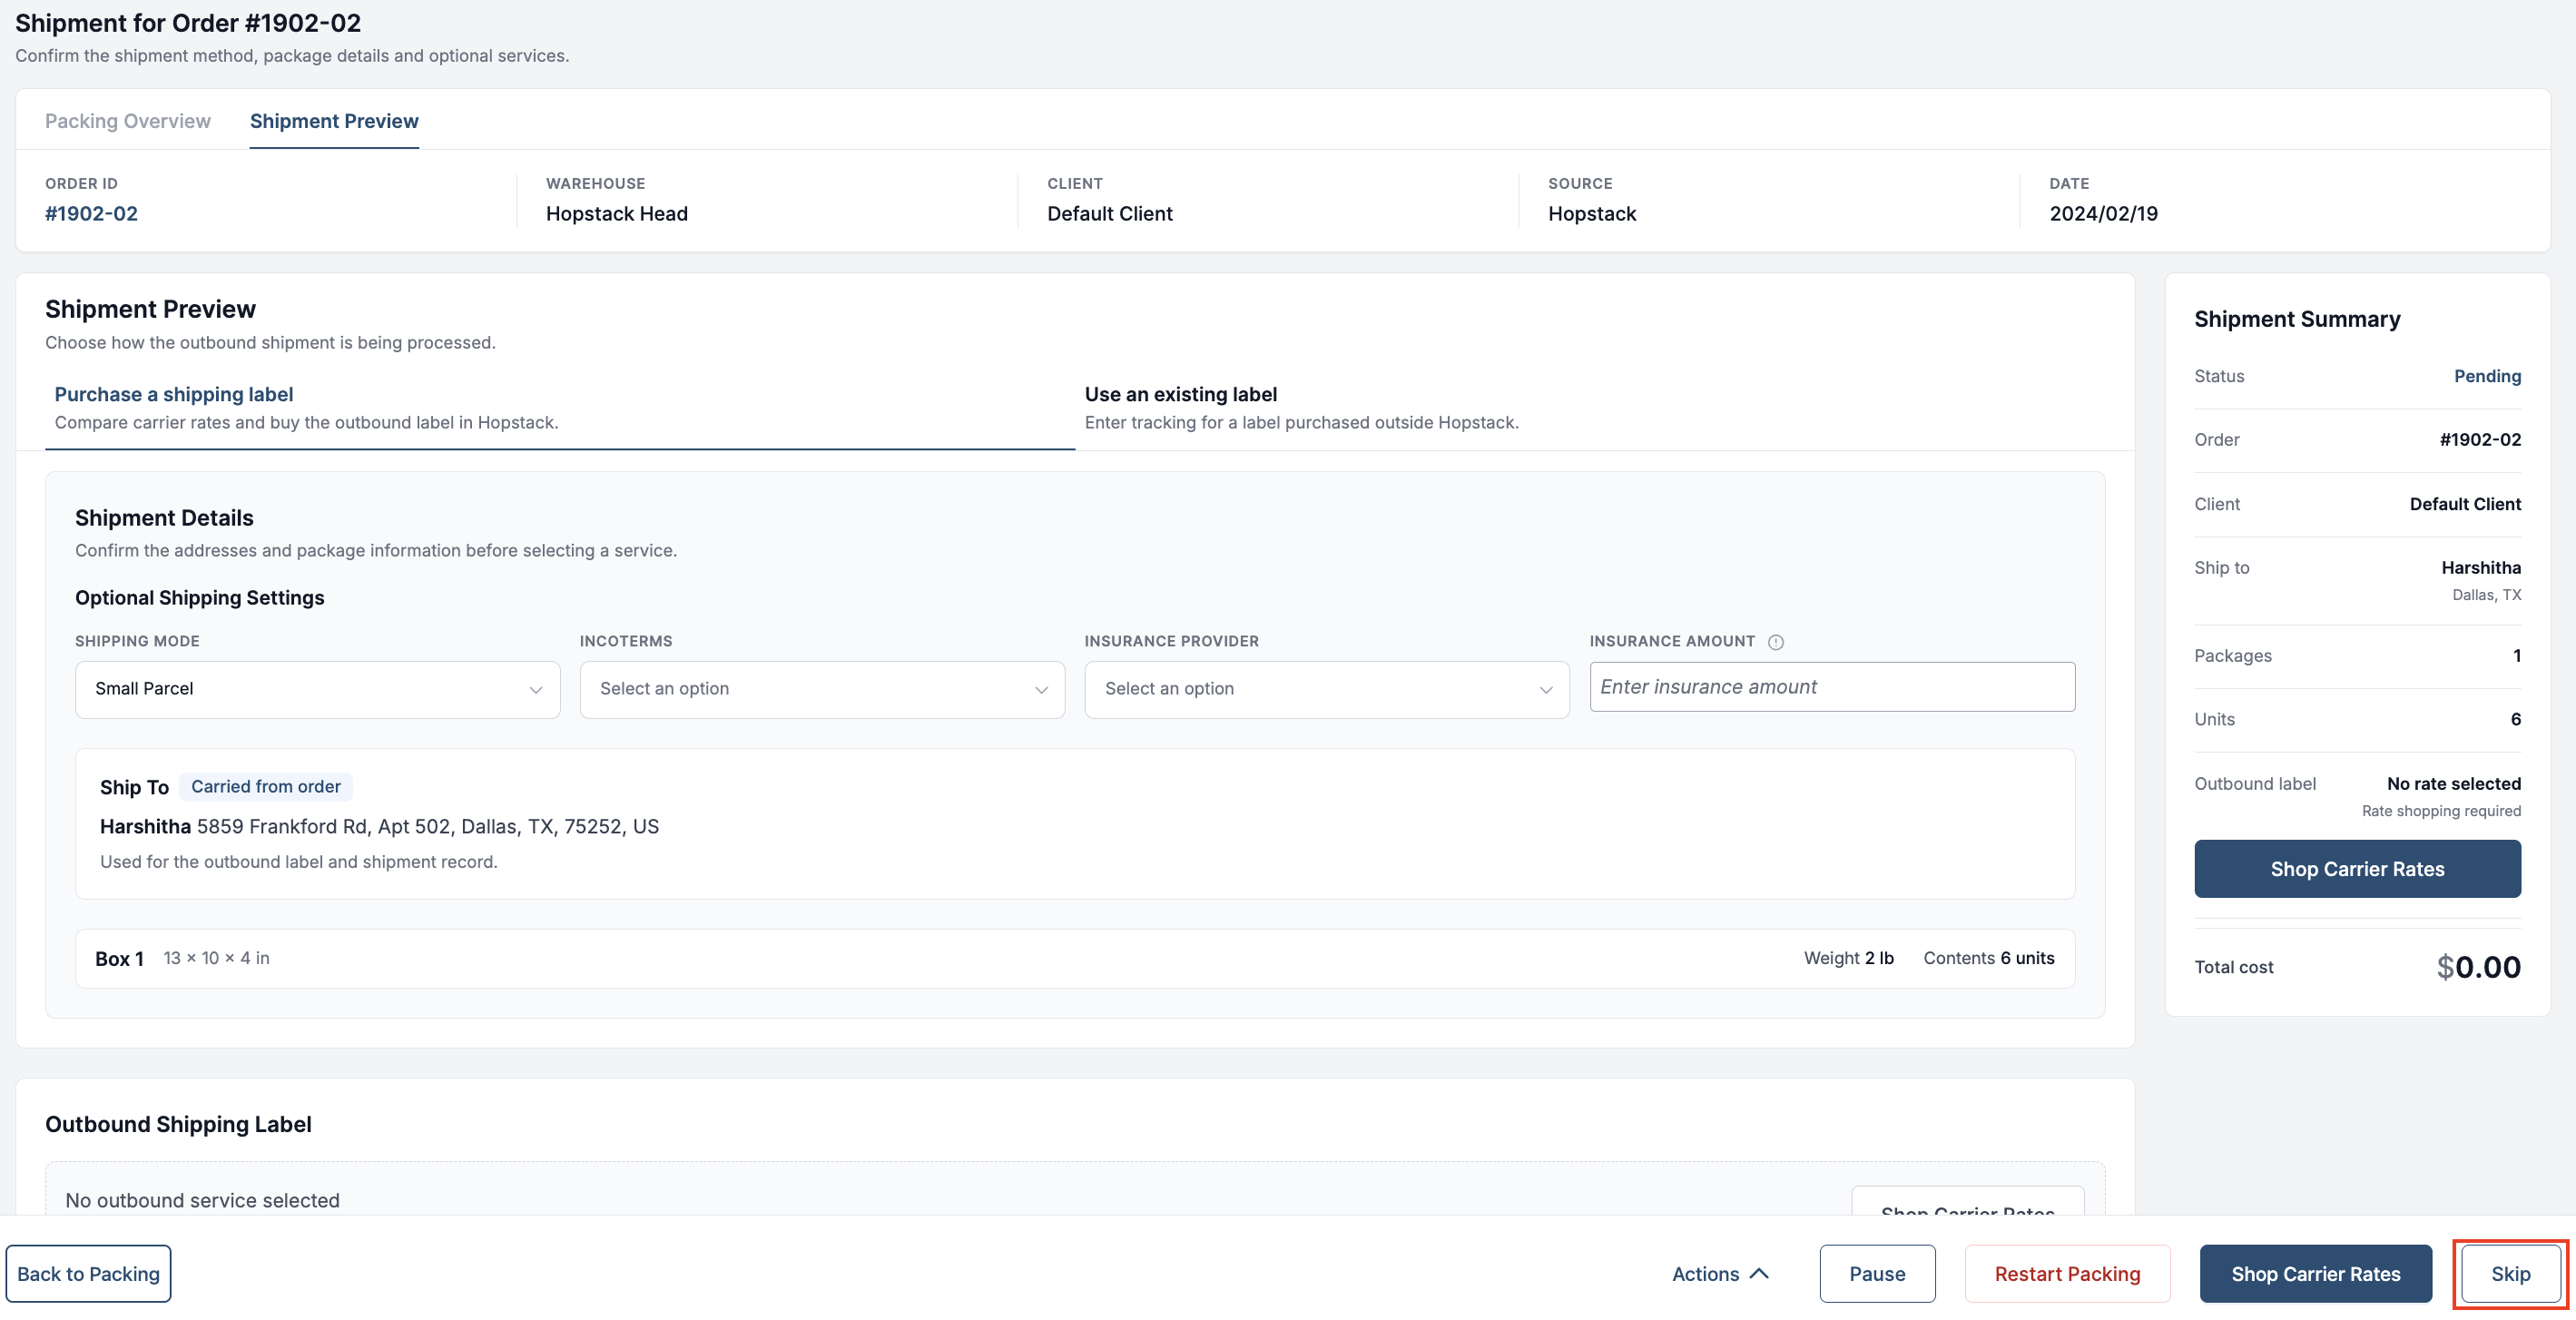
Step 1: Click on Skip button
Click on “Skip button”in the shipment preview screen.
Step 2: Confirm Skip and Pack
Click on “Yes, I confirm”. This completes the packing flow and marks the order packing complete.