The Prep + Pack functionality in Hopstack allows you to handle both individual and bundled products efficiently, including prep instructions and FNSKU label management — all directly from the packing screen.
This new workflow eliminates the need to prep items separately in a different step. You can now handle prepping and packing in one place, making the process faster and more seamless.
Note: On FNSKU labels, the field previously labeled "Best by" has been changed to "Exp Date" to match standard industry terminology and reduce confusion during FBA prep workflows.
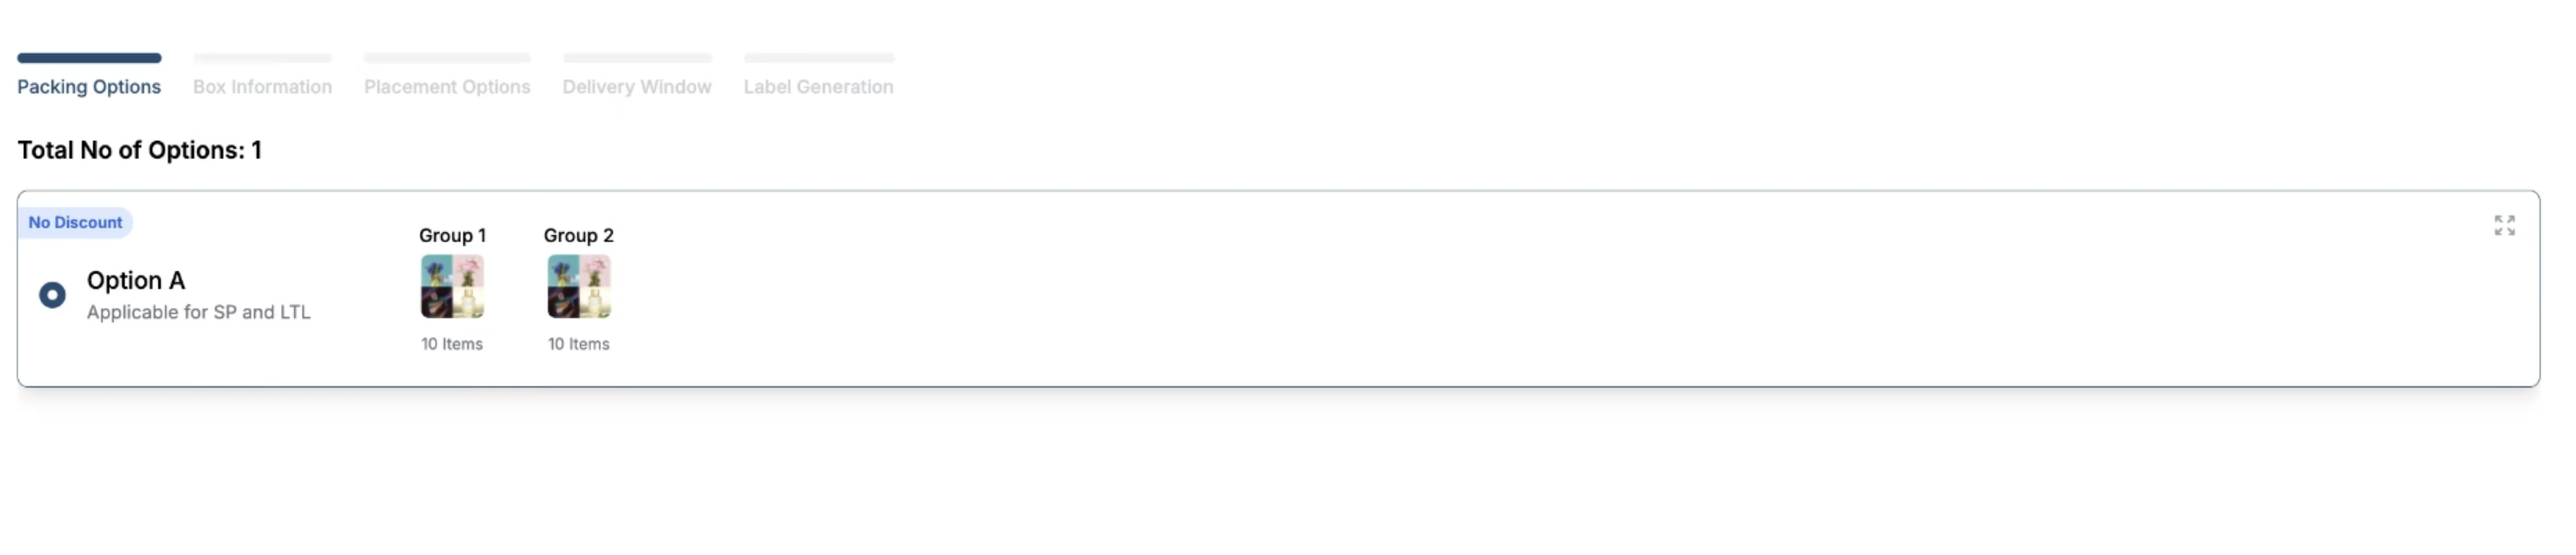
🔹 Step 1: Select Packing Options
-
Navigate to the packing screen.
-
Choose your packing method as usual.
-
Add the box details — you can create single or multiple boxes depending on your shipment.
-
Once the box is added, you'll be able to add items into it.
🔹 Step 2: Adding Items to a Box
You can add items to the box in three ways:
✅ Method 1: Manual Entry / Scanning
-
Enter the SKU or UPC code in the input field.
-
The system fetches:
-
Prep instructions
-
Option to download FNSKU labels
-
Field to adjust the quantity going into the box
-
-
Save the item into the box.
This is primarily for standalone (non-bundled) products.
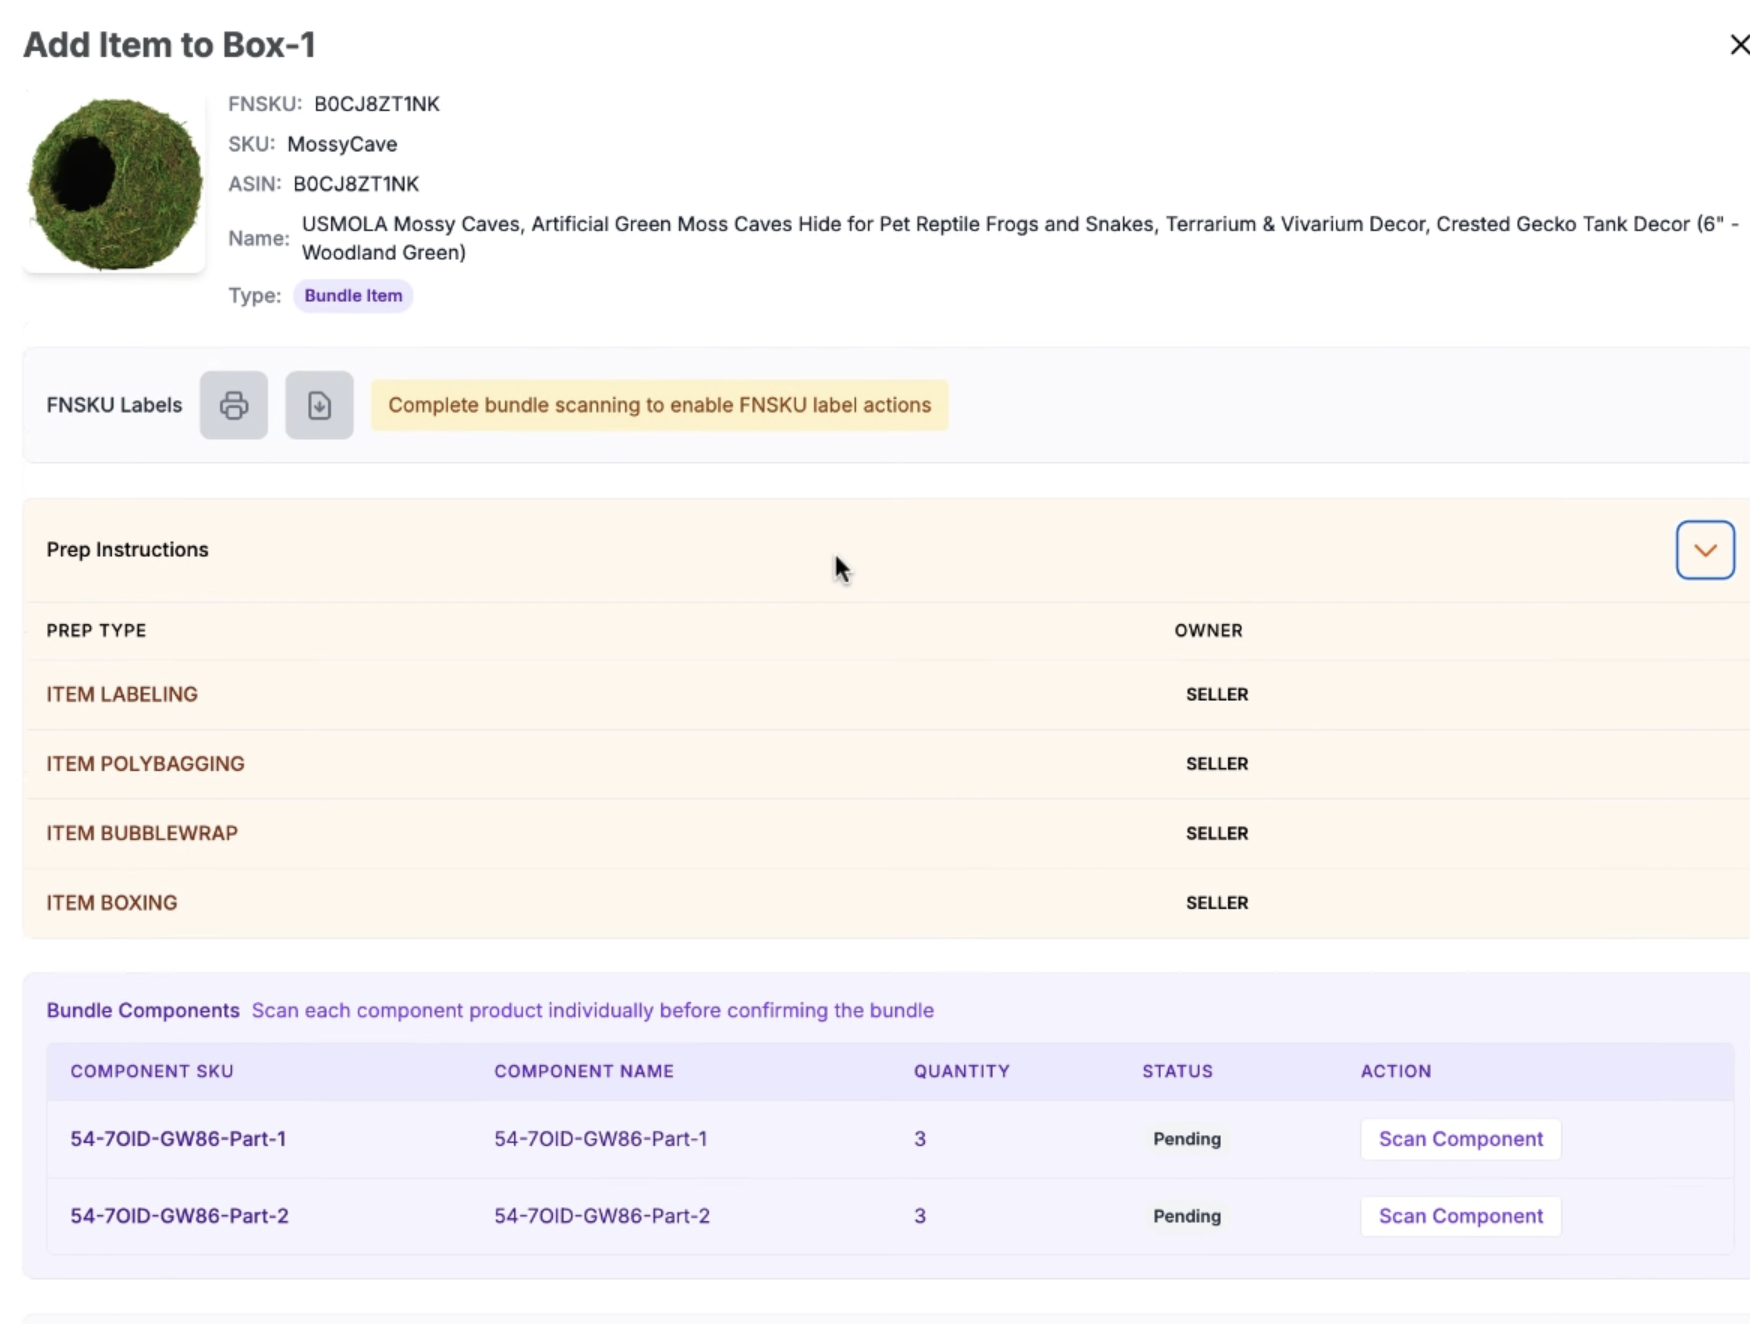
🔹 Step 3: Handling Bundled Products
When dealing with bundles, the flow adjusts to ensure all components are verified:
-
Select a group that contains bundled items.
-
The system will show:
-
Product details
-
Prep instructions
-
Option to download FNSKU (only after component verification)
-
🧩 Bundle Workflow:
-
The system prompts you to scan each component of the bundle.
-
You must verify the required quantity per component.
-
Once components are scanned and confirmed:
-
You can download or print the FNSKU labels.
-
🔹 Step 4: Additional FNSKU Label Actions
There are multiple places from where you can download/print FNSKU labels:
Option 1: While Adding Items to the Box
-
Scan the bundle component
-
Confirm the bundle
-
Print/download the FNSKU label
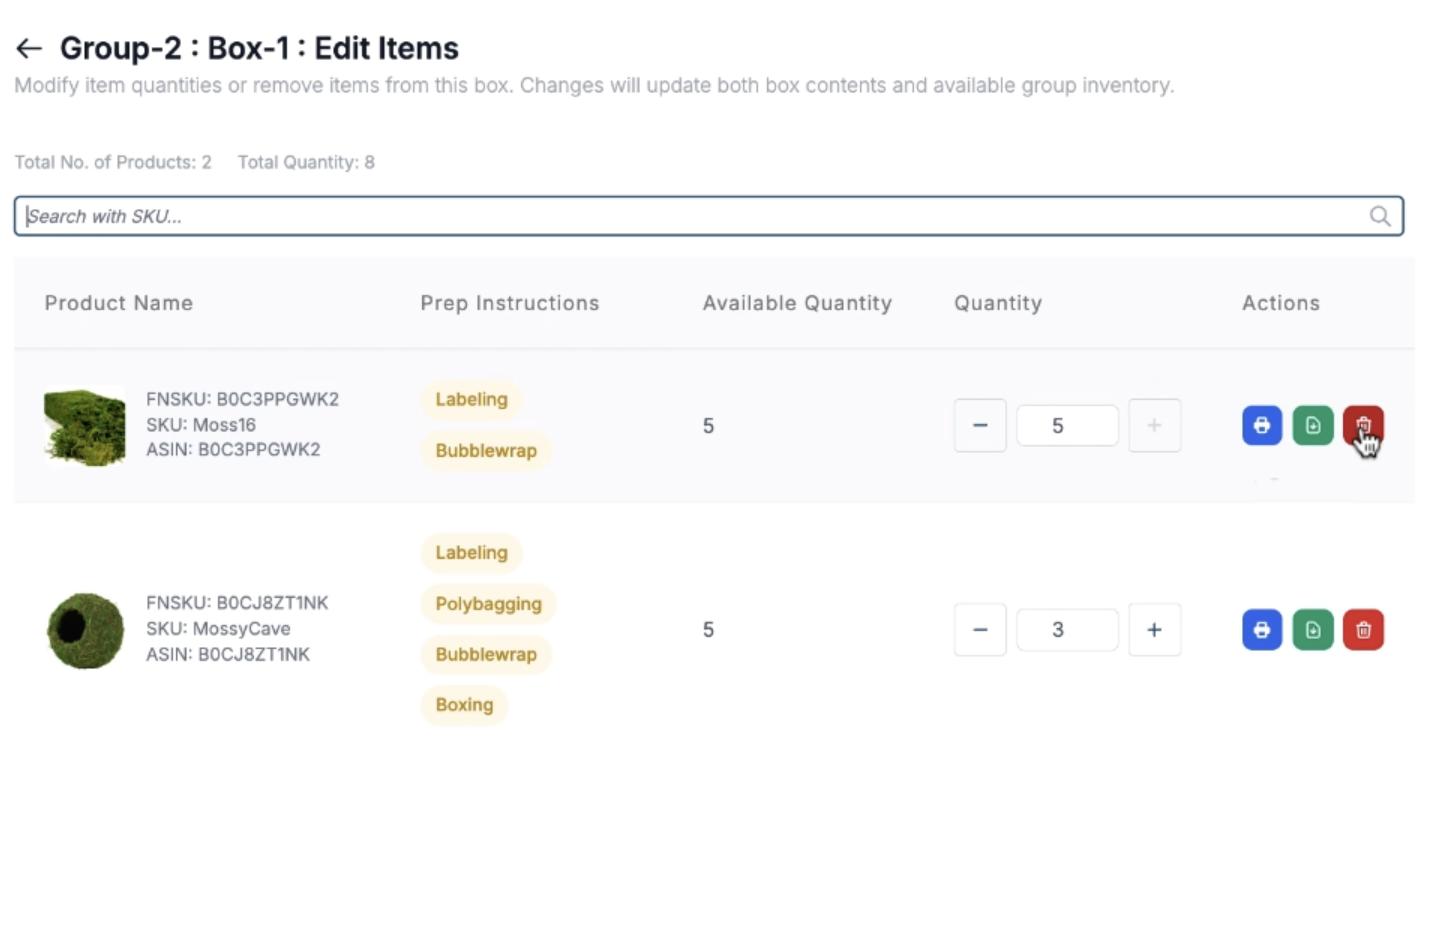
Option 2: While Editing Items Inside a Box
-
You can:
-
Download FNSKU
-
Print FNSKU
-
Delete item from the box
-
-
Prep instructions are visible at this stage as well for quick reference