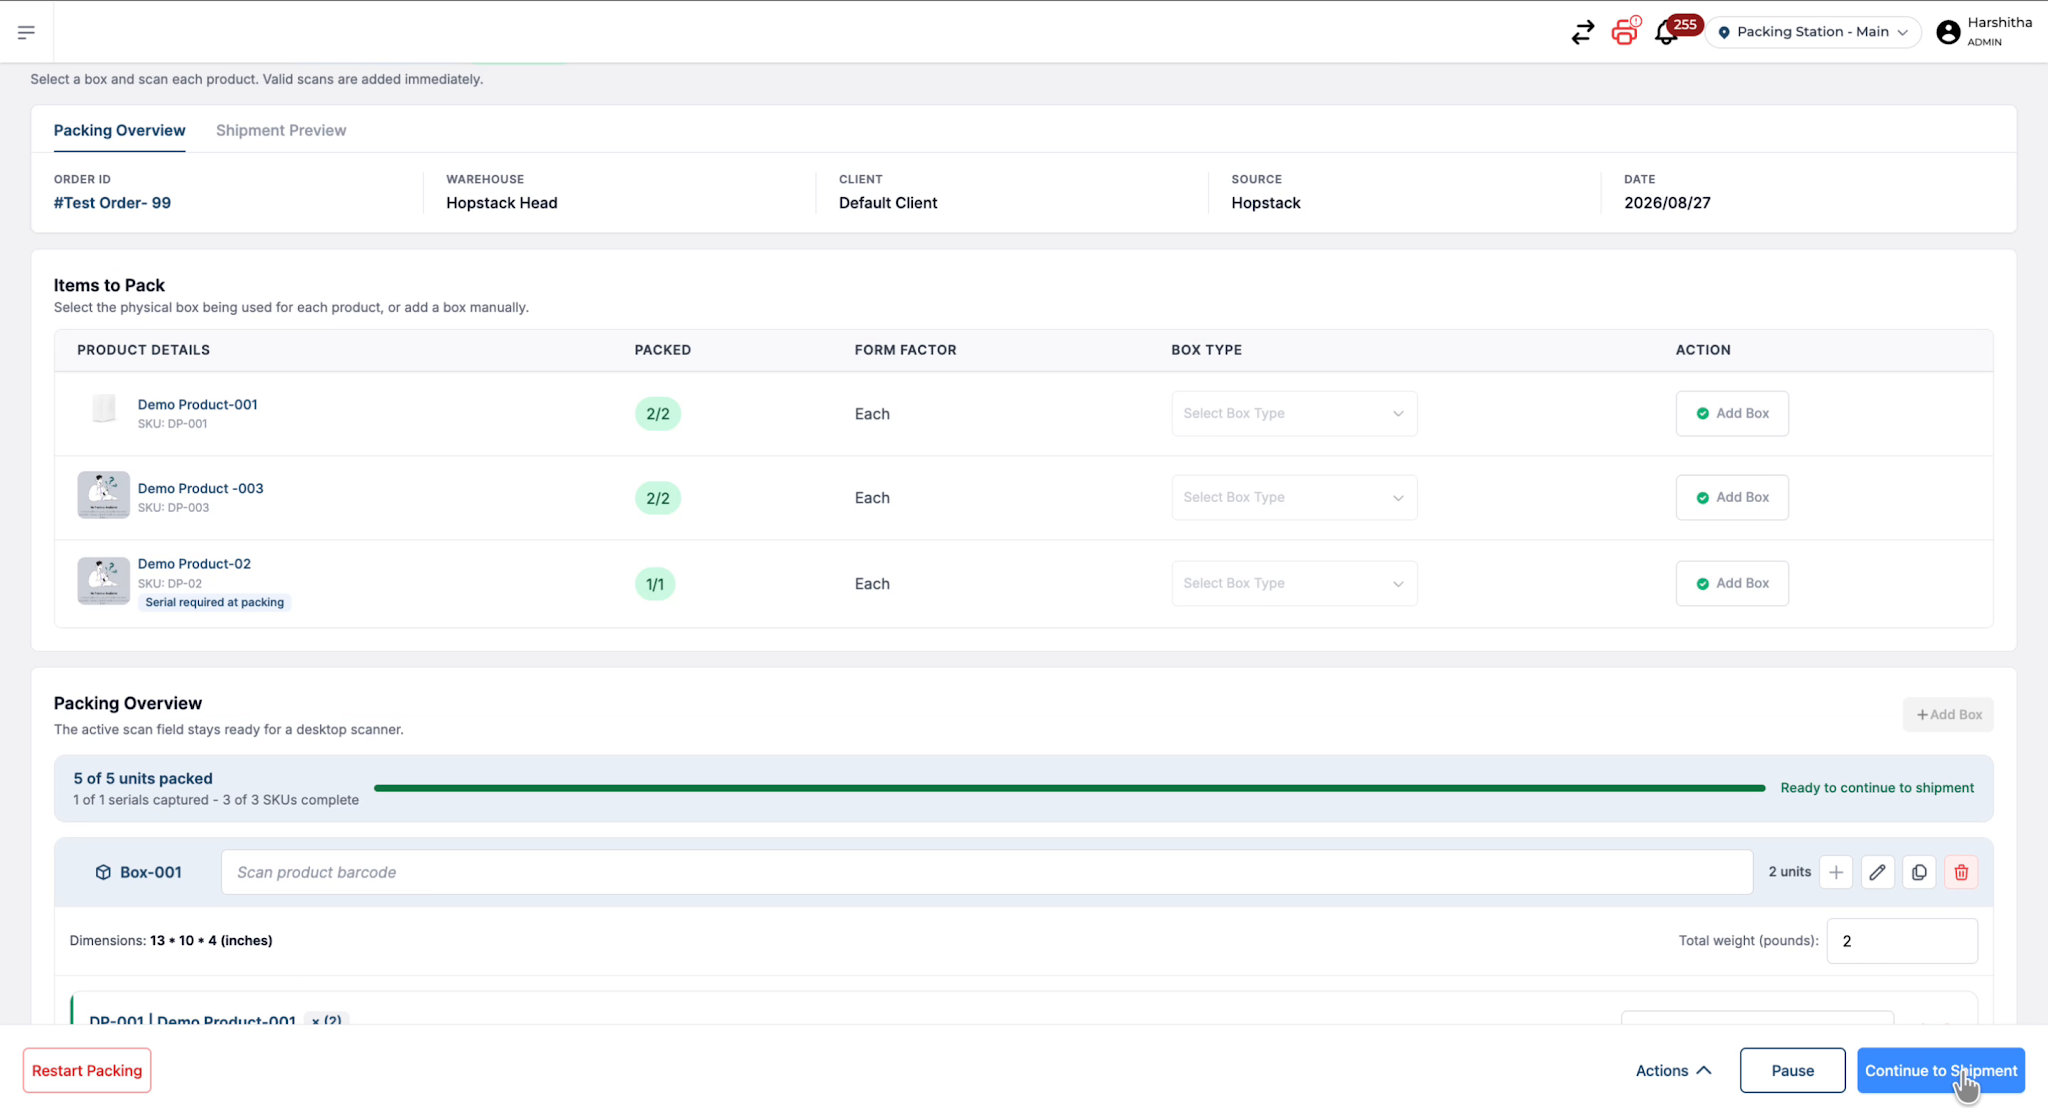
This document describes how to pack orders using the packing overview screen: adding boxes, scanning products, handling consumables and serial numbers, editing box details, and completing the packing process.
Step 1: Open the Packing Overview Screen
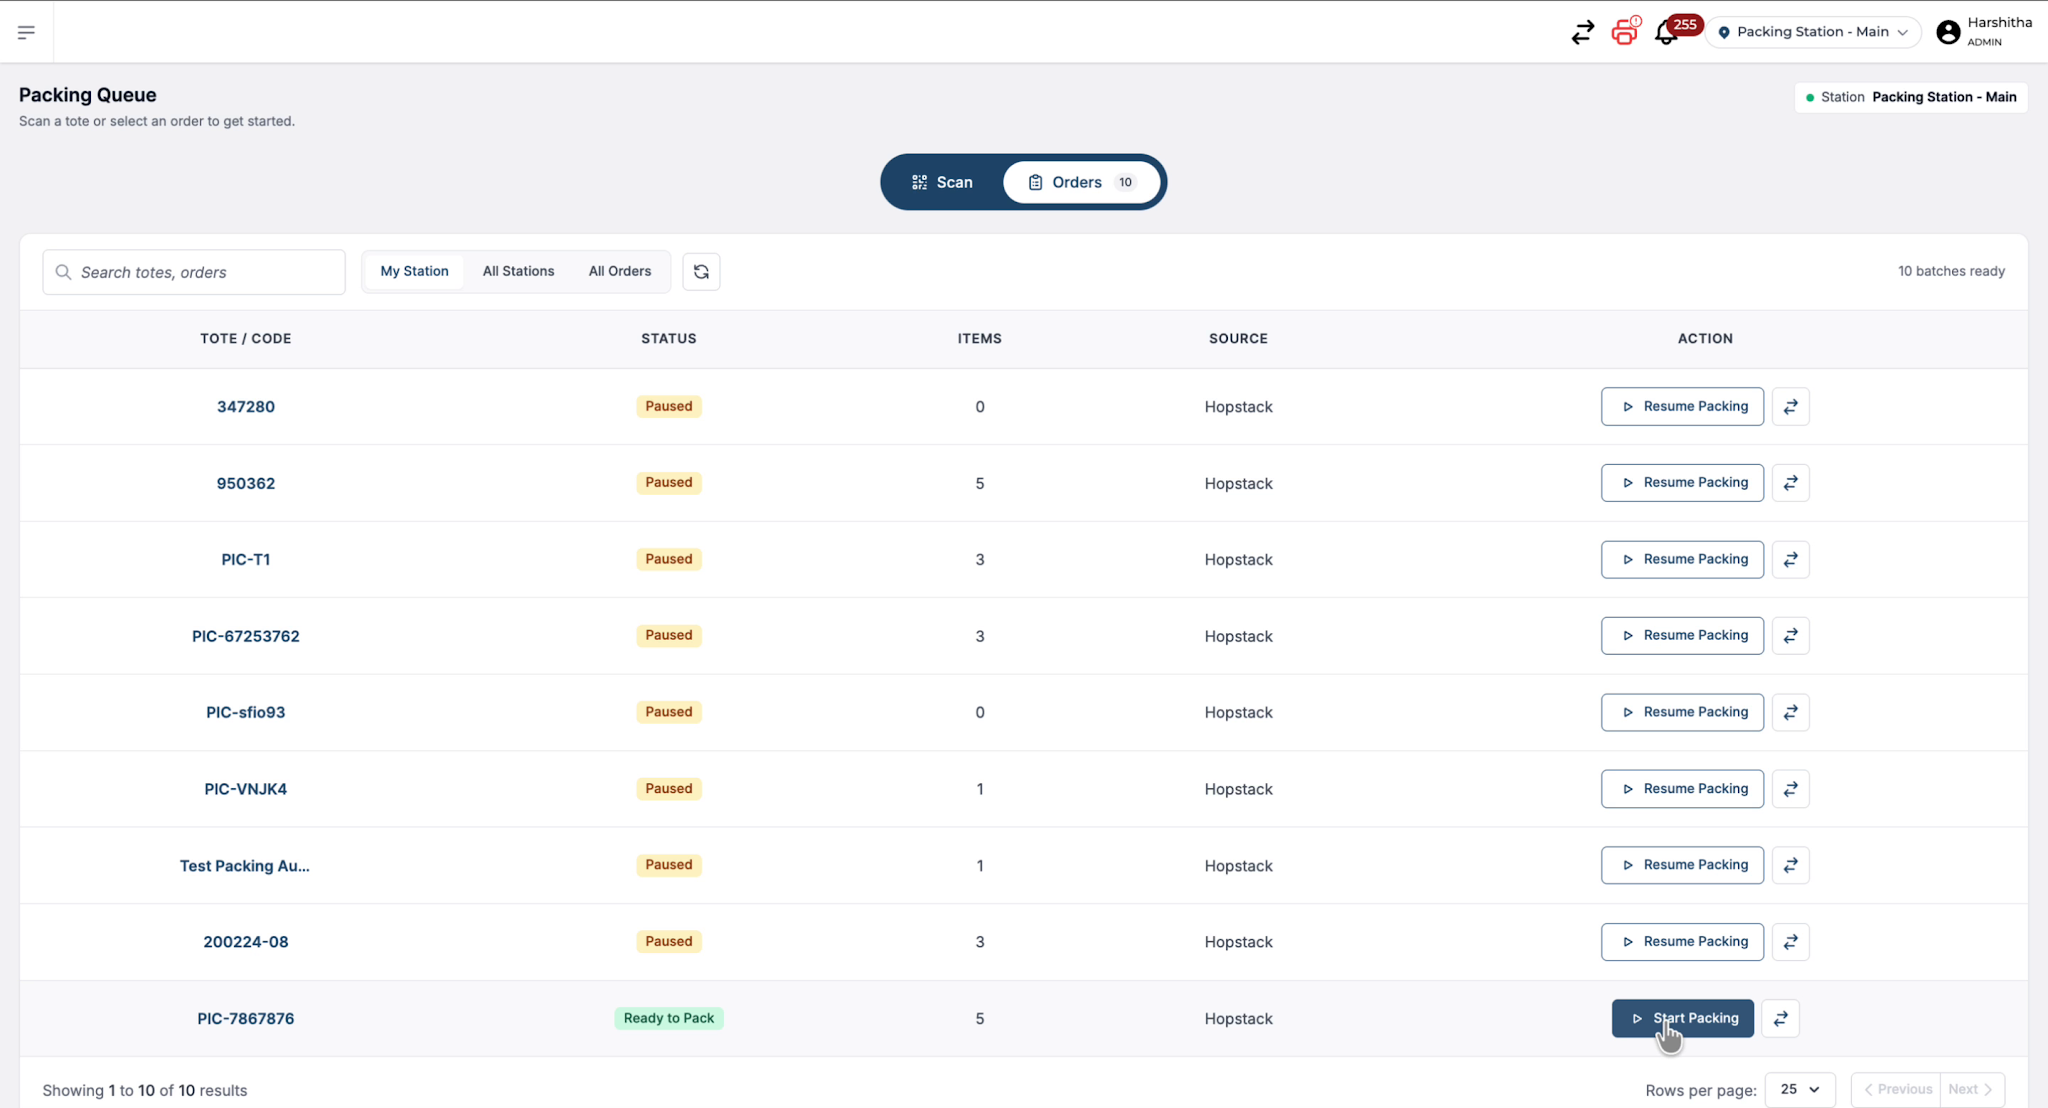
Once the user clicks on Start Packing or scans the order ID or tote ID, they land on the packing overview screen.
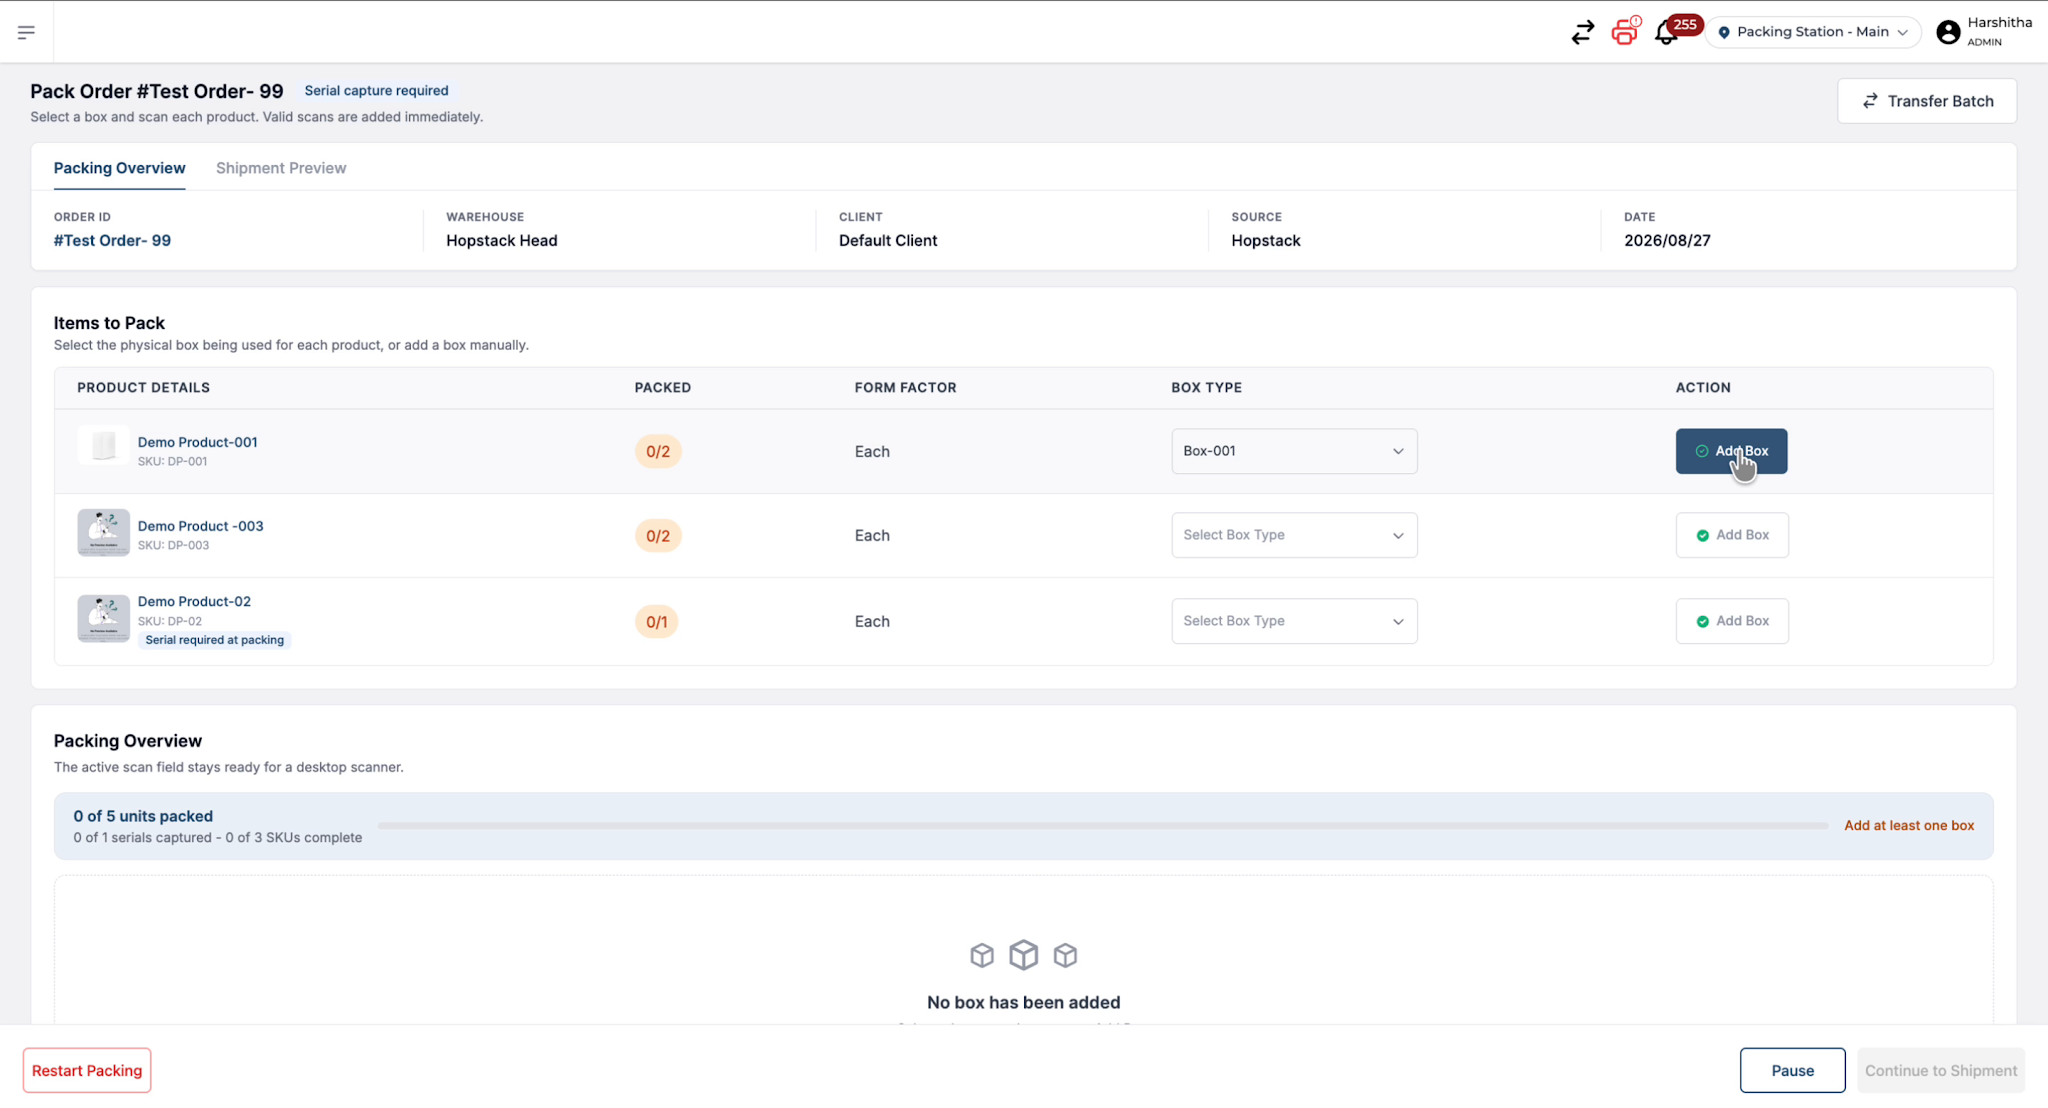
Here, they can see the order ID and, if serial capture at outbound is enabled for any of the products, a tag indicating that serial capture is required. The screen also shows key order details such as warehouse, client, source, and date, along with the list of items that need to be packed.
Step 2: Add a Box
1. Using Pre‑Associated Consumables
The first action in packing is to add a box. When the user clicks on the Box Type dropdown, they can see pre‑associated consumables that were configured for the product set in consumables management.
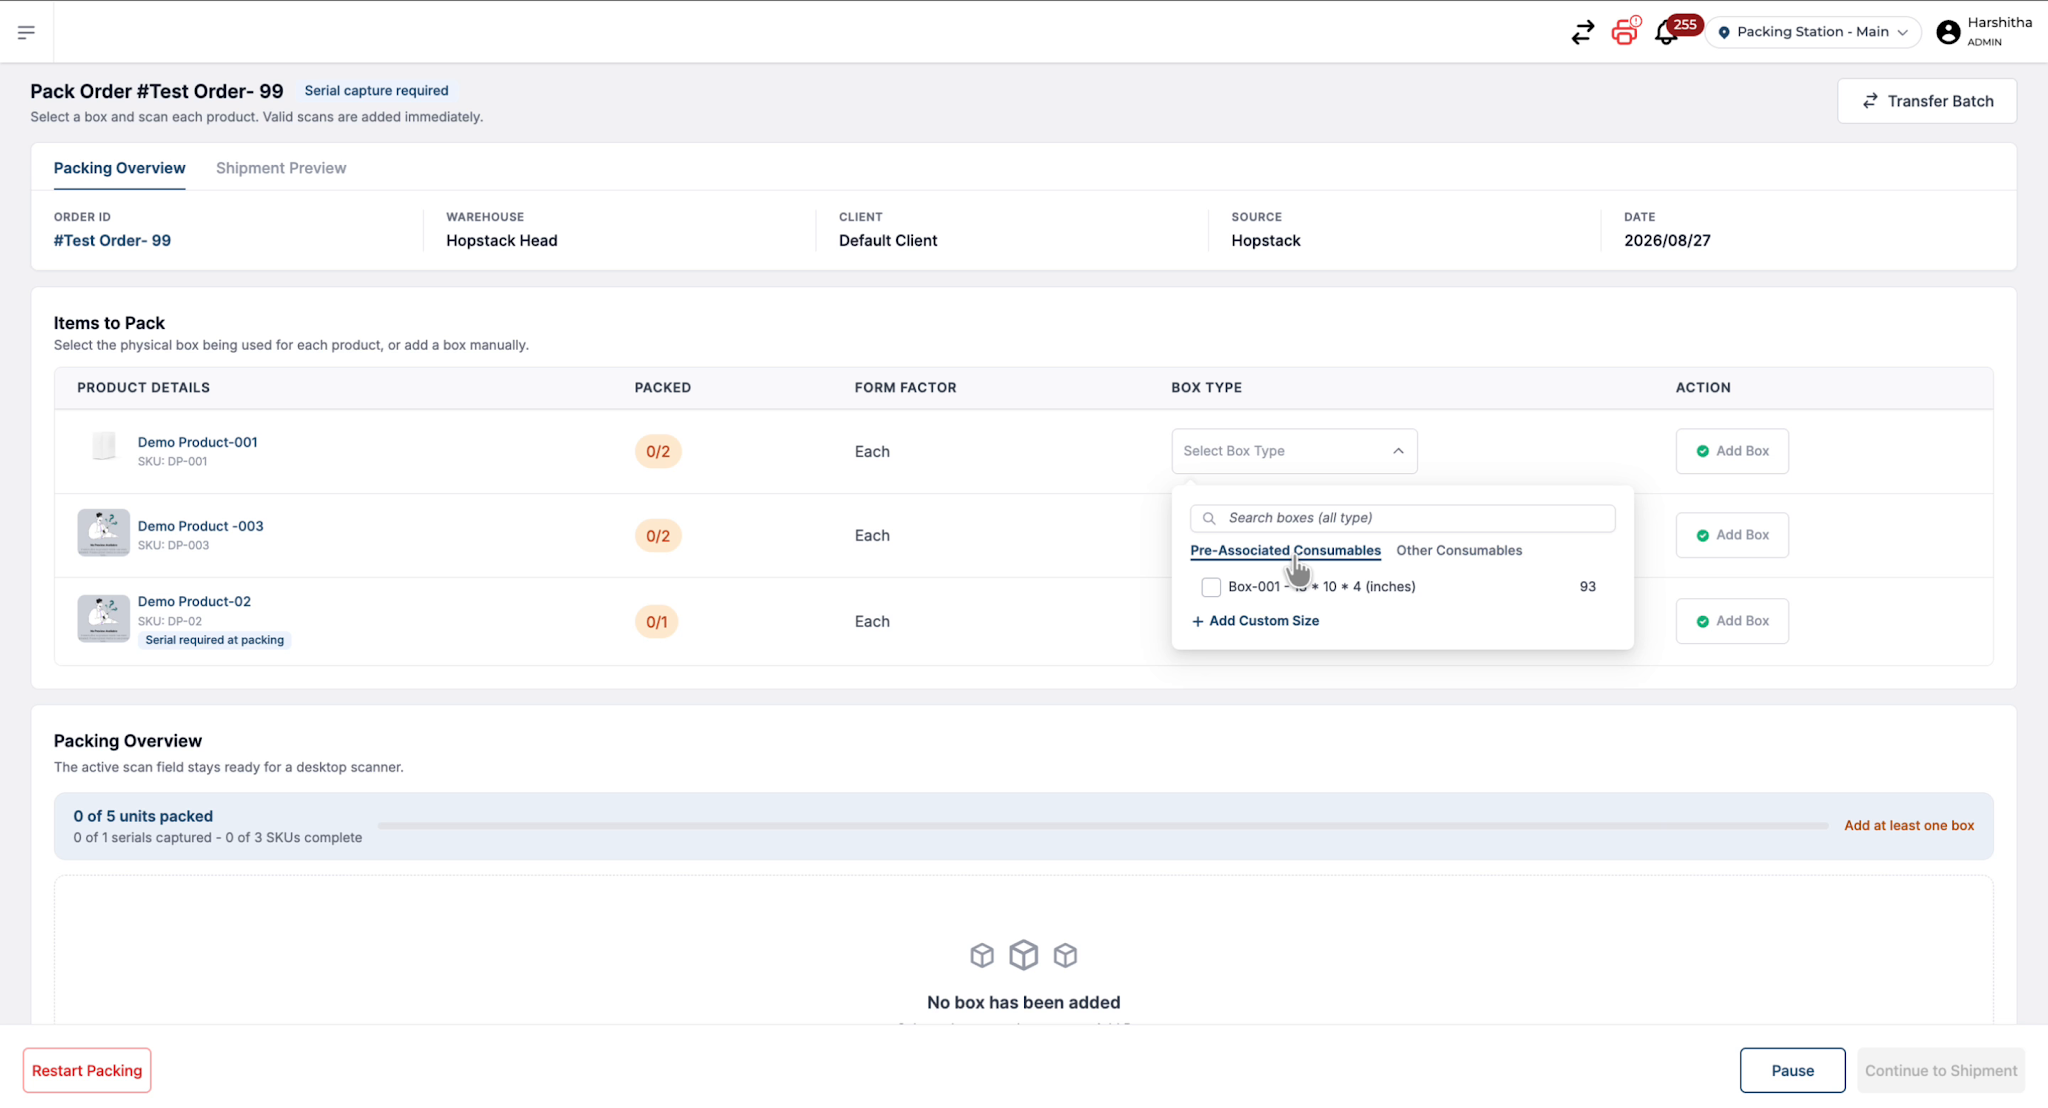
They can select the desired consumables via the checkbox and then click on Add Box to create the box for packing.
2. Handle Products Without Pre‑Associated Consumables by adding box from other consumables
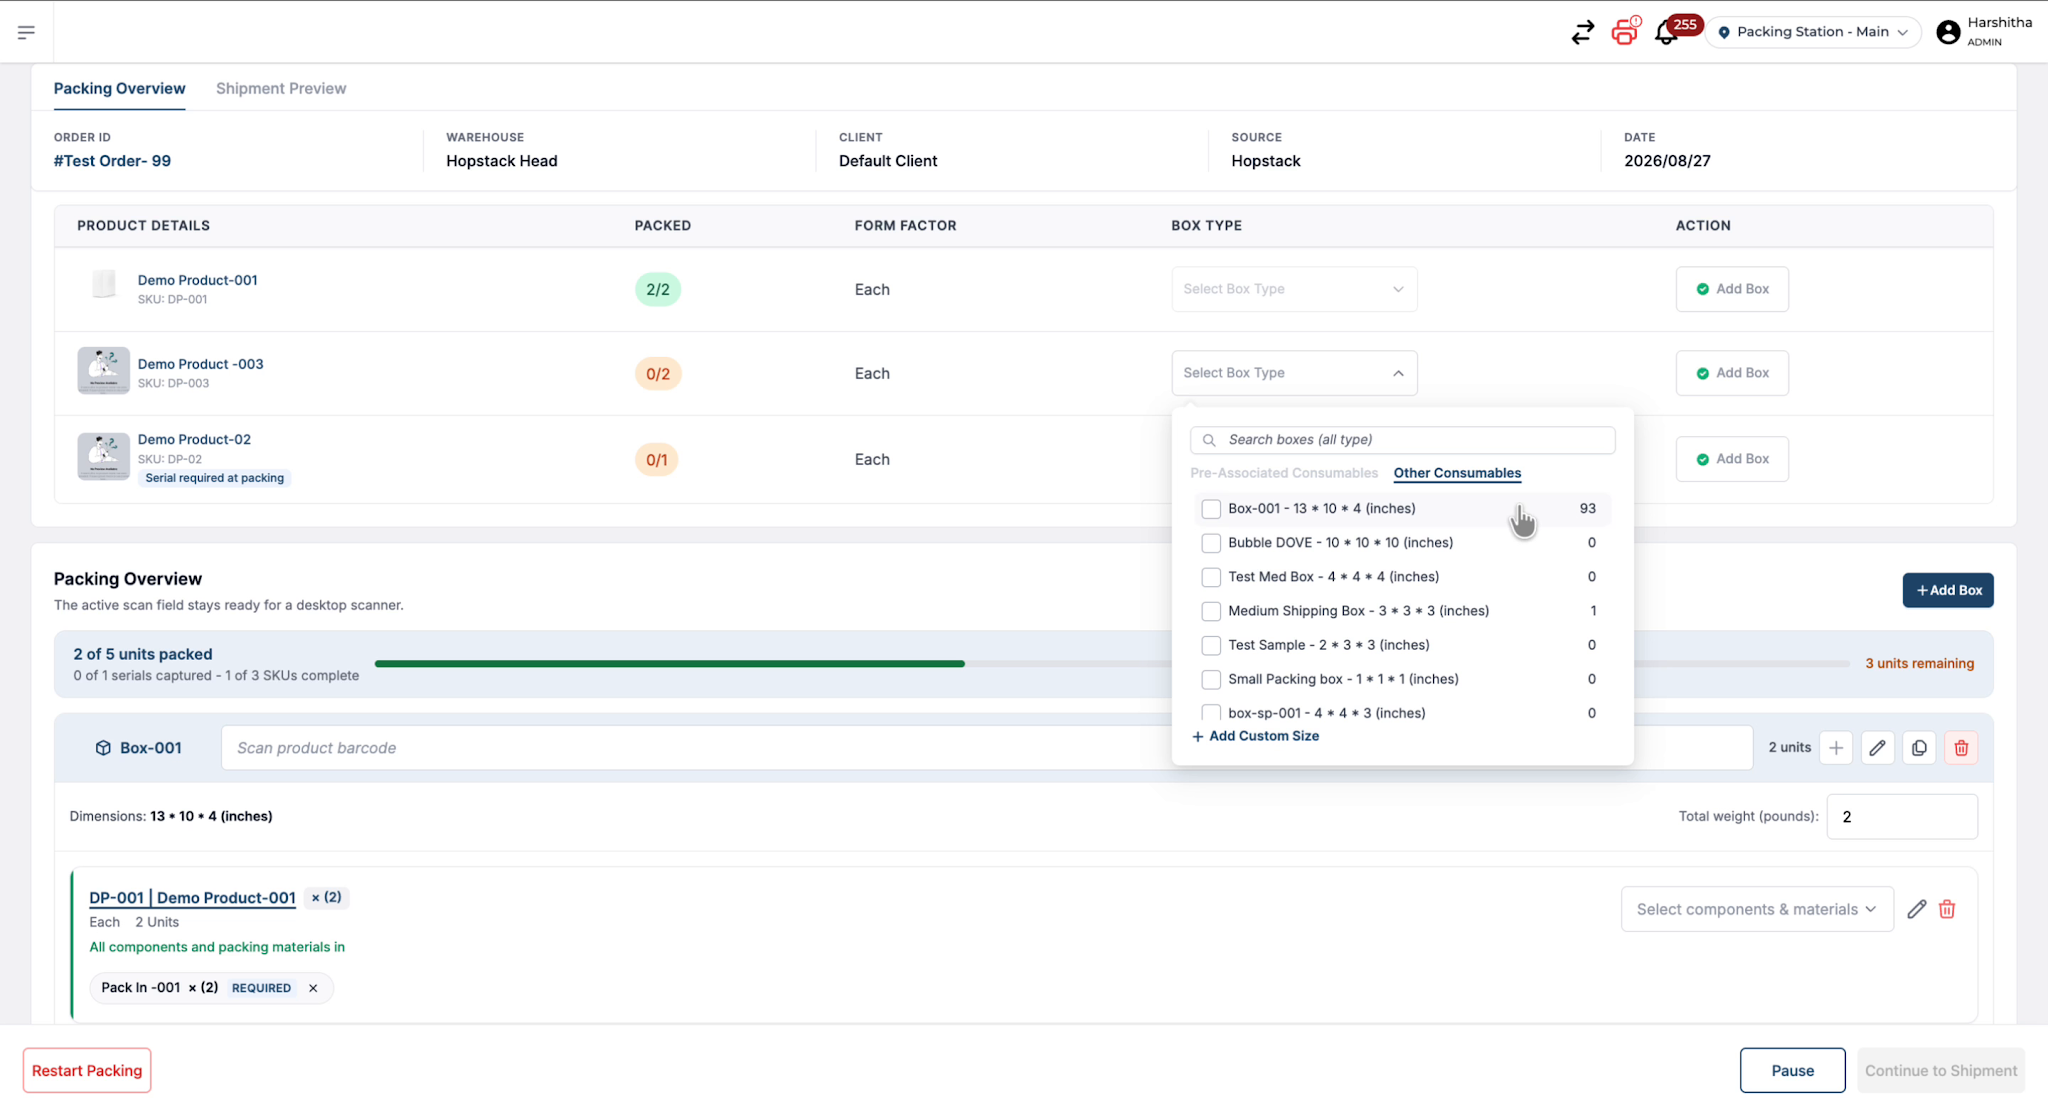
When adding a box for the next product, if there are no pre‑associated consumables for that product, the pre‑associated section appears grayed out.
In such cases, the user can select suitable consumables from the other available consumables list.
3. Add Boxes from the Overview
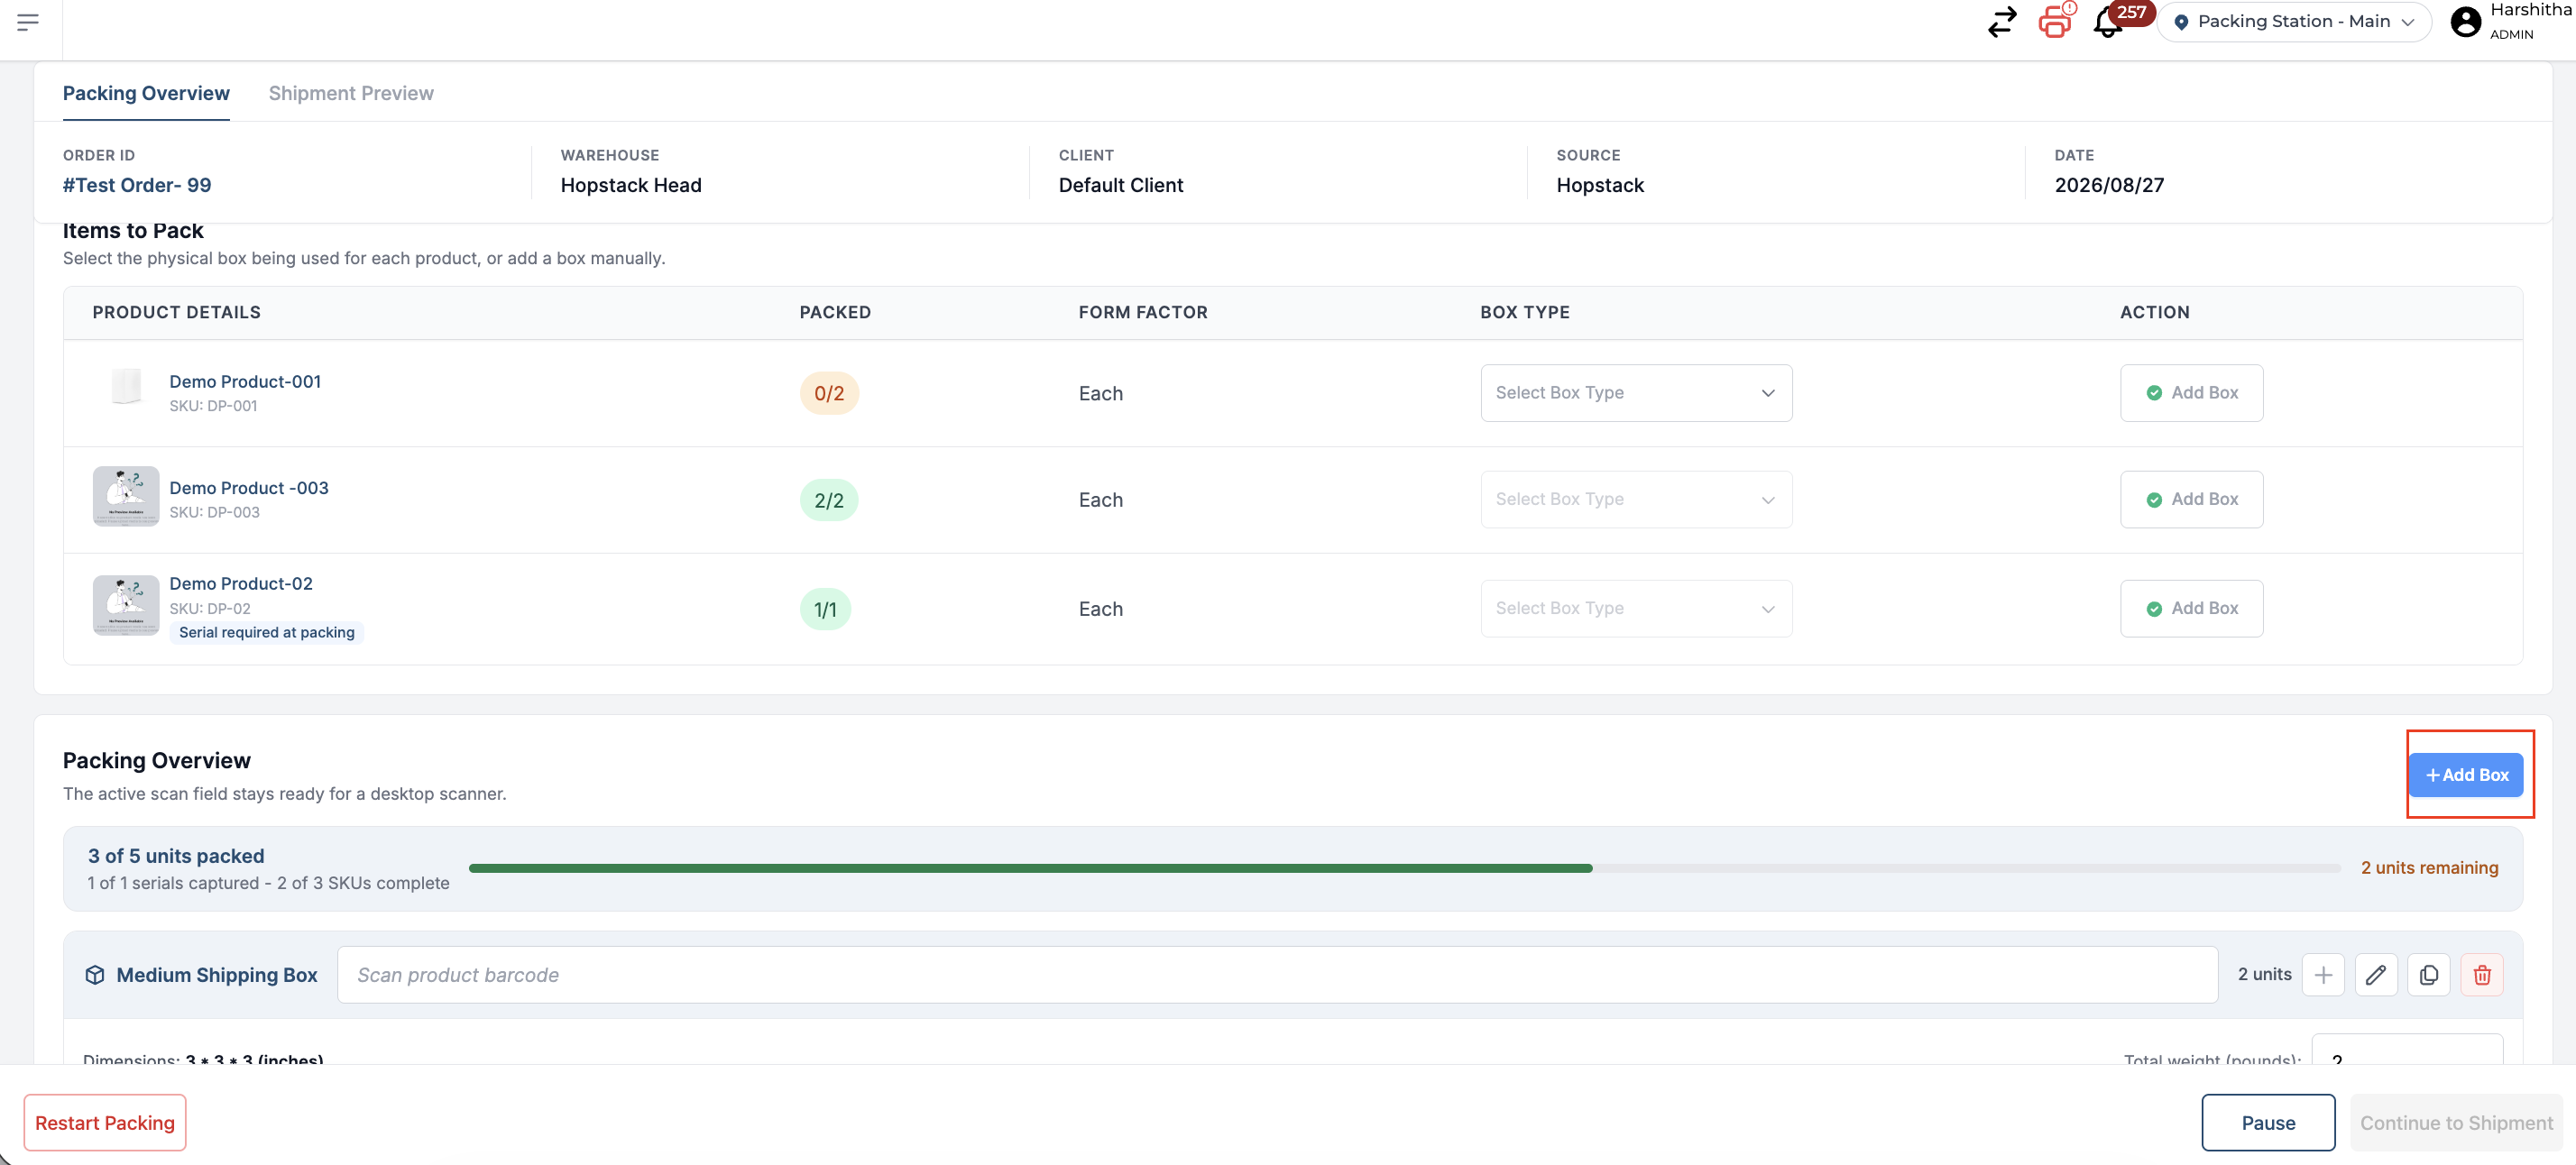
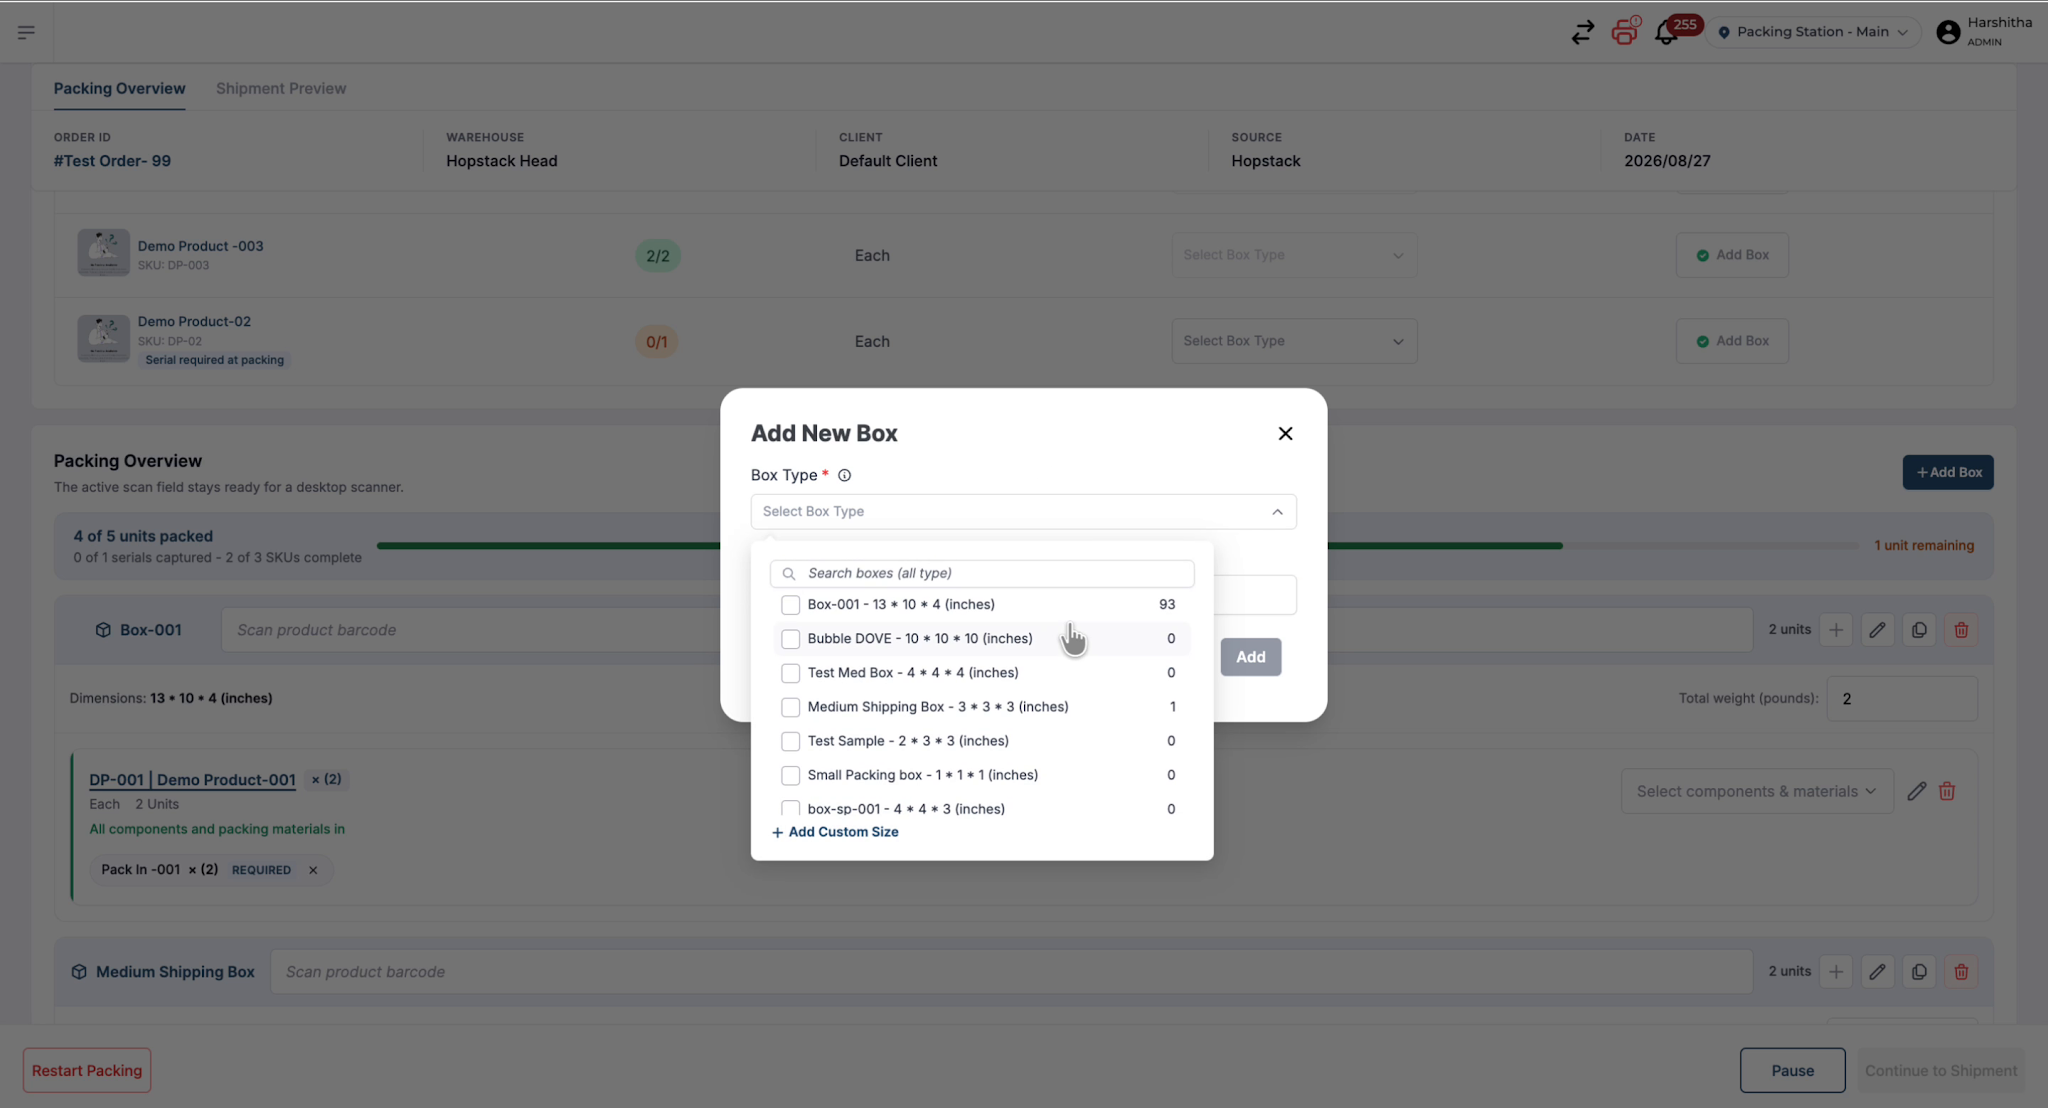
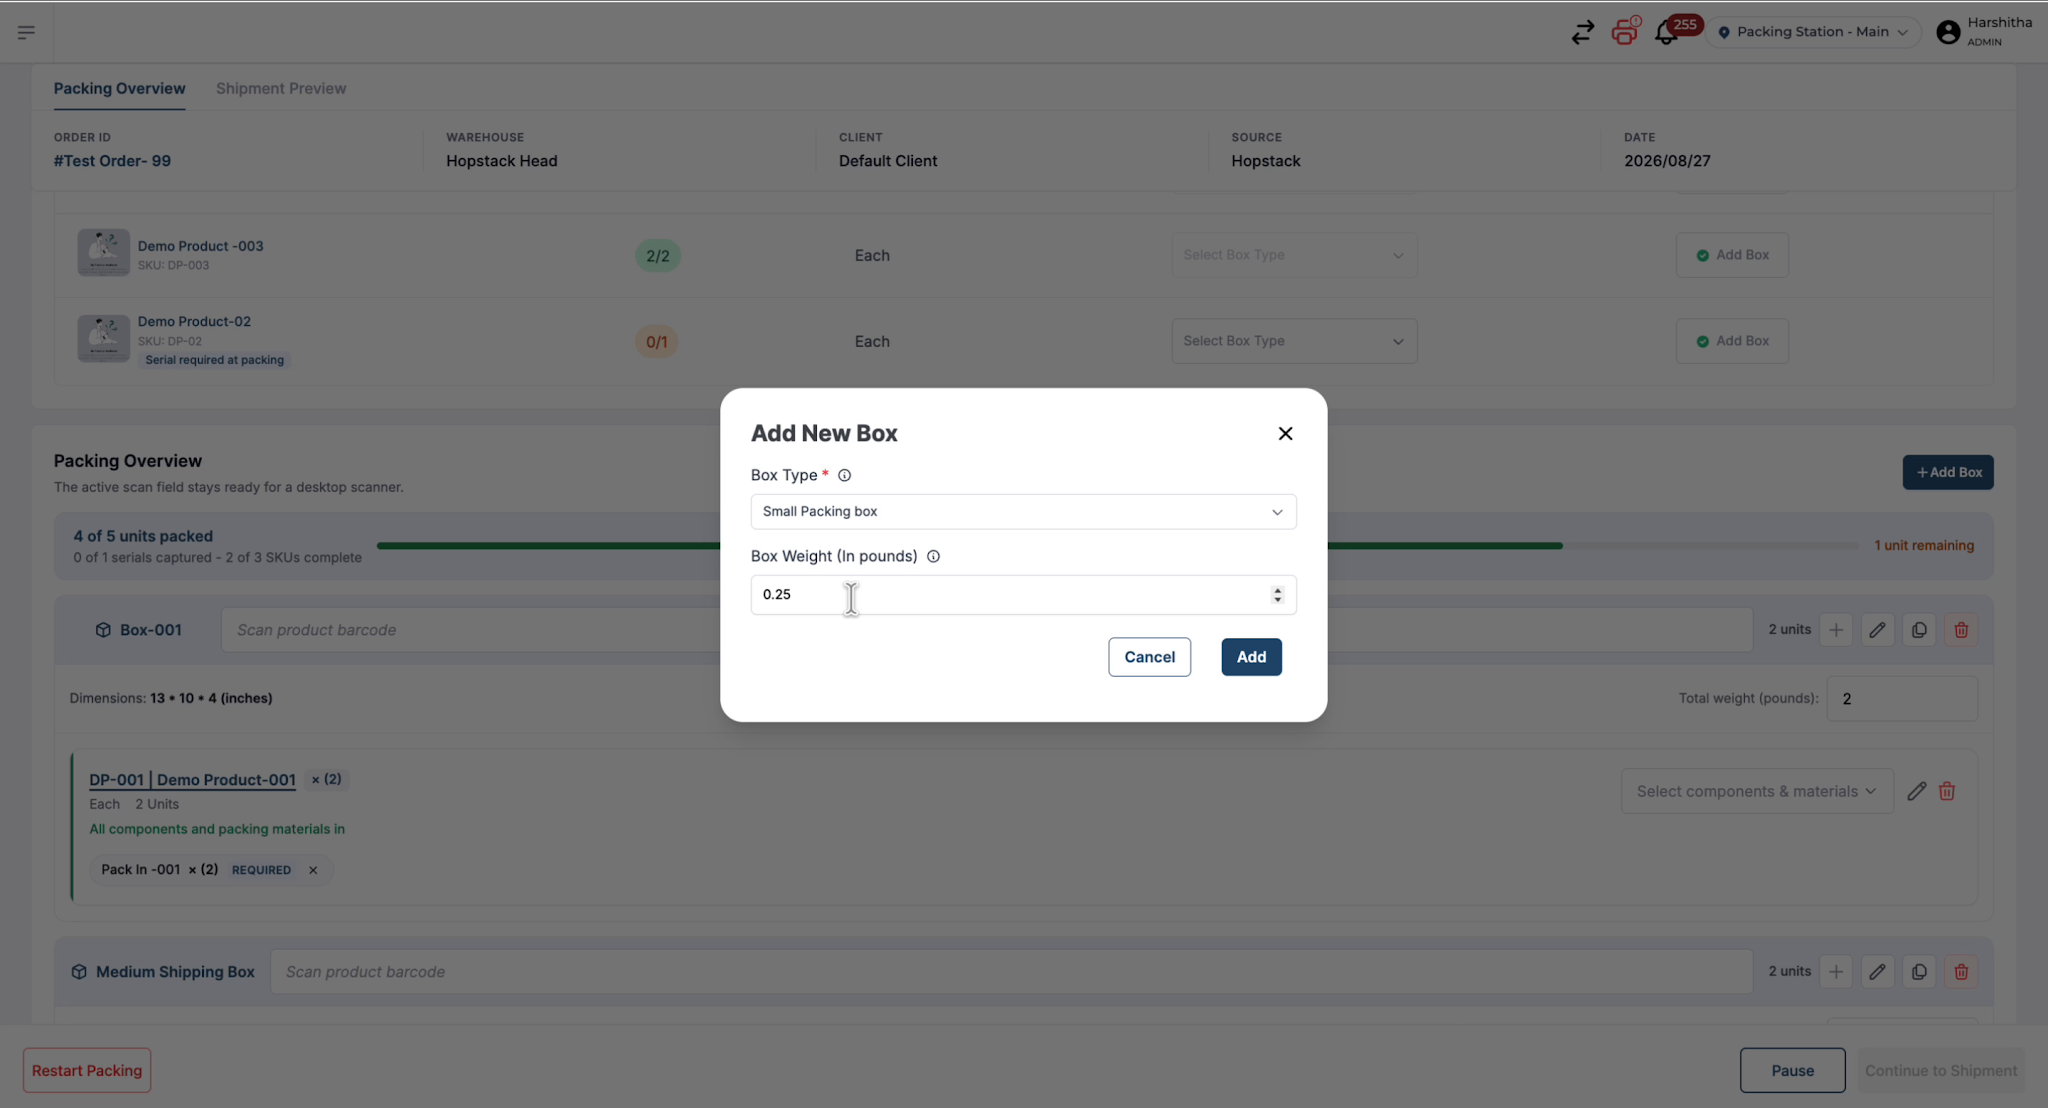
The user can also add a box directly from the overview by clicking on Add Box and then selecting the desired box type.
Step 3: Scan Products into the Box and Confirm Quantities
After adding the box, the next step is to scan products into the box. Once a product is scanned, the system prompts the user to input the number of units that should go into the box and then click on Confirm.
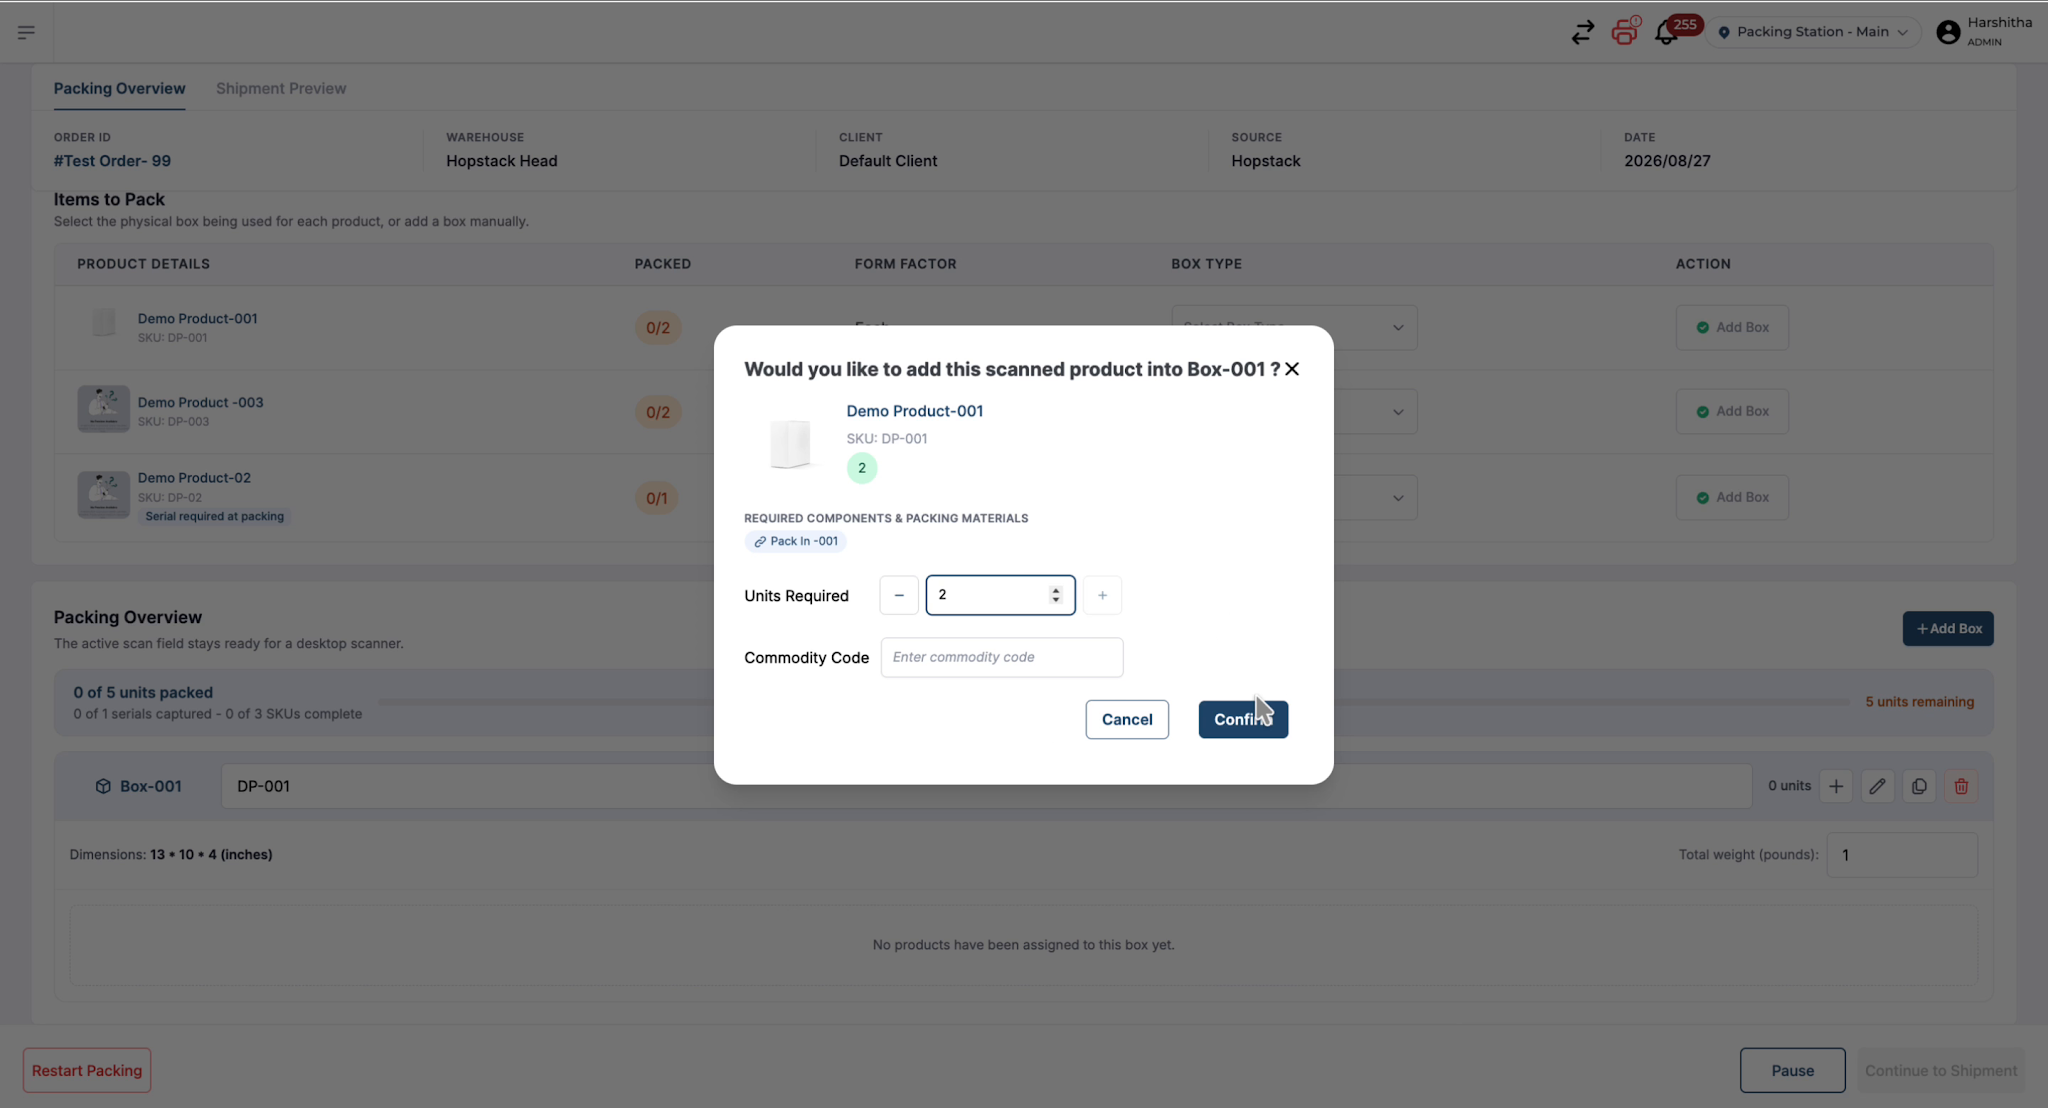
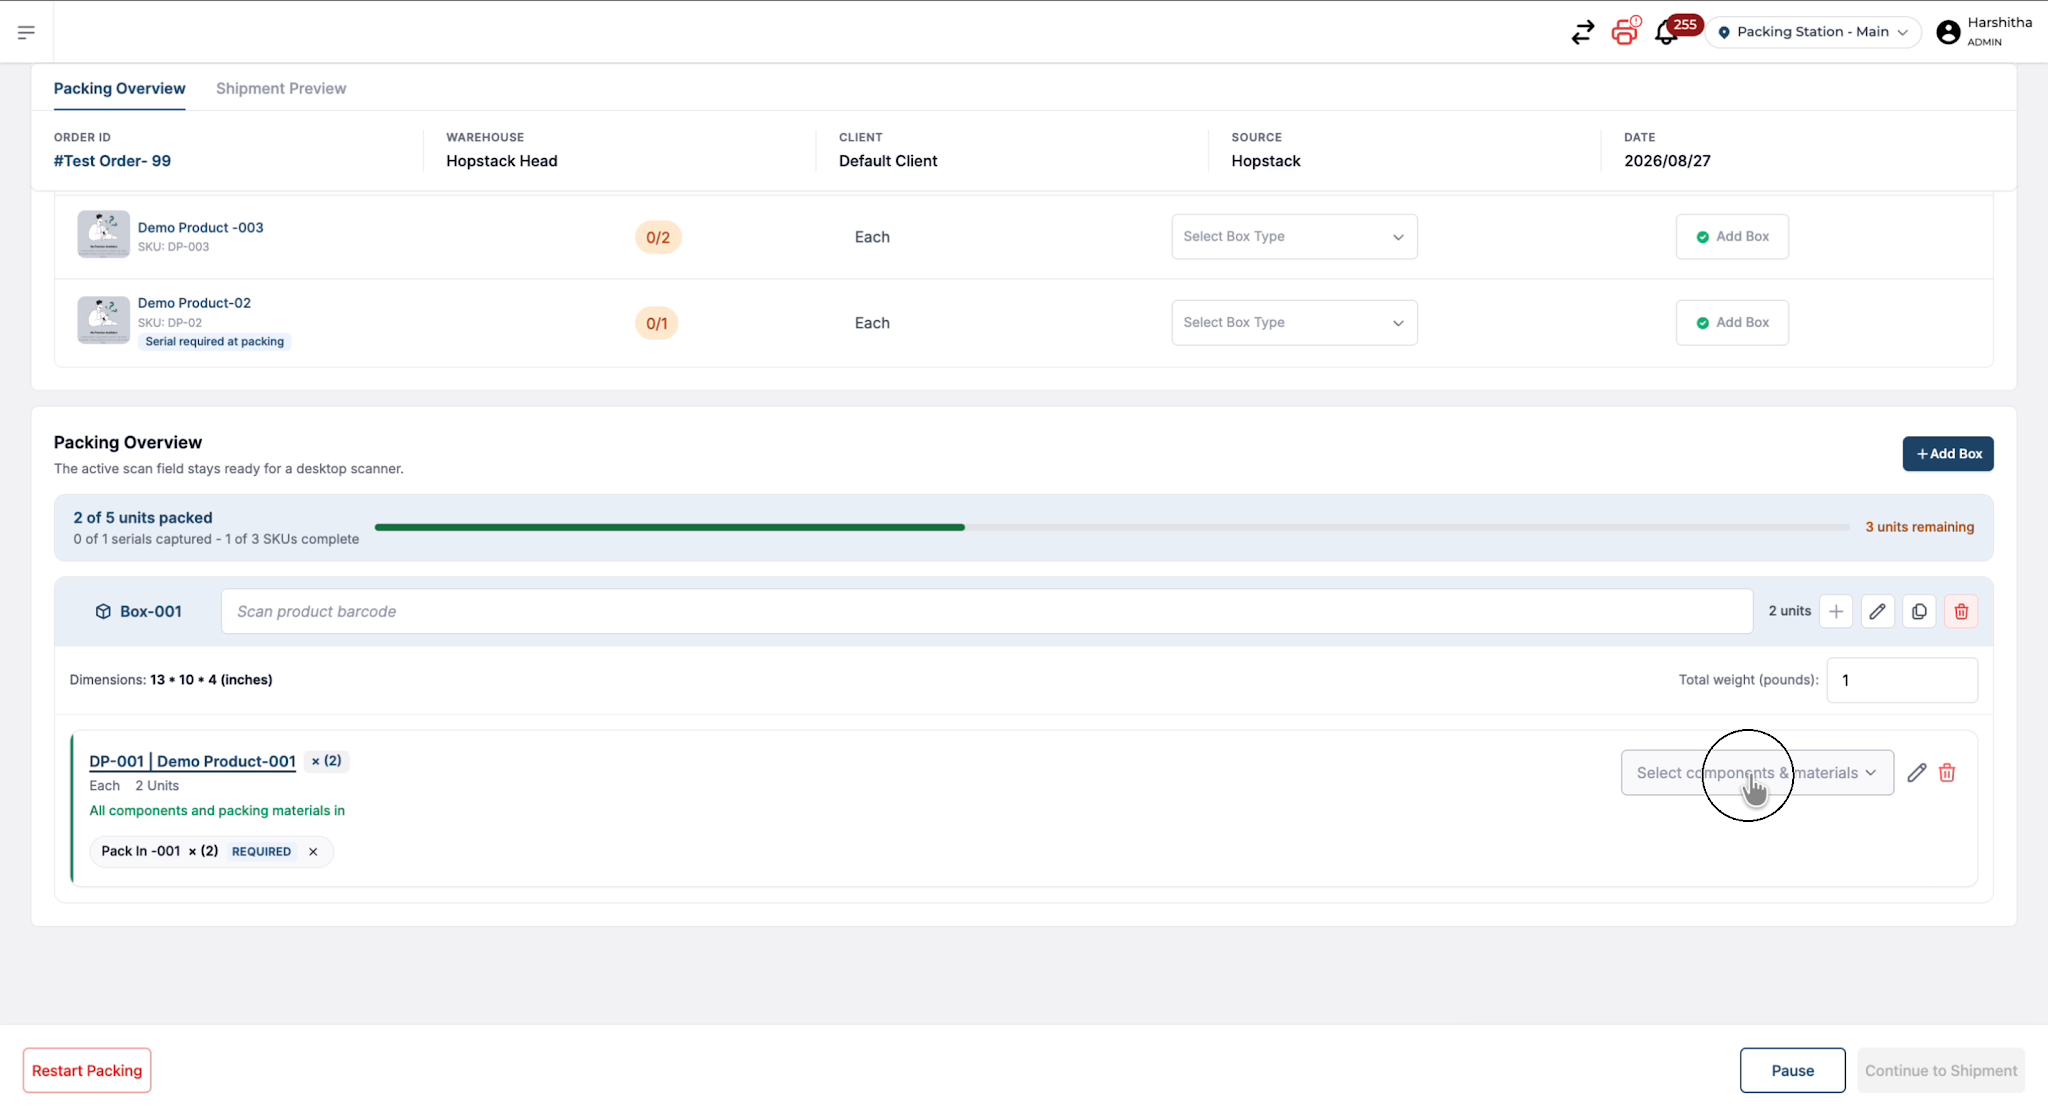
The product is added into the box with the specified quantity. If the product has a required packing material or component associated with it, that item is automatically populated so the packer does not miss it. The quantity of that material matches the number of units added.
Note: Each time a box is added, the scanner focus automatically moves to the active box, so the packer does not need to manually place the cursor or select the box; it is ready for scanning.
Step 4: Add or Adjust Packing Materials
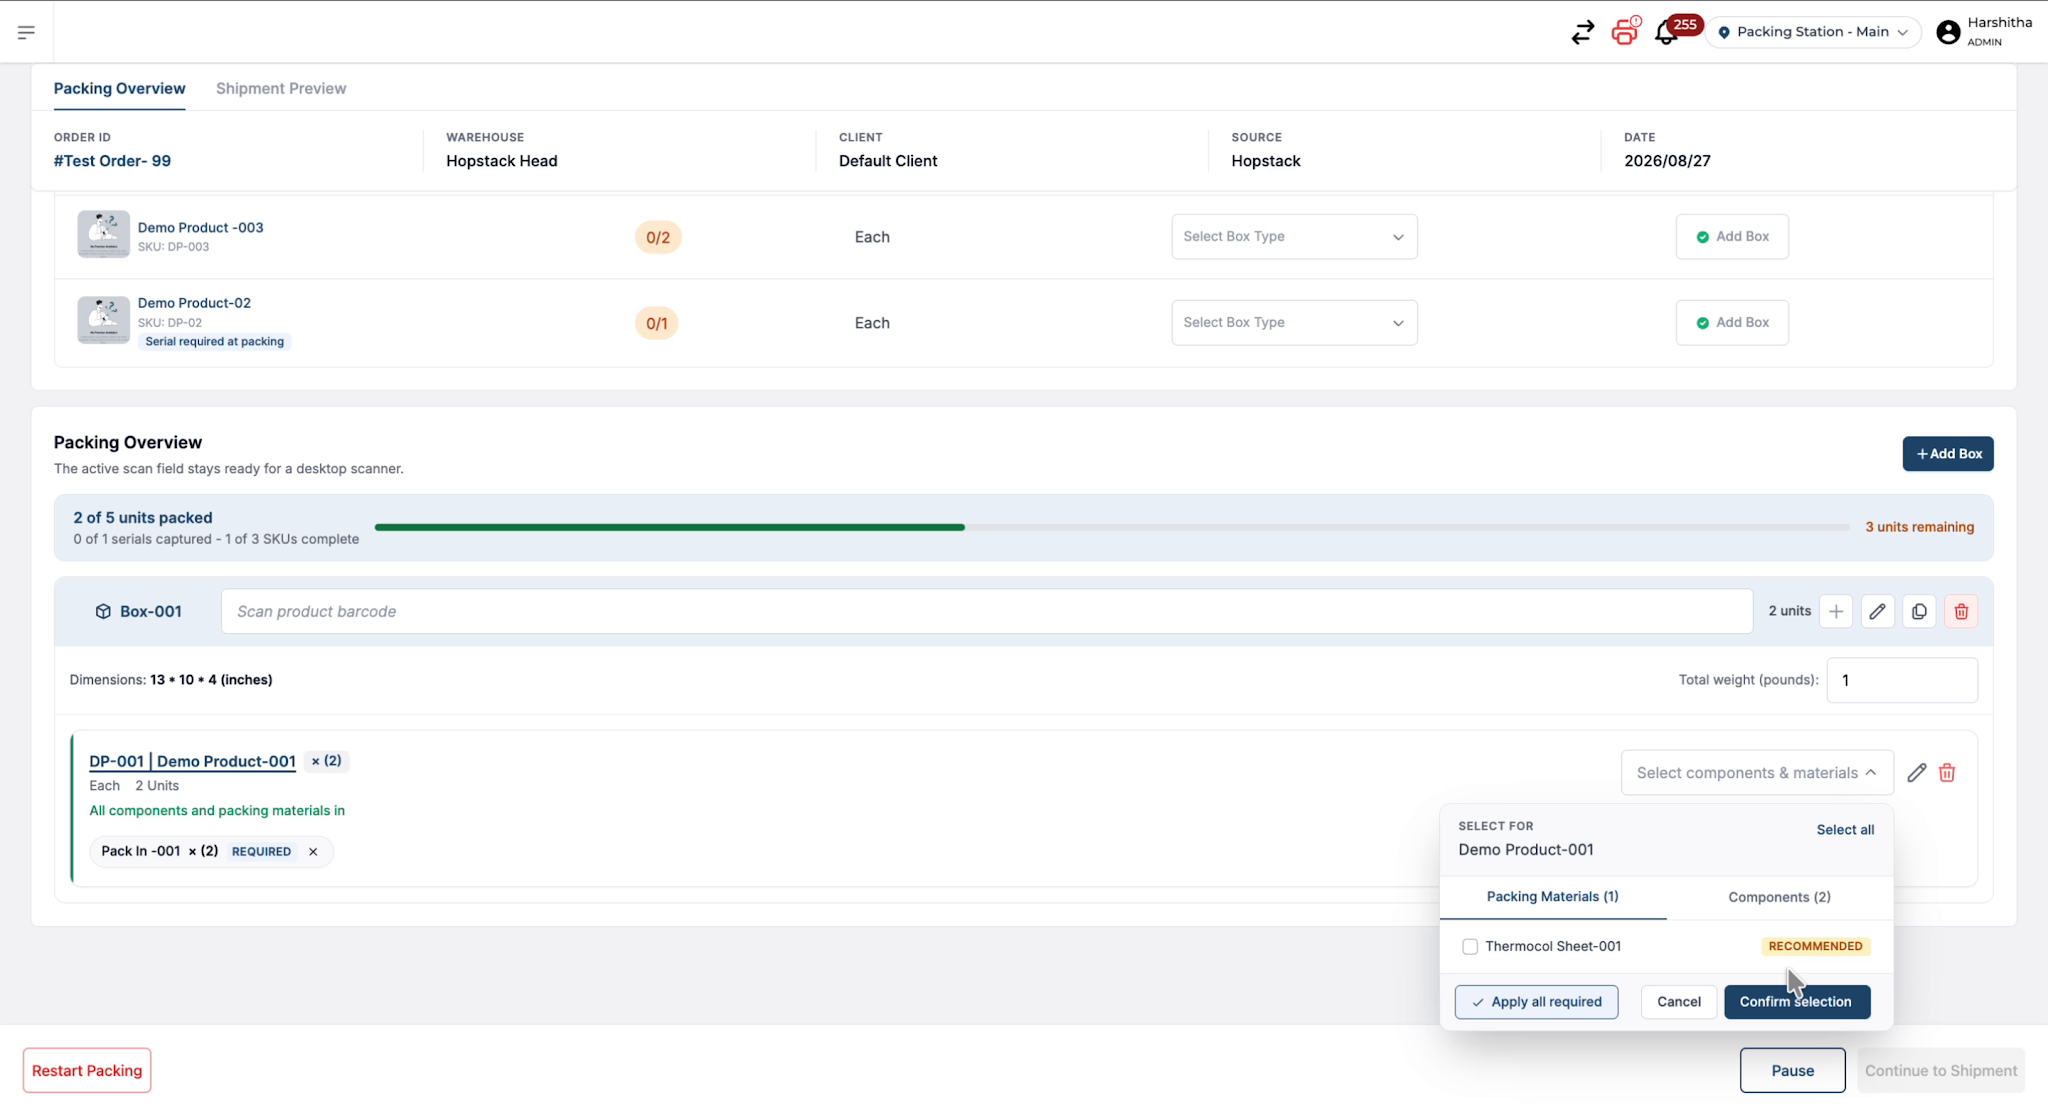
In addition to the automatically populated required components, the user can also select other optional packing materials or components that have been linked with the product from the dropdown.
Once they select the desired additional components, they can confirm the selection if they want to add them to the box.
Edit Box Type
The user can modify box details if needed. If they want to choose a different box type, they can click the Box Type dropdown and select another box.
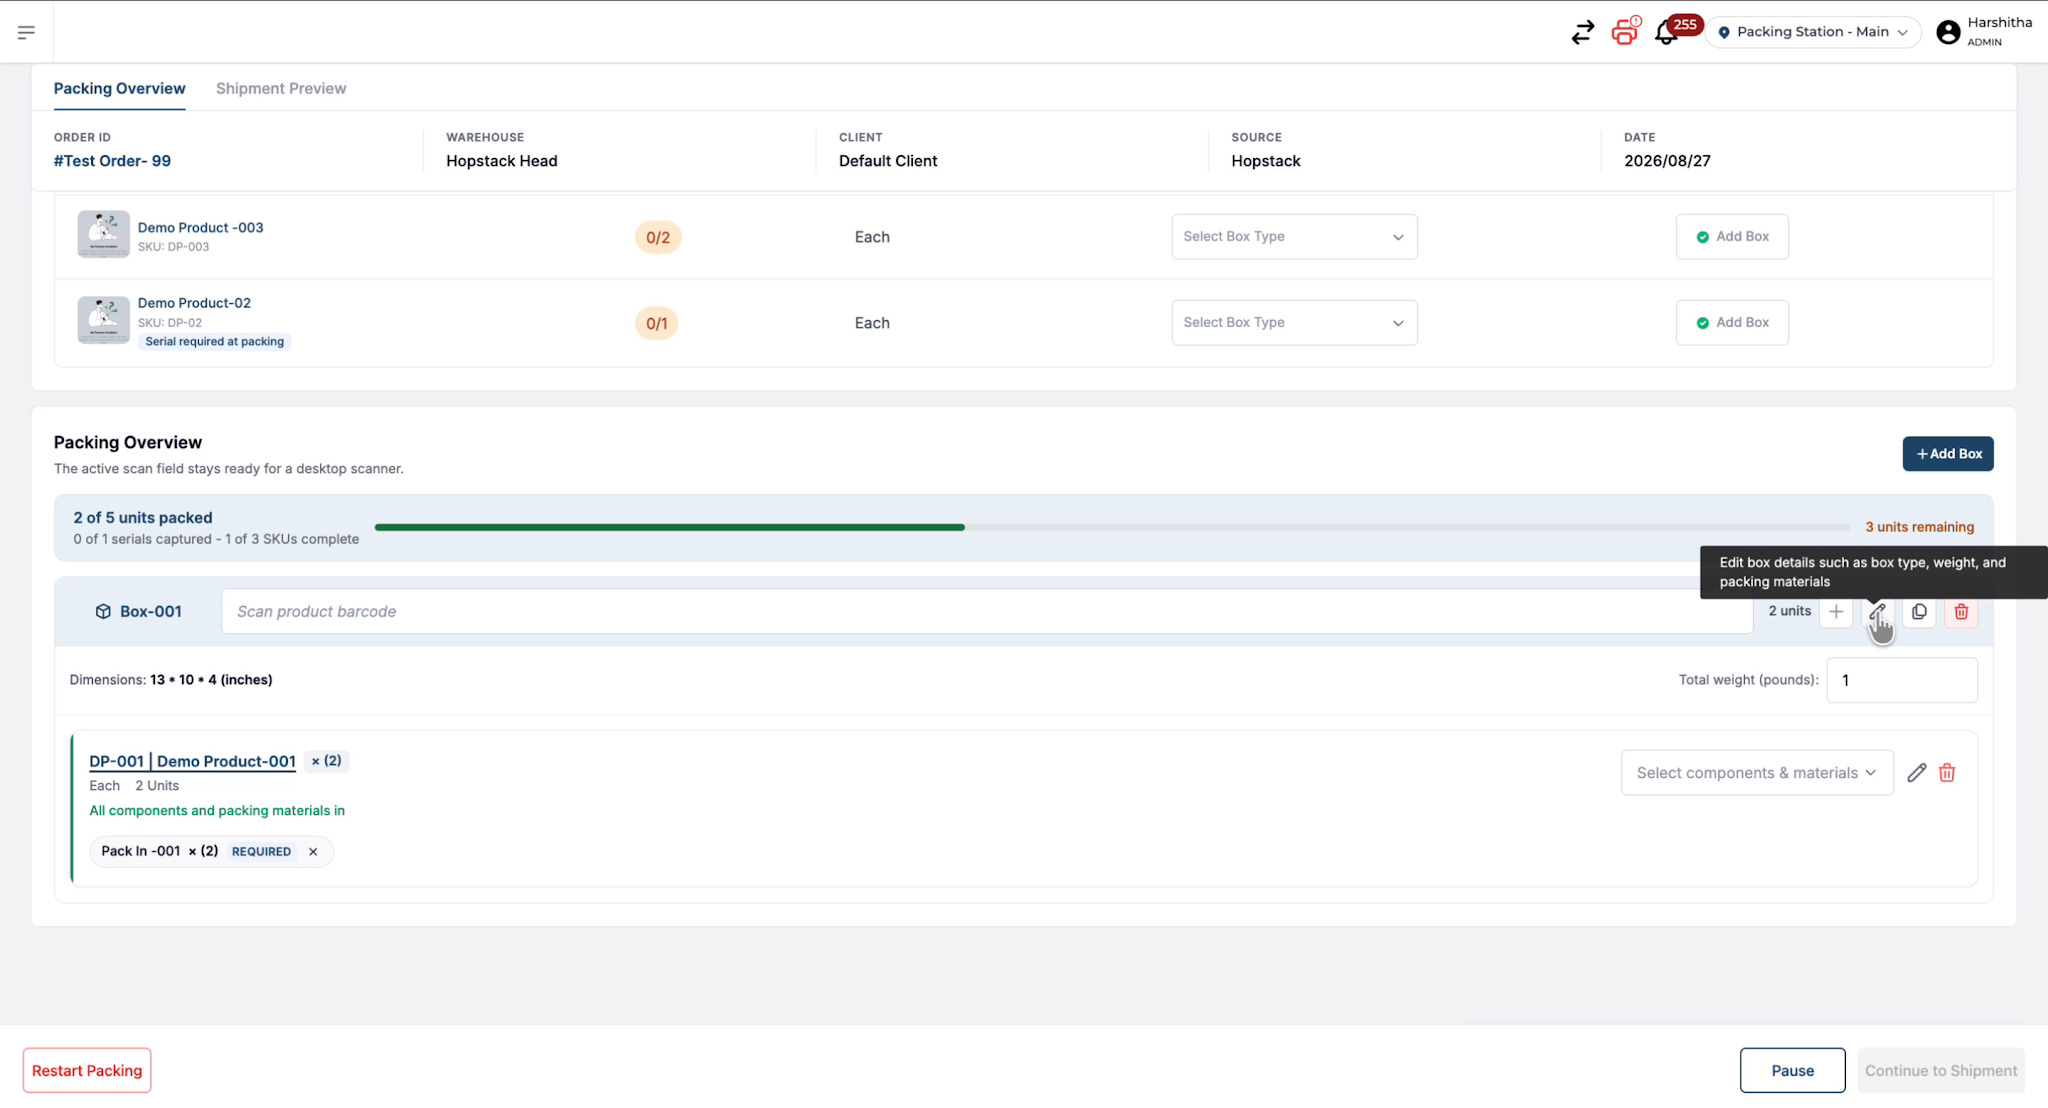
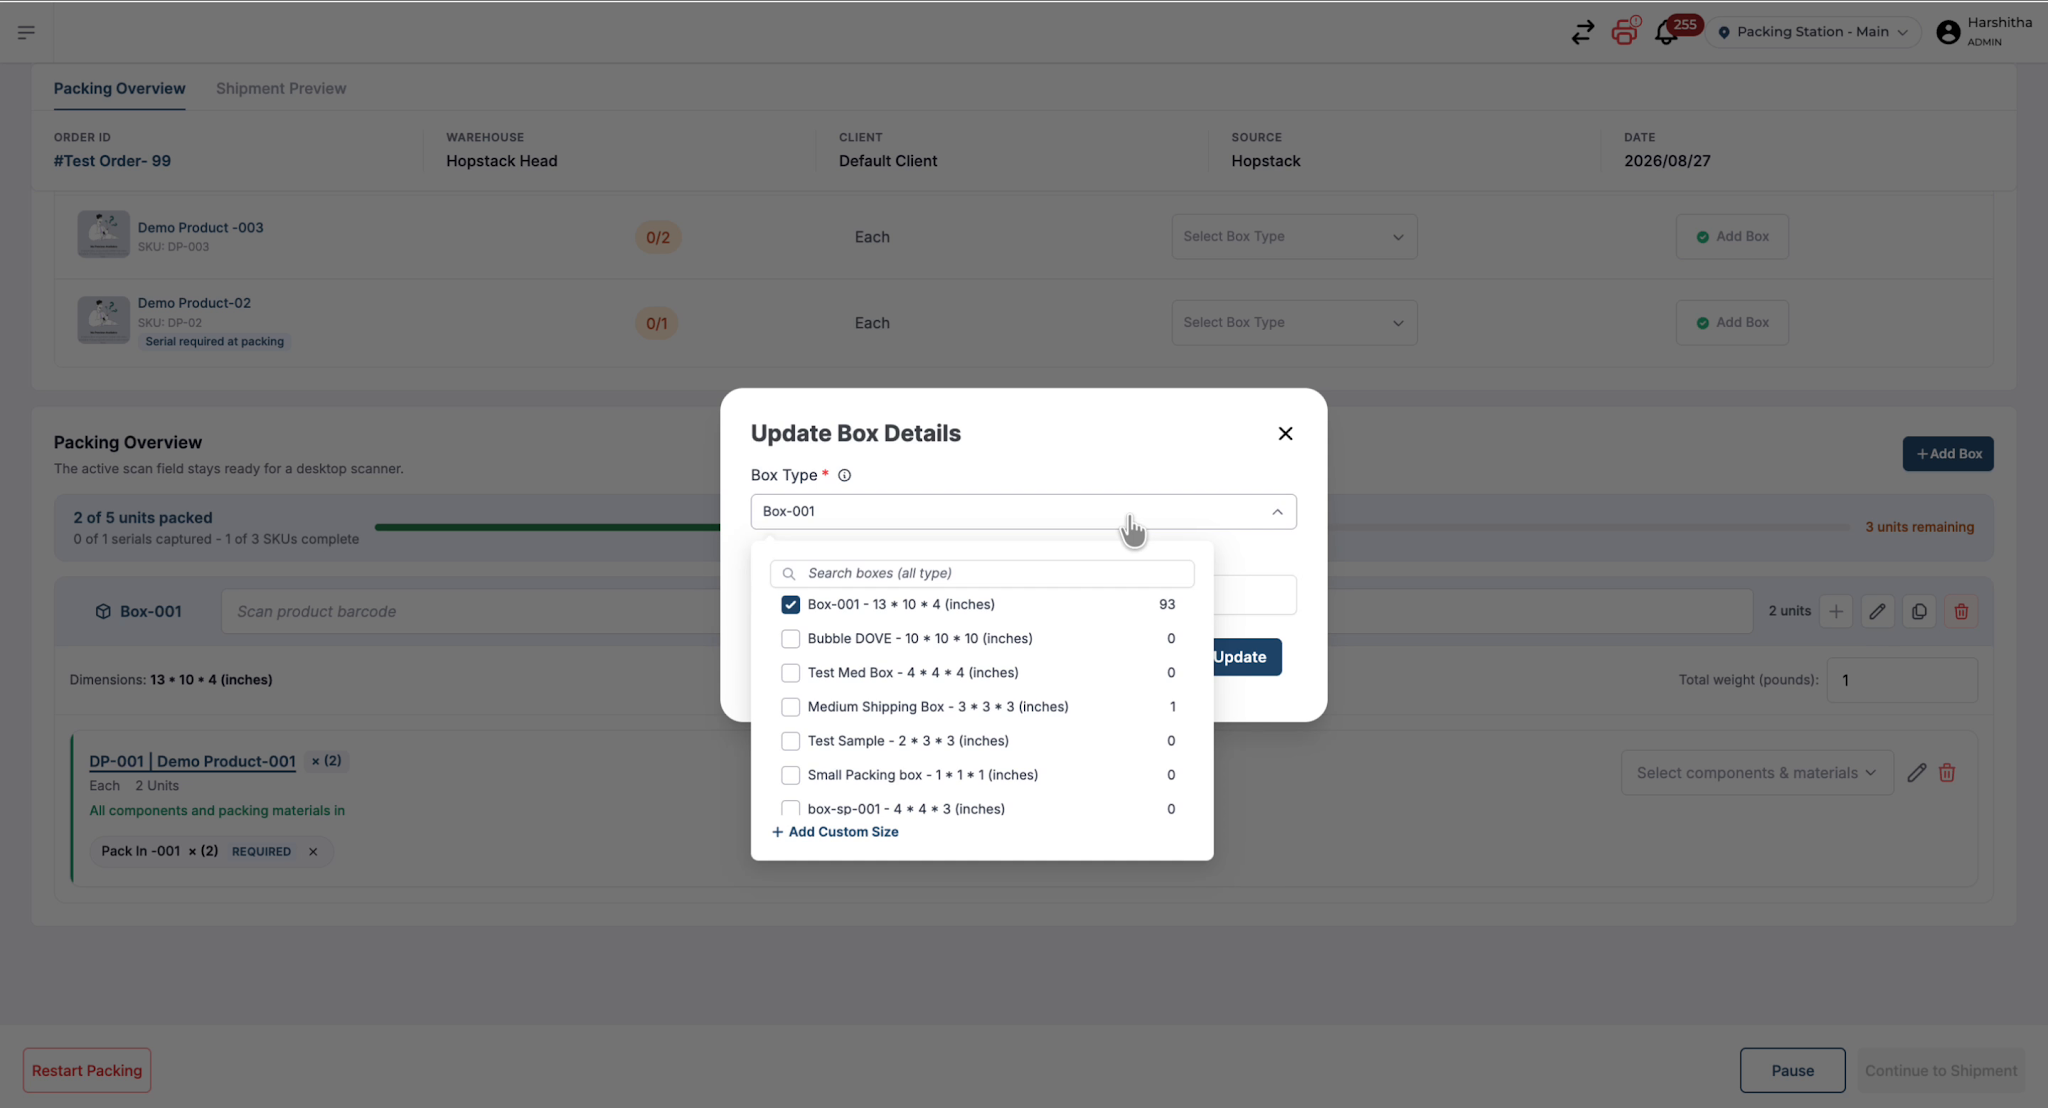
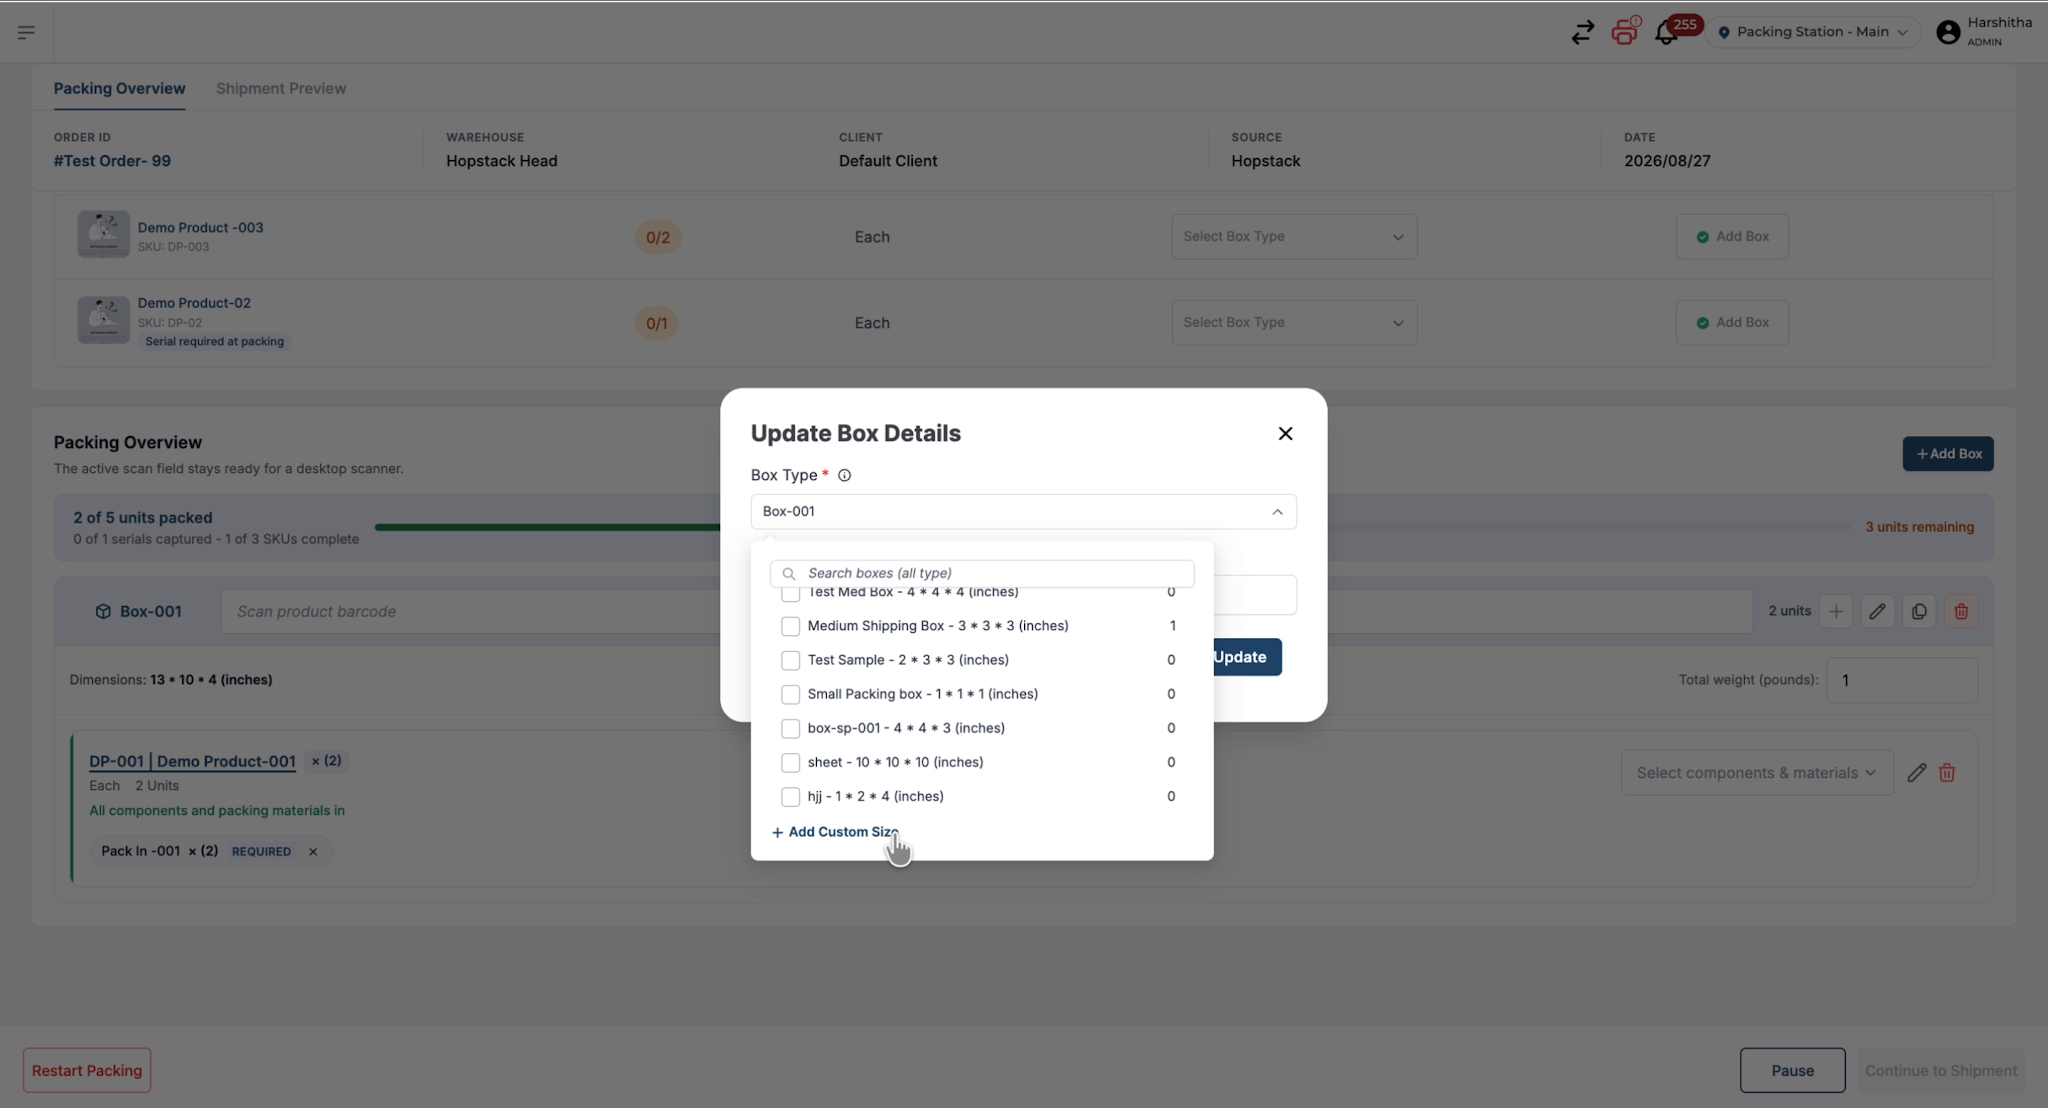
Add a Custom Box
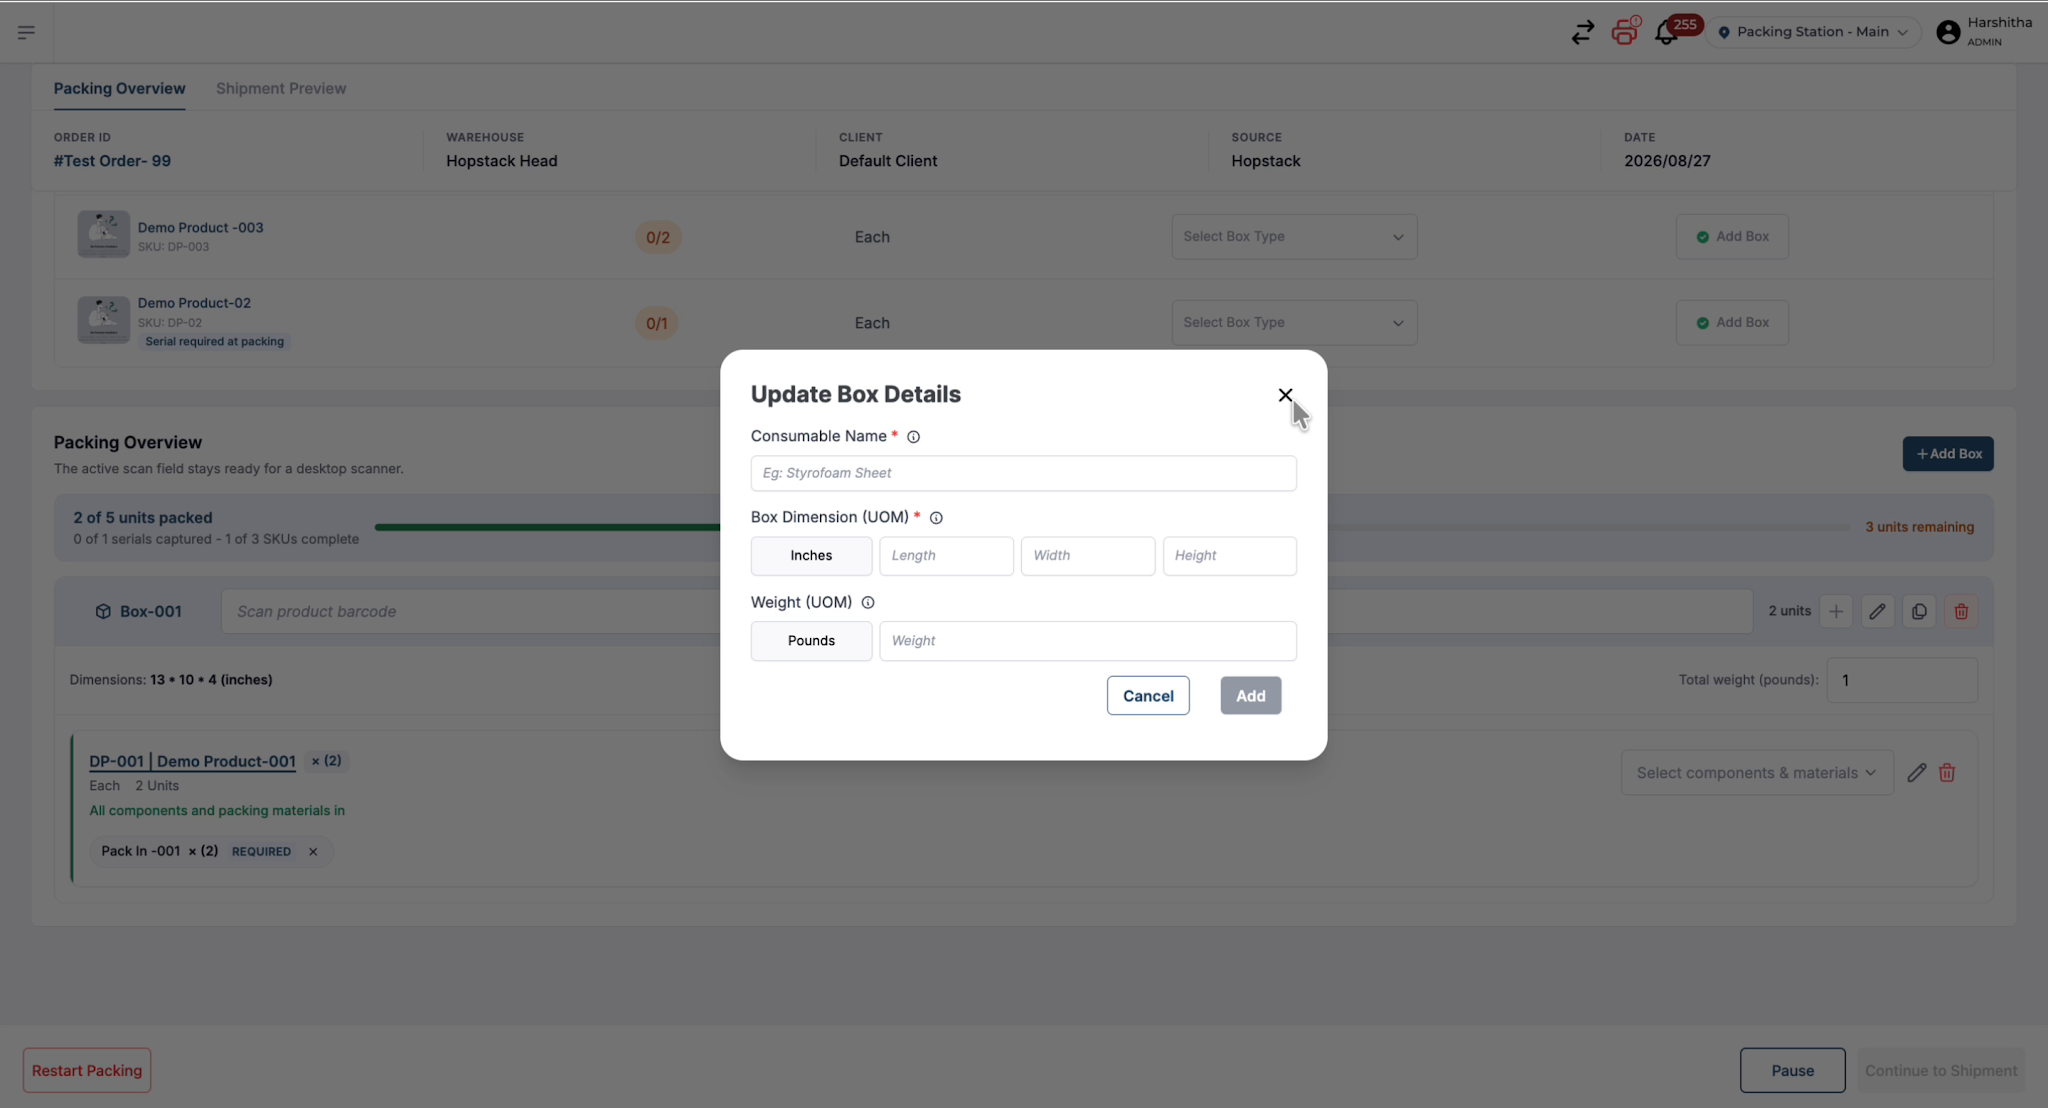
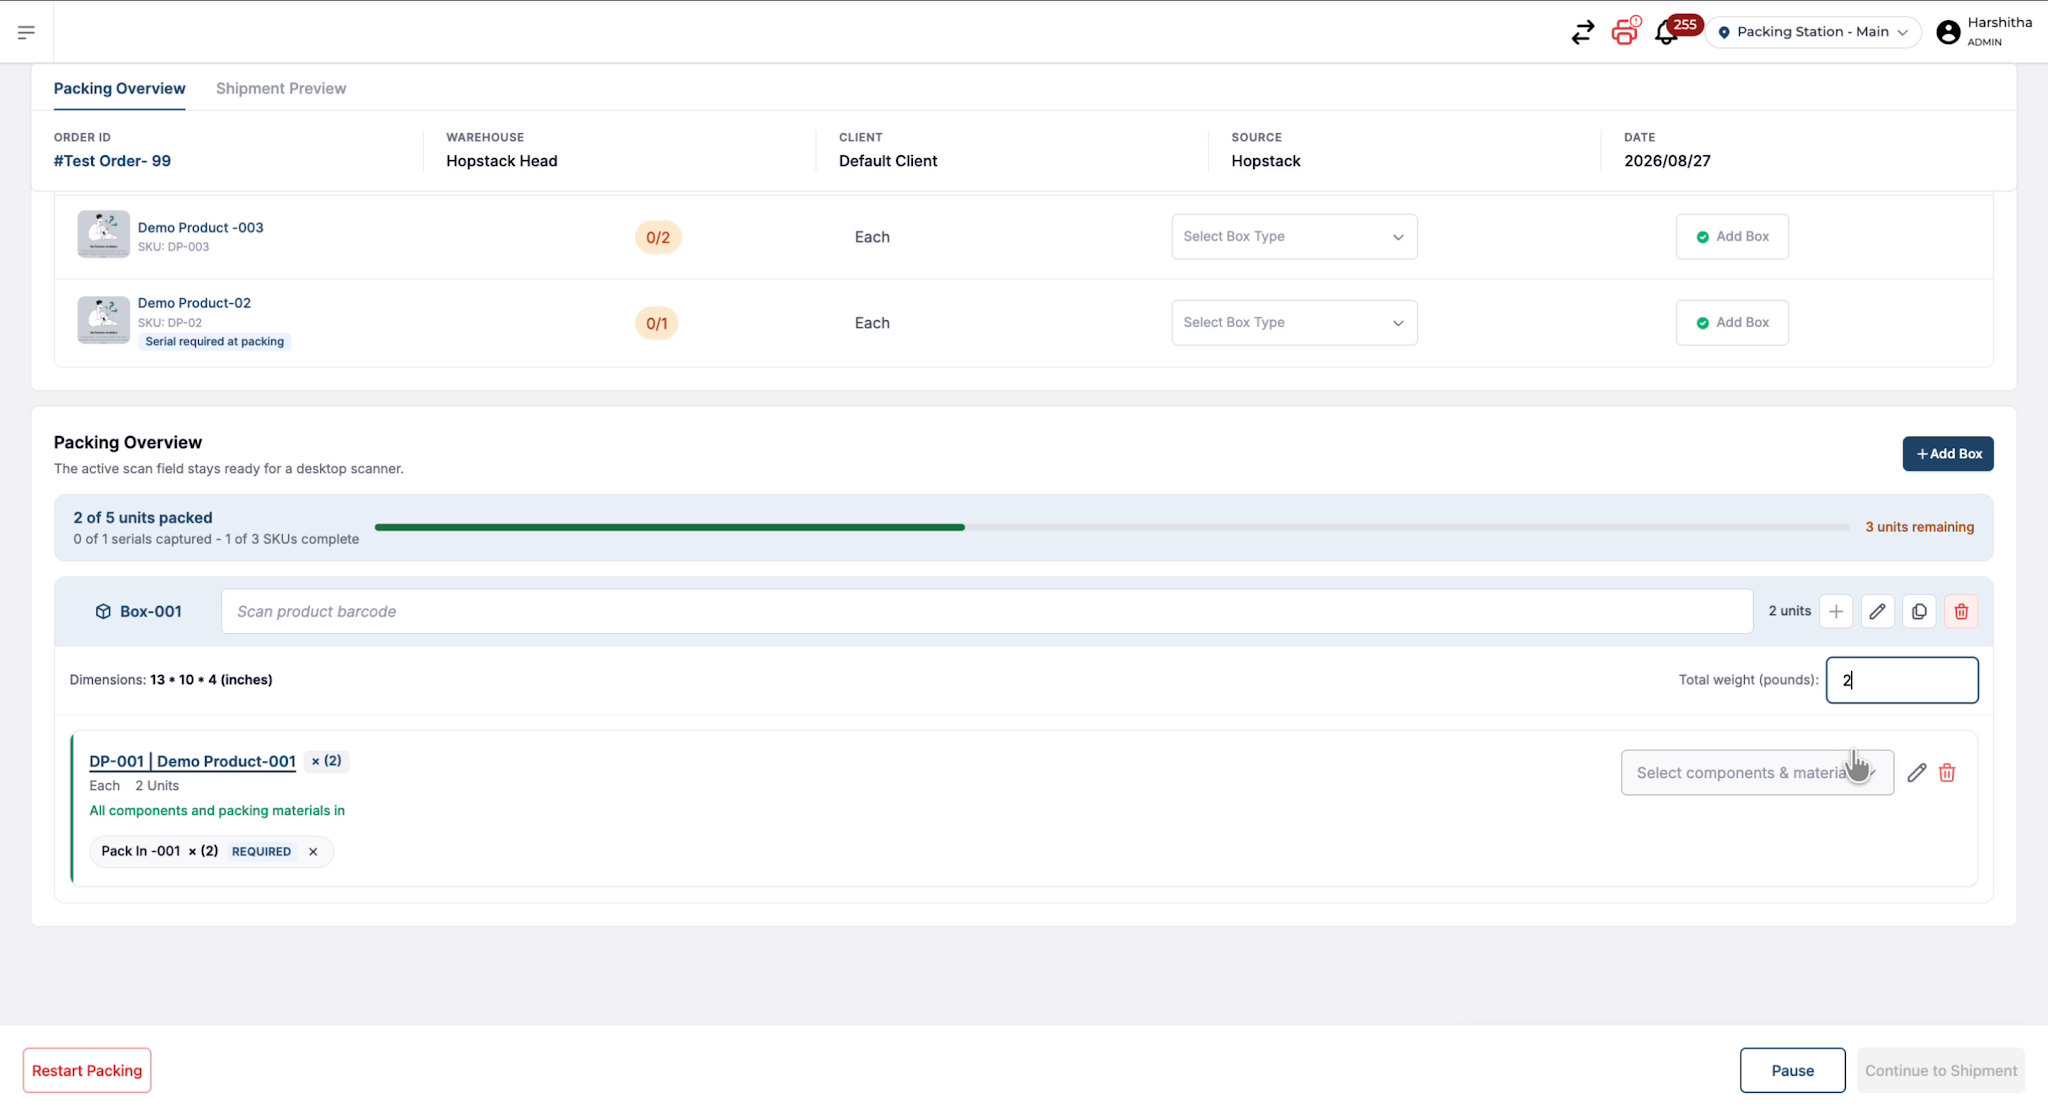
If they need a new custom box, they can click on Add Custom Size, provide a name for the box, and enter the box dimensions and weight.
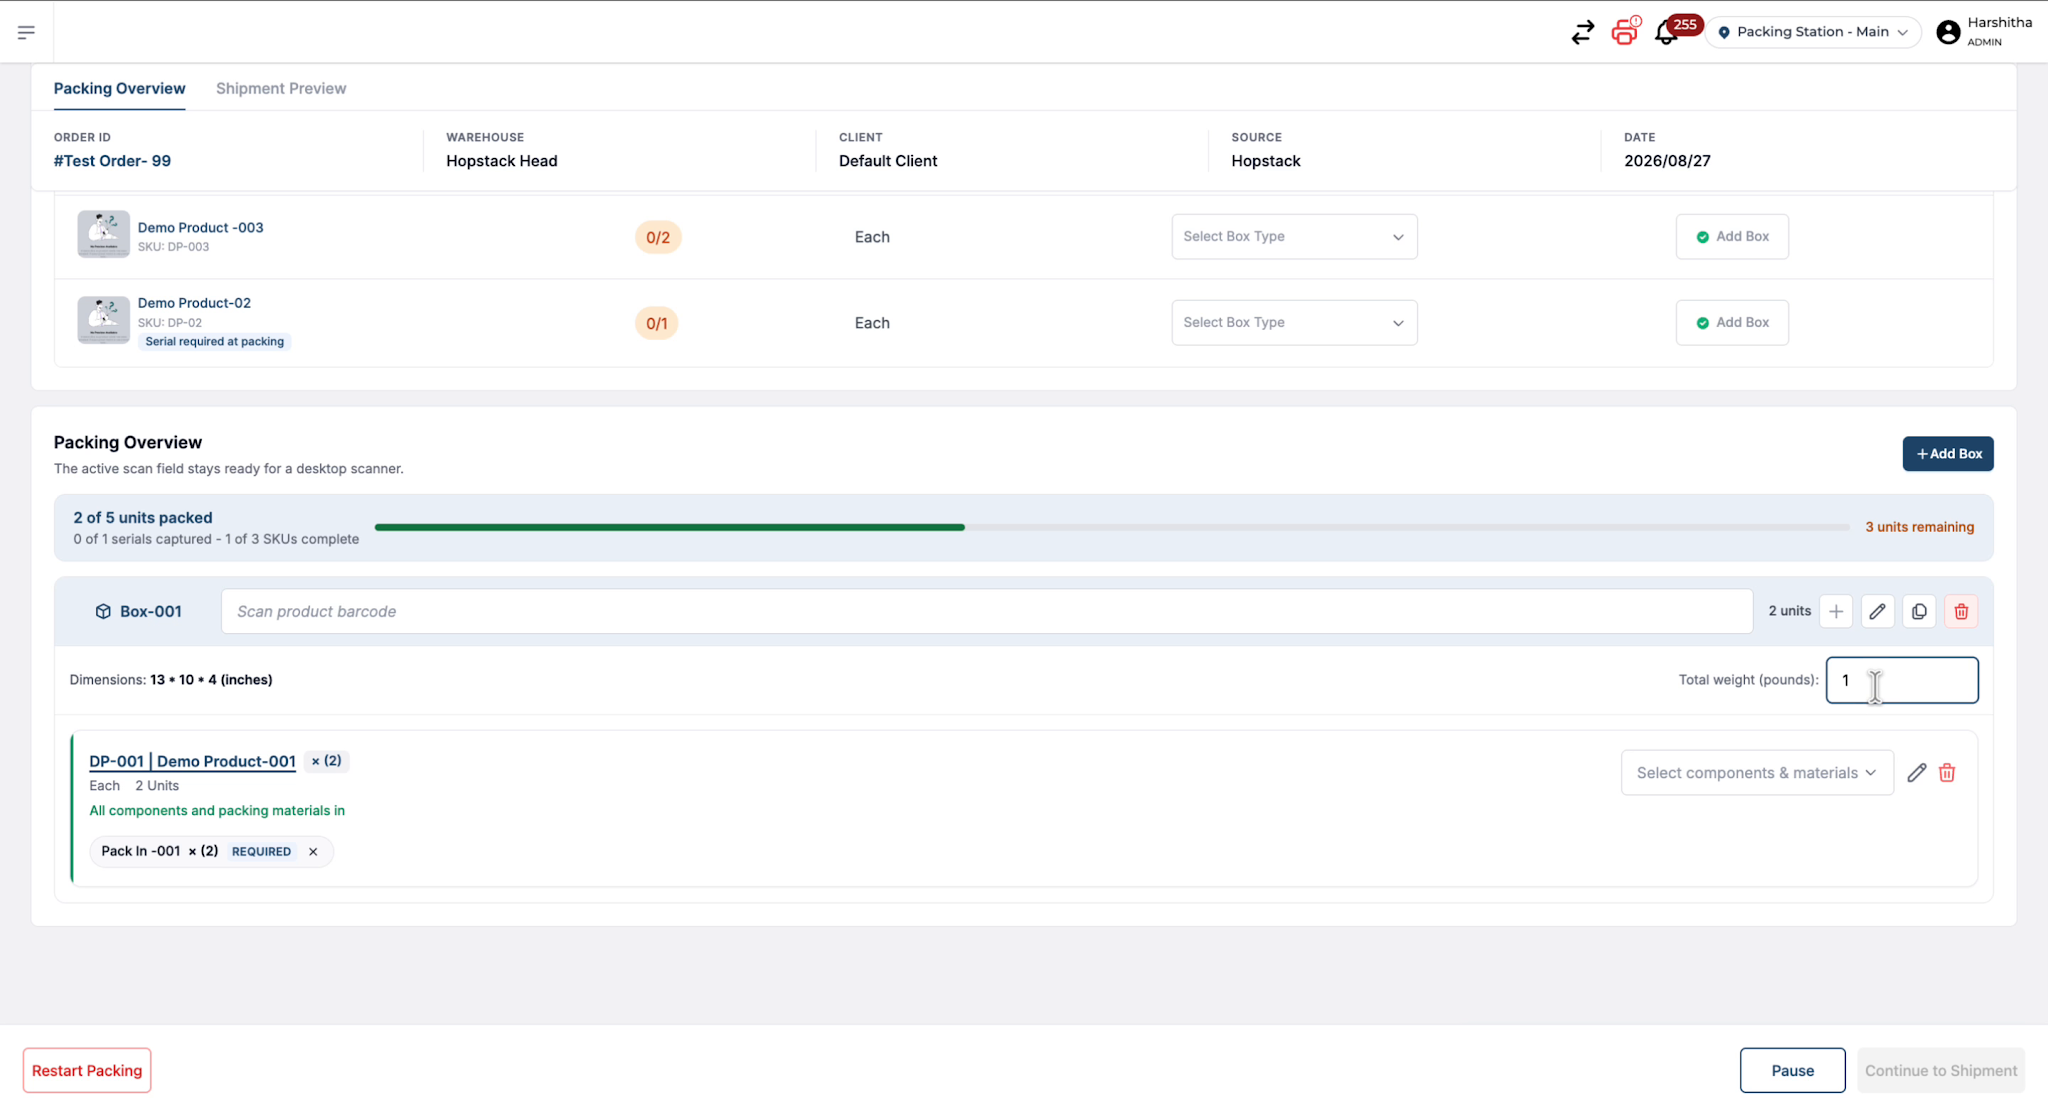
The total weight displayed is the combined weight of the box and the products inside it.
This weight includes product weights configured in product management and is automatically summed with the box weight, but it remains editable if adjustments are required.
Duplicate an Existing Box Configuration
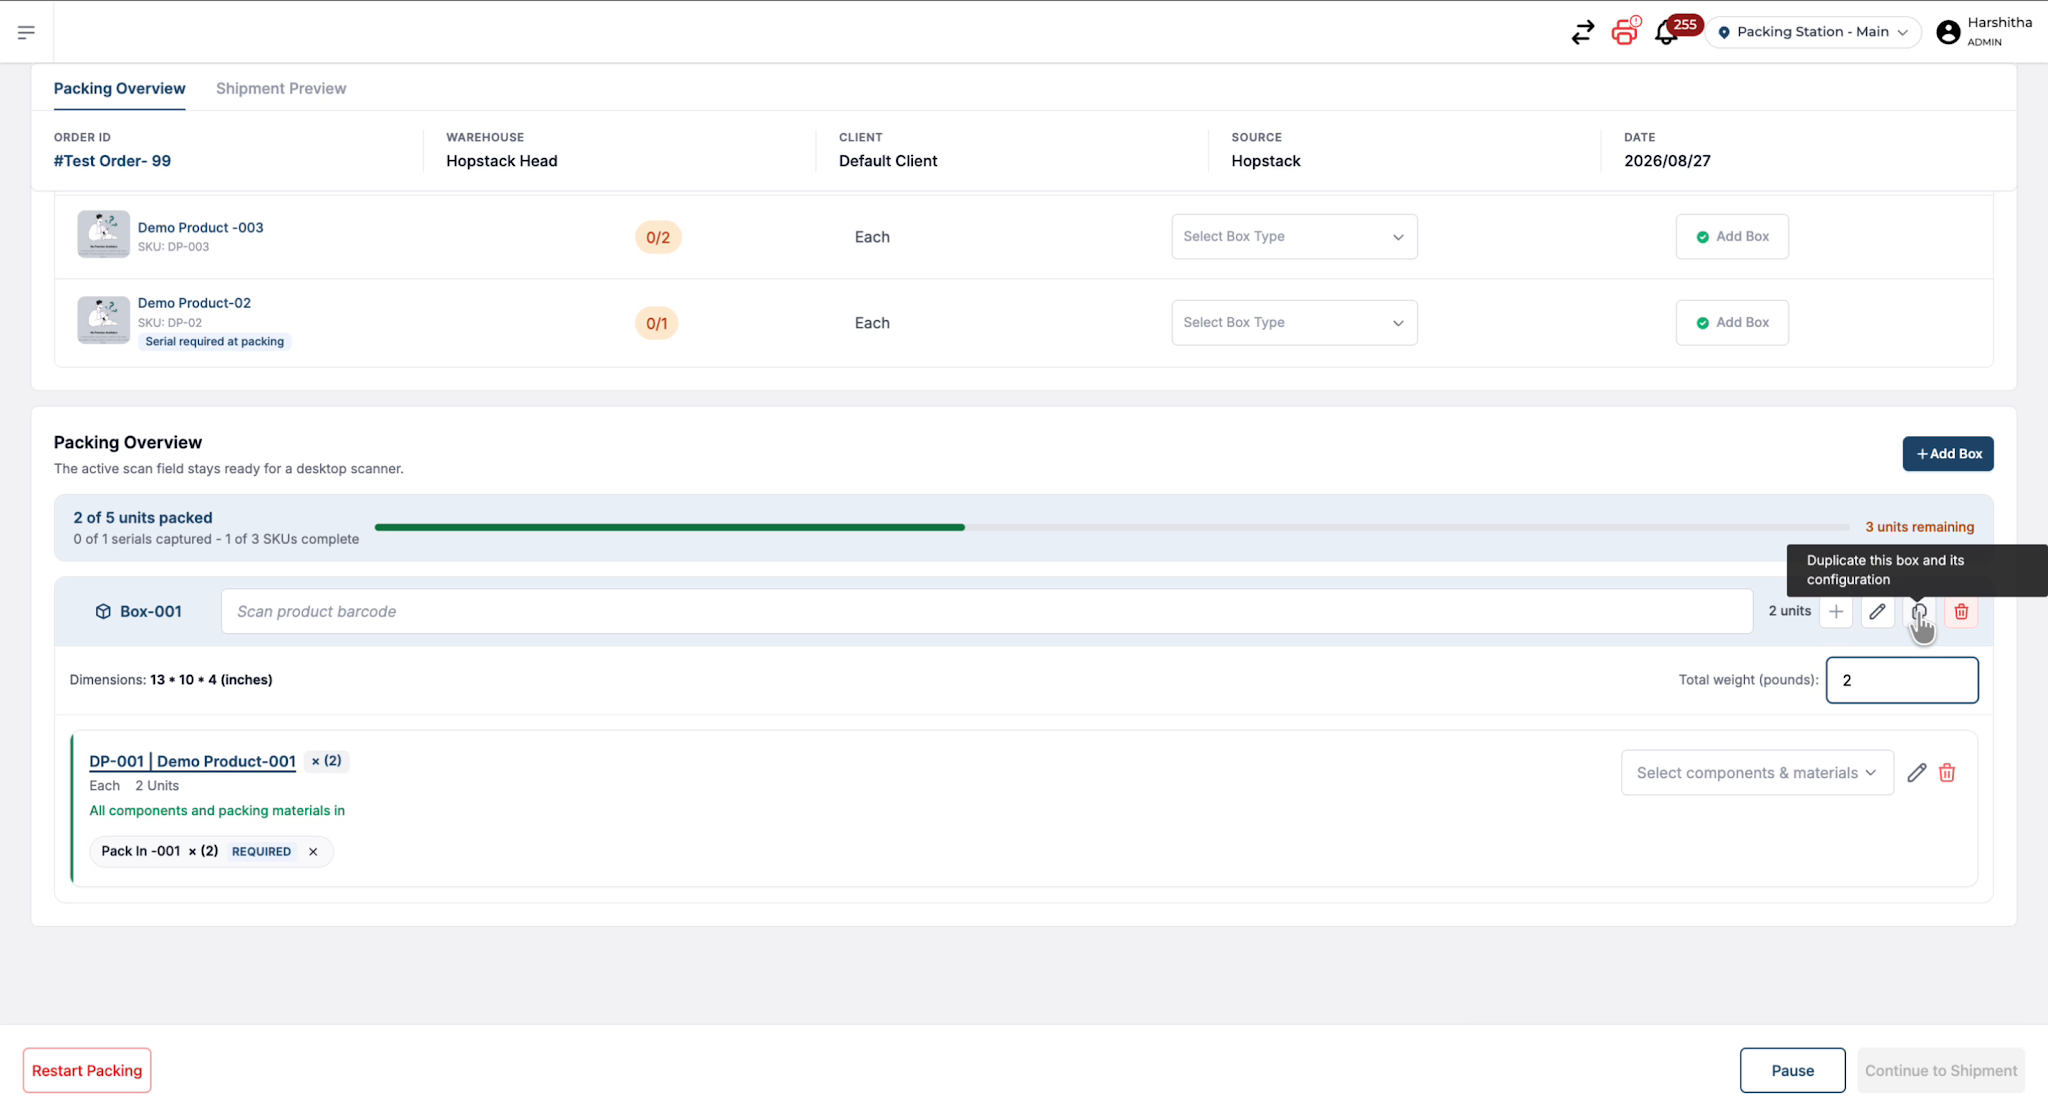
If the same configuration needs to be reused, the user can duplicate the box setup after adding products by clicking on Duplicate This Box and This Configuration.
View Packing Progress
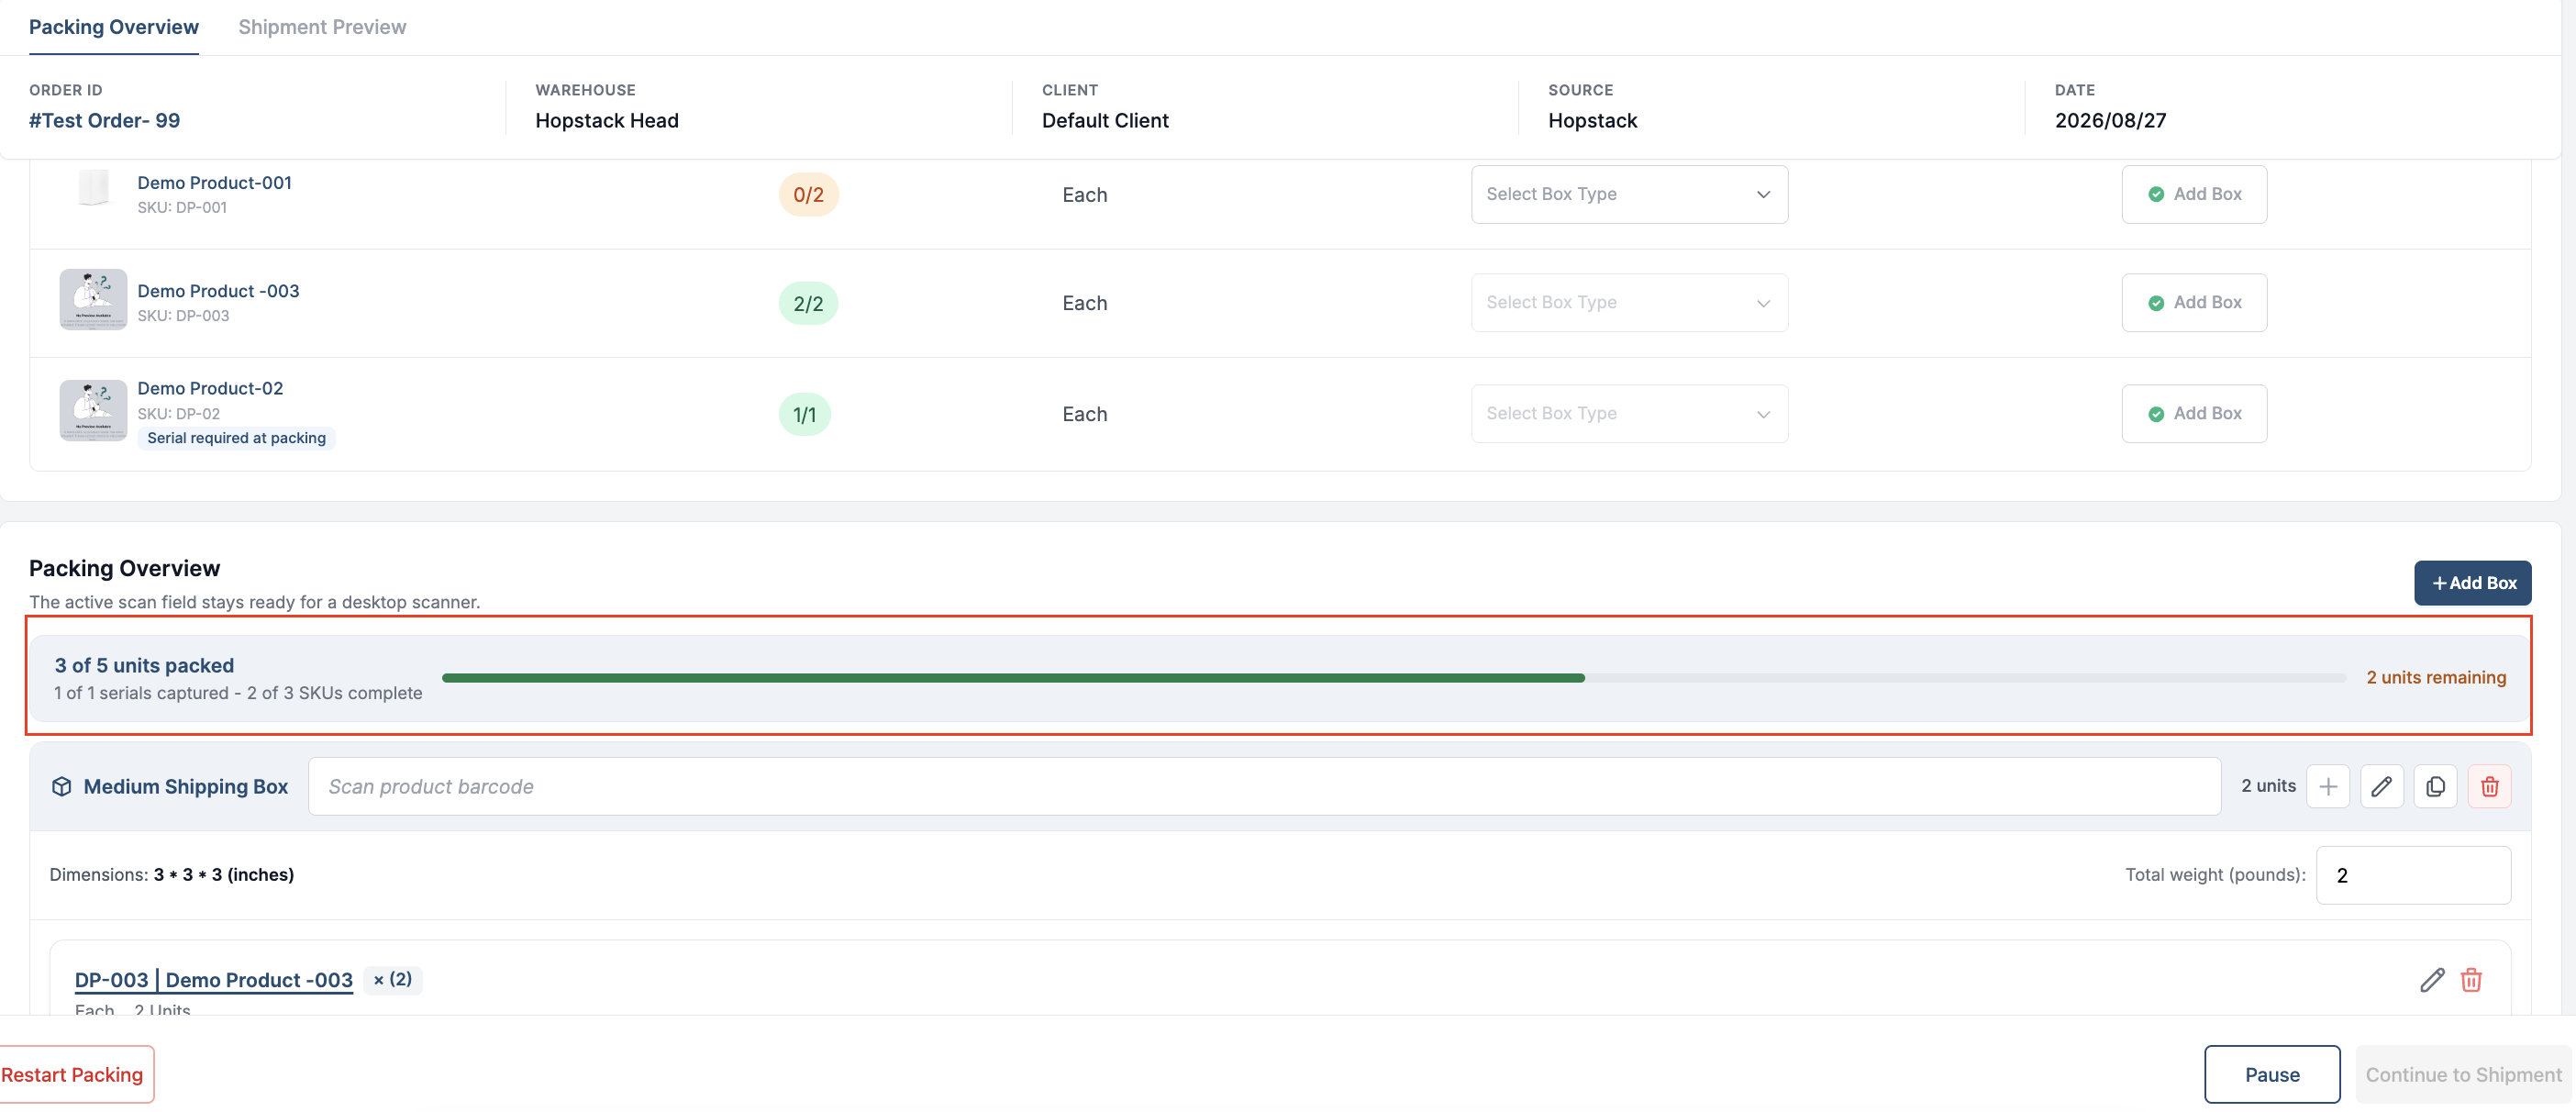
During packing, the packing progress is visible: units packed versus total units (e.g., 2 out of 5), remaining quantity, how many serial captures are required and completed, number of SKUs in the order, and how many SKUs are fully packed.
Capture Serial Numbers When Required
When serial capture is required for a product, scanning that product automatically opens the serial capture prompt. The user can then scan the serial number or manually enter it and press Enter to confirm.
Edit or Delete Box Contents
At any point, if the user wants to adjust what is inside a box, they can edit or delete the box contents. They can use the Edit icon to modify quantities or items in the box, and the Delete icon to remove products or clear box contents.

Step 11: Complete Packing and Proceed to Shipment Review
Once packing for the order is complete and all required units, SKUs, and serial captures are handled, the user can proceed by clicking on Continue Shipment to move to the Shipment Review screen.