
This document describes the enhanced consignment creation capabilities, including support for exploded and pre-formed bundles
-
Pre-Formed Bundles – Bundles arrive already assembled
-
Exploded Bundles – Bundle components are received individually and can be assembled into bundles after receipt.
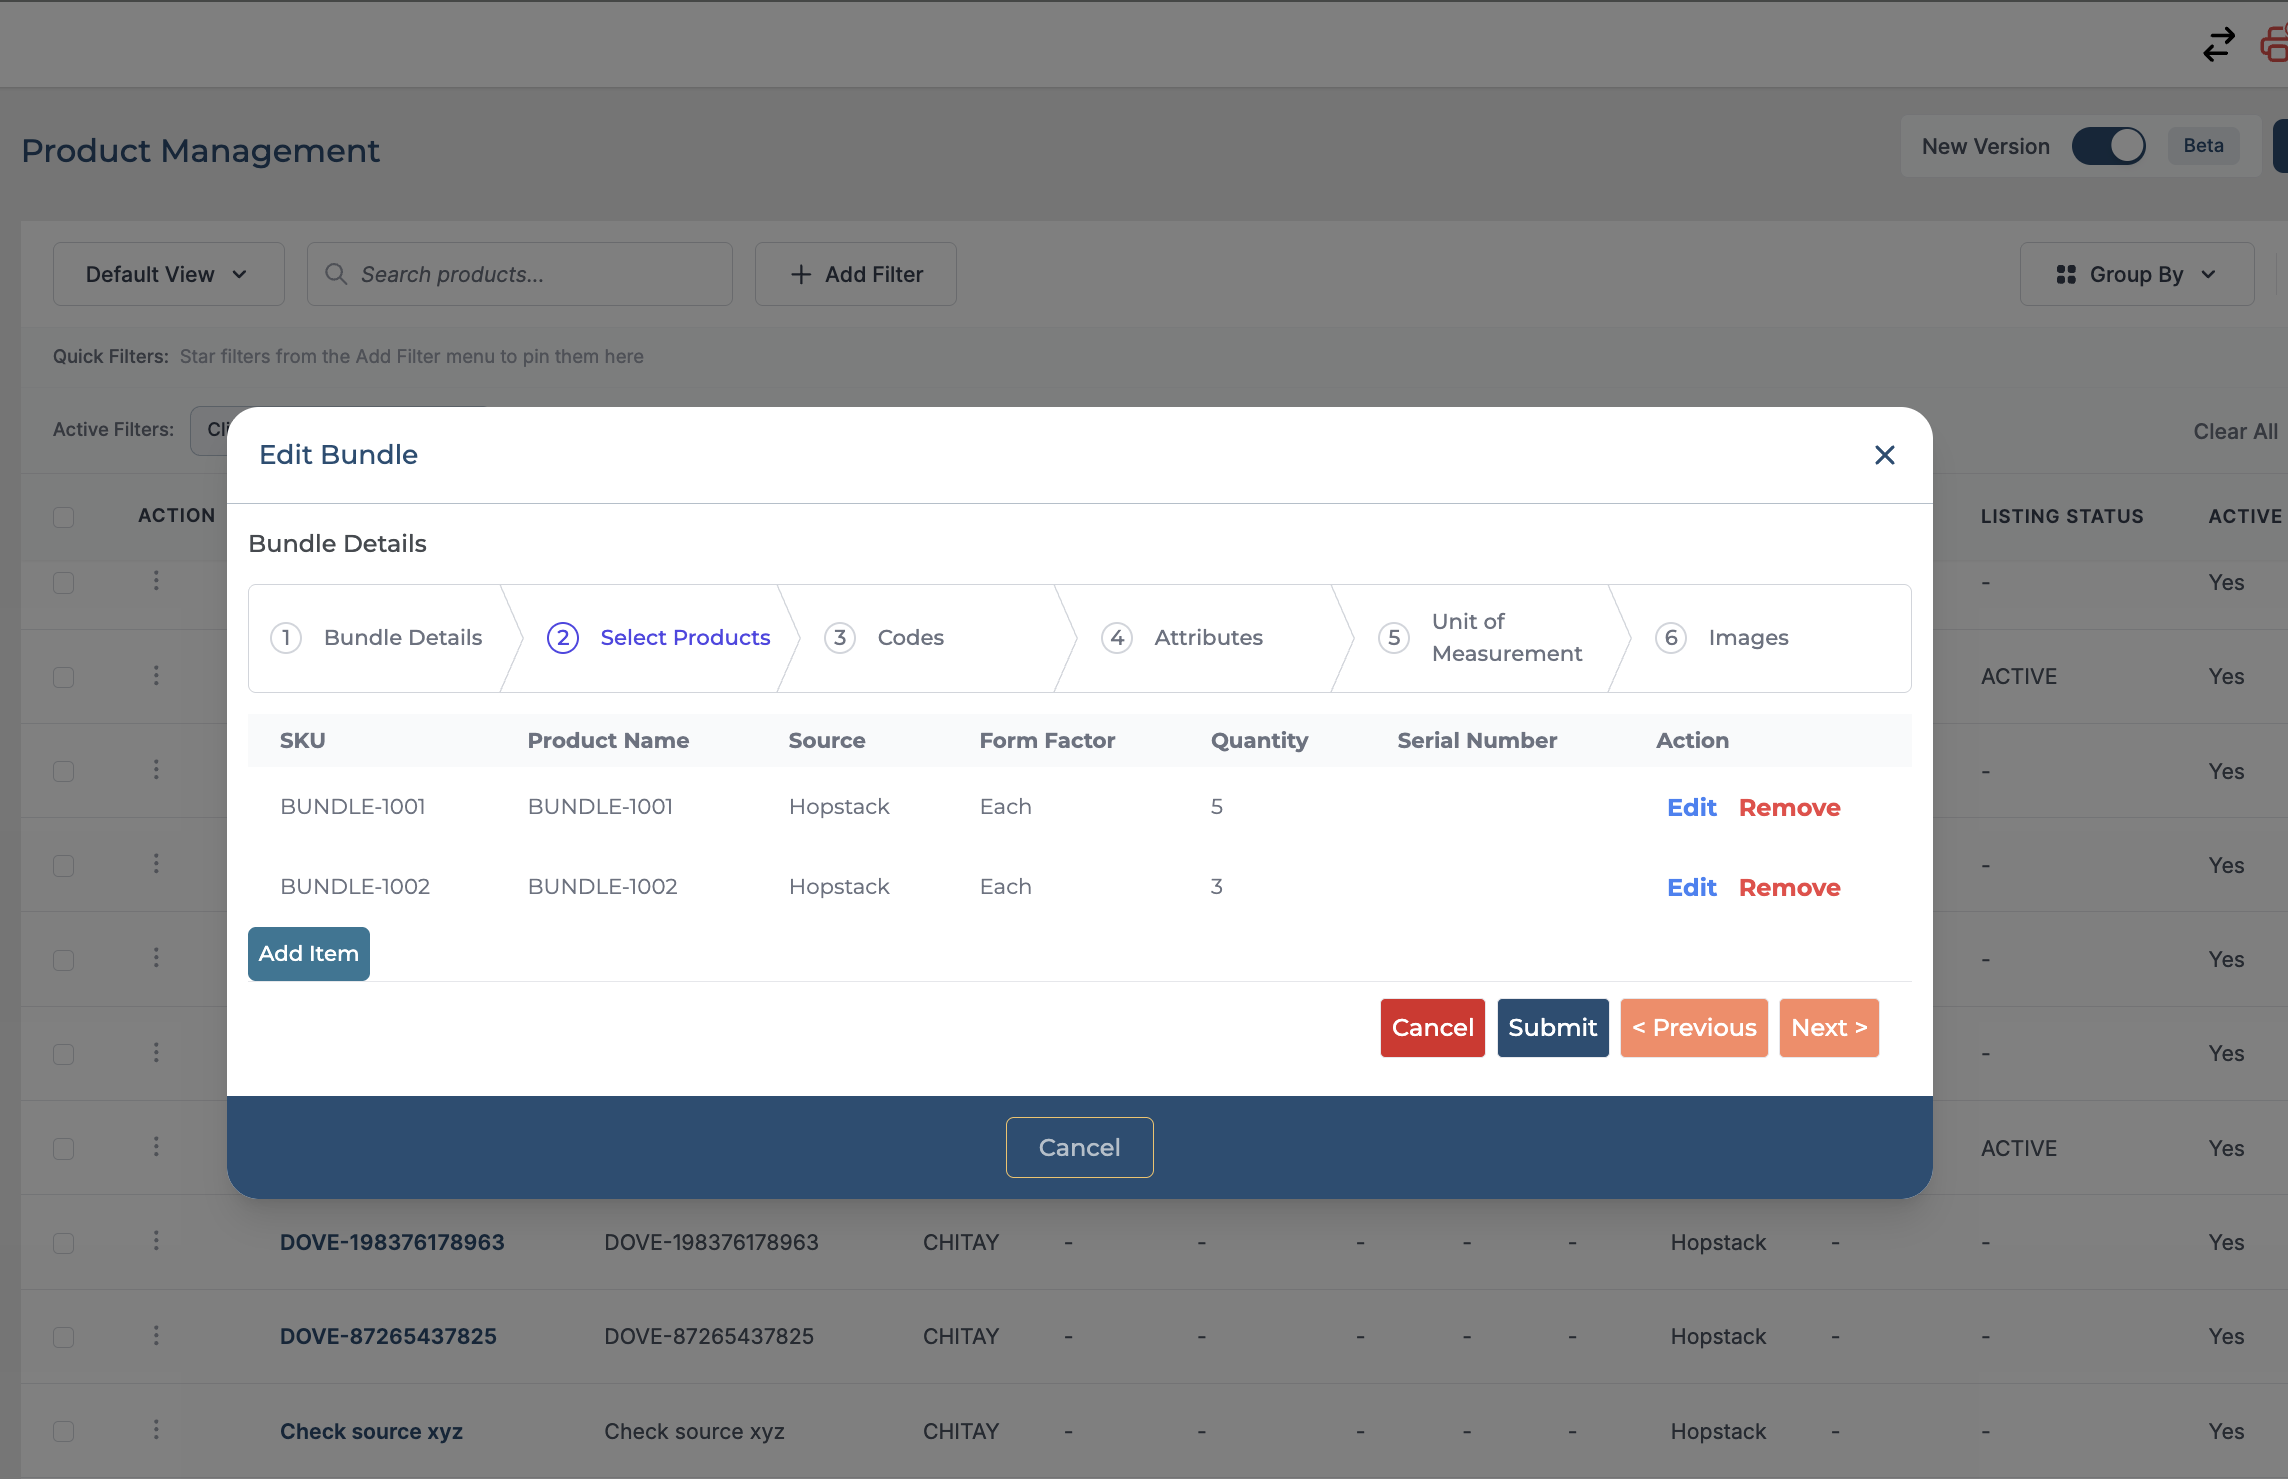
Let's say that you have a bundle that consists of two components
In this example, the bundle BUNDLE-PRODUCT consists of two components: BUNDLE-1001 and BUNDLE-1002.
Navigate to the Hopstack Dashboard
Click on "Inbound Logistics" from the side menu.

Click on "Consignments".

Click on the "Add Consignment" button.

Choose “Standard” to create a regular consignment.

In the pop-up dialog box's "Basic Info" section, click on the drop-down menu to select the warehouse and client of your choice.
Click "Next >" to navigate to the next section.

Here the “Order Details” modal starts. Users can click on the "Previous" button to navigate to the previous section and on the "Next" to navigate to the next section.
Fill in the order ID in the "Order ID" field.

Assign the "Consignment Date" using the date picker.

Tip: It is optional to fill in the consignment number.

Fill in the vendor/supplier name in the "Supplier/ Vendor" field.
Tip: It is optional to fill in the Supplier/Vendor.

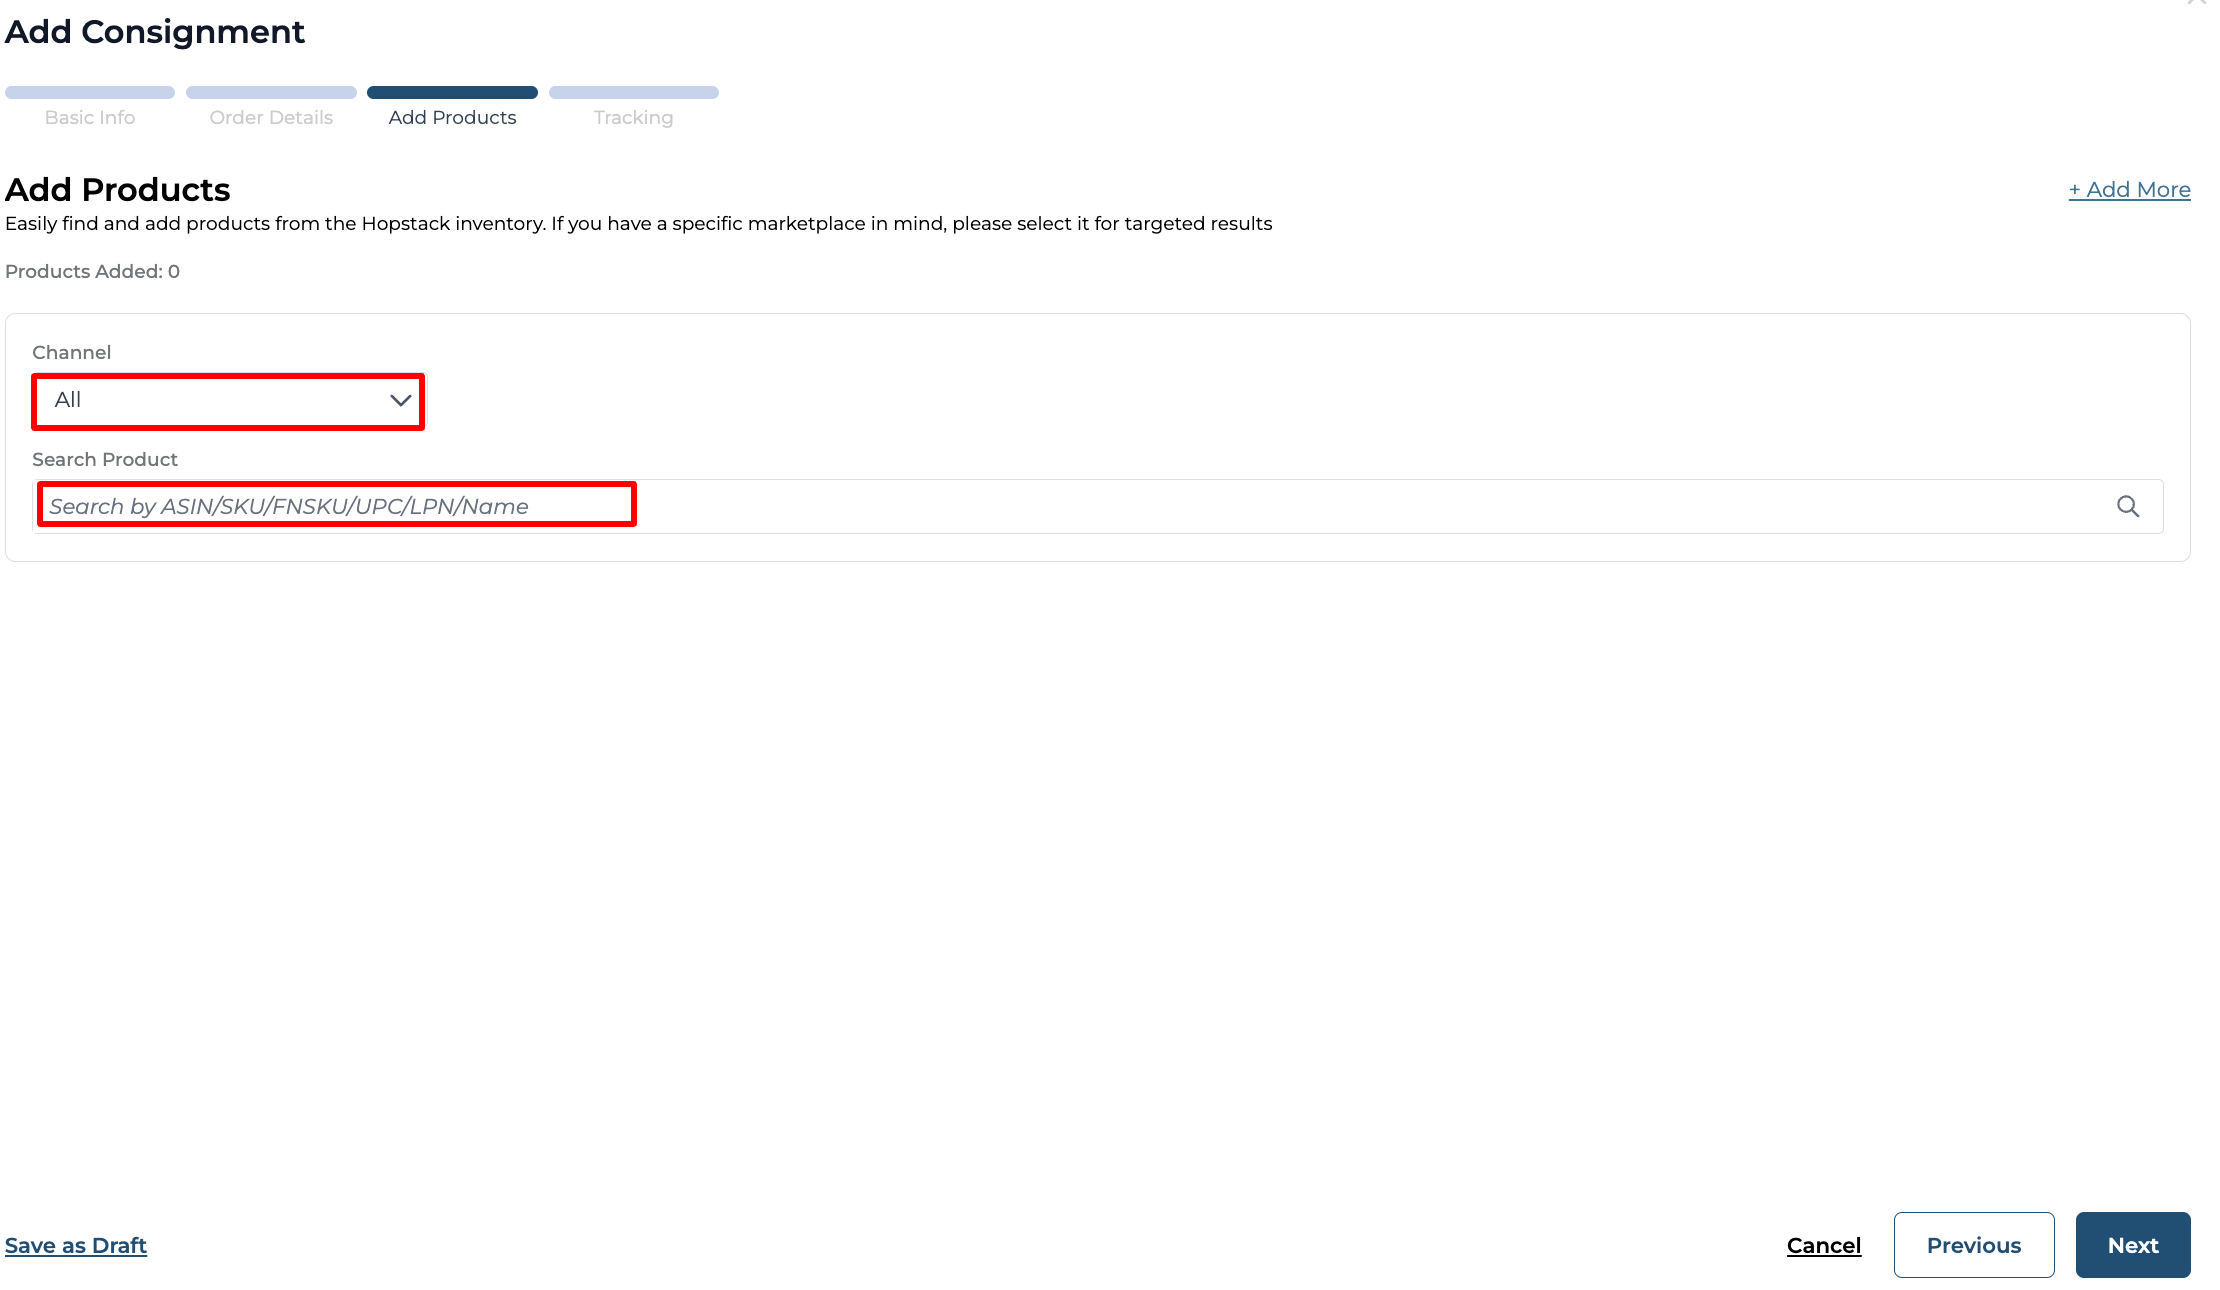
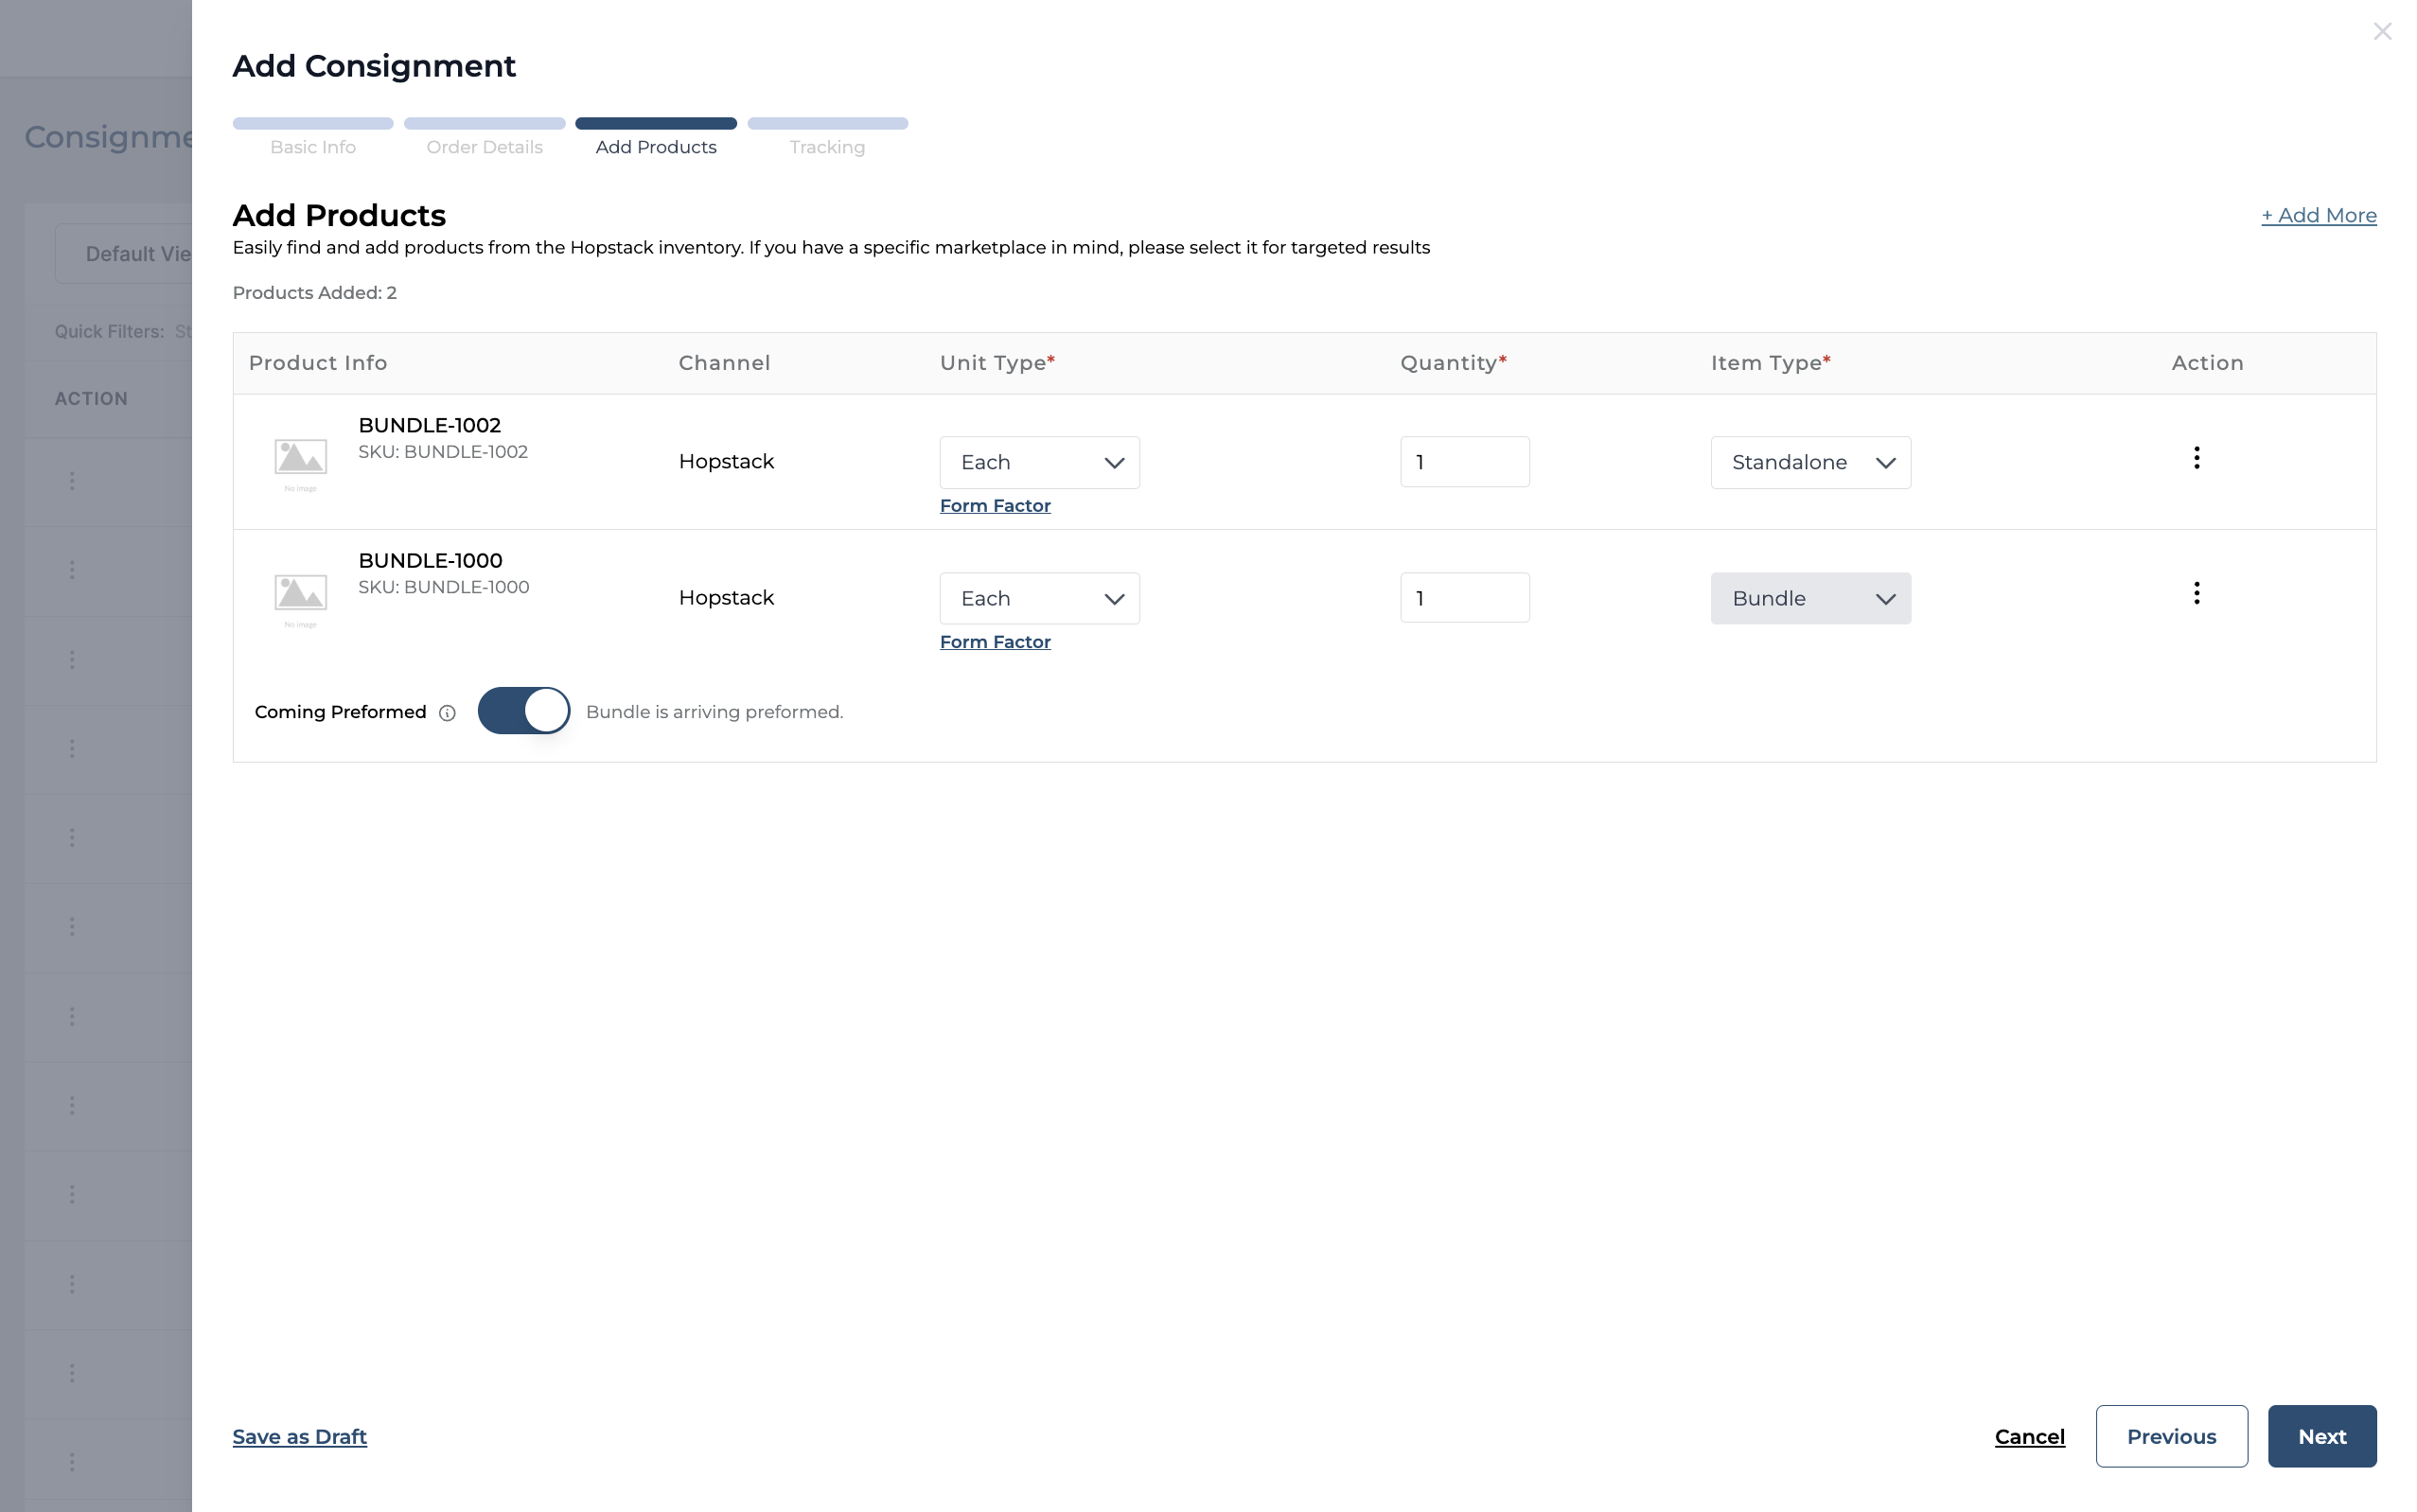
In the pop-up dialog box's "Products" section, select the channel and search with the SKU/UPC/LPN/Product name and enter the product details.
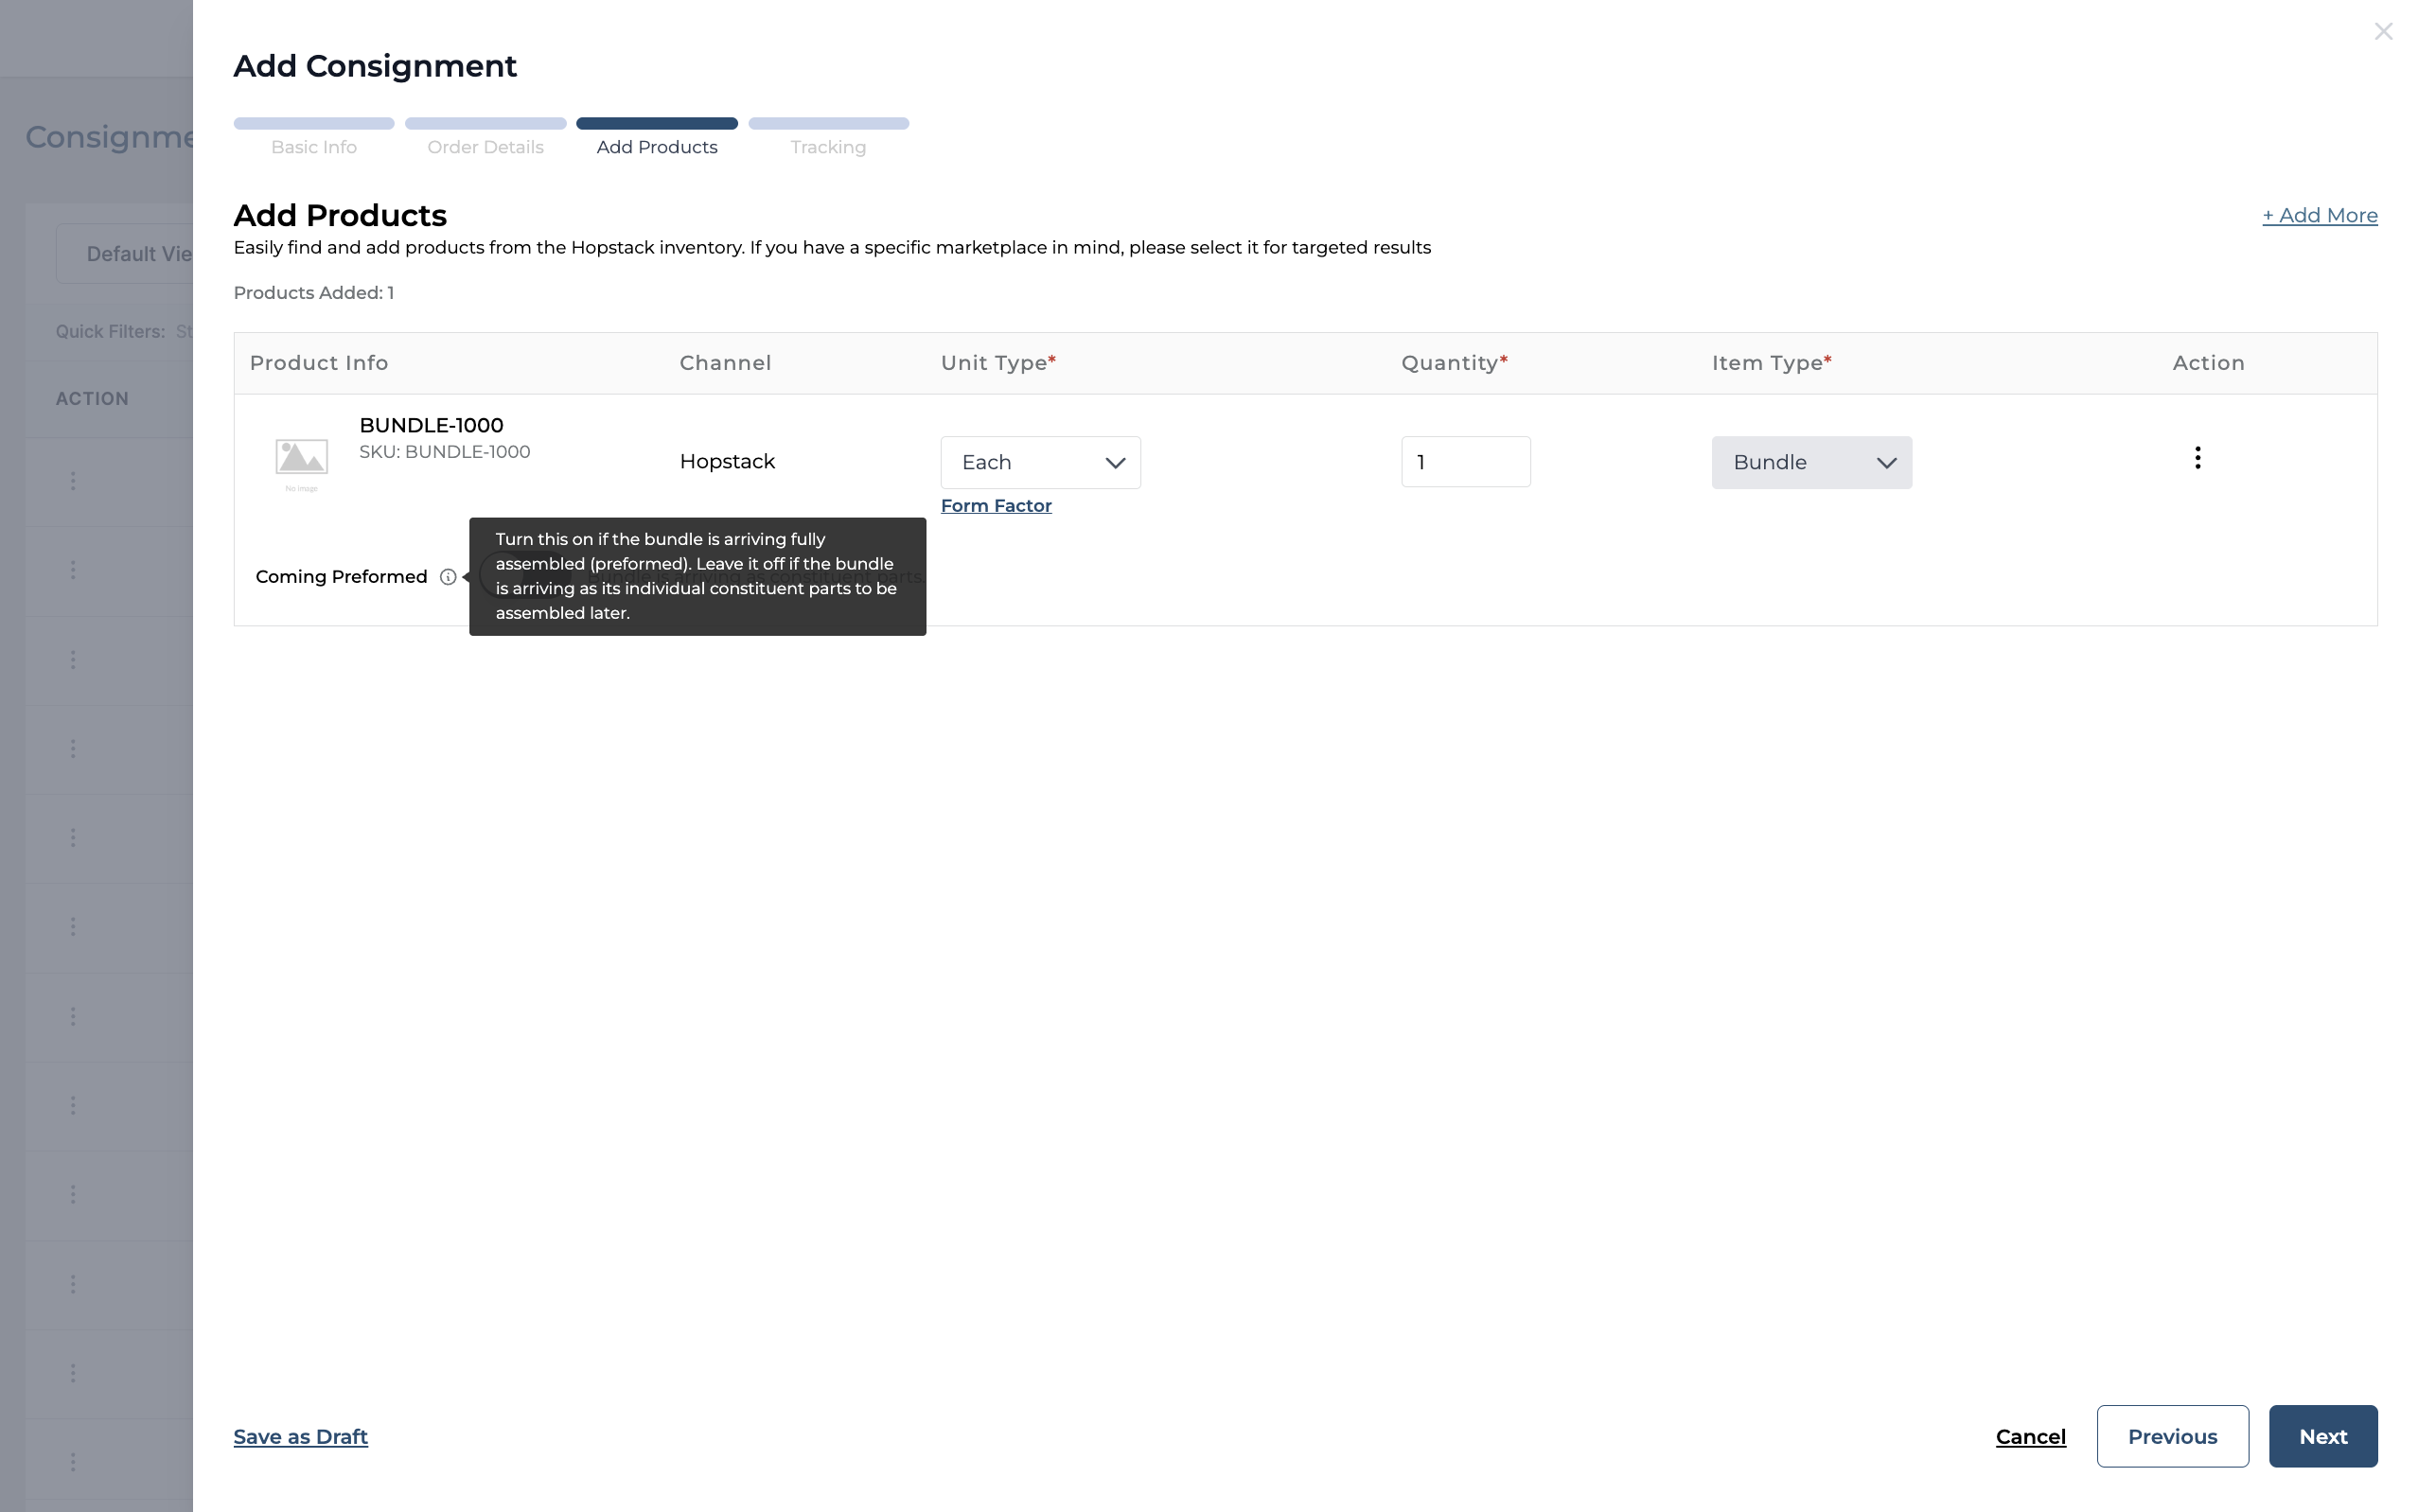
Select the Bundle product during the consignment creation
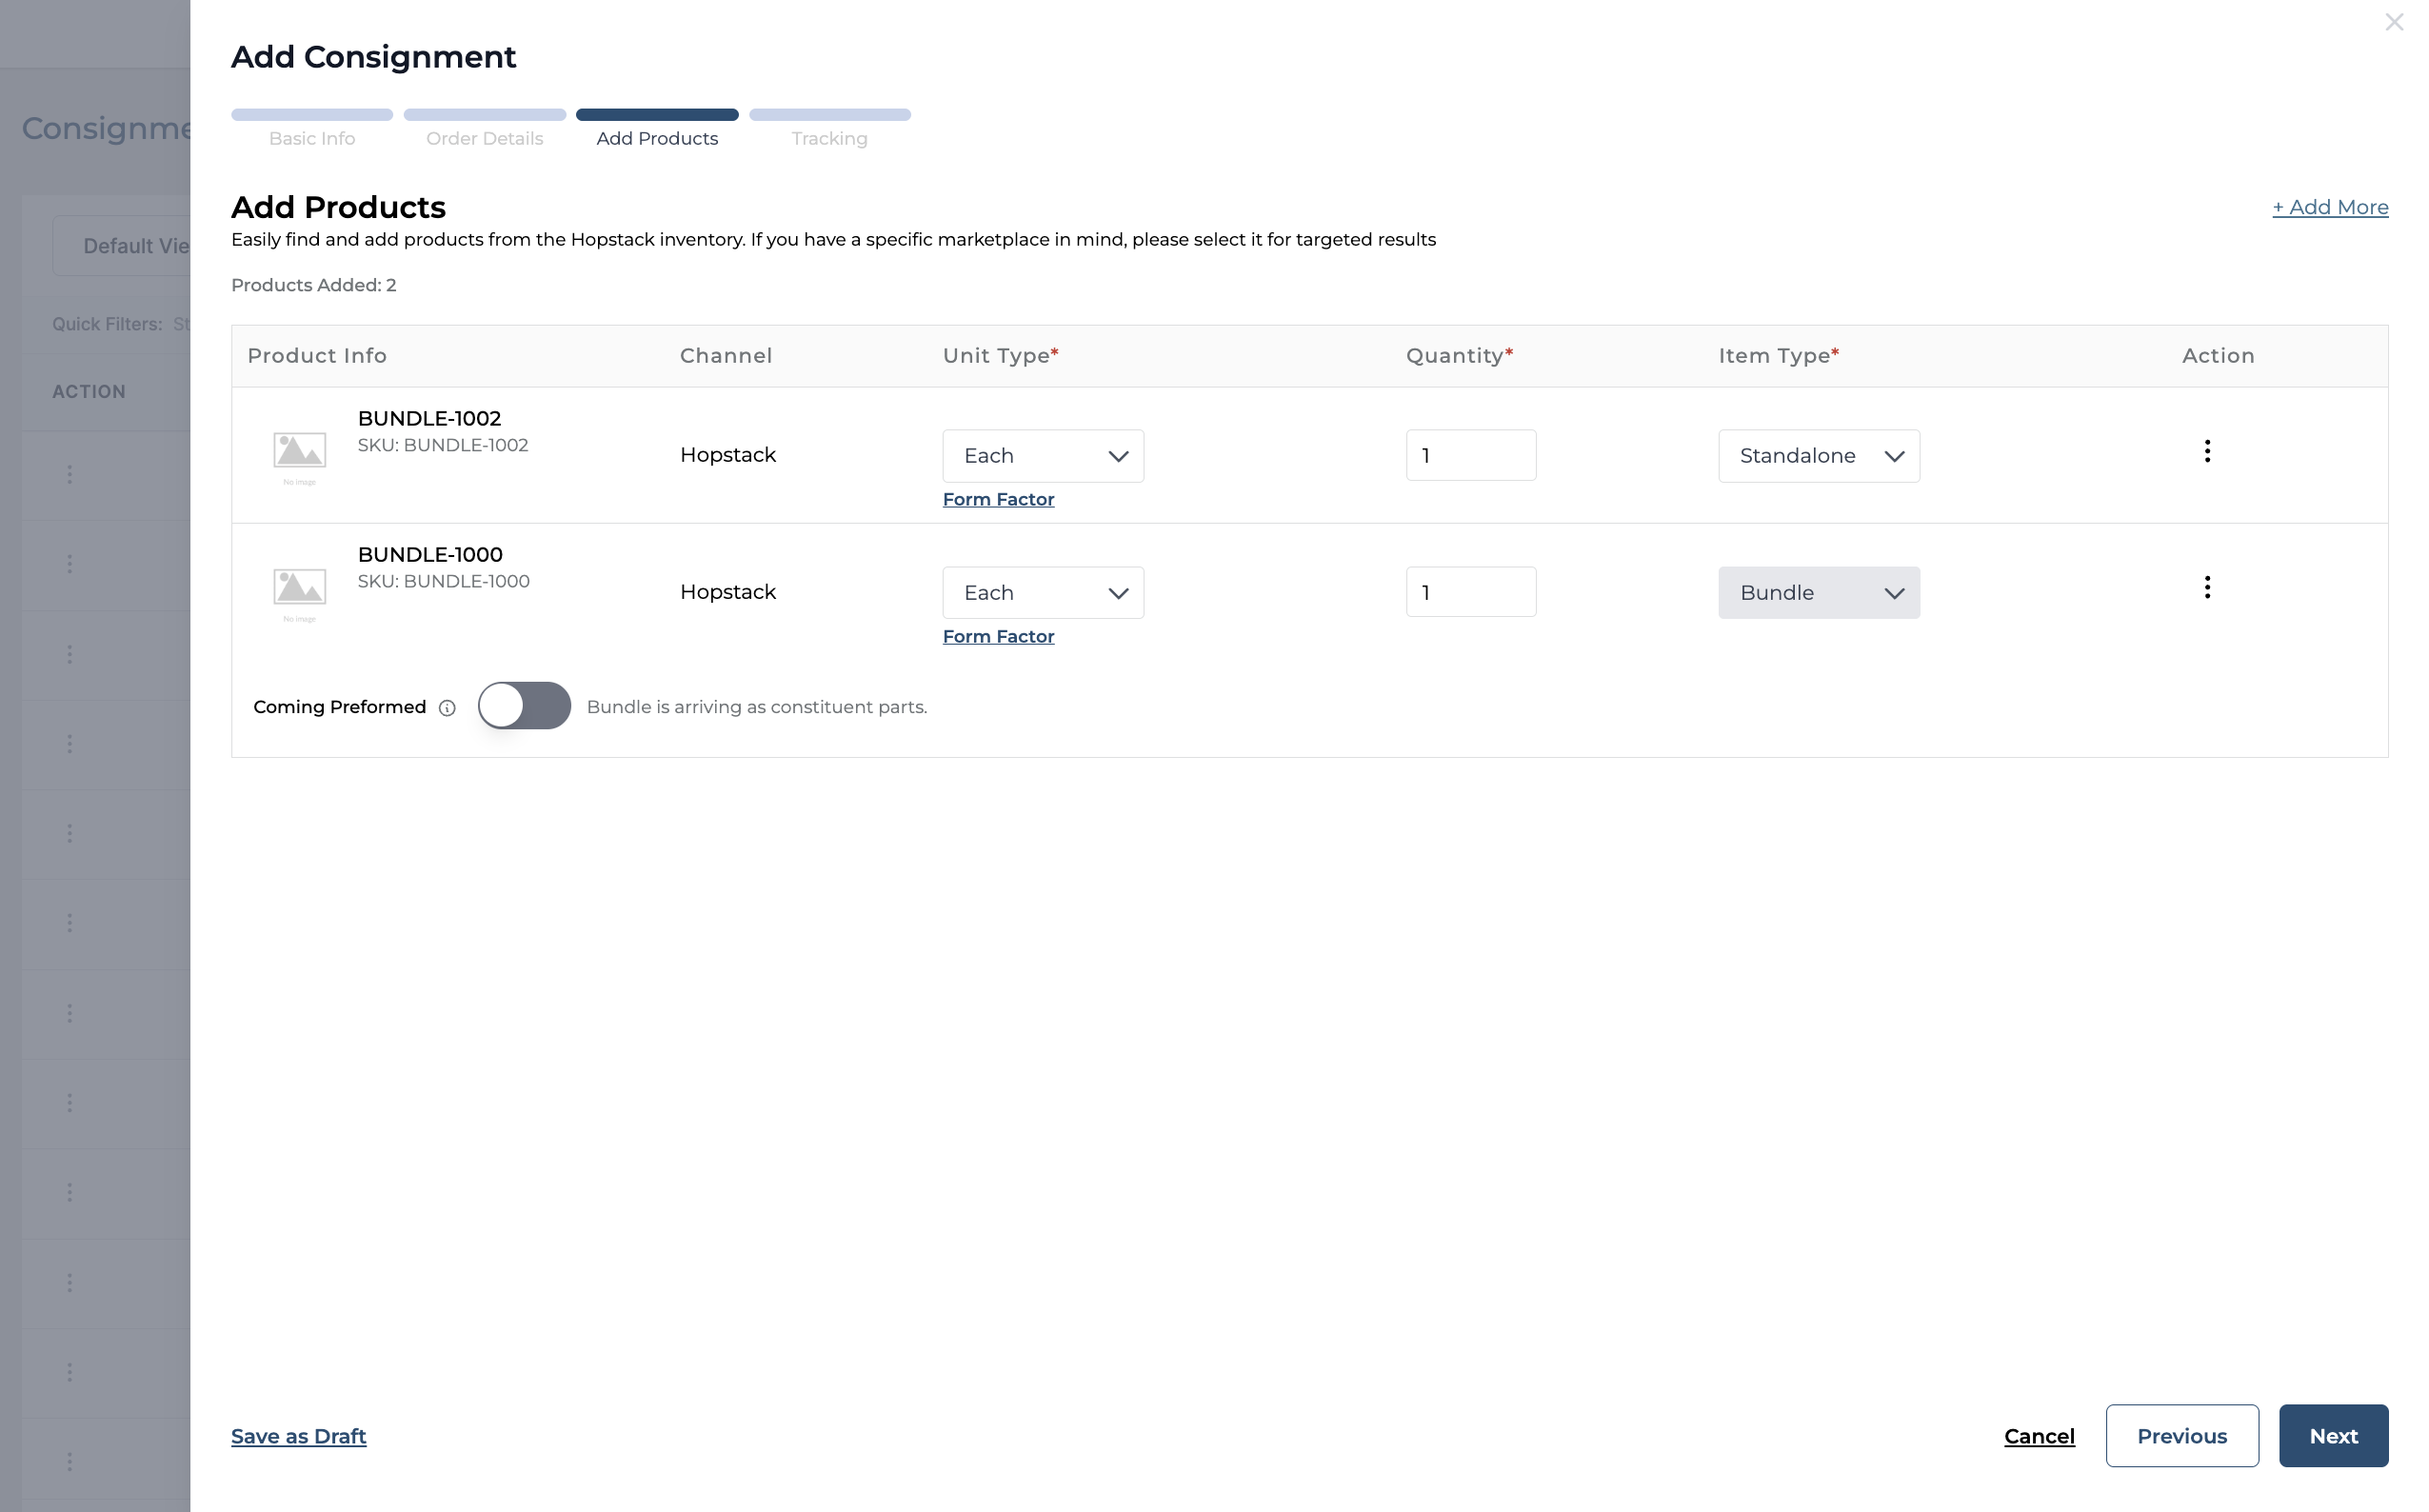
Enable this toggle if bundles are coming fully assembled. Leave the toggle disabled if bundles are received as individual components.
Click on the "Next" button to move forward
In the pop-up dialog box's "Tracking" section, click on the "Carrier" field to enter the name of the Carrier and Tracking Number.
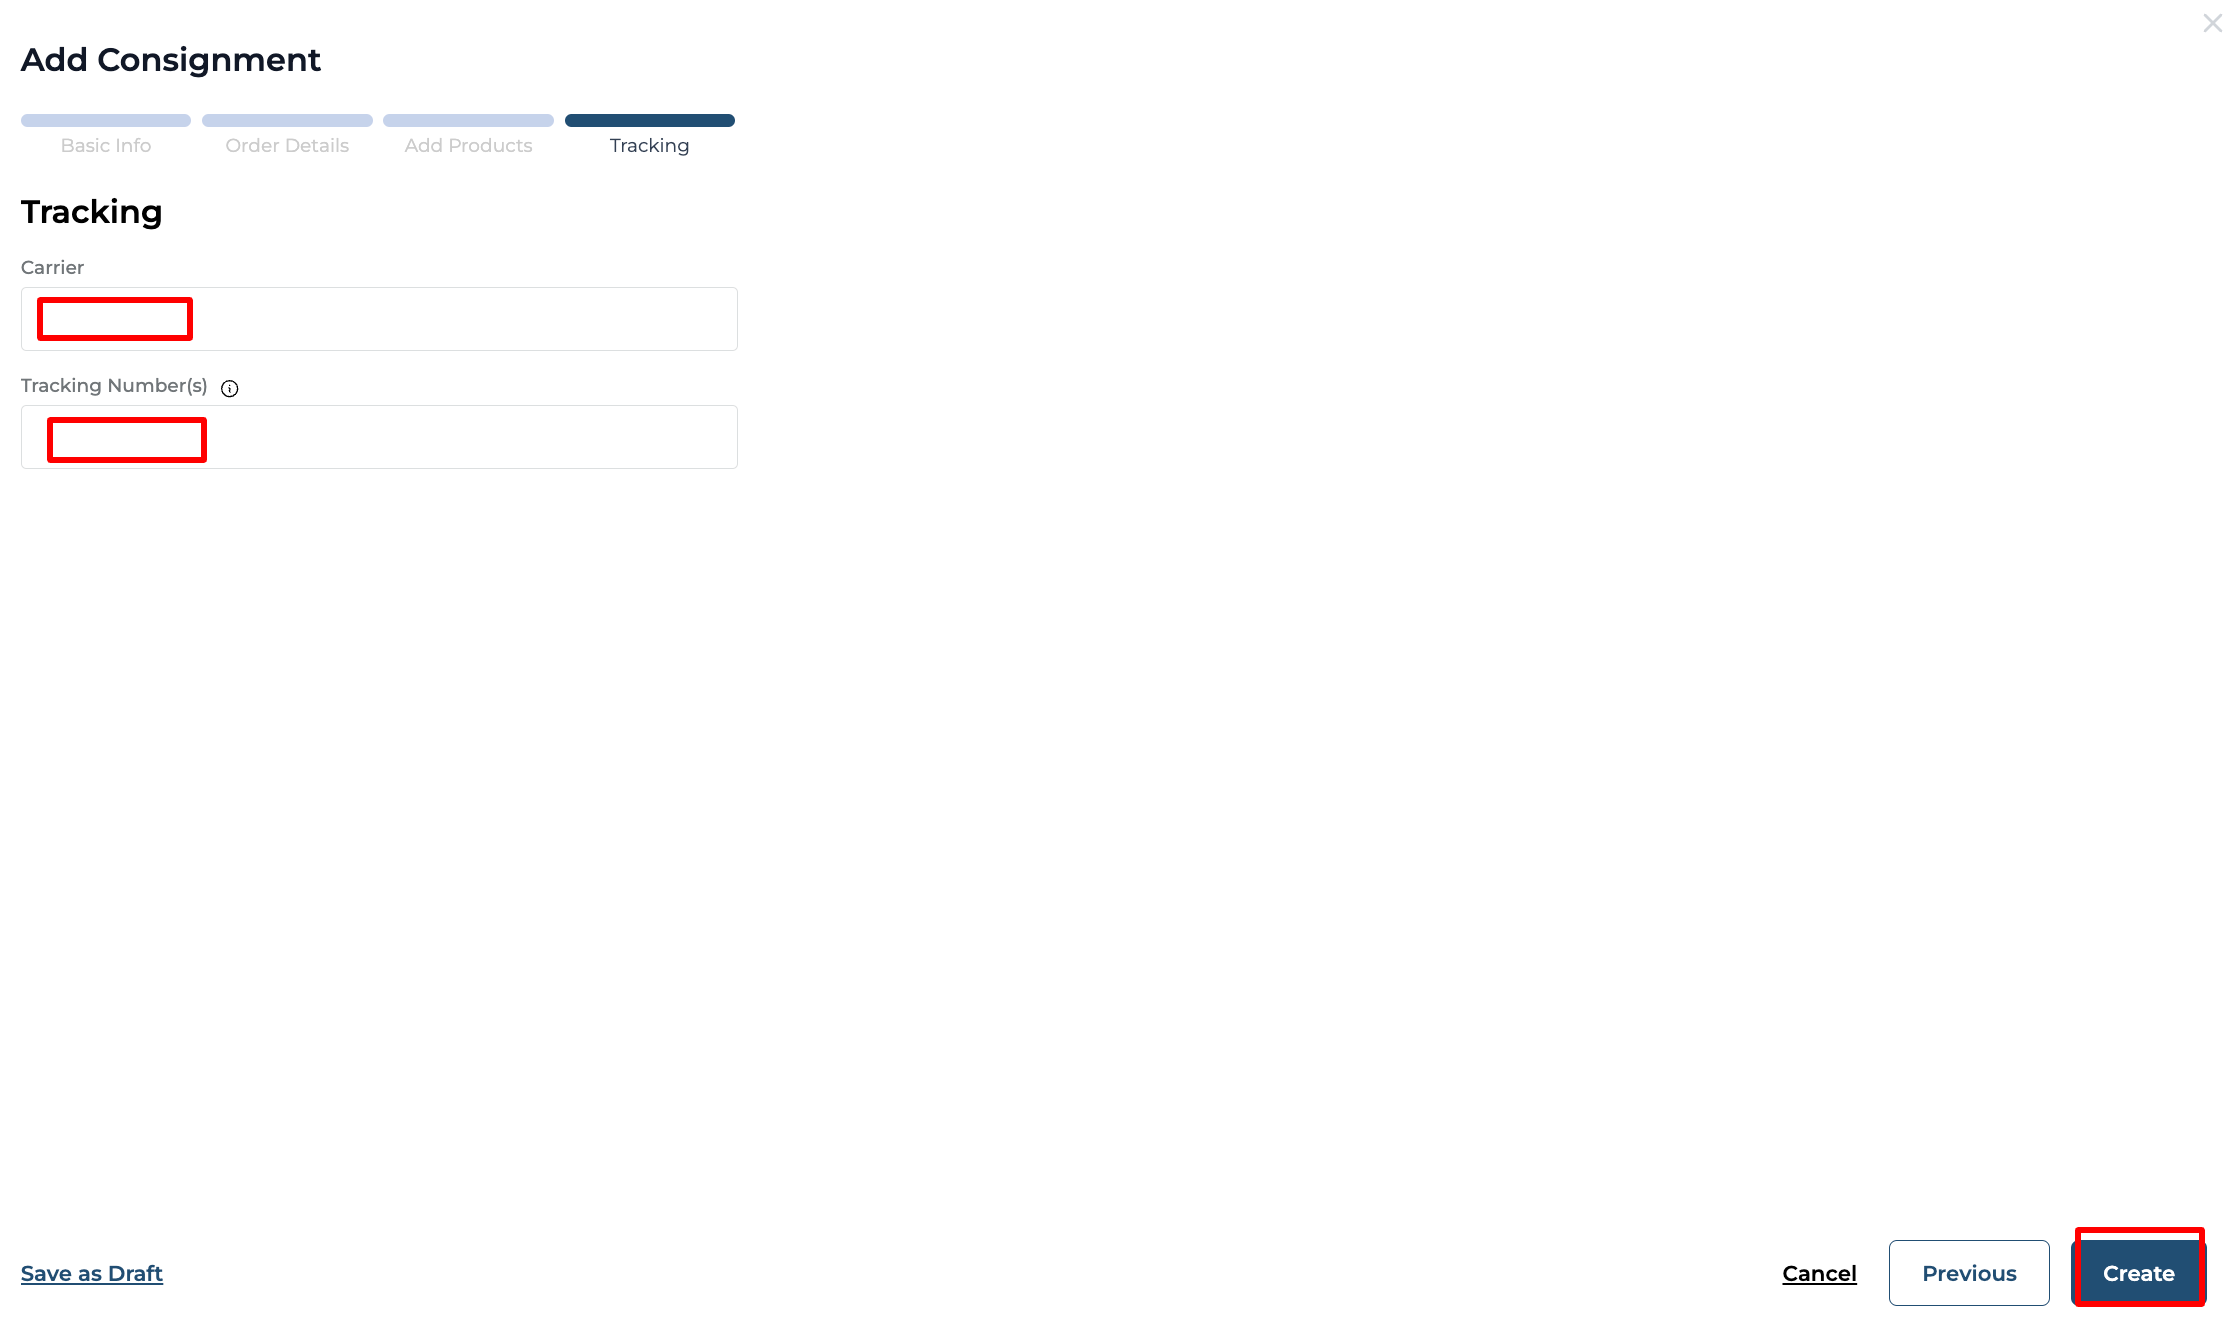
Click on the "Create" button to create the consignment.
Unknown Attachment