
This guide explains the process of creating a Return for an existing order by adding it to the Receiving Flow.
Overview
The Return Creation flow is designed to handle Carrier Returns against existing shipments. A return can only be created by referencing the tracking number of an outbound shipment. The system then converts that shipment into a inbound consignment, which is processed just like any other inbound order for receiving.
Pre-requisite: Outbound order should be completed in the system so the common identifier can be tracking number for return creation.
Steps to Create a Return
-
Start Receiving Workflow
-
From the top-right arrow, select Receiving.
-
-
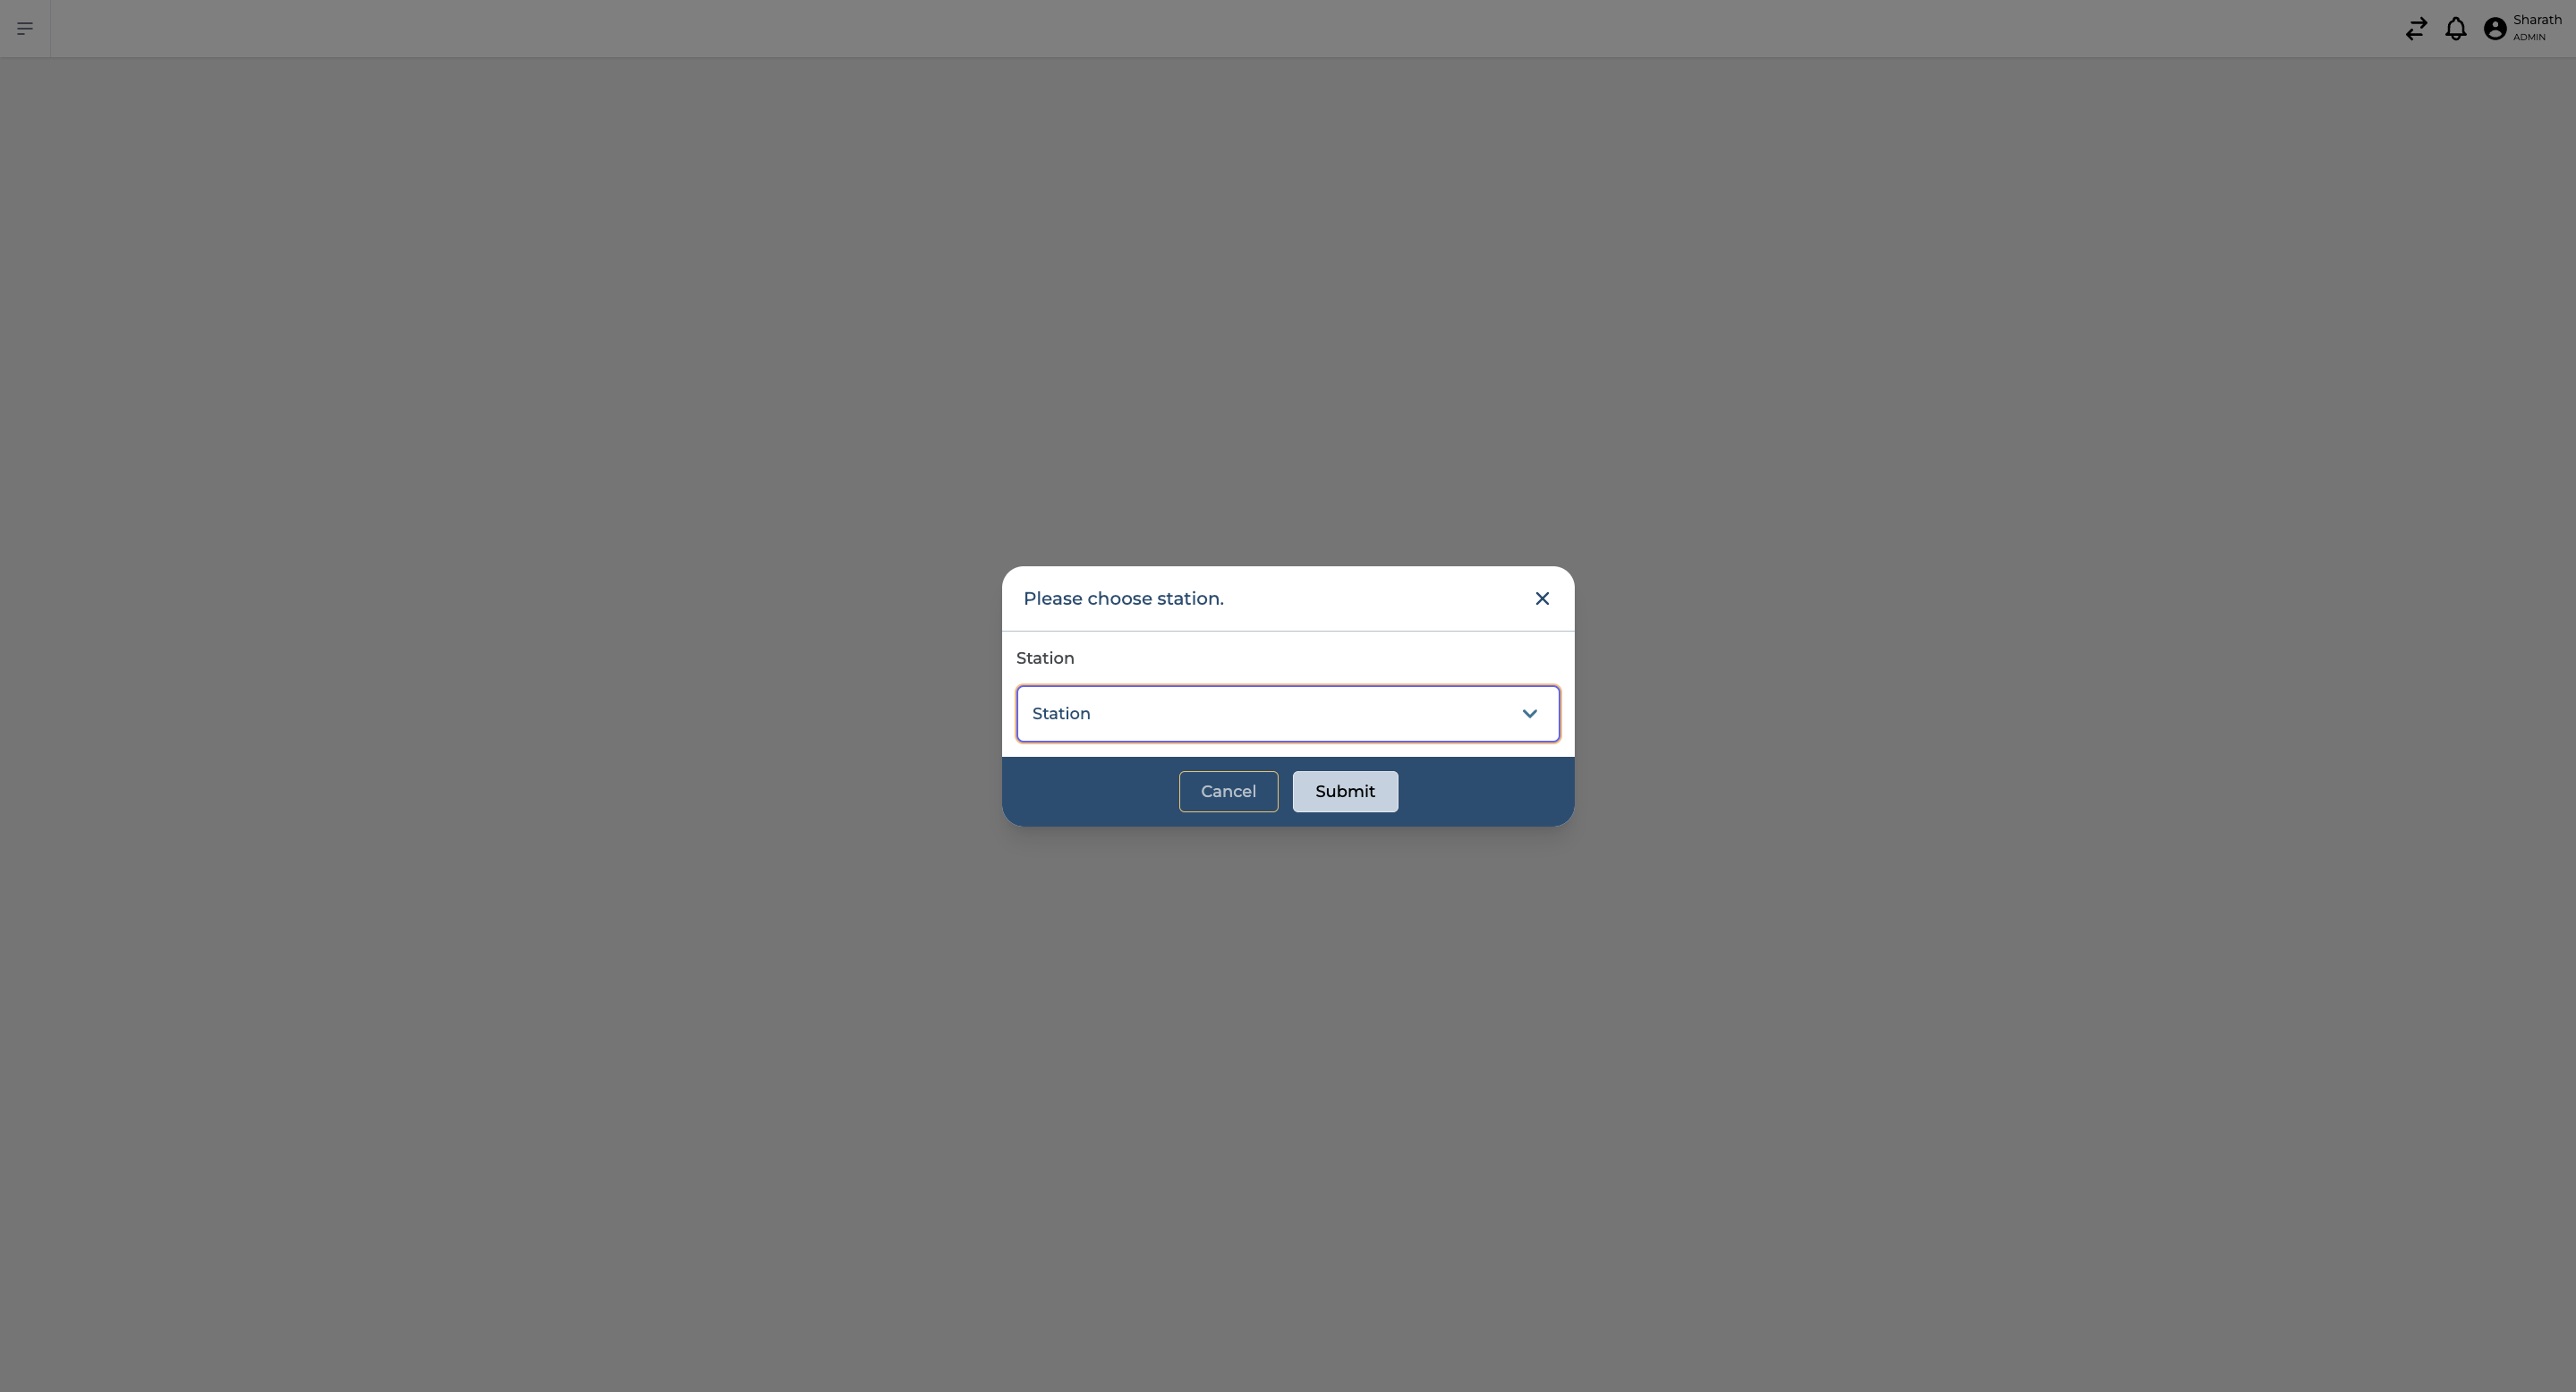
Select a Station for Receiving
-
Choose the station (location) where receiving will be performed.
-
Note: Only one user can log into a station at a time.
-
-
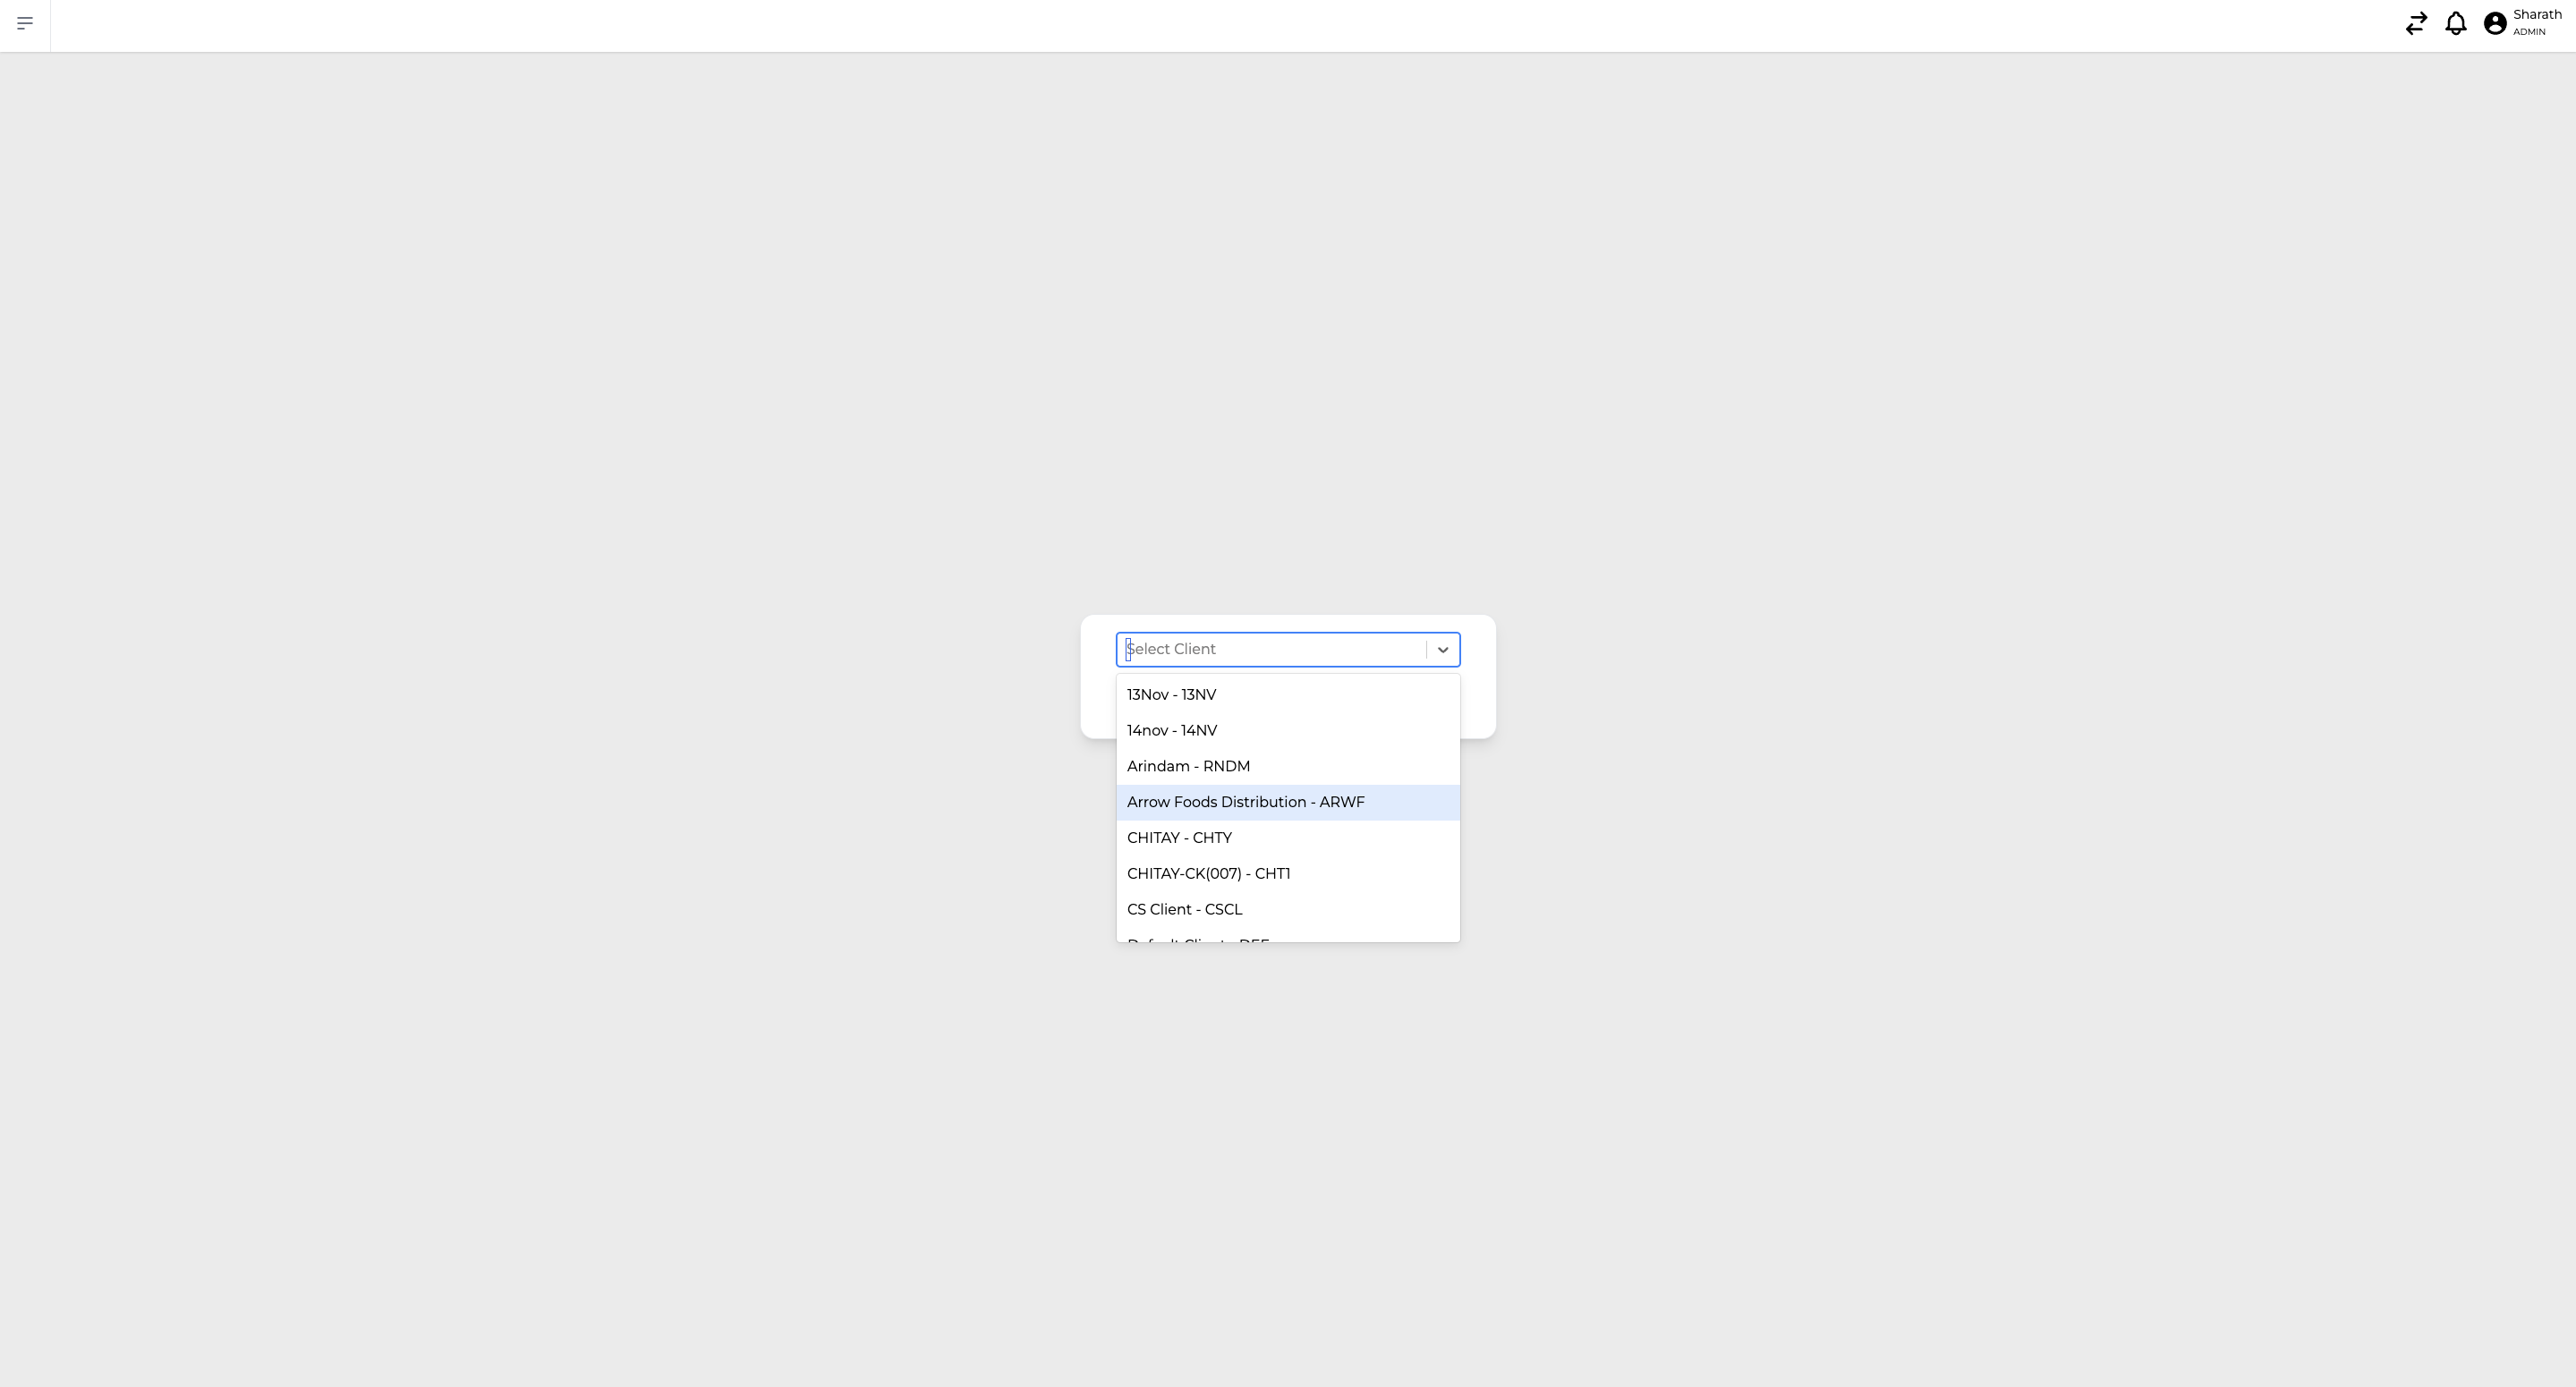
Select a Client (if applicable)
-
In multi-client setups, use the searchable dropdown to select the appropriate client.
-
-
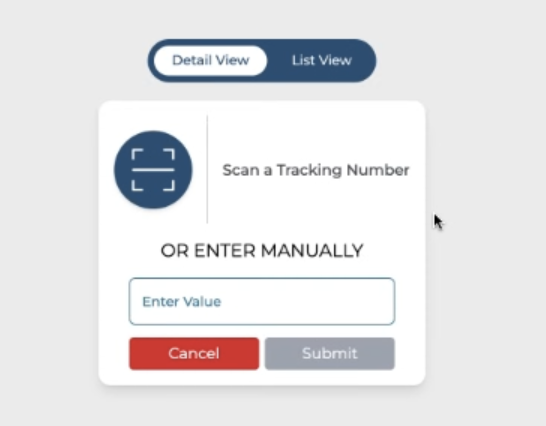
Add Tracking Number
-
Enter the tracking number of the shipment that originally left the warehouse.
-
Note: This should be the tracking number of the outbound order that is now being returned.
-
-
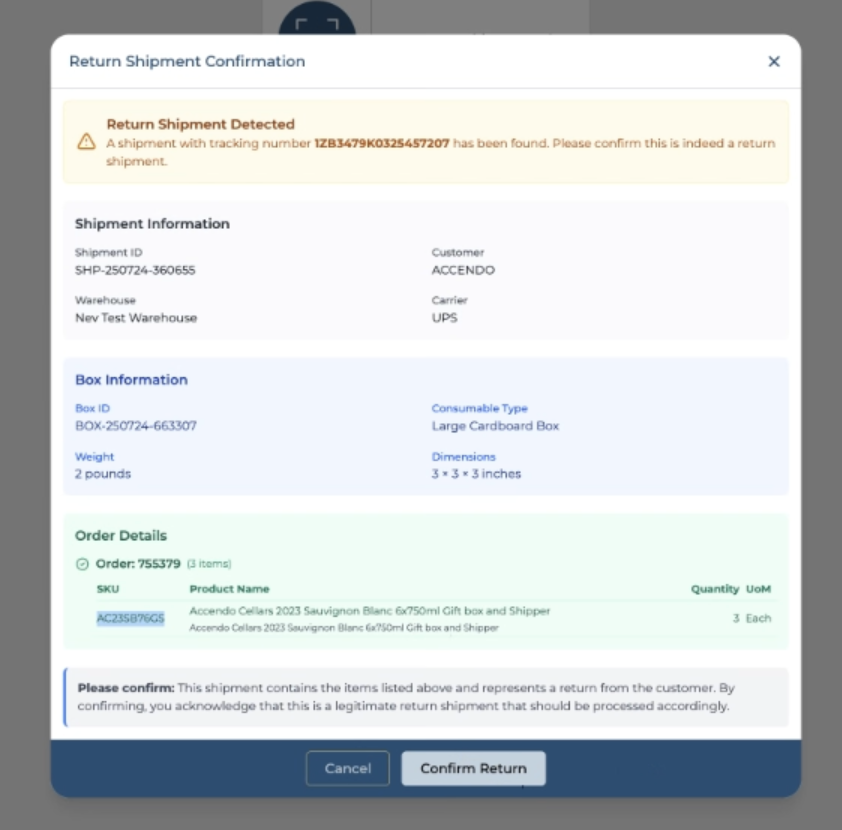
Verify Order Details
-
A pop-up will appear showing the order details.
-
Review the information carefully.
-
Once verified, click Confirm Return.
-
-
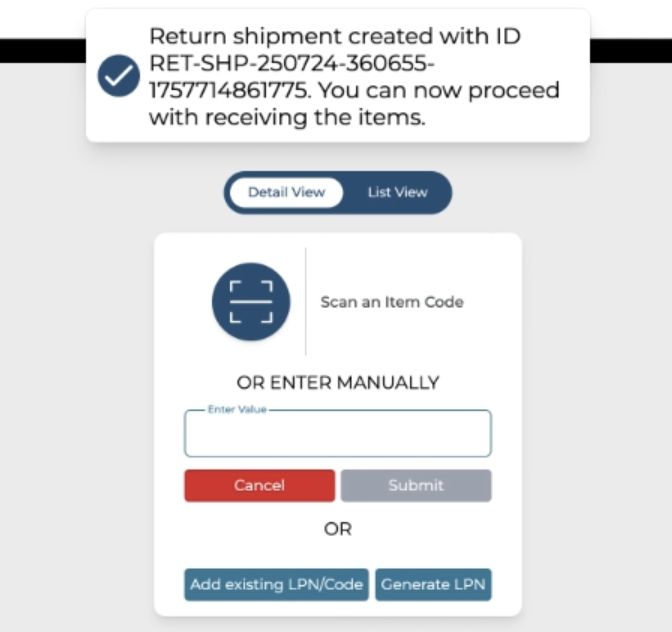
Consignment Creation
-
After confirmation, the system will show a Pop-up with Order ID and creates a Consignment for the returned order.
-
This consignment will have the same details as the outbound order, but it is now treated as a receiving order.
-
-
Check in Consignments Window
-
Navigate to the Consignments window to view and confirm the newly created consignment.
-
-
Receiving Process
-
Continue with the standard receiving workflow to complete the return.
-
For detailed steps, refer to the https://help.hopstack.io/home/new-receiving-workflow
-
Return Created Successfully – Once the receiving is completed, the return will be processed and updated in the system.