With the updated receiving workflow, users can now assign inventory tracking numbers to items during receiving, in addition to the existing features.
This section outlines all the activities involved in the new receiving workflow on the Hopstack platform.
-
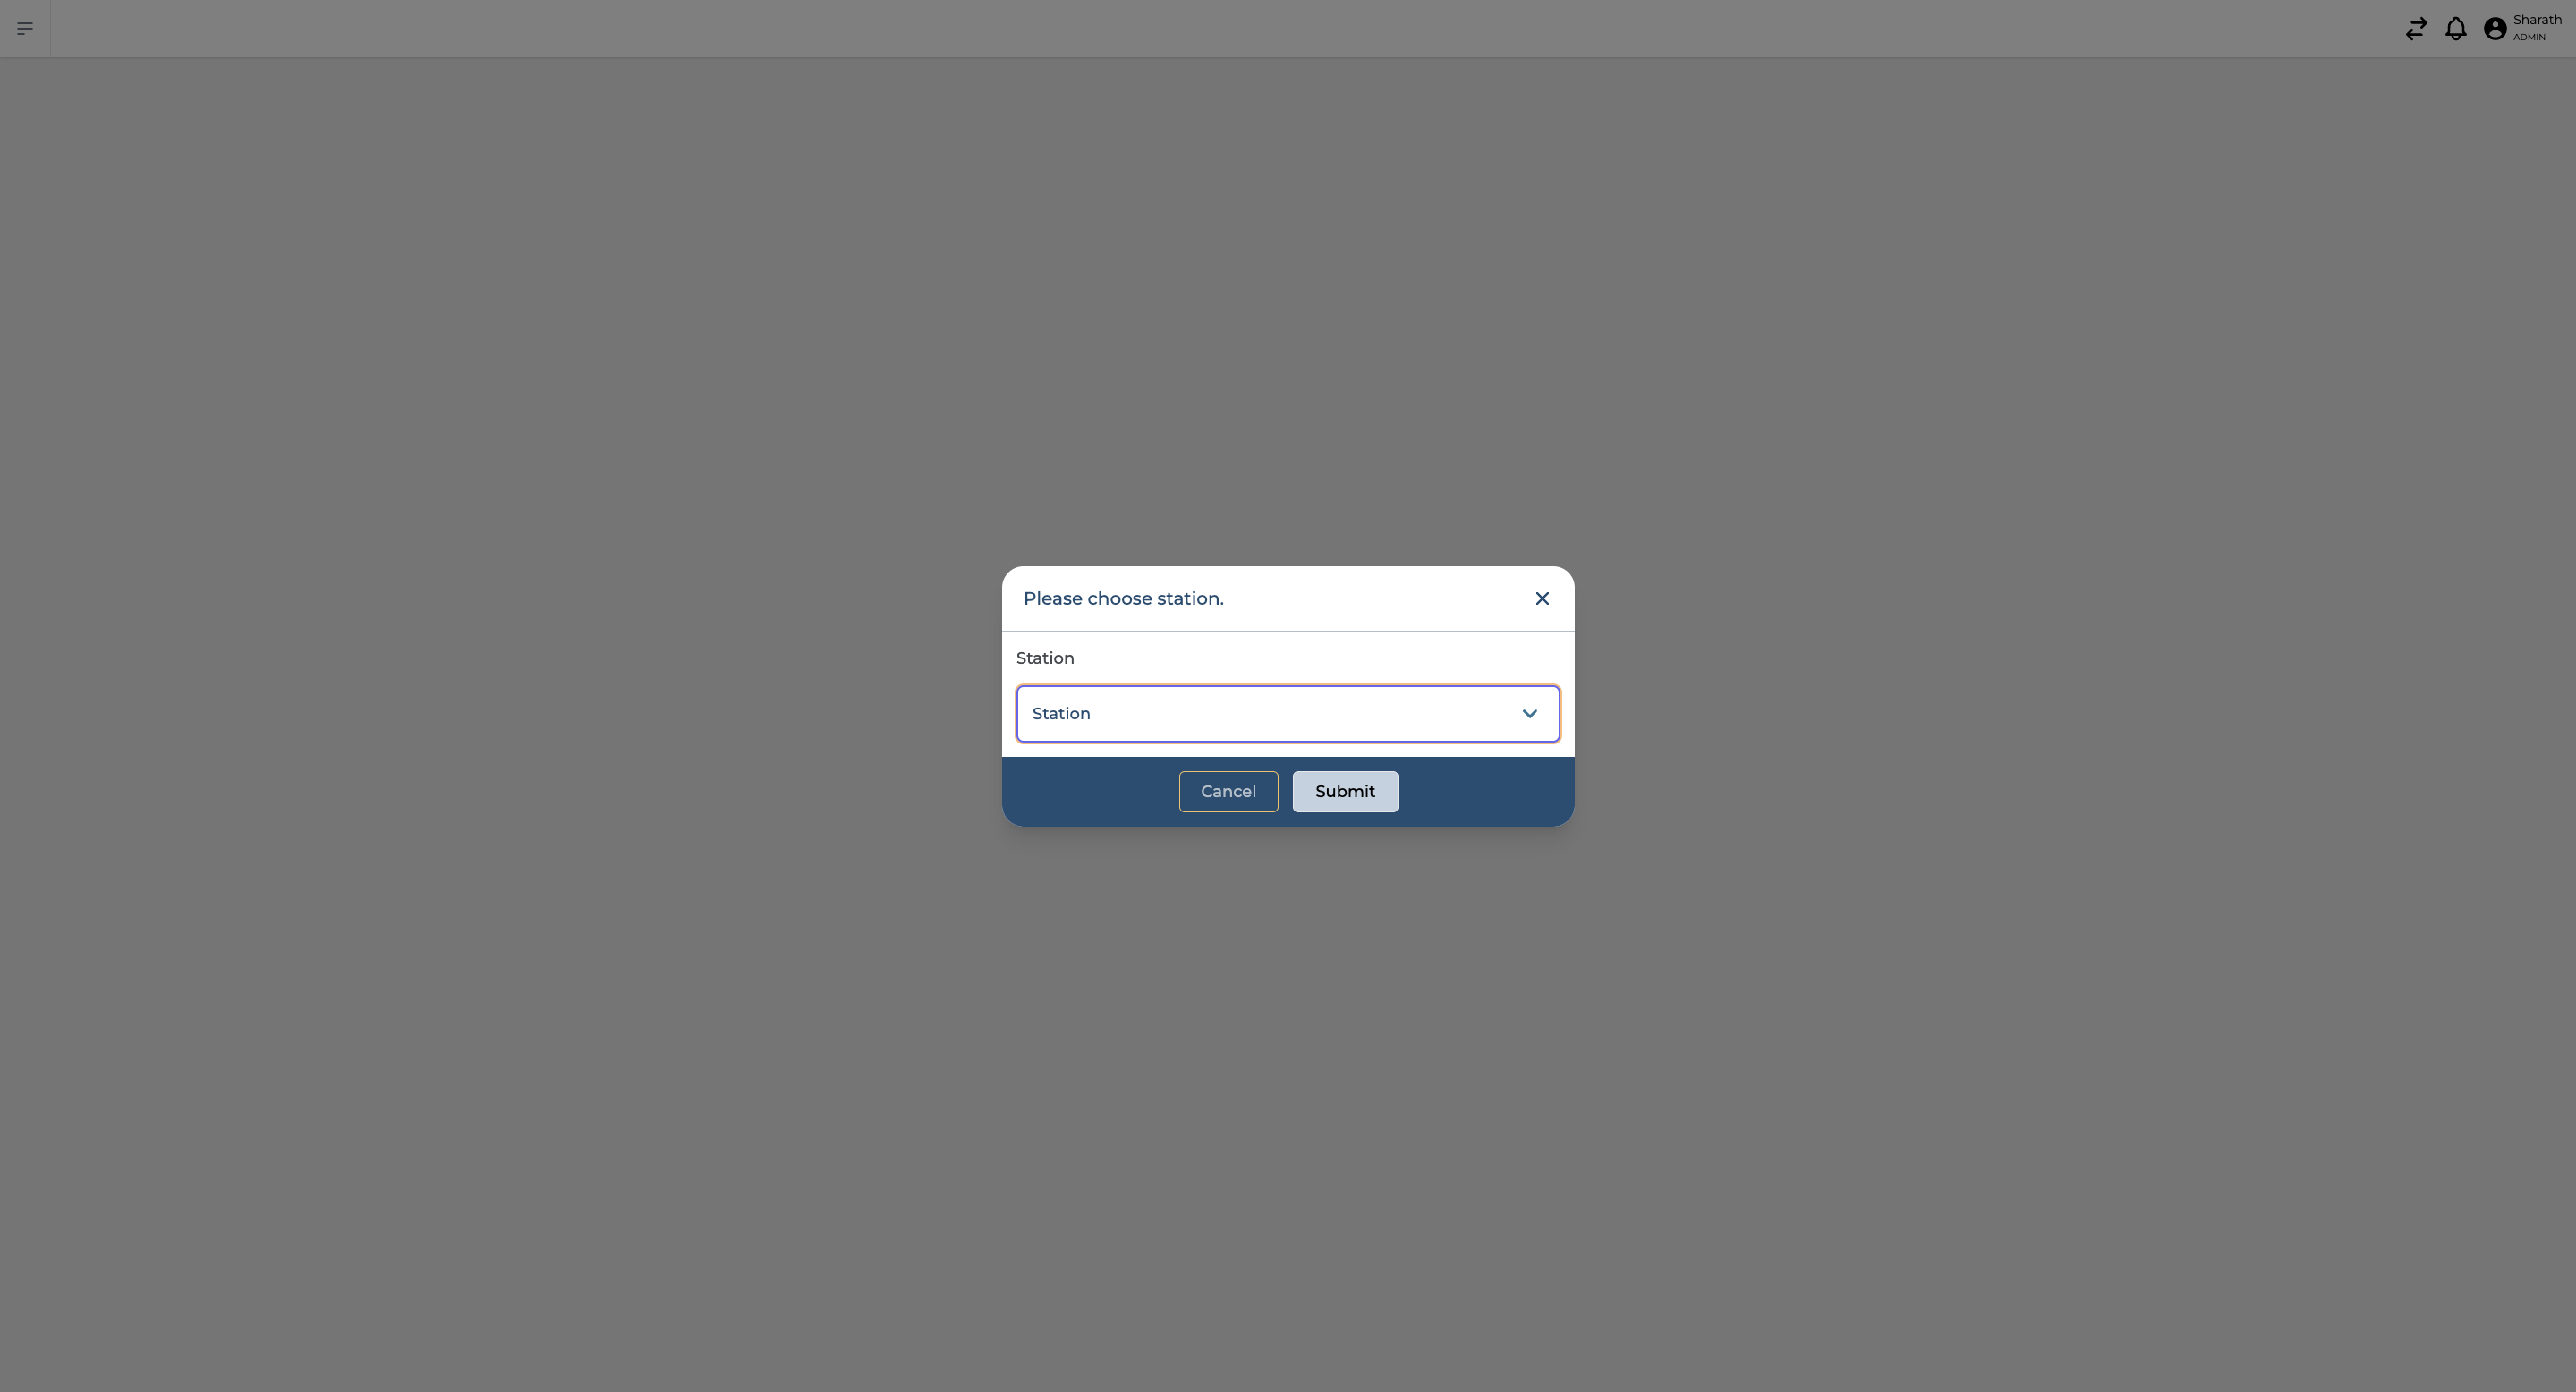
Choosing a Station for Receiving
Choosing a station means choosing a location where you will be performing receiving. Only one user can log into a given station at a time.
-
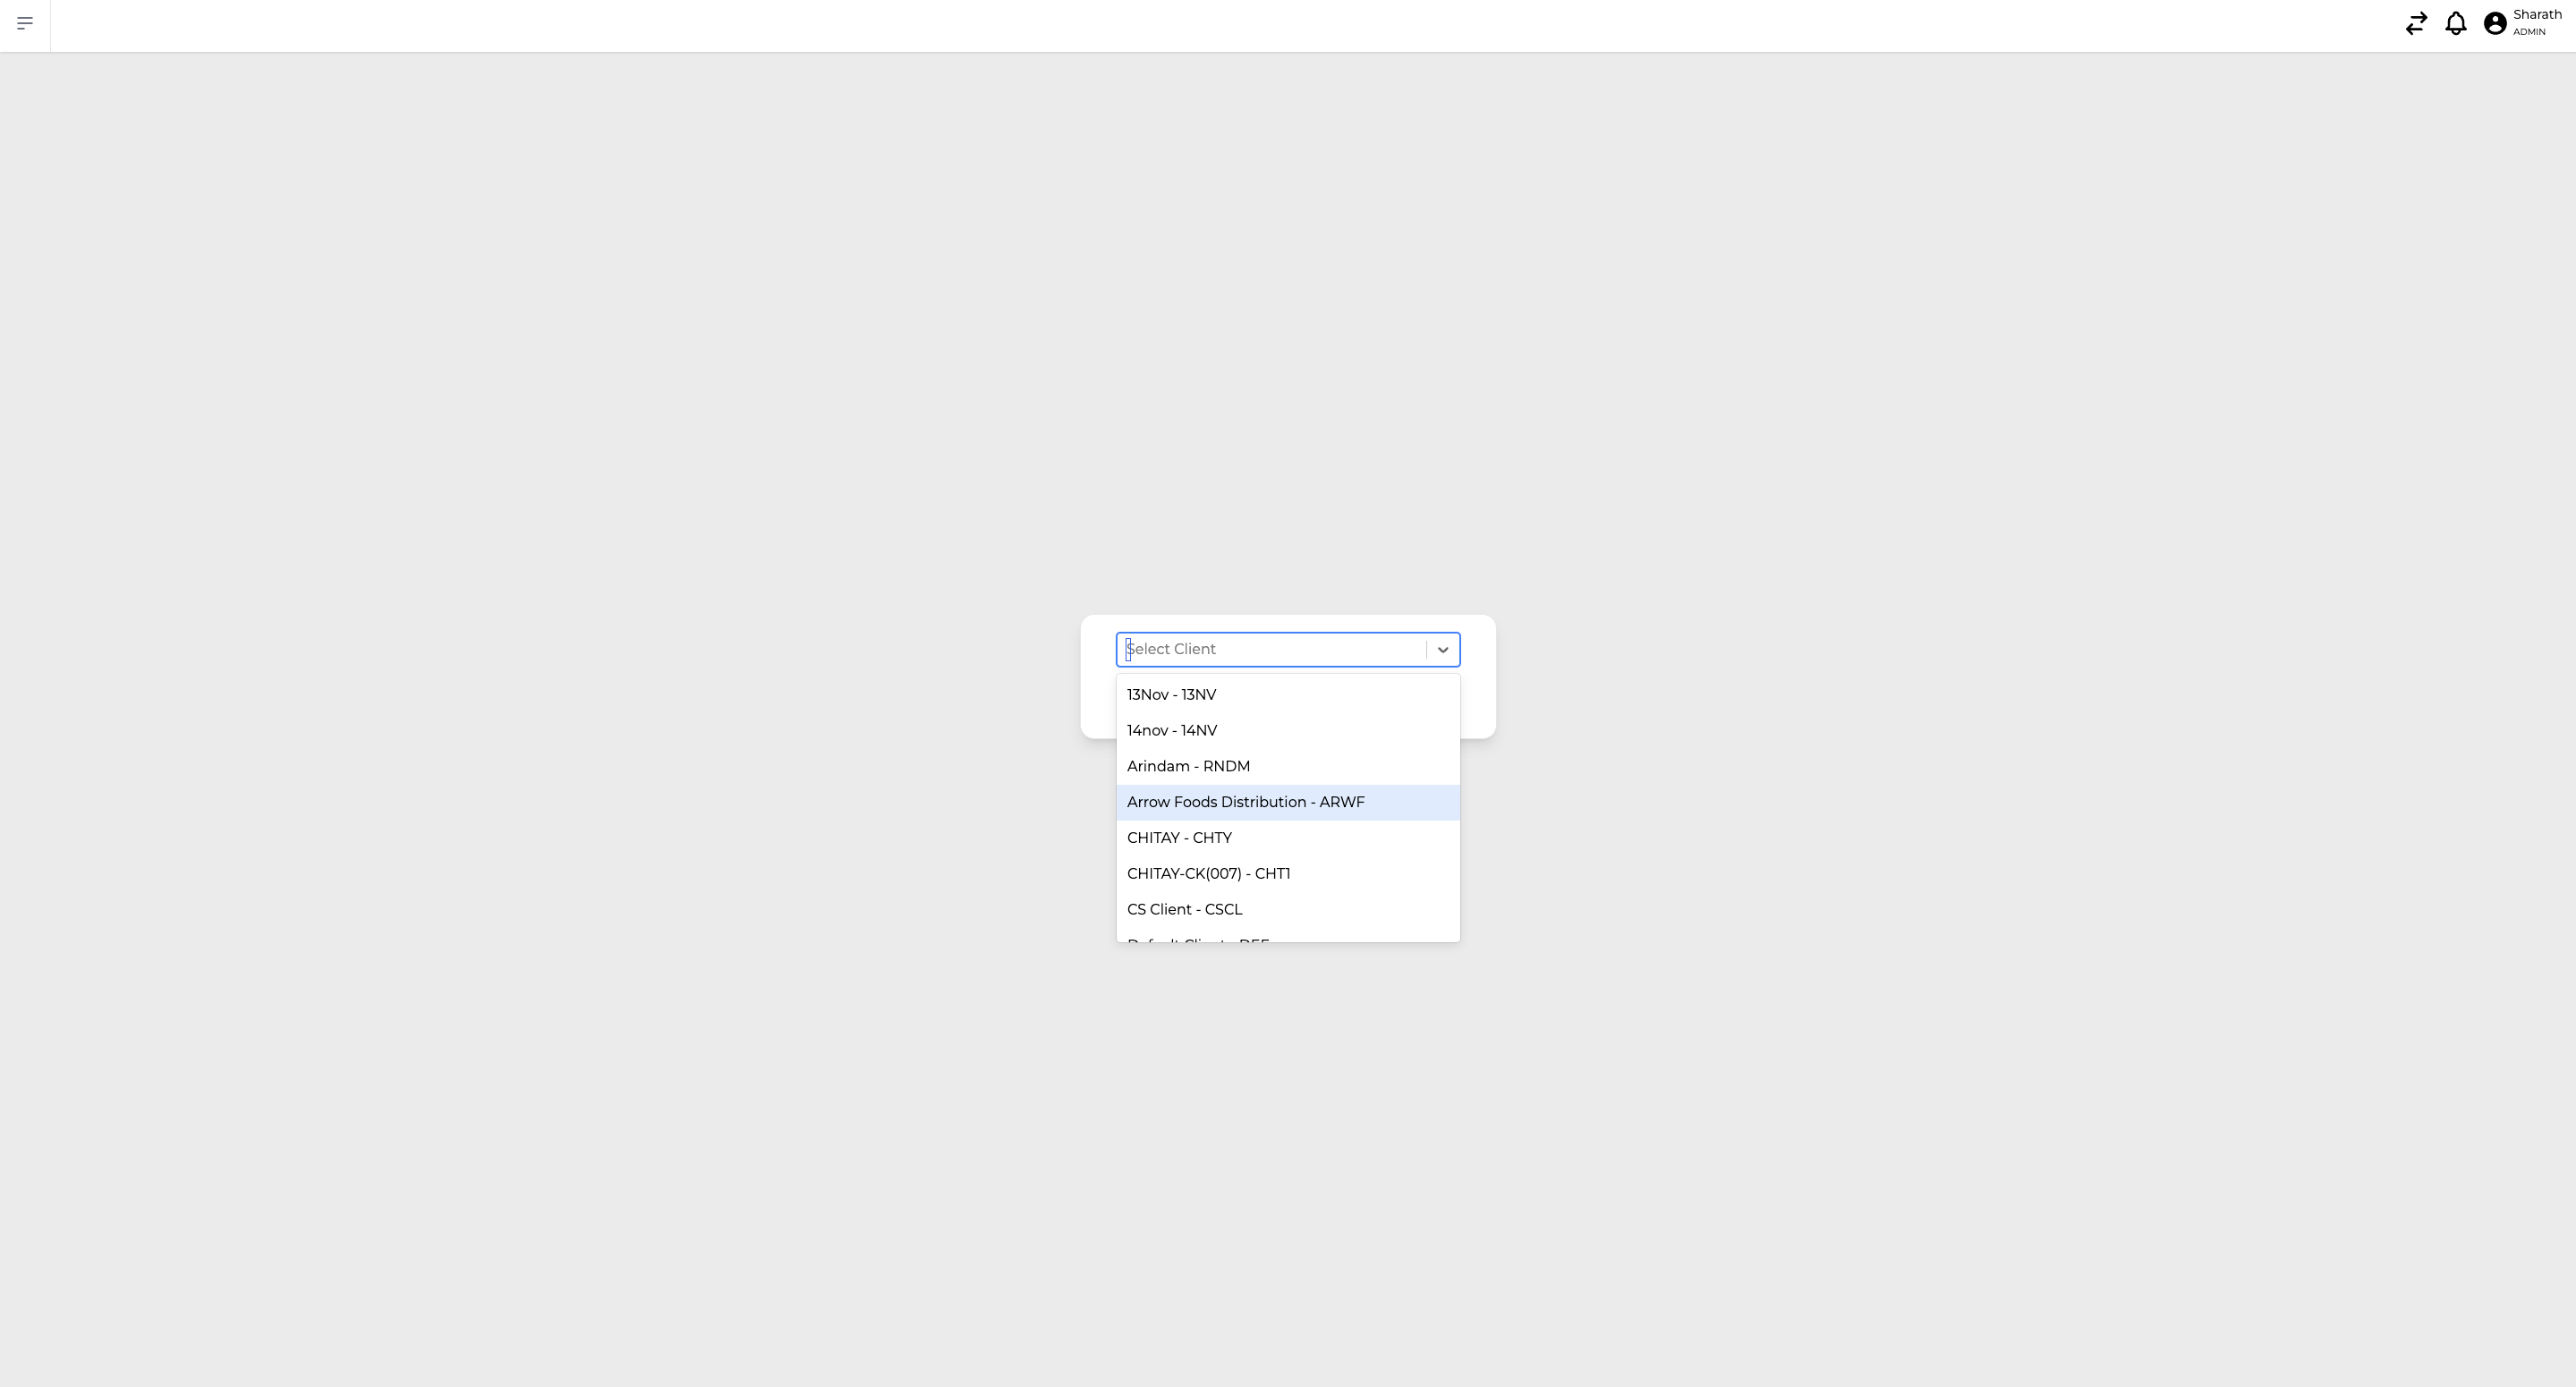
Choosing a Client during Receiving
This is typically the first step of performing receiving in the Hopstack platform and is going to be a common first step across multiple workflows. This step is relevant when there is a multiple-client setup.
On this screen, you will see a searchable dropdown component that allows you to select a client.
-
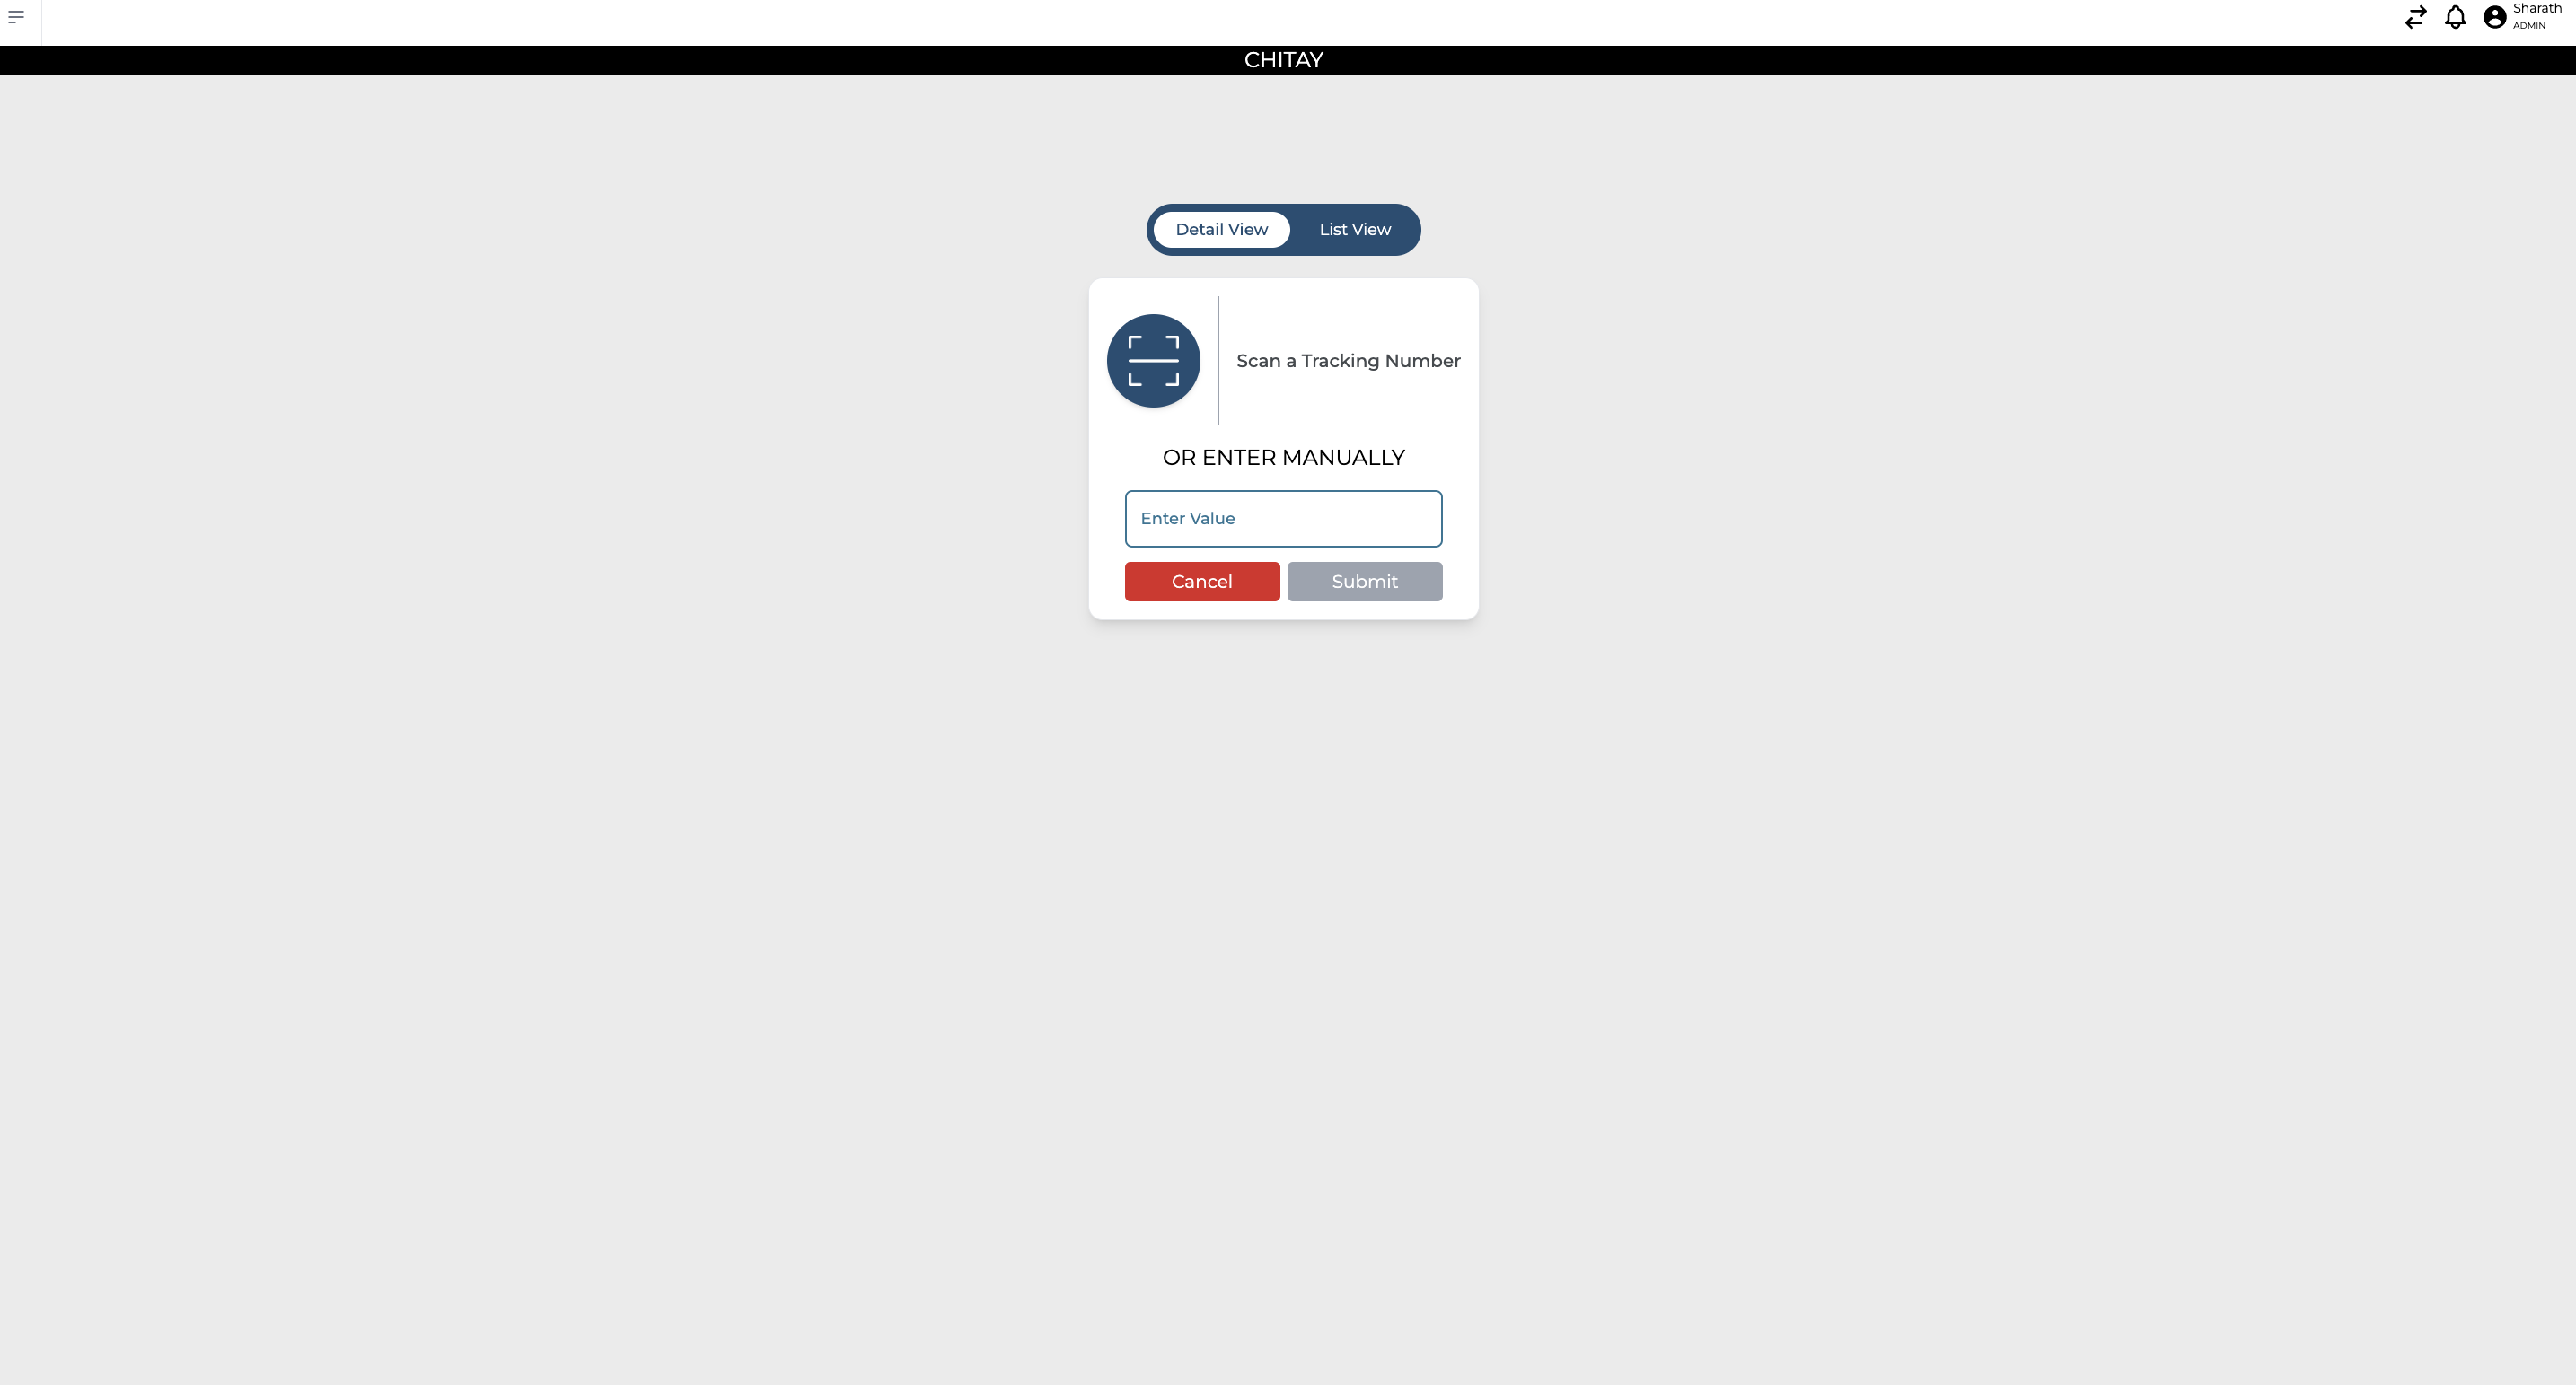
Scan the tracking number
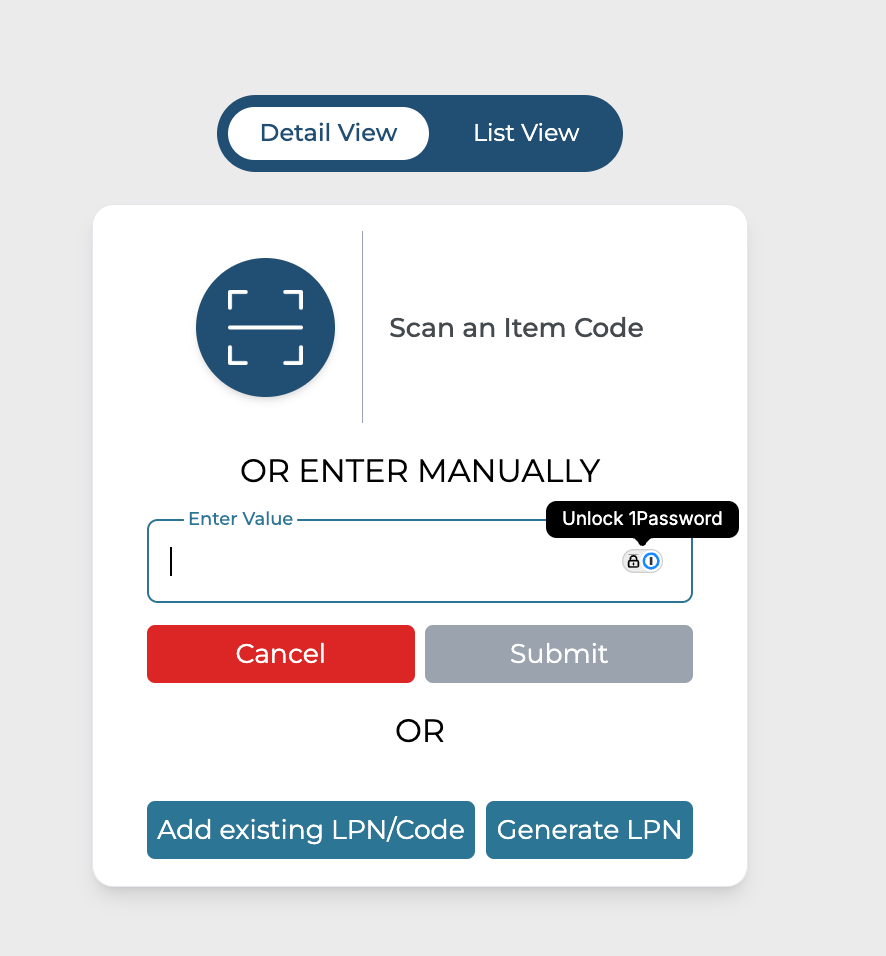
There is a detail view and a list view. In the detail view, the user can scan the tracking number for the consignment that they would like to receive, and the list view shows the list of all open consignments that are waiting to be received where the user can click on “Work on this” button to start receiving a particular consignment.

-
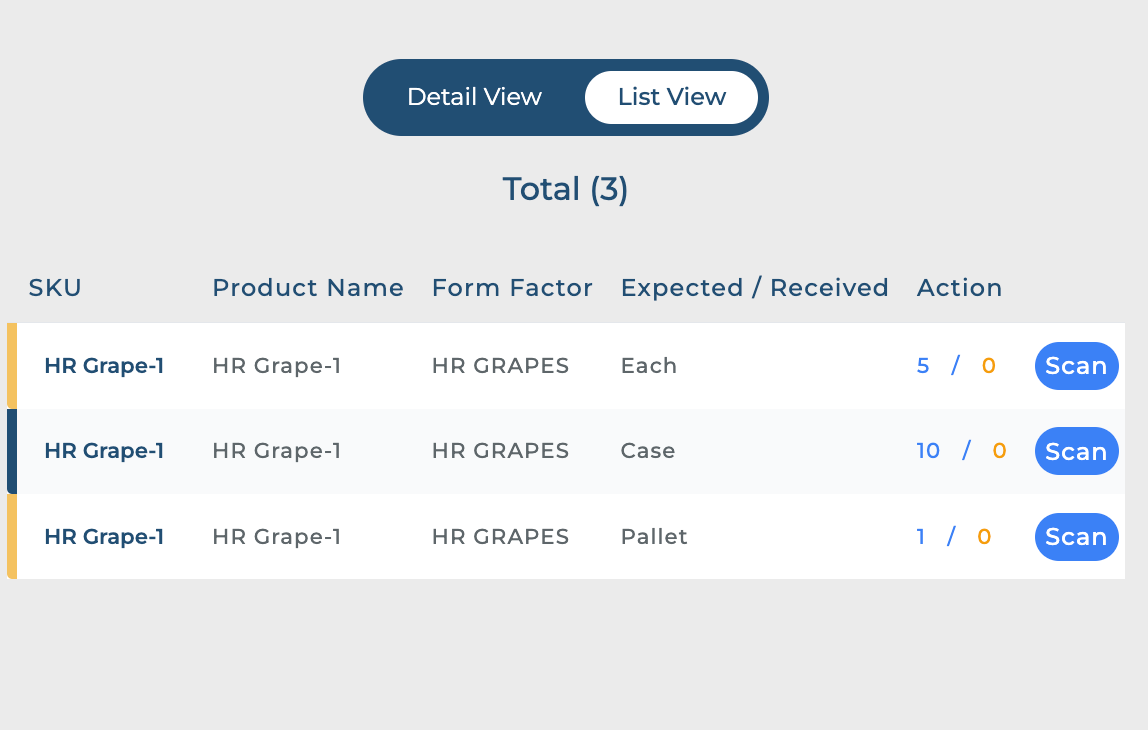
Scan Item: After scanning the tracking number or selecting an order from the list view page, the user is directed to a detailed view where they can scan the item code to start receiving. Switching to the list view presents the user with a list of items in the consignment, where users can click the "Scan" button next to a specific item to begin receiving it.
-
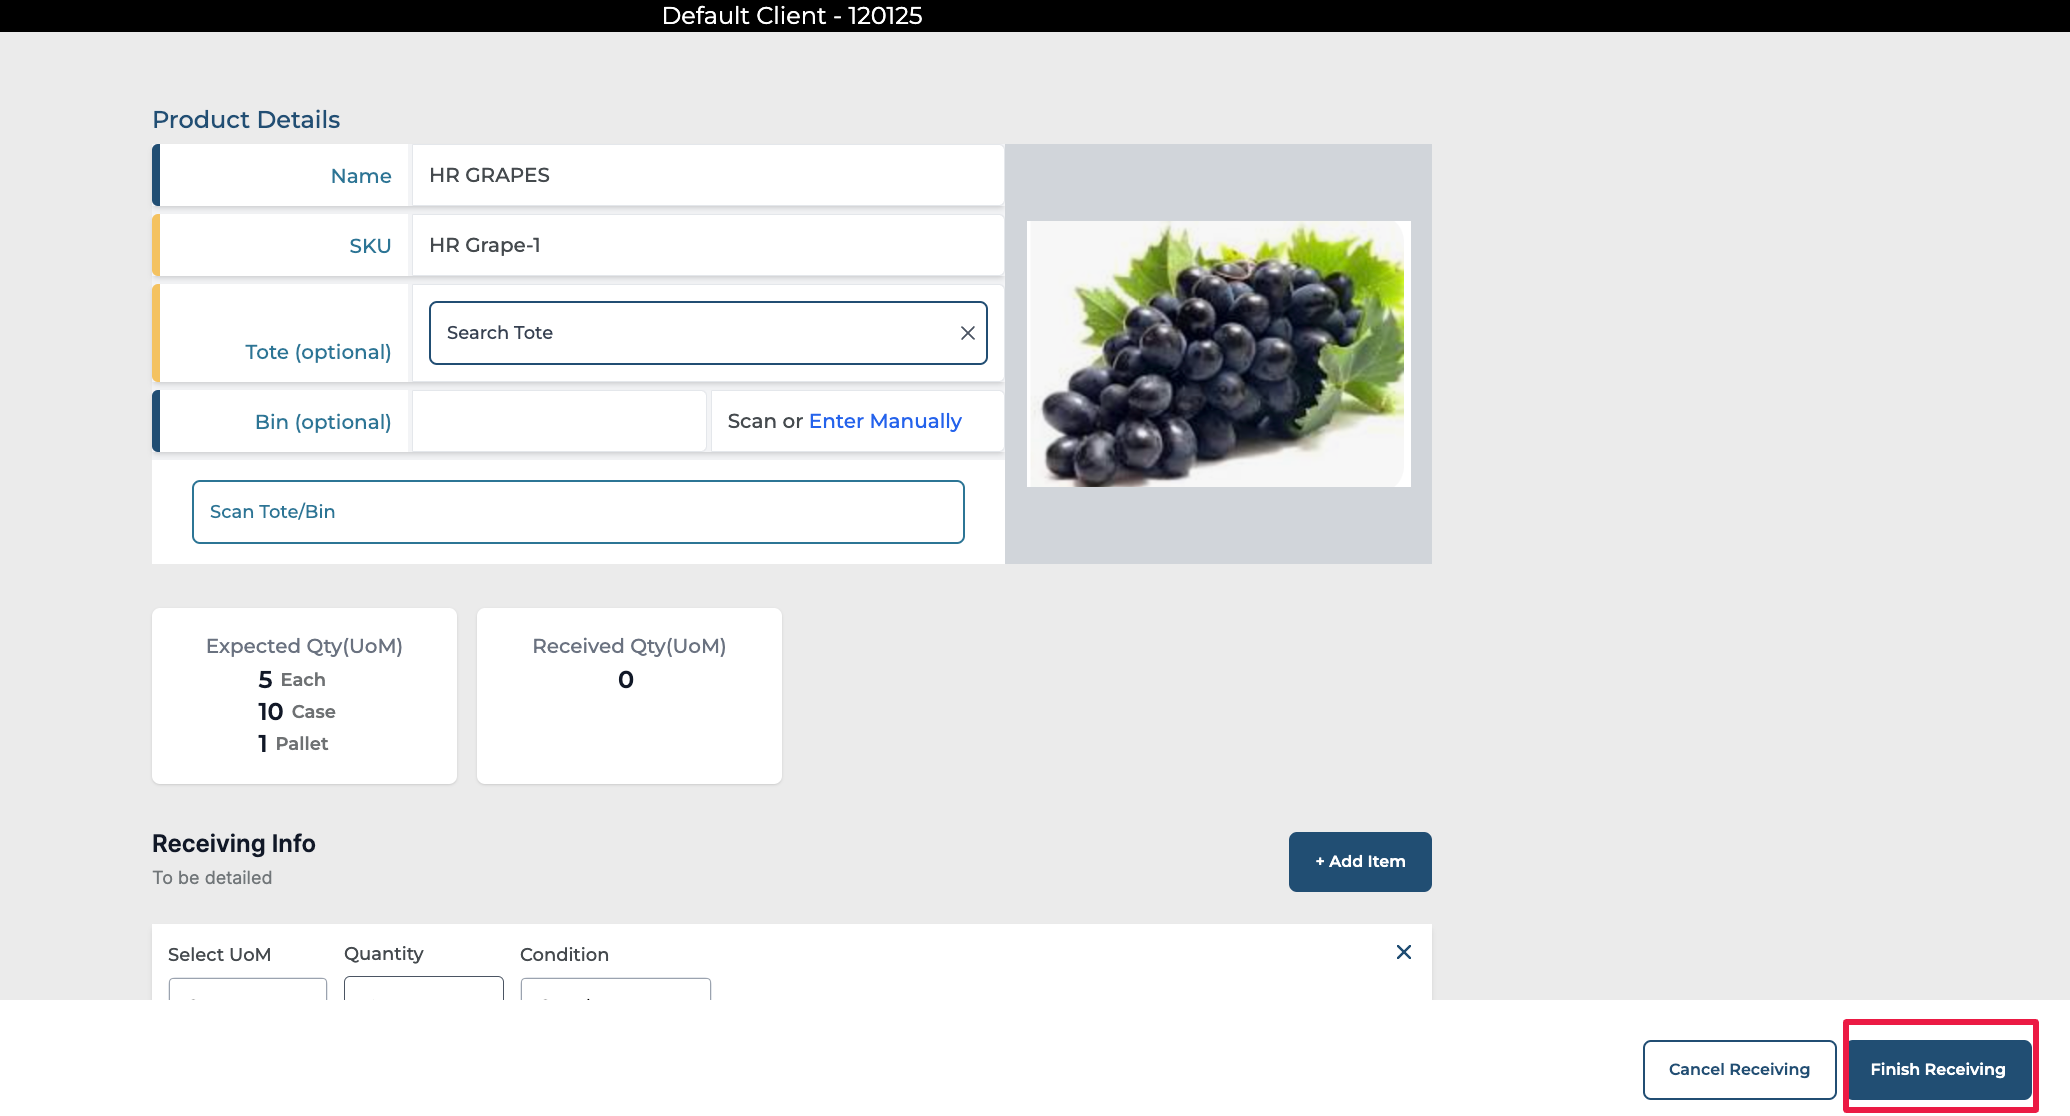
Receive Item: A receiving screen appears where the user can see details such as Name, SKU expected and Received quantity.
The user can specify the UoM, Quantity, Condition (good or damaged), Expiry Date, Lot ID, Serial Number, PO ID, PO Line ID and putaway location.
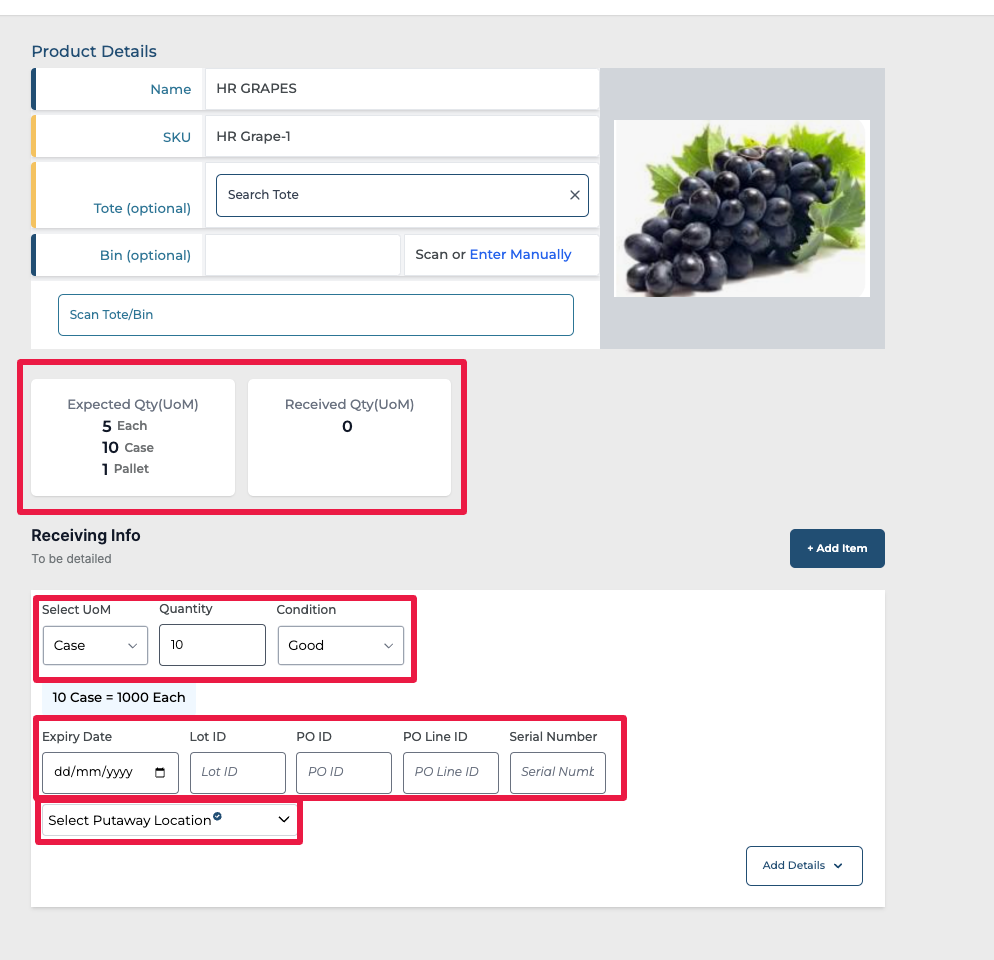
Clicking on Add Details provides the user with the following actions:
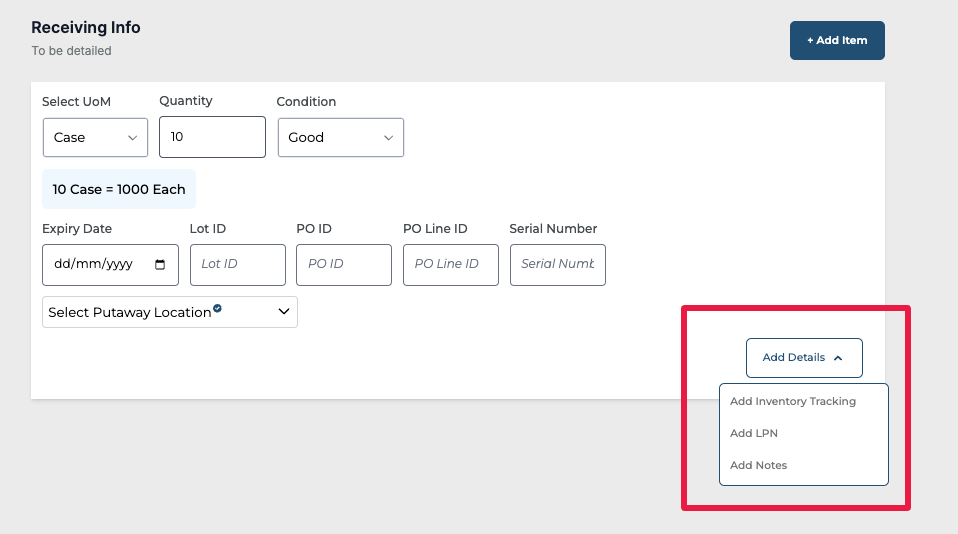
a. Add Inventory Tracking - New
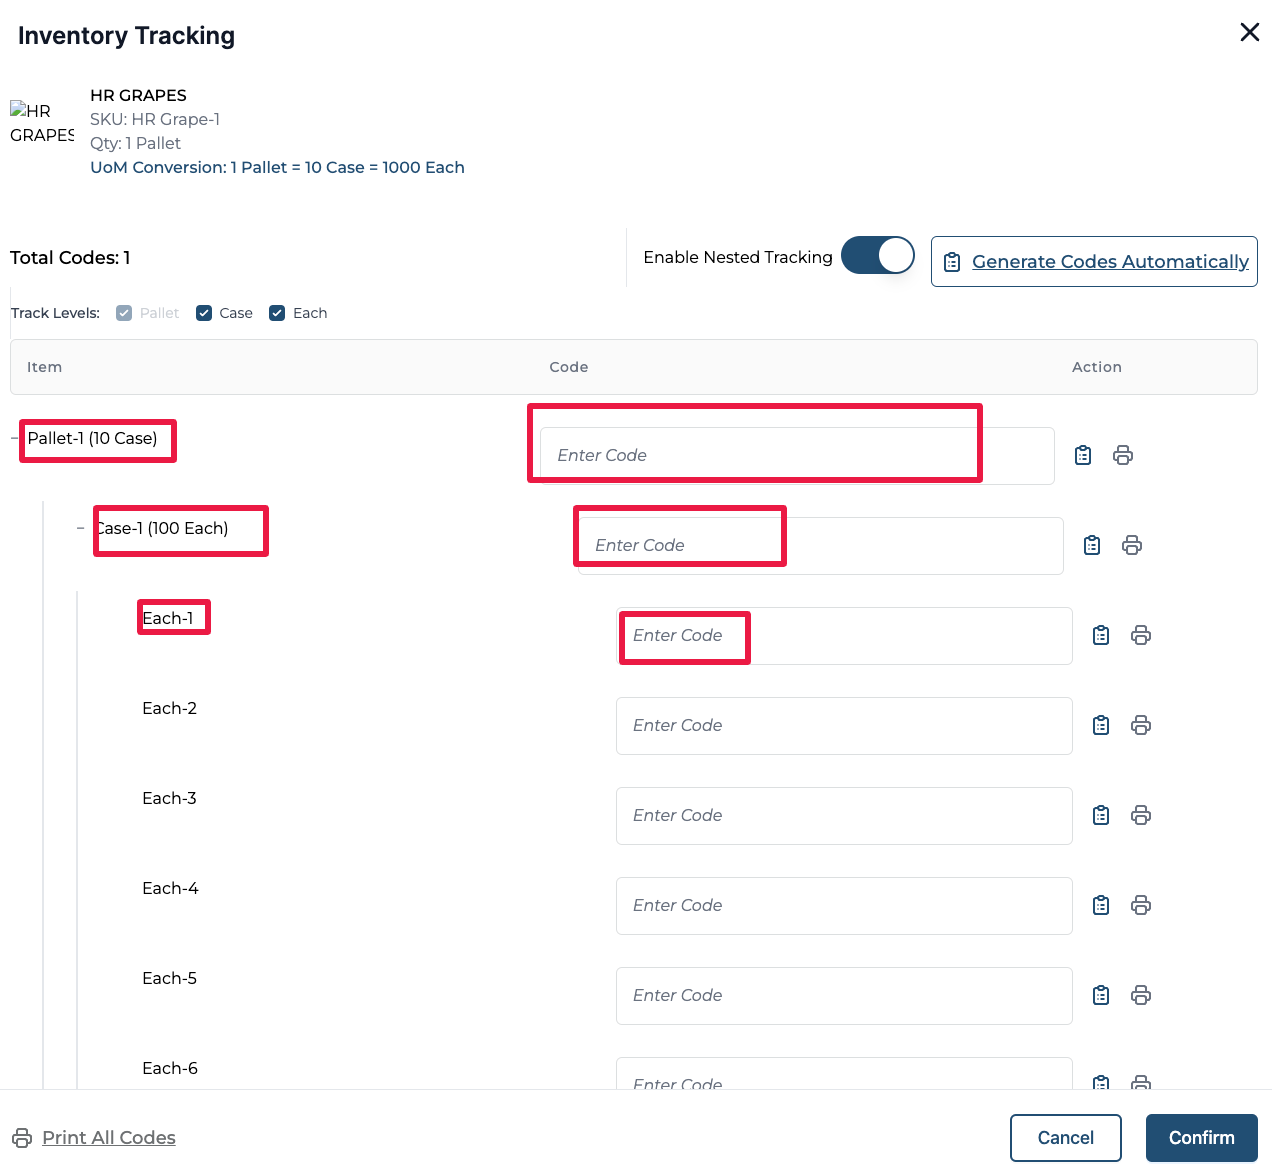
The “Add Inventory Tracking” feature allows users to add unique custom LPNs or use auto-generated LPNs to add inventory tracking numbers while receiving products into the warehouse. Based on the Form factor that the product is being received in and the UoM configuration, this feature supports inputting tracking numbers across all levels of the inventory hierarchy, from the top-level unit down to the lowest storage unit. Additionally, it associates each level's identifier with the next, enabling seamless nested tracking of LPNs (License Plate Numbers). The user has the flexibility to choose the level of inbound tracking they need for the given product.
For example: if the UoM configuration of a product is 1 Pallet = 10 Case and 1 Case = 100 Each and the user is receiving 1 pallet, the inventory tracking screen will be as below.
-
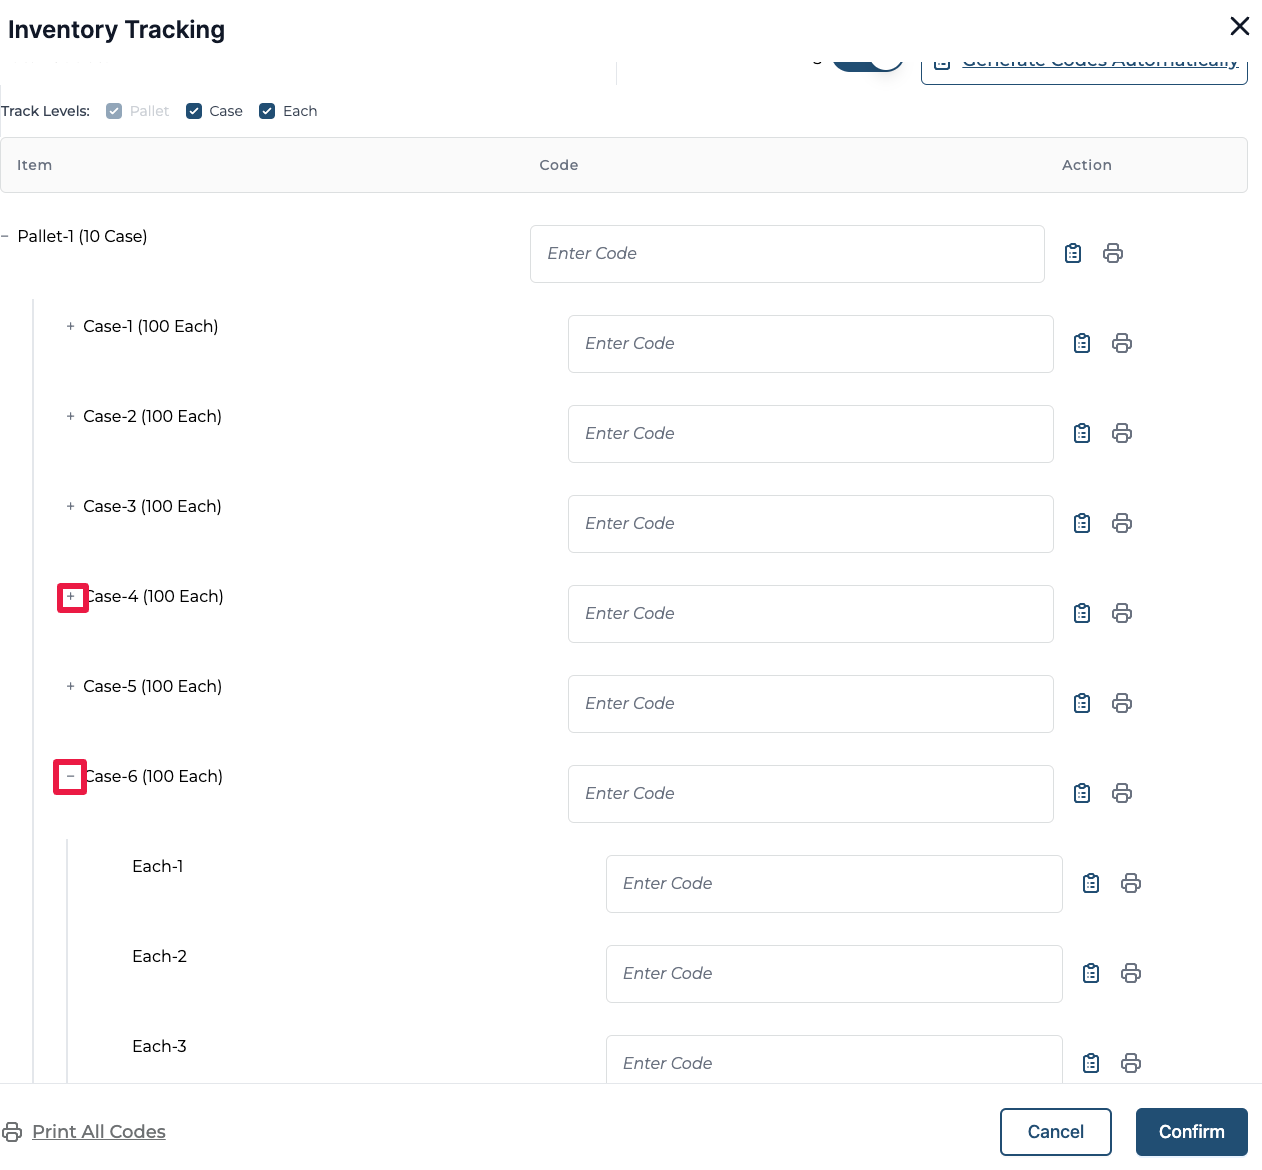
The user can provide tracking numbers for the Pallet, Cases, and eaches within each case. If the user does not want to track eaches and would like to track only the Pallet and case, they can simply click on the “-” next to the case to close the eaches. Clicking on + will collapse to show the eaches in the case.
-
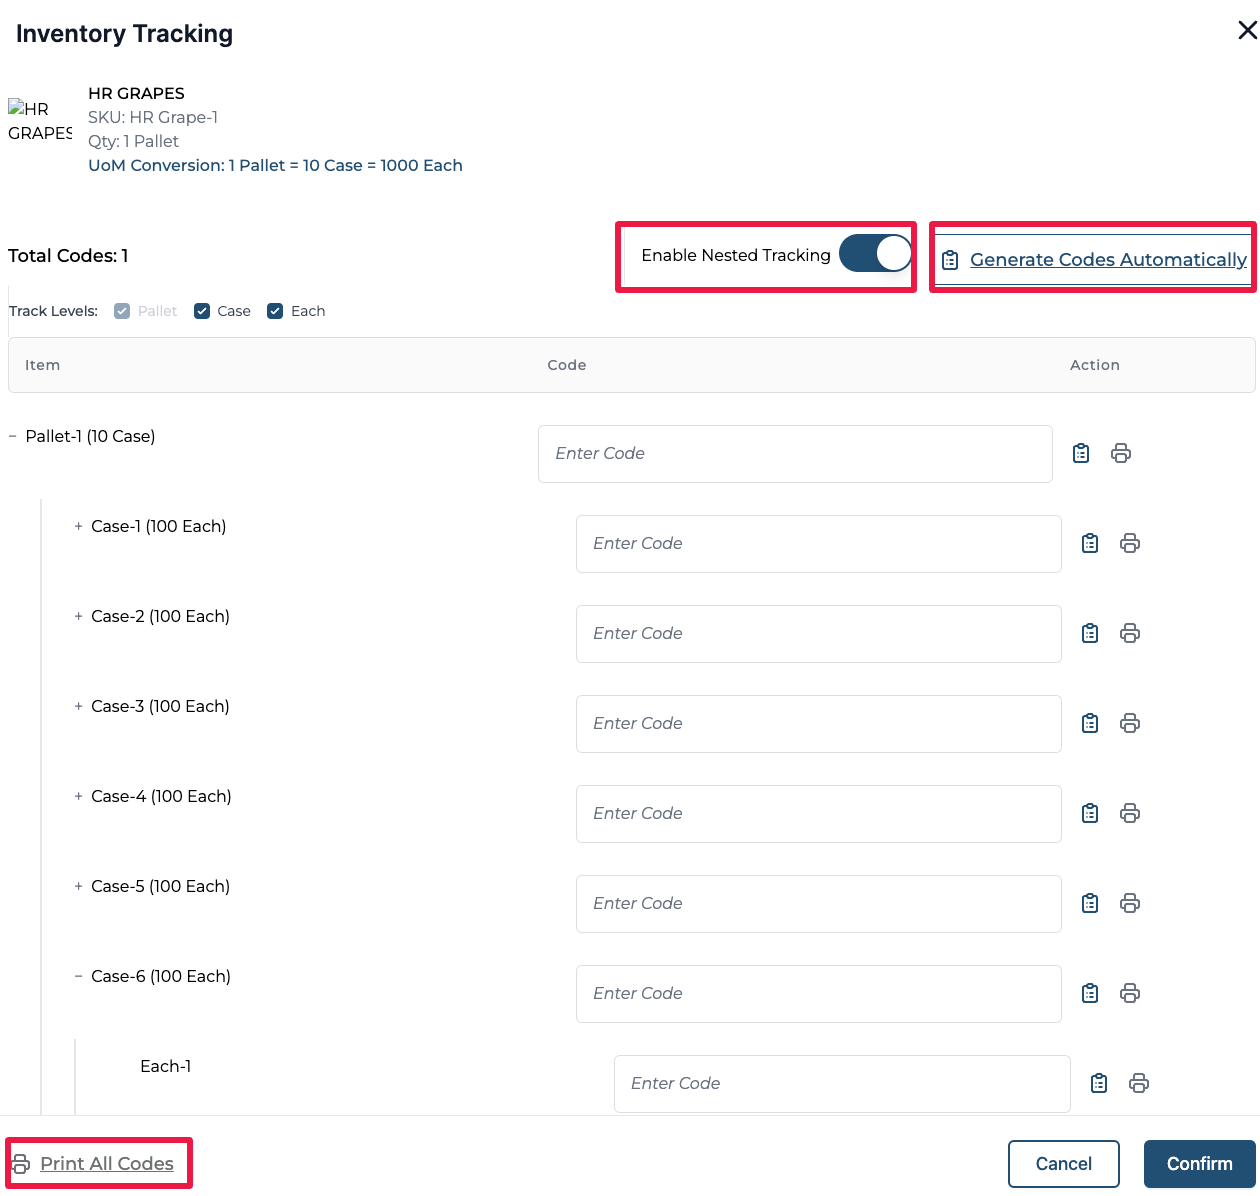
Users can enable or disable nested LPN tracking, Auto-generate all the codes and print all the codes.
-
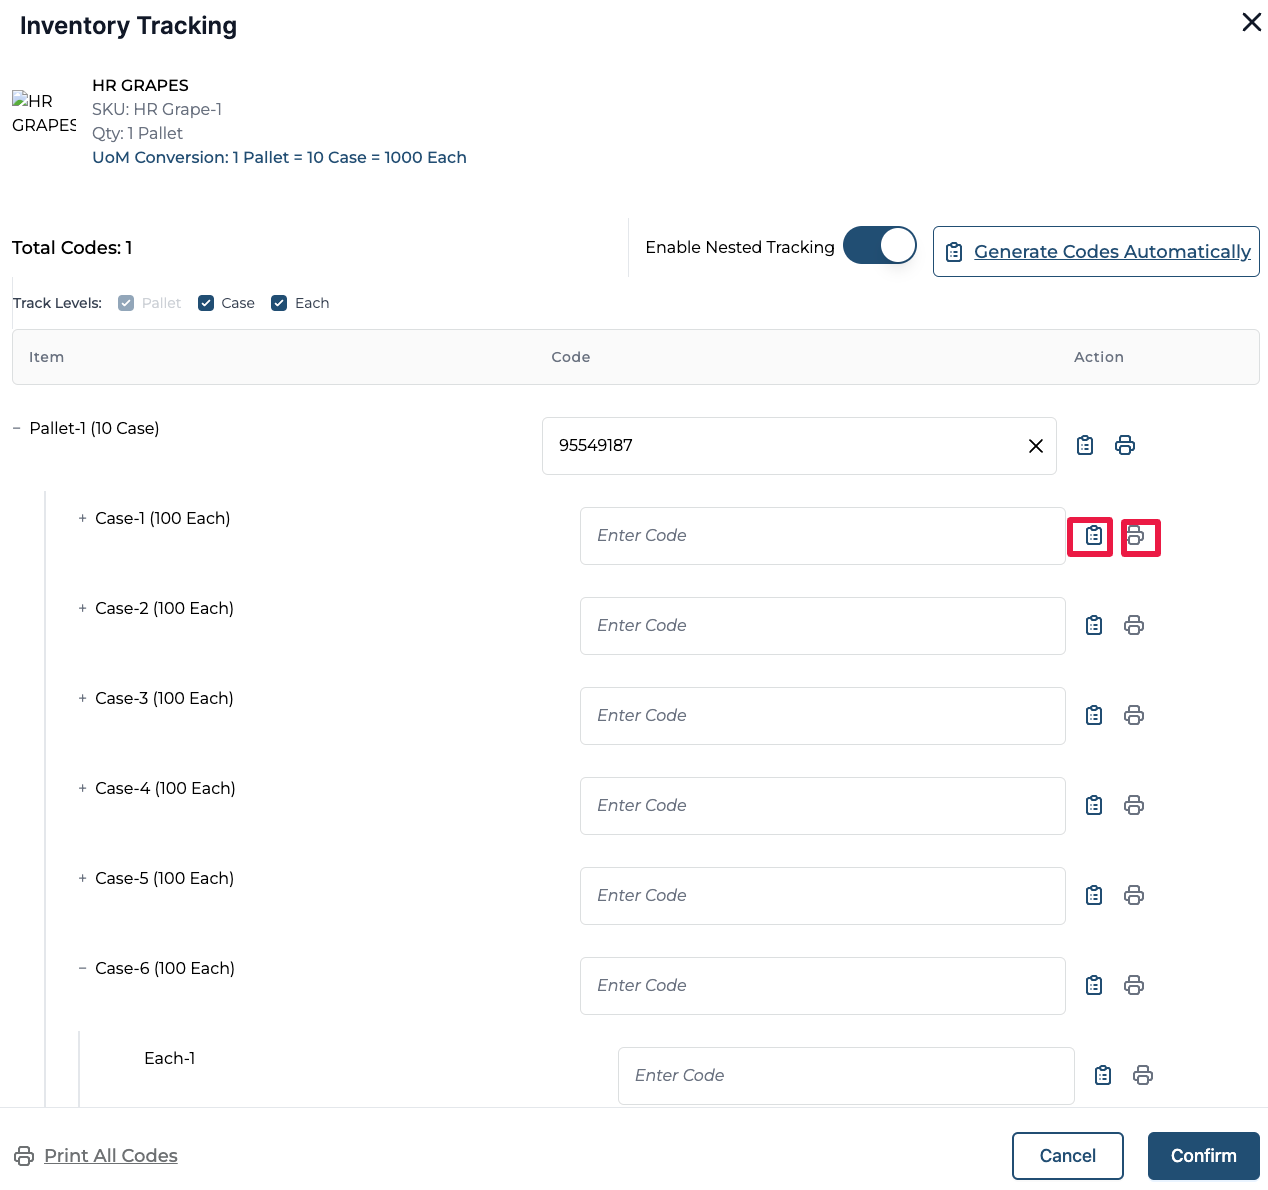
Users can input a custom code in the Enter Code box, or click the generate code or print code icon at the individual levels. Clicking on confirm saves the inventory tracking numbers.
-
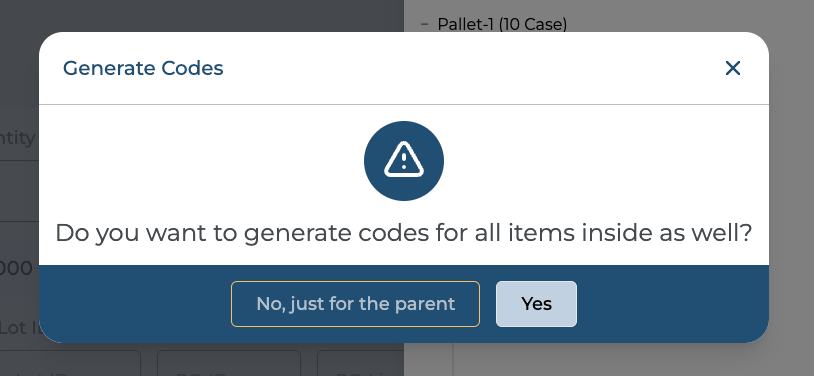
When they attempt to generate code for an individual item, if there exist lower levels of inventory within the selection, the user is presented with this pop-up.
-
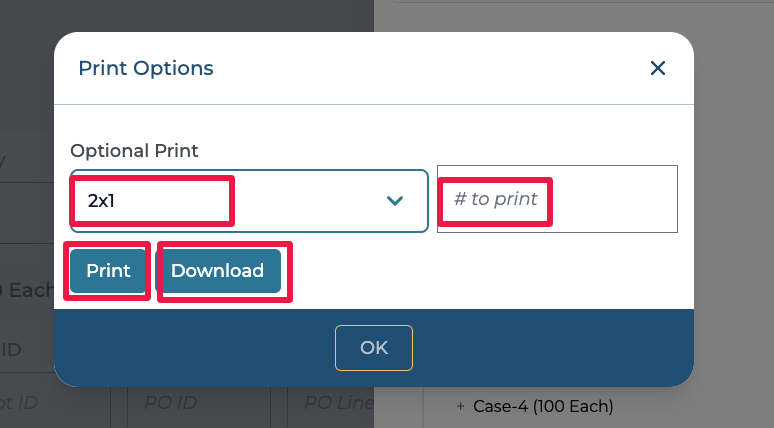
Clicking on "Print" prompts the user to select a label size, specify the number of copies to print, and choose between printing or downloading the labels.
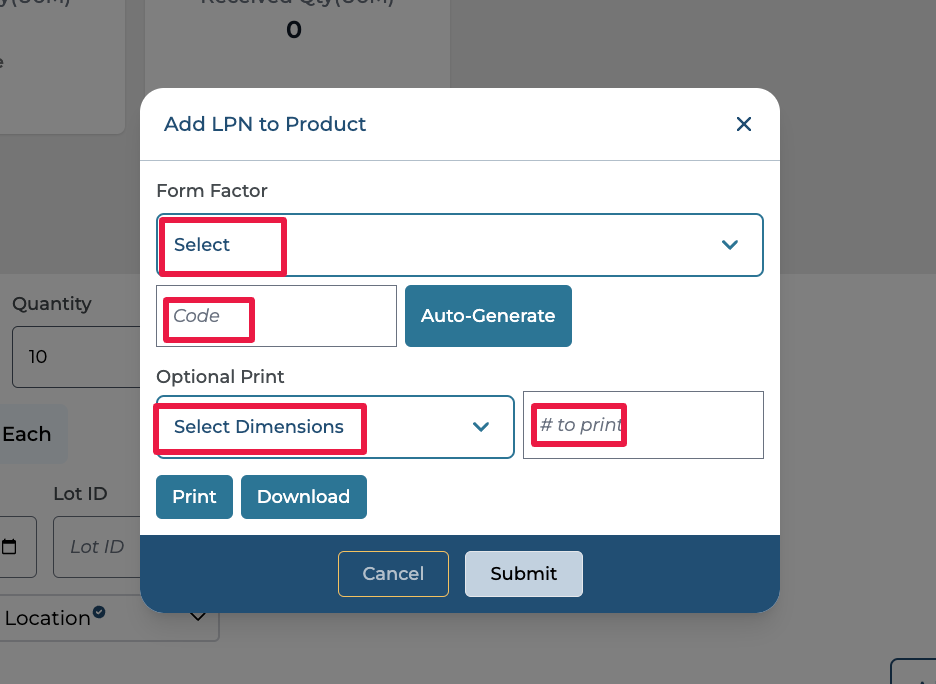
b. Add LPN
This feature allows users to add one flexible identification number per line of receiving to track the Handling Unit. The user specifies the Form Factor, Code (input or auto-generate), select dimension of the label, number of copies to print and choose to print or download. Clicking on Submit saves the LPN.
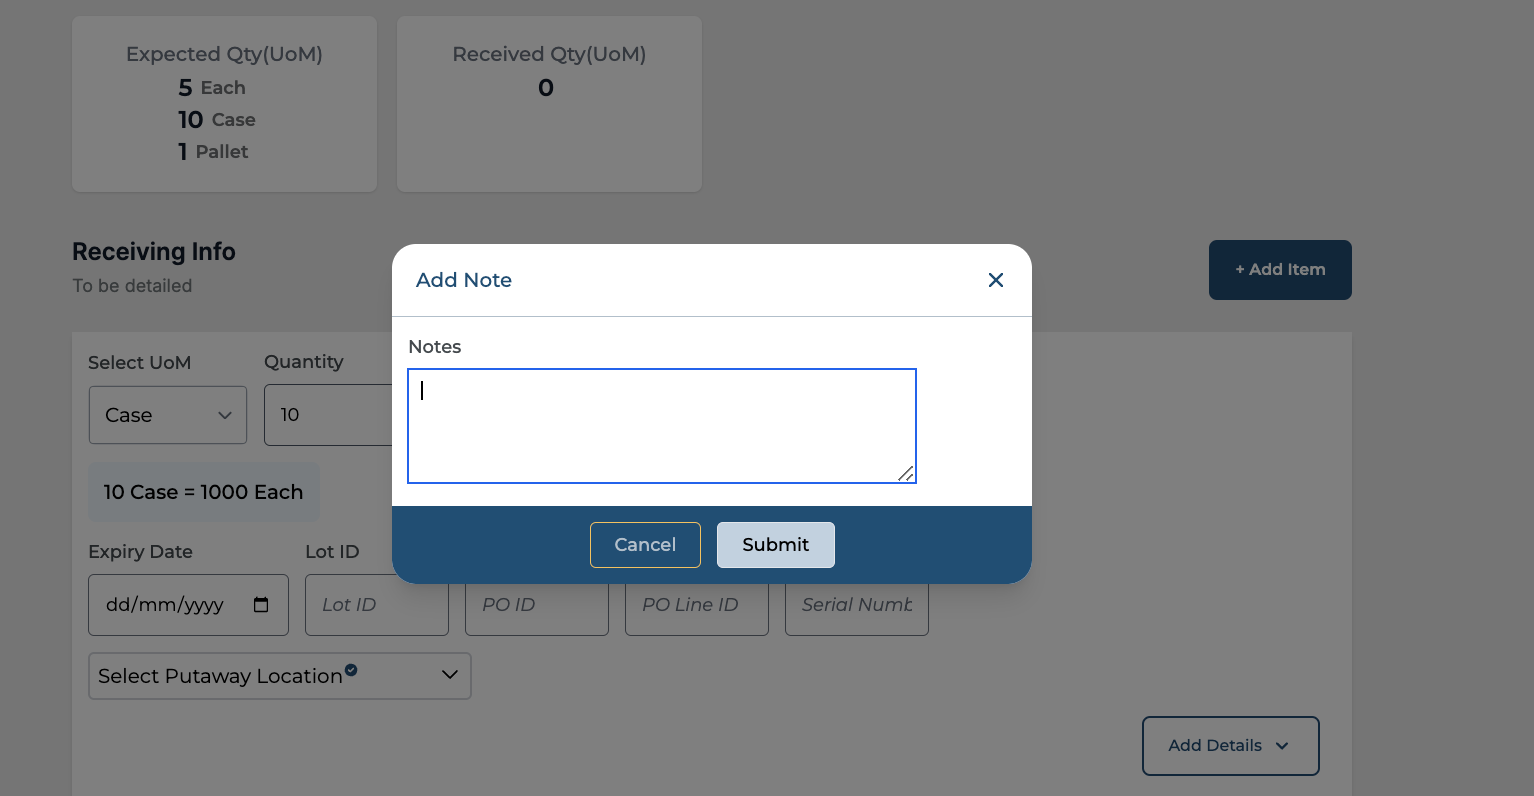
c. Add Notes: This is a free text field that allows the user to add notes to capture any information about items being received in that line. Clicking on Submit saves the note.
-
Add Item: Click on “+ Add Item” to add a receiving line. The user can now repeat the actions detailed in step 5 for the new line.
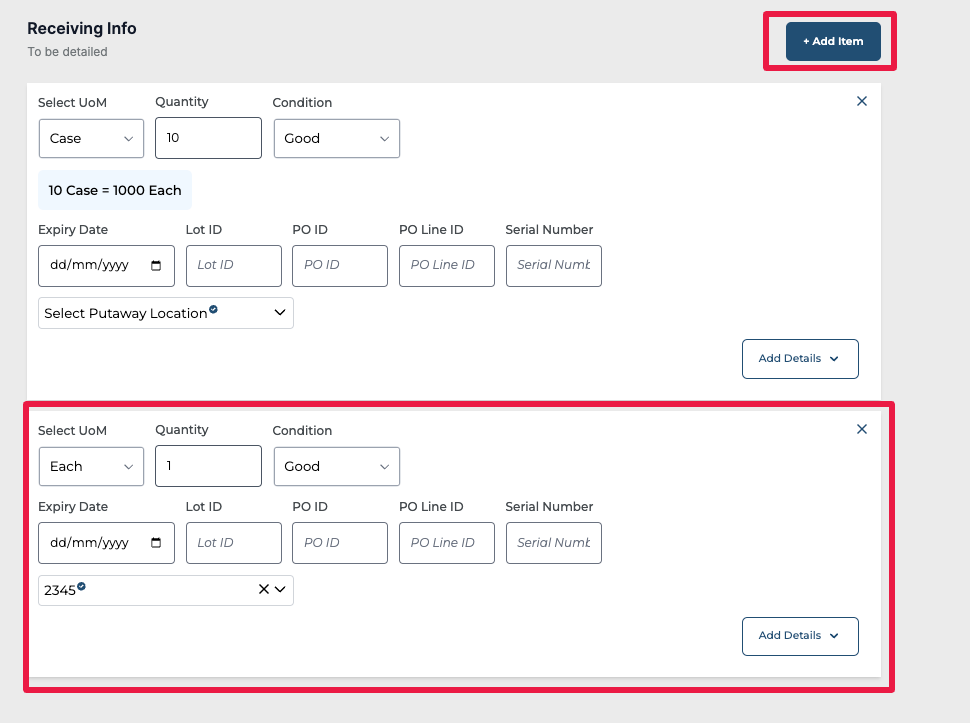
-
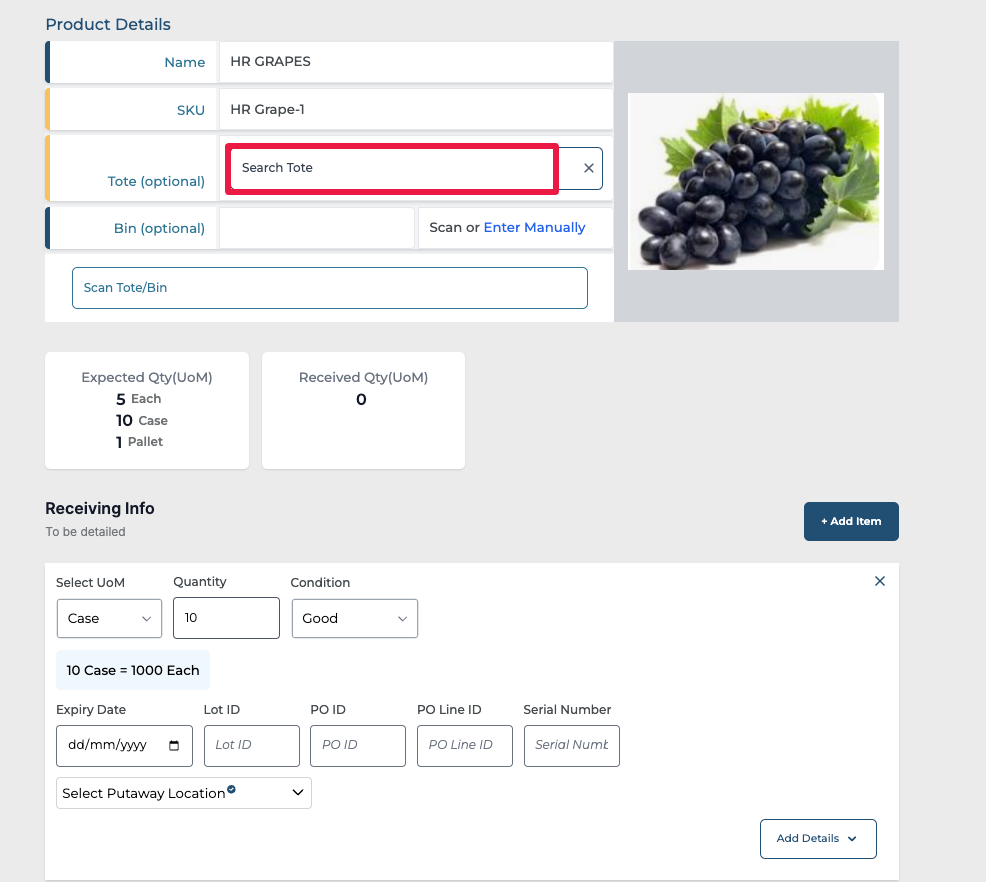
Scan/Enter Tote (Optional): The user may scan a tote to receive all the items in a tote and if a tote is used the items get associated with the tote, the following putaway workflow can be done by just scanning the tote instead of scanning the individual products.
-
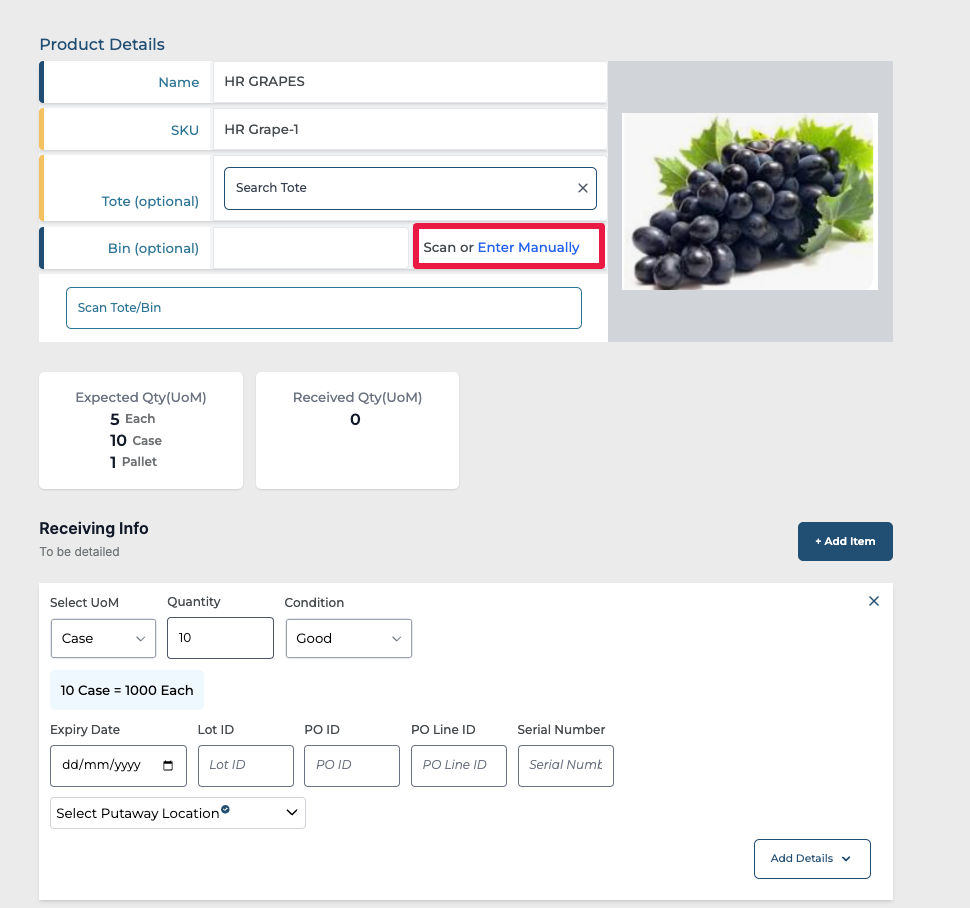
Scan/Enter Bin Location (Optional): The user may scan or enter Bin Location to perform receiving and putaway together. Scanning a Location performs putaway of items to the scanned location along with the receiving flow.
-
Finish Receiving: The user should click on the “Finish Receiving” button to complete receiving of the items.