This section outlines all the activities involved in the putaway workflow on the Hopstack platform.
Putaway is the second step taken during fulfillment. It refers to all the activities performed to move the received products into the storage area of the warehouse.
Based on the extensive nature of the receiving workflow, the putaway workflow also has multiple variations and alternative actions that you can take to mold a specific business outcome.
The list below shows all the activities that can be performed during putaway, from the start of the process till the end.
-
Accessing the Putaway Workflow Screen -
Choosing a Client during Putaway -
Scanning an Item Code During Putaway -
The Item Details Screen - Putaway -
Guided Putaway Logic - Suggested Bin Location for Putaway -
Extended Granularity in Consignment Status Tracking -
Putaway List View -
Chained Putaway Workflow - Putaway Enhancement
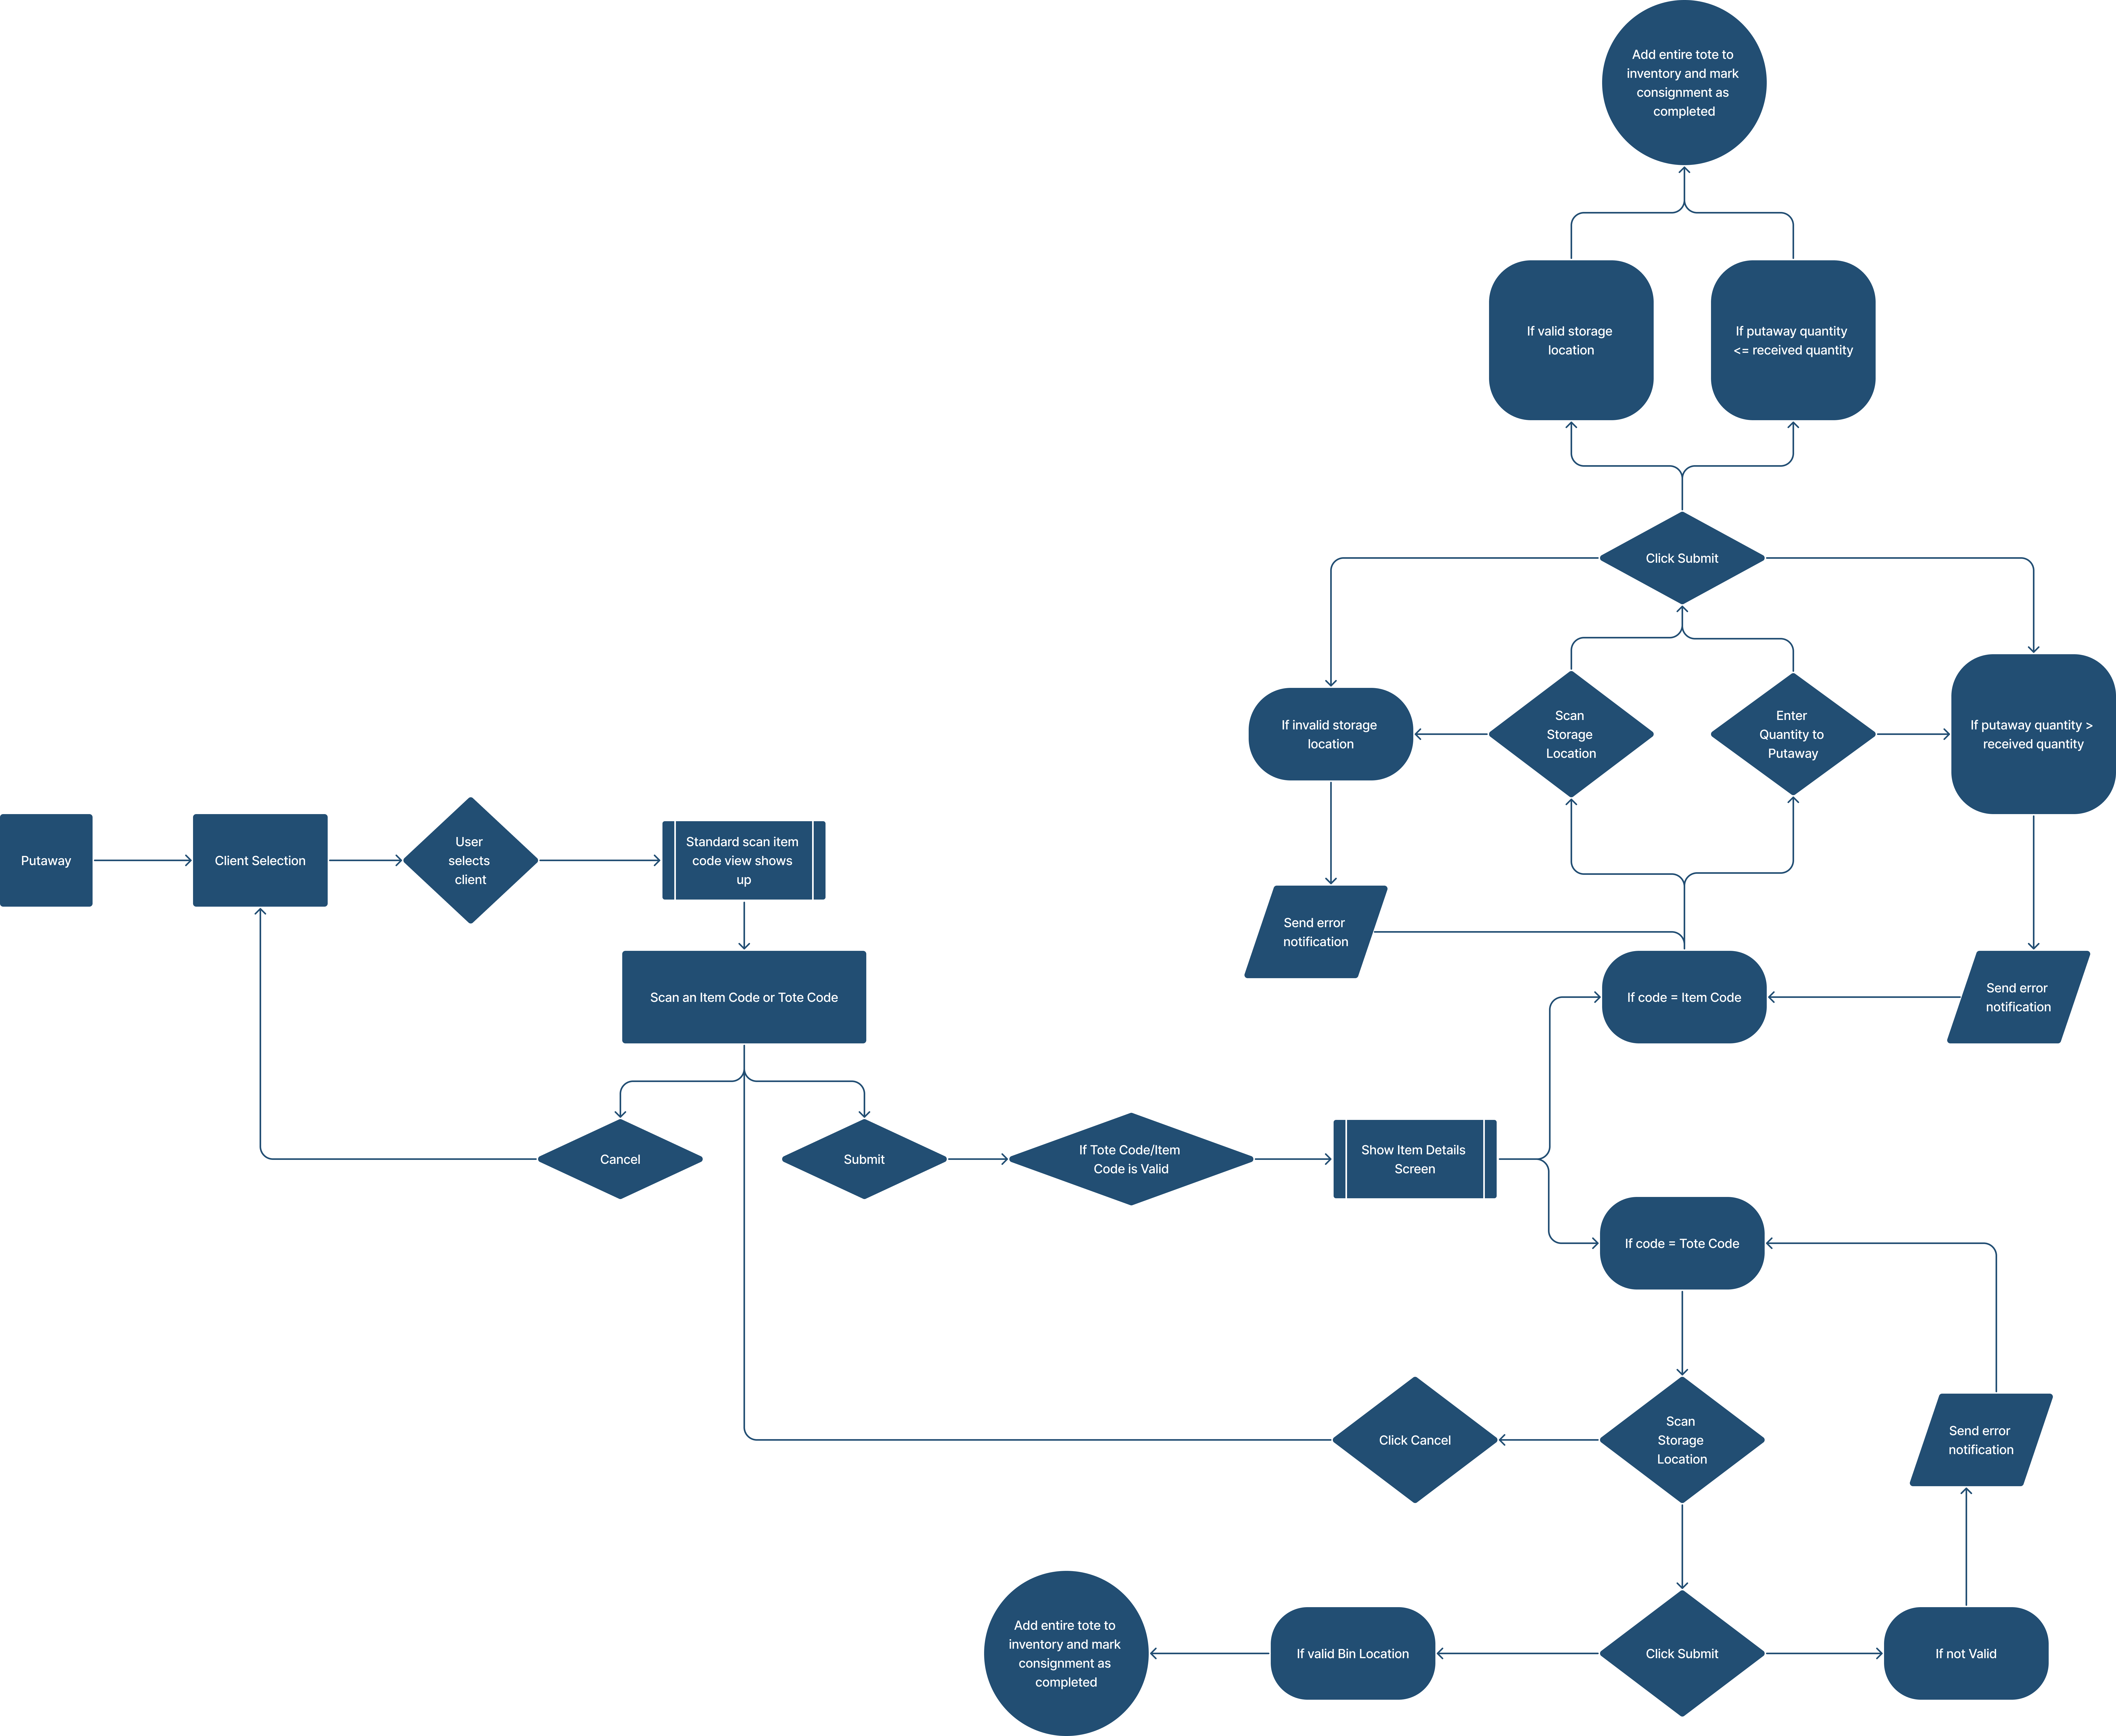
Here’s a full-fidelity flow chart of all the possible flows available in putaway. This is not important to your understanding since each of the pages has its explanatory flowcharts, but rather it is placed here to help you track your understanding.