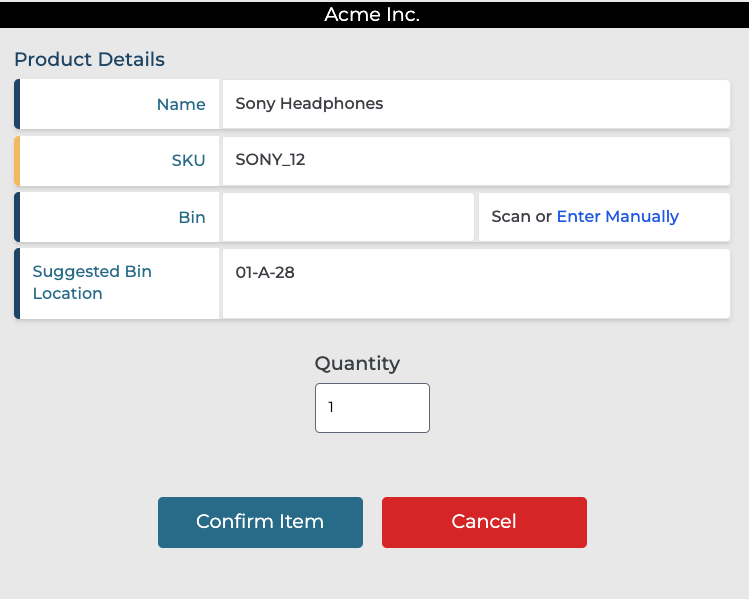
Based on the item code scanned in the previous screen, the item details screen will show up. This is the actual screen where the associate will be able to perform receiving activities.
The screen will populate with the following system-provided details (provided that it is present in the product details for the chosen SKU)
-
SKU ID - The SKU ID of the product that was scanned.
-
Name of SKU - The name of the product that was scanned.
-
Suggested Bin Location - A suggested bin location that the system computes based on a variety of factors. Click to learn more.
These fields are customizable. If you would like to add or remove any field from being visible here, please get in touch with your Hopstack implementation manager during the implementation phase.
There are also the following user input fields:
-
Bin Location Field - Mandatory
-
Quantity - Mandatory (unless a tote is scanned)
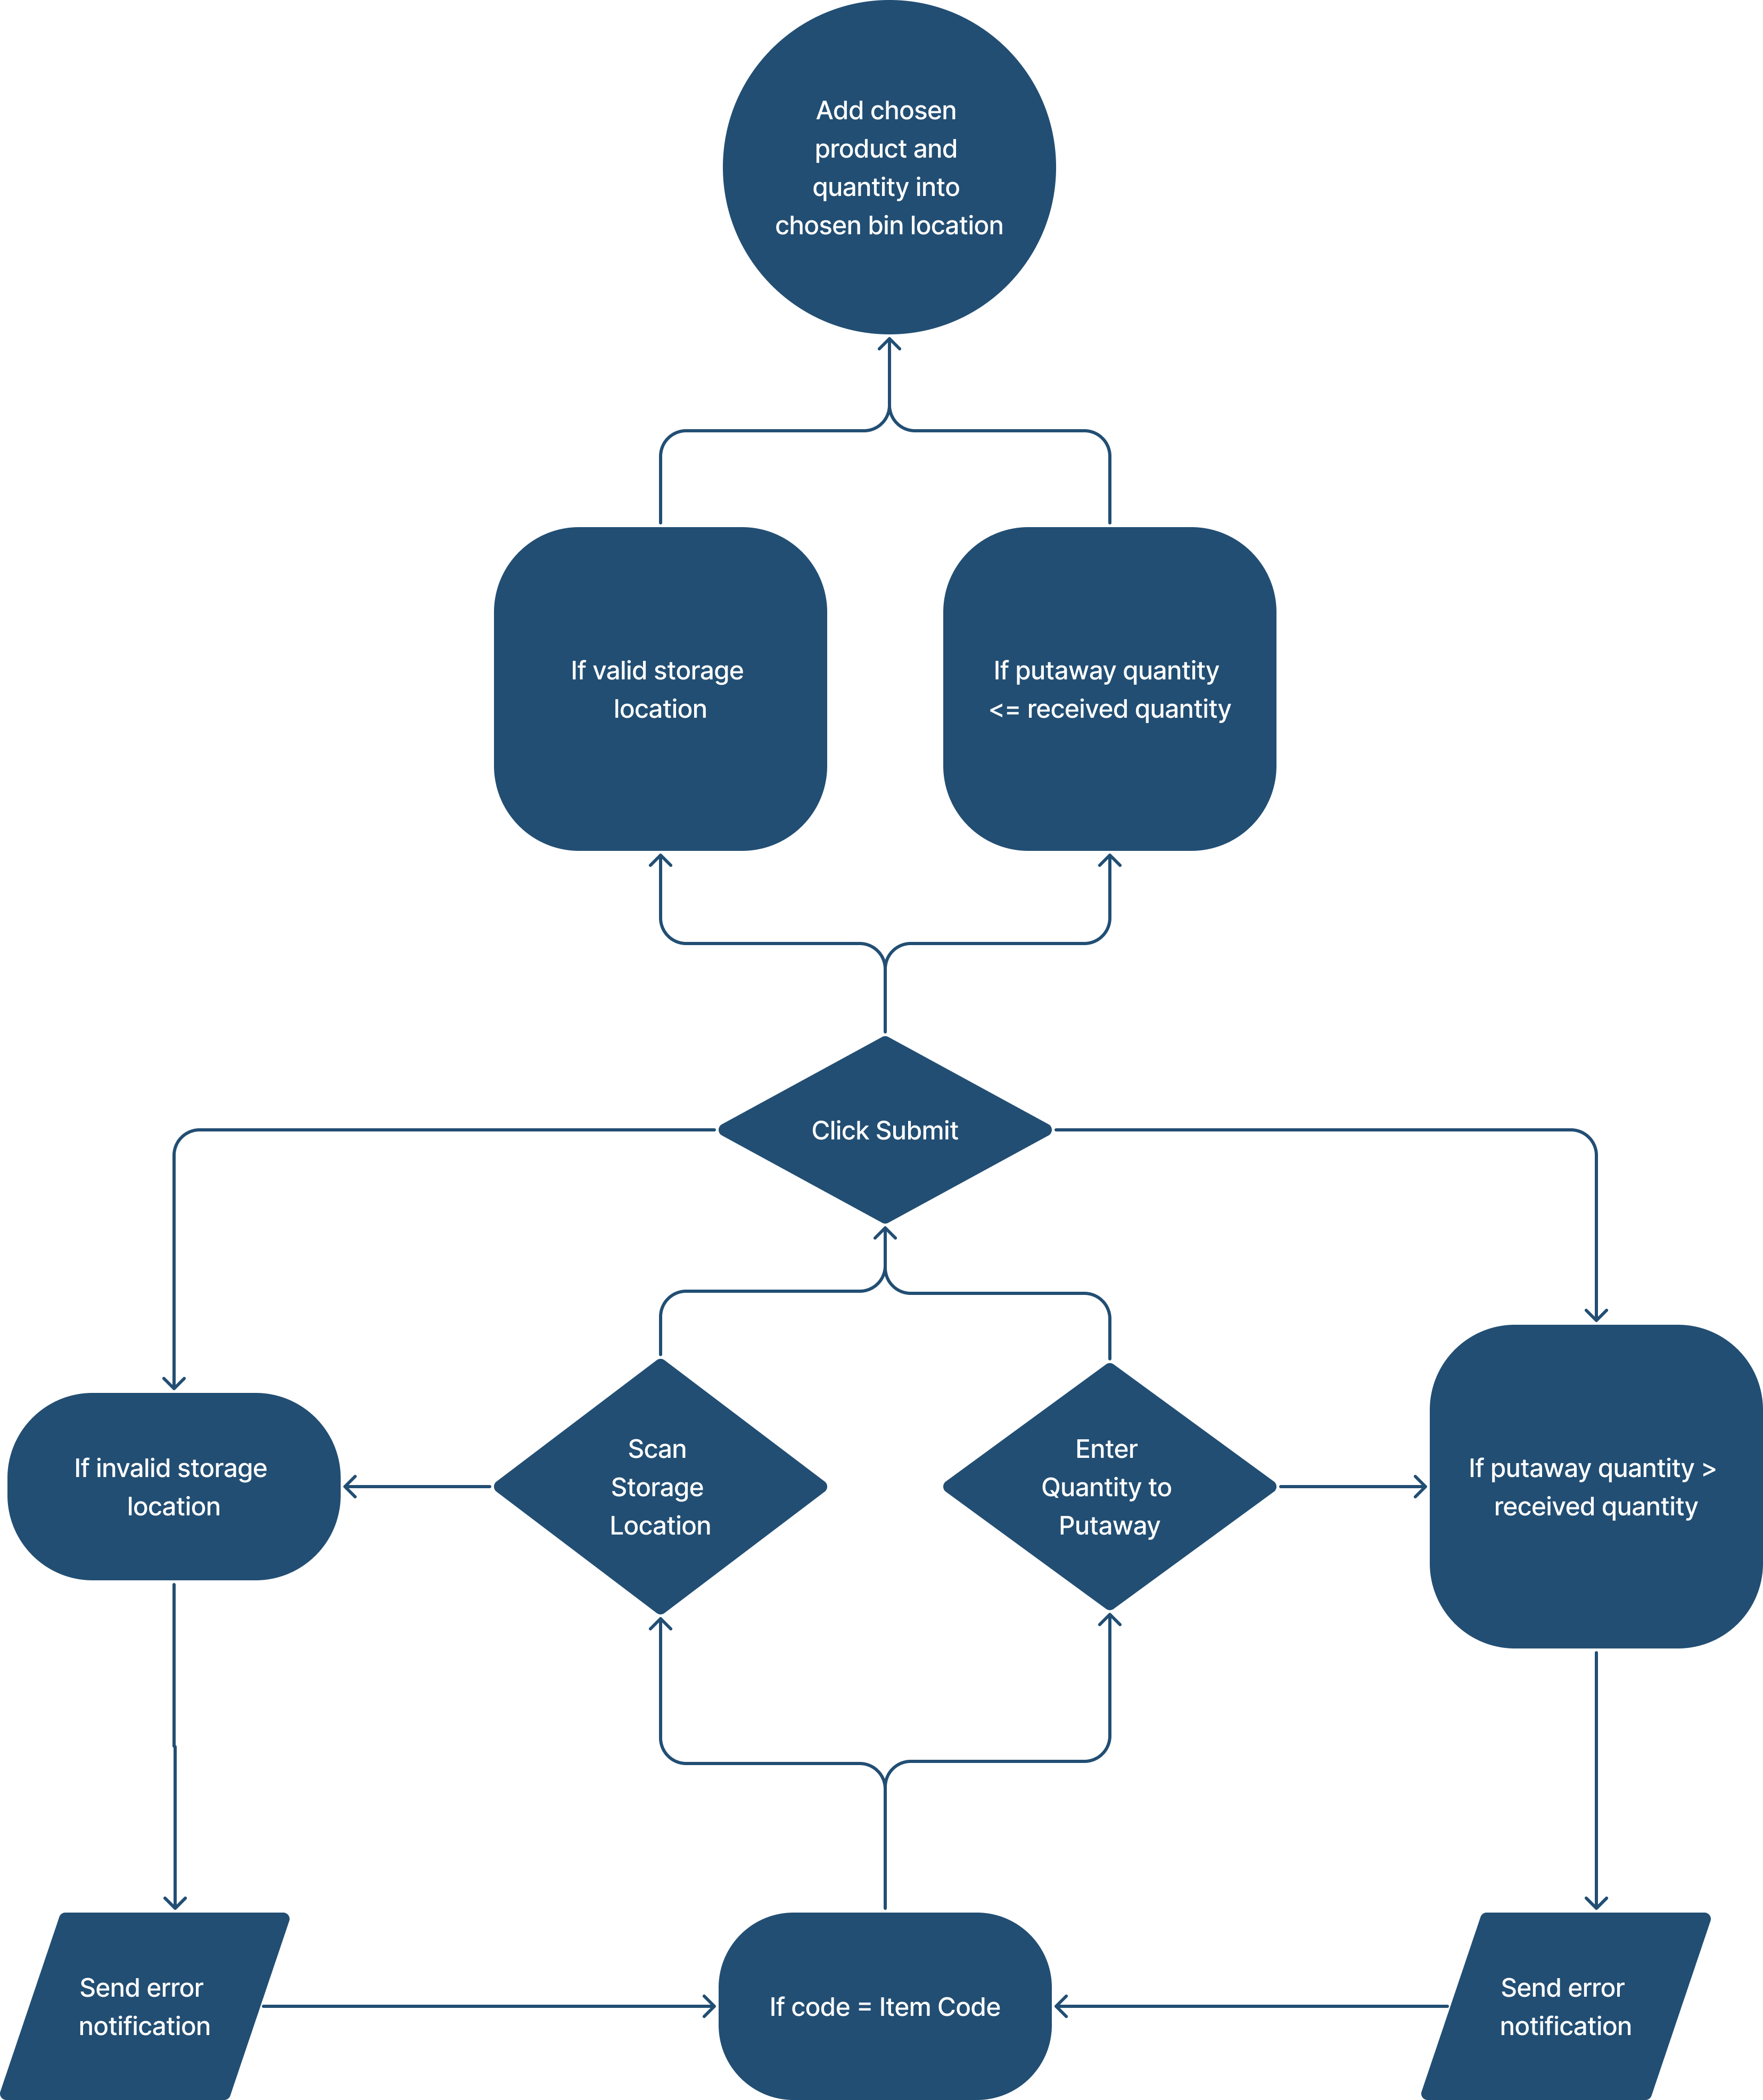
Explained: Performing Putaway for Items
When you scan an item code, the resultant screen will look like this (barring any customizations that may have been done for your organization)
This screen will ask you to specify two data fields:
-
Bin Location - The intended location to put away the chosen SKU.
-
Quantity - The intended quantity to be put away into the chosen bin location.
After both the above items are specified, users can click on Confirm Item to finish the putaway action.
Clicking on Cancel will take you back to the previous screen i.e. where you can scan an item code for putaway.
Here is a flowchart to demonstrate the workflow for performing putaway for individual SKUs.
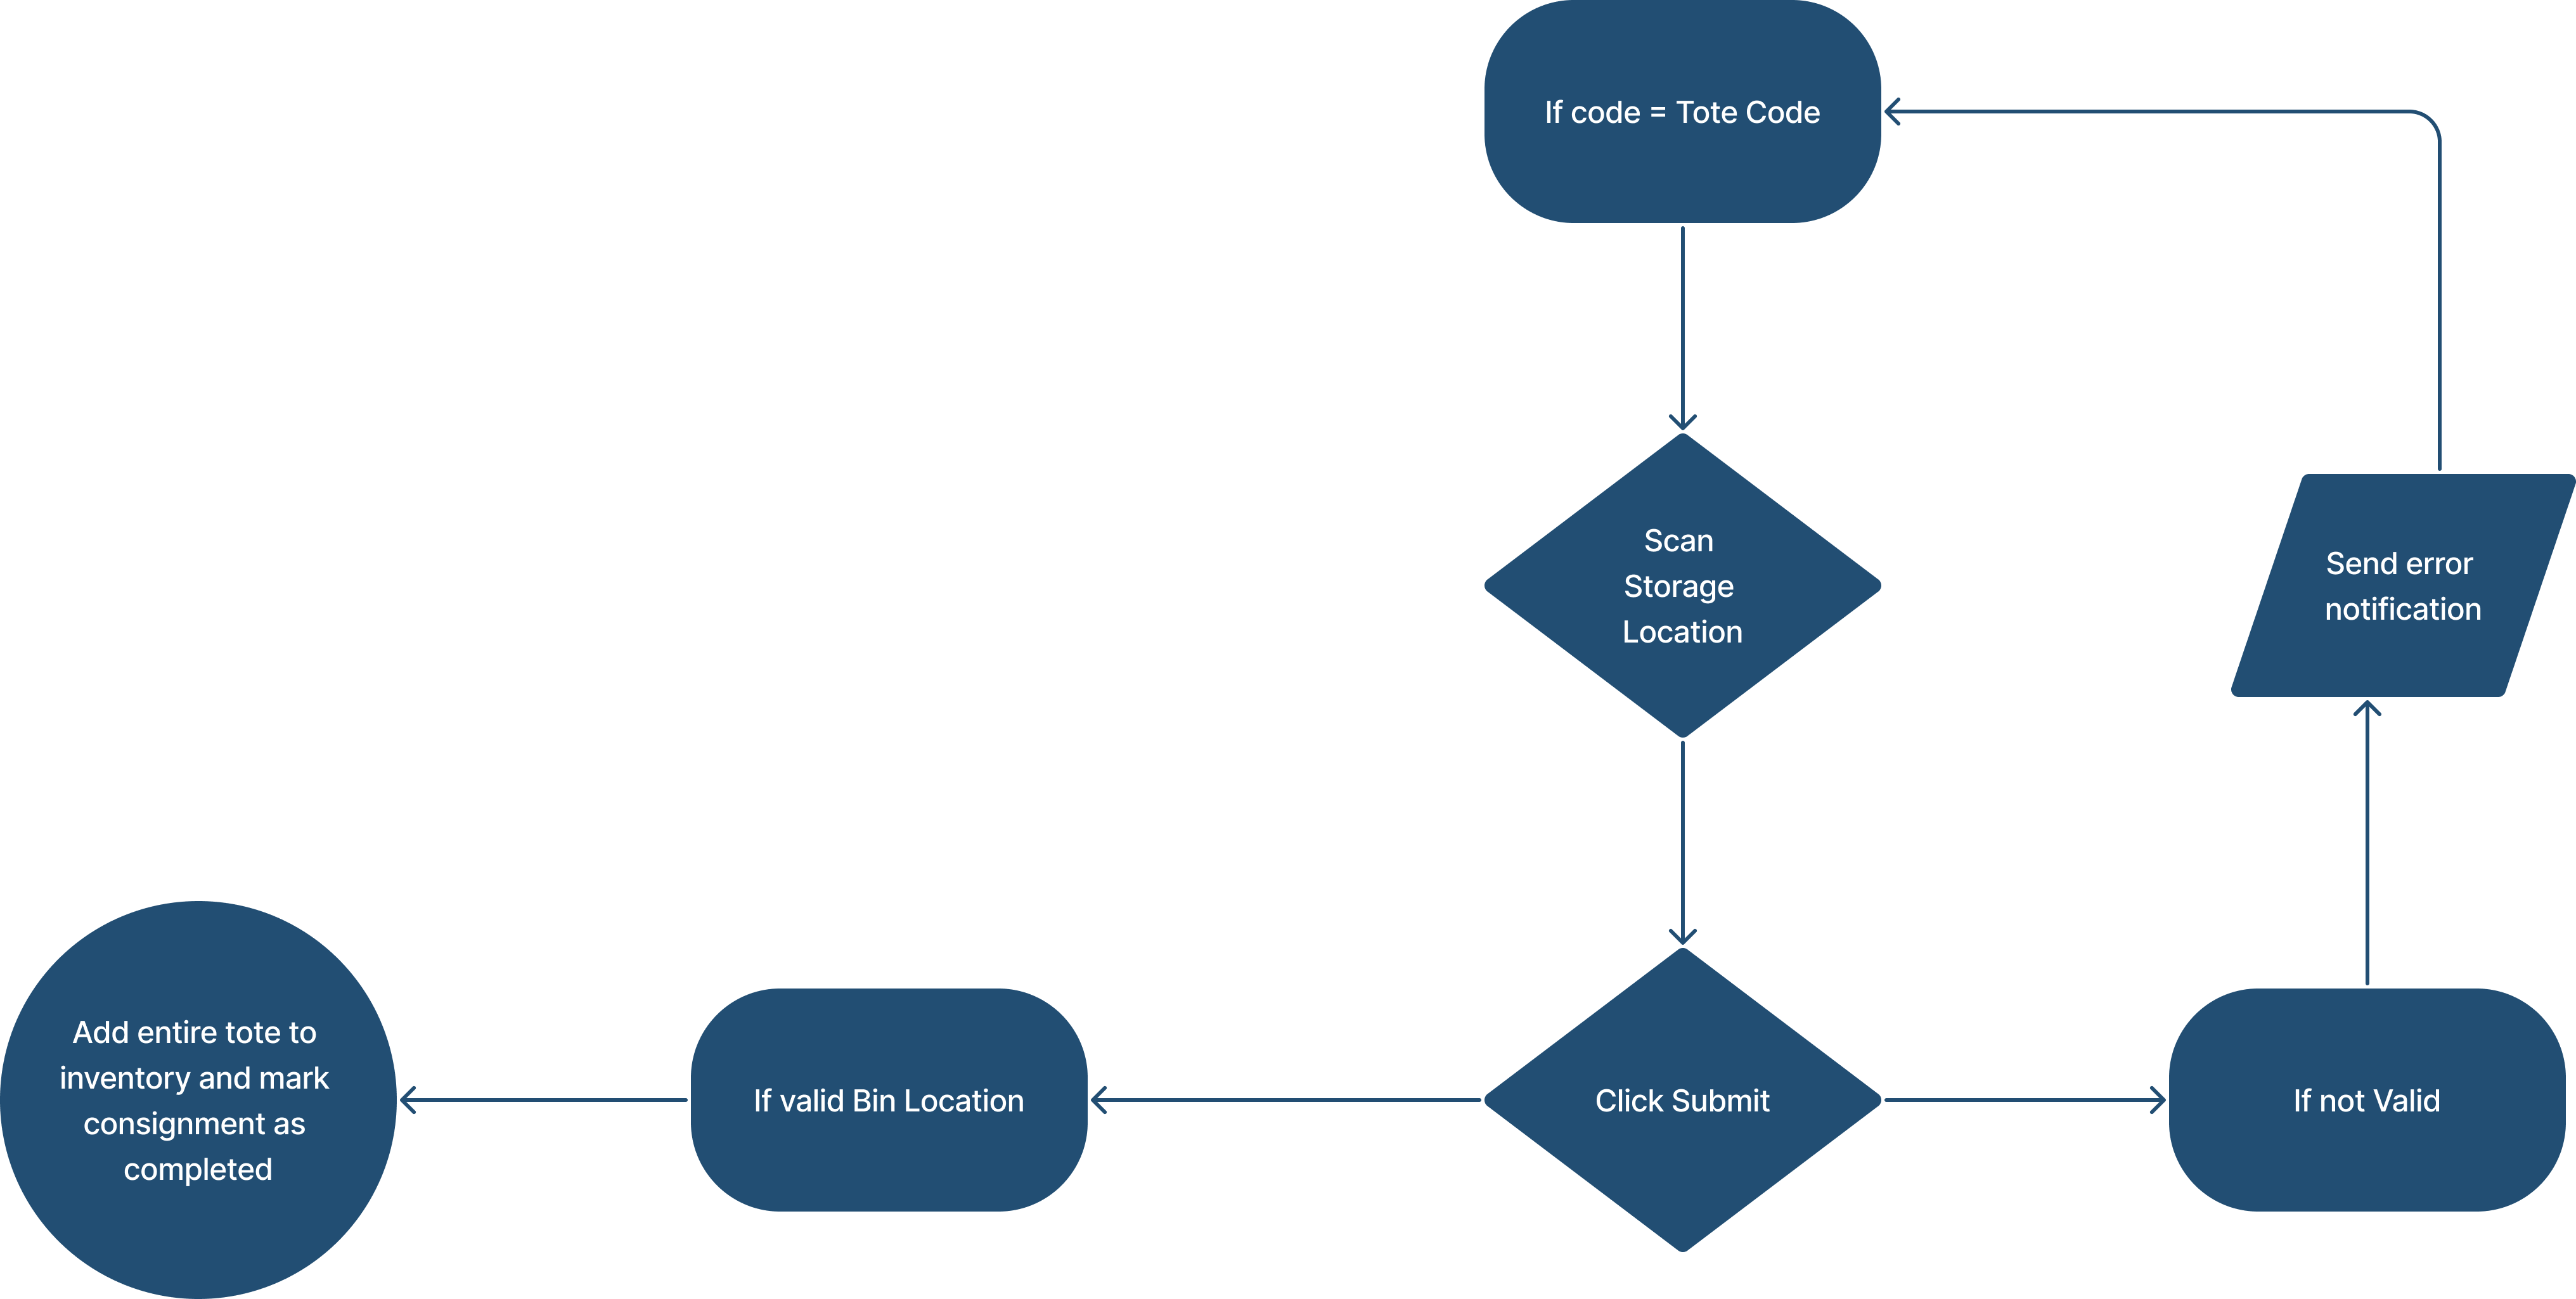
Explained: Performing Putaway for Totes
When you scan a tote code, the resultant screen will look like this (barring any customizations that may have been done for your organization)
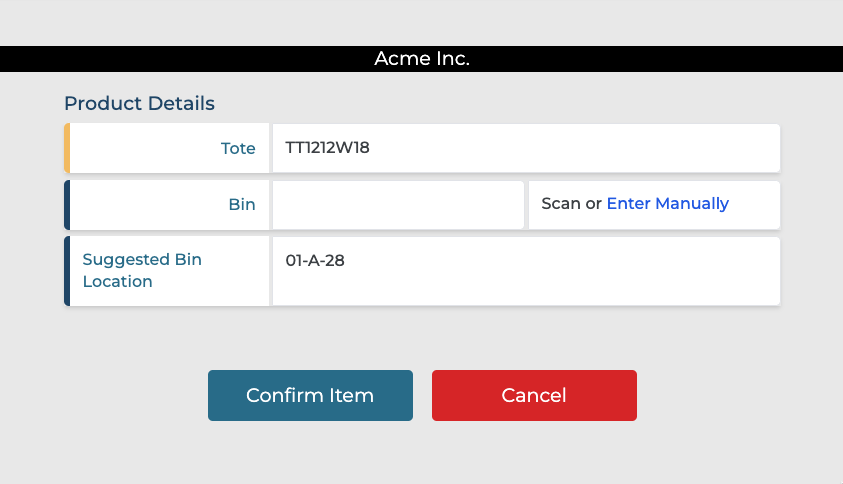
This screen will ask you to specify only one data field i.e. the bin Location - the intended location to put away the chosen SKU.
Users will NOT be asked to specify the quantity at this stage because the tote already has a pre-defined mix of items, as was configured in receiving.
Performing a putaway for a tote will result in the tote also being putaway. The same tote cannot be used for any other operations until the products contained in it have been shipped out and the tote is empty.
After the bin location is specified, users can click on Confirm Item to finish the putaway action.
Clicking on Cancel will take you back to the previous screen i.e. where you can scan an item code for putaway.
Here is a flowchart to demonstrate the workflow for performing putaway for totes.