
Products can be added to Hopstack using any of the following methods:
-
Add a product manually: Create an individual product directly within the Hopstack platform.
-
Add products via bulk upload: Upload multiple products at once using a bulk-upload template.
-
Sync products through integrations: Automatically pull product information from connected e-commerce stores and other integrated platforms.
This document provides step-by-step instructions for manually adding a product to Hopstack.
1. Open the Add Product workflow
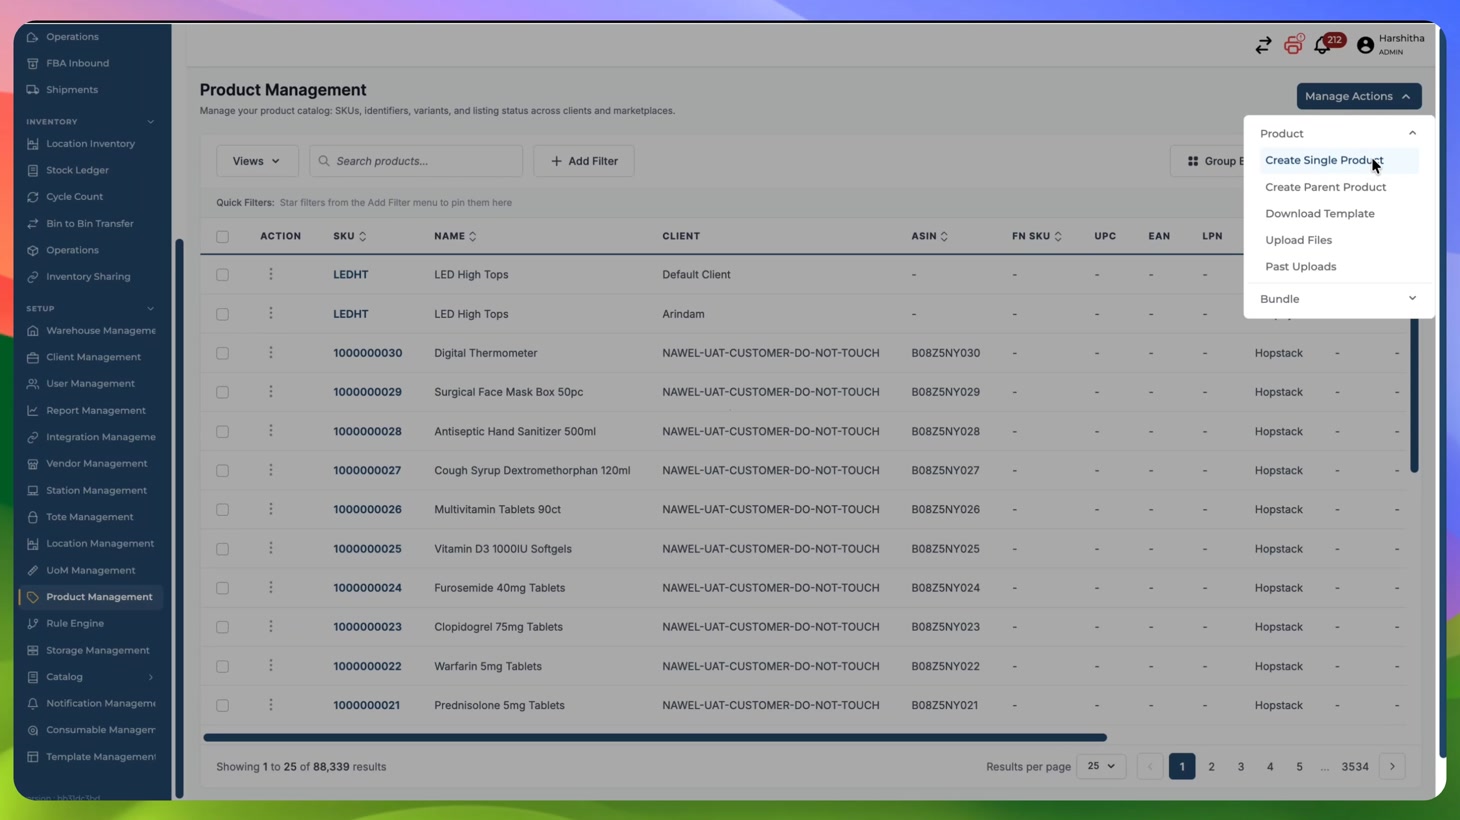
Open Product Management from the Set Up section. Select Manage Actions, expand Product, and then choose Create Single Product,
2. Enter basic details
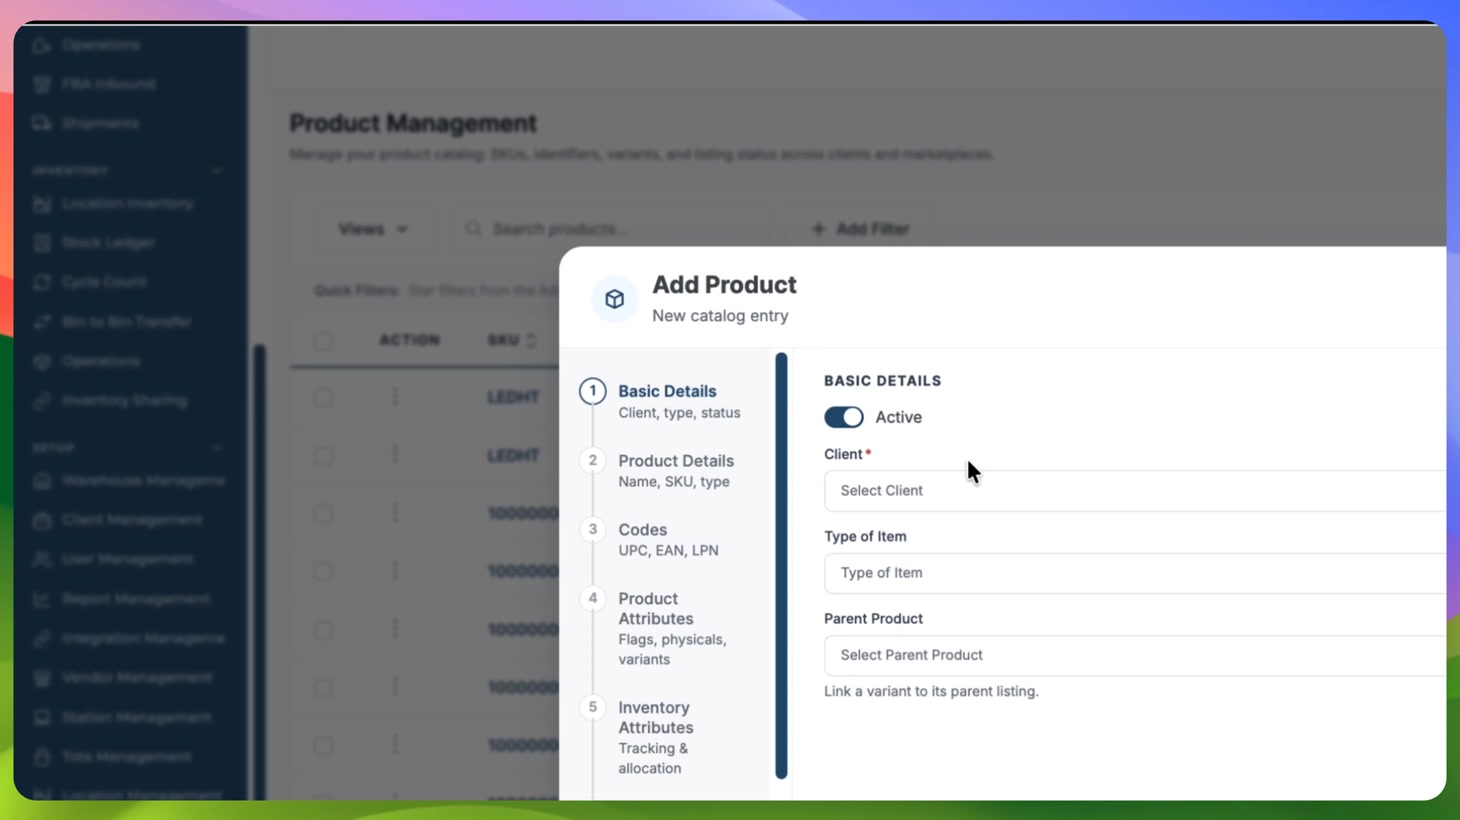
Use Basic Details to define who owns the product and how the entry relates to the catalog.
-
Active: Keep this enabled when the product should be available for operational use.
-
Client: Select the client that owns the product.
-
Type of Item: Choose the appropriate item type.
-
Parent Product: If this product is a variant, link it to the relevant parent product.
3. Add product details
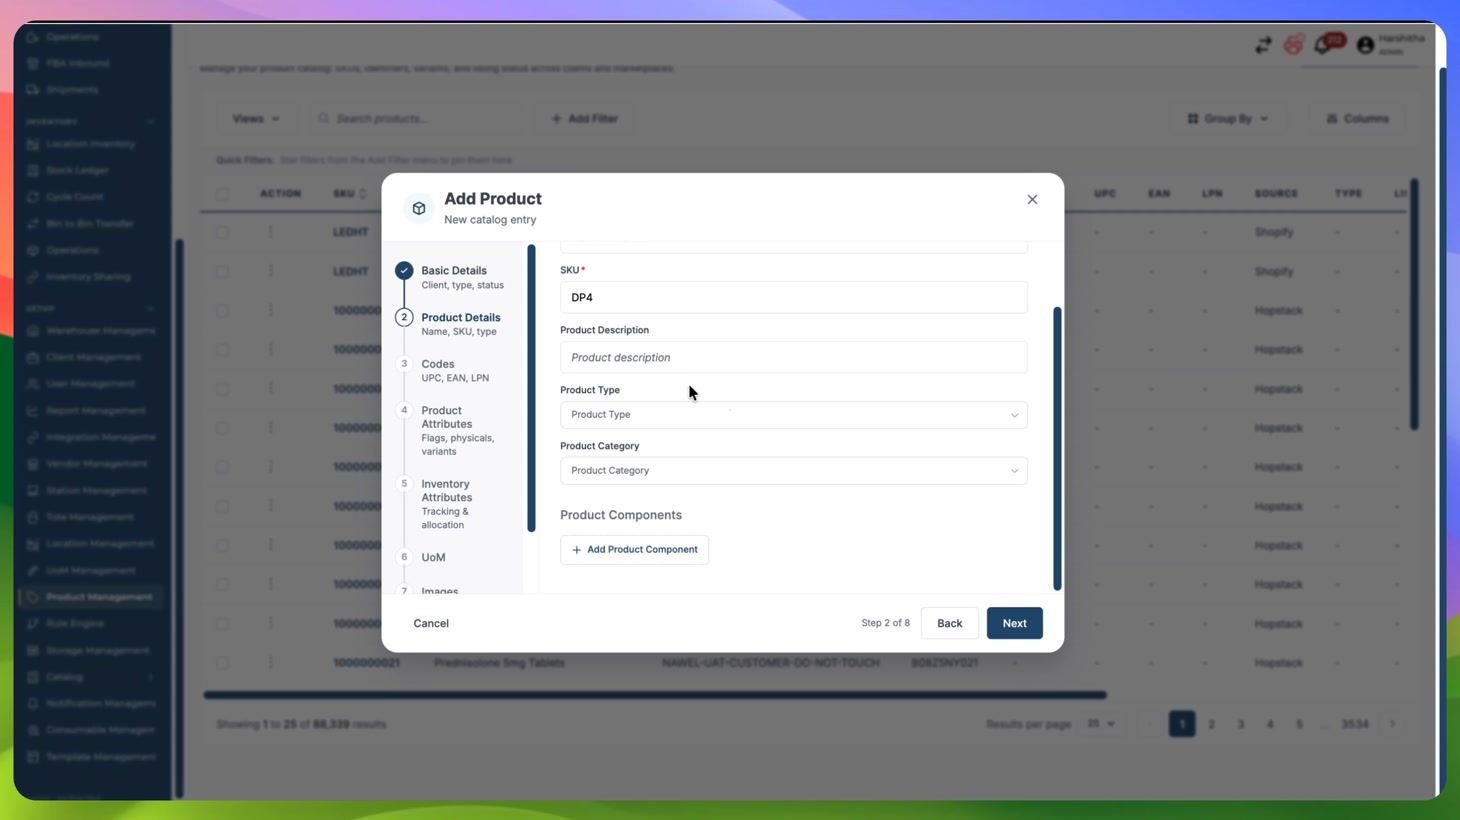
Enter a clear product name and a unique SKU. You can also add a description, product type, category, and product components where applicable.
|
Required fields: The Product Name and SKU must be completed before you can add the product. |
4. Add product codes
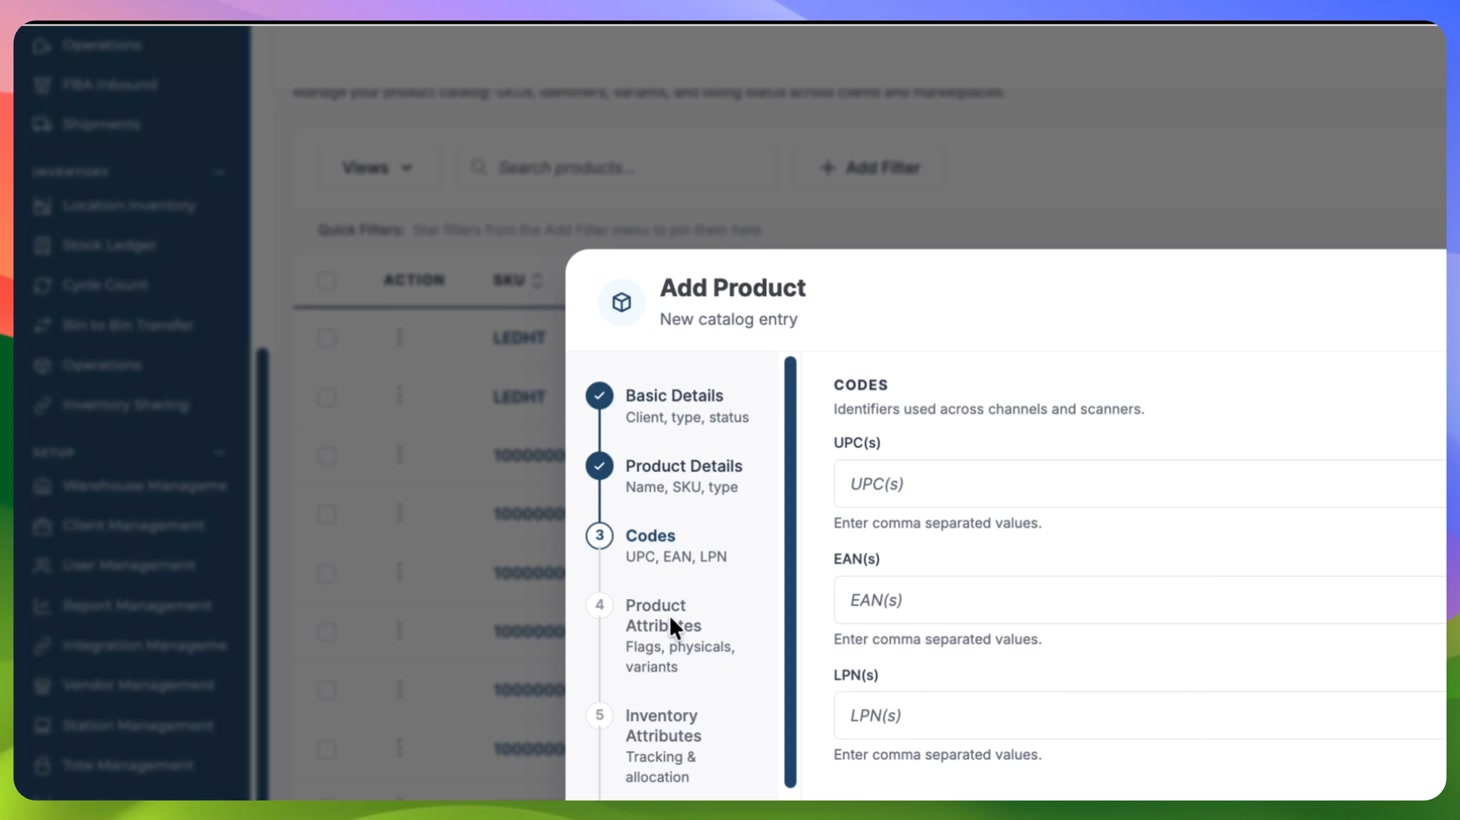
Enter the identifiers used to recognise the product across warehouse operations, connected systems, labels, and scanners. Add the applicable UPC, EAN, LPN, then select Next.
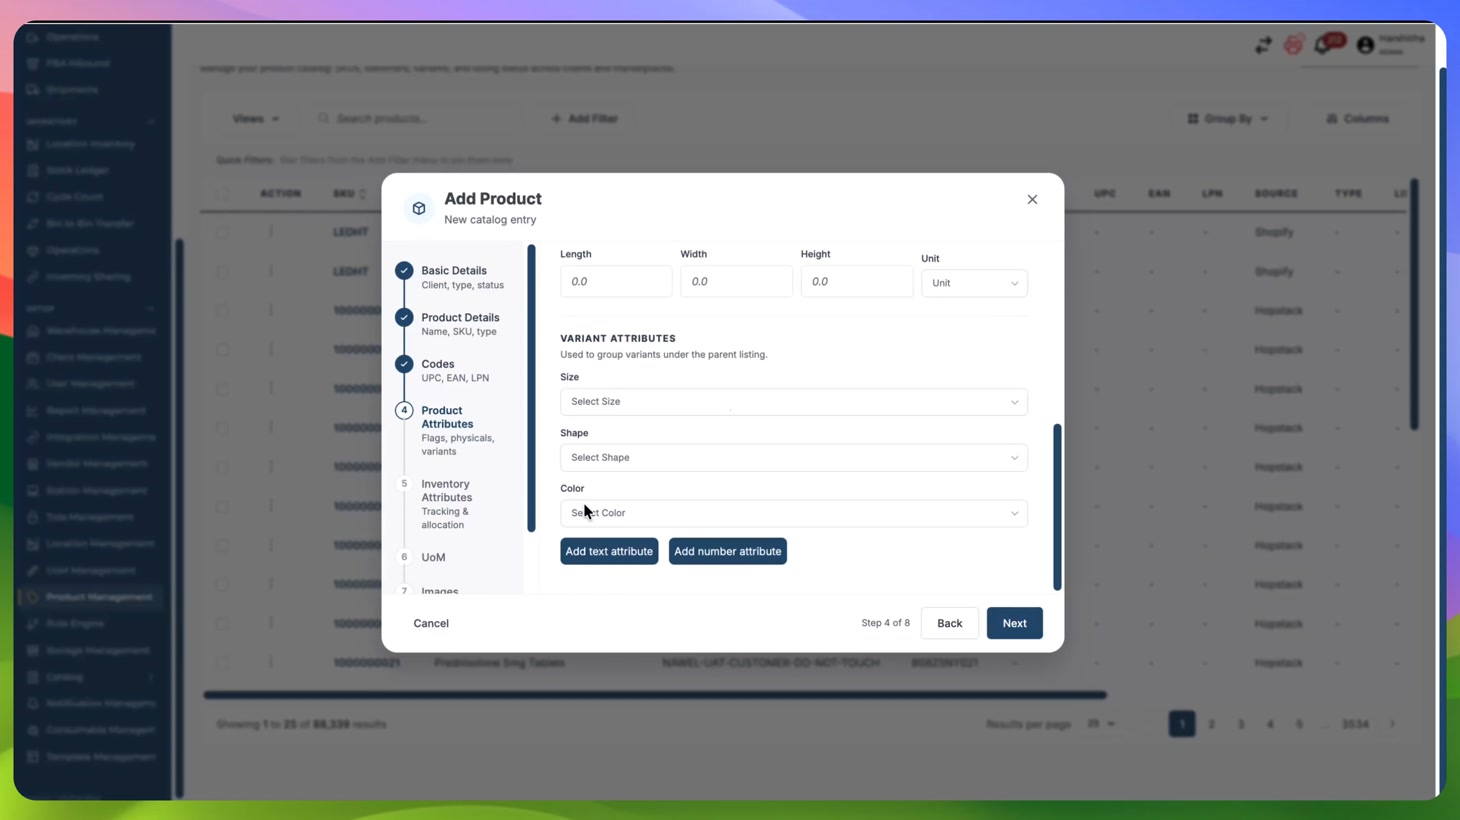
5. Configure product attributes
Product Attributes determine which special workflows and validations apply to the product. Configure only the attributes relevant to the item.
-
Enable applicable flags, such as Perishable, Pre-Packaged, Regulated Alcohol, or Fractional Inventory. For example, if Pre-Packaged is on, the packing flow can be skipped.
-
Enter physical information such as commodity code, weight, dimensions, and their units.
-
Add variant attributes, such as size, shape, or color, when the product belongs to a parent listing.
|
Validation: Some flags introduce additional requirements. For example, a pre-packaged product must include weight and dimension values before it can be created. |
6. Set inventory tracking and allocation requirements
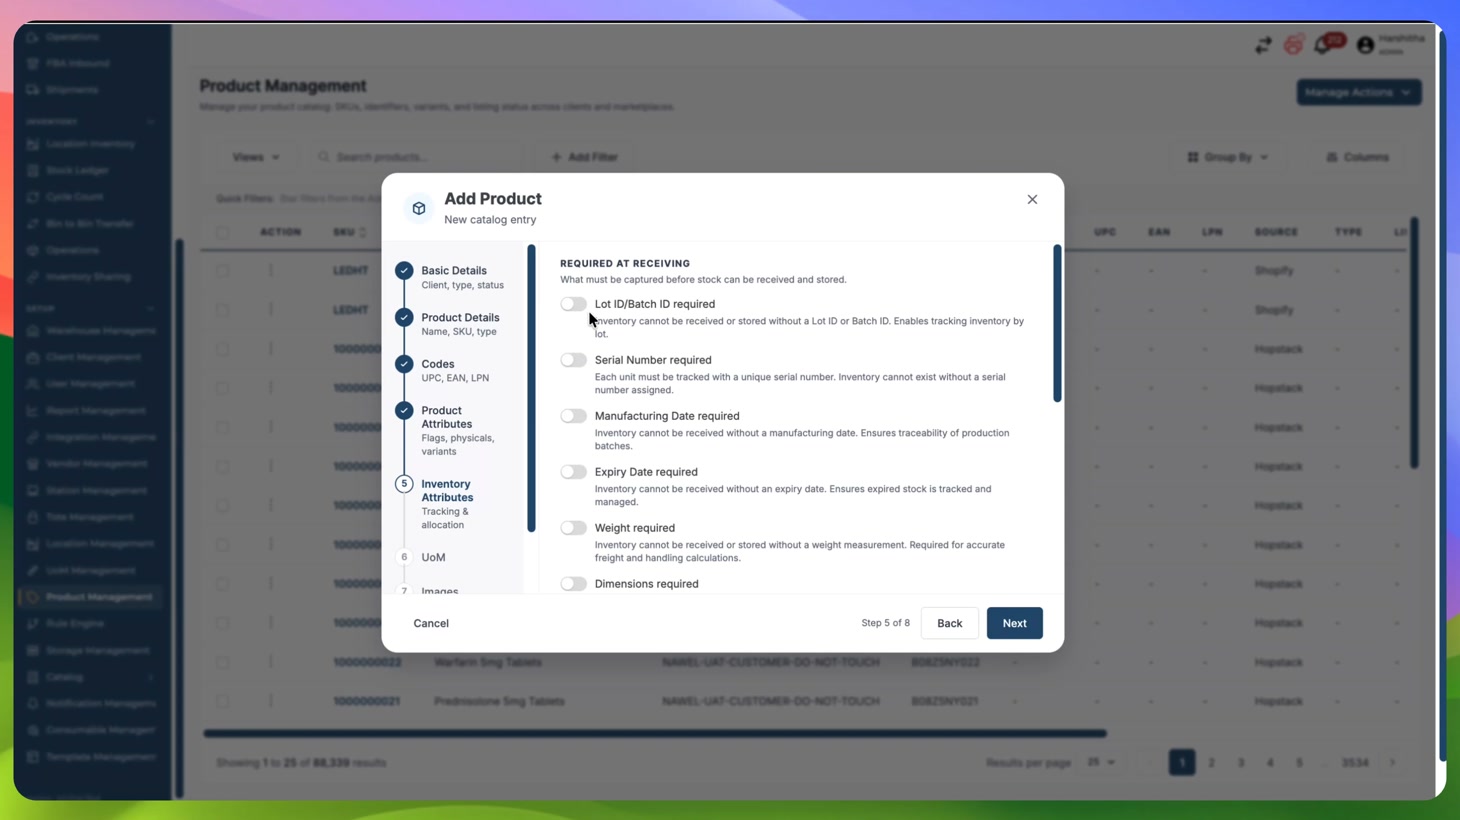
Choose the information that warehouse users must capture when inventory is received. Any attribute marked as required becomes mandatory during receiving and data is stored for inventory tracking.
|
Setting |
Effect |
|
Lot ID required |
Requires a lot or batch ID during receiving. |
|
Serial Number required |
Requires a unique serial number for each tracked unit. |
|
Manufacturing Date required |
Captures the production date for traceability. |
|
Expiry Date required |
Captures expiry information for shelf-life tracking. |
|
Weight / Dimensions required |
Requires the applicable measurement before stock can be received or stored. |
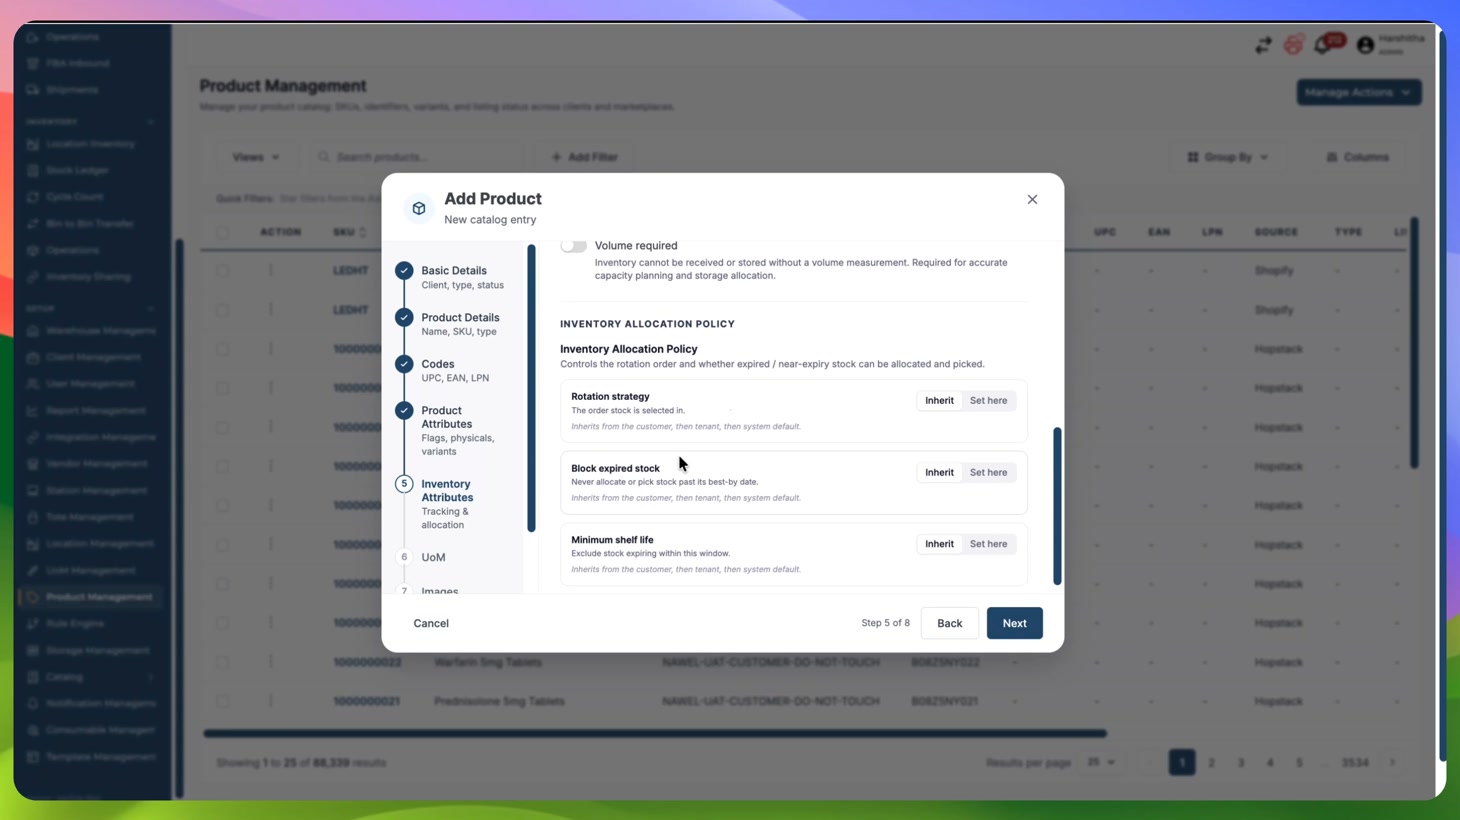
Configure inventory allocation
Define how eligible stock should be selected for orders. You can inherit client-level settings or set product-specific rules.
-
Rotation strategy: Select the stock-rotation rule, such as FEFO (First Expiry, First Out).
-
Block expired stock: Choose whether expired inventory can be allocated.
-
Minimum shelf life: Set the minimum remaining shelf life required for allocation.
7. Configure units of measure
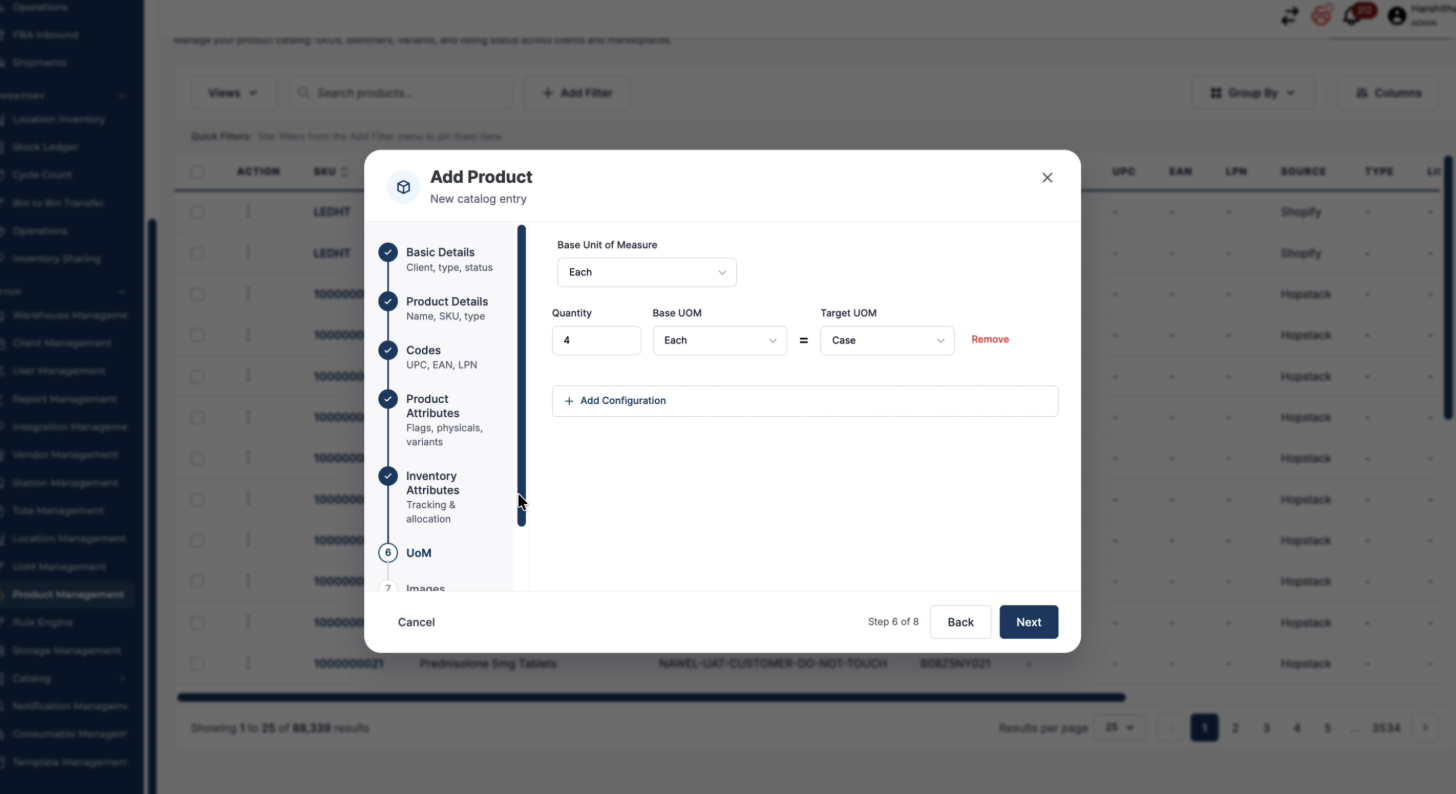
Select the Base Unit of Measure used to track the product. If the product is handled in cases, boxes, packs, or other units, add a conversion that specifies how many base units make up the target unit.
|
Example: If one case contains four individual units, enter Quantity = 4, Base UOM = Each, and Target UOM = Case. |
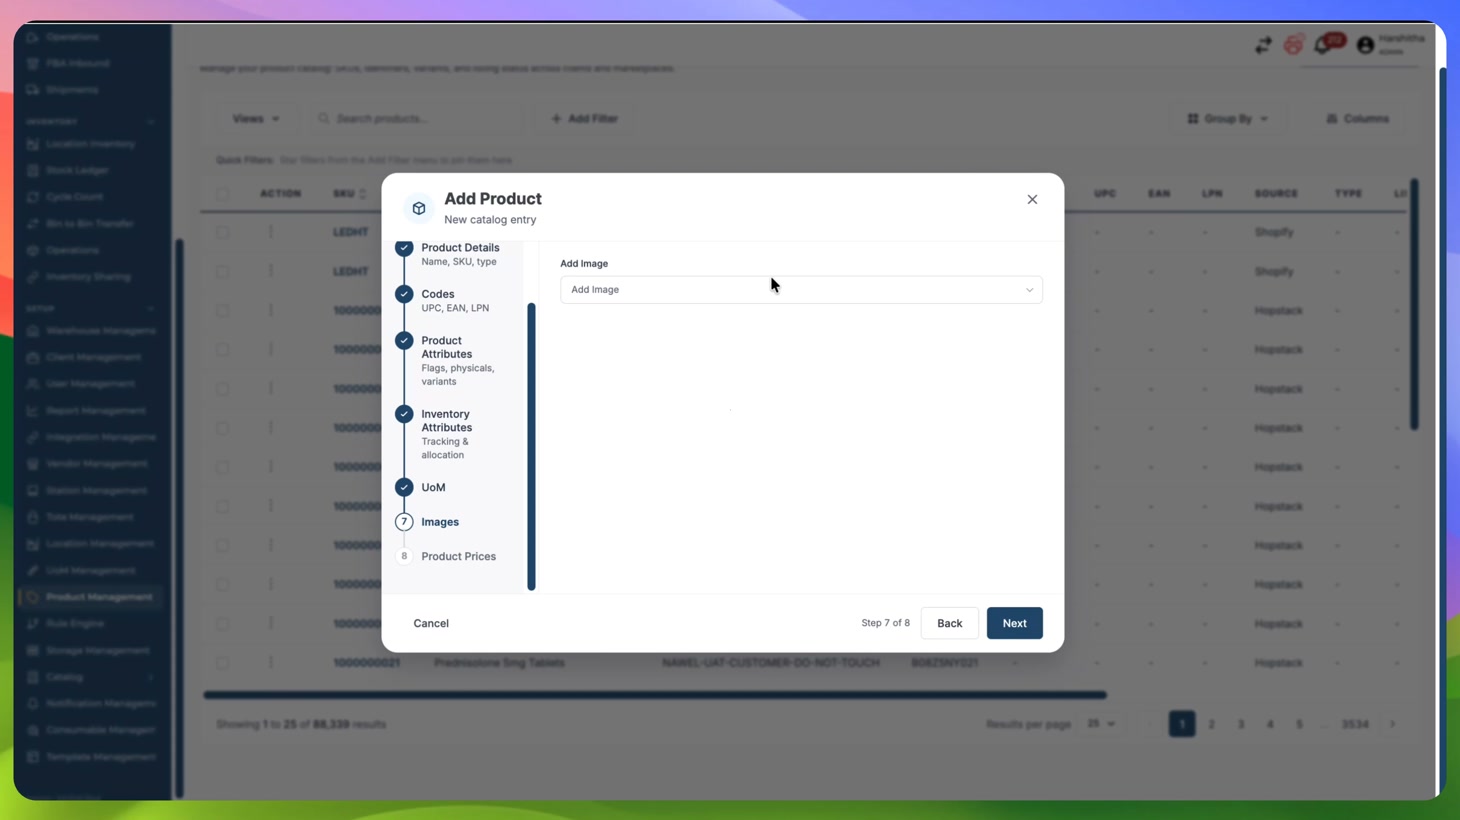
8. Add a product image
Upload an image that clearly identifies the product. The image helps warehouse users confirm that they are working with the correct item.
9. Add pricing
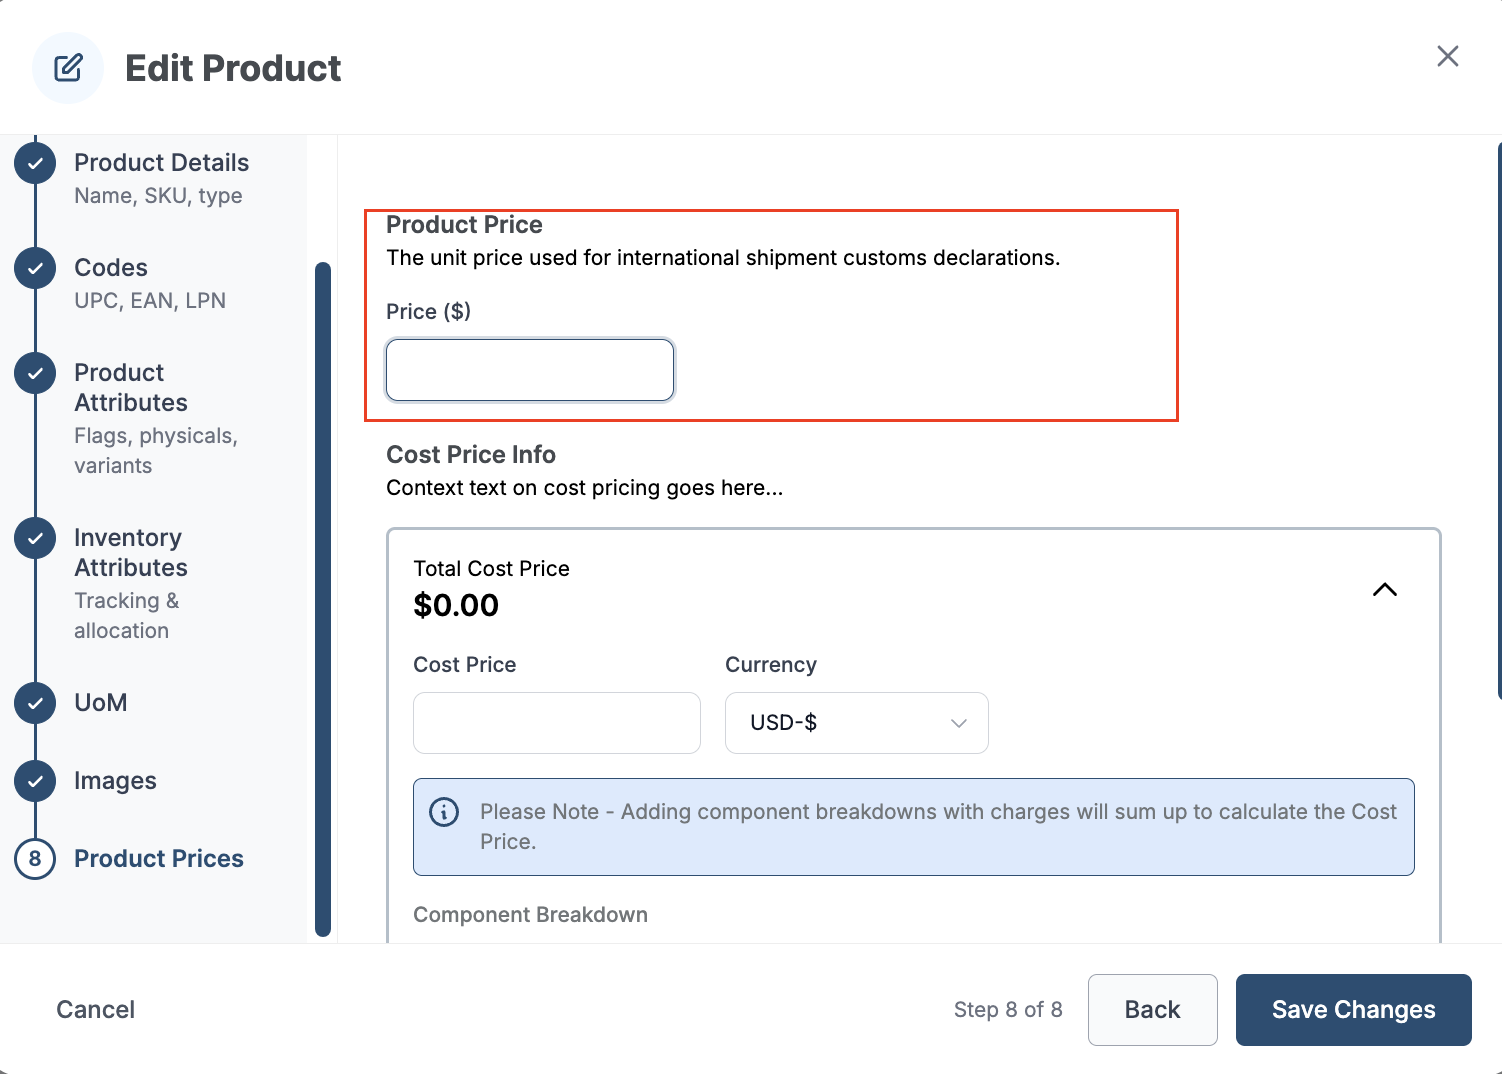
Unit Price
The user can add a Unit Price that can be used for international shipment customs declarations. This field can be edited at any point by using the edit option under action.
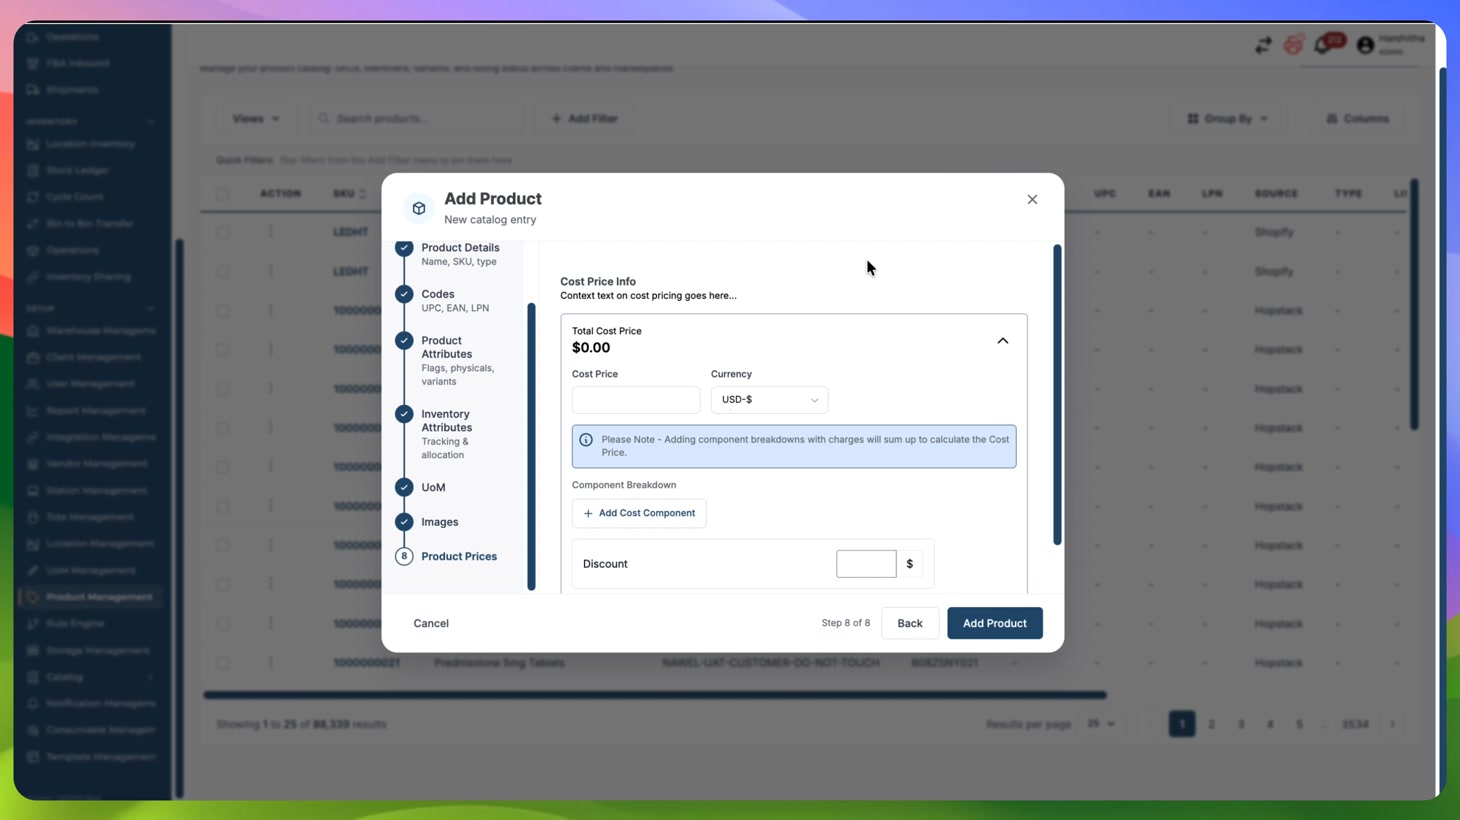
Cost Price Info
Enter the cost price and select the currency. If required, add component-level cost details and a discount.
10. Create Product
Review the information entered across all sections, then select Add Product.
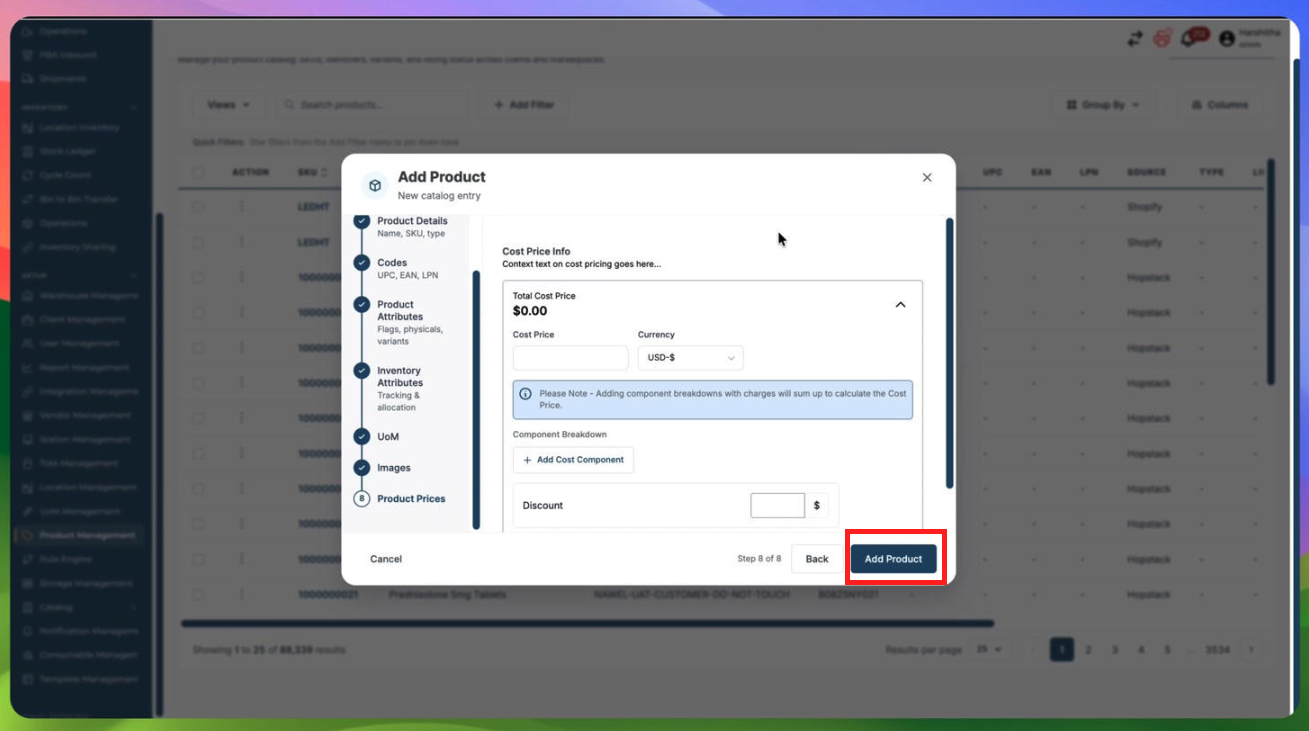
After the product is created successfully, it appears in Product Management and can be used in the workflows. Use search or filters to locate the SKU and verify its details.