
To ensure the integrity and confidentiality of the data, it is strongly advised that permissions related to this module should not be delegated to any users or any external entities. Granting such permissions might lead to unintended access and potential discrepancies, thereby compromising the reliability of our system.
Presently we have made sure only users with role Admin have access to Report Management.
This feature is designed to provide comprehensive tools to generate, manage, and schedule reports. With Report Management, you can easily create detailed reports tailored to your needs, automate the scheduling of these reports for regular updates, and receive them directly via email. This functionality ensures you have the latest data at your fingertips, streamlining your decision-making process and enhancing operational efficiency. By doing so, admins can easily track the performance of the business and make data-driven decisions.
Since this is a new module addition make sure the user access is there for Report Management. You can enable the access for a user by taking the following steps :
-
Navigate to user management on the Hopstack Platform.
-
Click on the access setting icon beside the user to whom you want to give report management access.
-
Toggle on for the report management and save it.
Report Management Home Page
Introduction
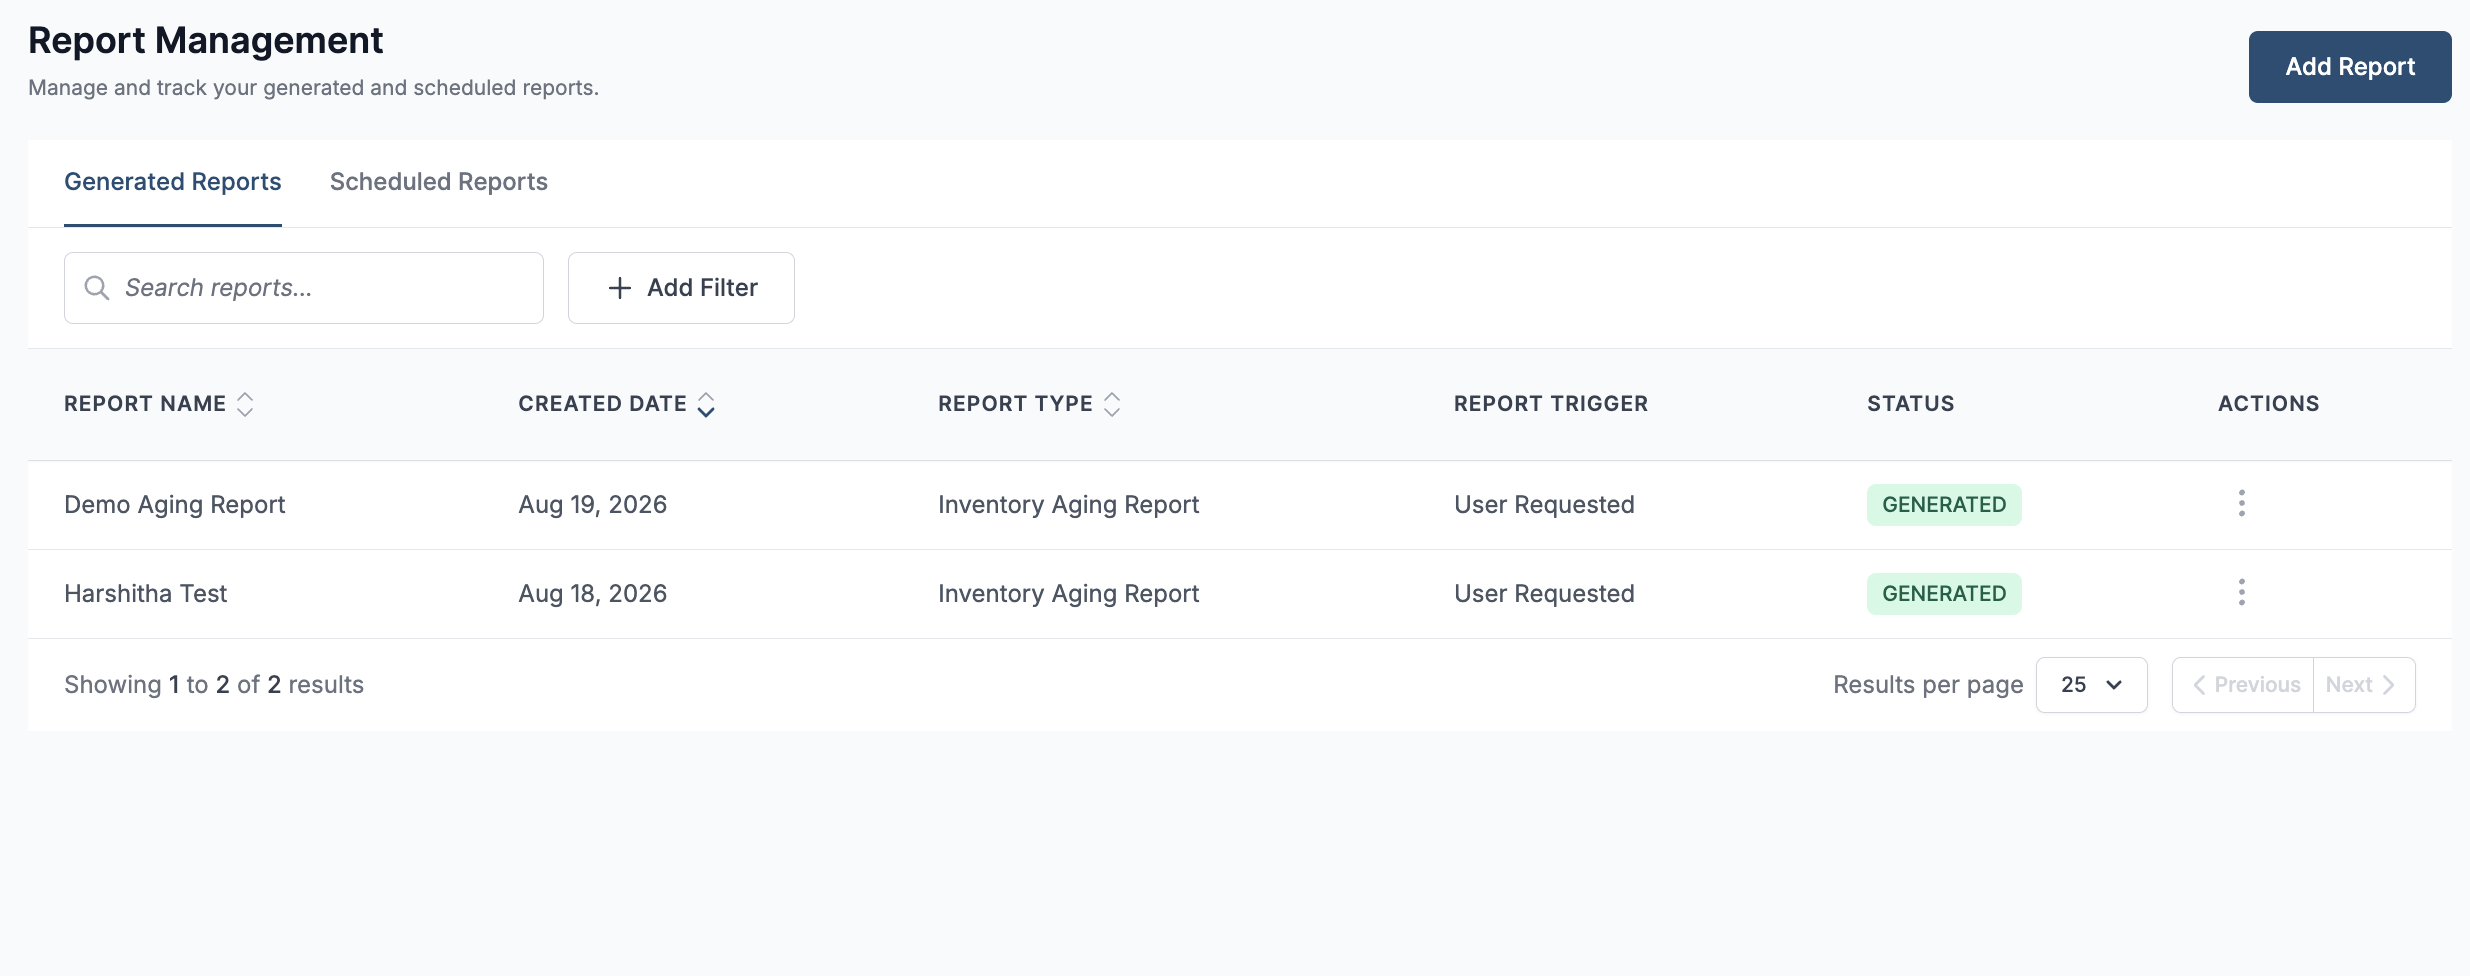
The Report Management page provides a centralized view of all generated and scheduled reports. From this page, users can quickly find reports, review their status, preview report data, regenerate reports, download them, or delete reports that are no longer required.
To create a new generated or scheduled report, click Add Report.
Viewing Reports
The Generated Reports tab displays reports that have been created on the platform. Each report includes the following information:
-
Report Name: The name assigned to the report.
-
Created Date: The date on which the report was generated.
-
Report Type: The category of the report, such as Inventory Aging Report.
-
Report Trigger: Indicates how the report was initiated, such as User Requested.
-
Status: Shows the current report status. A Generated status confirms that the report is ready to view or download.
-
Actions: Provides additional options for managing the report.
Select the Scheduled Reports tab to view and manage reports configured to generate automatically at a defined schedule.
Available Report Actions
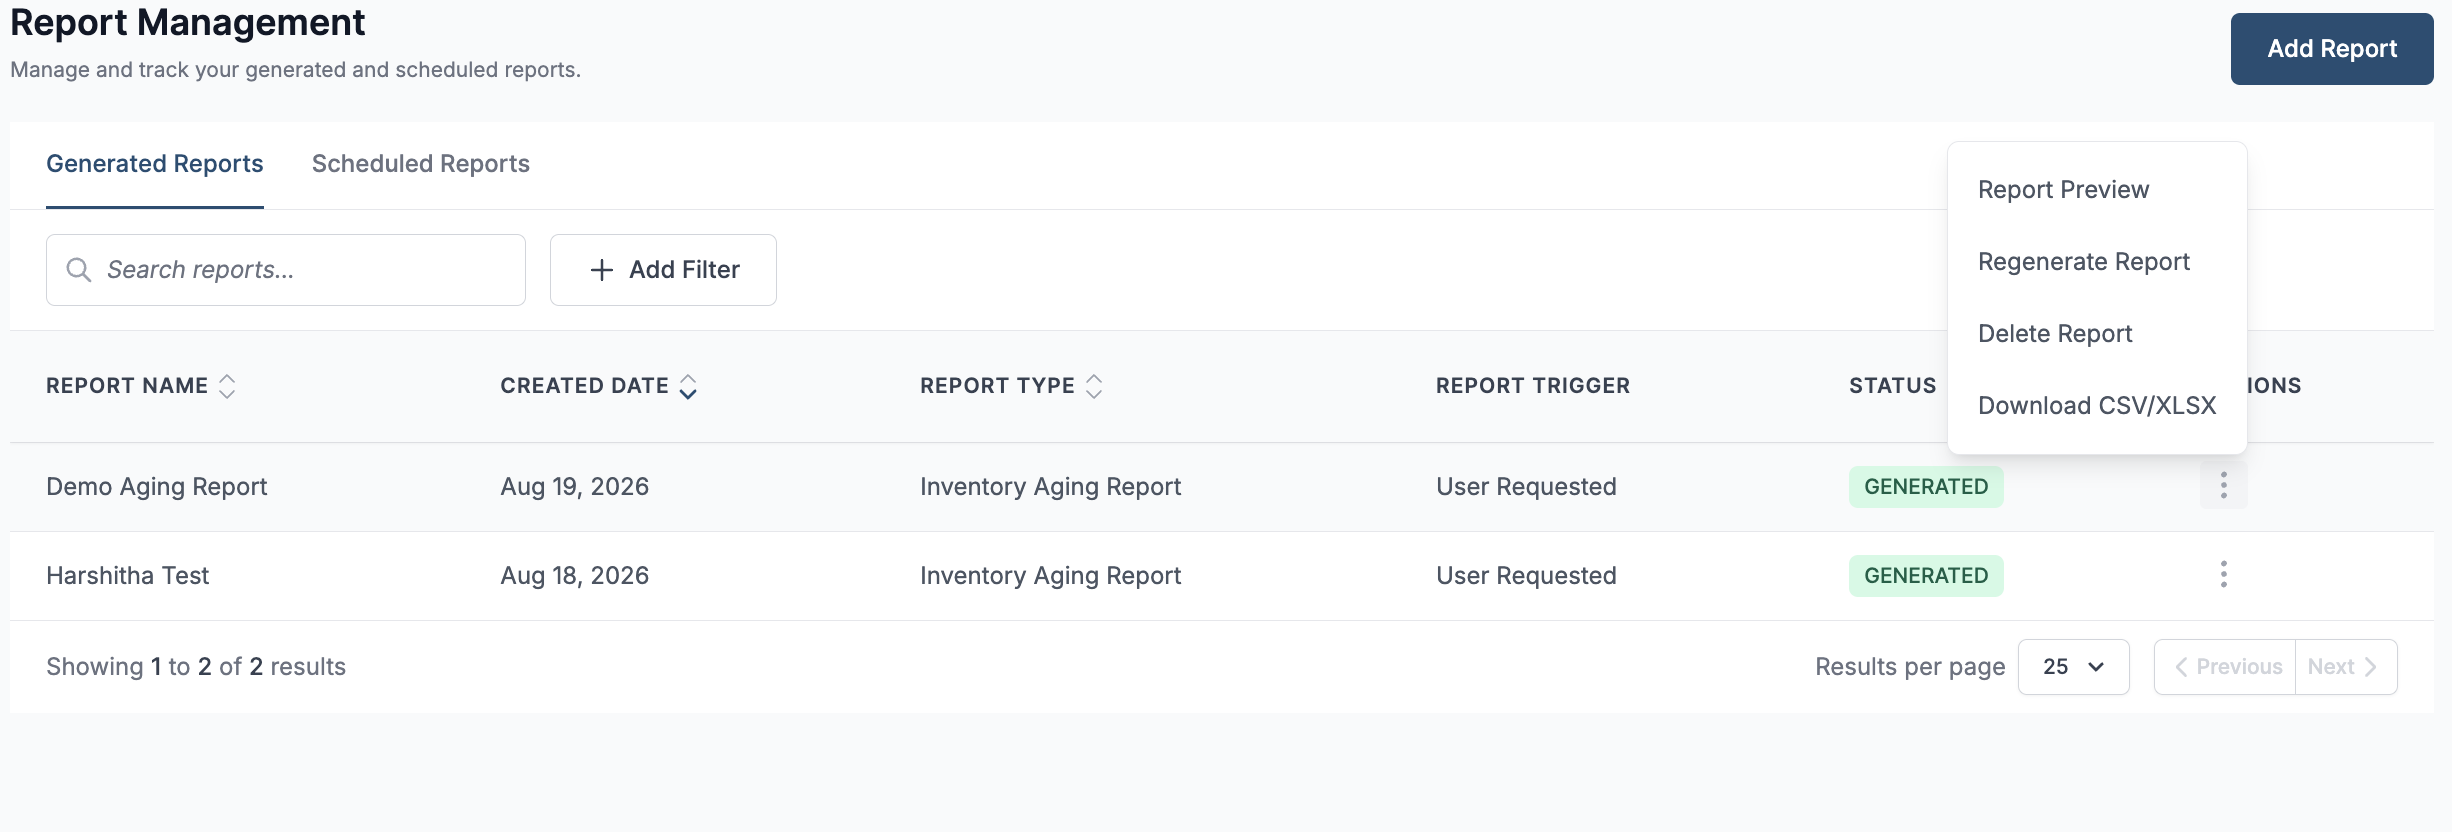
Click the three-dot menu in the Actions column to access the following options:
-
Report Preview: View a sample of the report directly within Hopstack.
-
Regenerate Report: Generate an updated version of the report using the latest available data.
-
Delete Report: Remove the generated report from the list.
-
Download CSV/XLSX: Download the complete report in CSV or Excel format for further analysis or sharing.
Previewing a Report
To preview a report:
-
Locate the required report in the Generated Reports tab.
-
Click the three-dot menu under Actions.
-
Select Report Preview.
-
Review the report data in the preview window.
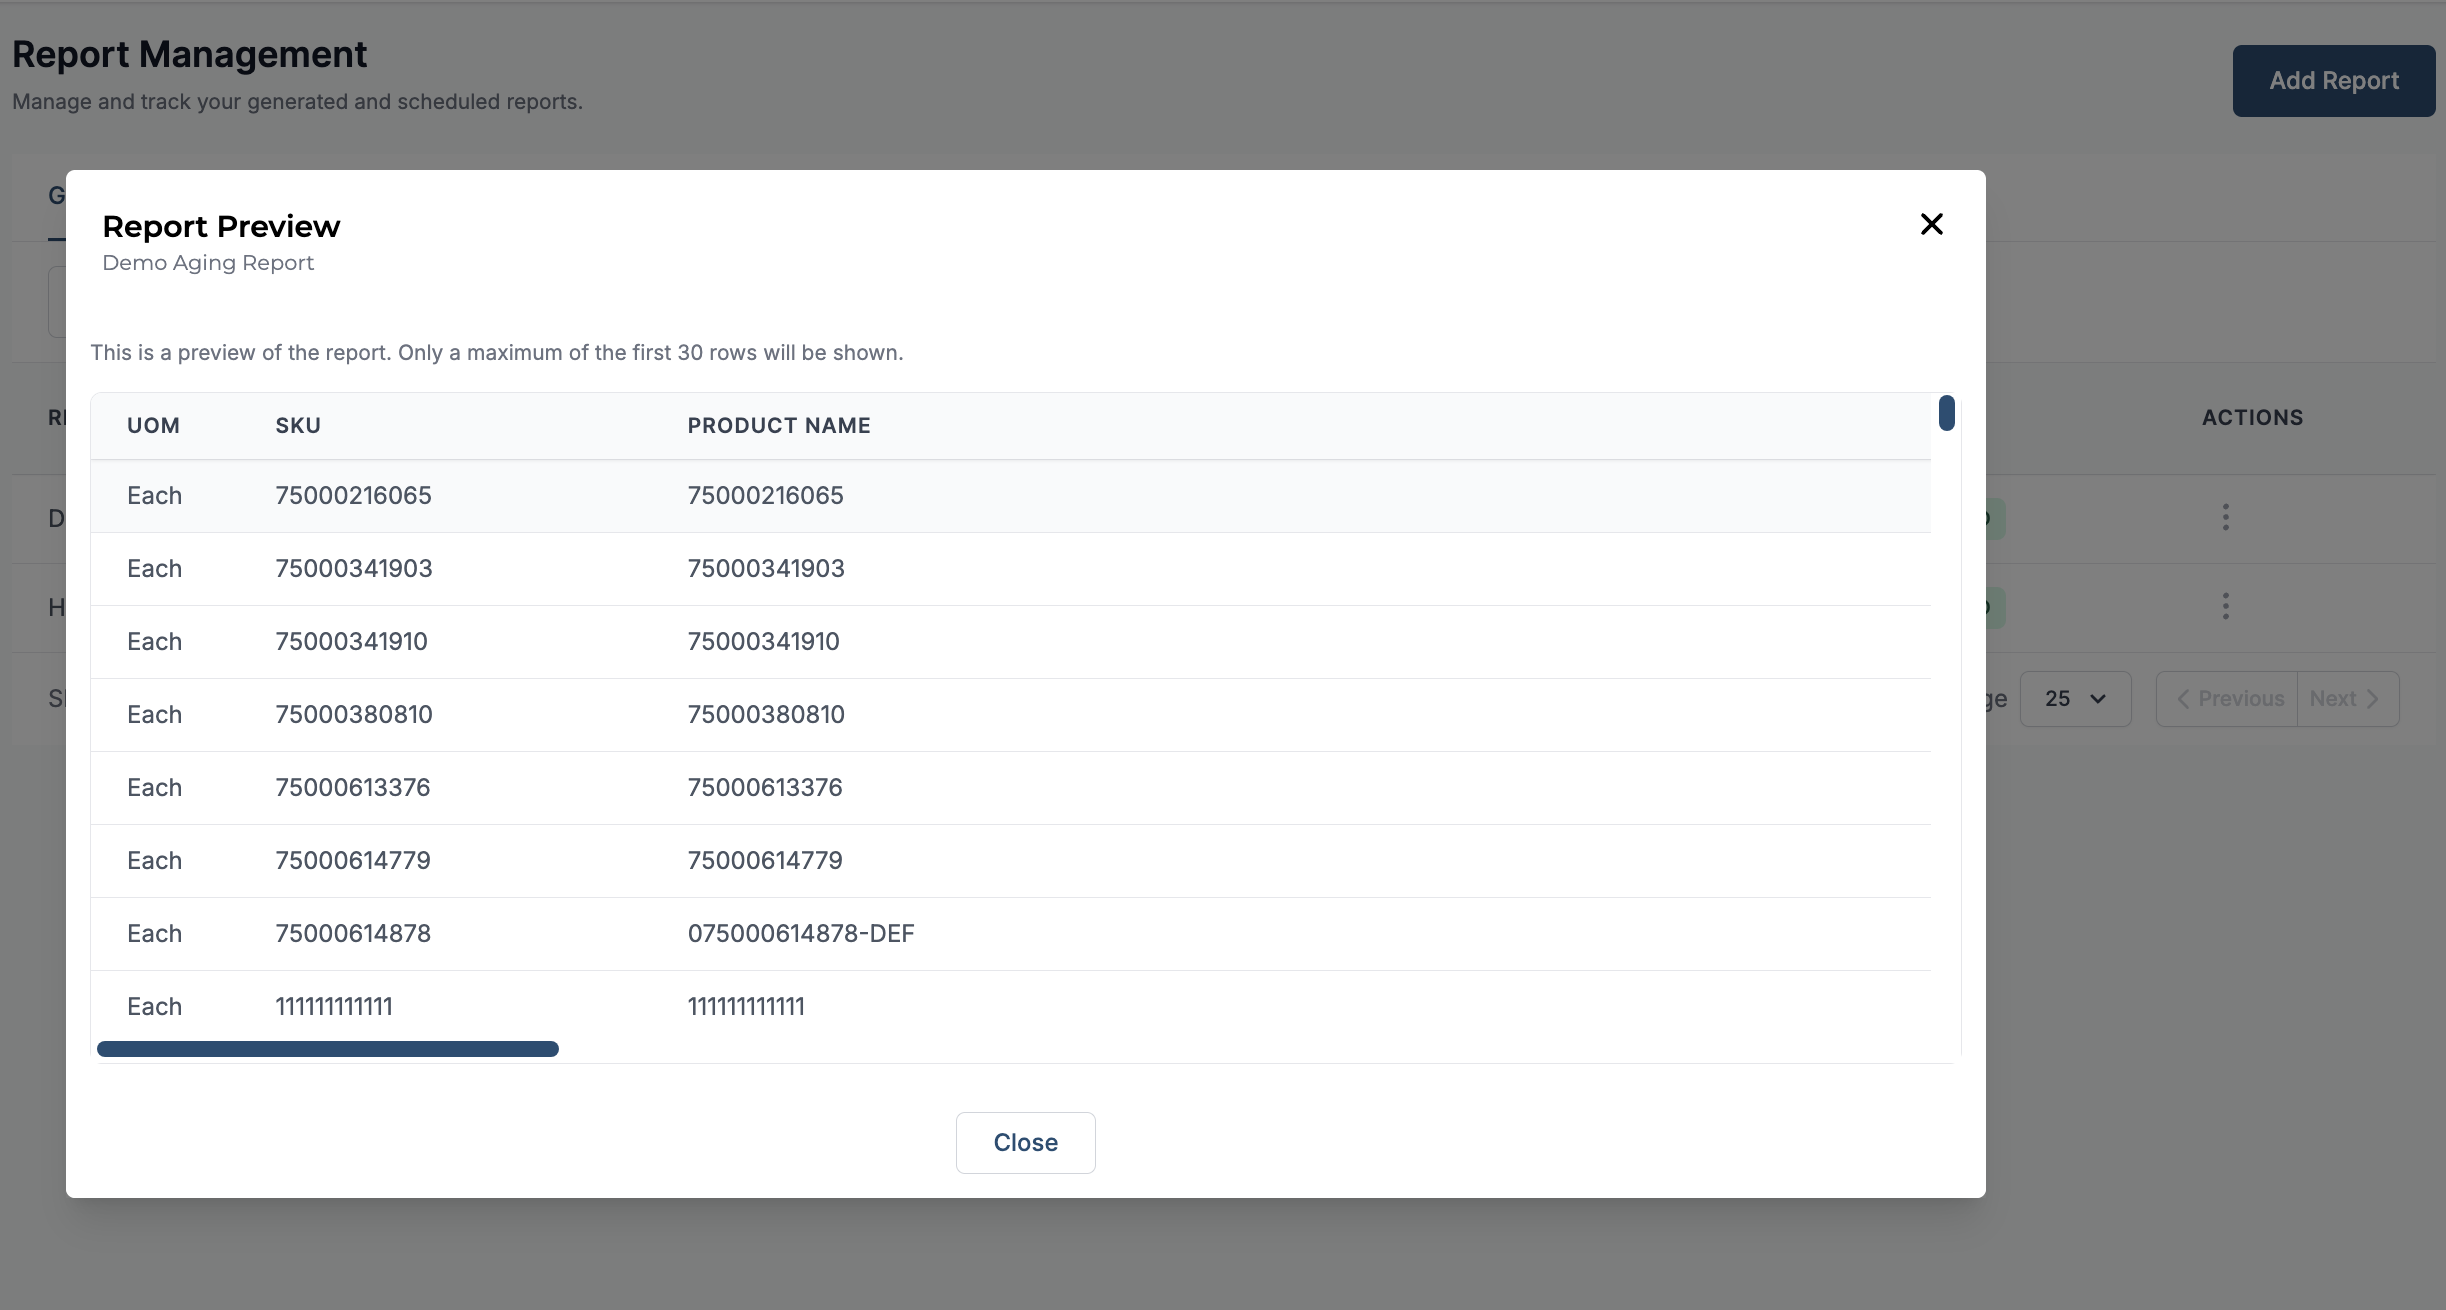
The preview displays a maximum of the first 30 rows. Use the vertical and horizontal scroll bars to review the available rows and columns. To view the complete dataset, download the report using the Download CSV/XLSX option.
Click Close or the X icon to exit the preview and return to the Report Management page.