We're excited to introduce the improved product bulk upload feature, designed to help you efficiently manage large amounts of data. With improved data validation and formatting, you'll benefit from real-time feedback during uploads, as well as the ability to view past uploads for better tracking and management.
Follow the steps below to bulk upload products.
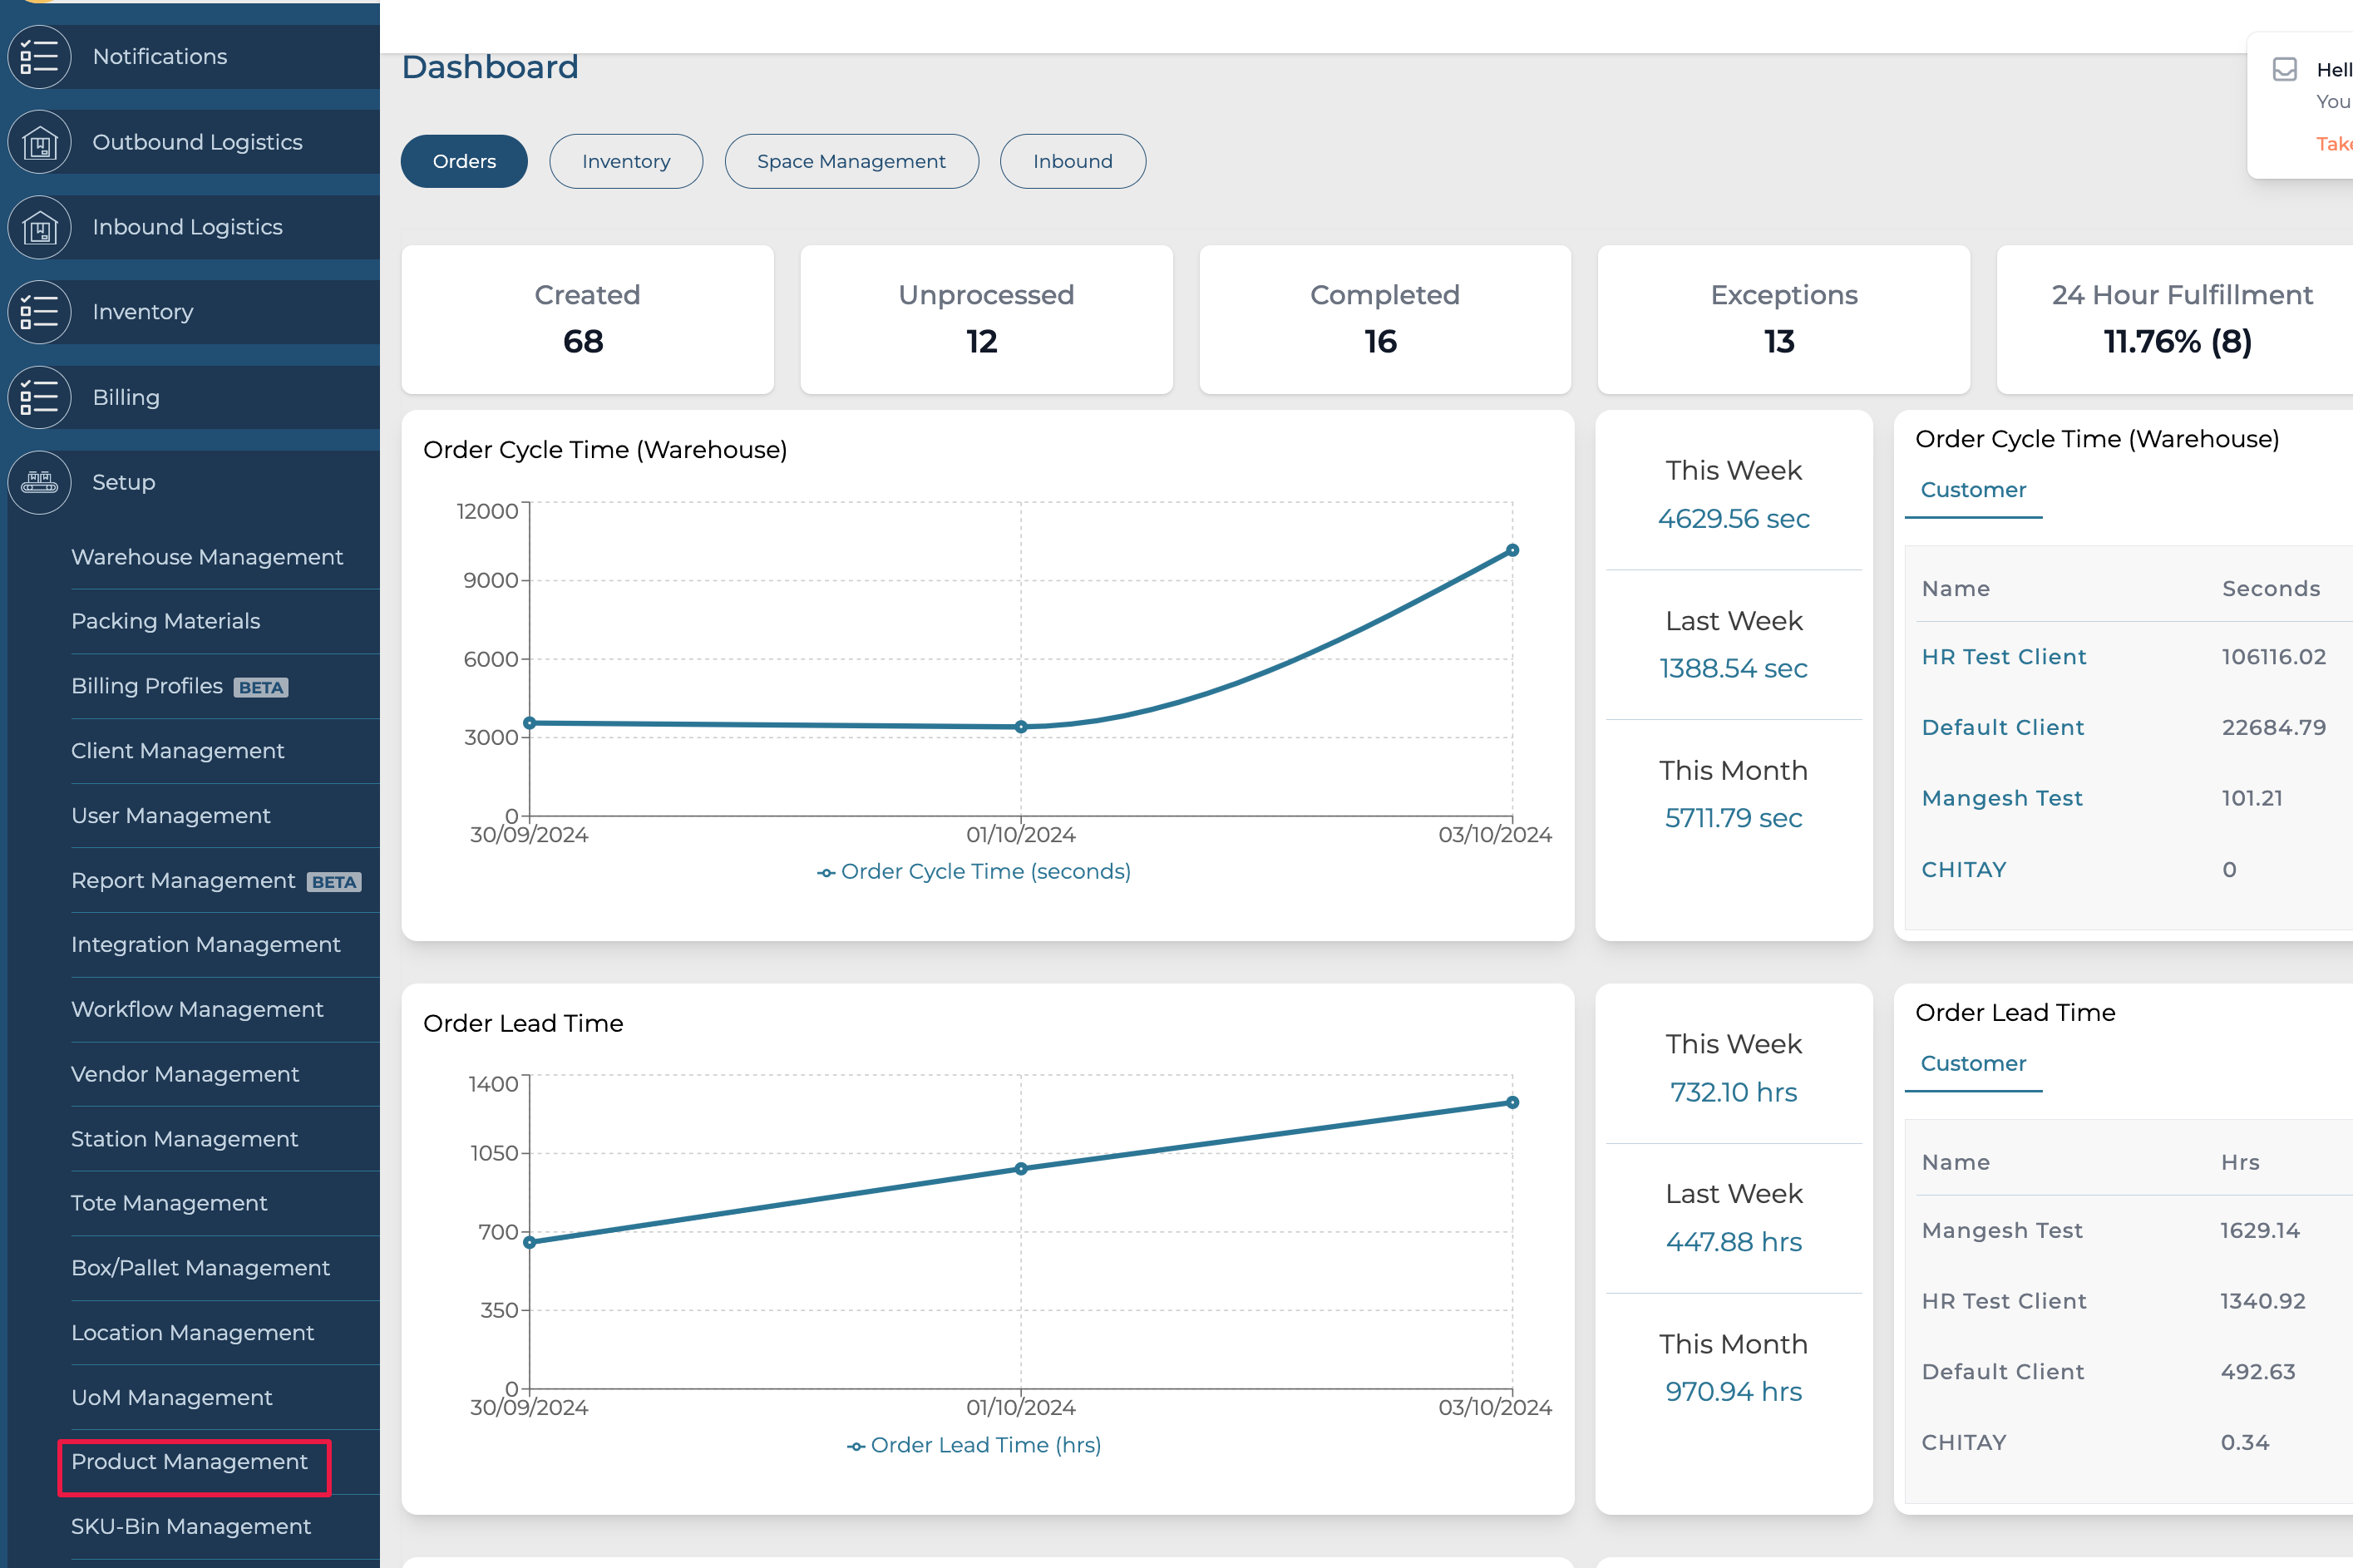
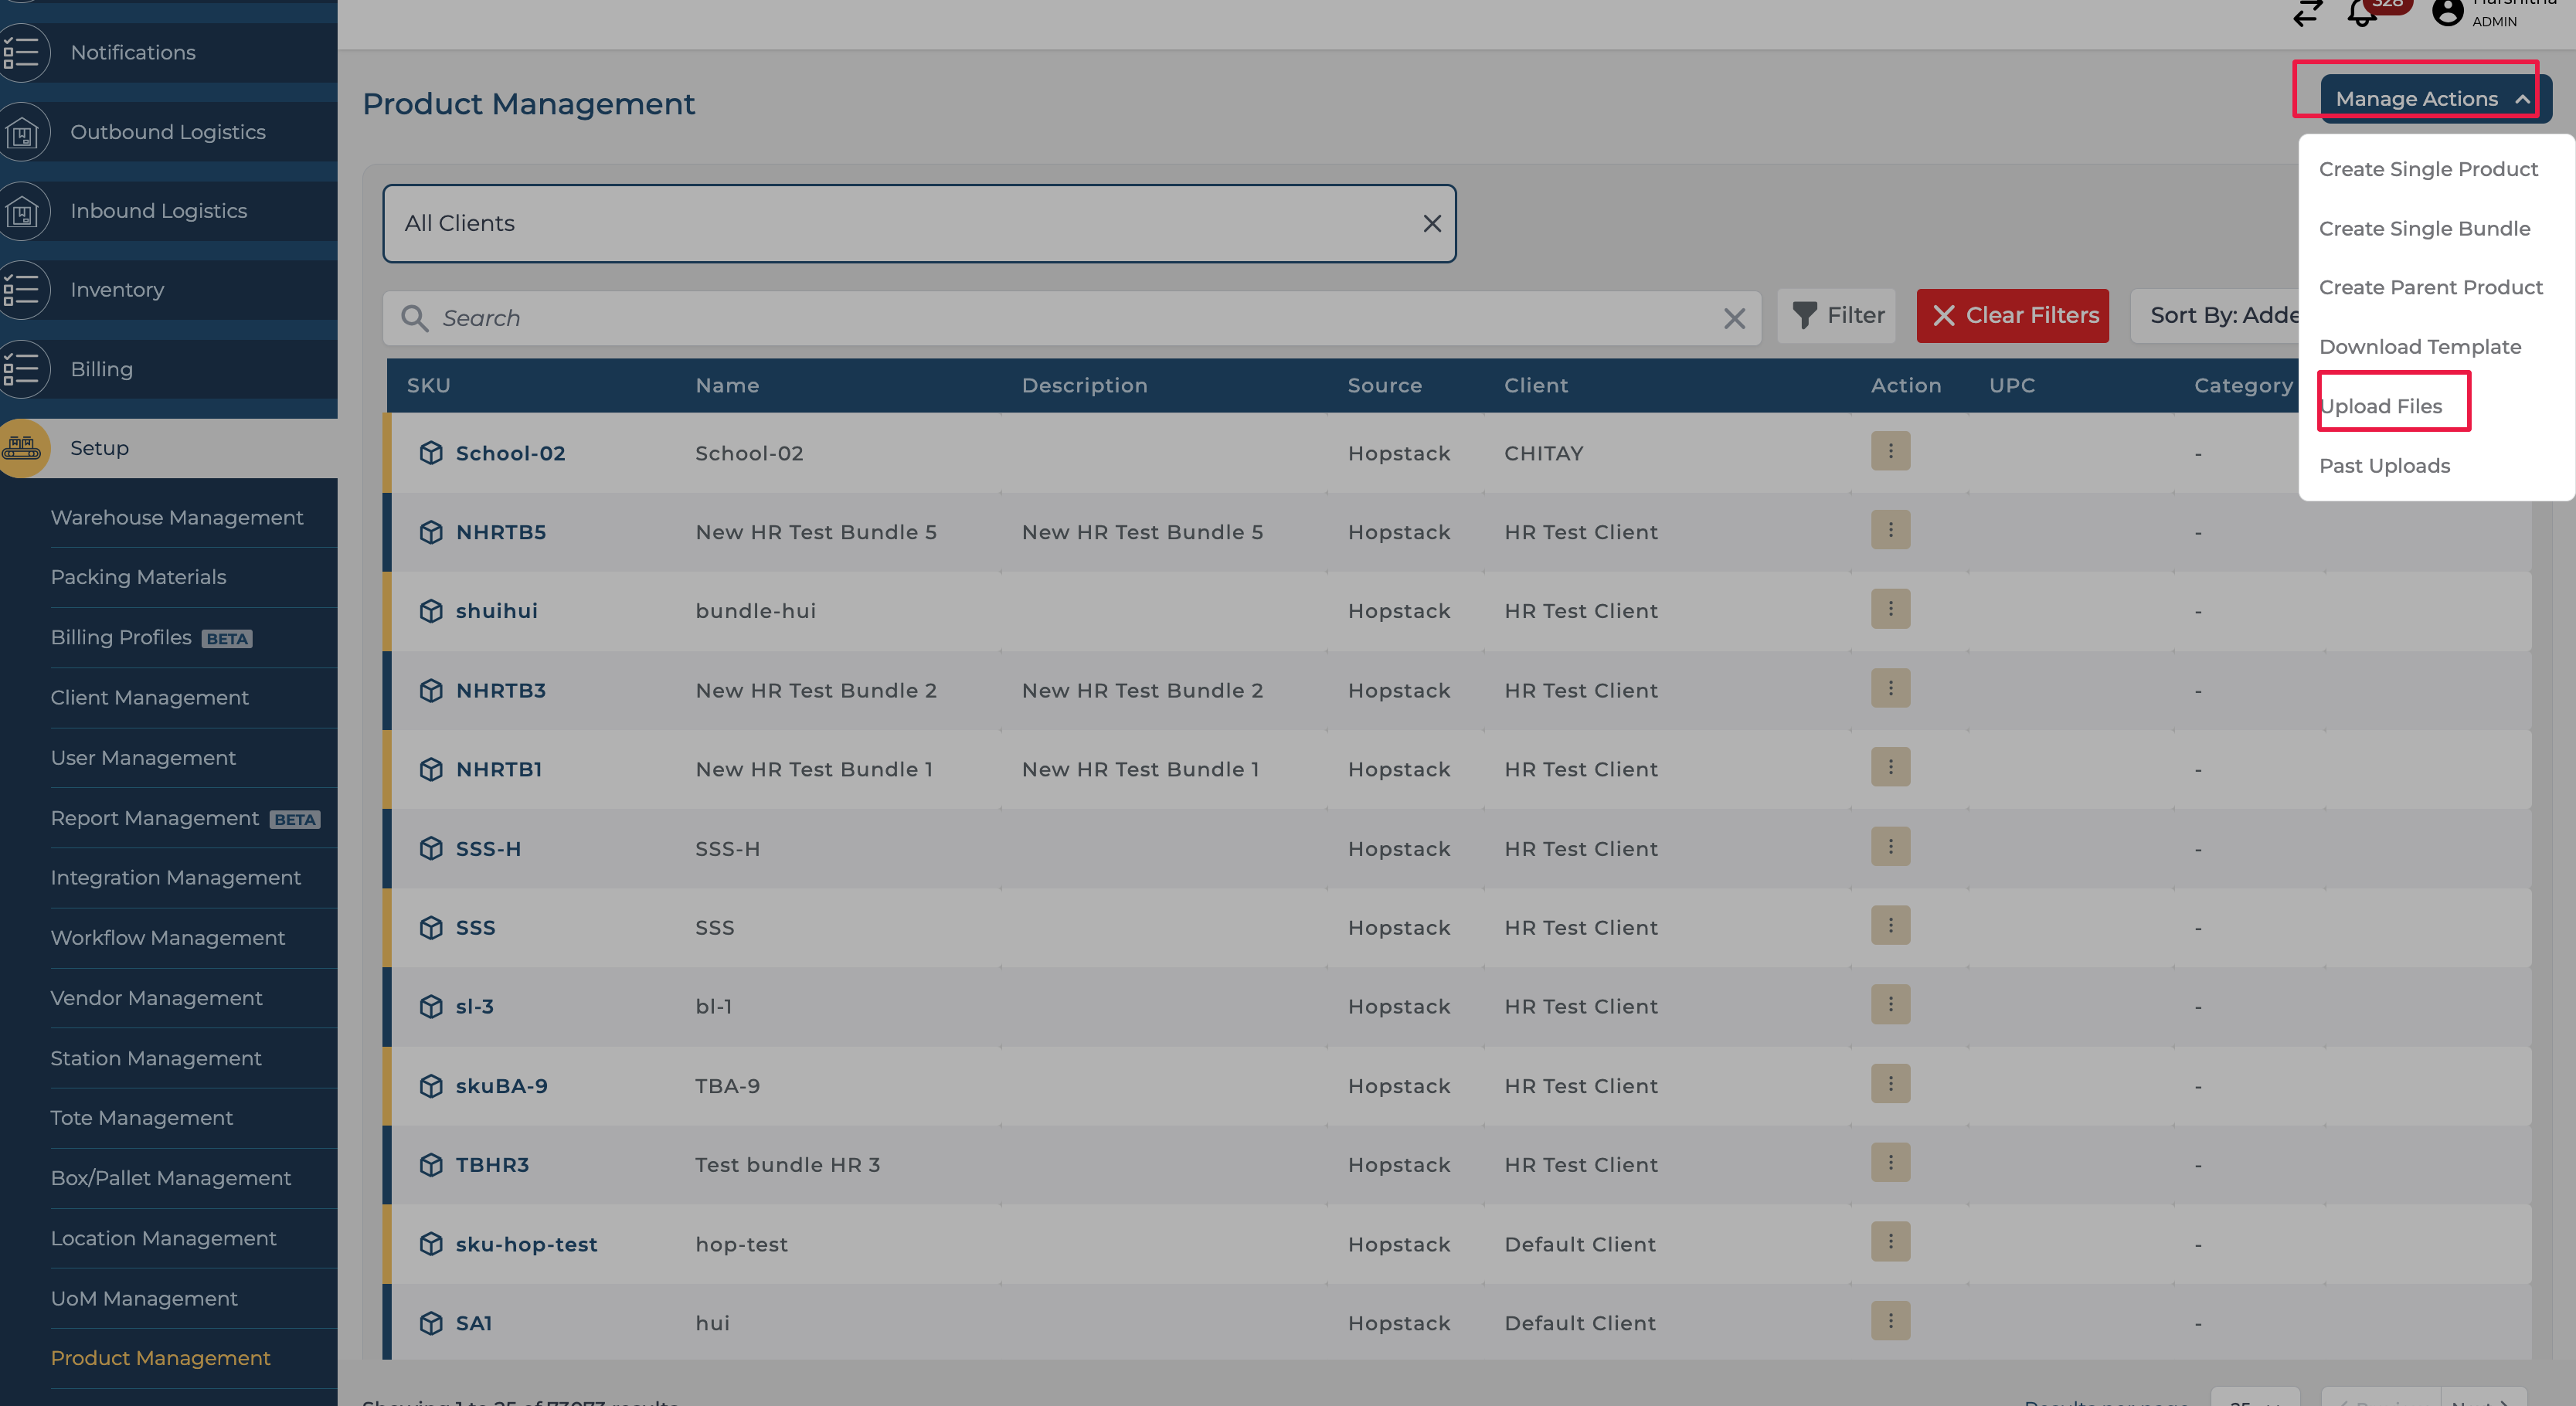
Step 1: Click on Product Management under Setup to enter the product management screen.
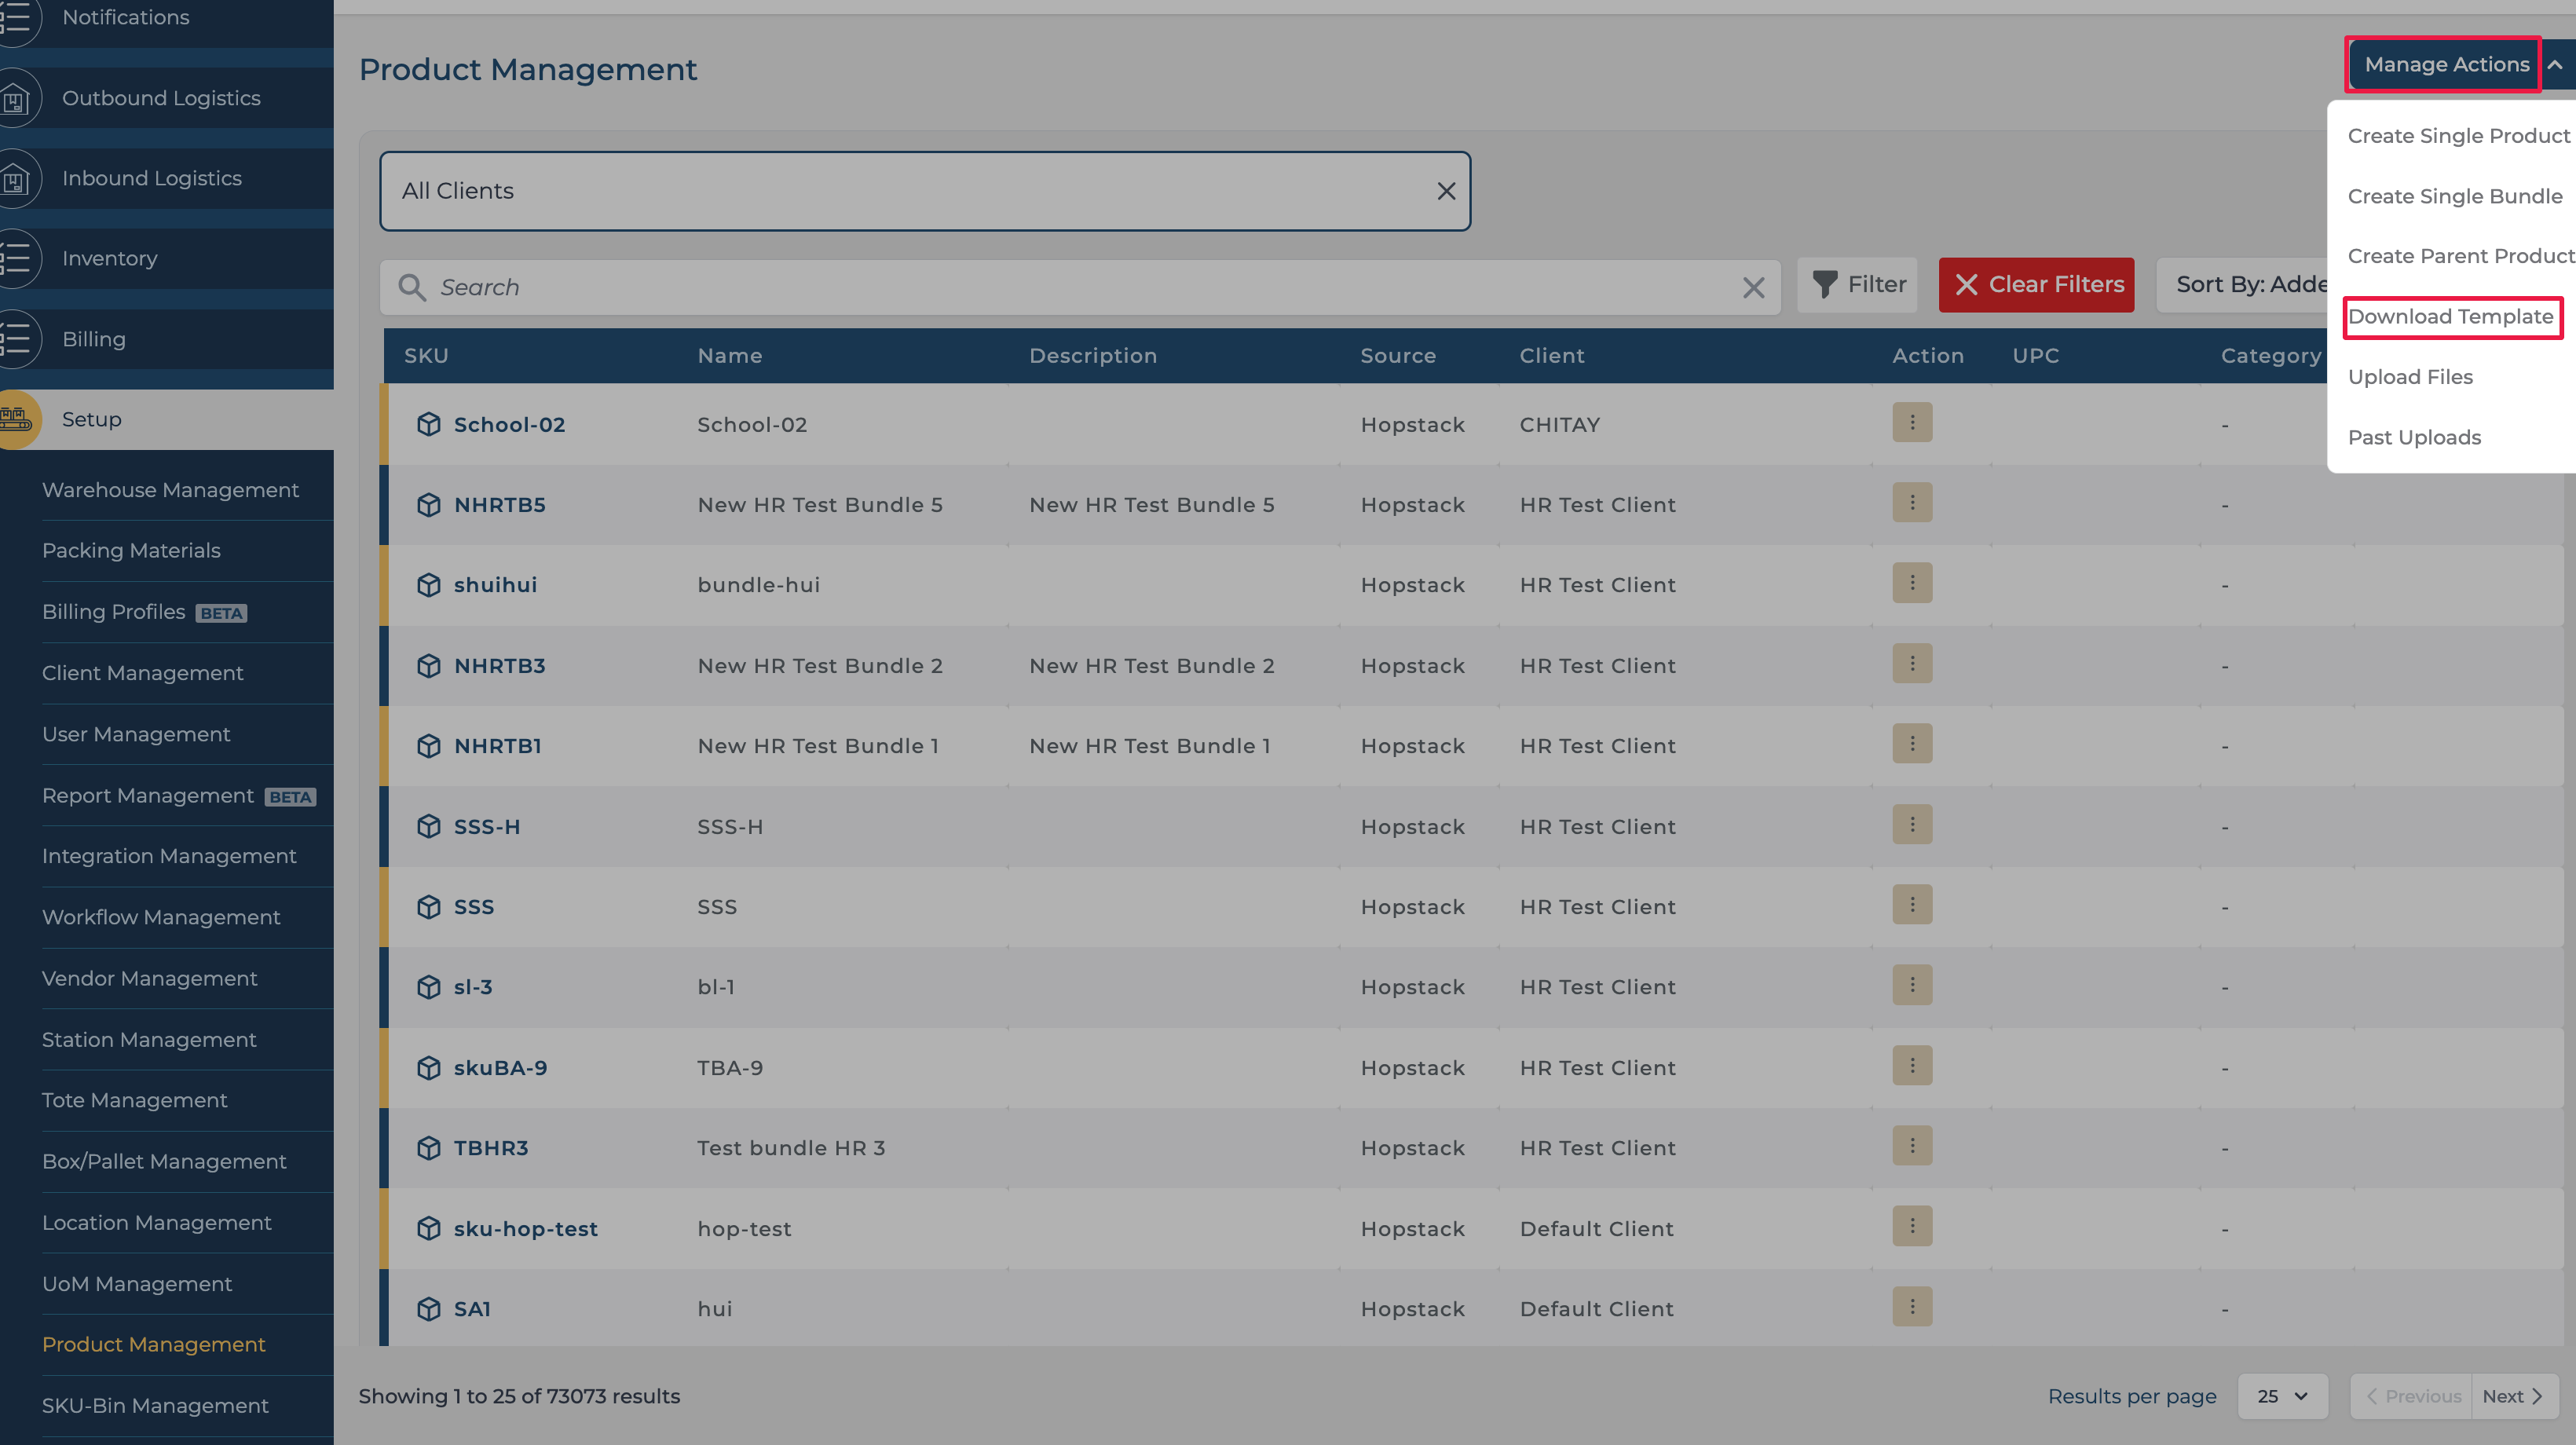
Step 2: Click on the Manage Actions button, and click on the Download template to download the bulk upload template.
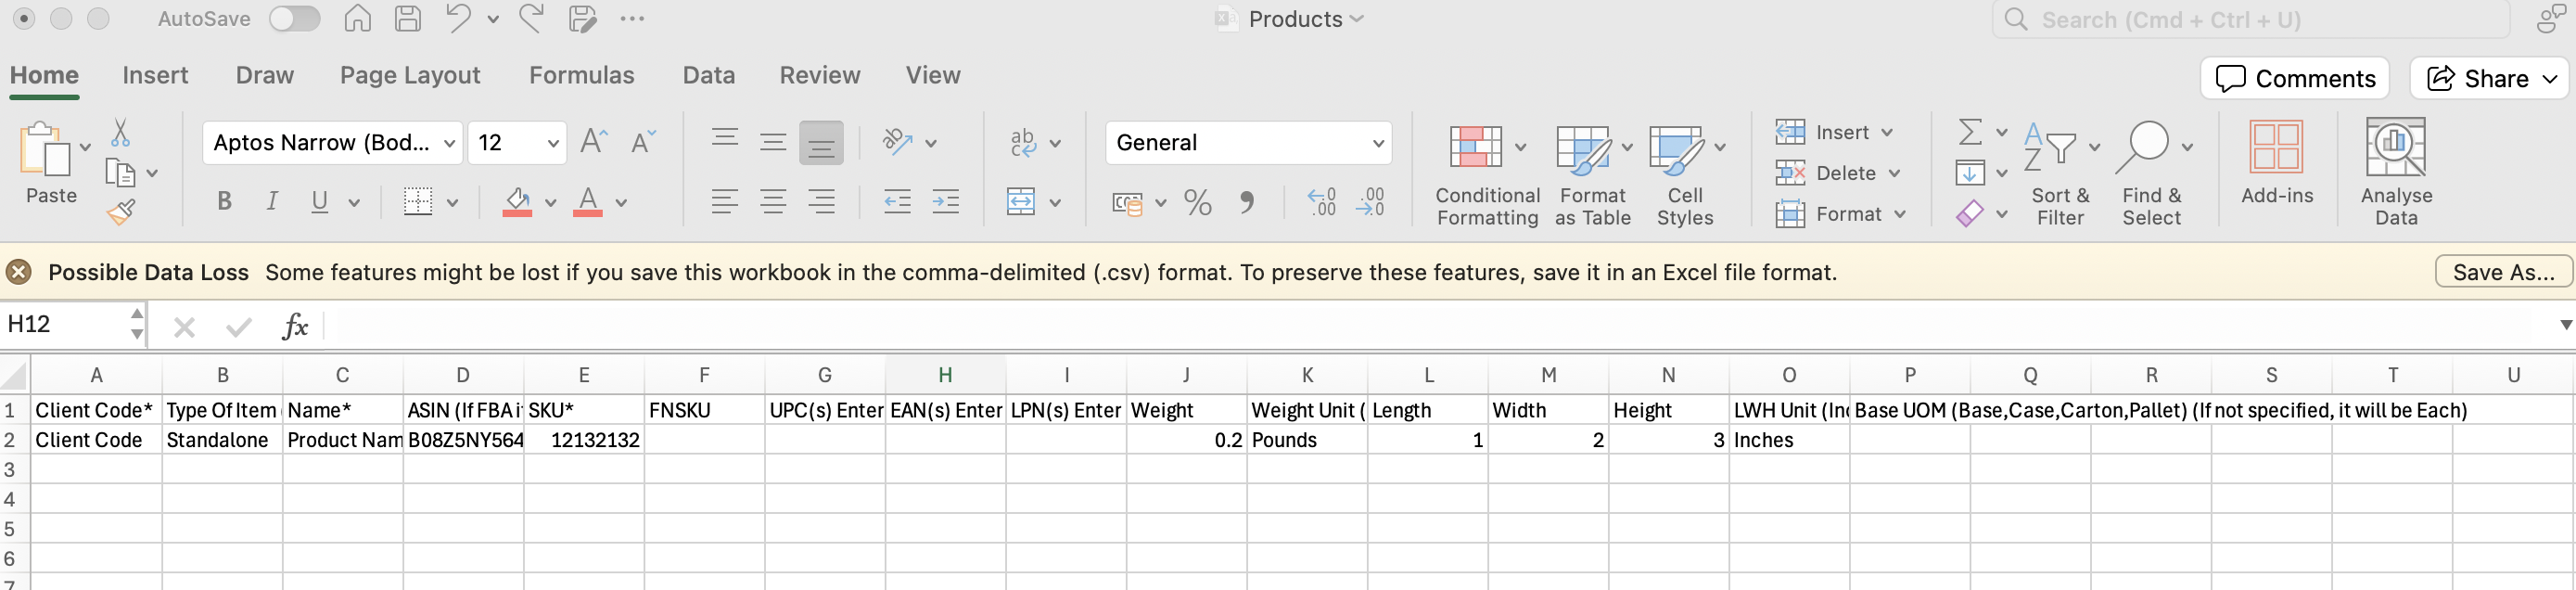
Step 3: Open the template and fill in the products and details (Note that the fields with * are mandatory fields). The template will look like the one below.
Step 4: To upload the filled template file click on the Manage Actions button and then click Upload Files.
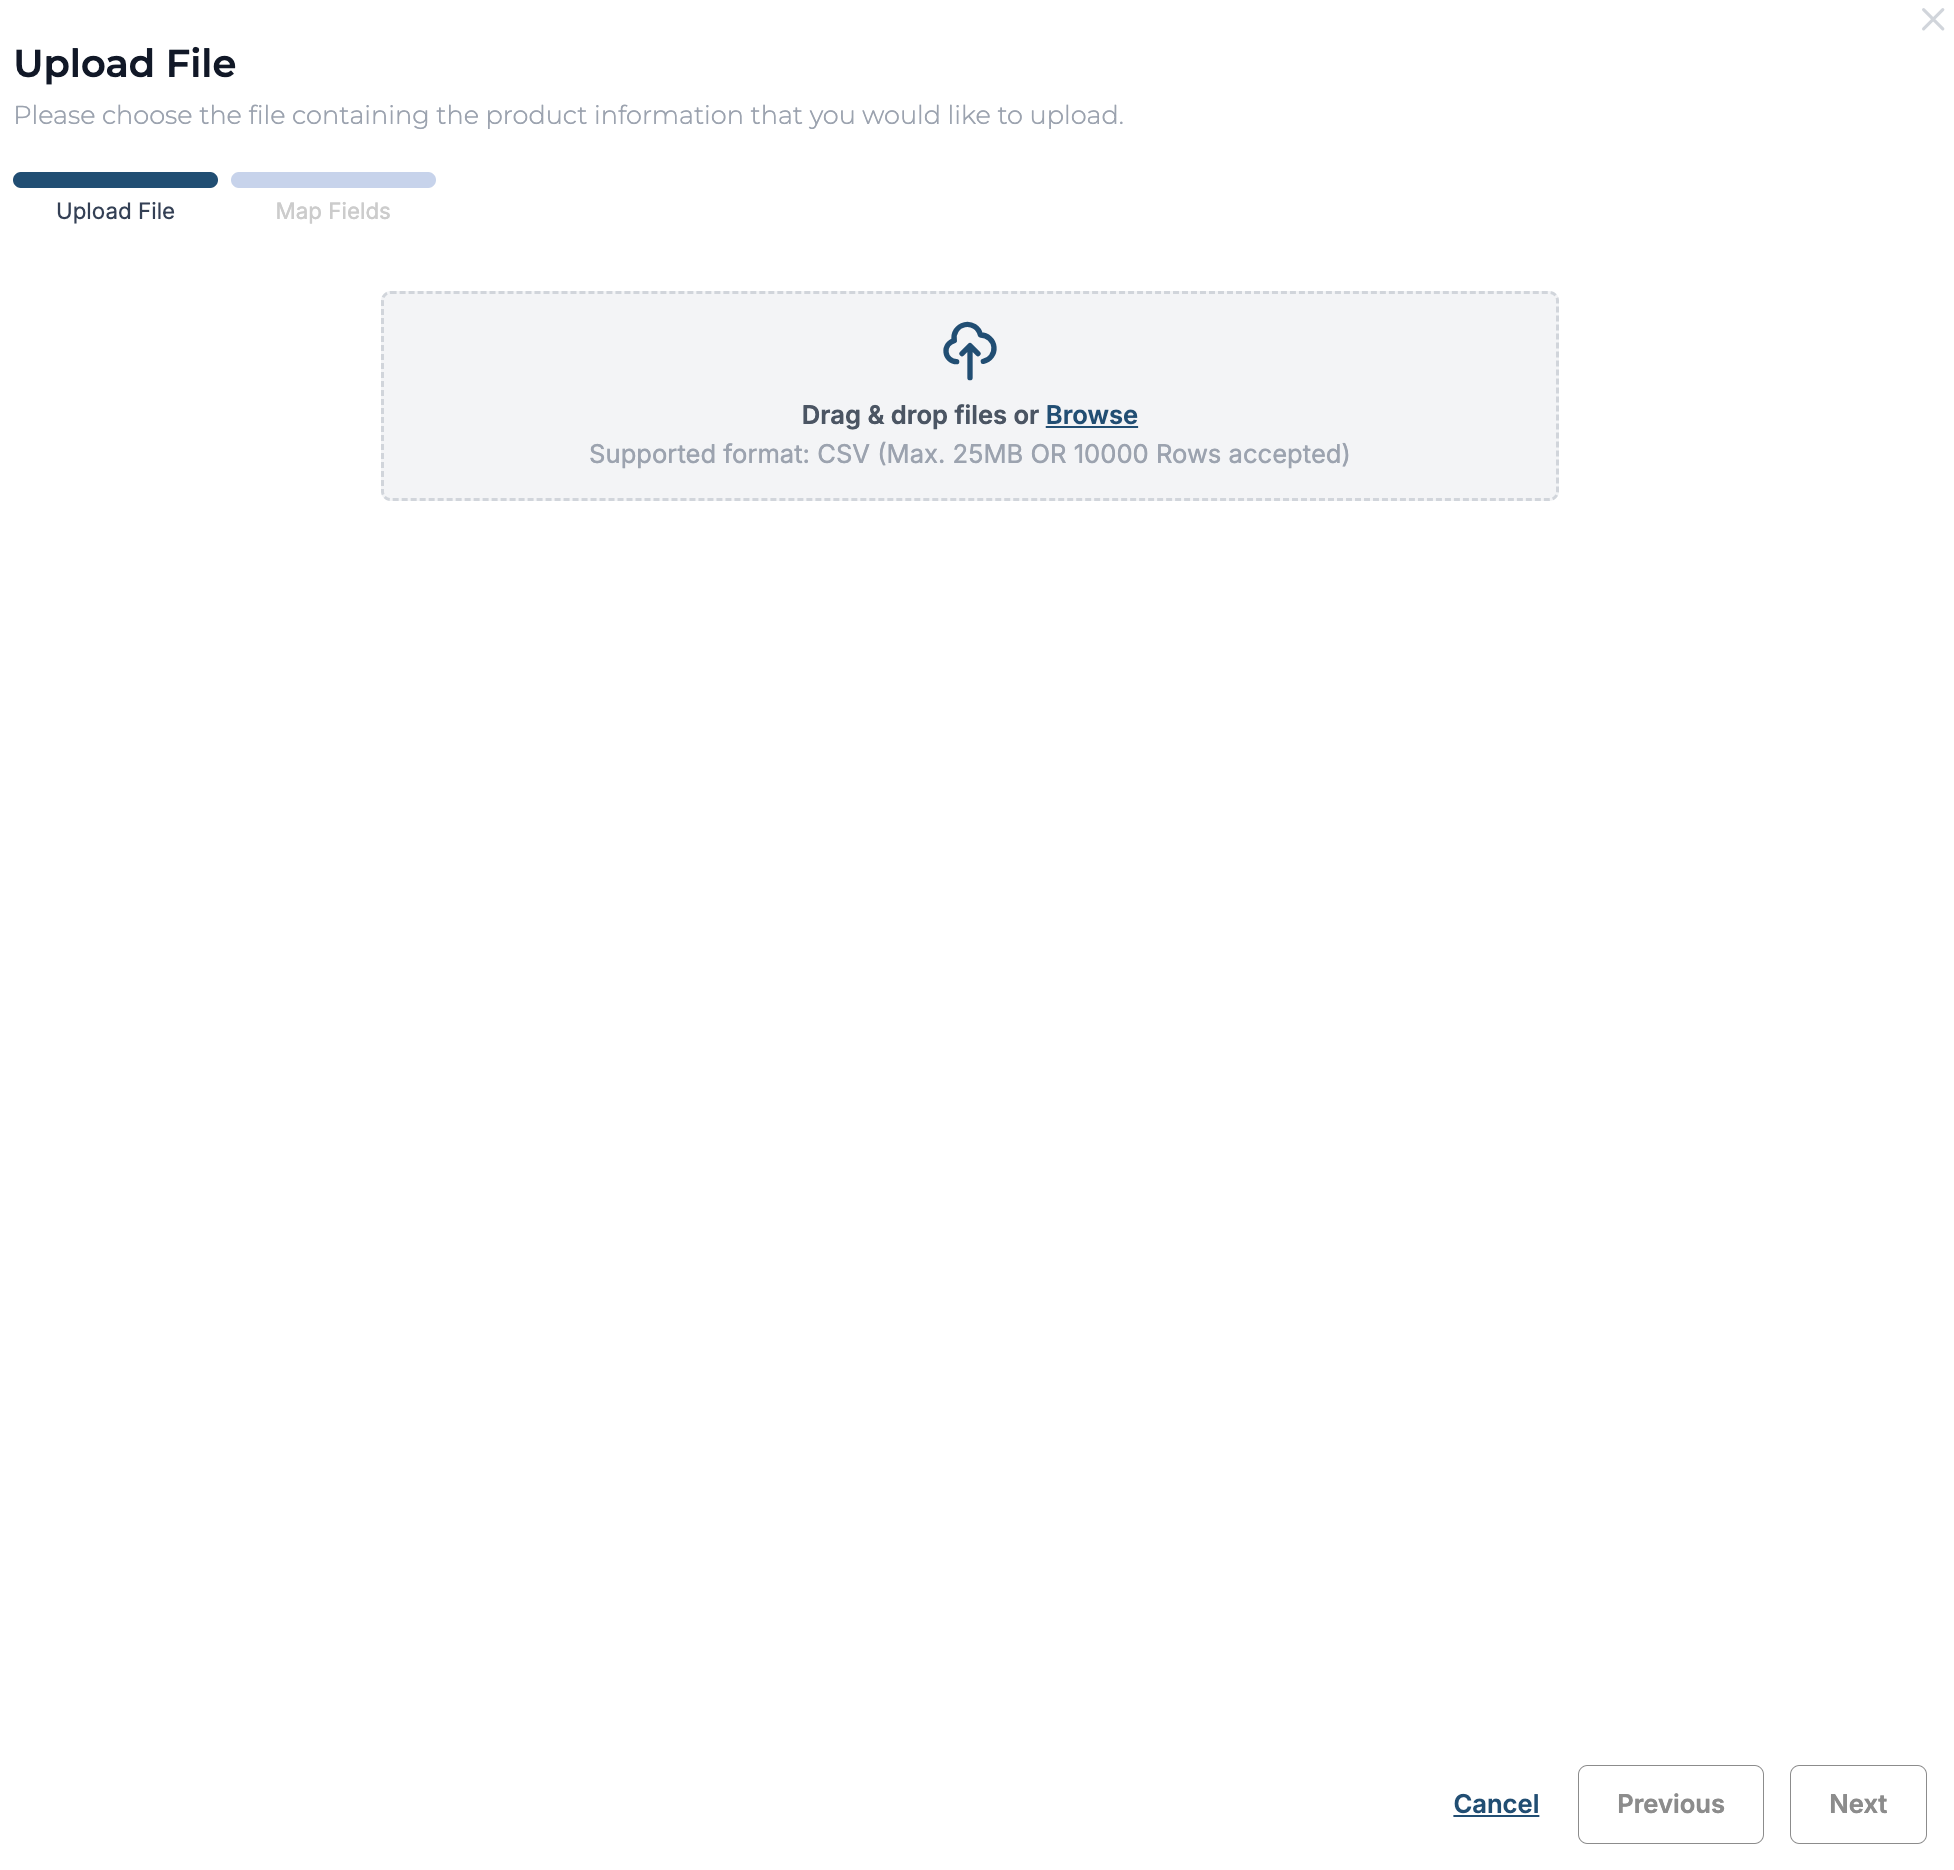
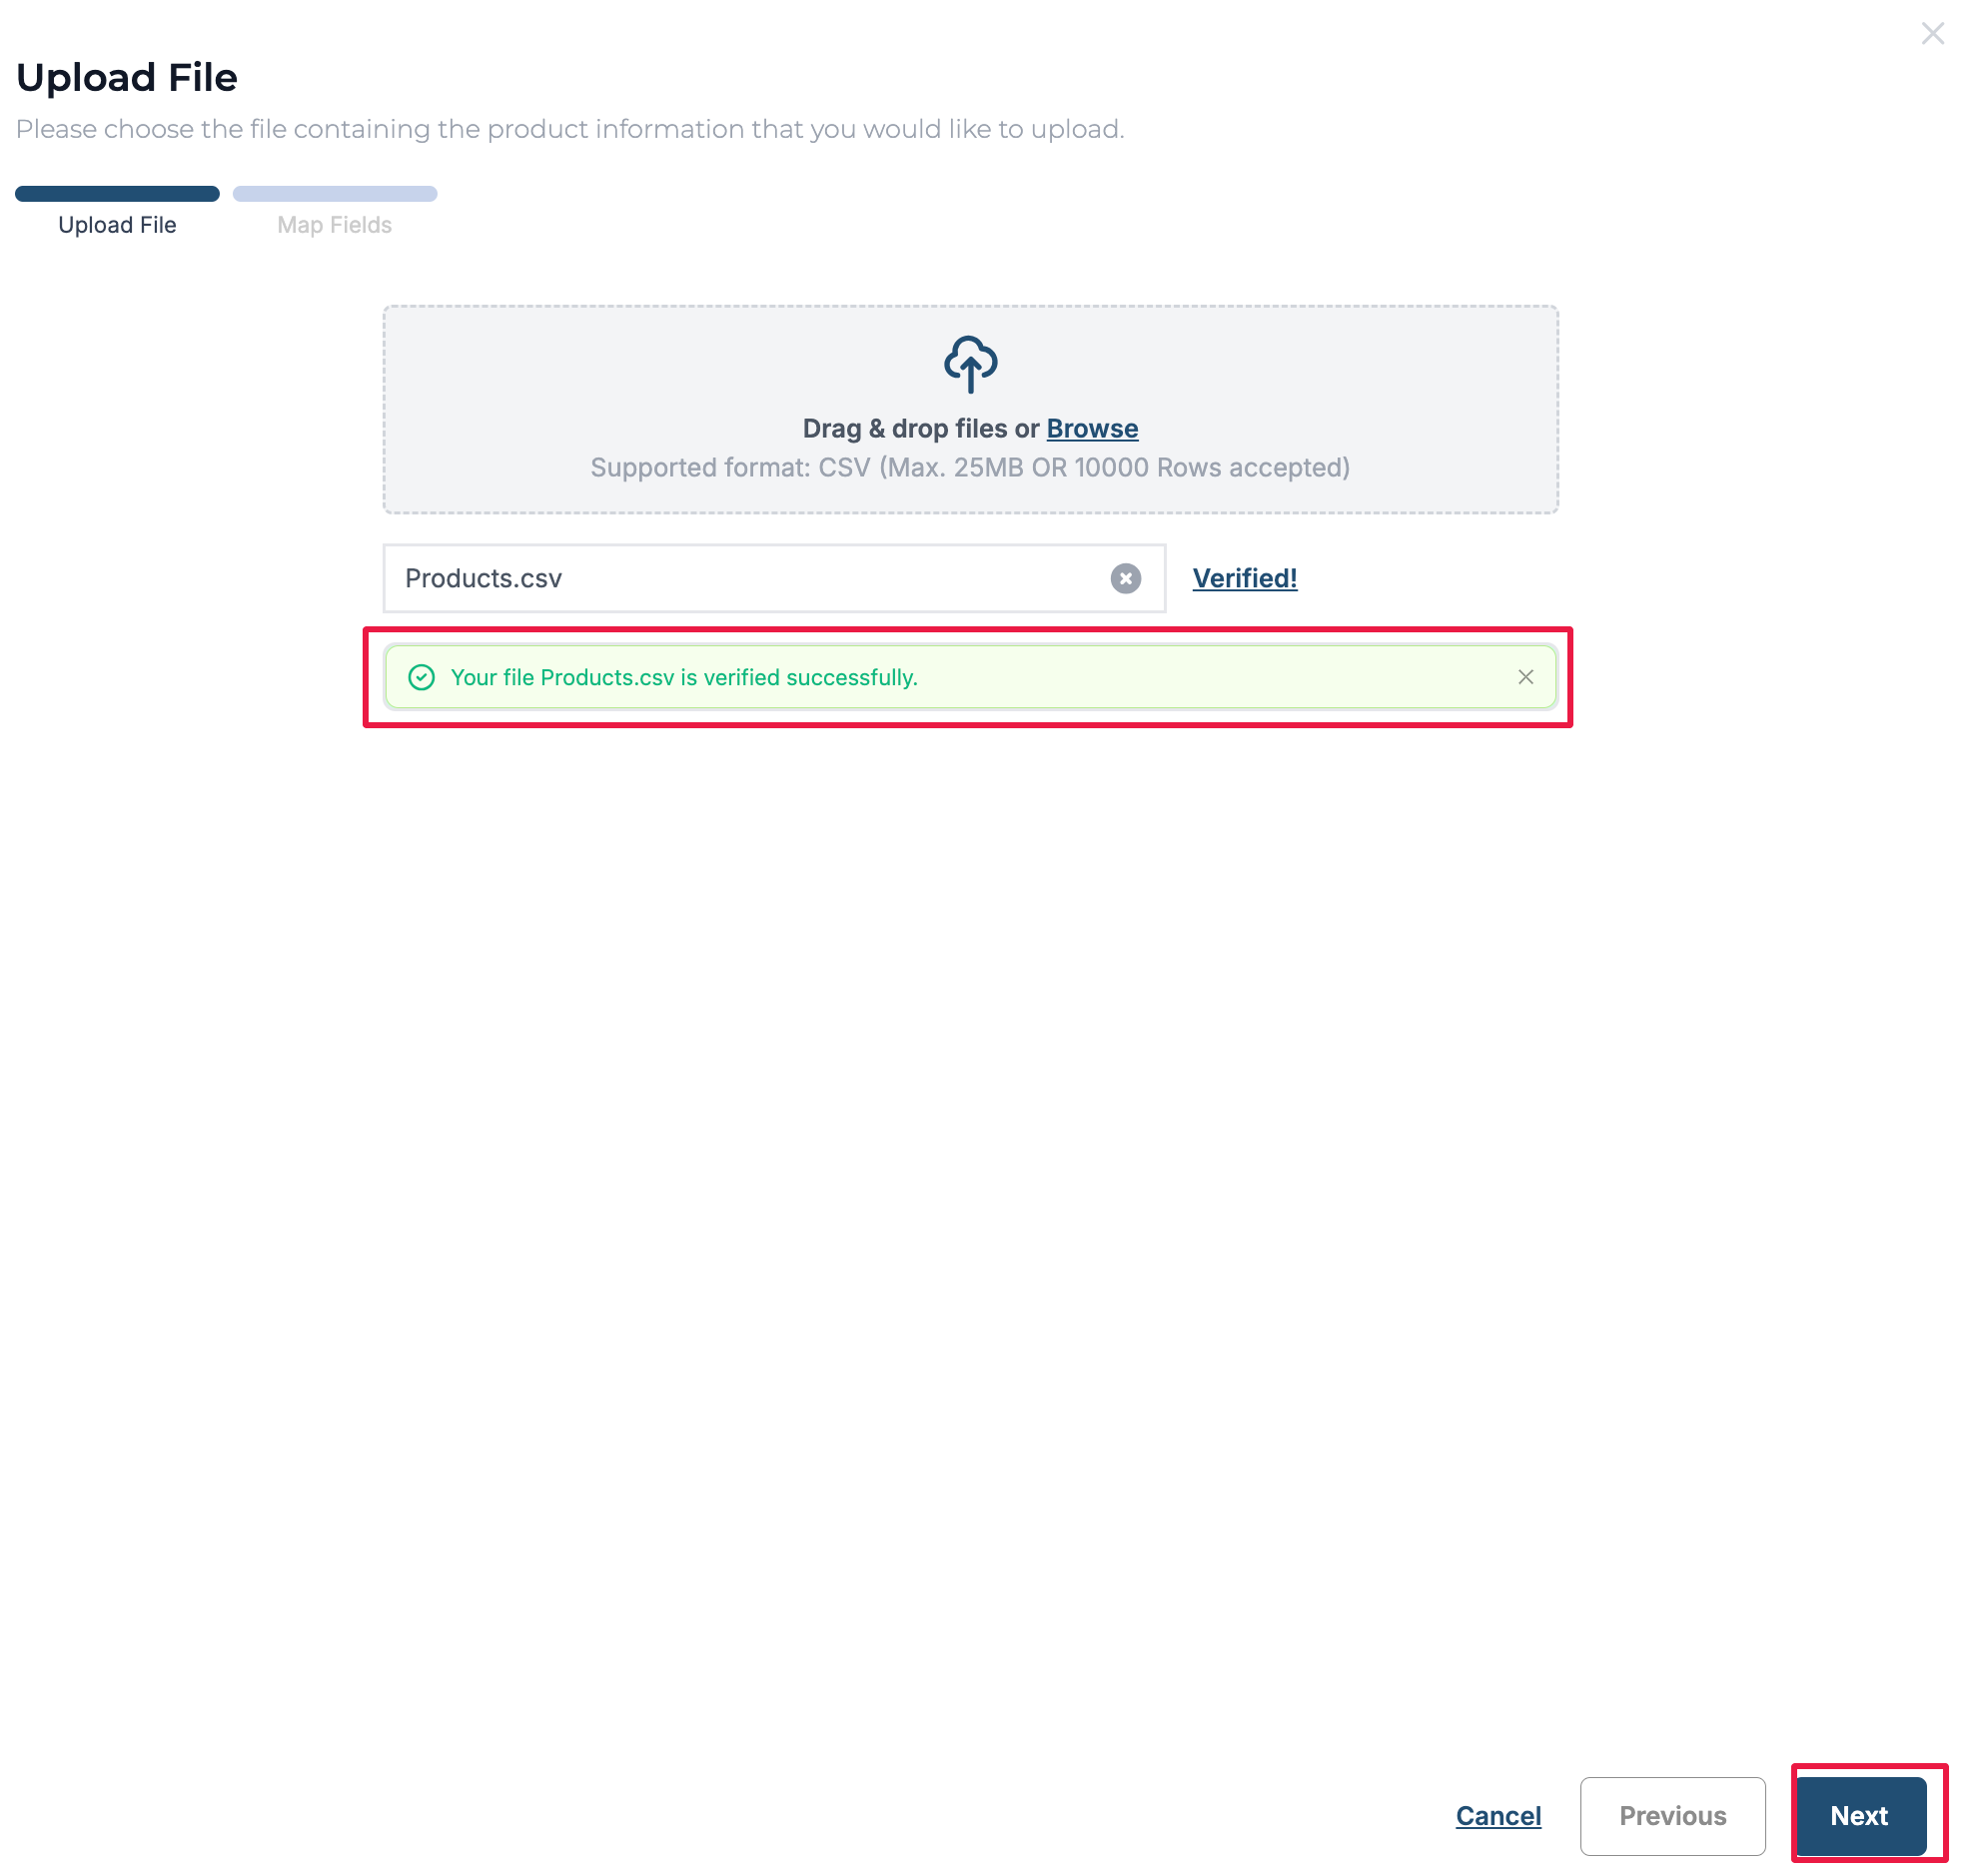
Step 5: Upload file window opens, click on Browse or drag and drop files to upload.
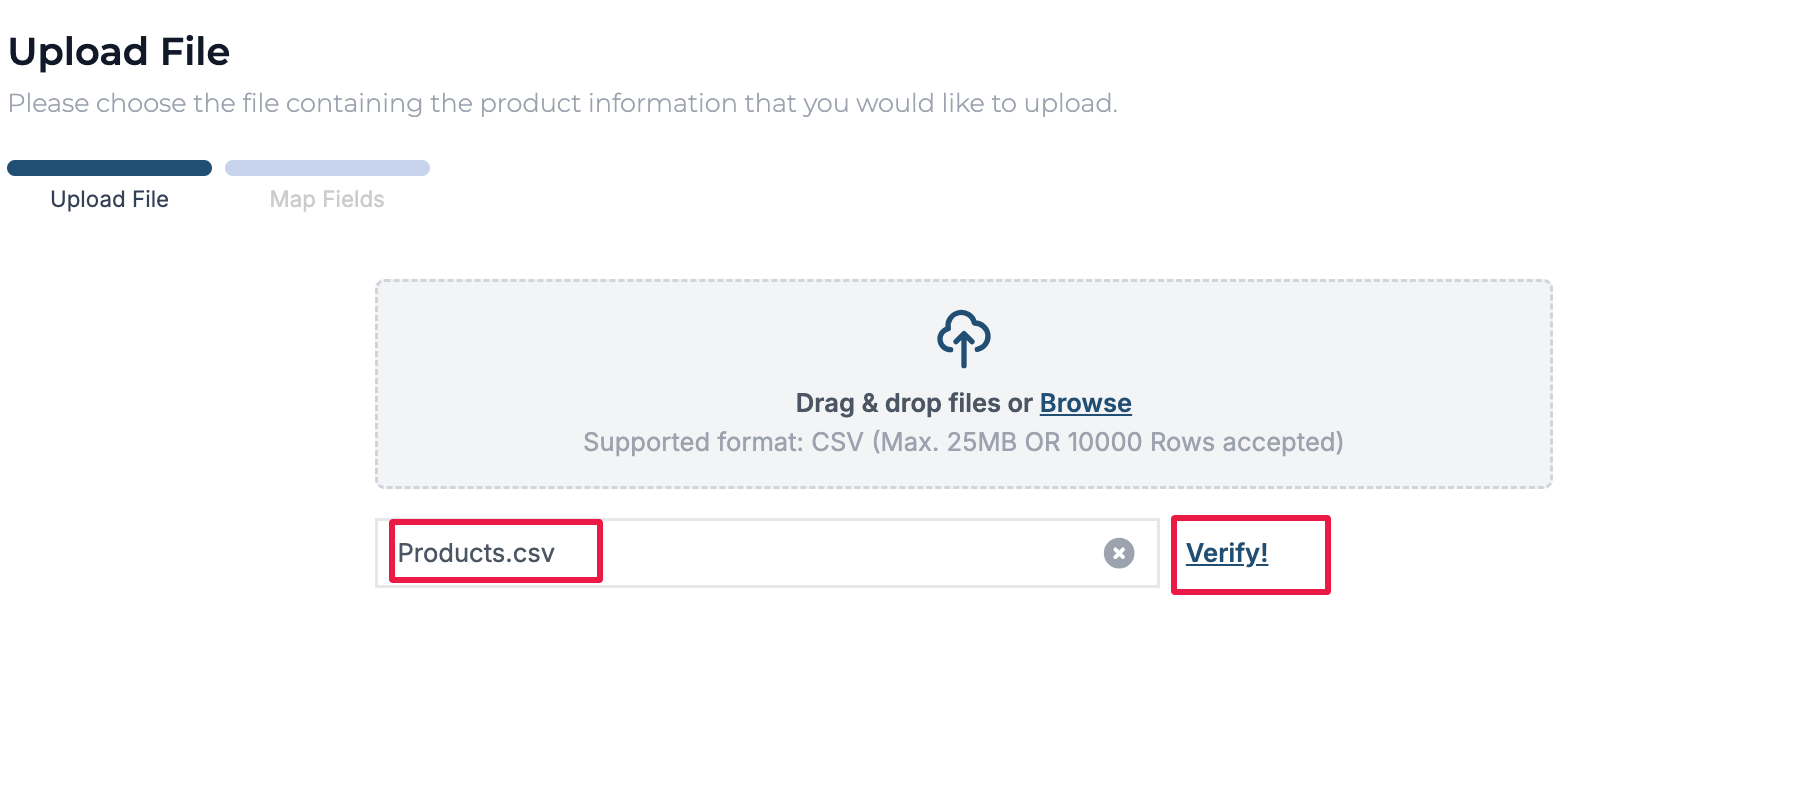
Step 6: Confirm that the file name reflects on the screen and click on Verify!

Step 8: Map Fileds screen appears, this screen can be useful to map the field names in the file to the specific product attributes when the column name on the file is not the same as the template. If the template column names were not modified, this step can be skipped and the user can click on Submit.
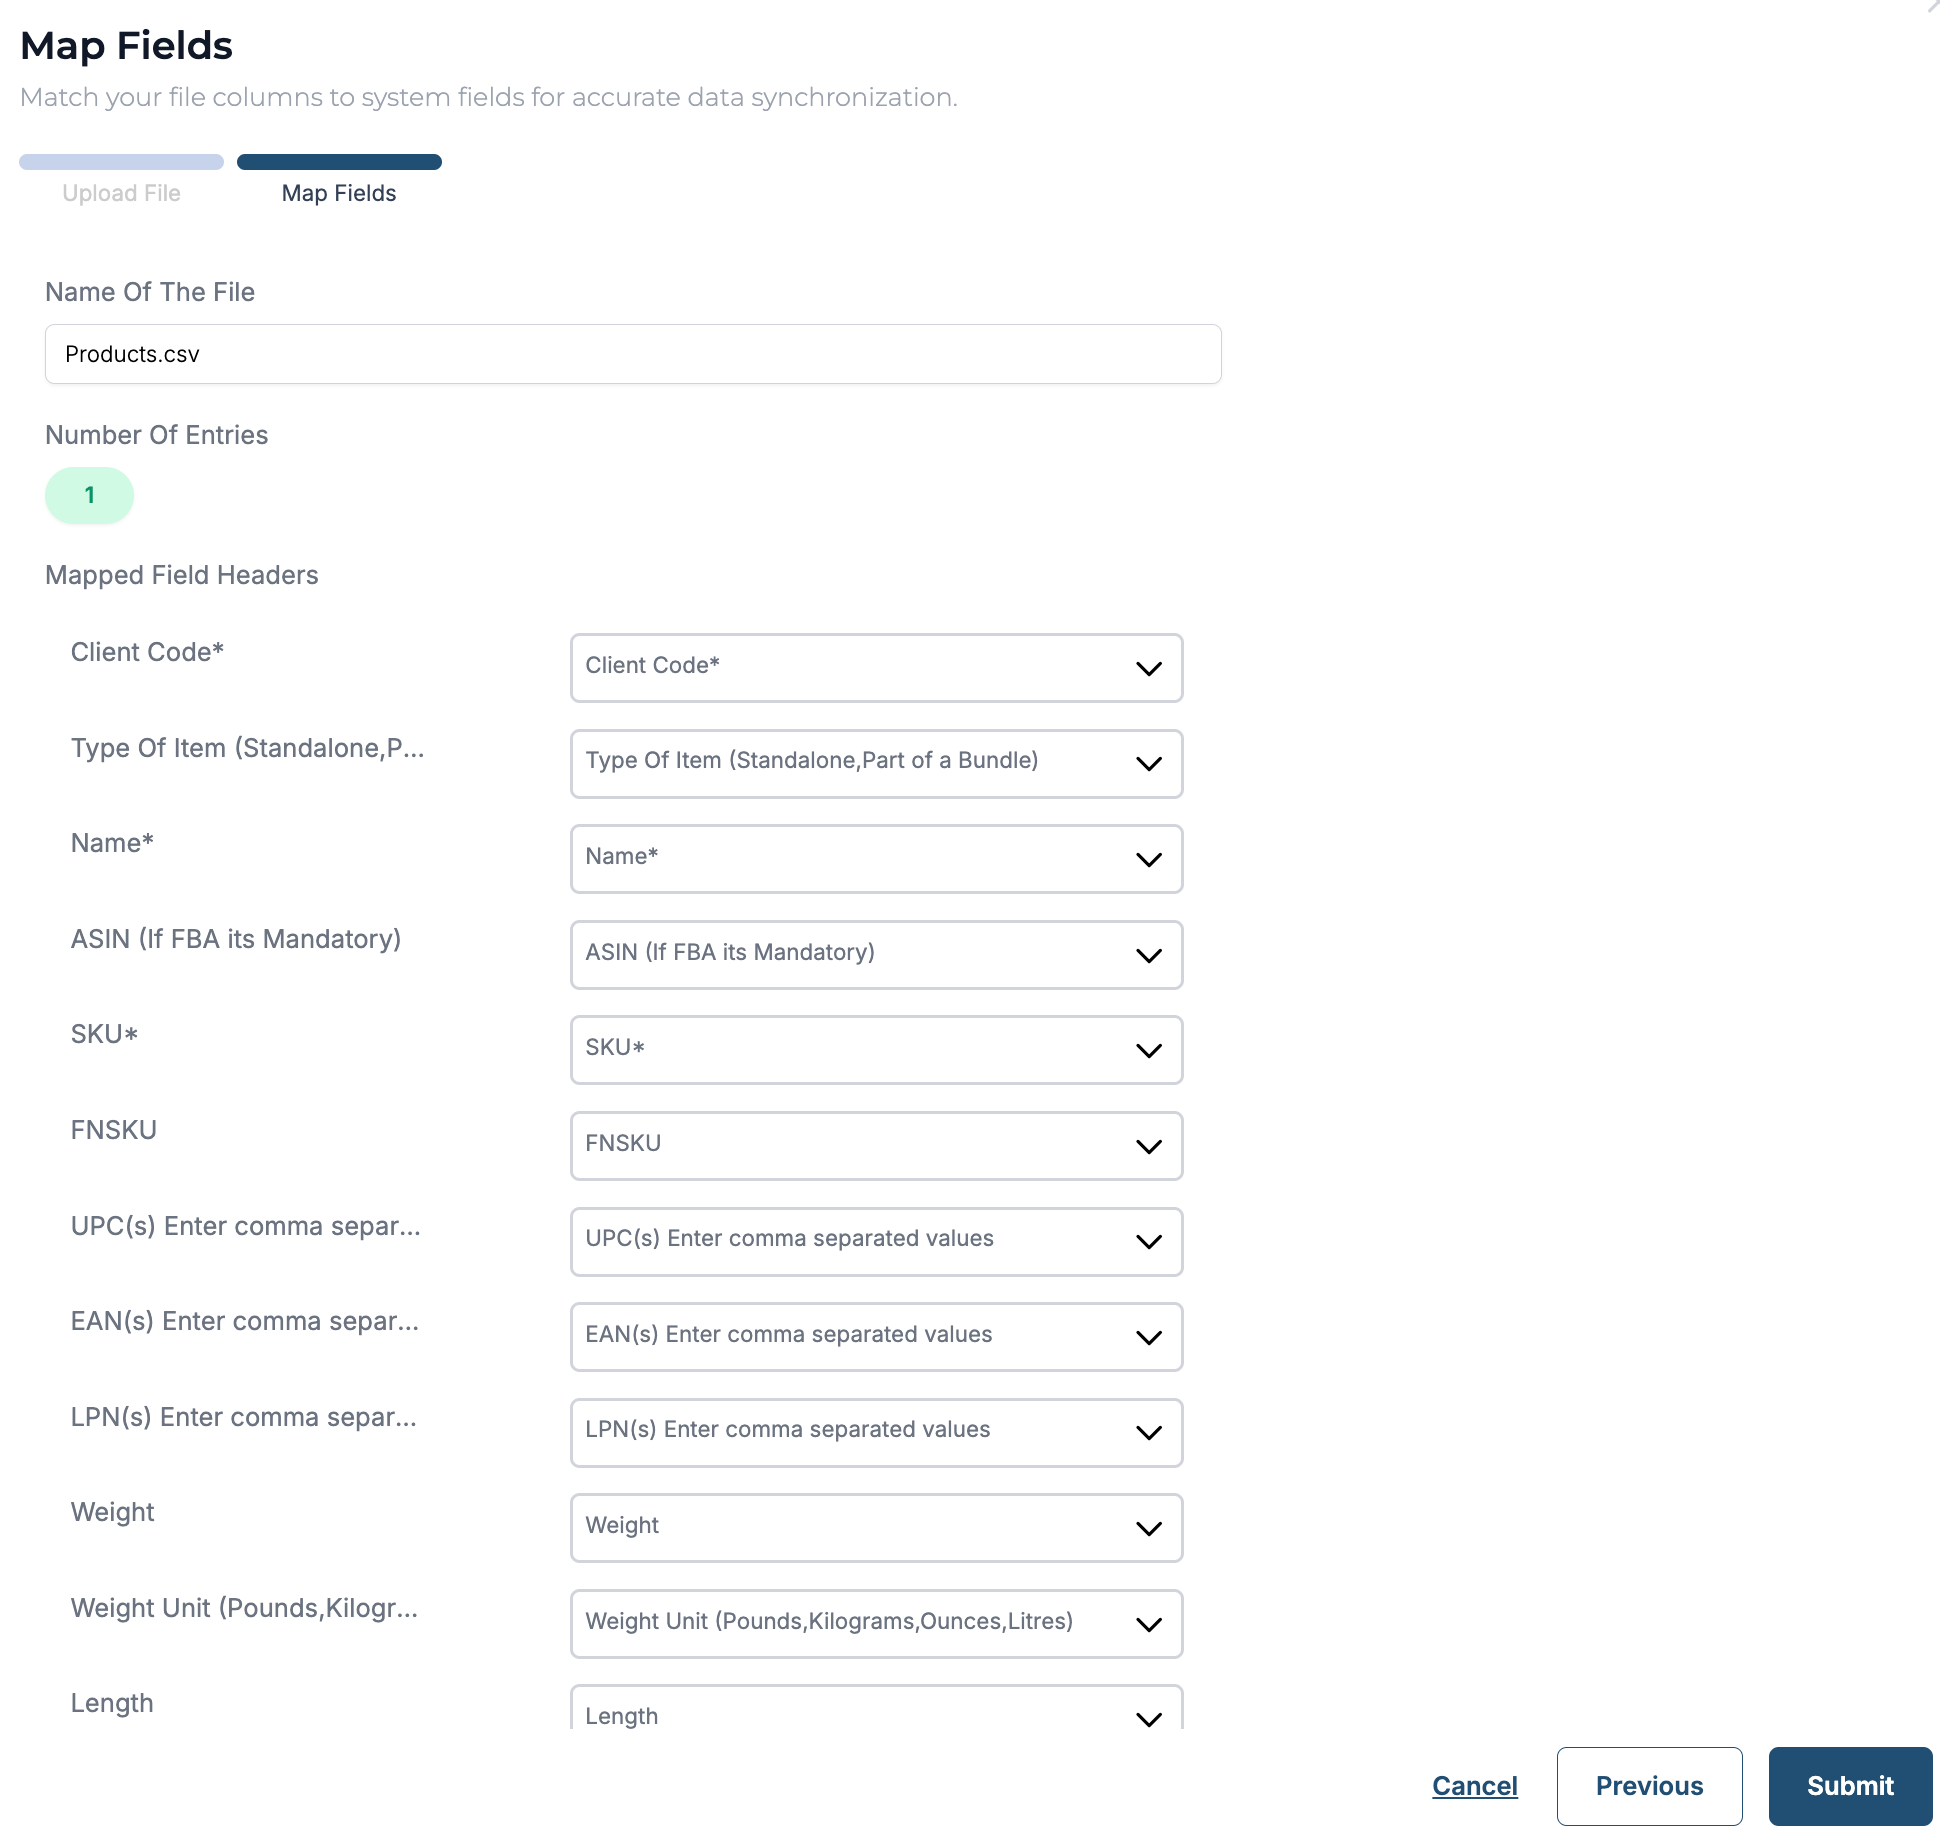
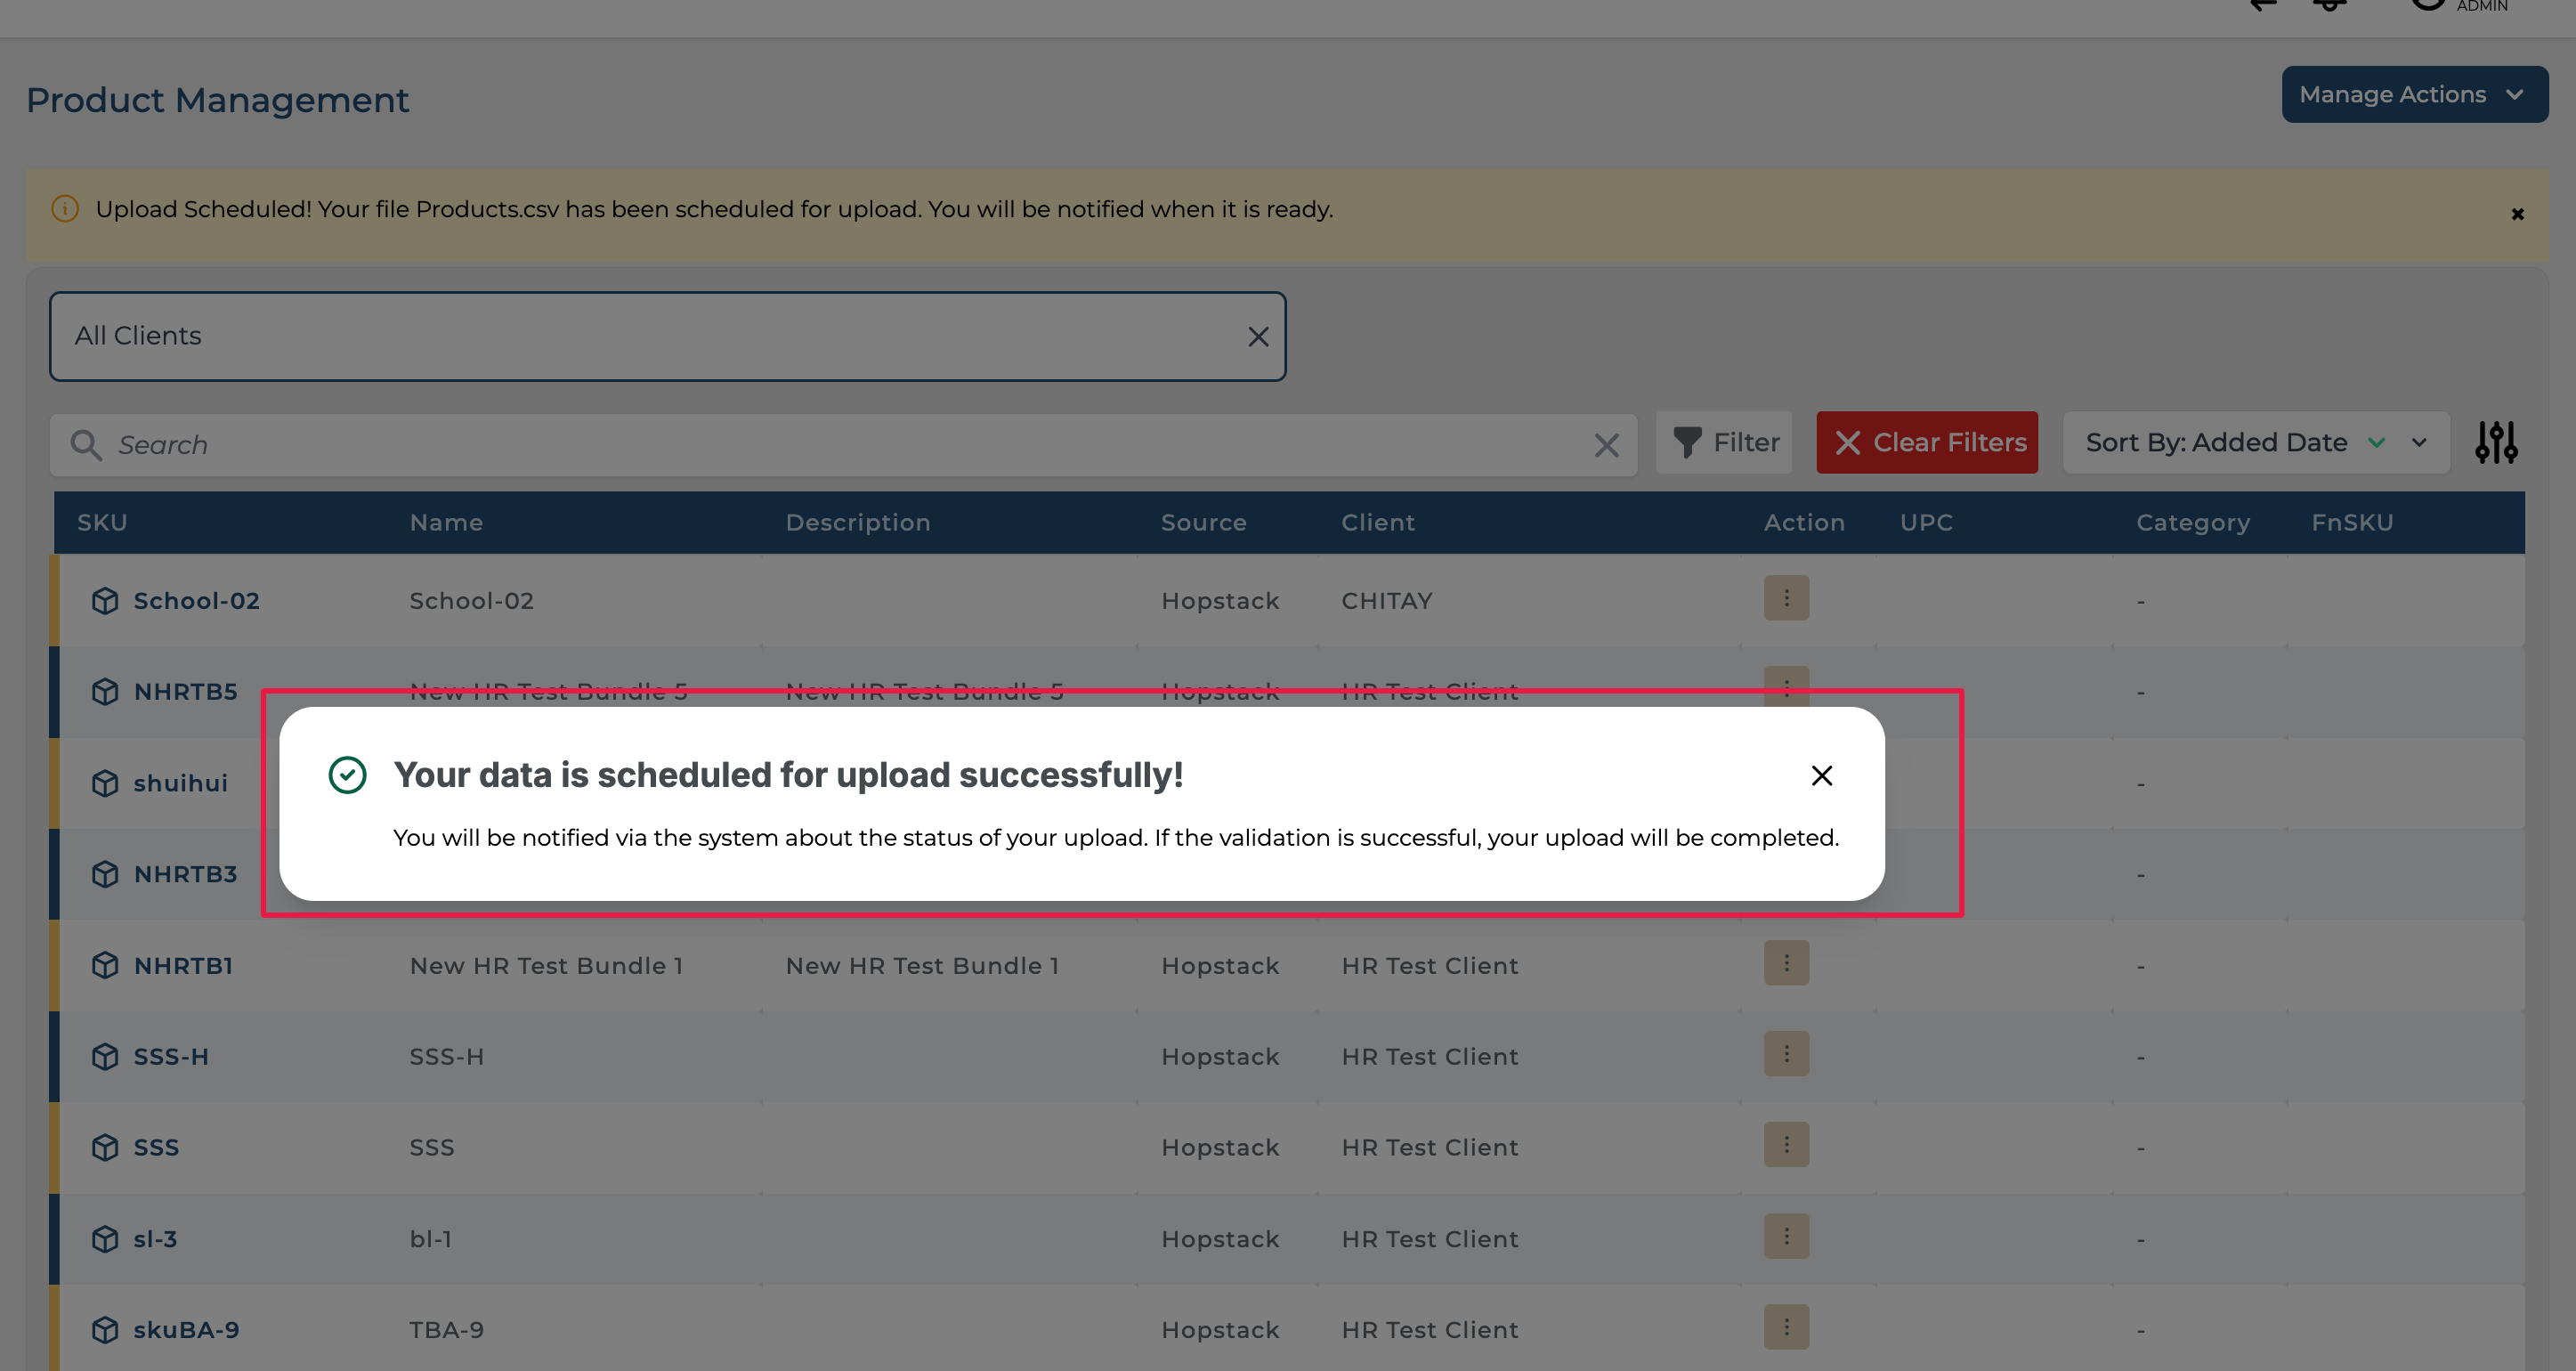
Step 9: Click on Submit. The user will receive a notification indicating that the data is scheduled for upload.
If successful, the following notification will appear.
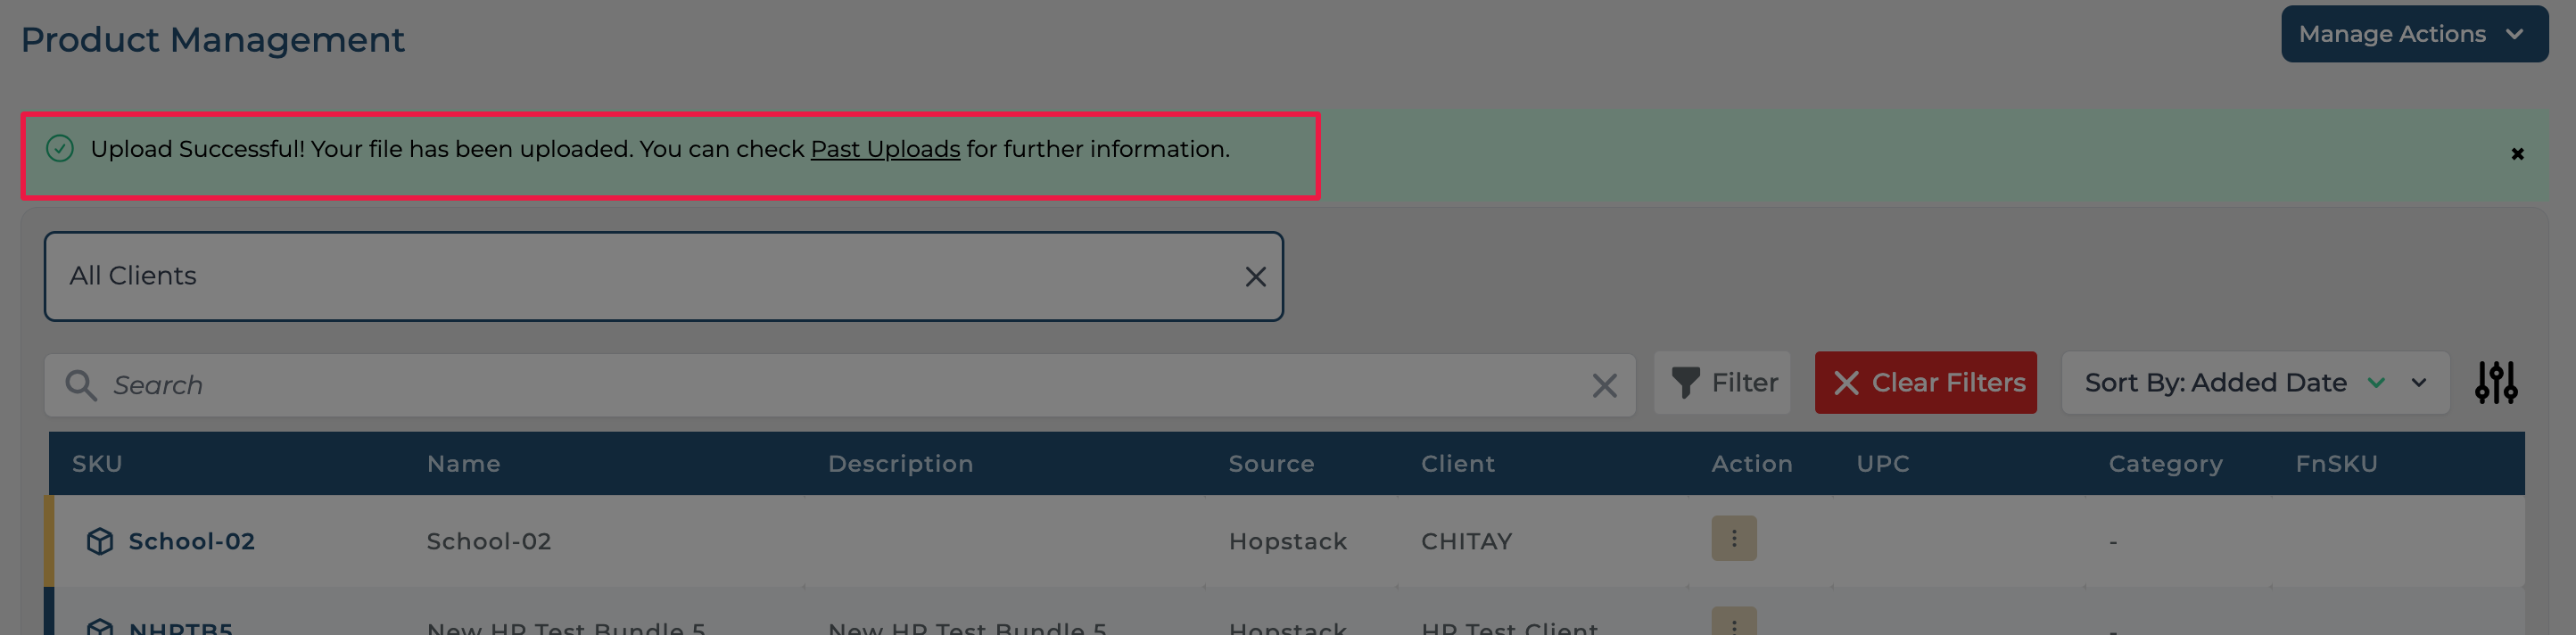
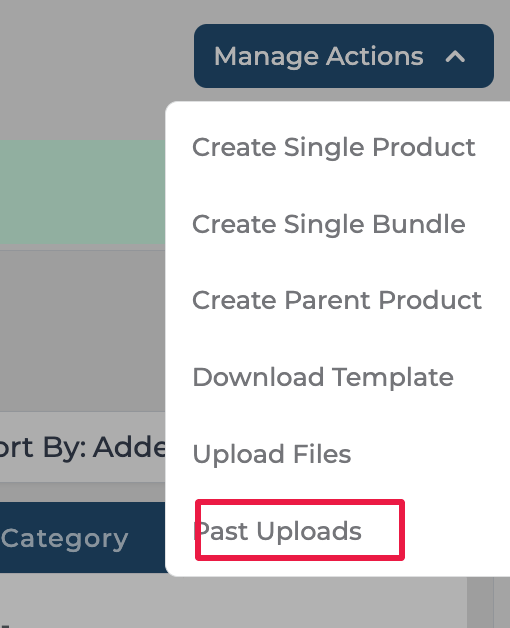
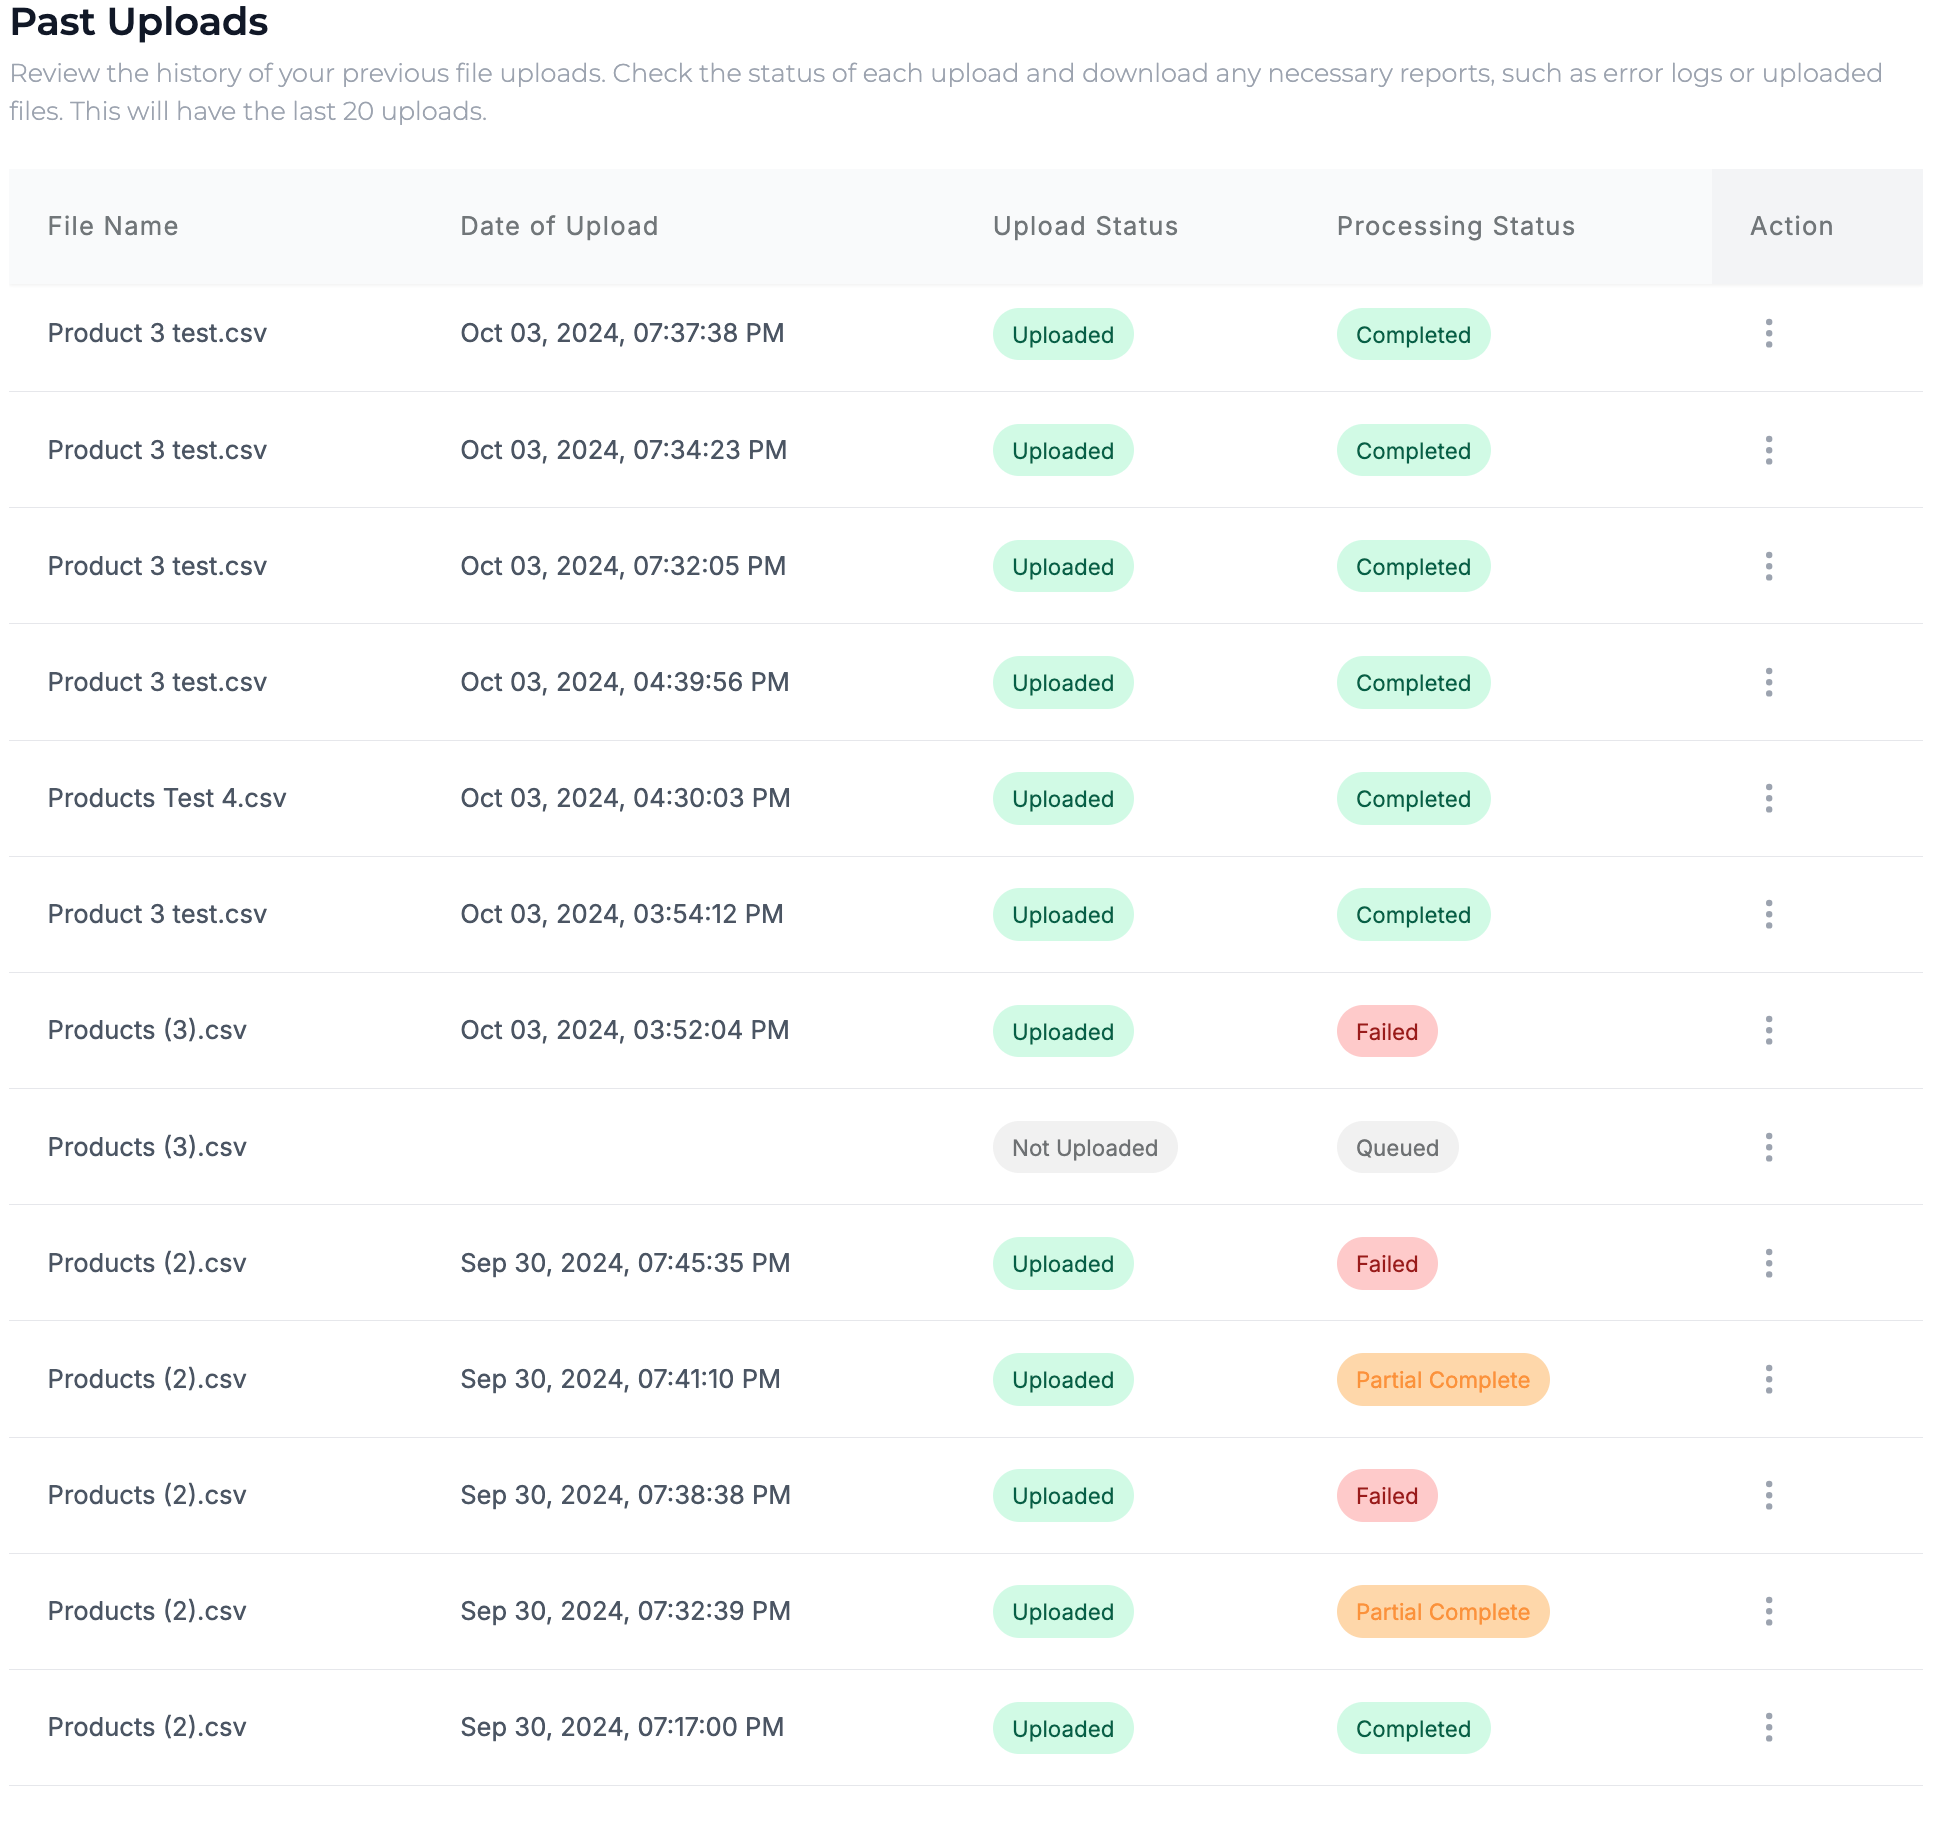
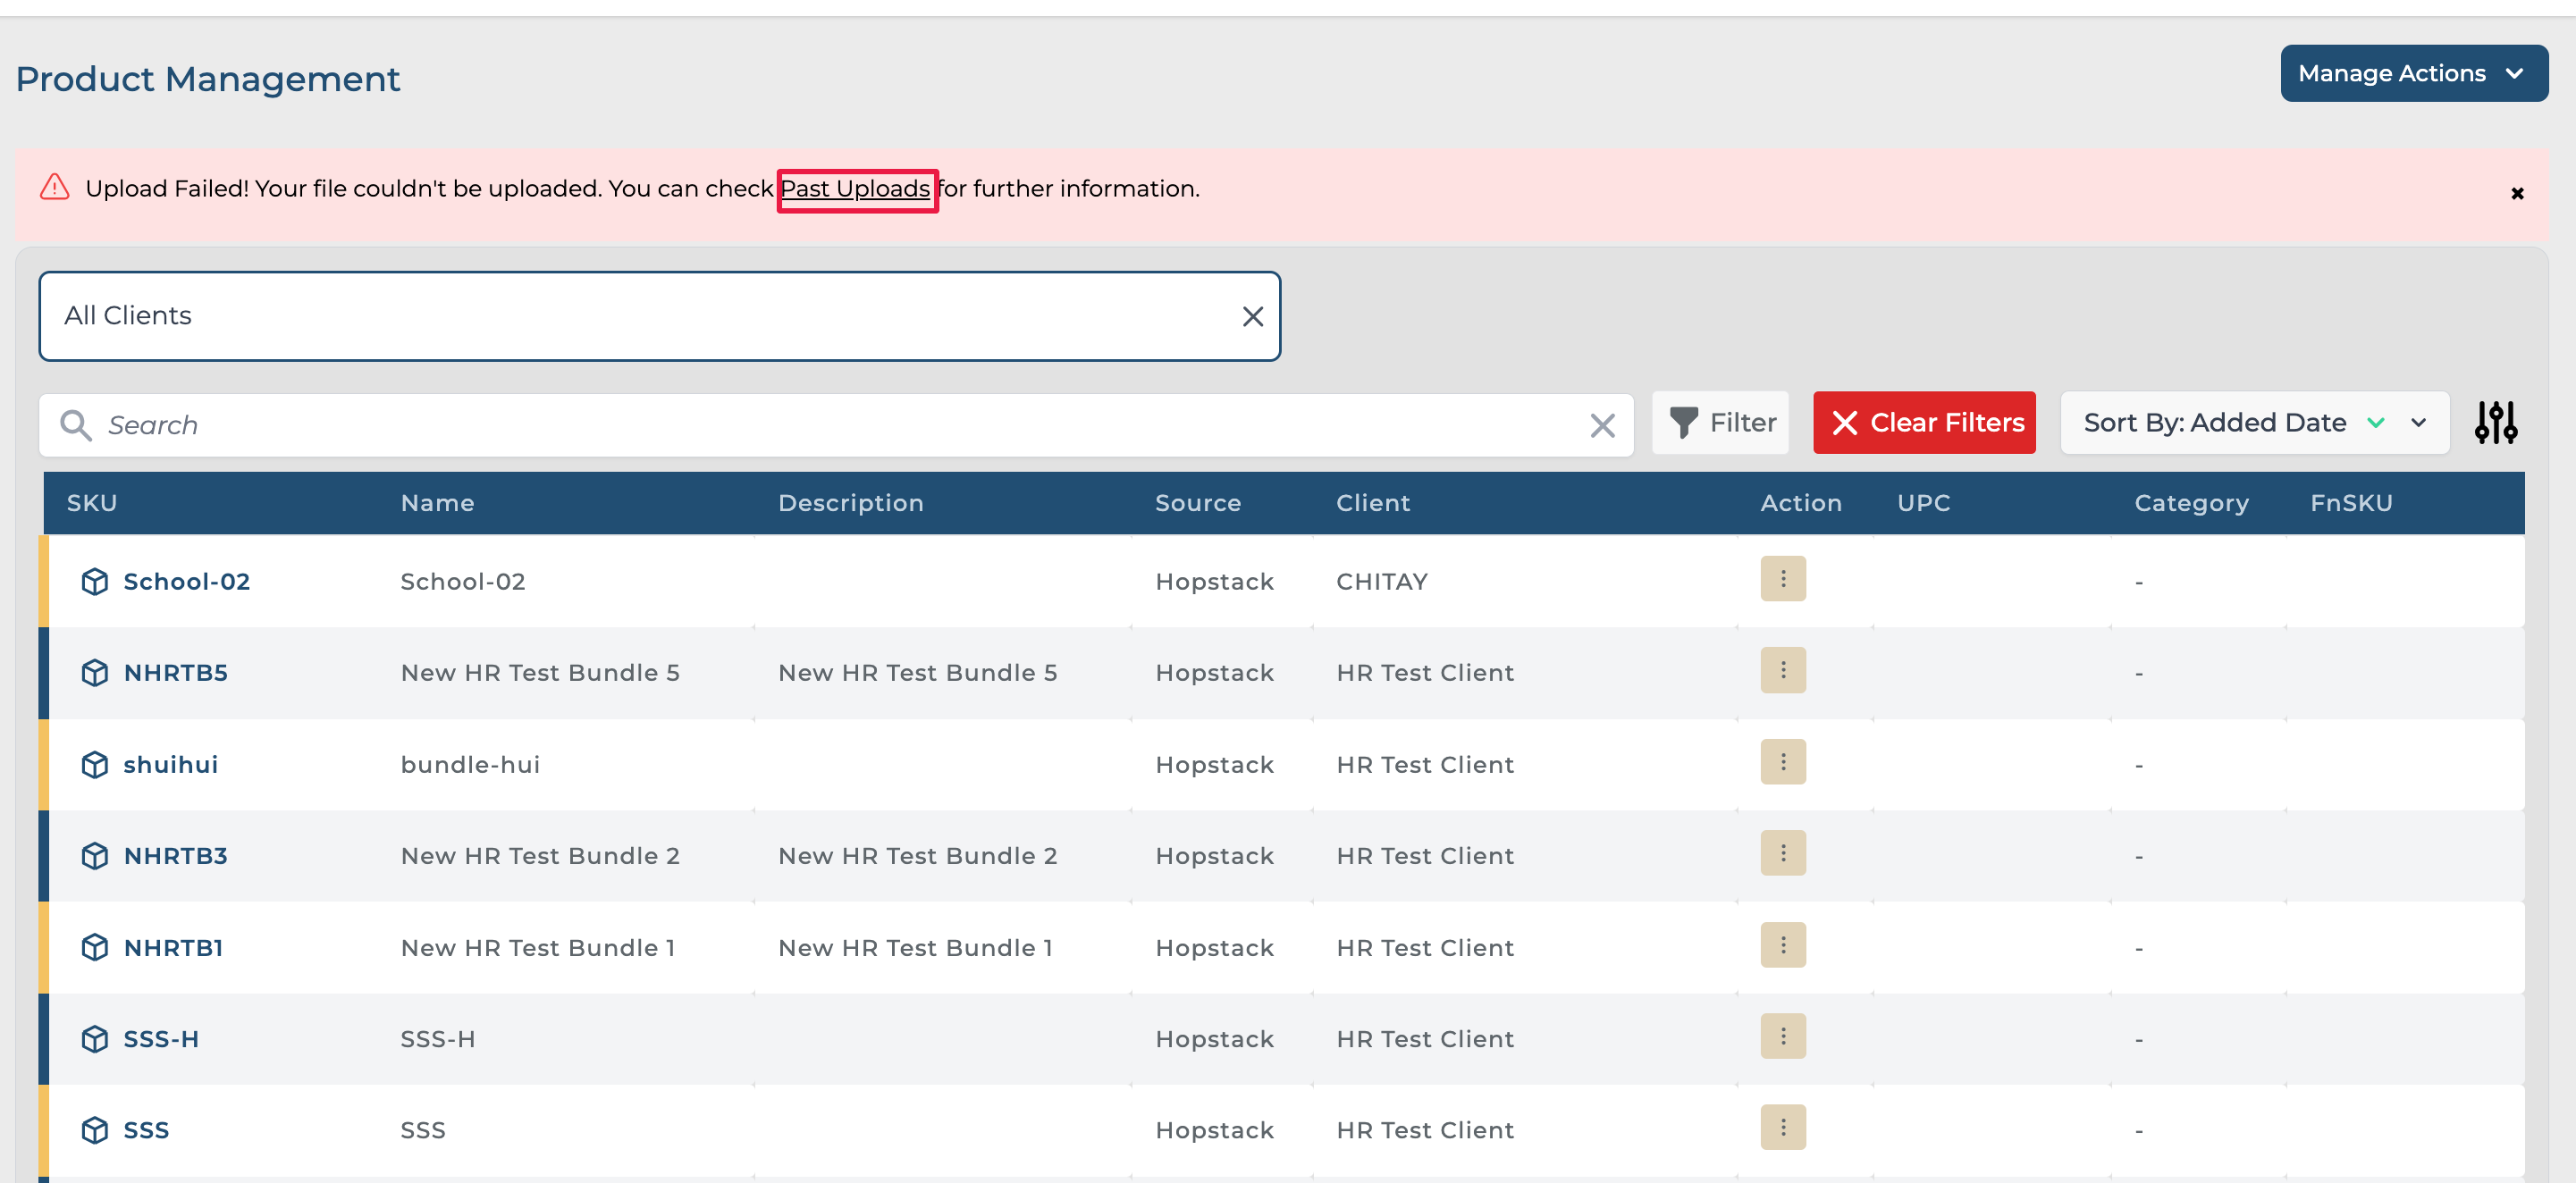
If the upload failed or was partially successful a corresponding notification will appear and the user can click on Past Uploads to download the error record to view the reason for the error.
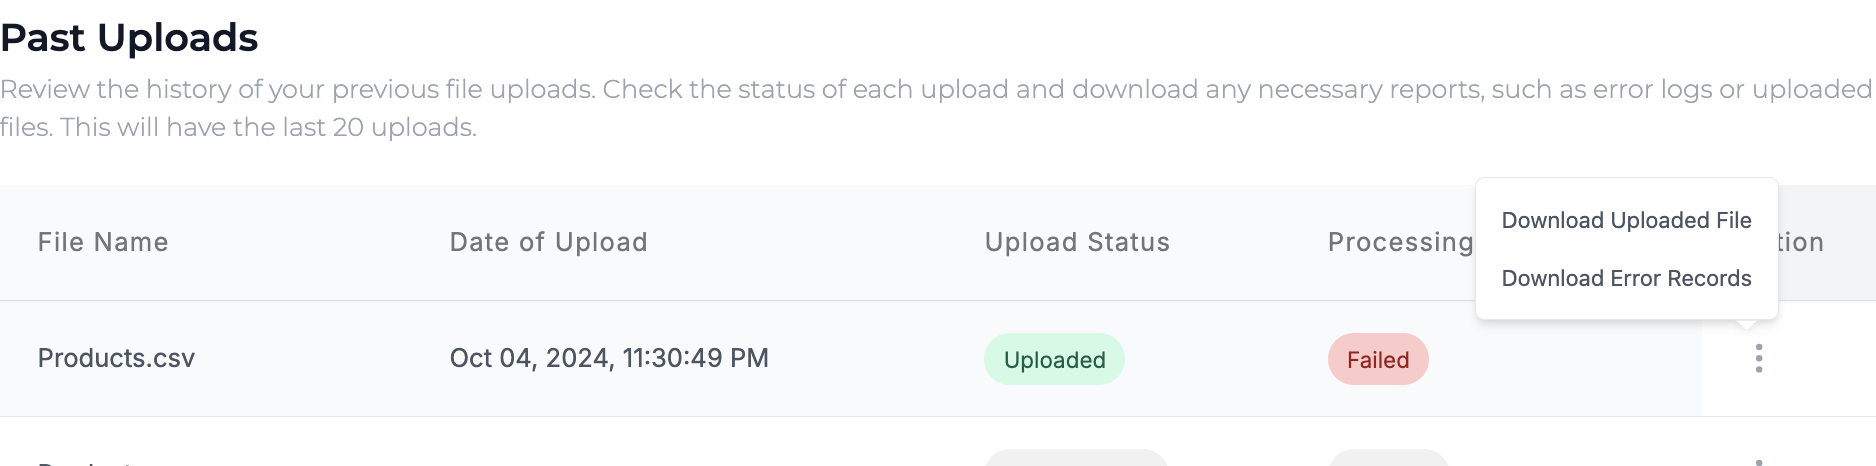

The Manage Actions button could also be used to view all the past uploads.