
We've enhanced the putaway process to support chained scanning of inventory items destined for the same location. Instead of scanning and putting away each item individually, operators can now putaway multiple inventory entities (such as pallets, totes, SKUs, serial numbers, or inventory tracking IDs) together by scanning the identifiers and then scaning the destination Location once, to complete the putaway for all scanned entities to the location in a single submission.
This enhancement streamlines putaway operations for warehouses handling large volumes of serialized inventory, reducing repetitive steps.
This document explains how to use the enhanced chained put away workflow on desktop and handheld devices.
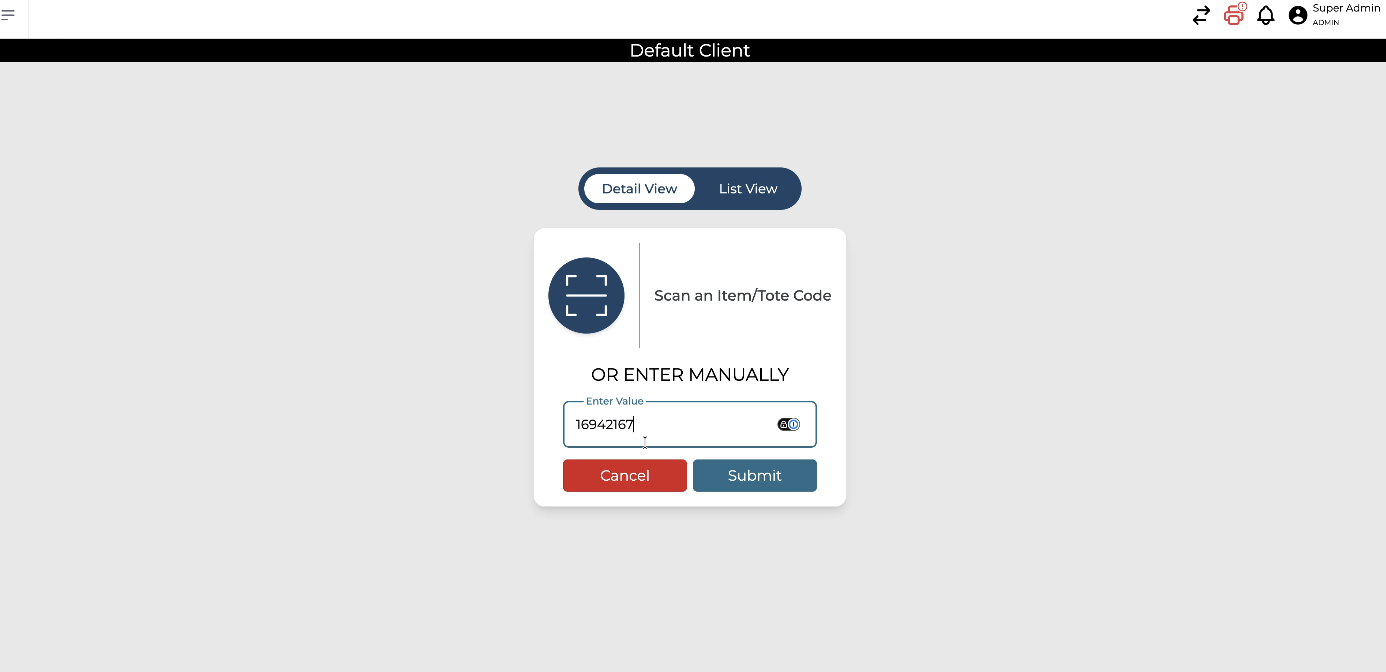
Step 1: Start a Standard Put Away and Scan an Identifier
Begin in the standard put away screen on your desktop or handheld device.
In this workflow, you can scan any supported identifier such as a serial number, product SKU, or LPN.
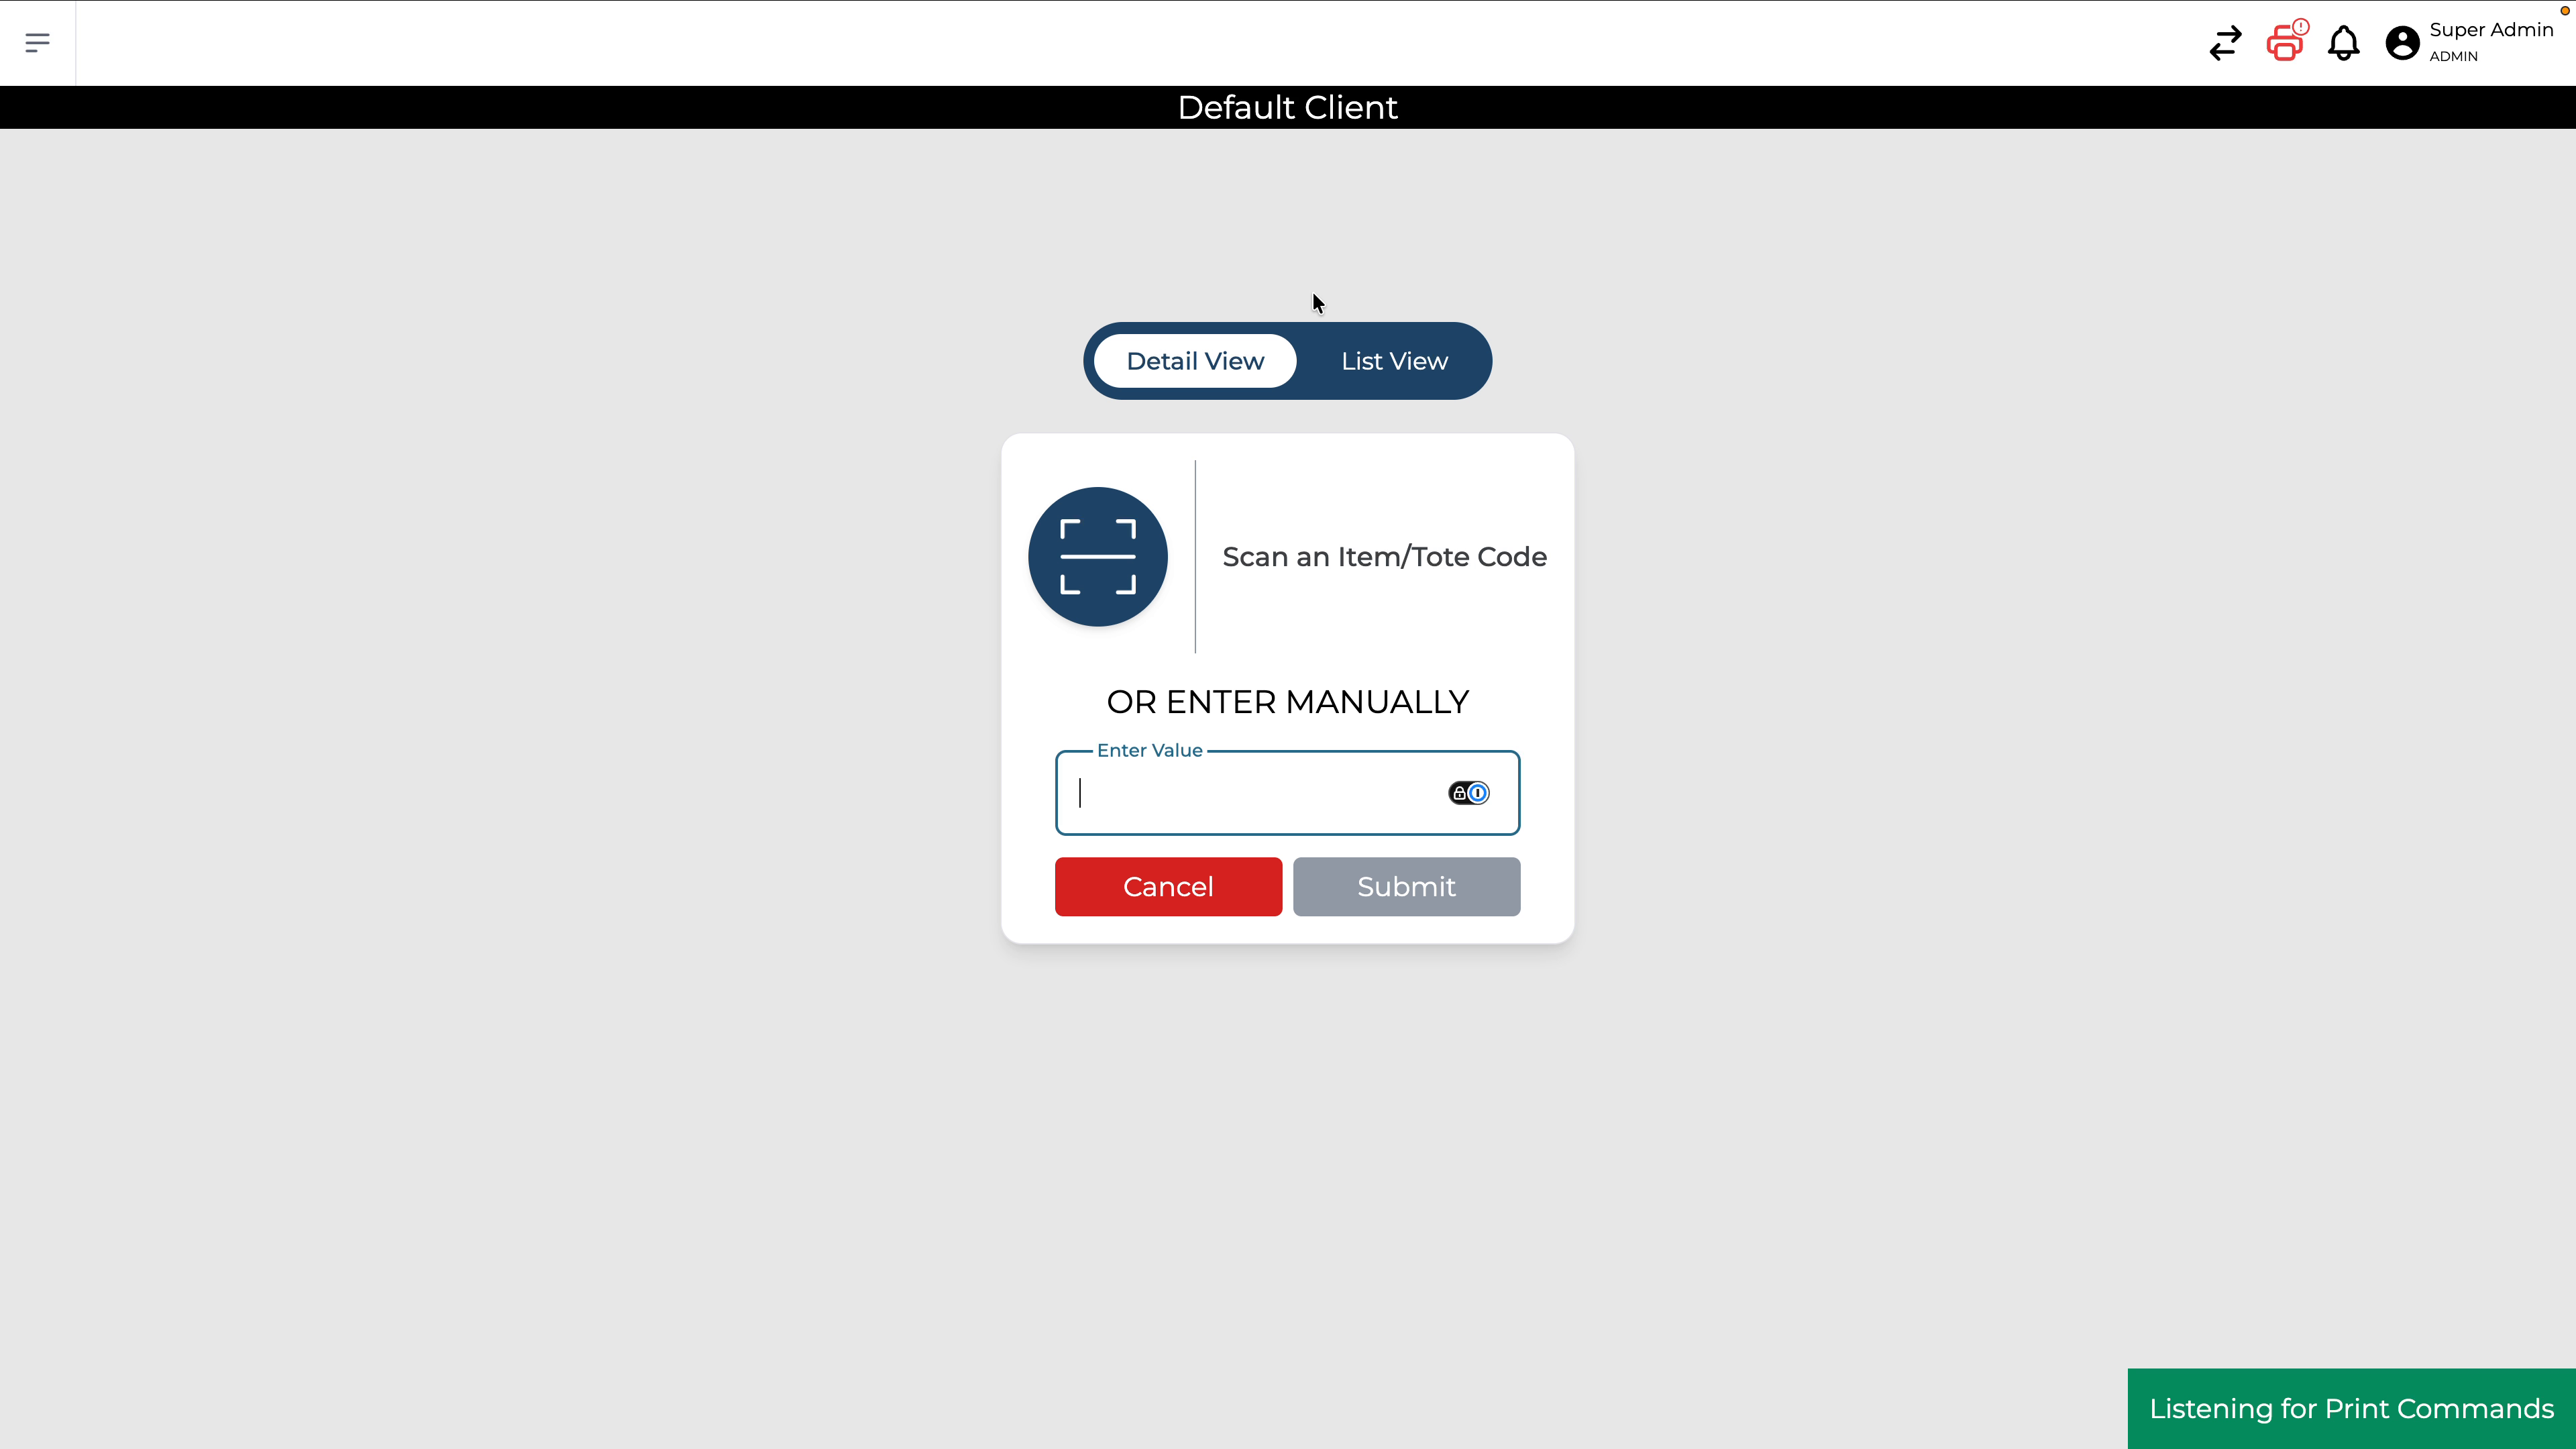
For example, scan the pallet or LPN you want to put away.
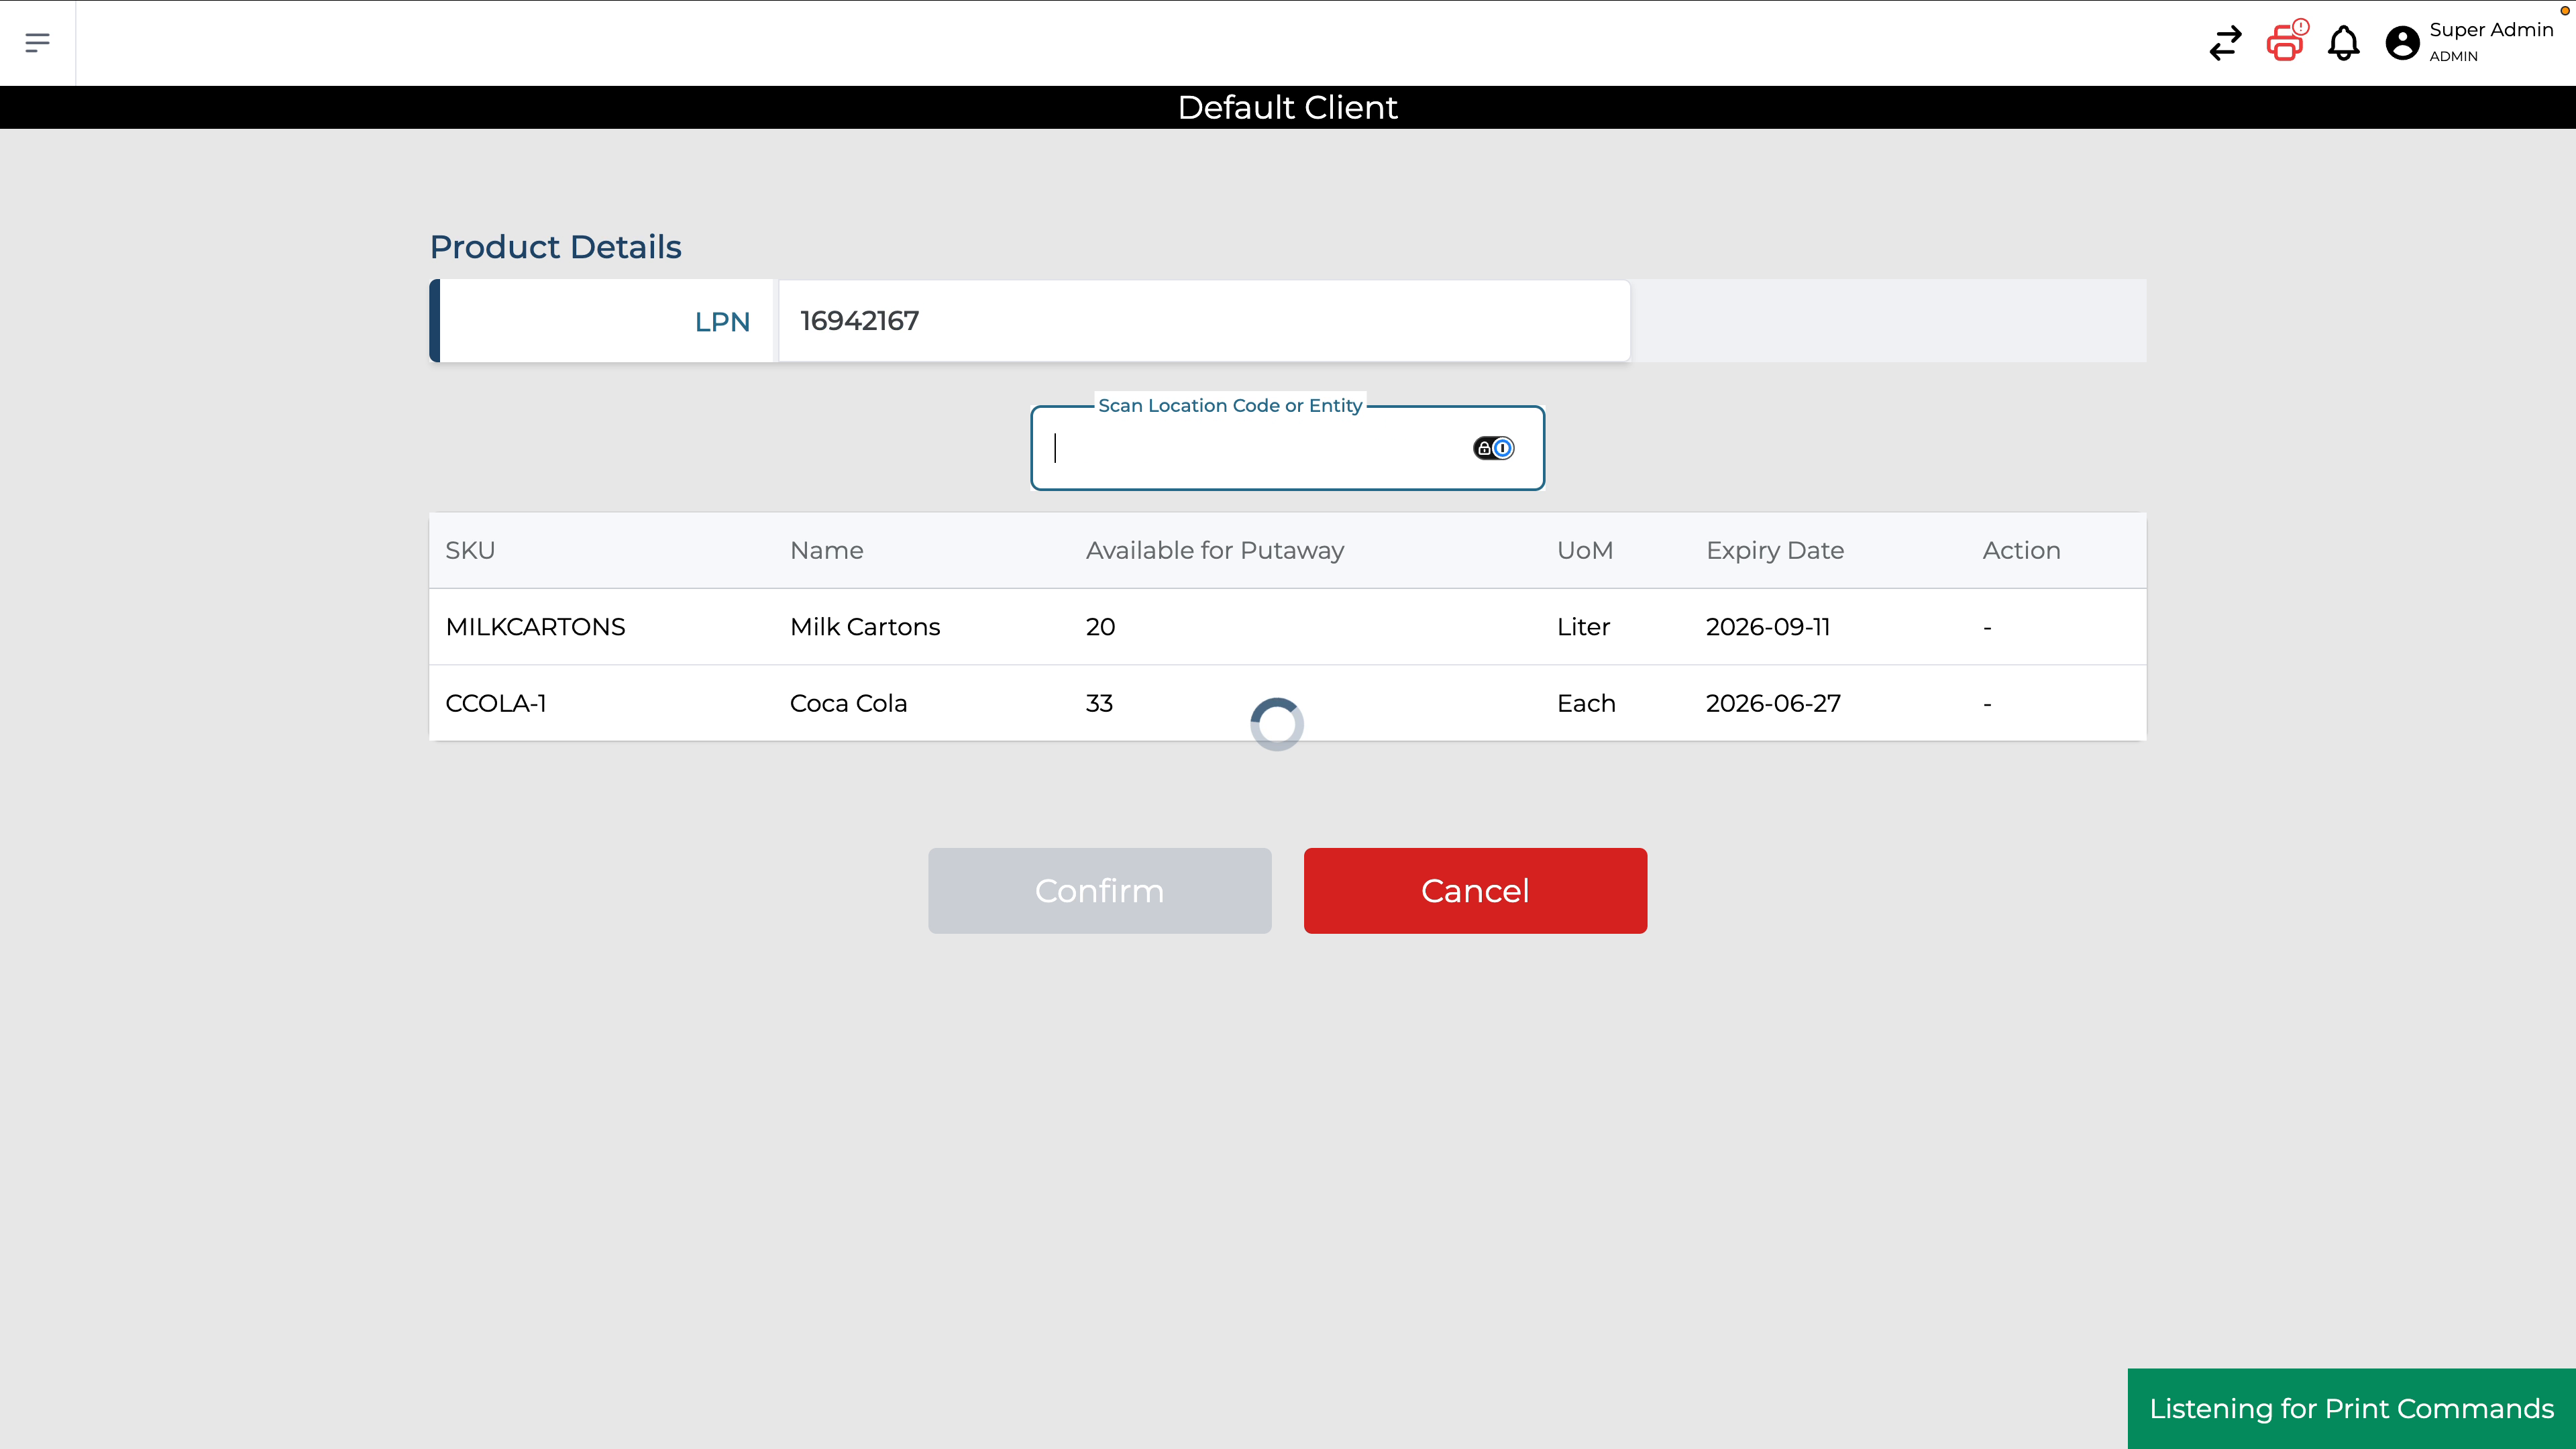
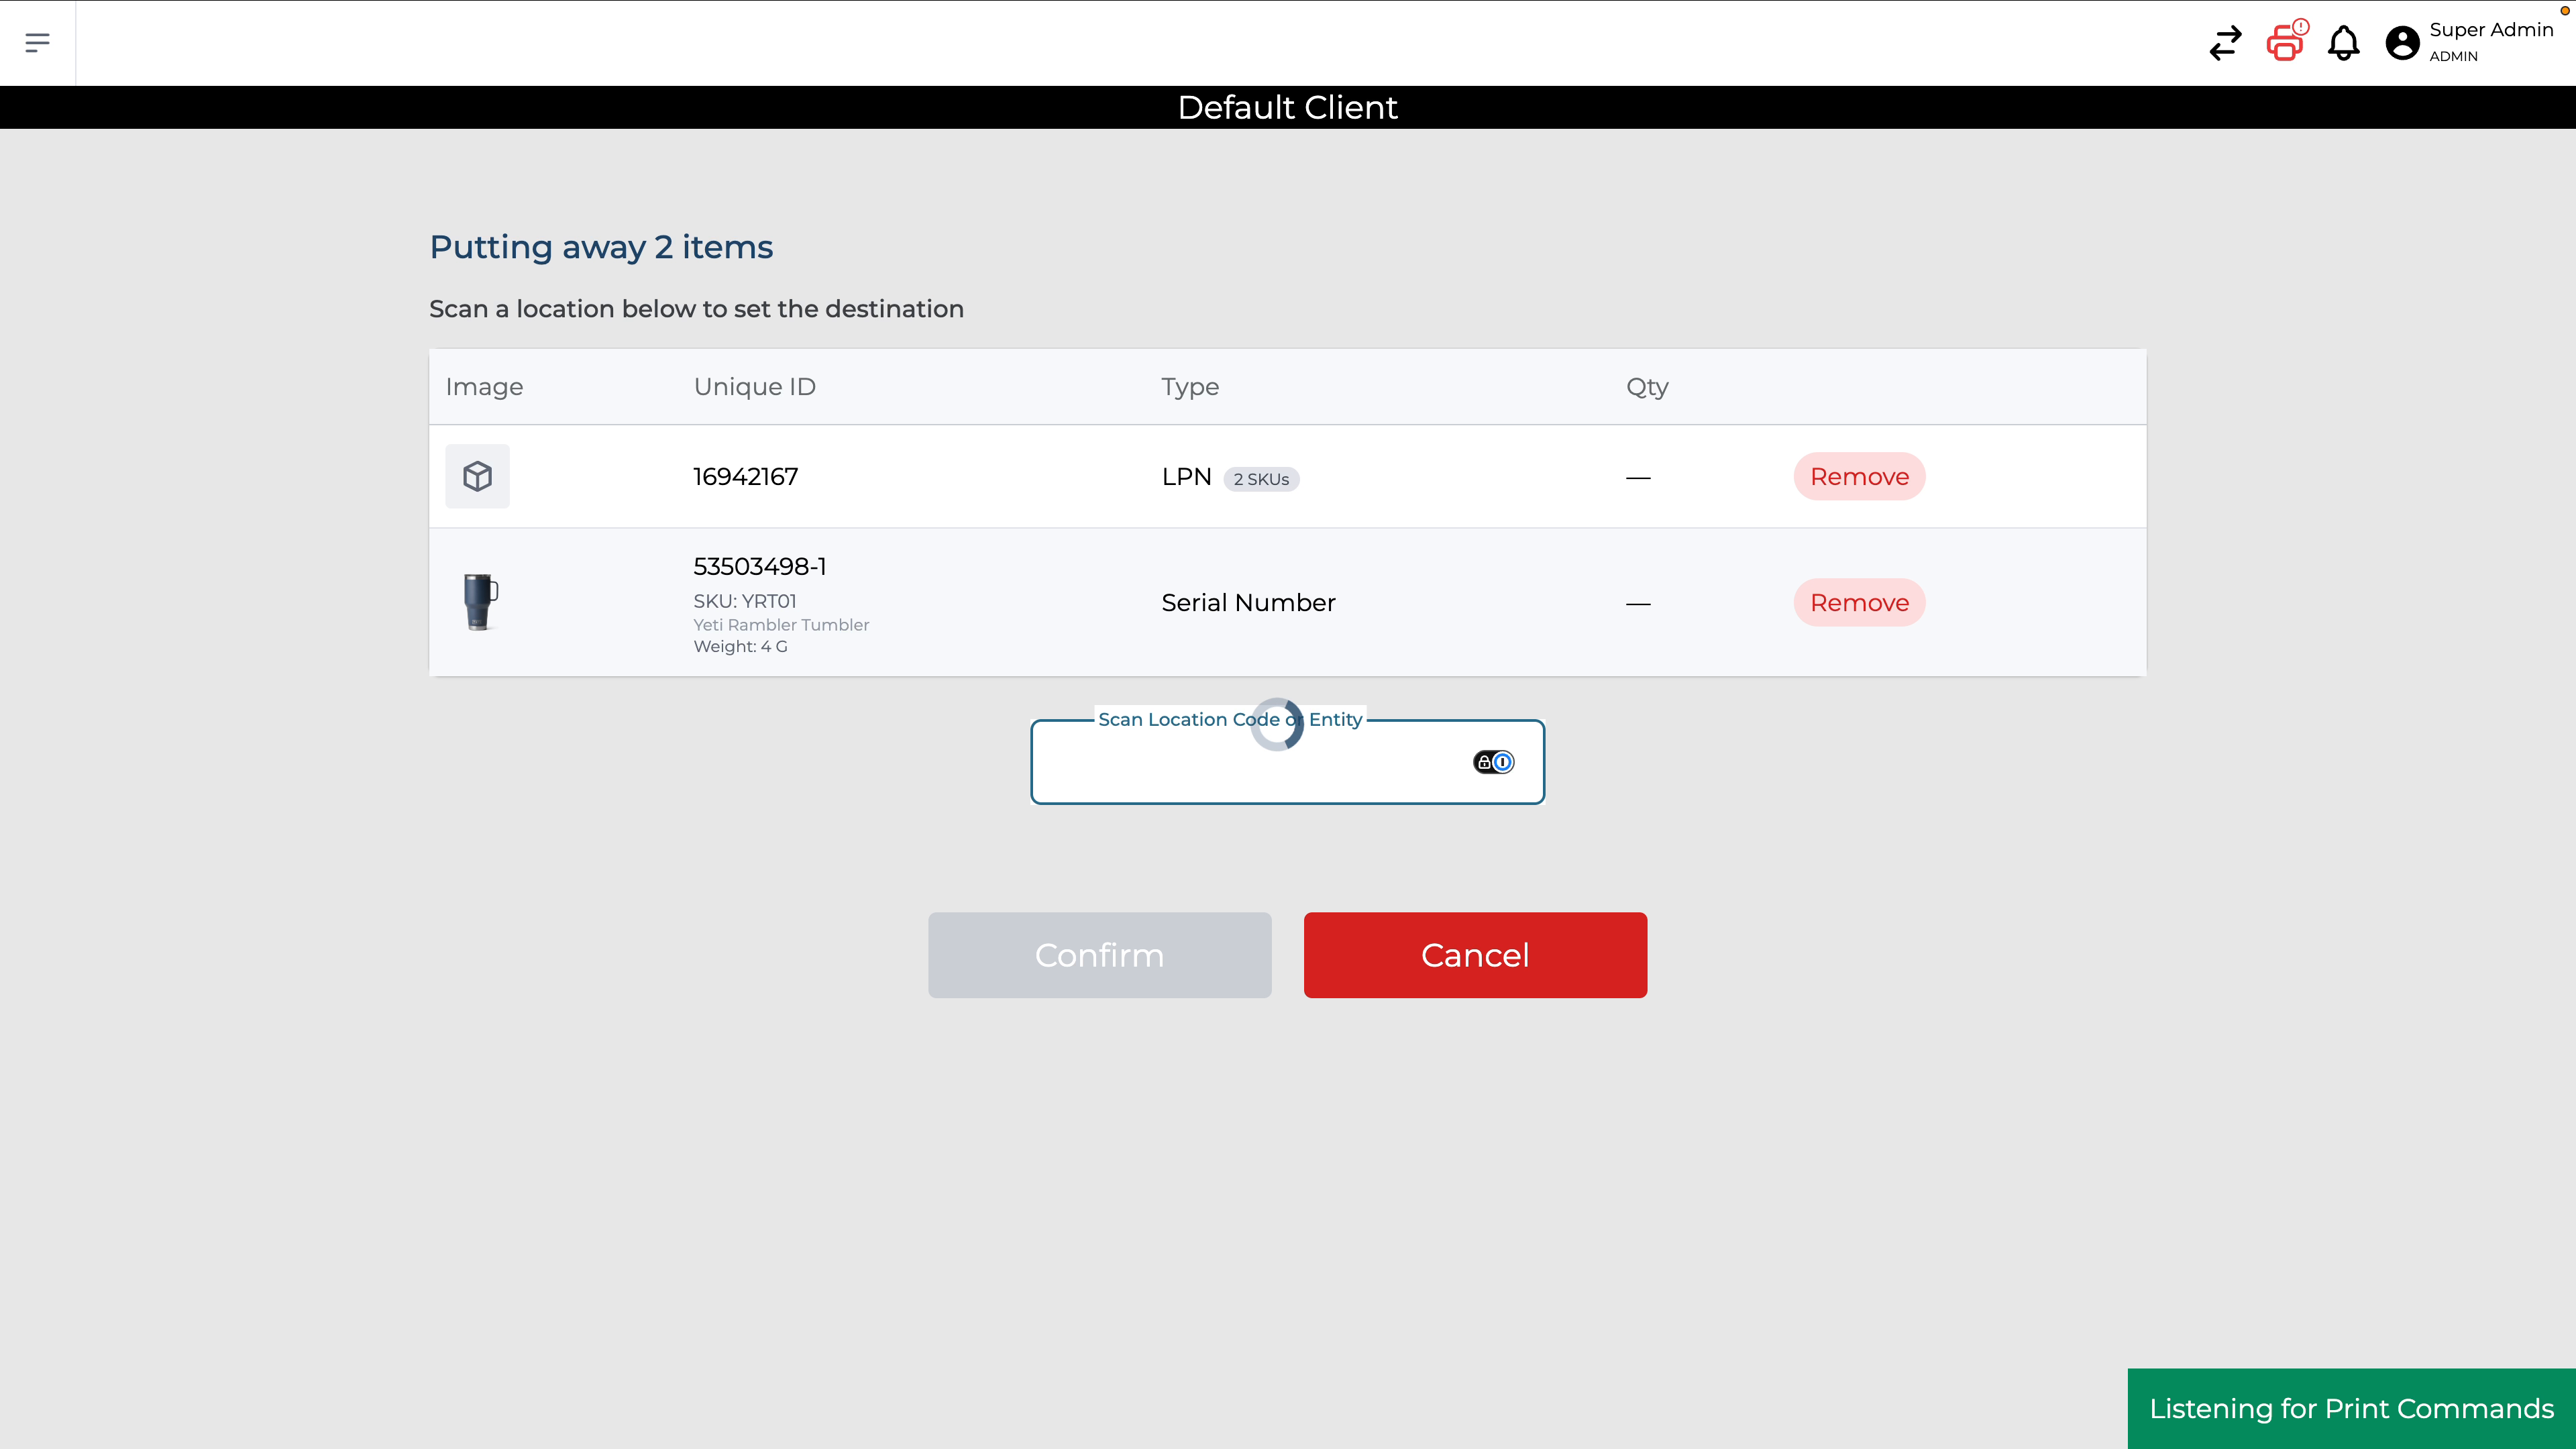
After scanning, the system identifies the LPN and shows its contents, including the different products and their quantities.
Step 2: Add Additional Items to Chain the Put Away
To chain this put away with other items going to the same location, scan another identifier, such as a serial number.
After scanning the additional item, the view changes to a consolidated layout showing all items included in the chained put away.
In this consolidated view, you will see:
• The LPN with its SKUs and quantities
• The latest serial number scanned
You can also see A “Type” field indicating the identifier type (LPN, serial, SKU, etc.)
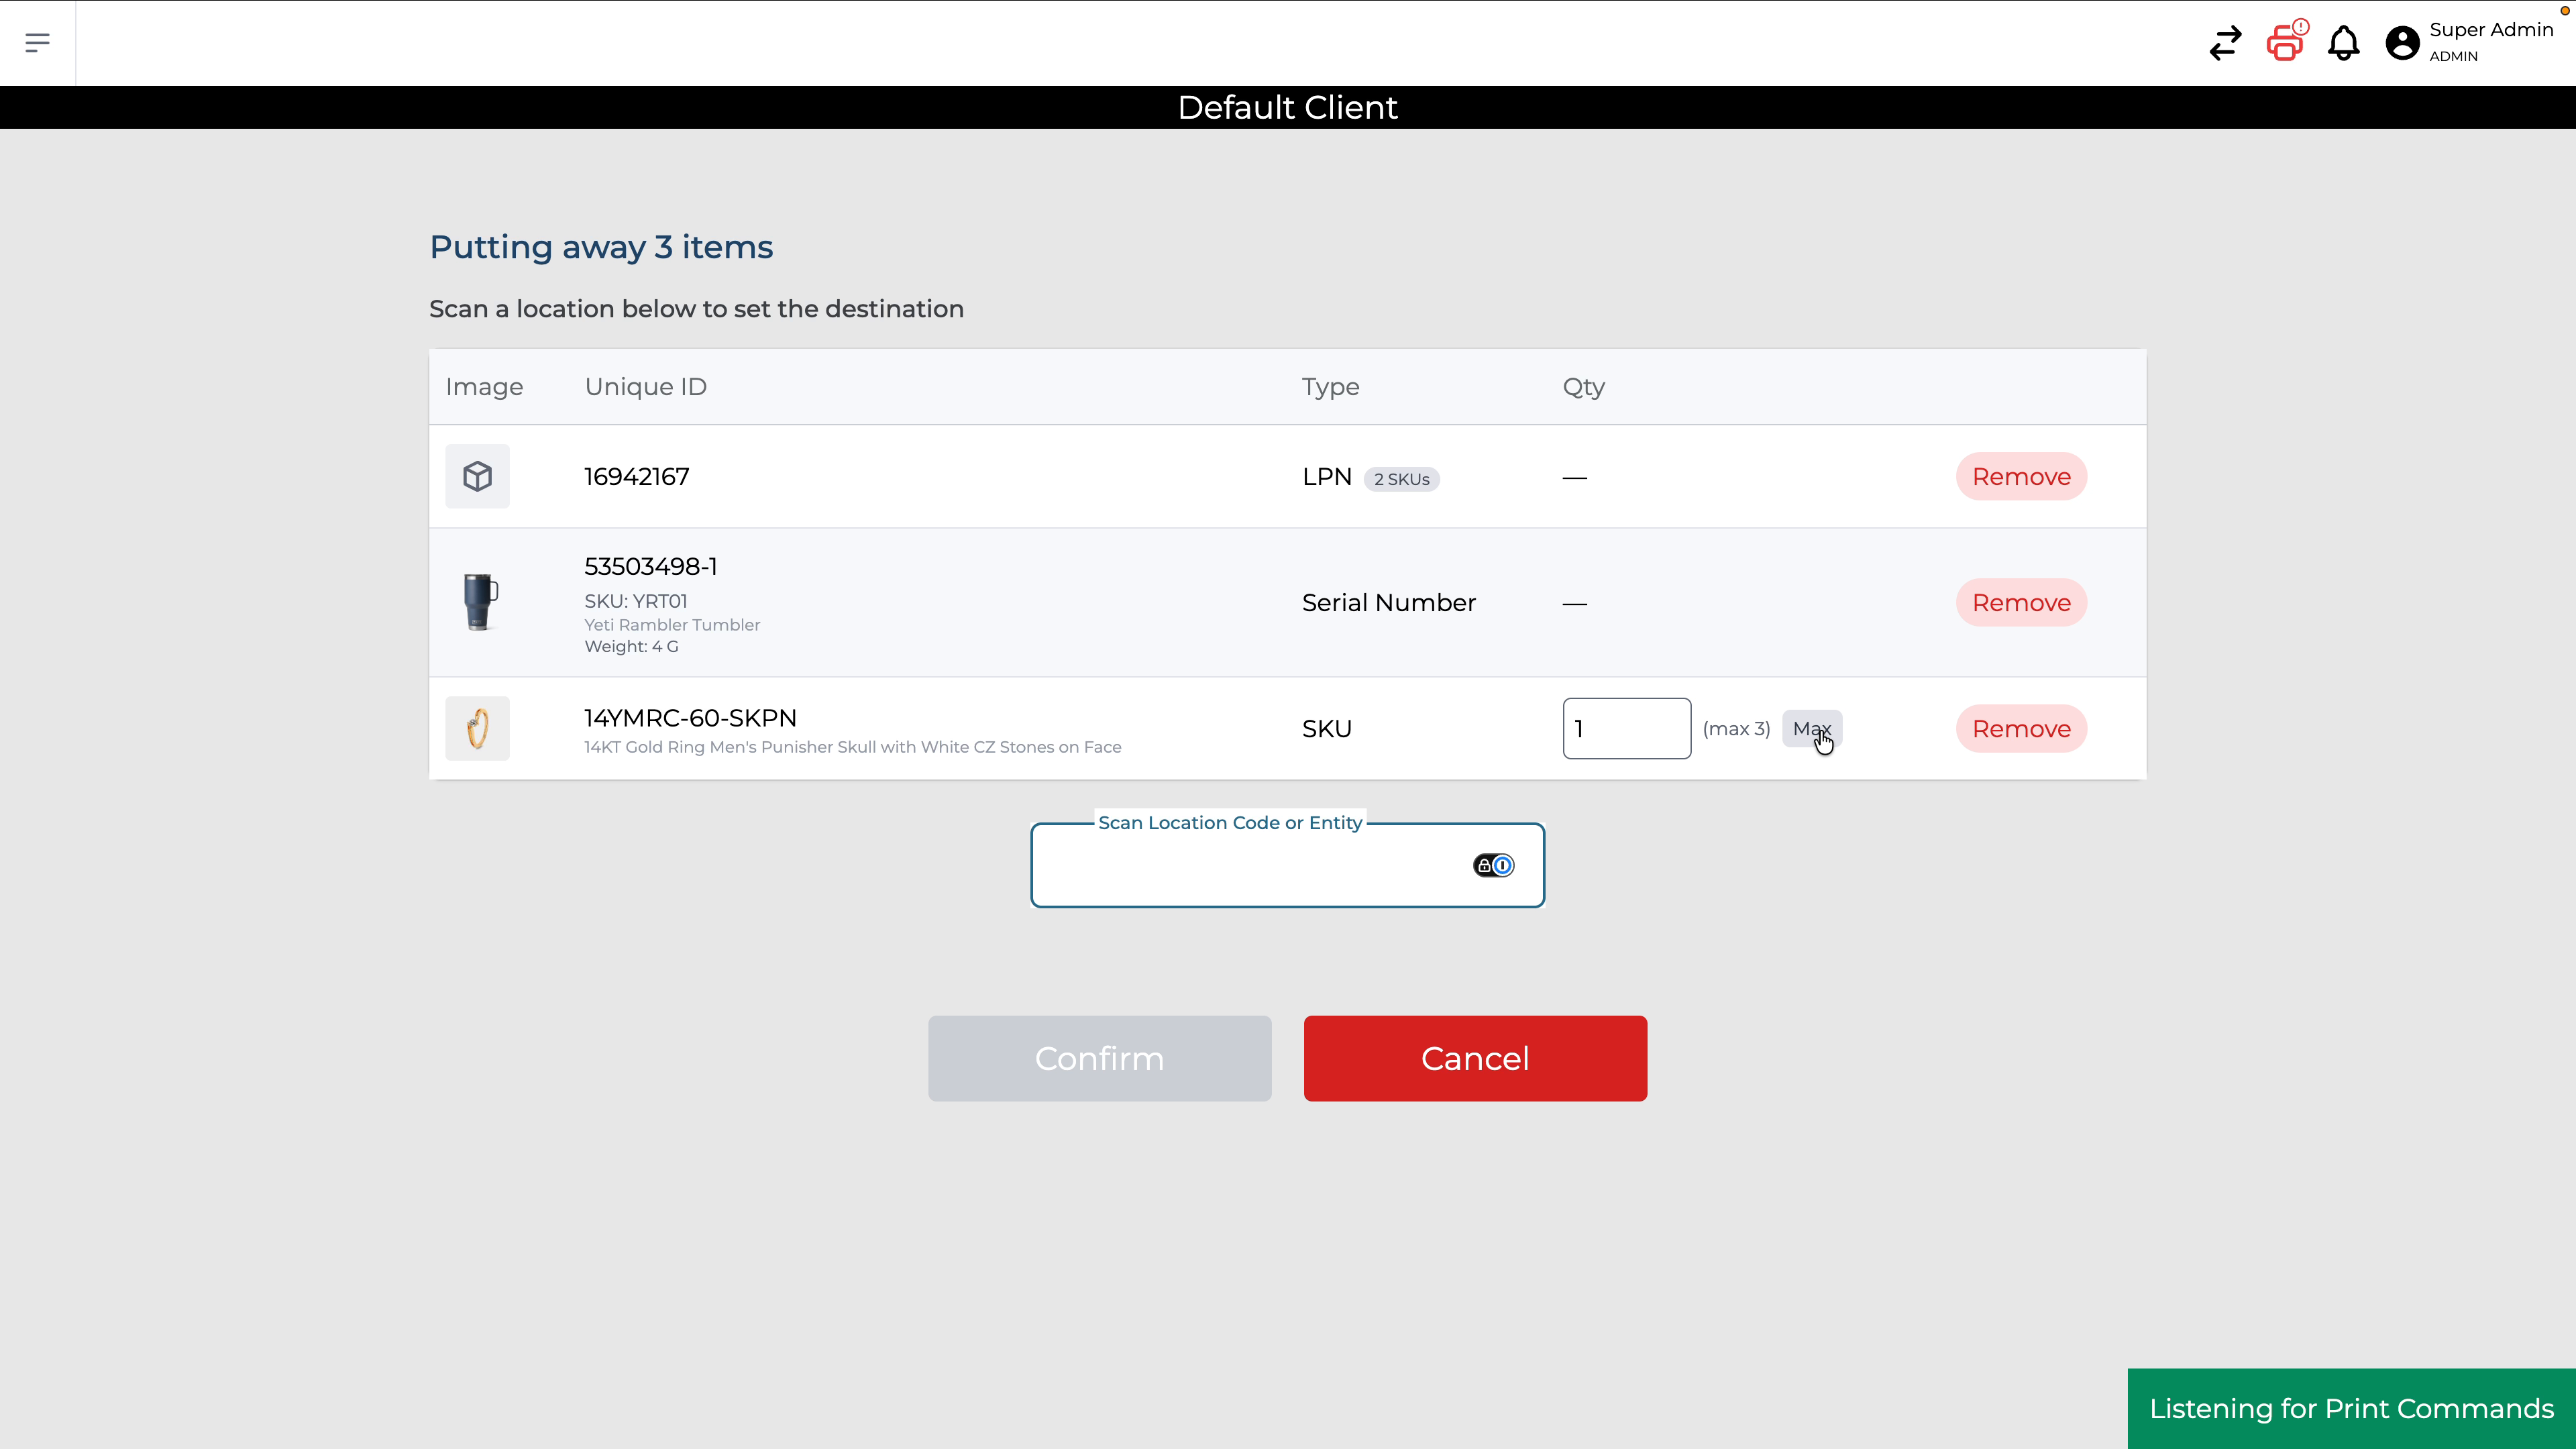
Step 3: Adding SKU to the chain
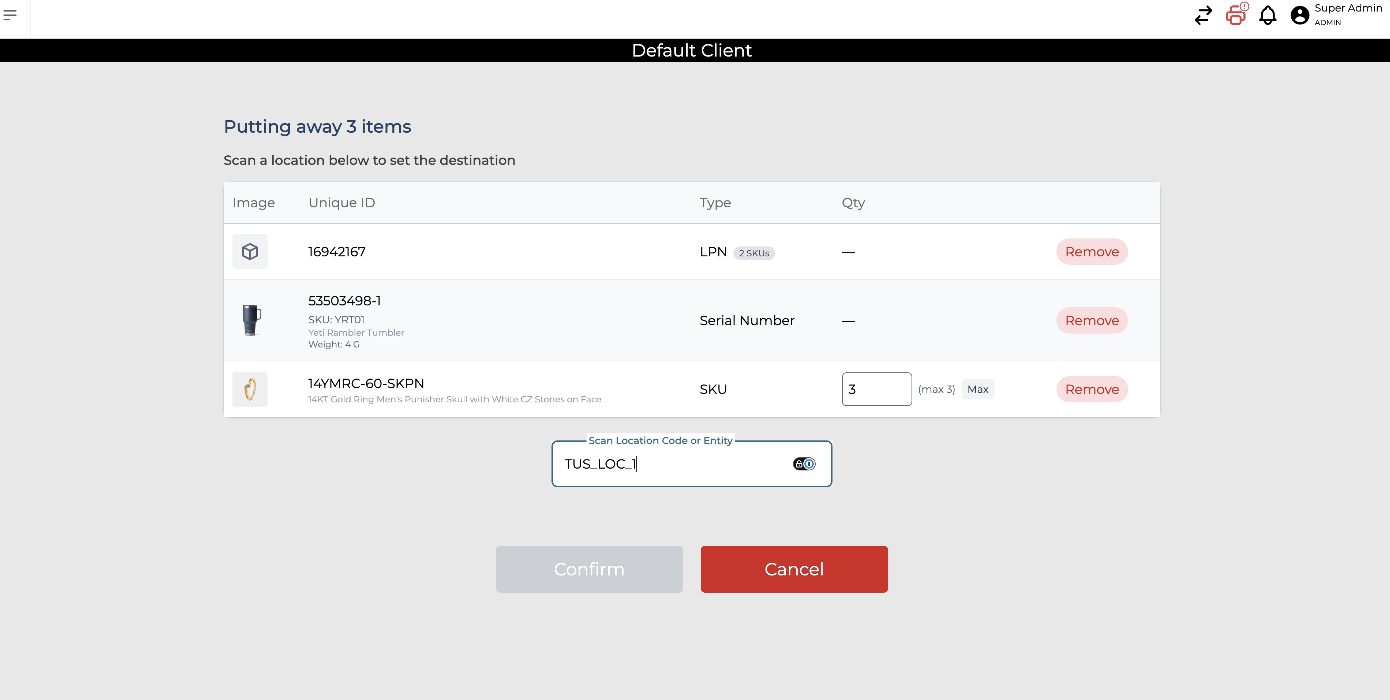
You can continue to add other identifiers as needed, including regular SKU scans. For SKU-level entries, you can modify the quantity being put away.
Unlike LPNs and serials (where quantity is fixed by what was scanned), SKU scans provide:
• An editable quantity field
• A maximum quantity indicator
• A quick max button to set the quantity to the maximum allowed
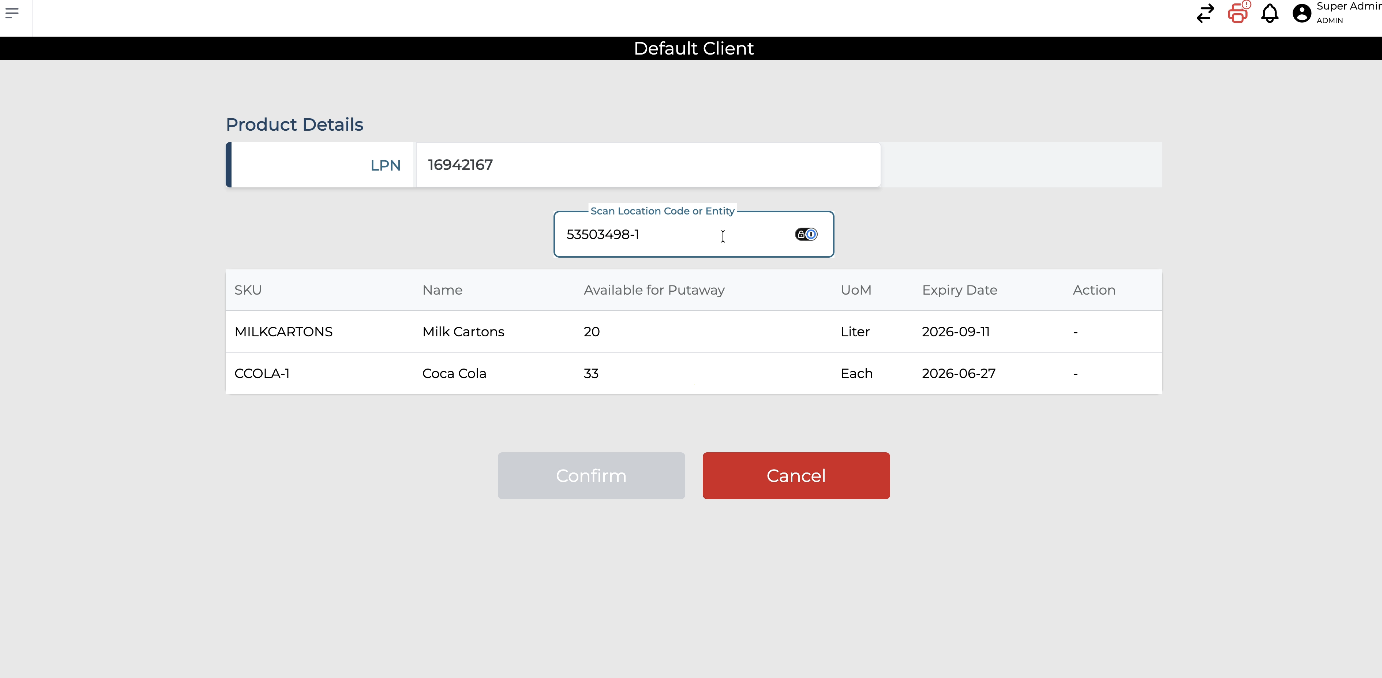
Step 4: Scan the Destination Location and Complete the Chained Put Away
Once you have chained all desired items (LPNs, serials, SKUs), scan the destination location.
The system will then put away all included items to this single location in one action.
Click on Confirm.
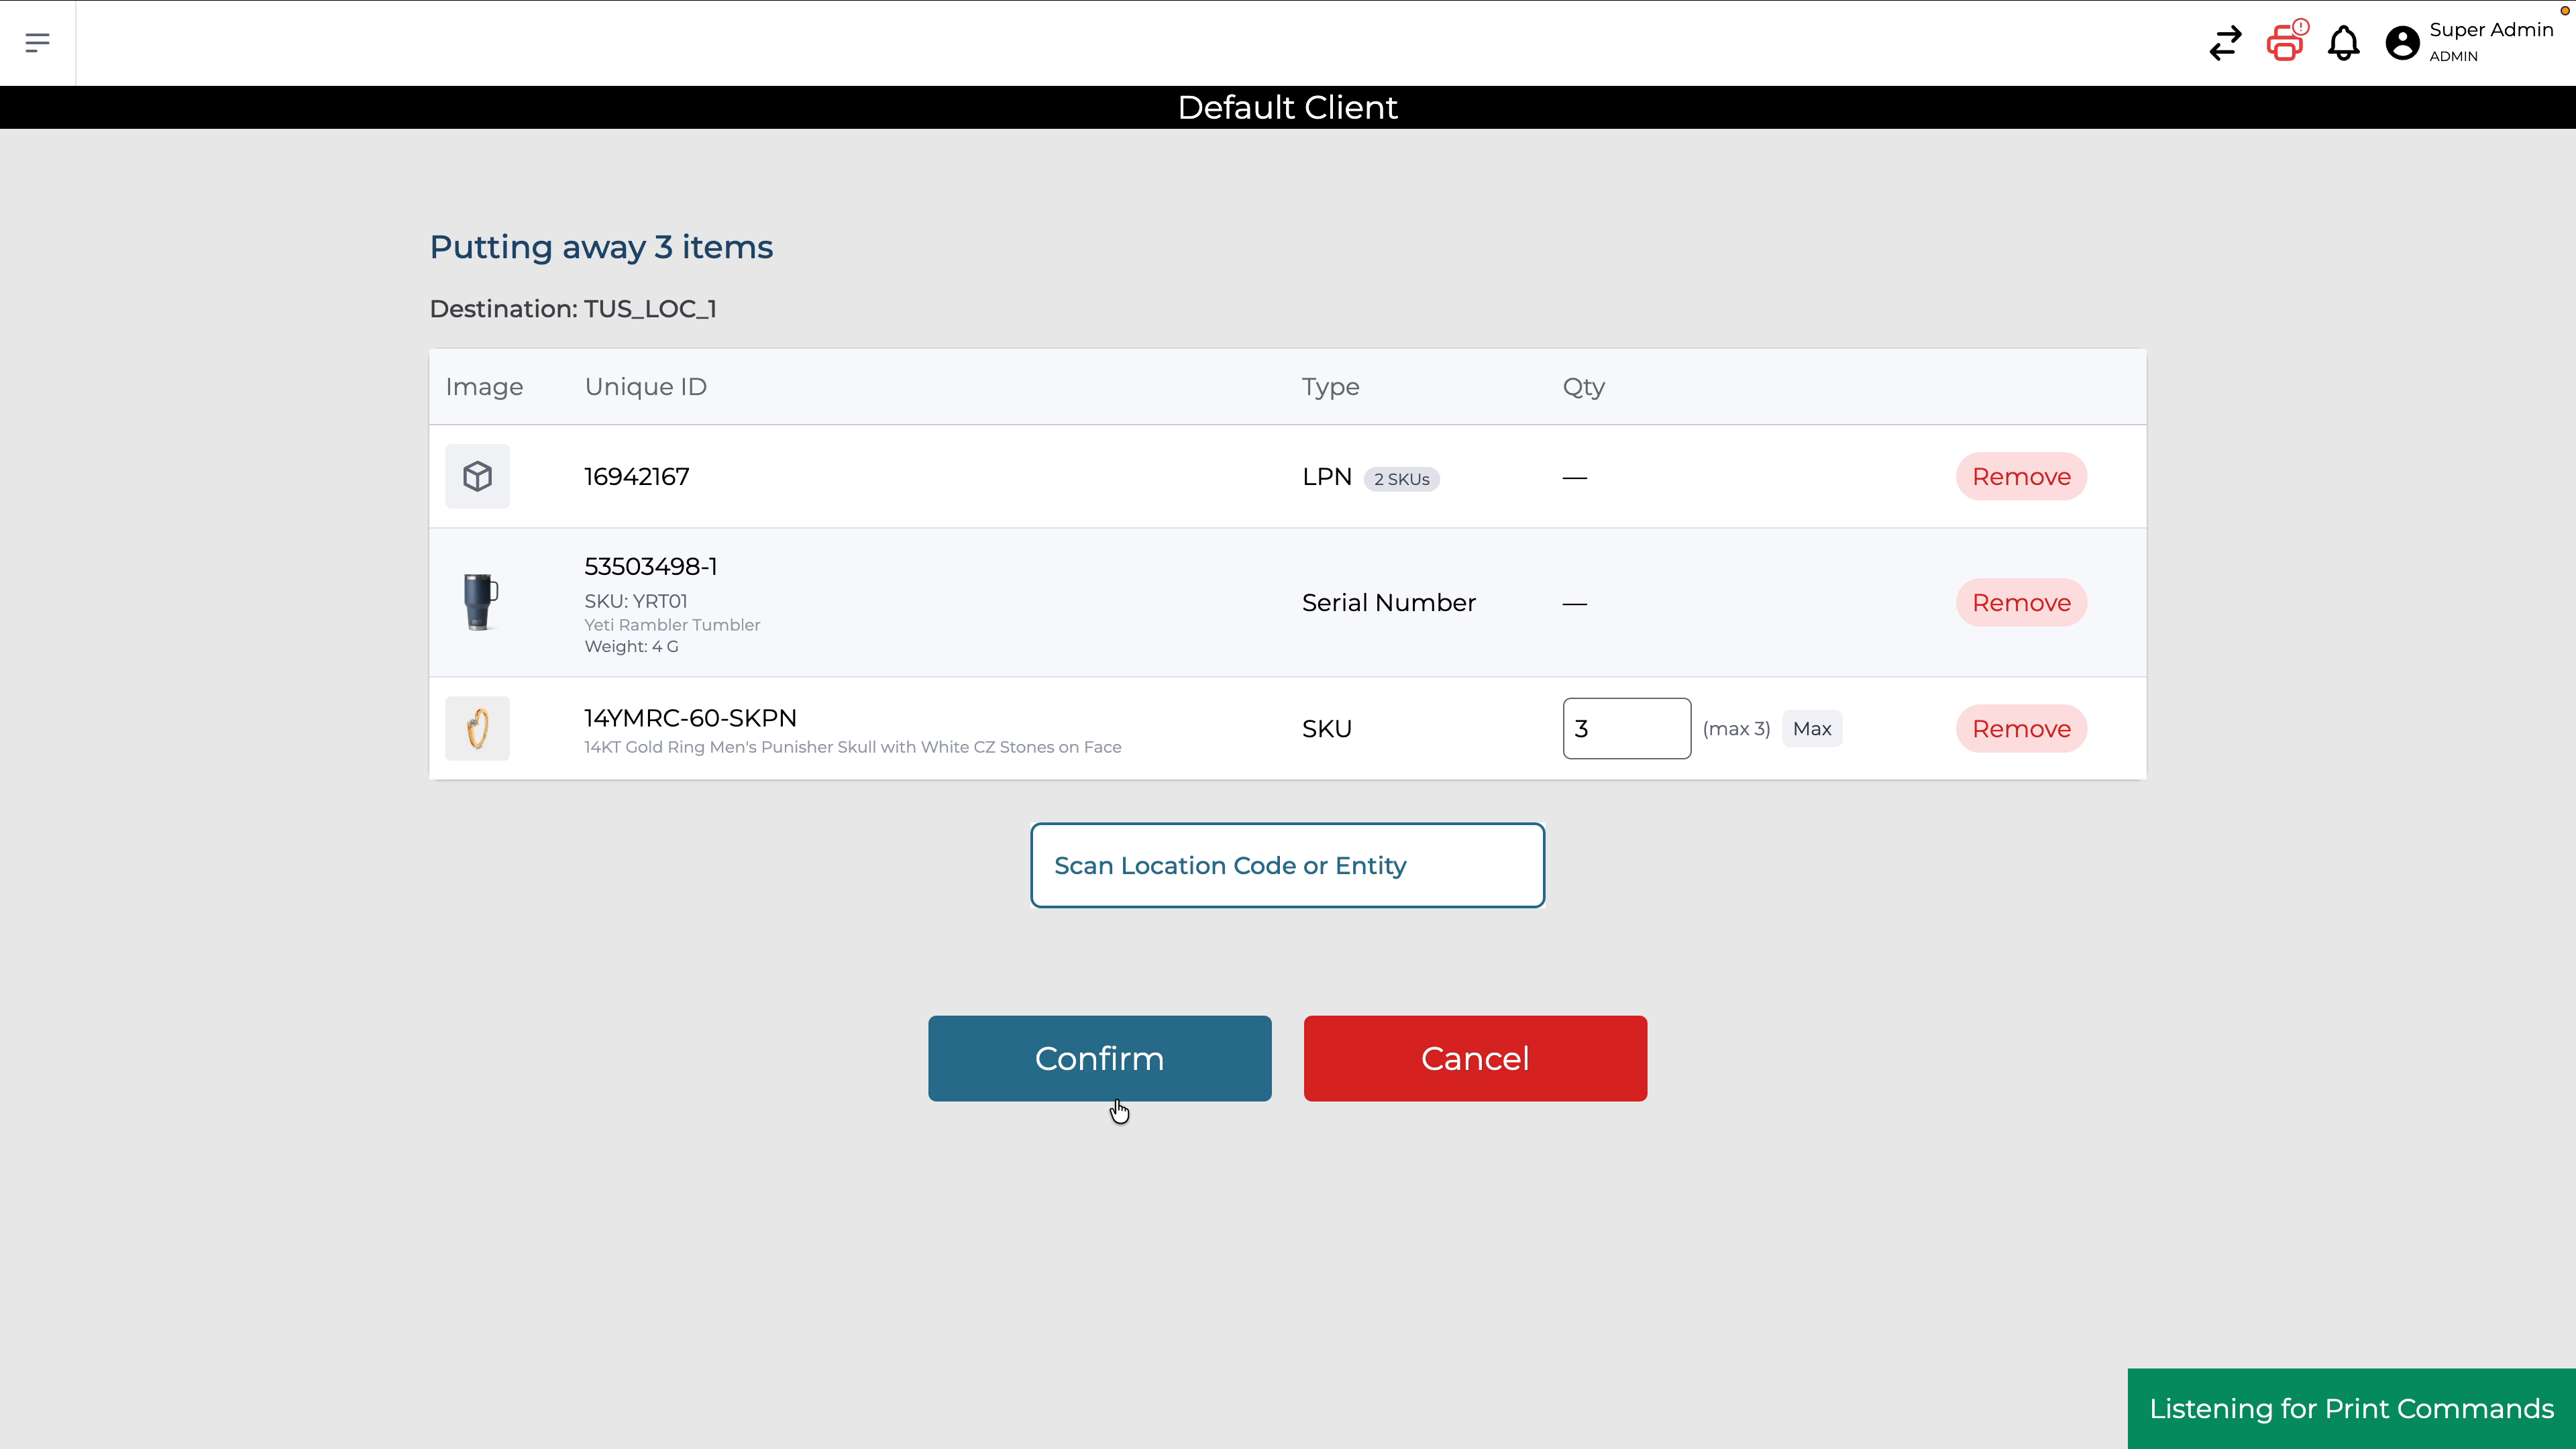
Now, the LPN, serial number, and SKU are all put away together to the same location.