
This document explains how to create and download an Inventory Aging Report in Hopstack. The report groups available (unallocated) inventory into aging buckets so you can identify slow‑moving or long‑held stock, review expiry risks, and make informed inventory decisions.
Step 1: Open Report Management and Start a New Report
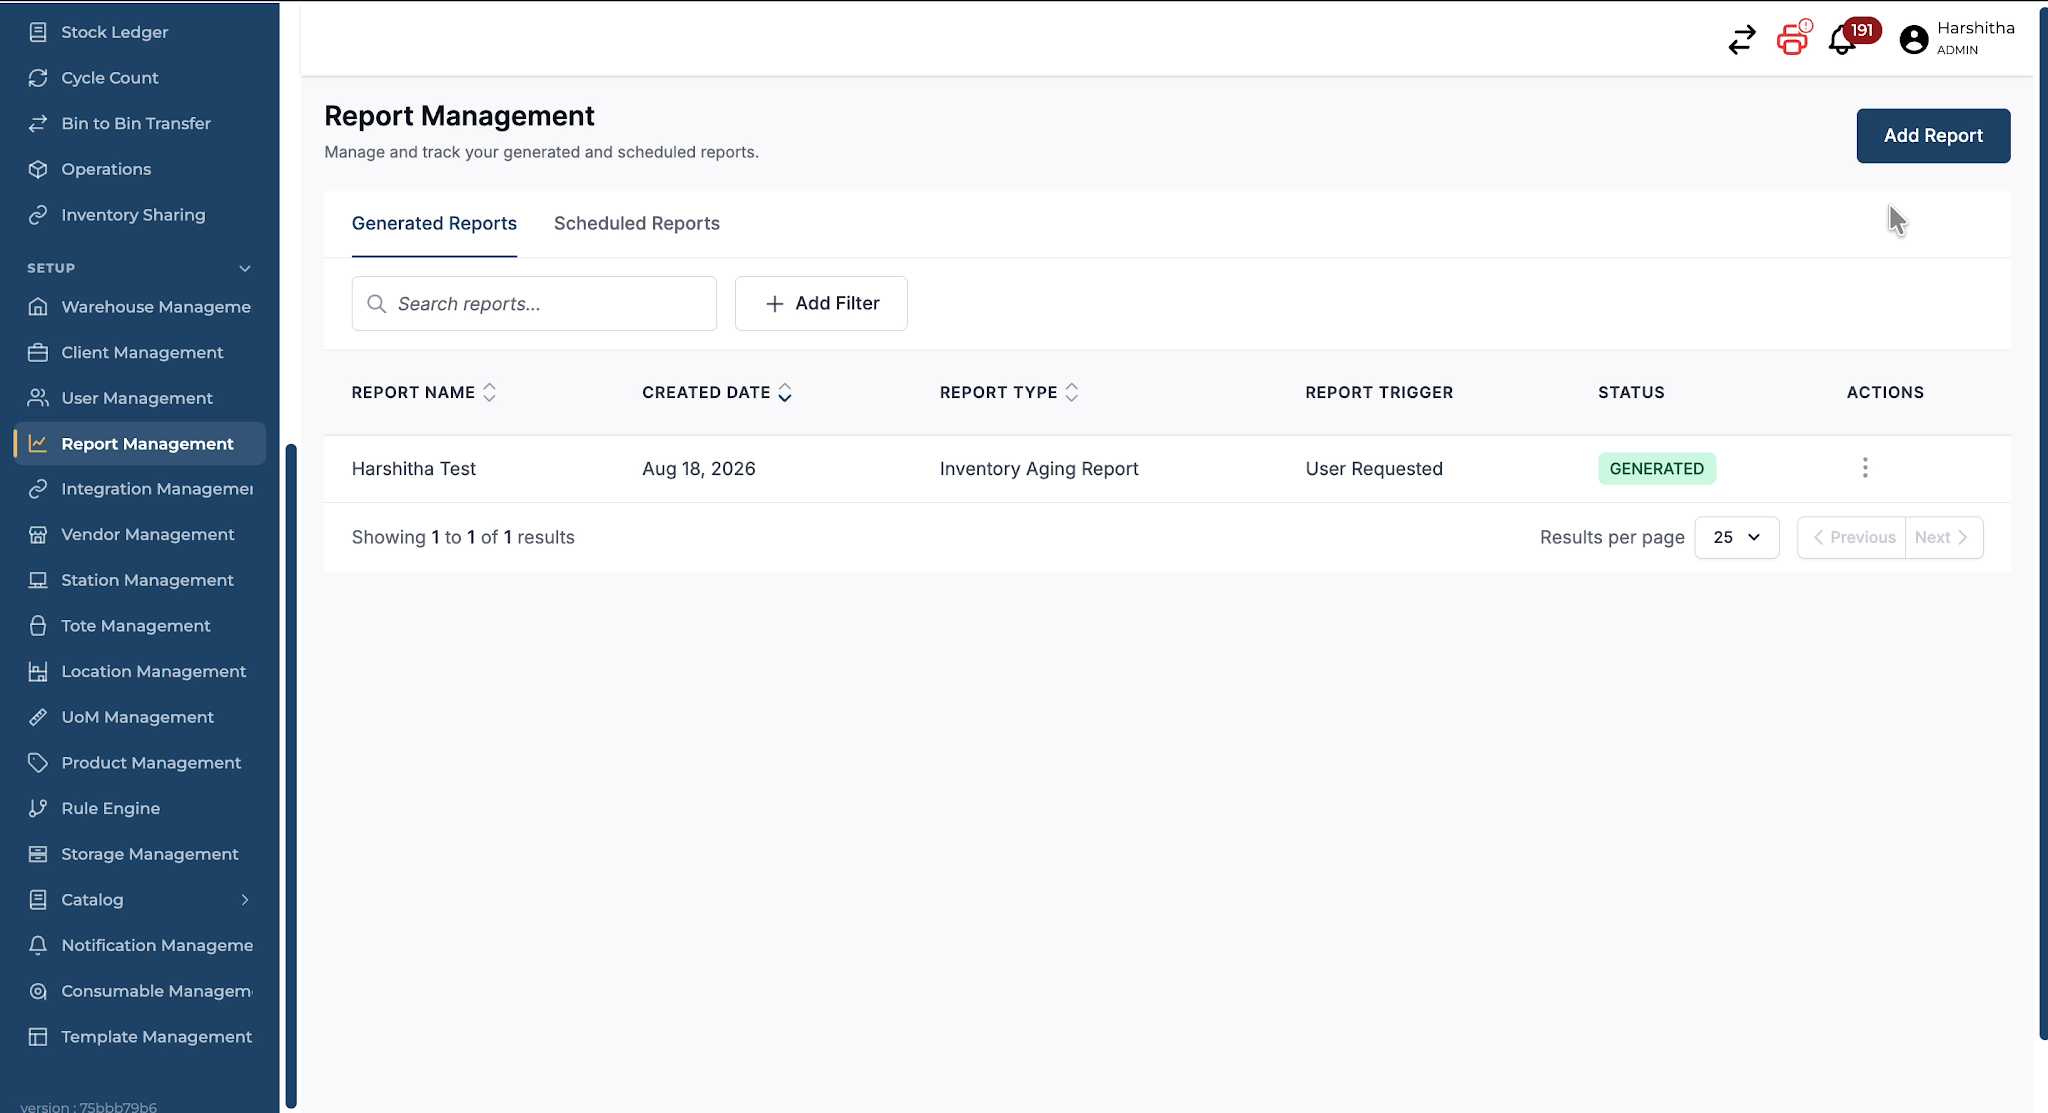
Navigate to Setup and open Report Management.
Click Add Report.
Step 2: Choose the Inventory Aging Report Type
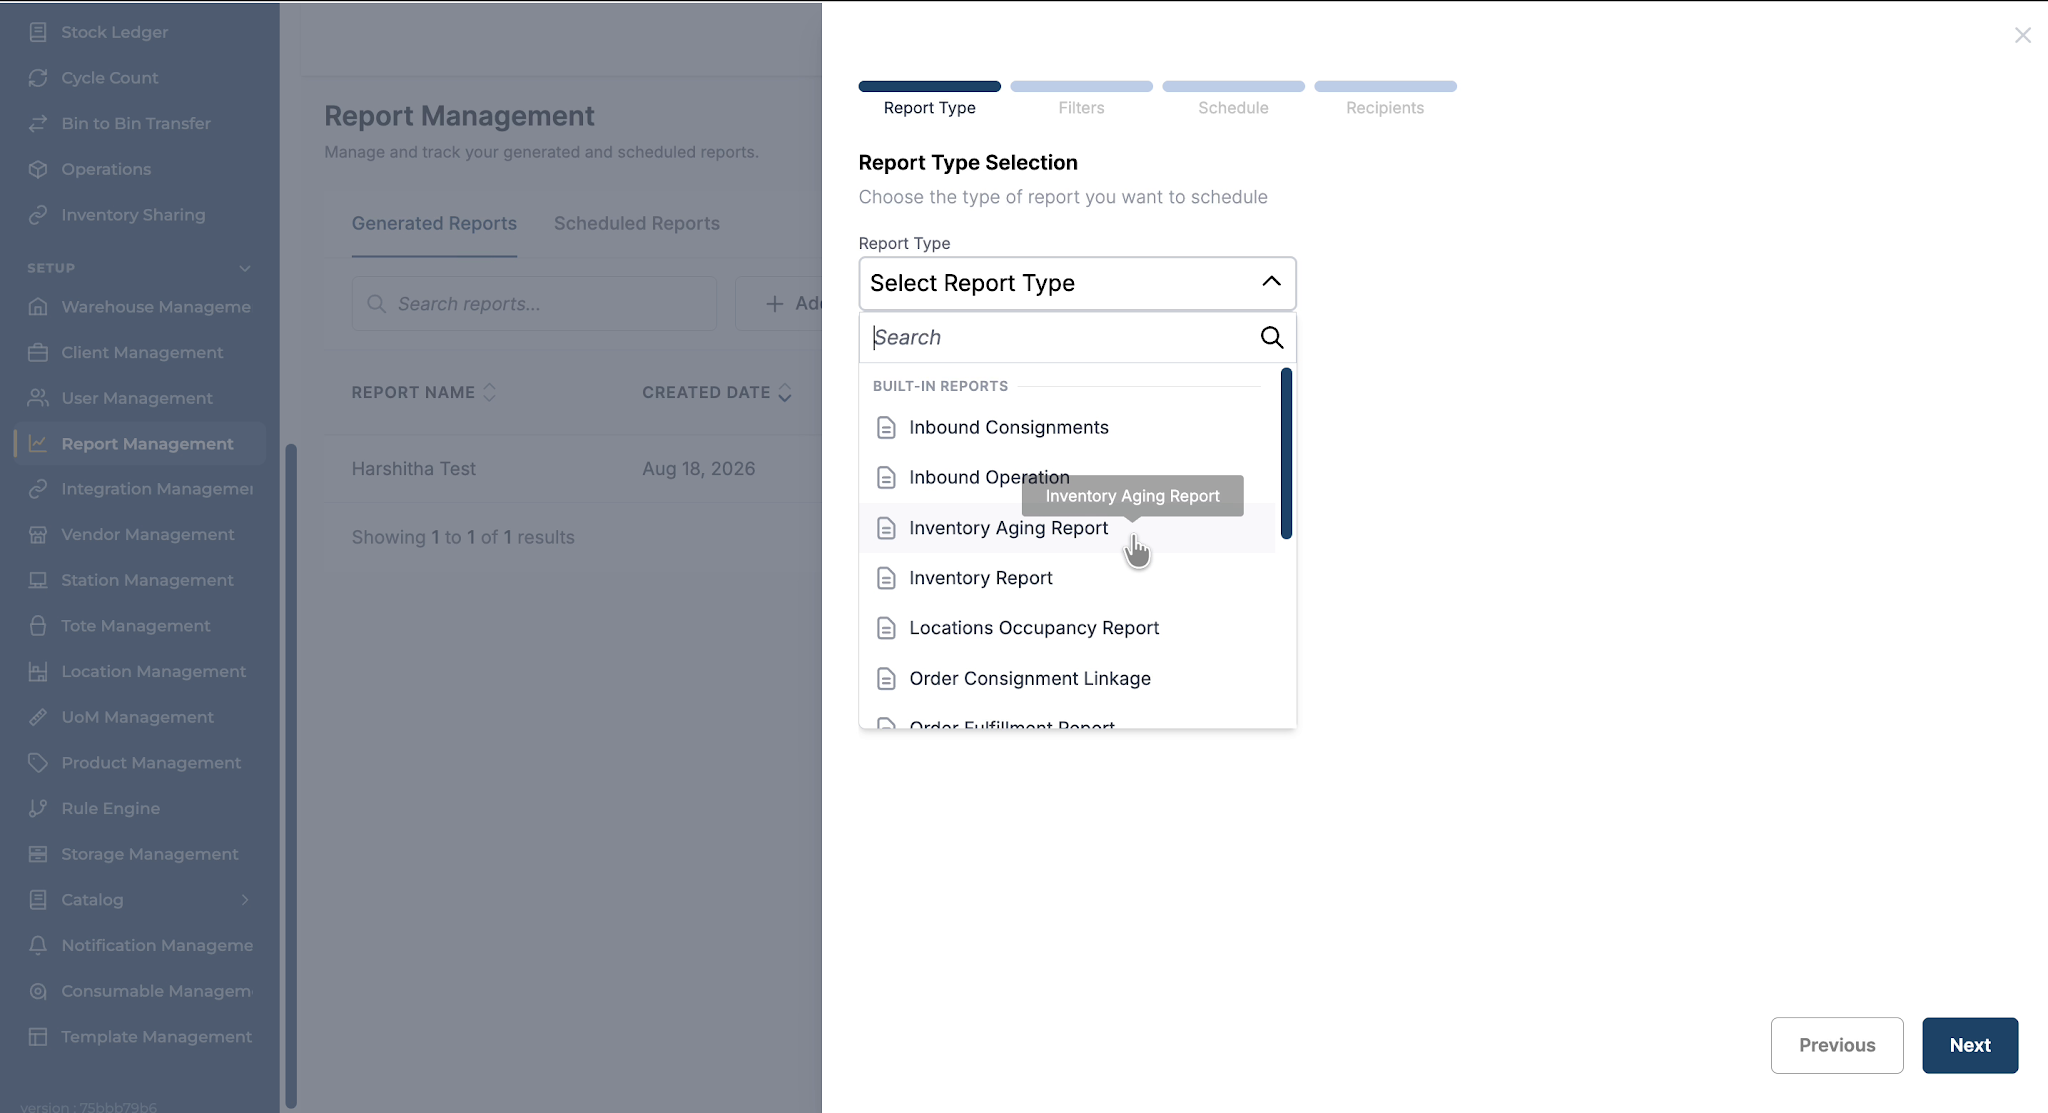
In the Report Type field, open the list.
Select Inventory Aging Report from the available report types.
Step 3: Name the Report and Select Core Fields
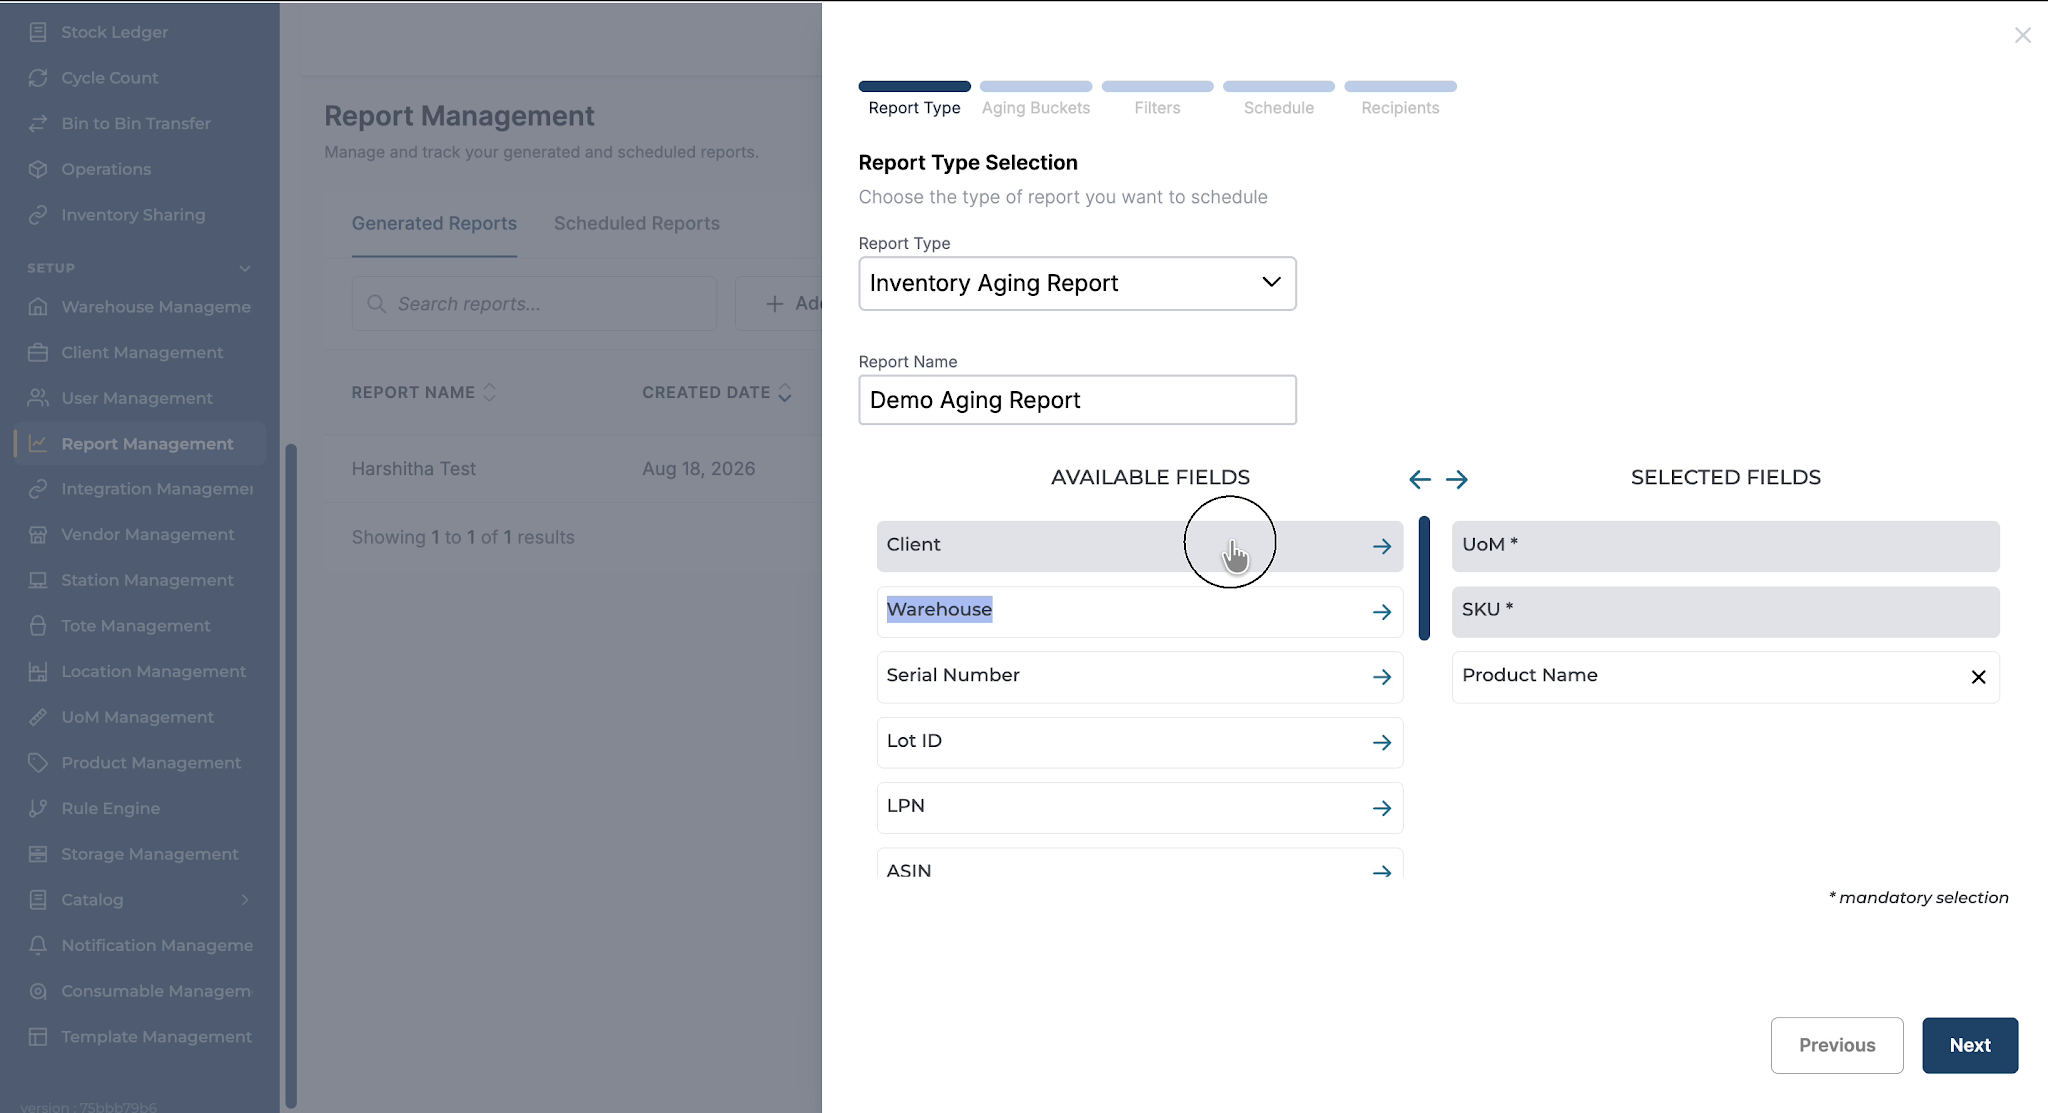
Enter a meaningful Name for the report so it is easy to recognize later.
Choose the fields you want to include in the report output.
Step 4: Configure Granularity Using Identifiers
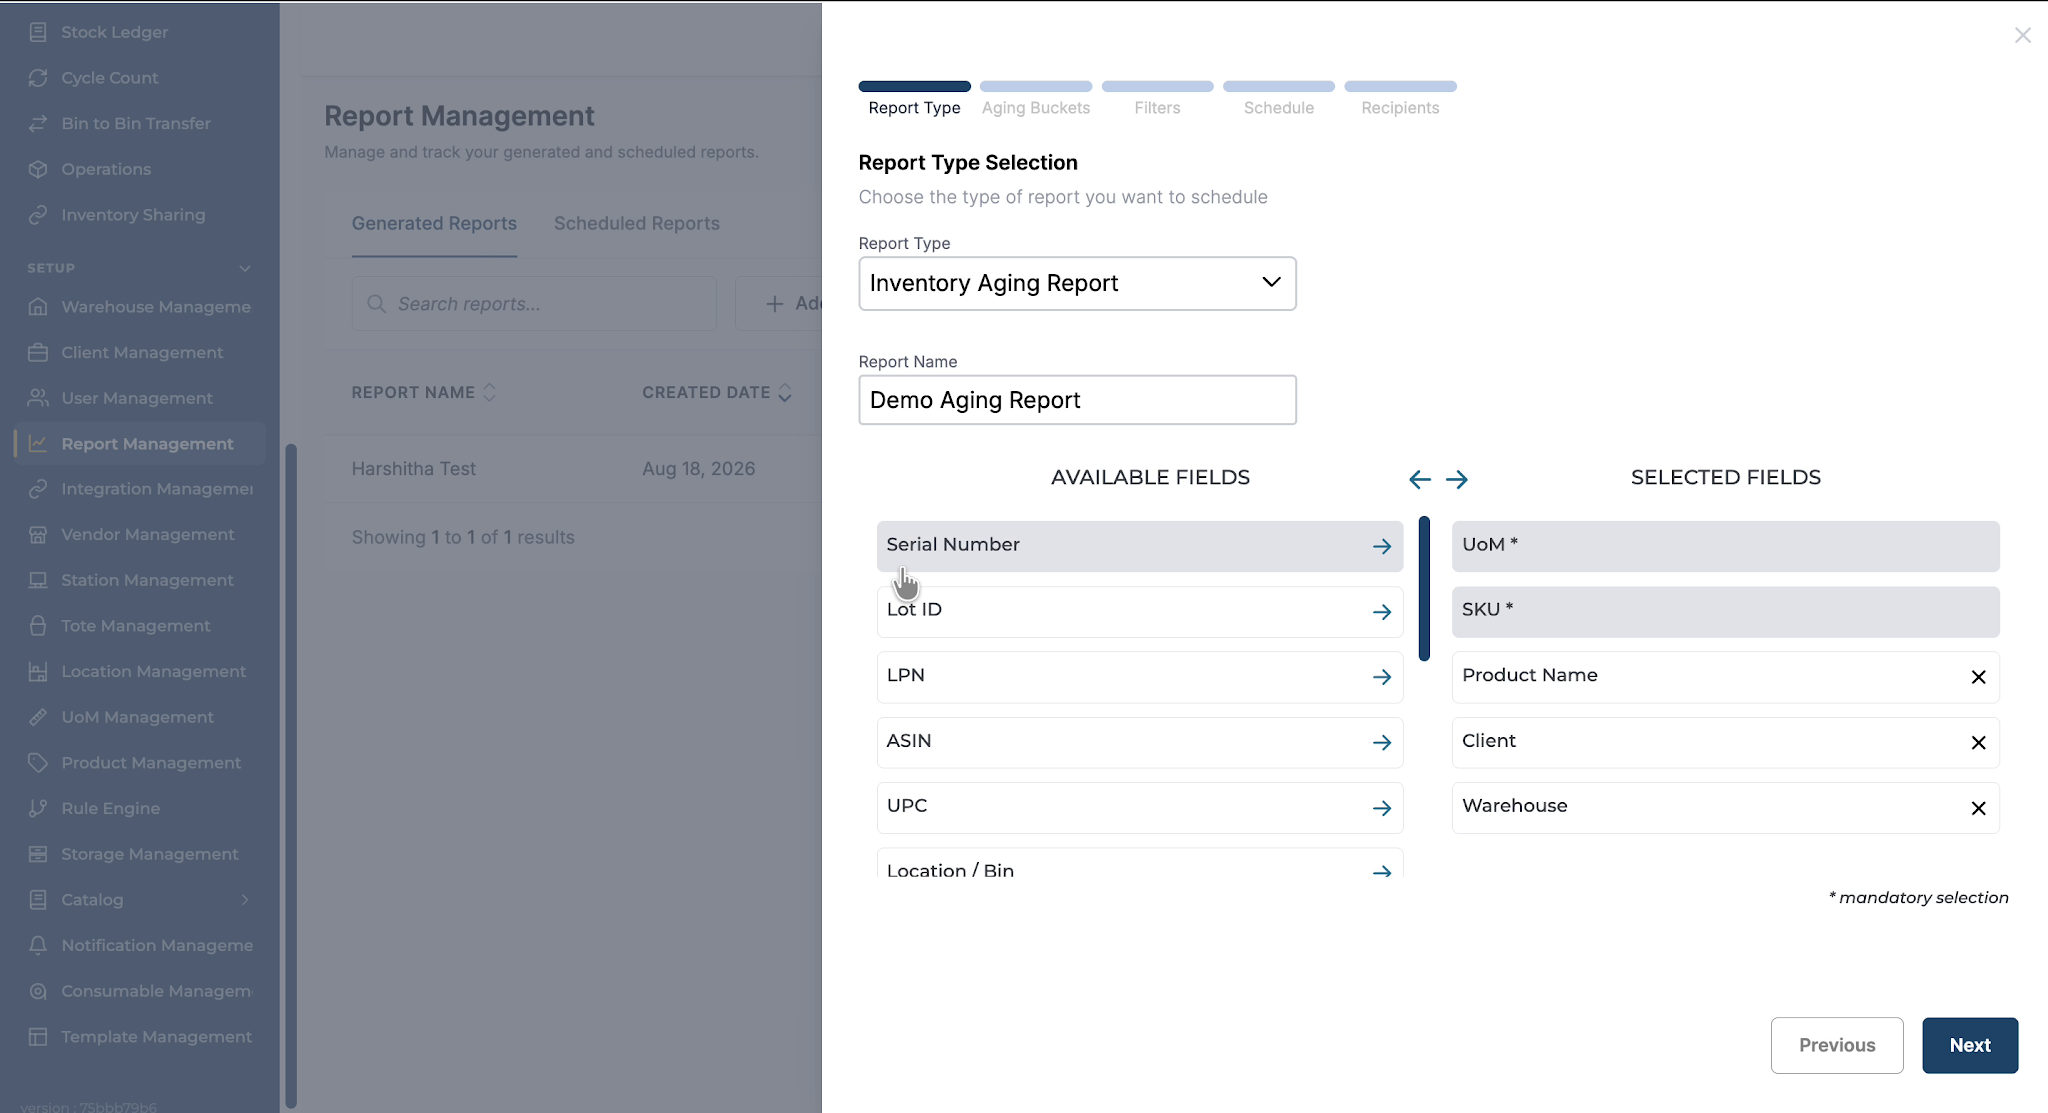
To get a more granular report, select identifier fields such as:
-
Serial Number
-
Lot ID
-
LPN
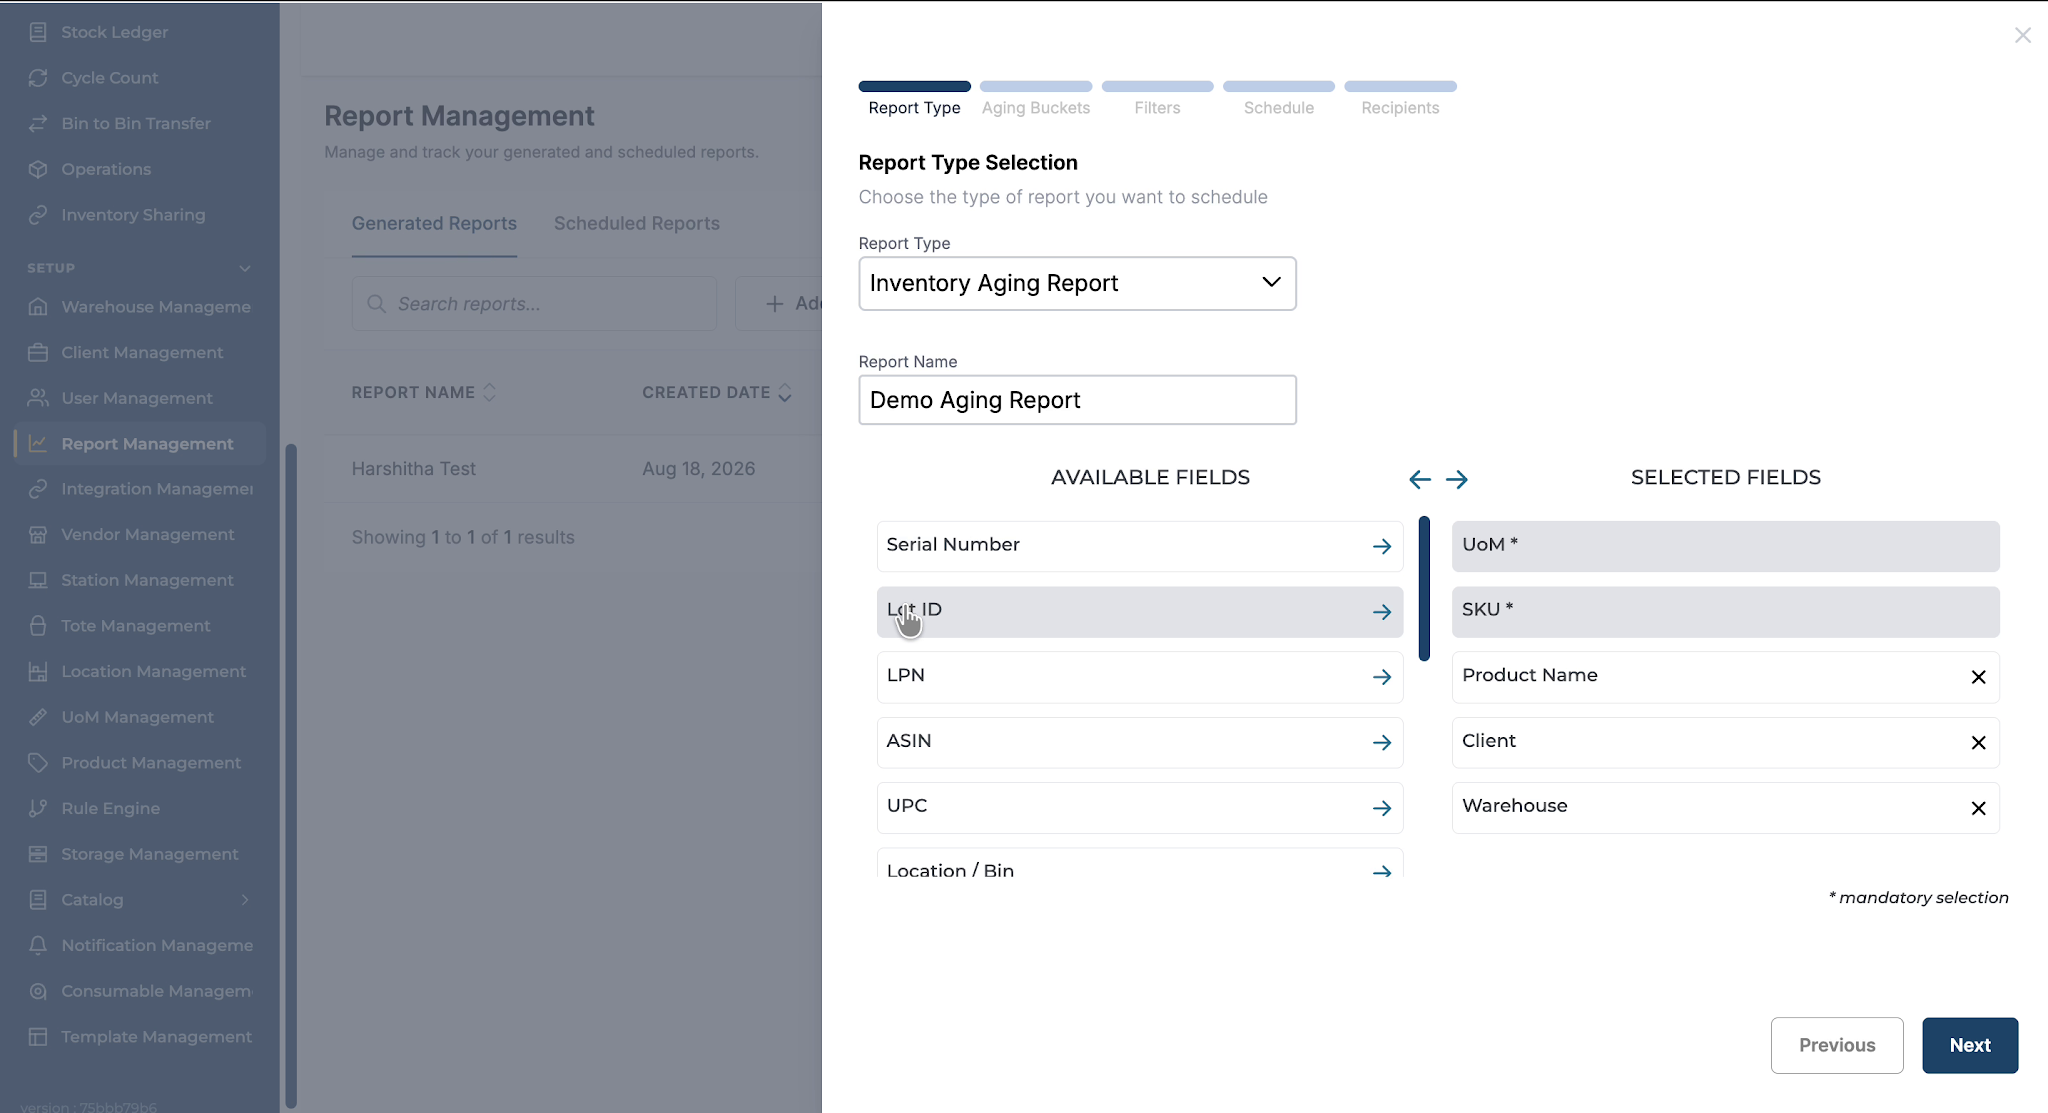
Selecting these will break out inventory into separate rows per value. For example:
-
If LPN is selected, inventory from different LPNs appears as separate rows.
-
If Serial Number is selected, inventory from different serial numbers appears as separate rows.
If you want this more detailed view, ensure these fields are selected.
Step 5: Add Aging and Expiry‑Related Metrics
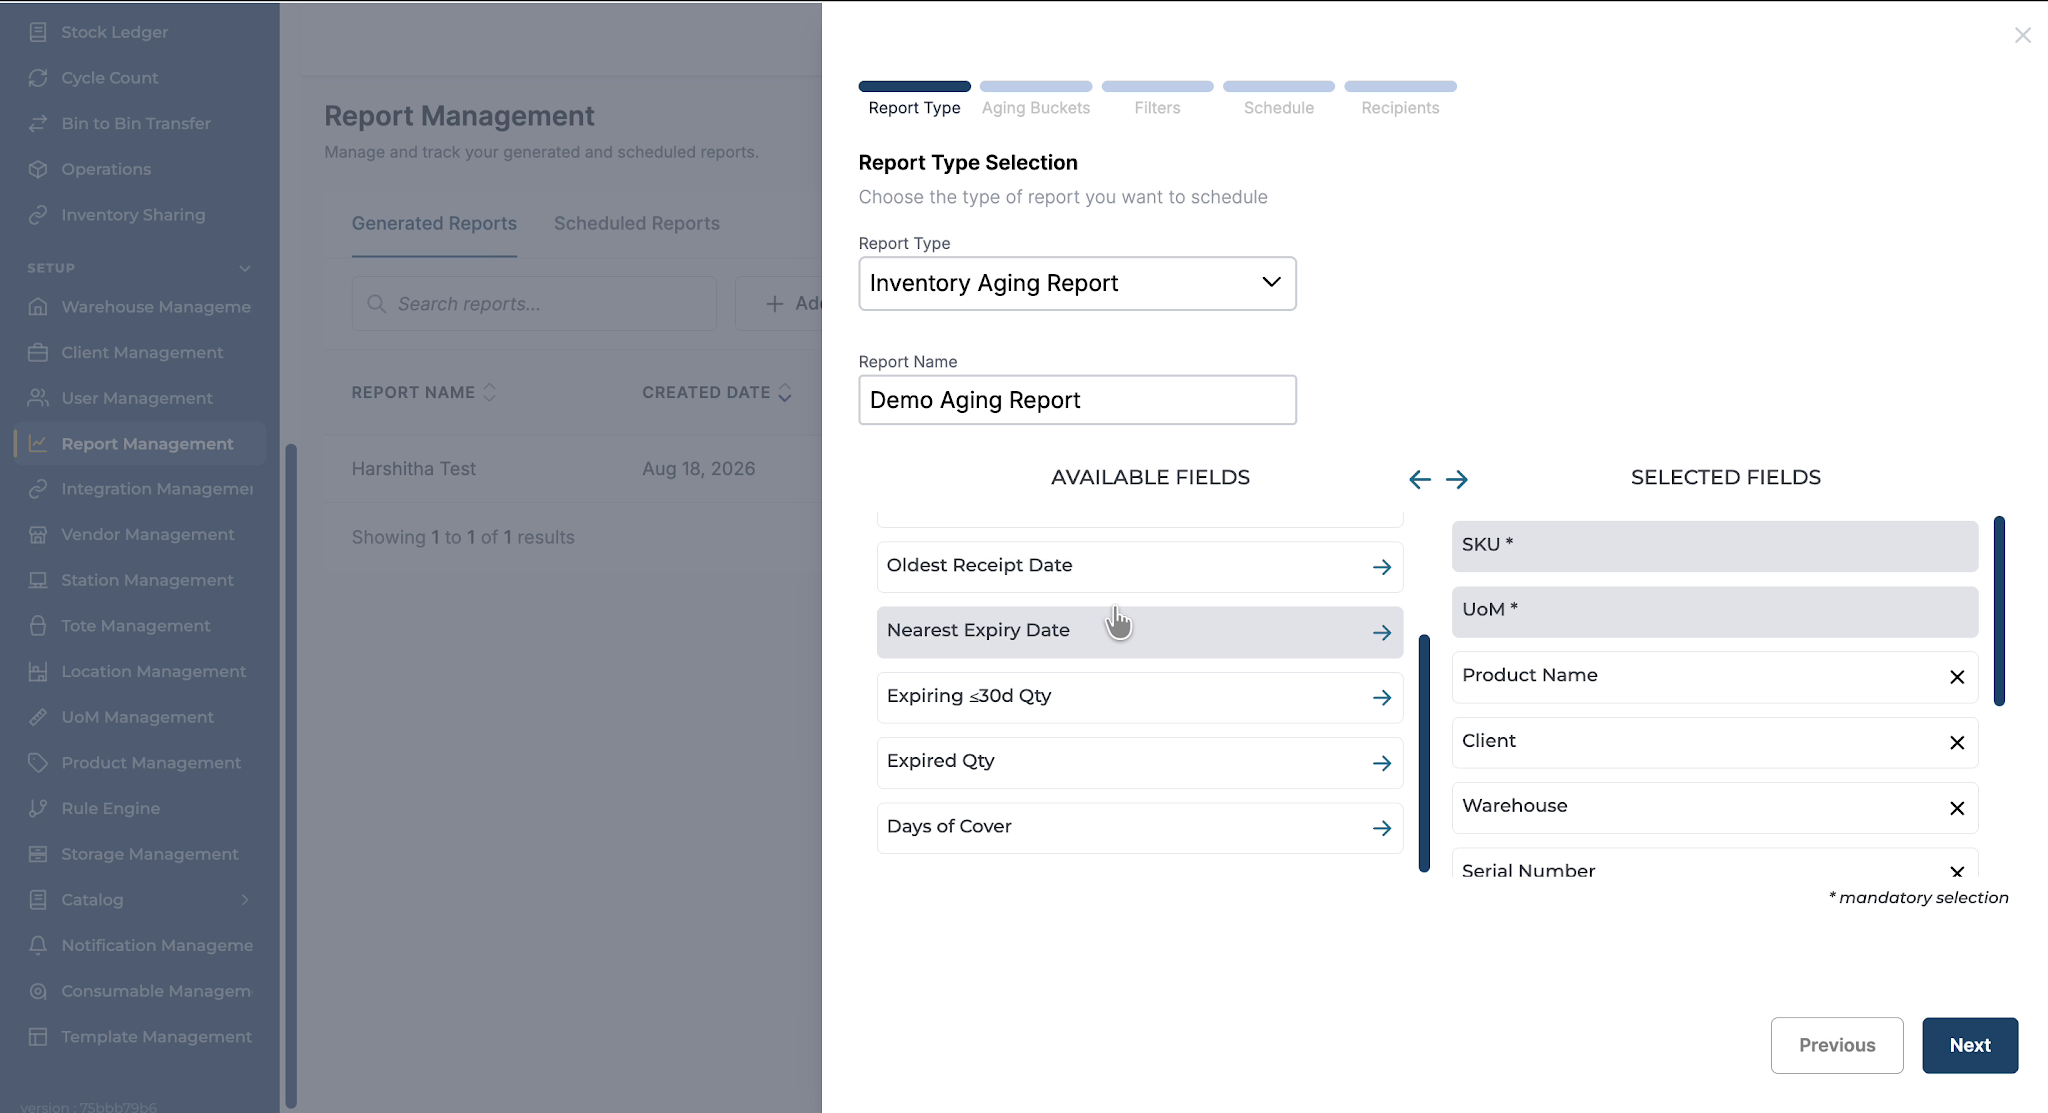
Include fields to analyze aging and expiry details, such as:
-
Oldest Received Date in each aging bucket, to see how long items have been in stock.
-
Nearest Expiry Date in each aging bucket.
-
Quantity Expiring Within 30 Days in that bucket.
-
Any Expired Quantity you want to monitor.
Include Days of Cover to understand how long current inventory will last.
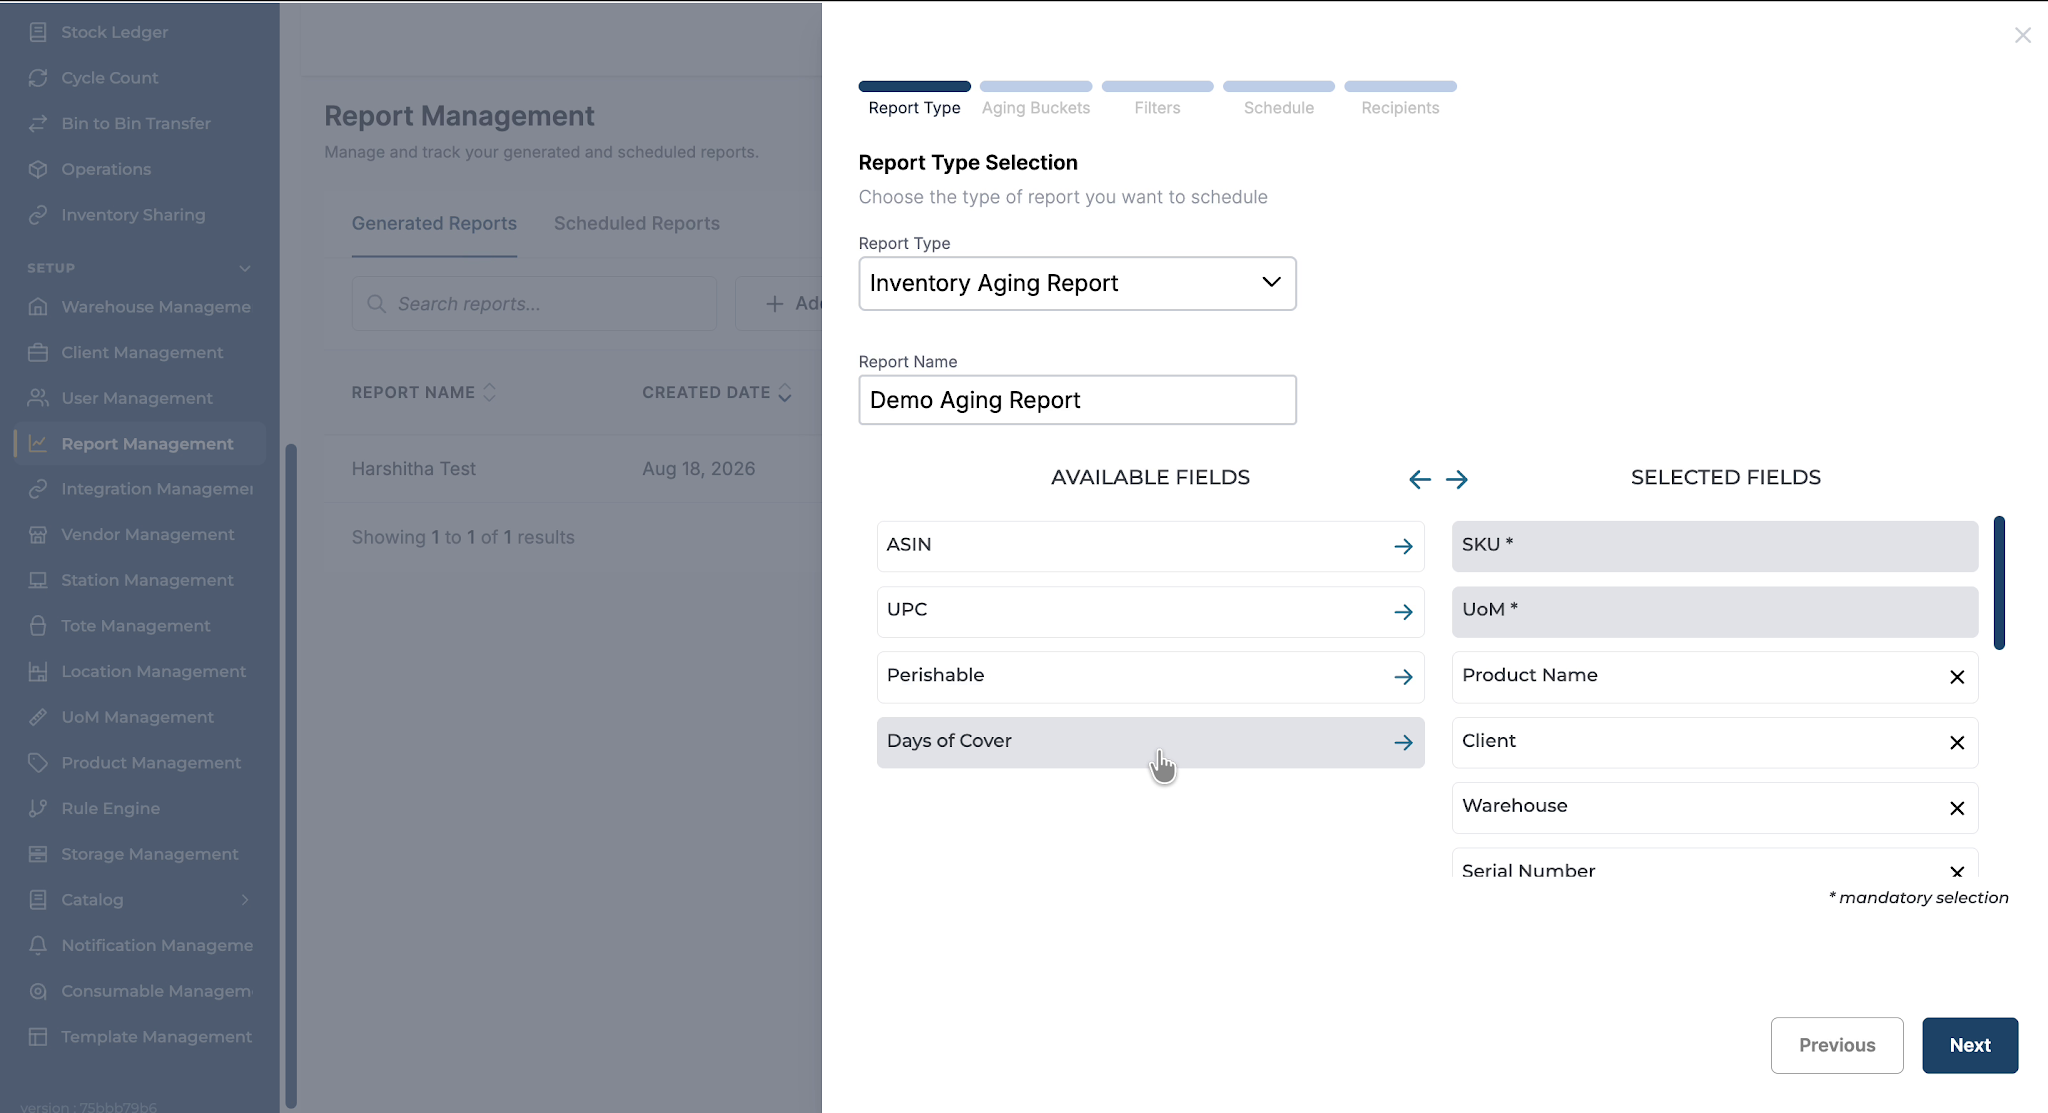
Days of Cover is calculated using recent outbound demand. For example:
-
If in the last month a SKU had outbound demand of 600 units, daily demand is 600 ÷ 30 = 20.
-
If the aging bucket currently has 200 units, Days of Cover is 200 ÷ 20 = 10 days.
Step 6: Define Aging Buckets and Templates
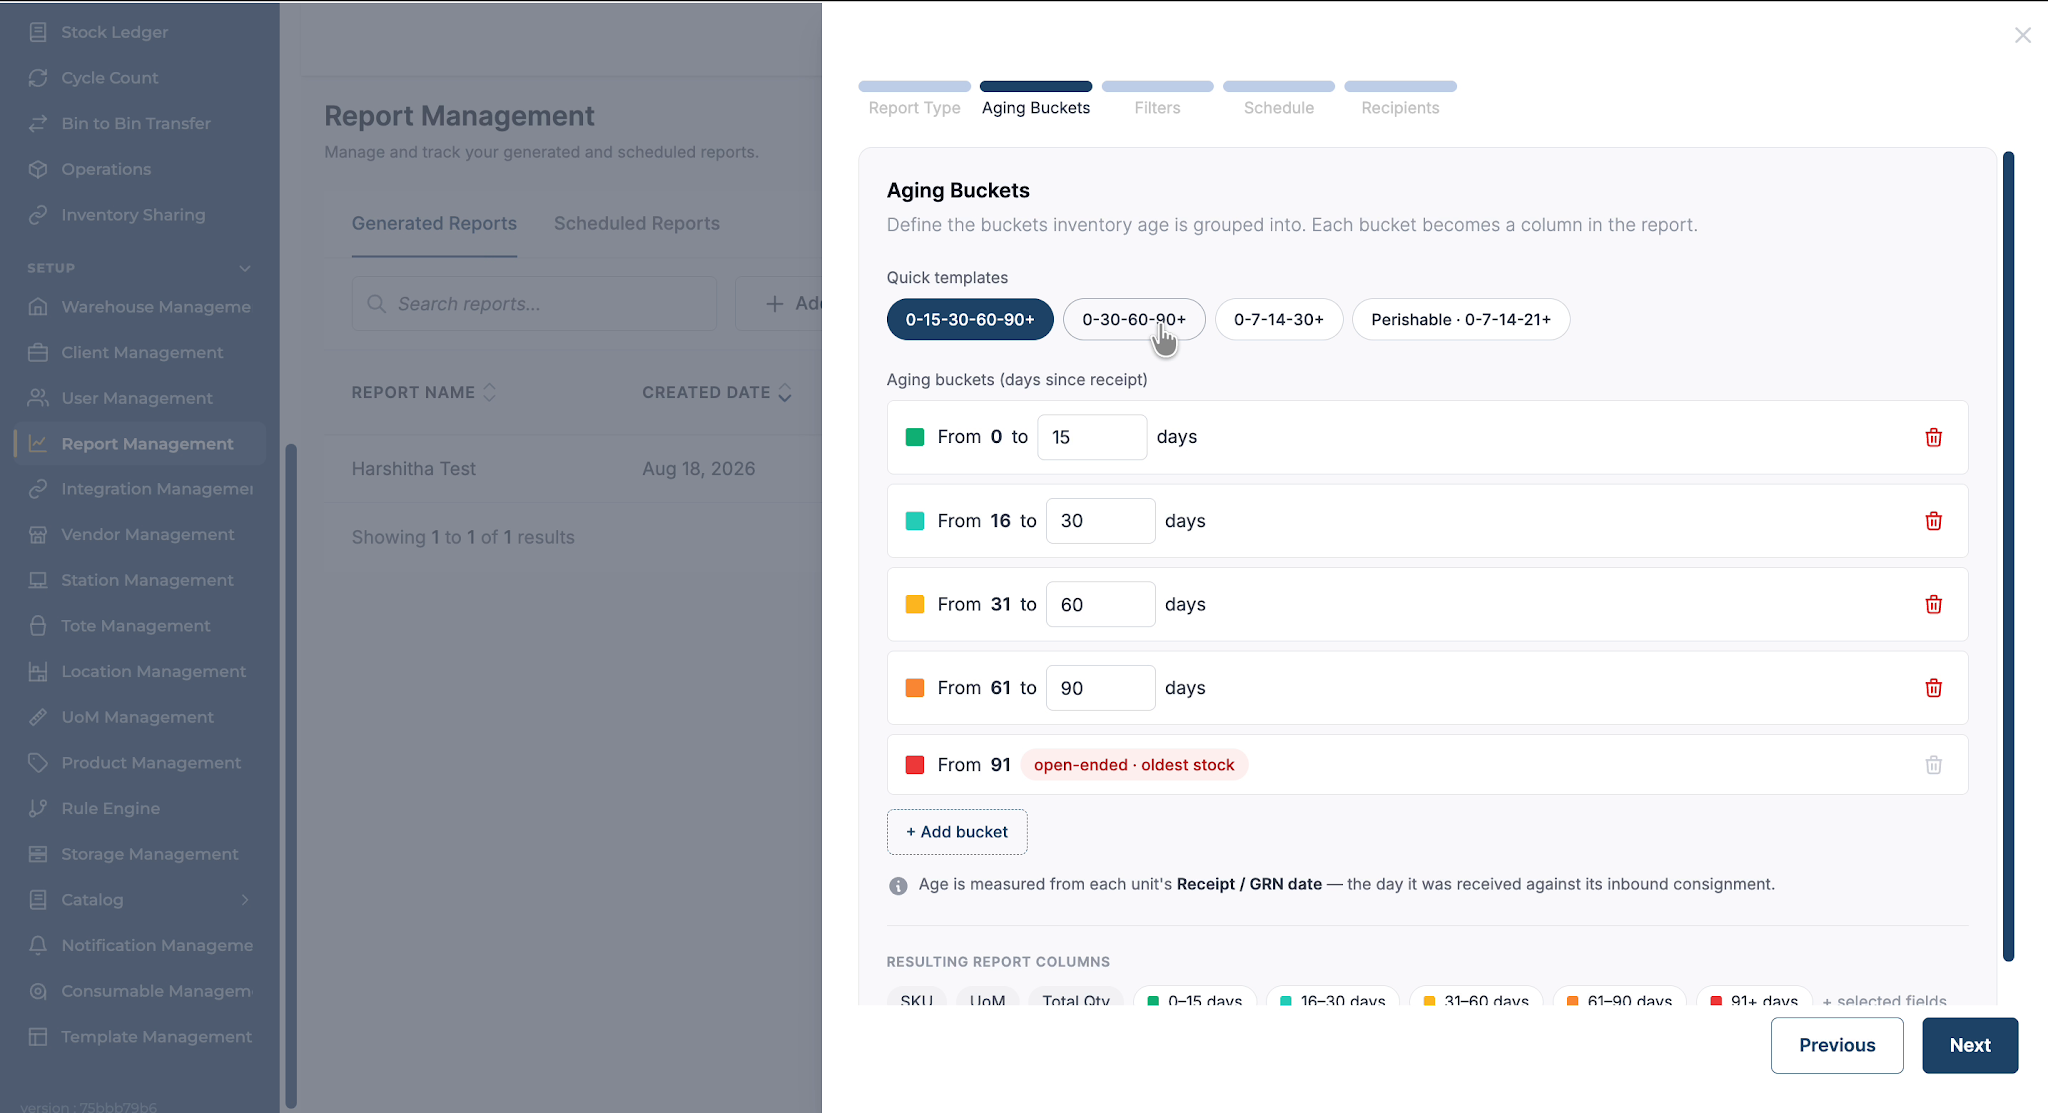
Choose or configure your Aging Buckets.
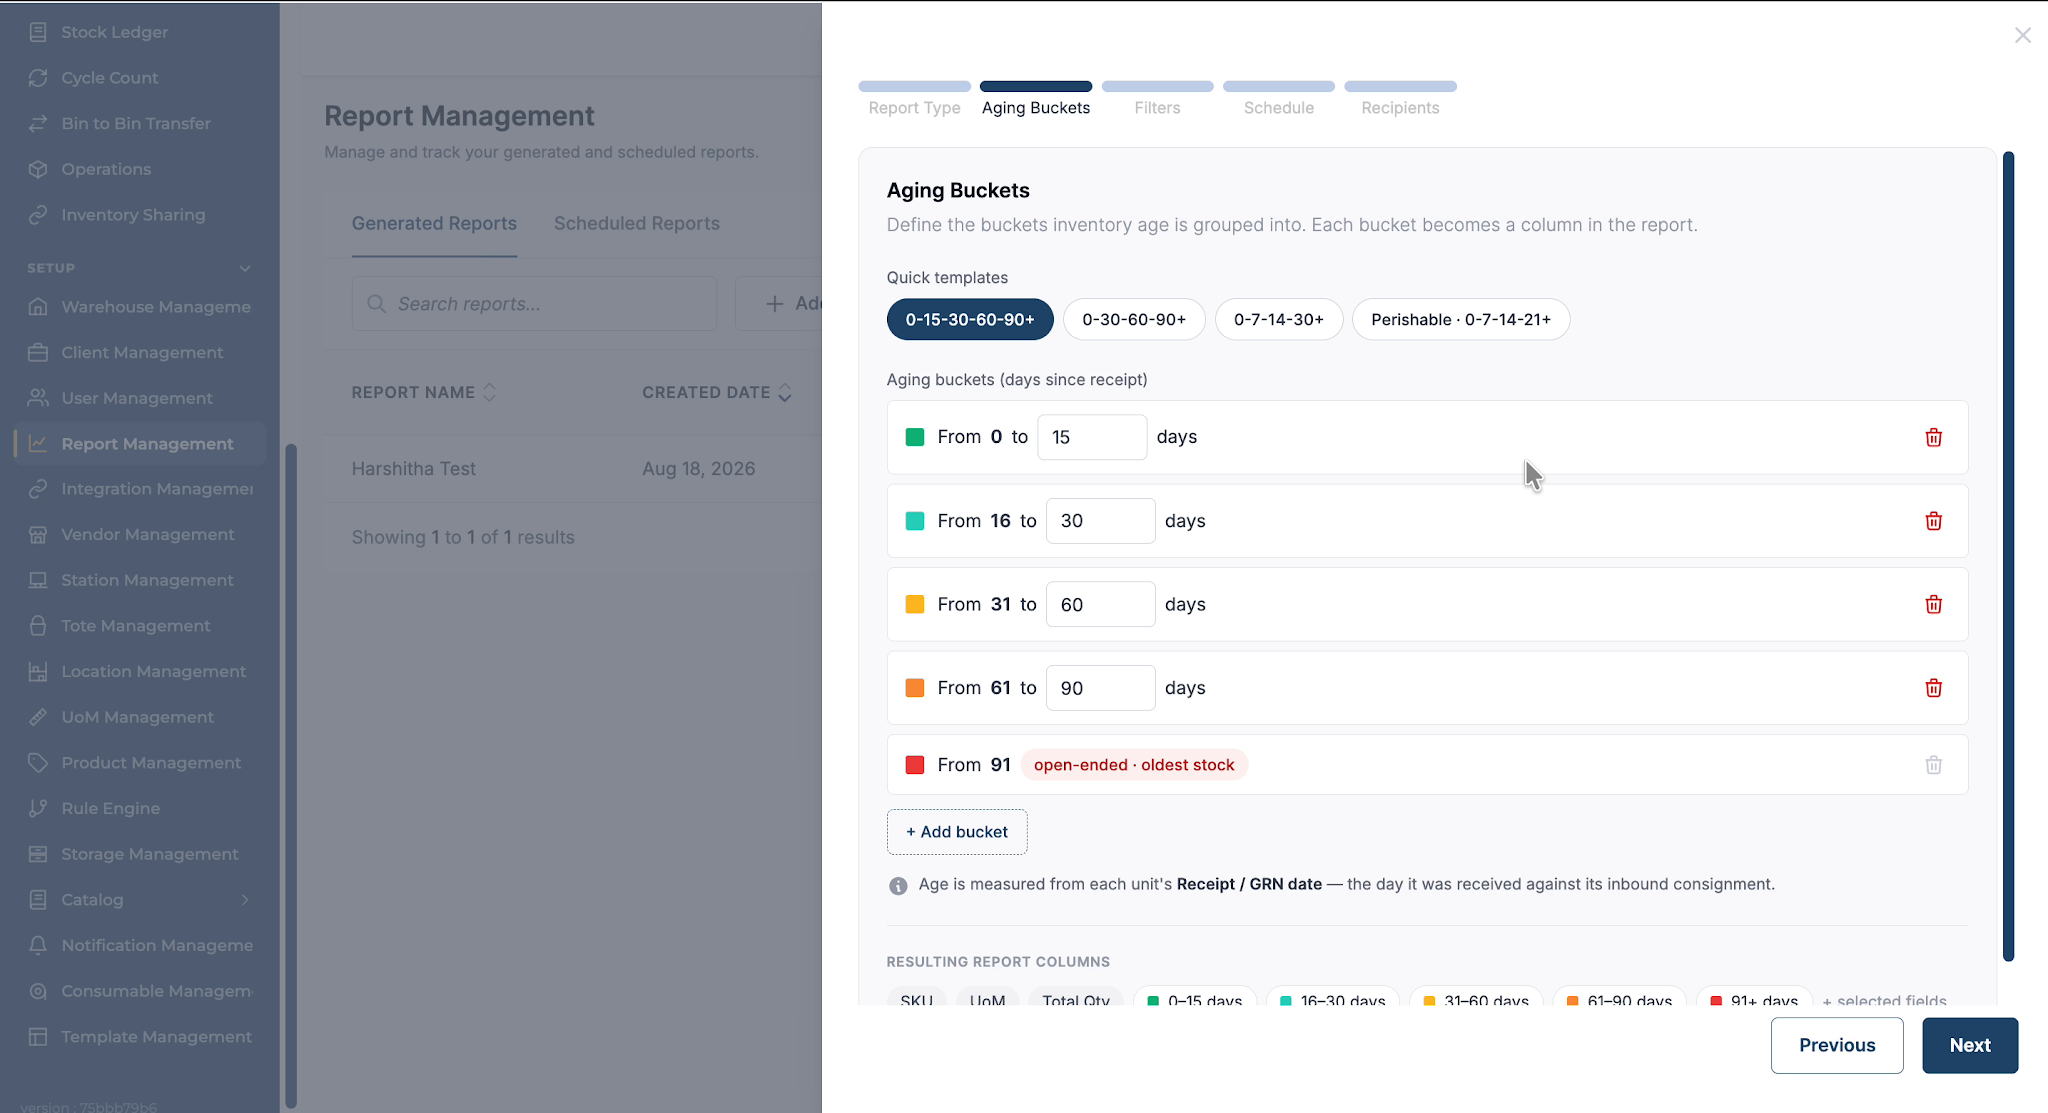
You can:
-
Select from predefined aging groups and quick templates.
-
Modify these or create your own by adjusting the ranges.
When configuring ranges:
-
Ensure buckets do not overlap.
-
The final bucket open‑ended so it captures all remaining inventory.
Step 7: Apply Warehouse and Client Filters
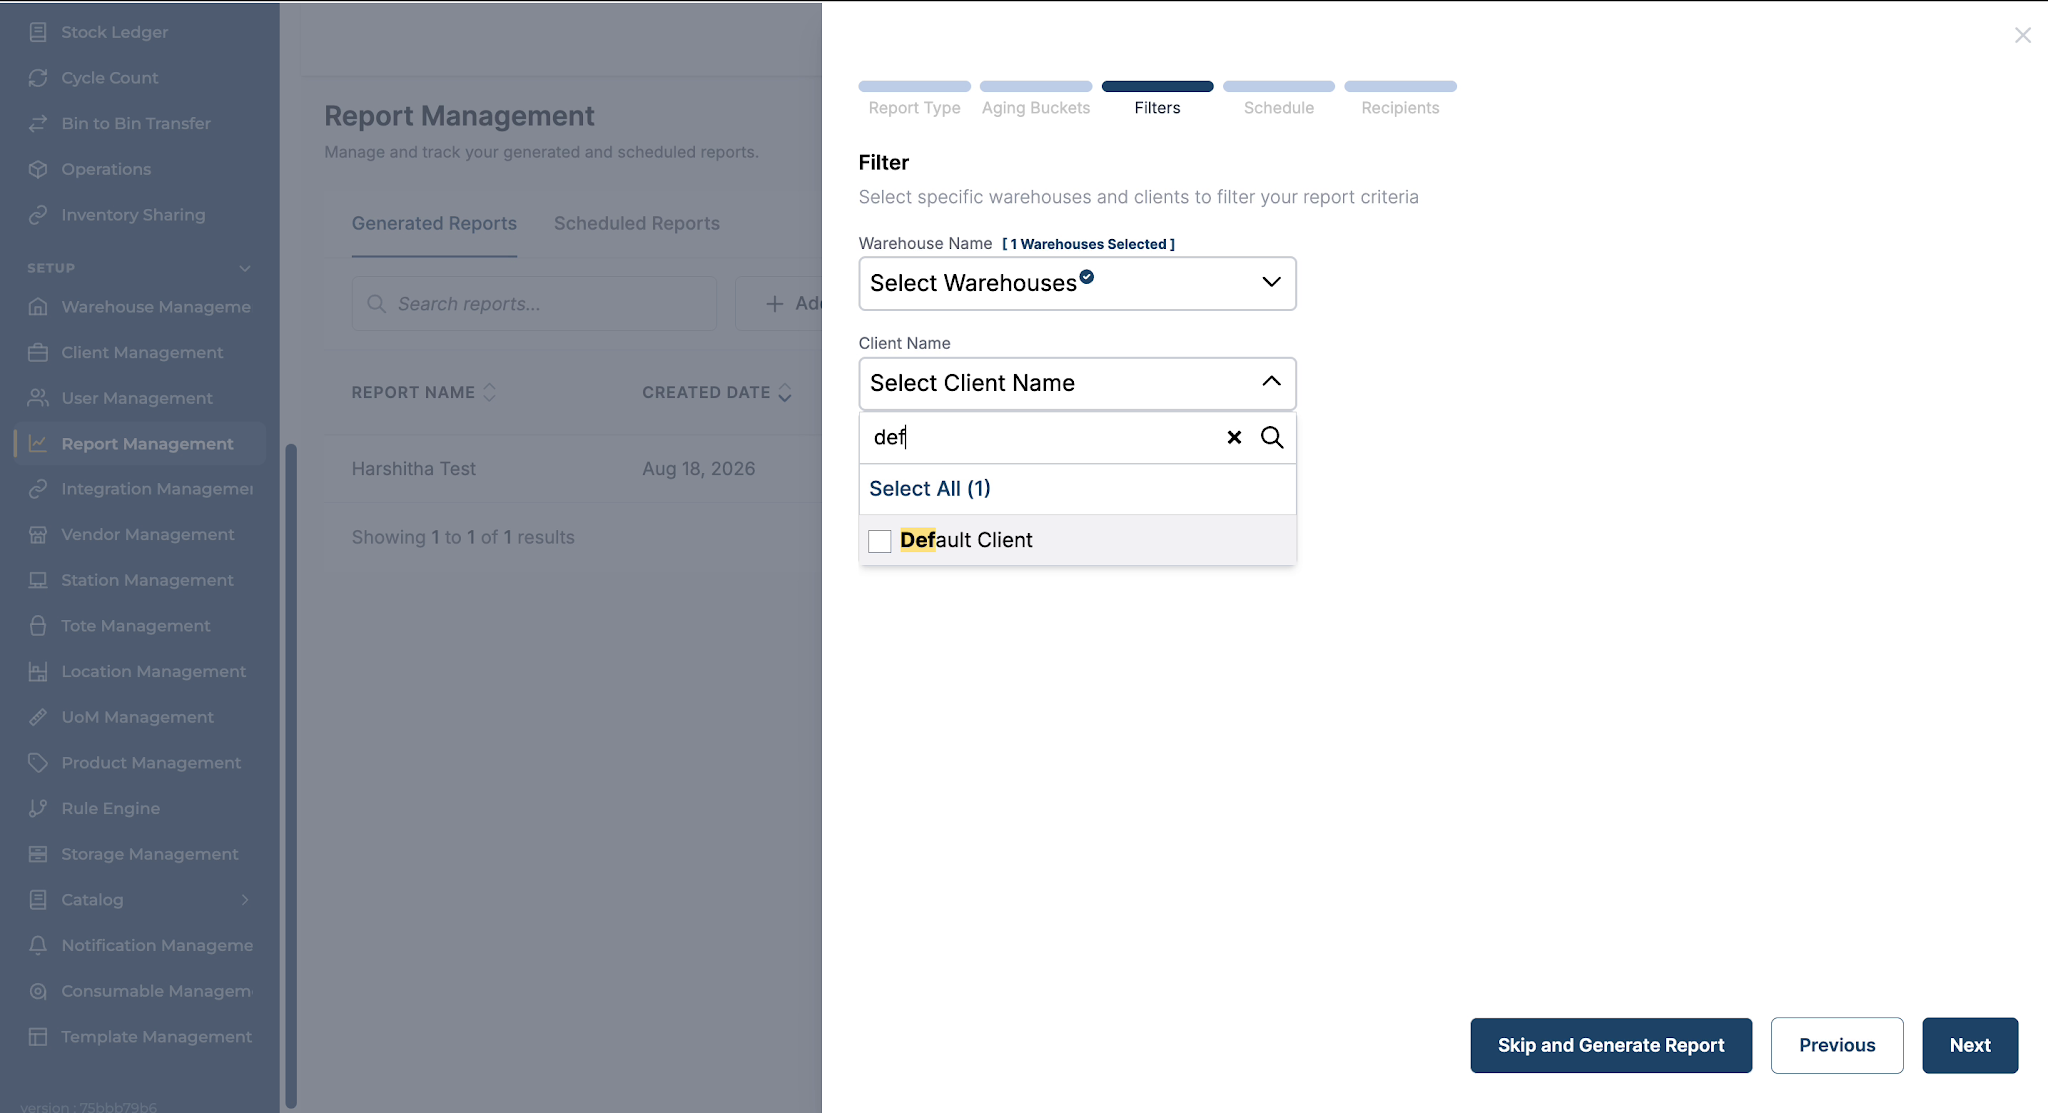
Apply filters as needed:
-
Warehouse filter for multi‑warehouse setups, to restrict the report to specific warehouses.
-
Client filter if you want to see inventory for a particular client only.
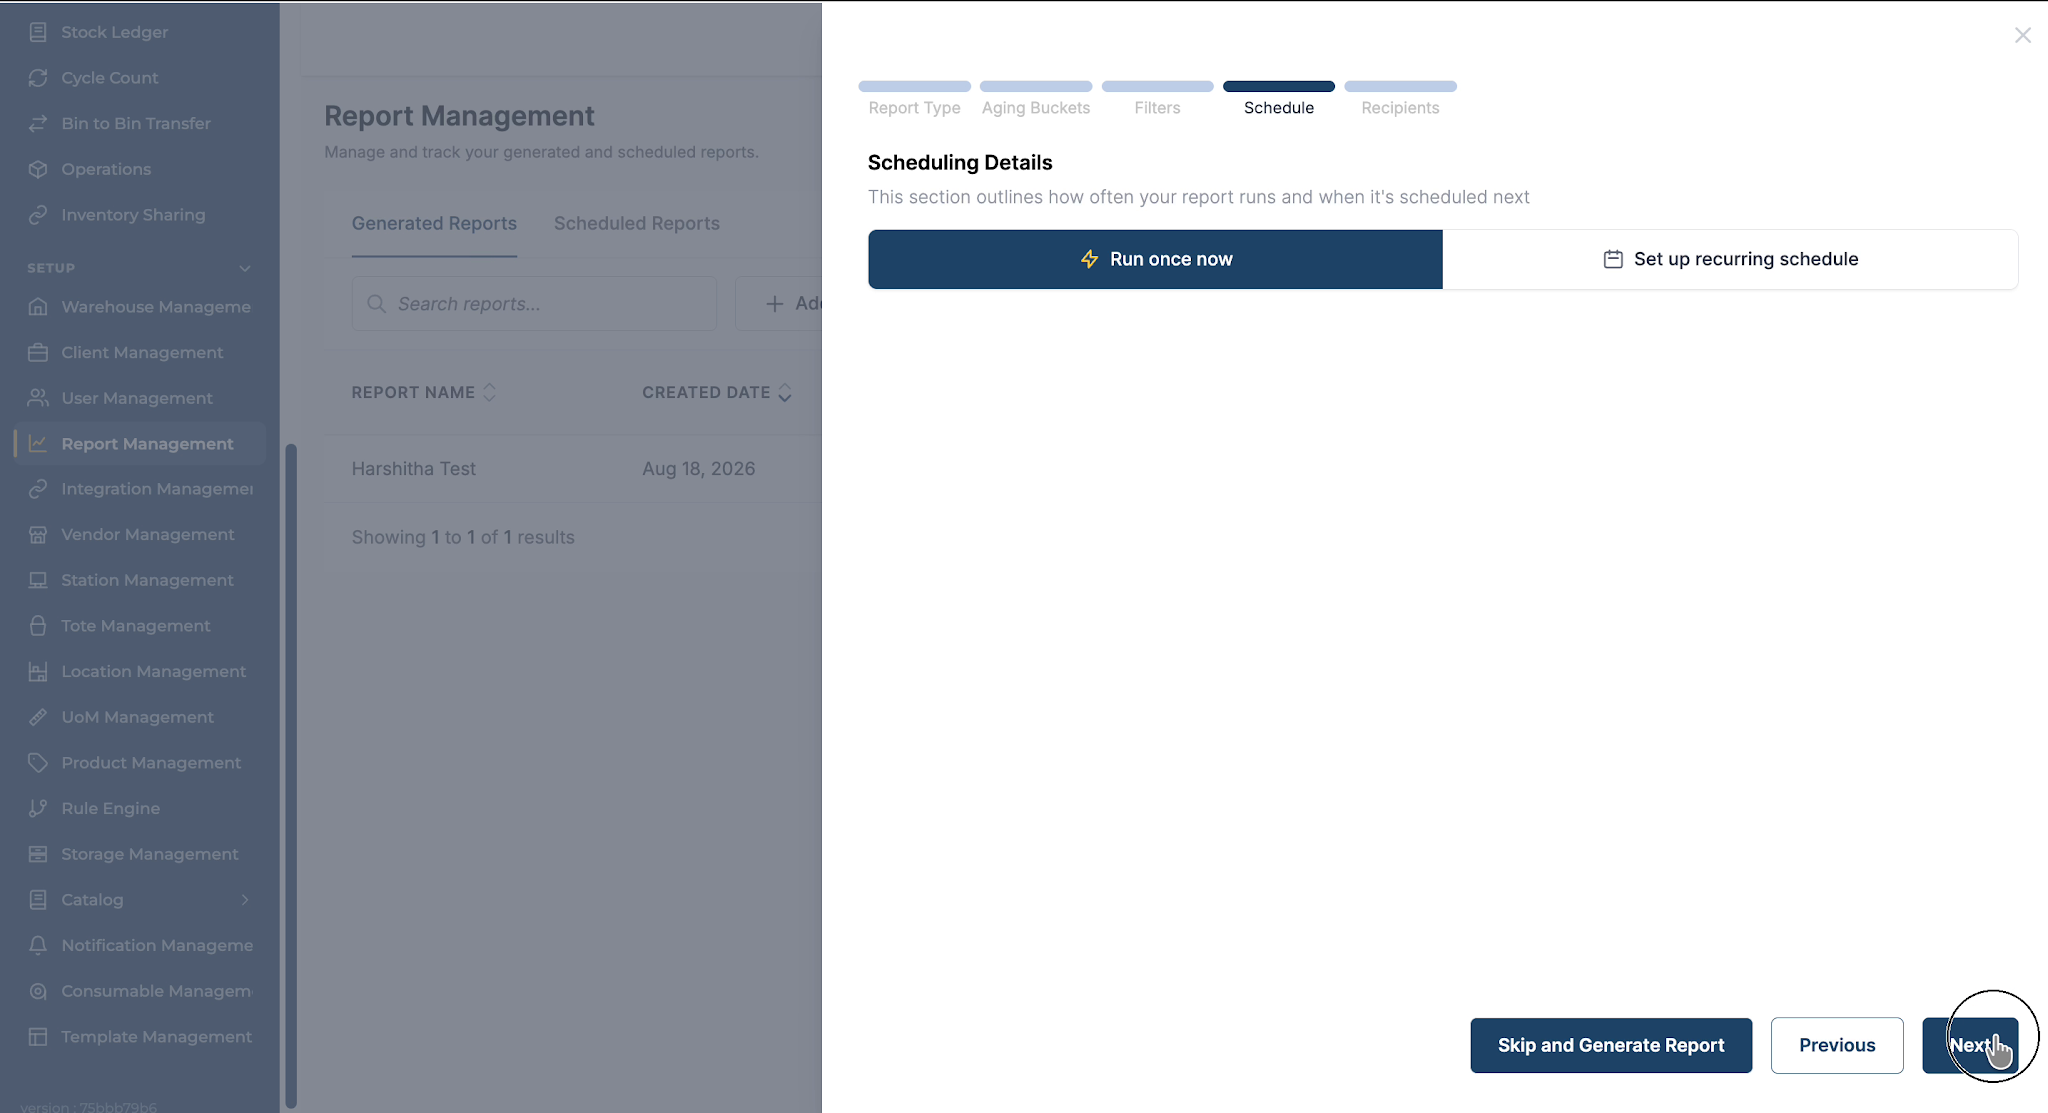
Decide whether to:
-
Run the report once, or
-
Set up a recurring schedule to generate the report at a specific frequency.
For this example, choose to run it once and click Next.
Step 8: Specify Recipients and Generate the Report
Enter the email addresses of the users who should receive the report.
When recipient details are complete, click Generate Report.
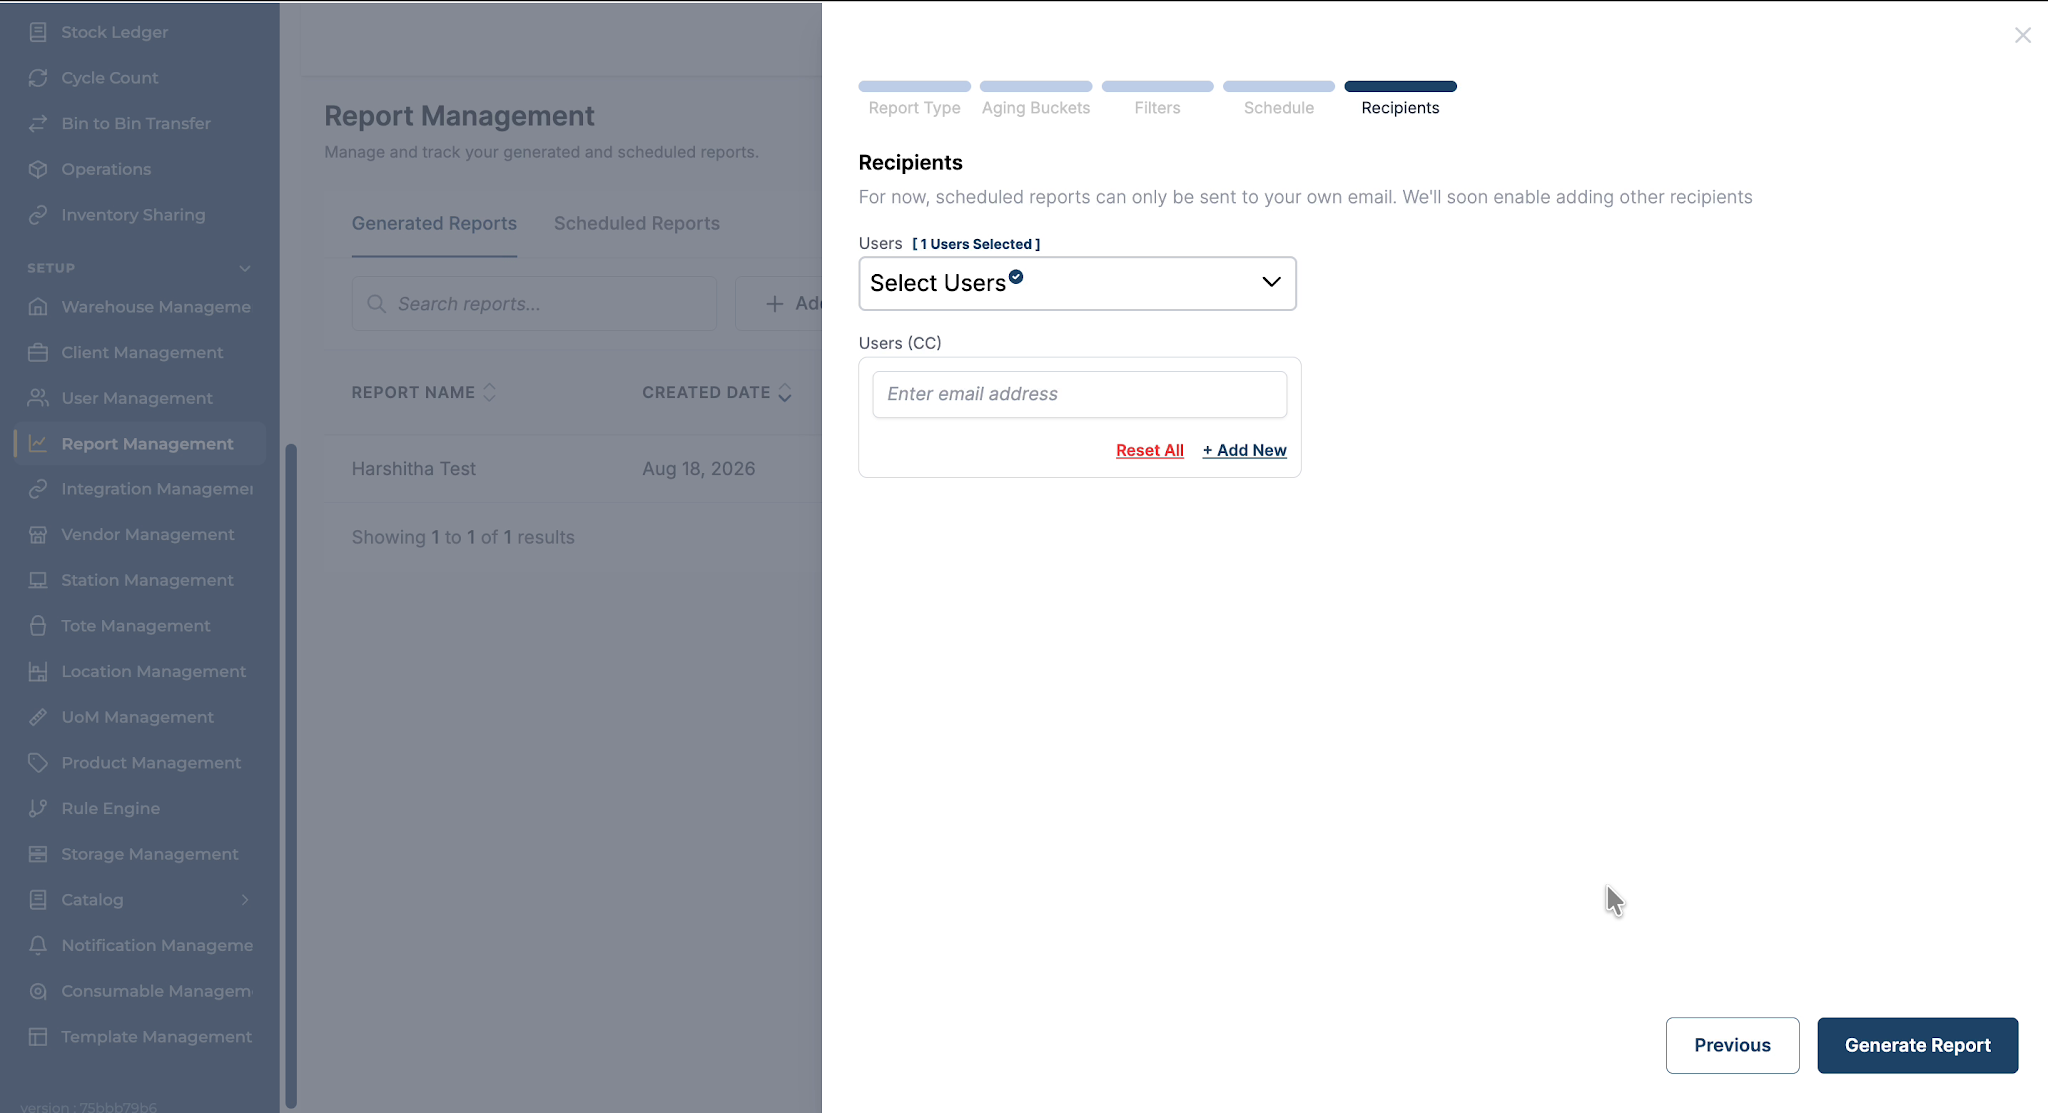
The request will be added to Report Management, where you can track its status. Once the status changes to Generated, open Actions and download the report file.
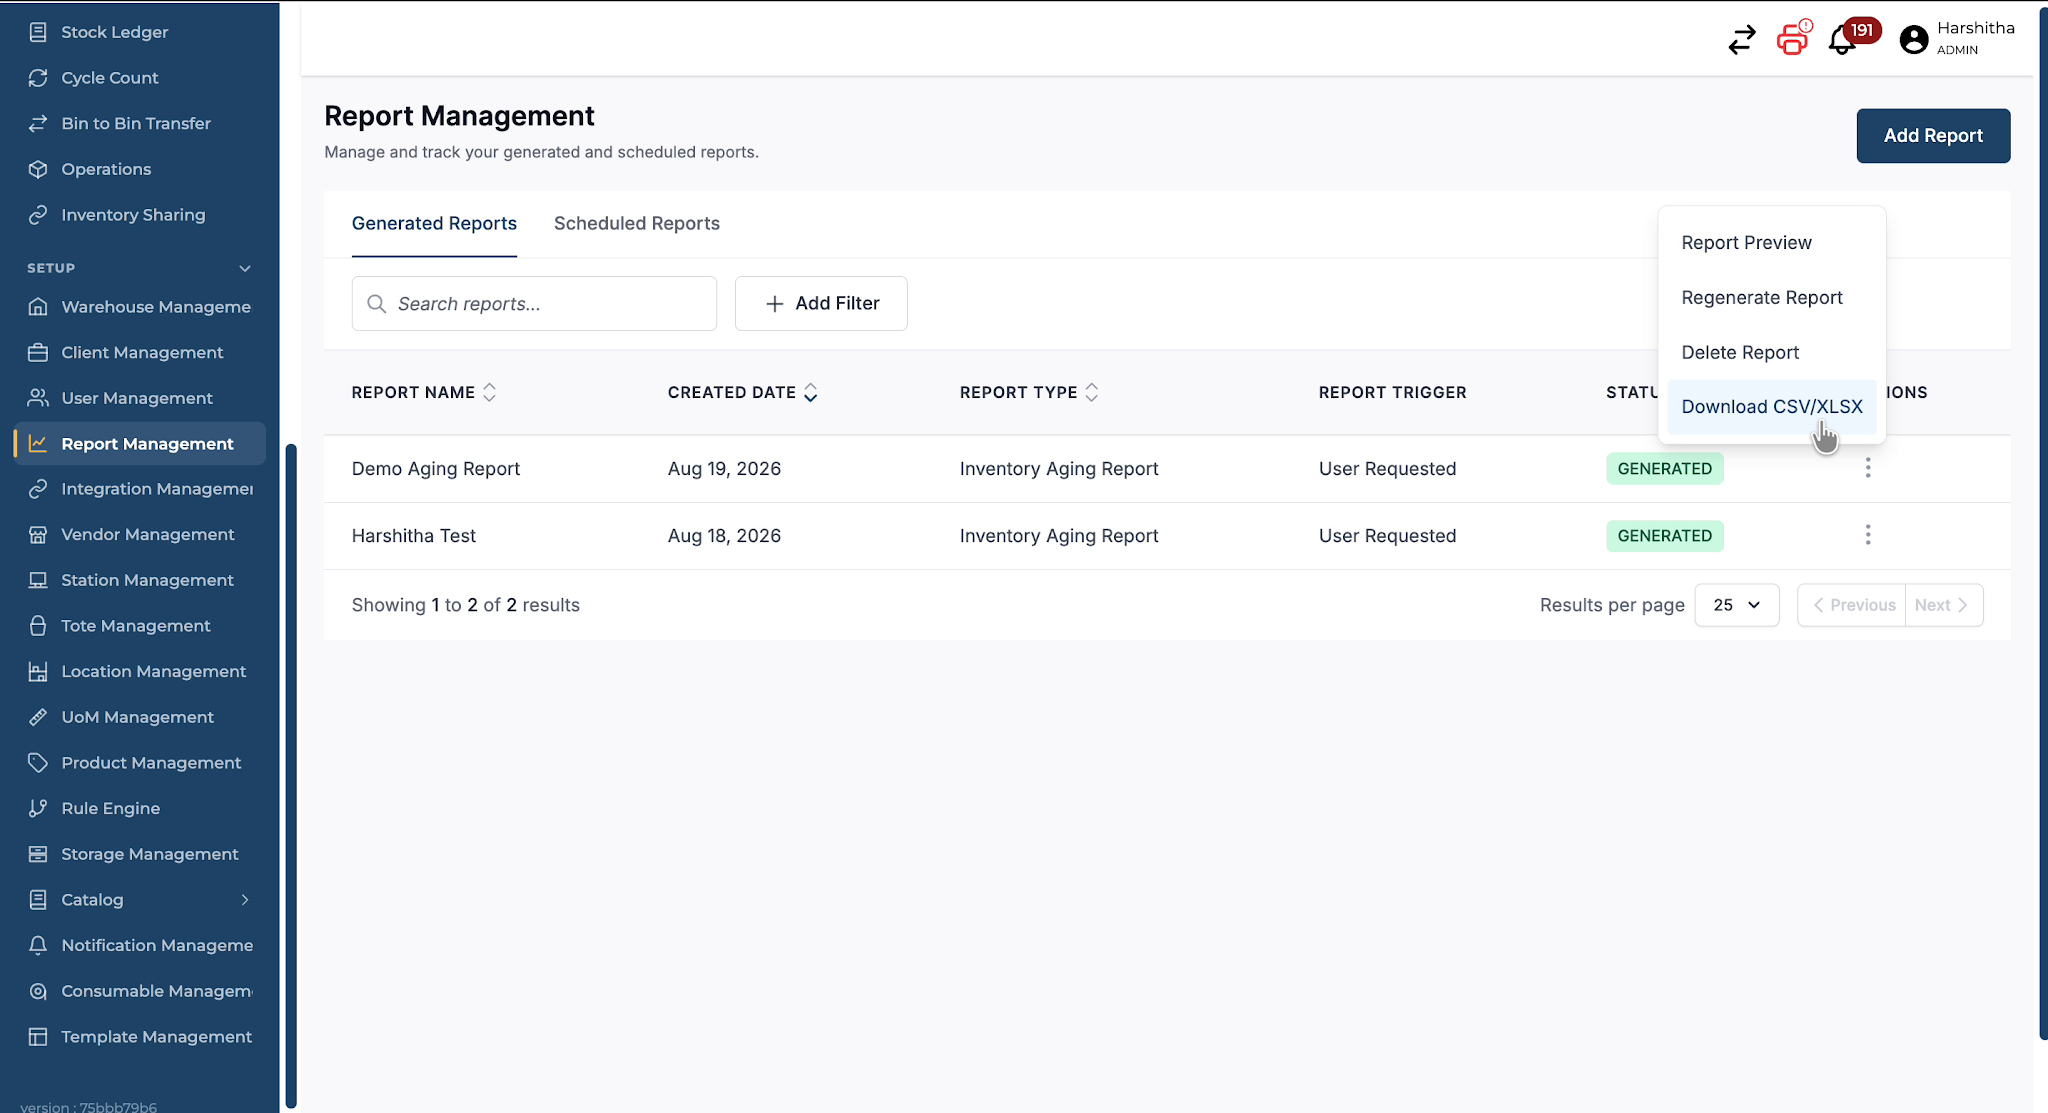
Step 9: Review the Downloaded Inventory Aging Report
Open the downloaded Inventory Aging Report to review the results.
The report distributes quantities according to your configured aging buckets.
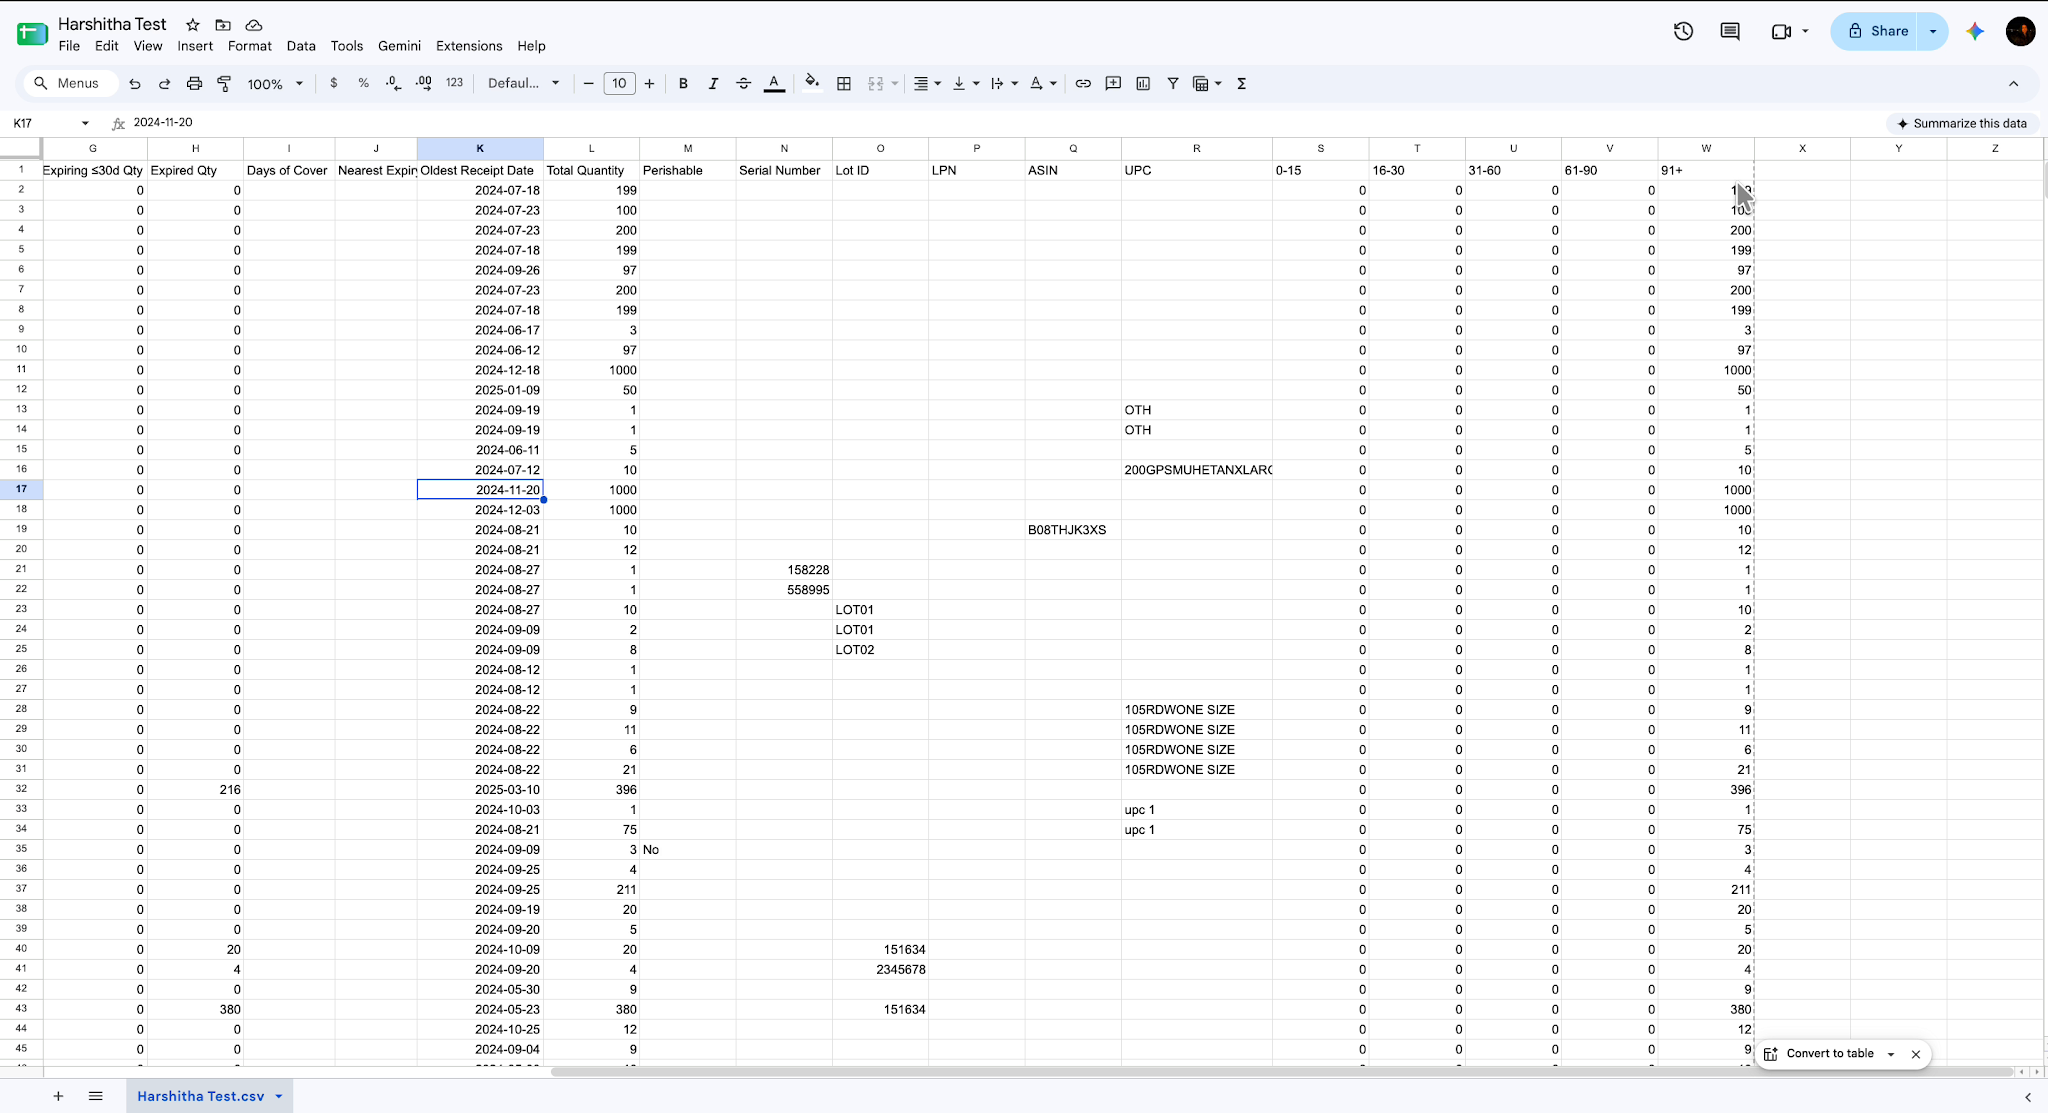
Important points when reviewing:
-
Only unallocated inventory (not reserved or allocated to orders) is included in the aging quantities and buckets.
-
Inventory already allocated to orders does not contribute to aging bucket quantities.
-
Days aged is calculated based on the received date of each item.
This report helps you:
-
Identify slow‑moving or long‑held inventory.
-
Prioritize older stock for outbound orders.
-
Review expiry risks and support better inventory planning and decision‑making.