
This guide will enable you to set up your thermal printer to work with the Hopstack platform with macOS.
As a customer, setting up your thermal printer with Hopstack is crucial to enable mission-critical features such as:
-
Printing shipping labels
-
Printing box labels
-
Printing location barcodes
This guide consists of three main steps:
-
Installing and configuring the printer with your Mac
-
Installing and configuring JSPrintManager
-
Setting up and testing the printing workflow from the Hopstack platform
Step 1: Installing and configuring the printer with your Mac
You can add Zebra printers to your Mac via the CUPS Web Interface. As the CUPS Web Interface may be disabled by default on your Mac, you will need to enable it in order to have your Zebra printers appear on the network.
To do this, open this link http://localhost:631/printers/ in a web browser on your Mac.
If the message Web Interface is Disabled is shown, this is an indication that CUPS is disabled on your Mac.
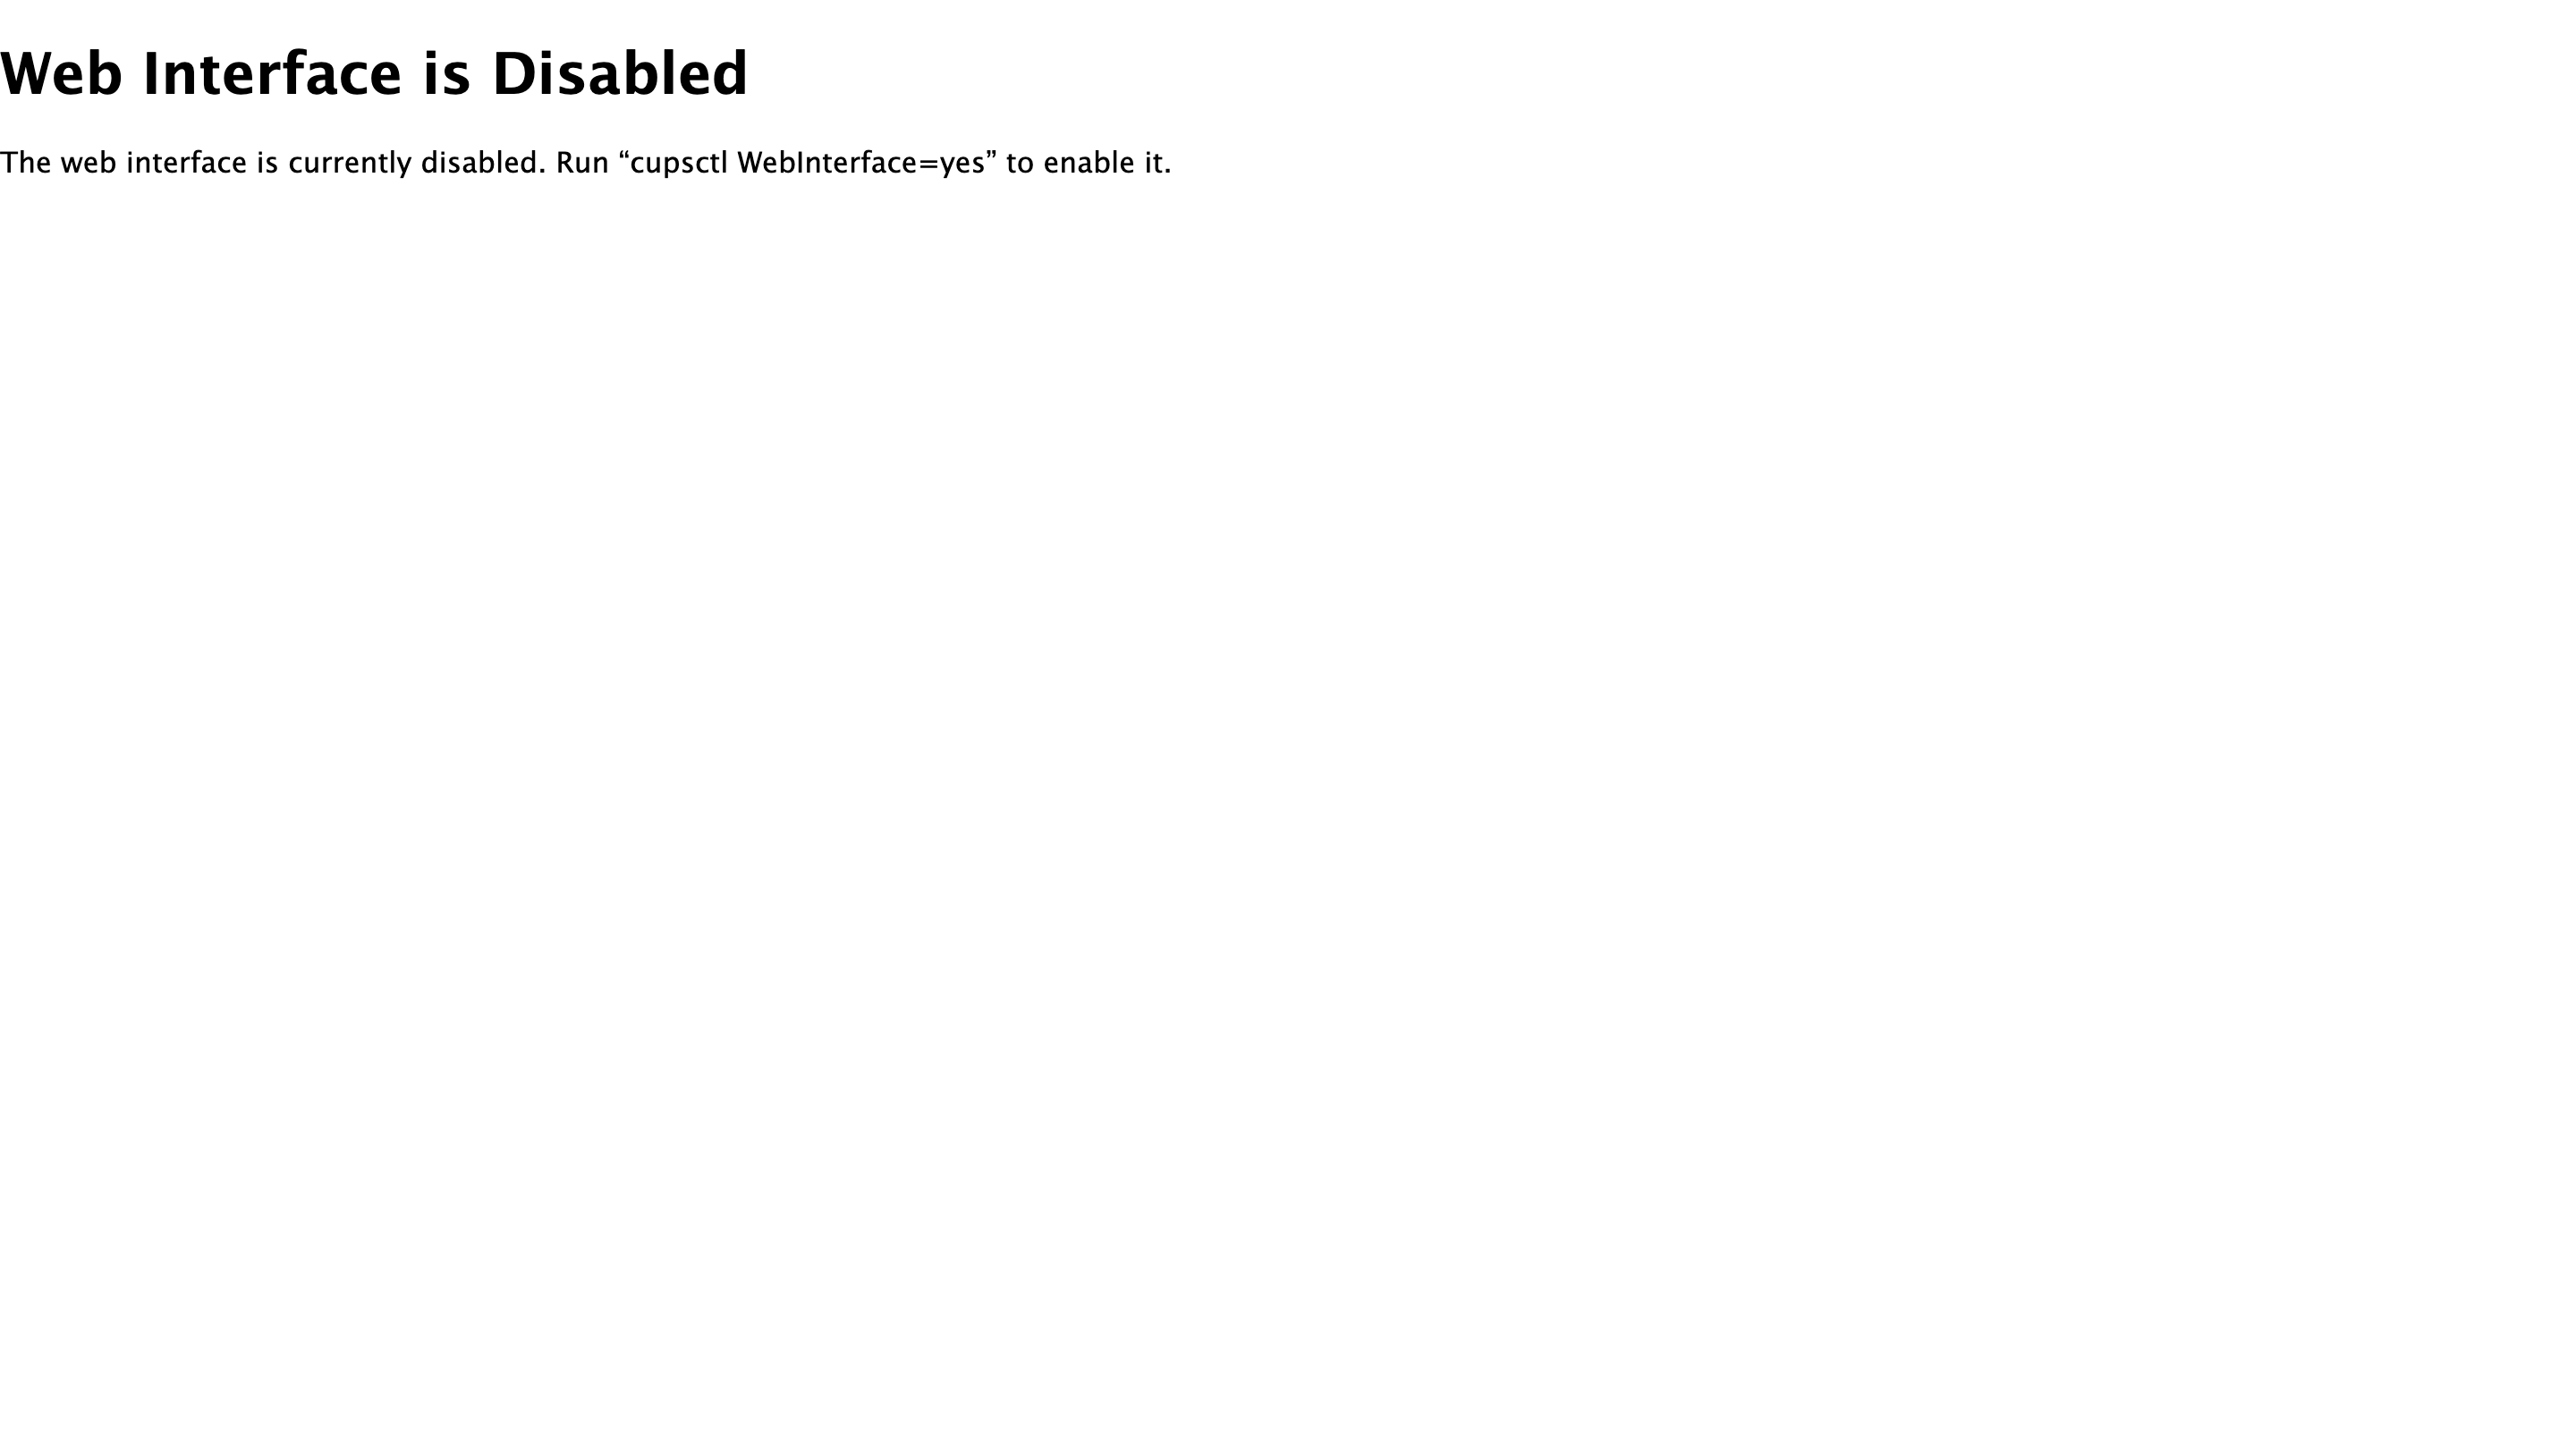
Follow the steps in the next section to enable CUPS: Enable the CUPS Web Interface.
If your CUPS Web Interface is already enabled, proceed to the subsequent section: Add a Wi-Fi/Network Printer. If you want to add a Zebra printer that is connected via USB, read this article instead: Install CUPS Driver for Zebra Printer in Mac OS
Enable the CUPS Web Interface
-
Select and copy the
cupsctl WebInterface=yescommand from the page.
-
Next, open a Terminal window on your Mac. Here is help doc for the same.
-
In the Terminal app, paste the command
cupsctl WebInterface=yesand press Enter.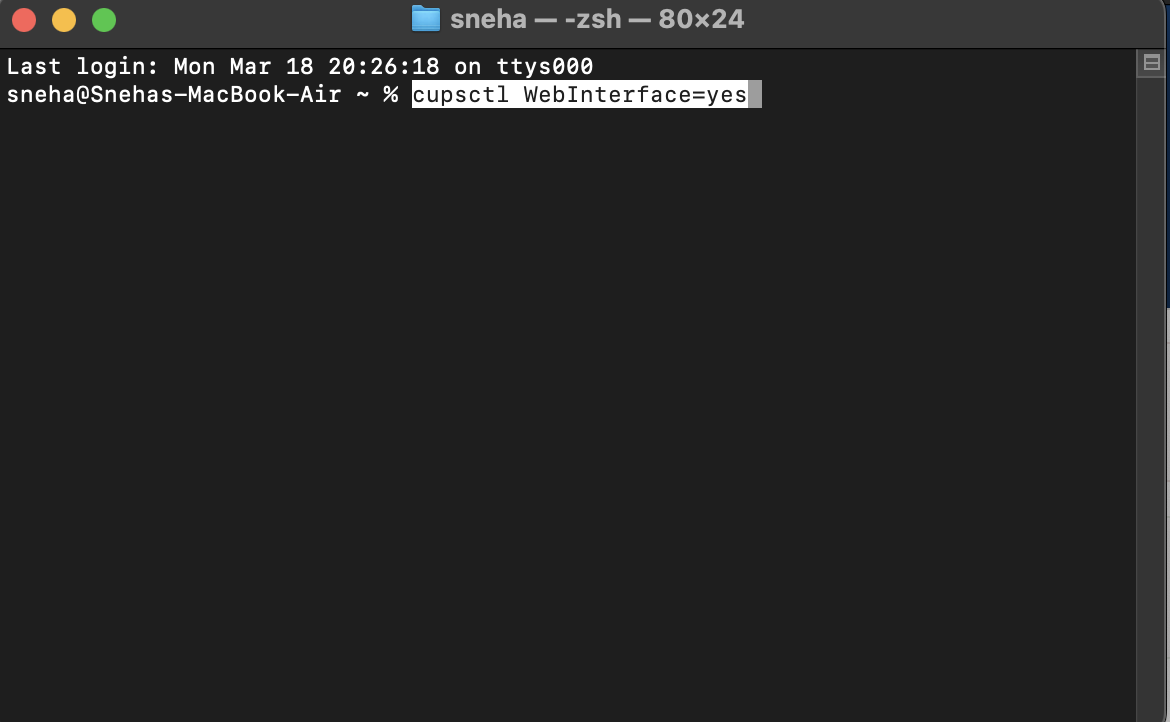
-
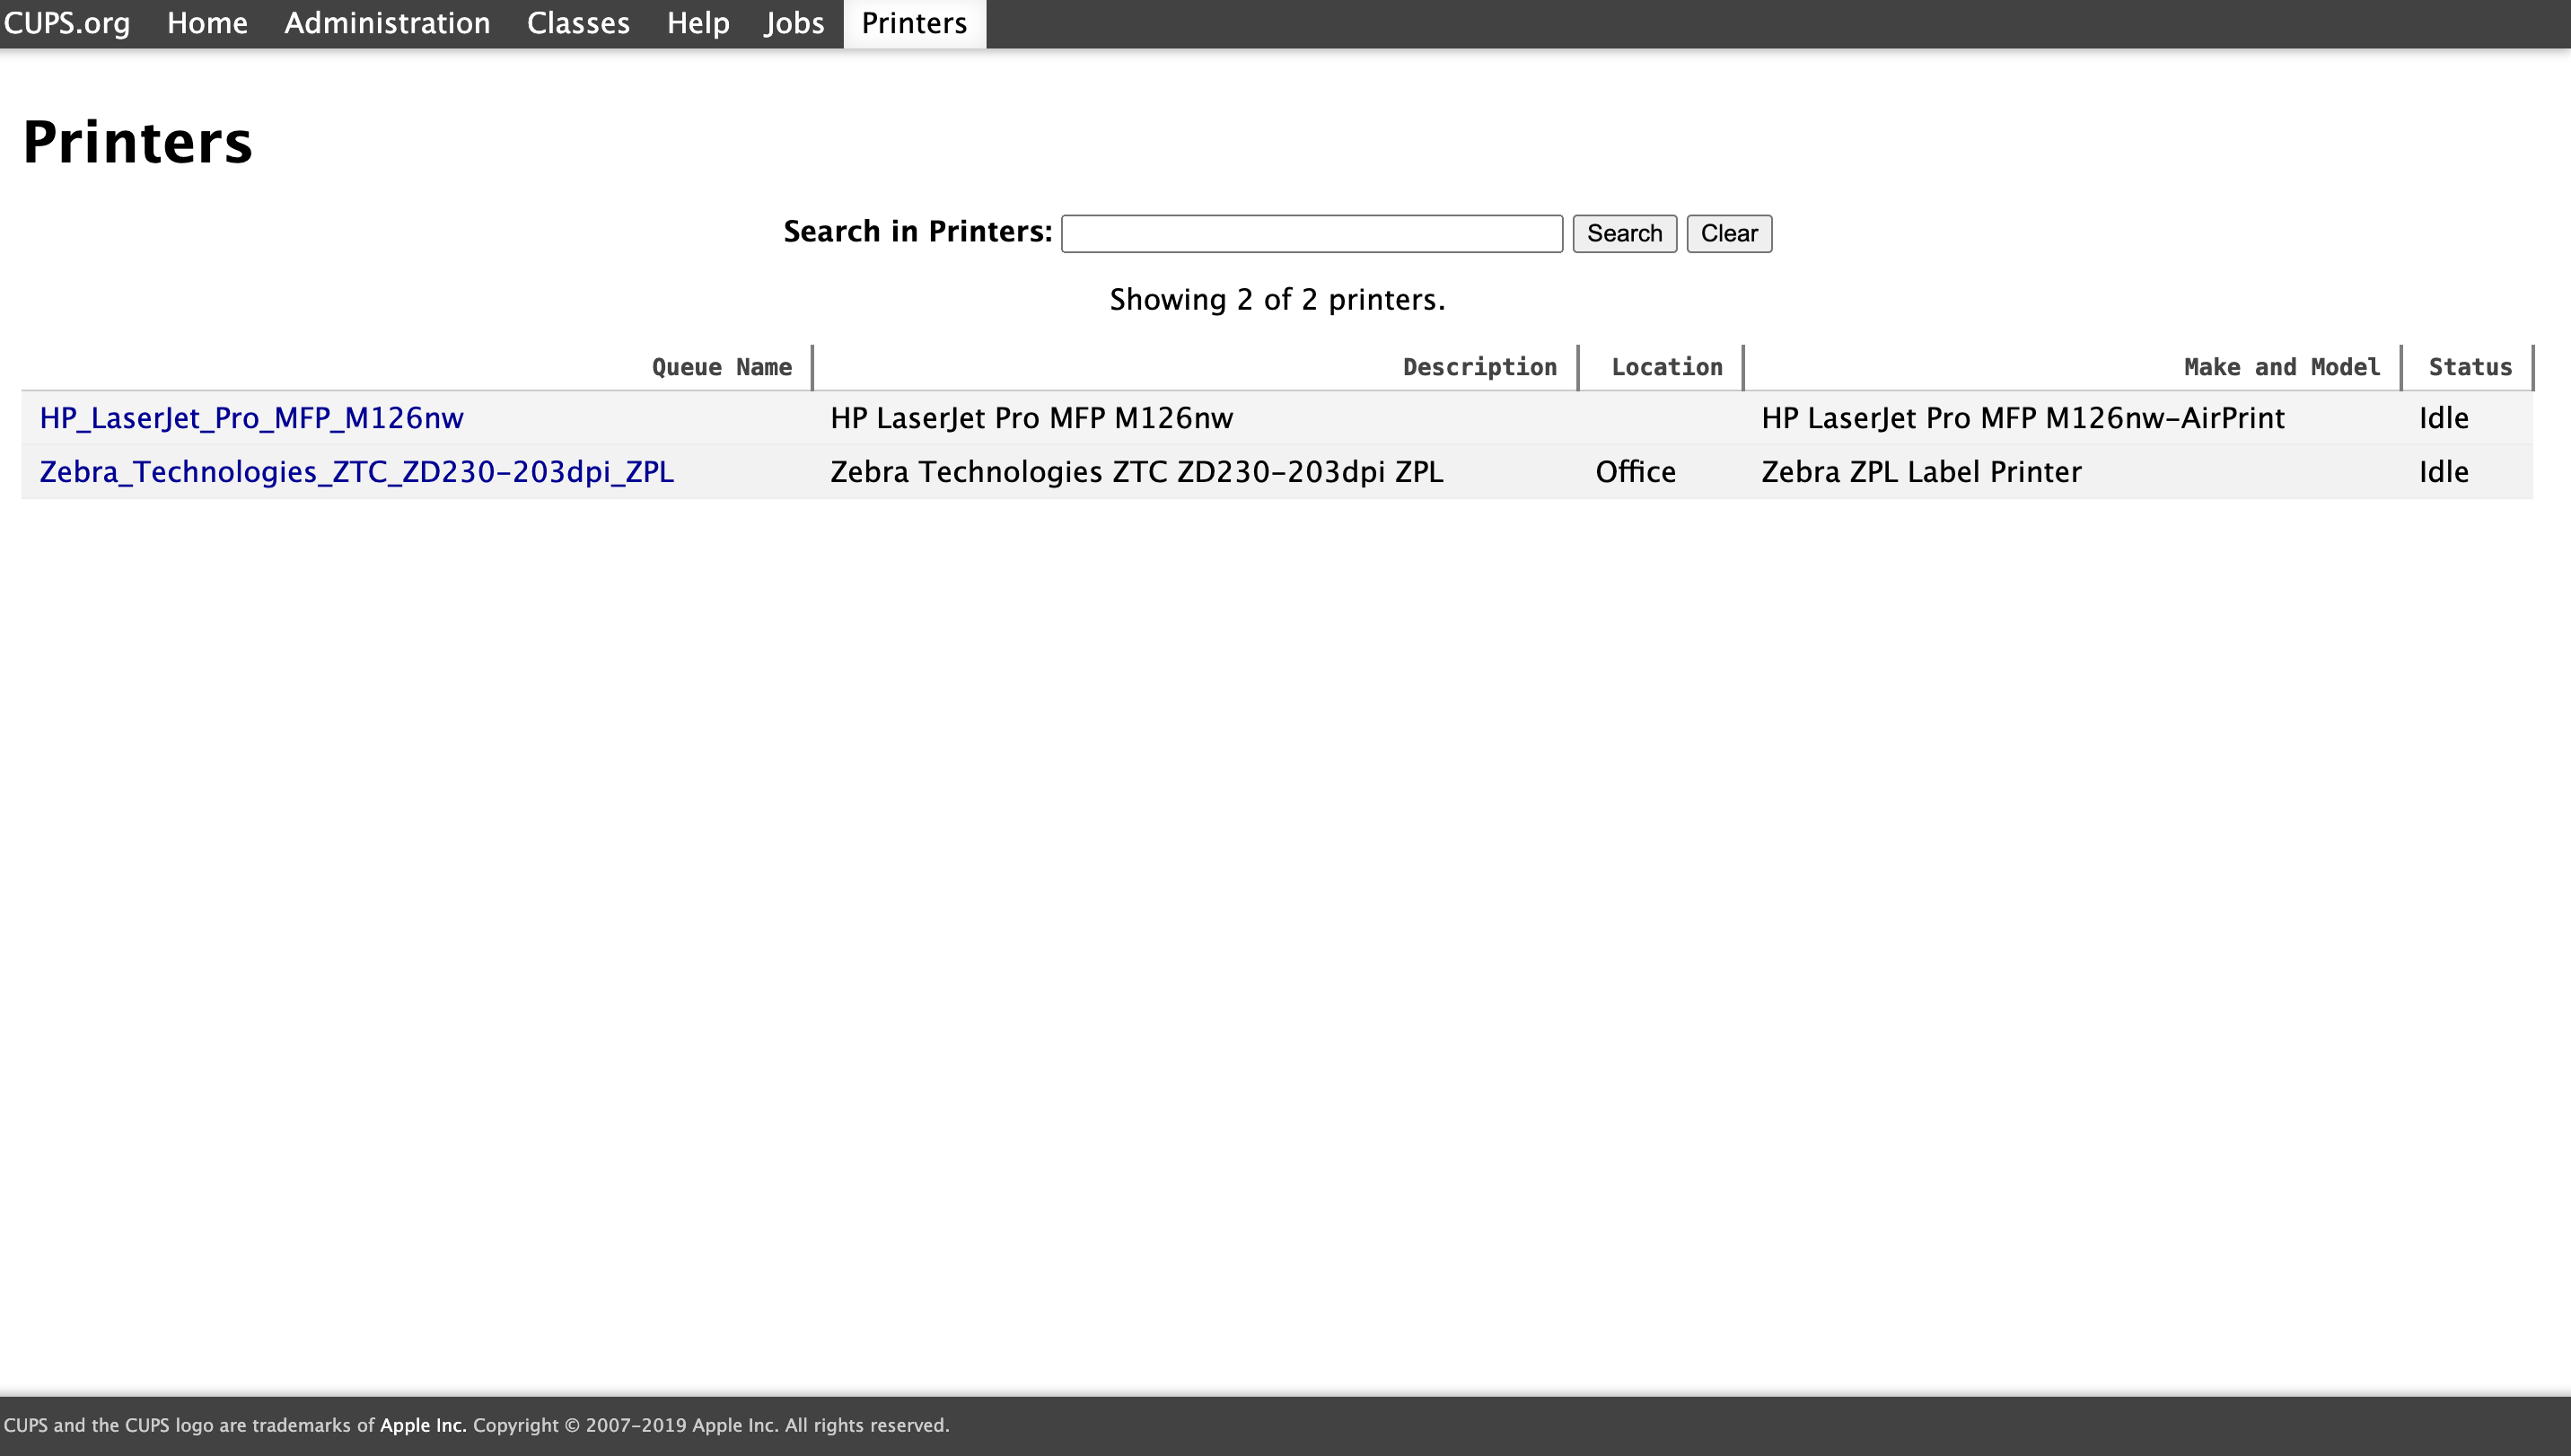
Now, once you go to http://localhost:631/printers/ you will see the CUPS Web Interface enabled and a list of your installed printers.
Add a Wired Zebra Printer
Before you proceed, ensure that your Mac and printer are already connected using the provided cable.
-
Open up a web browser on your Mac and go to http://localhost:631/.
-
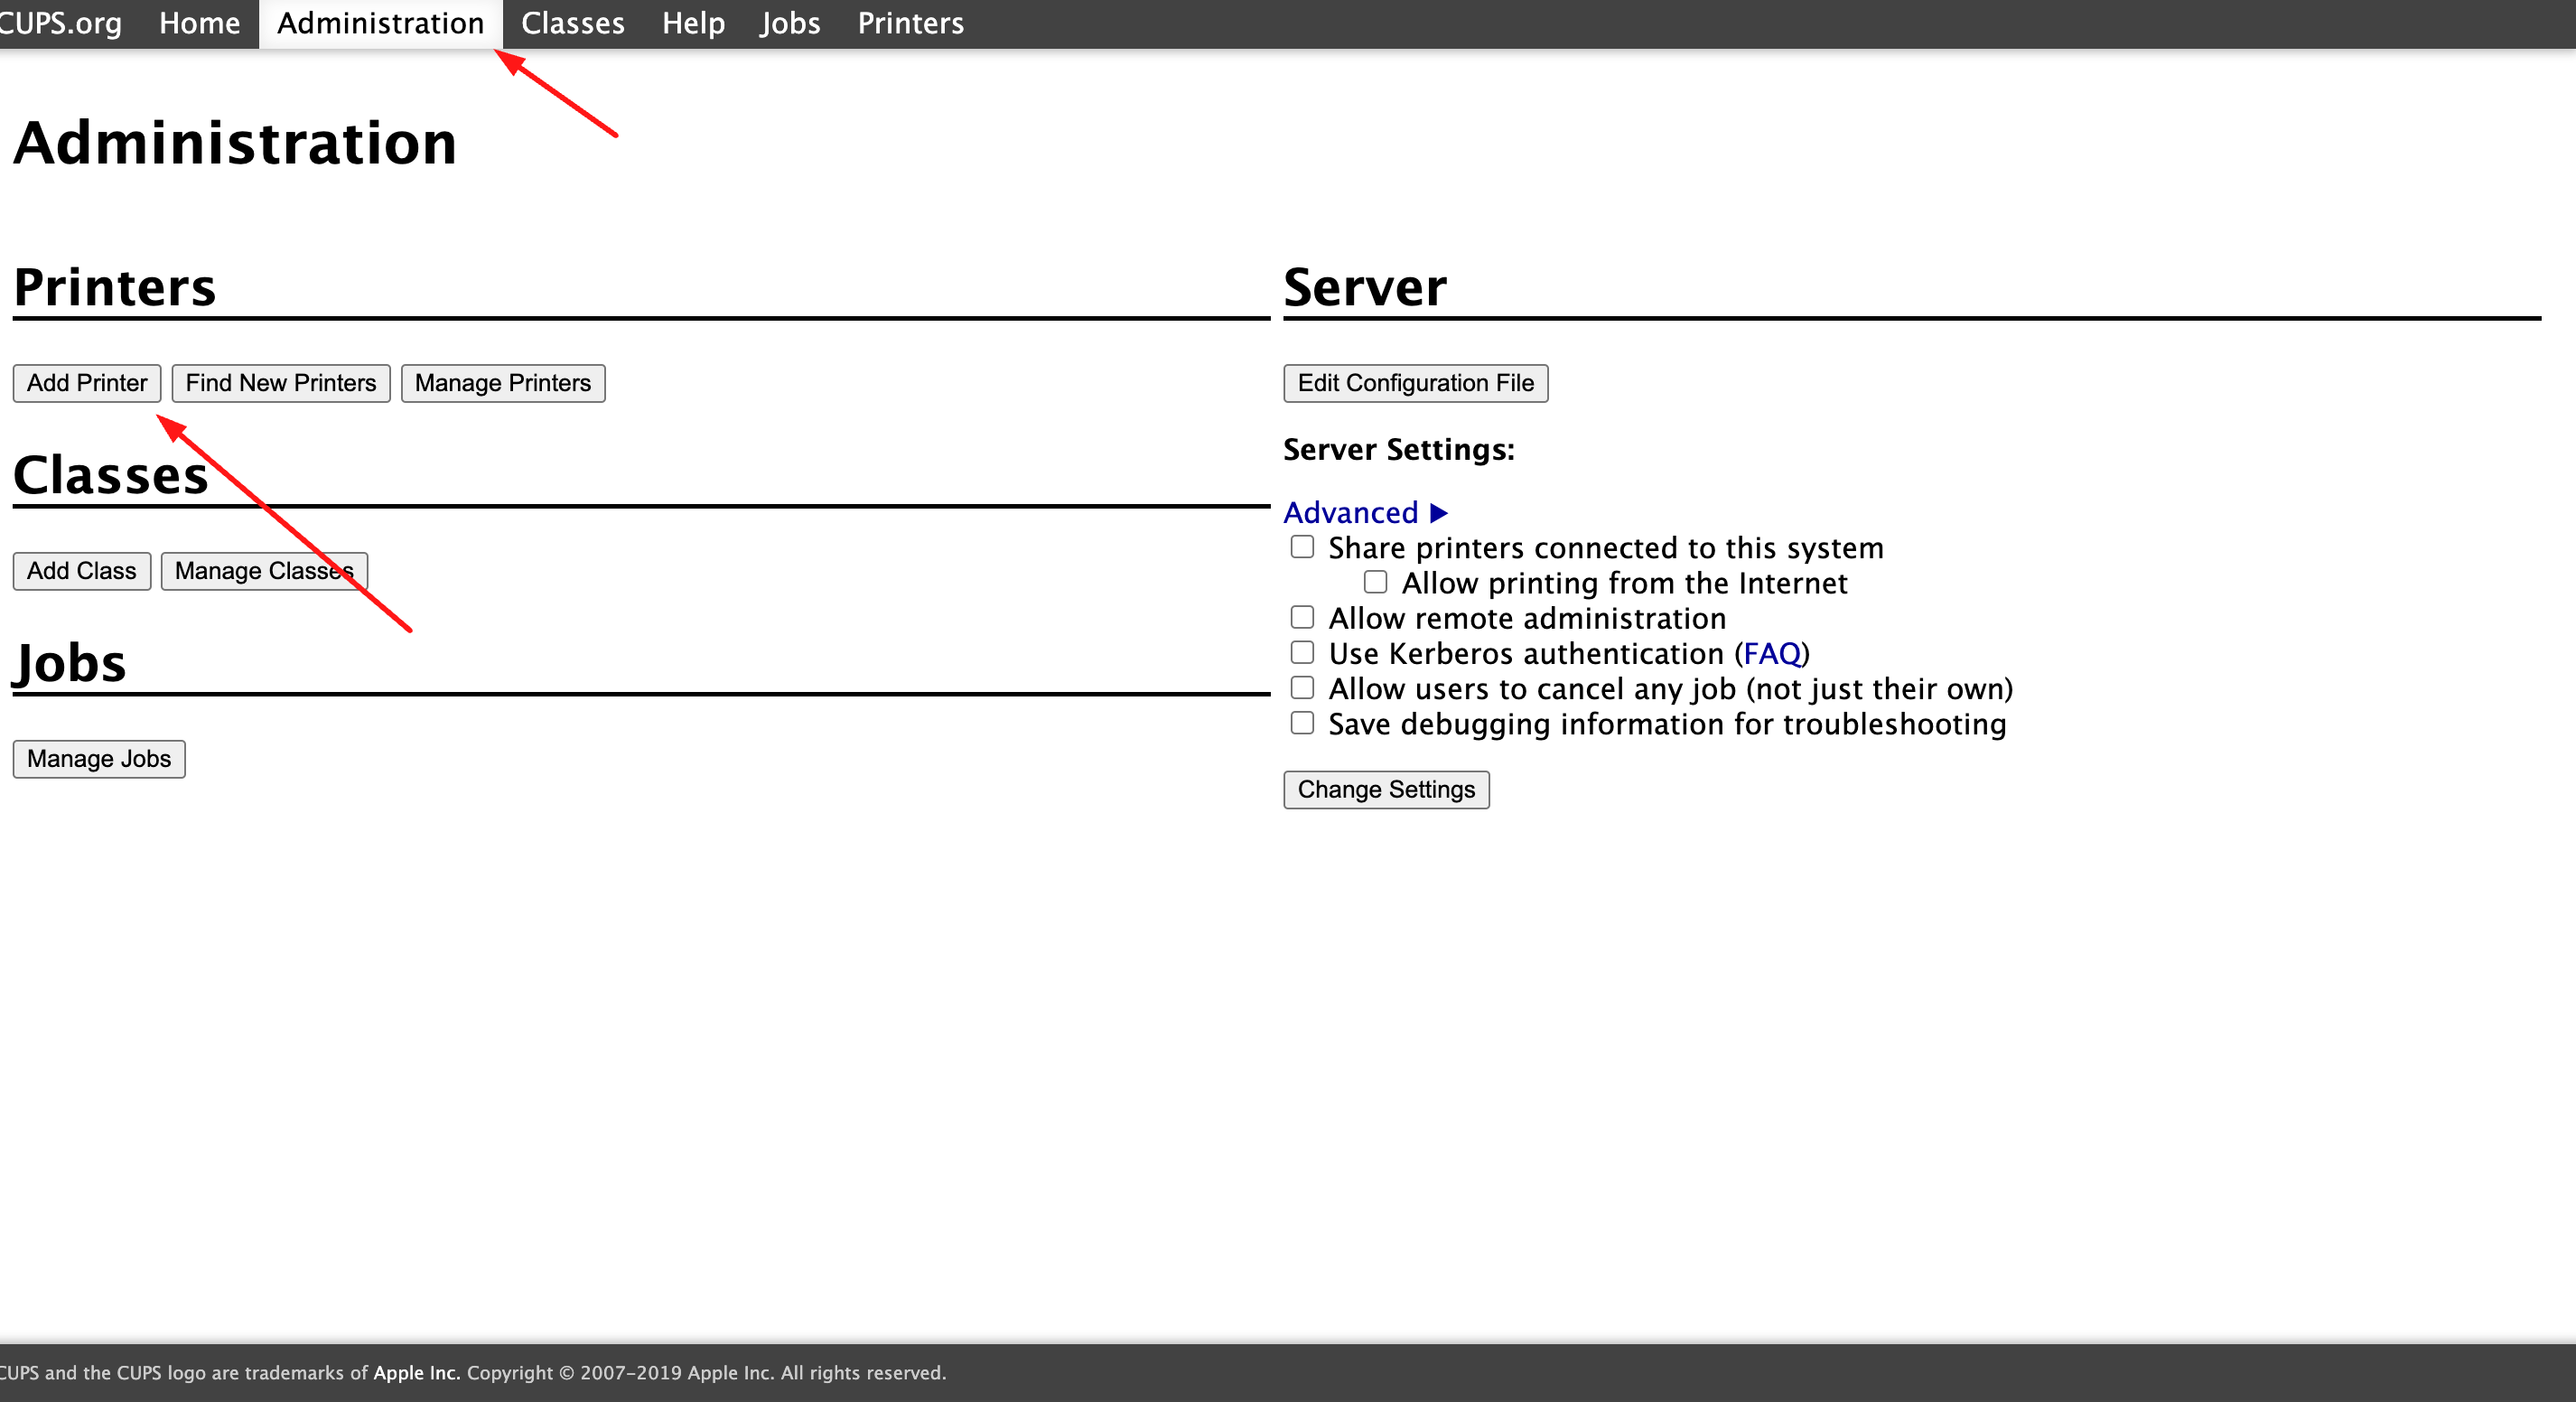
Click on the Administrator tab and then click Add Printer. You may be prompted to enter the name and password of an administrator to verify that you are a user with administrator privileges.
-
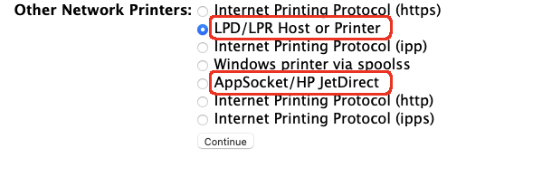
In the Add Printer window, choose either LPD / LPR Host or Printer or AppSocket / HP JetDirect and click Continue.
-
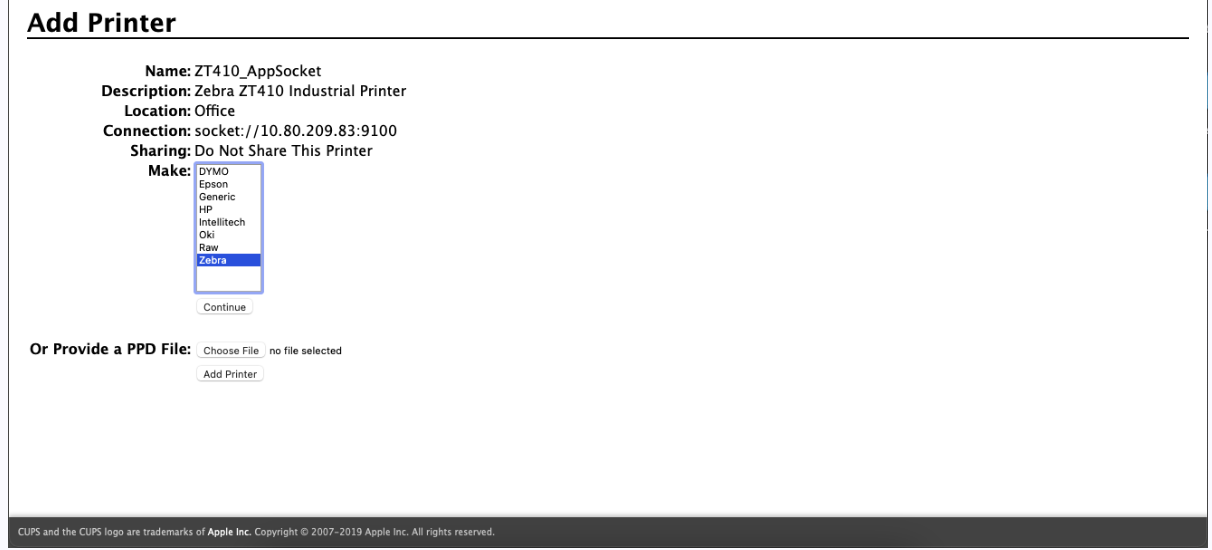
Enter your printer's details (name, description, and location) as desired and click Continue.
Please Note to follow these official steps if you find any step is missed here or the interface is changef
-
Next, select Zebra in the Make drop-down list and click Continue.
-
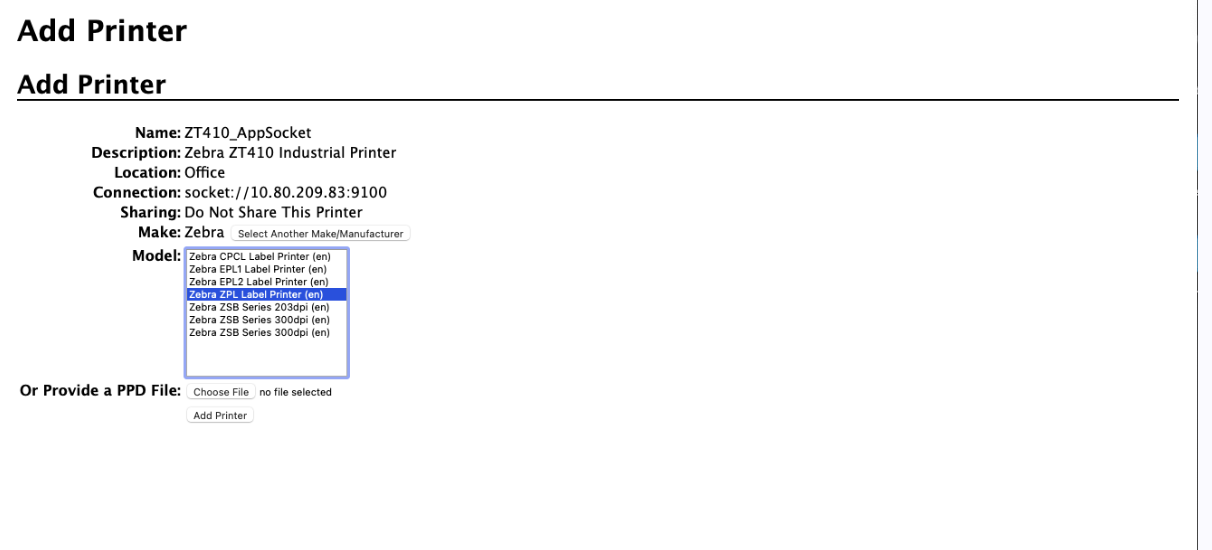
Finally, select Zebra ZPL Label Printer in the Model drop-down list and click Add Printer.
Print a Test Page
-
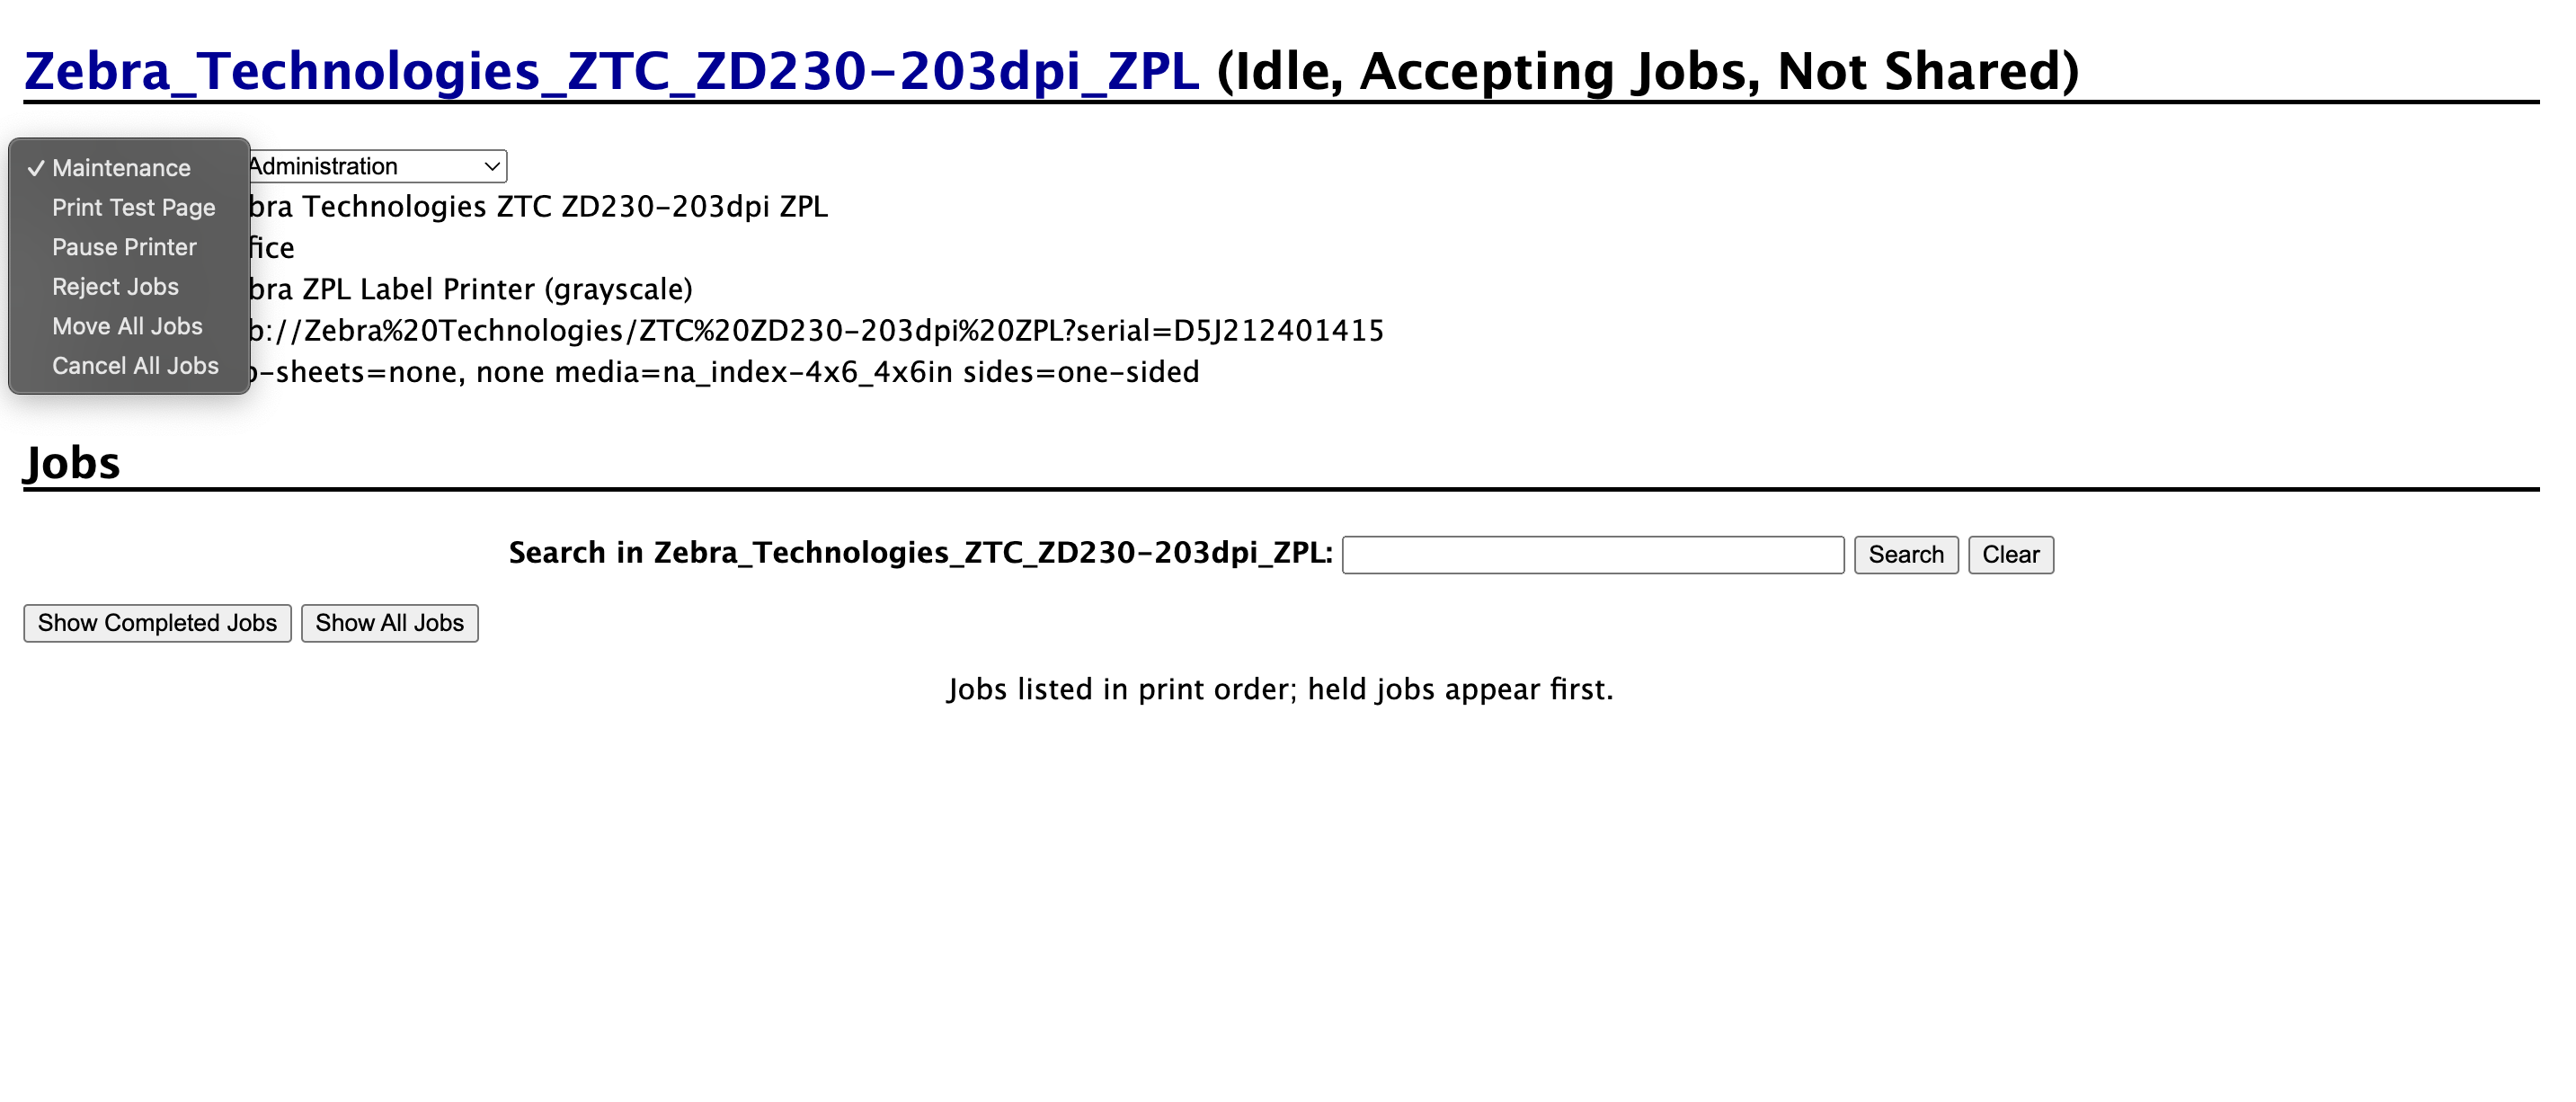
Click on the Printer tab, locate your Zebra printer and click on its name.
Select Print Test Page in the drop-down list to print a test page.
You should able to see the option by clicking on Maintenance Dropdown.
Step 2: Install and configure JSPrintManager
The Hopstack platform uses a utility named JSPrintManager to perform print queue management on your system.
This allows Hopstack to perform one-click printing as well as automated printing based on the fulfillment of actions.
Hence, this is a very crucial step and must be followed as per the guide’s instructions.
While there may be newer versions of the software available on the official website, Hopstack uses JSPrint Manager v3.xx only due to our license agreement and platform configurations.
Hence, using any other version will not connect to the Hopstack platform.
The link to download the recommended software is attached below.
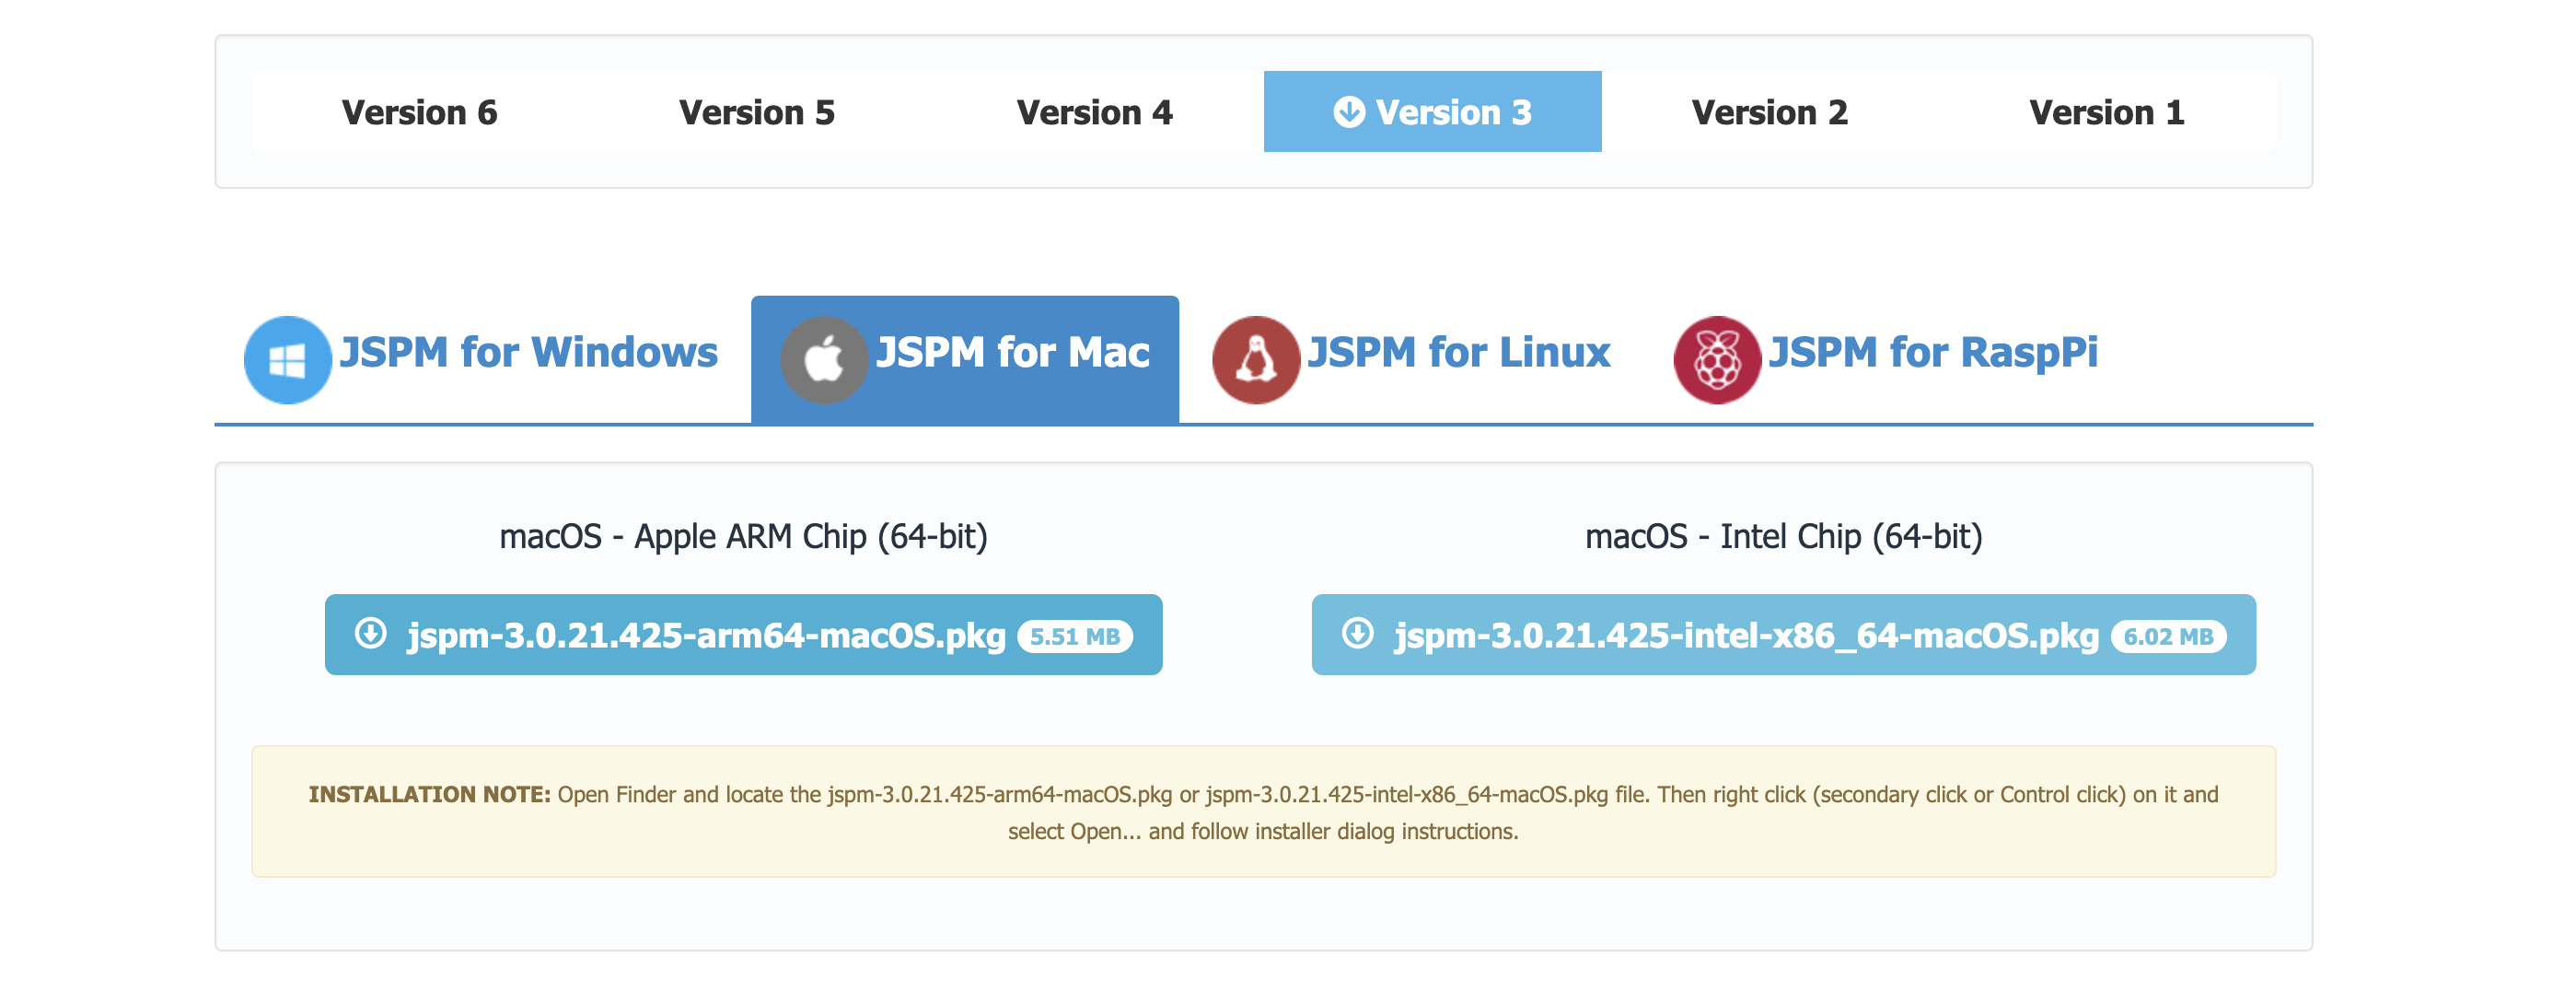
1. Click this link to download JSPrint Manager v3 from the official developer’s website.
2. Select the package.
Select the Chip according to your device.(You can find the same by searching About on Mac Setting)
-
Right click on the downloaded file. And compress the file.
-
You will be asked for the confirmation.
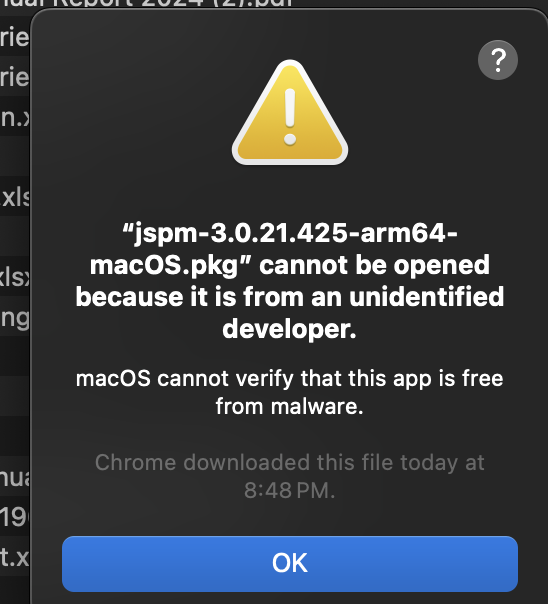
Please note, that you may be prompted to enter your Administrator password during this process.
-
Click on “Finish” to close the window and complete the installation.
You should be able to find the app on the applications screen as well. And you can click on Open.
For good measure, open your start menu and click on JSPrintManager 3.0. Please note that this will not result in any window being opened.
Instead, this will open up a background utility that can be configured in Menu Bar, which is visible in the top right corner of your screen, besides the clock.
-
Right-click on the JSPrintManager icon and ensure that “AutoStart” is enabled (refer to image)
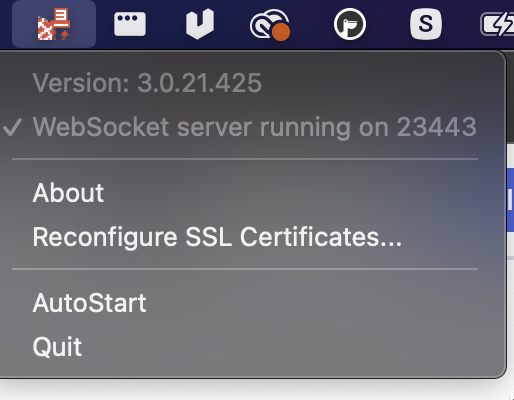
6. Your JSPrintManager is now configured.
Step 3: Setting up and testing the printing workflow from the Hopstack platform
Please note that this section can only be completed by a user with admin-level access to the Hopstack platform instance. If you are not an admin, please reach out to your warehouse manager to complete this section of the guide.
Admin privileges are only required for the first-time setup and will not be required during day-to-day operations.
1. Log in to your Hopstack platform using the credentials provided to you.
Please note that you must be an admin to complete this part of the setup. This would be a one-time effort.
If the Hopstack platform is already open, then reload the screen.
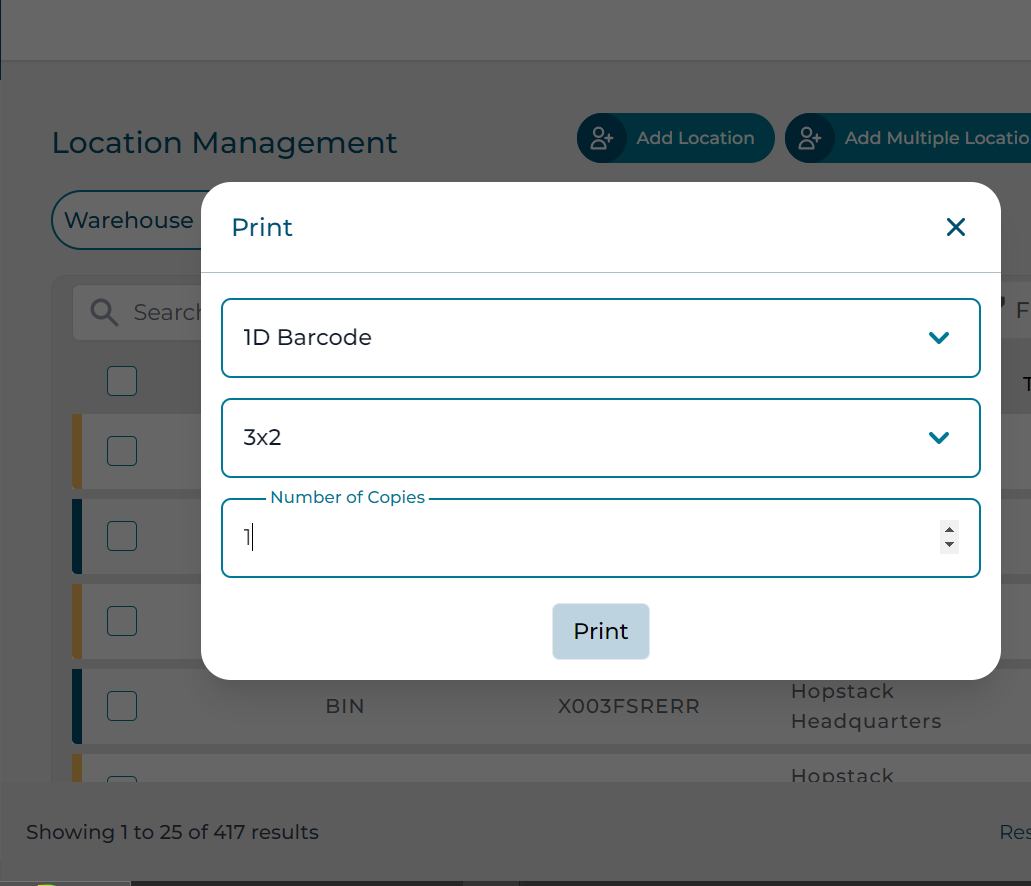
2. Navigate to “Location Management” under the Setup Section of the Hopstack platform.

3. Click on the print icon next to any location code and configure it as follows:
Print a 1D barcode with a label size equal to the label size you configured in Step 1 and print one copy.
4. Sometime during this process, you will receive a prompt that looks like this (refer to image)
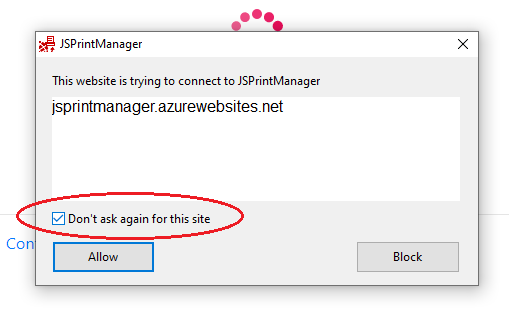
5. Please ensure that the checkbox is checked as in the image and press “Allow”
6. Return to the Hopstack platform and click on “Print” to run a test print
If the guide was completed successfully, then the test print will come out as configured and your printer will be ready to use.
If there are any discrepancies with the print in terms of quality, dimensions, visibility or otherwise, please notify your product expert or deployment lead about the same.
If the test print does not print out, then there is a chance that your printer may not be supported by the Hopstack platform. Please notify your deployment lead about the same and allow us 48-96 business hours to get back to you with a solution or alternate approach.