Currently, during Receiving workflow, the users can create LPNs and add necessary quantity to it. For this, the user has to create an LPN and mention its details like ‘Form Factor’, ‘LPN Code’ etc. The user can only create one LPN at a time, even though most of the parameters like ‘Expiry Date’, '. This can be time consuming, especially in cases where there are large number of LPNs involved.
The new feature allows the users to create multiple LPNs and auto-generate their LPN Codes at once. This will reduce the time spent by the user during receiving. Refer the below guide to understand how to use this feature.
-
Navigate to the ‘Receiving’ screen for a Consignment
-
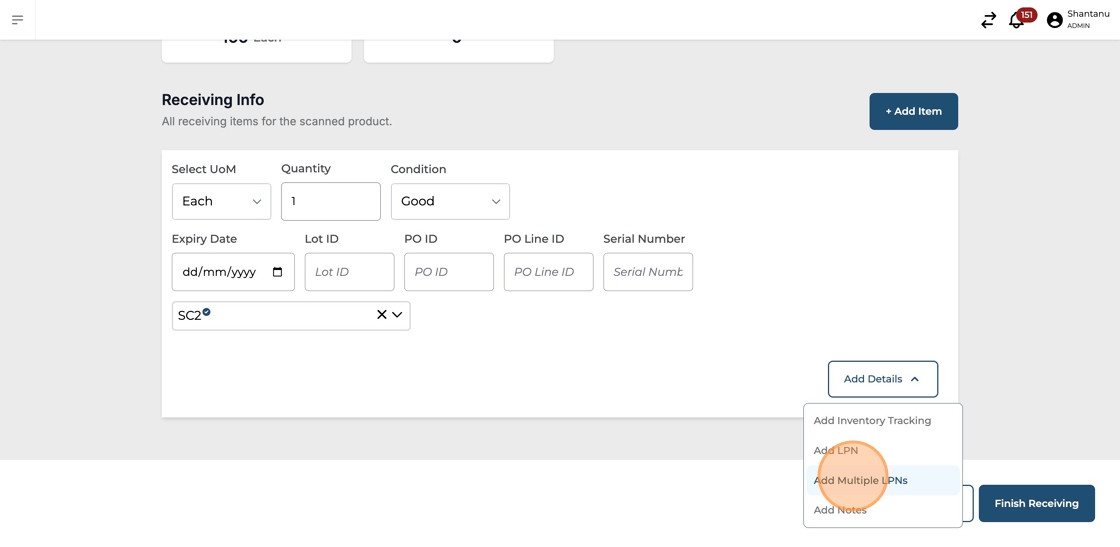
Click "Add Multiple LPNs"
-
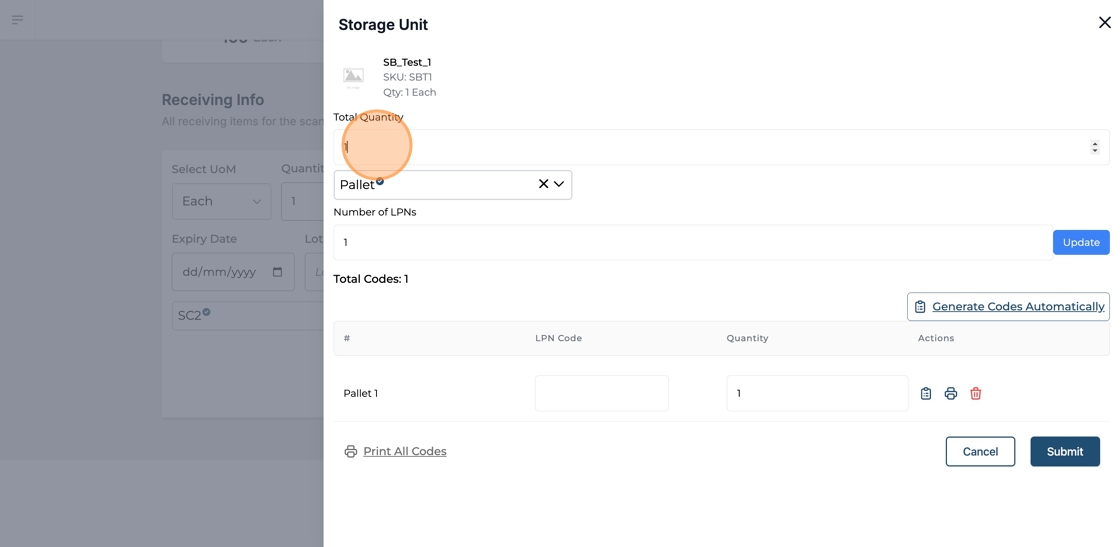
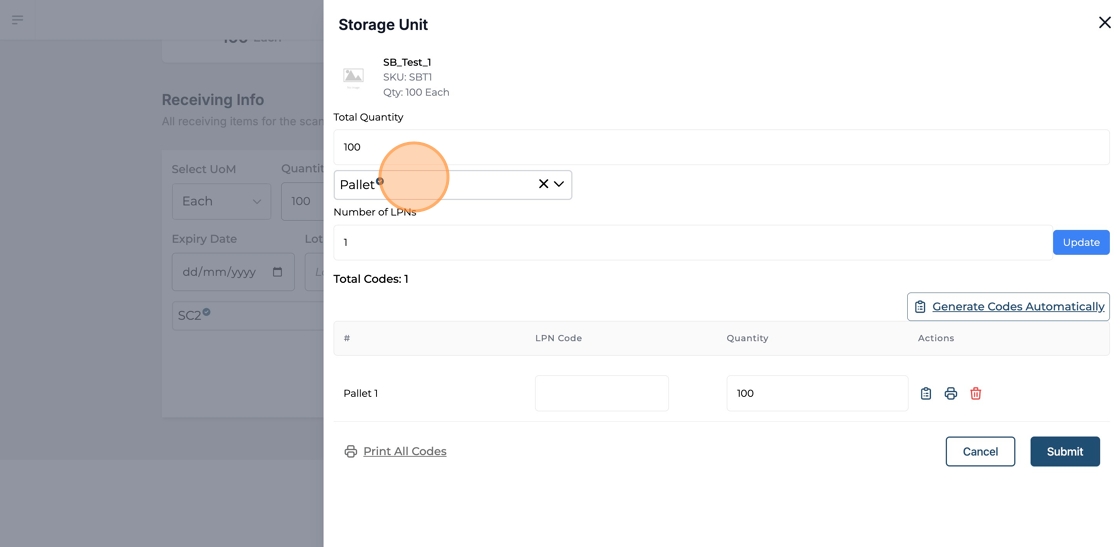
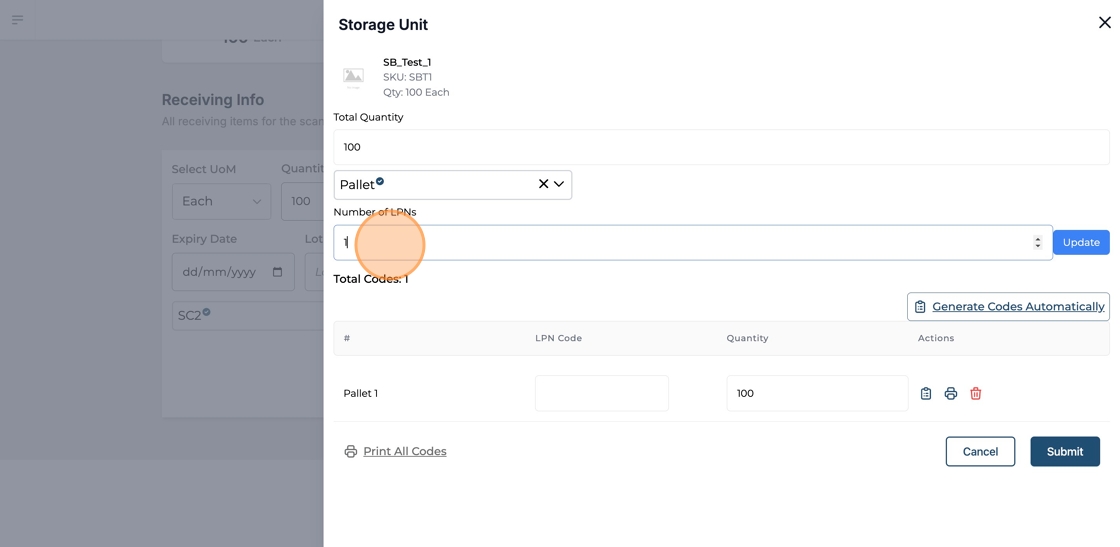
Mention ‘Total Quantity’ to be added to LPNs
-
Select the LPN Form Factor
-
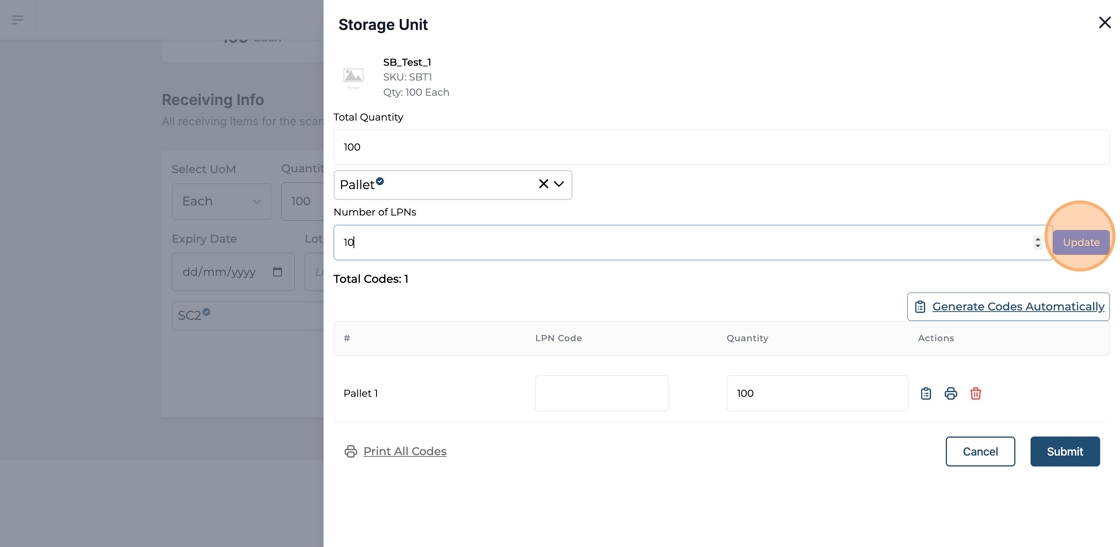
Mention the number of LPNs to be created
-
Click on ‘Update’
-
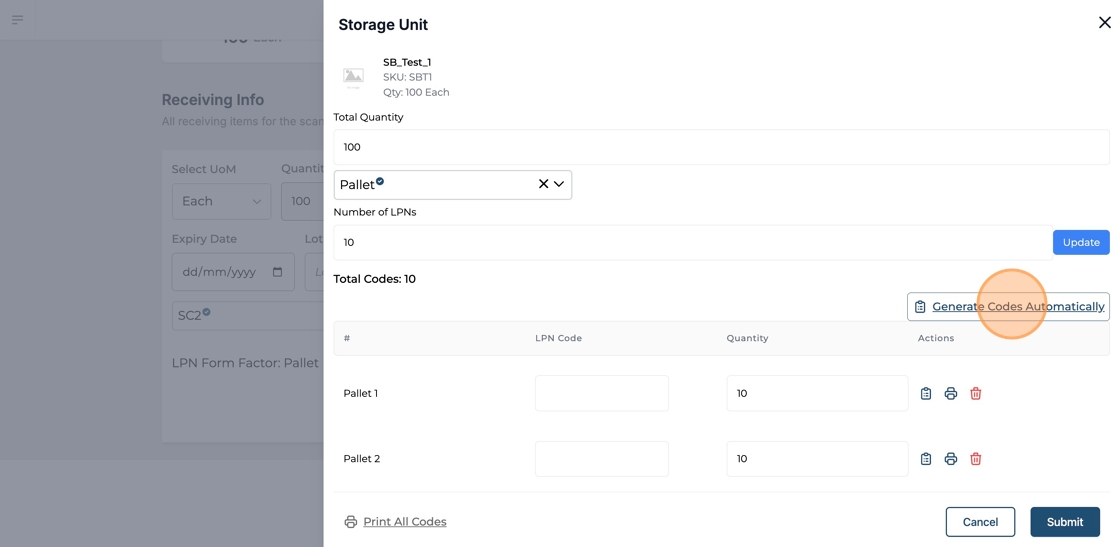
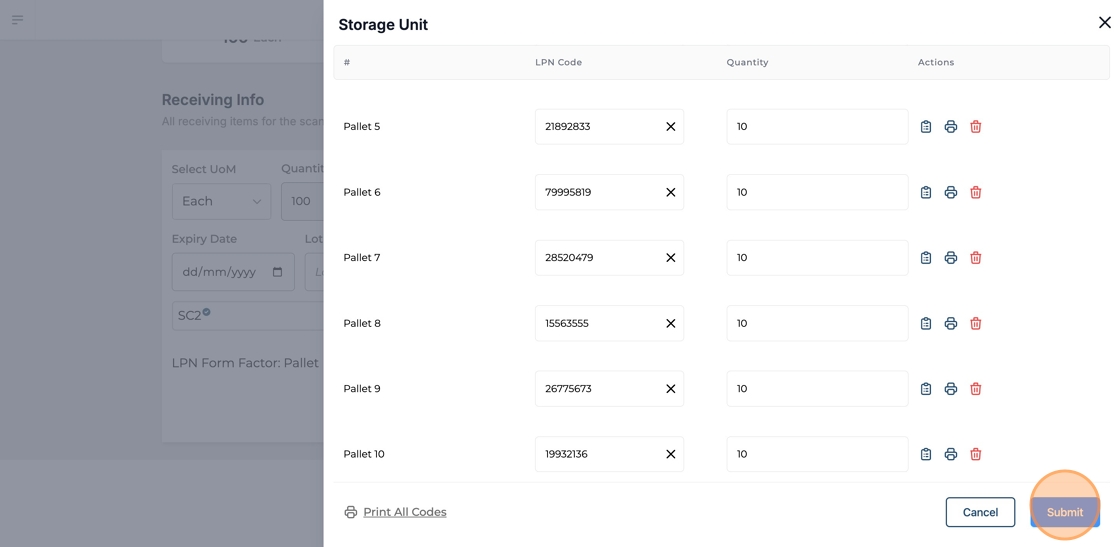
The user can either generate LPN codes manually or click on ‘Generate Codes Automatically’ to auto-generate codes for all at once
-
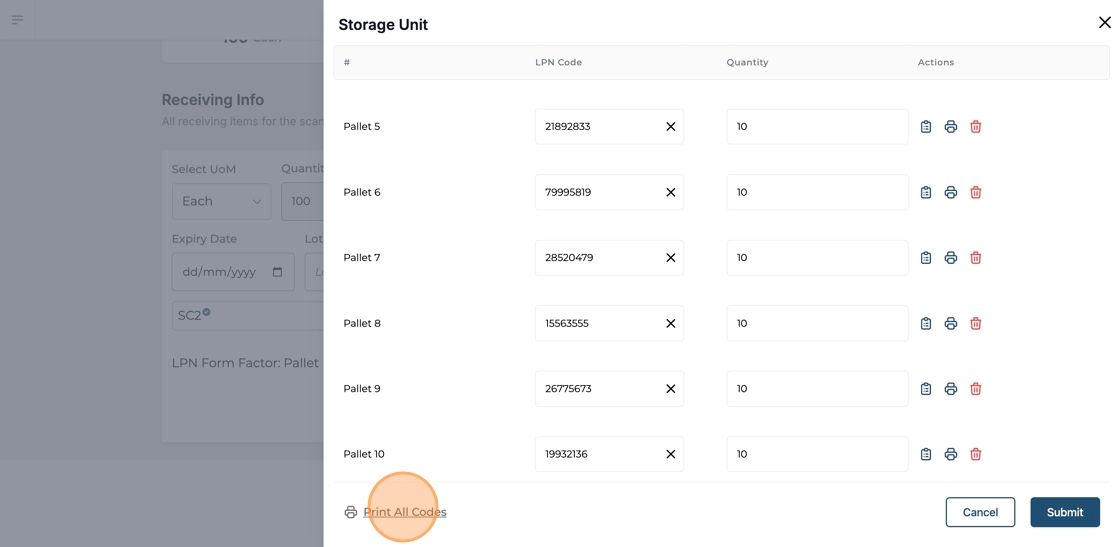
The user can print all codes at once by clicking on ‘Print All Codes’ CTA at the bottom left corner of the modal
-
Click on ‘Submit’ to create all LPNs
-
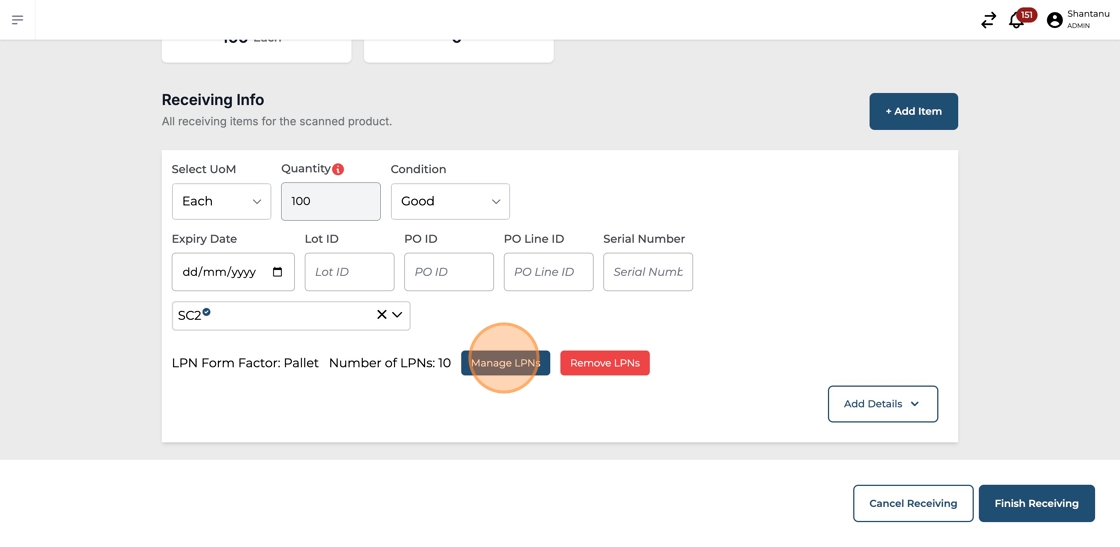
Click "Manage LPNs" to edit the LPN details