This article explains how to allocate inventory using the Stock Ledger in the Inventory module. Allocation helps you assign available inventory to specific clients or products, either in a straightforward way or based on detailed tracking identifiers.
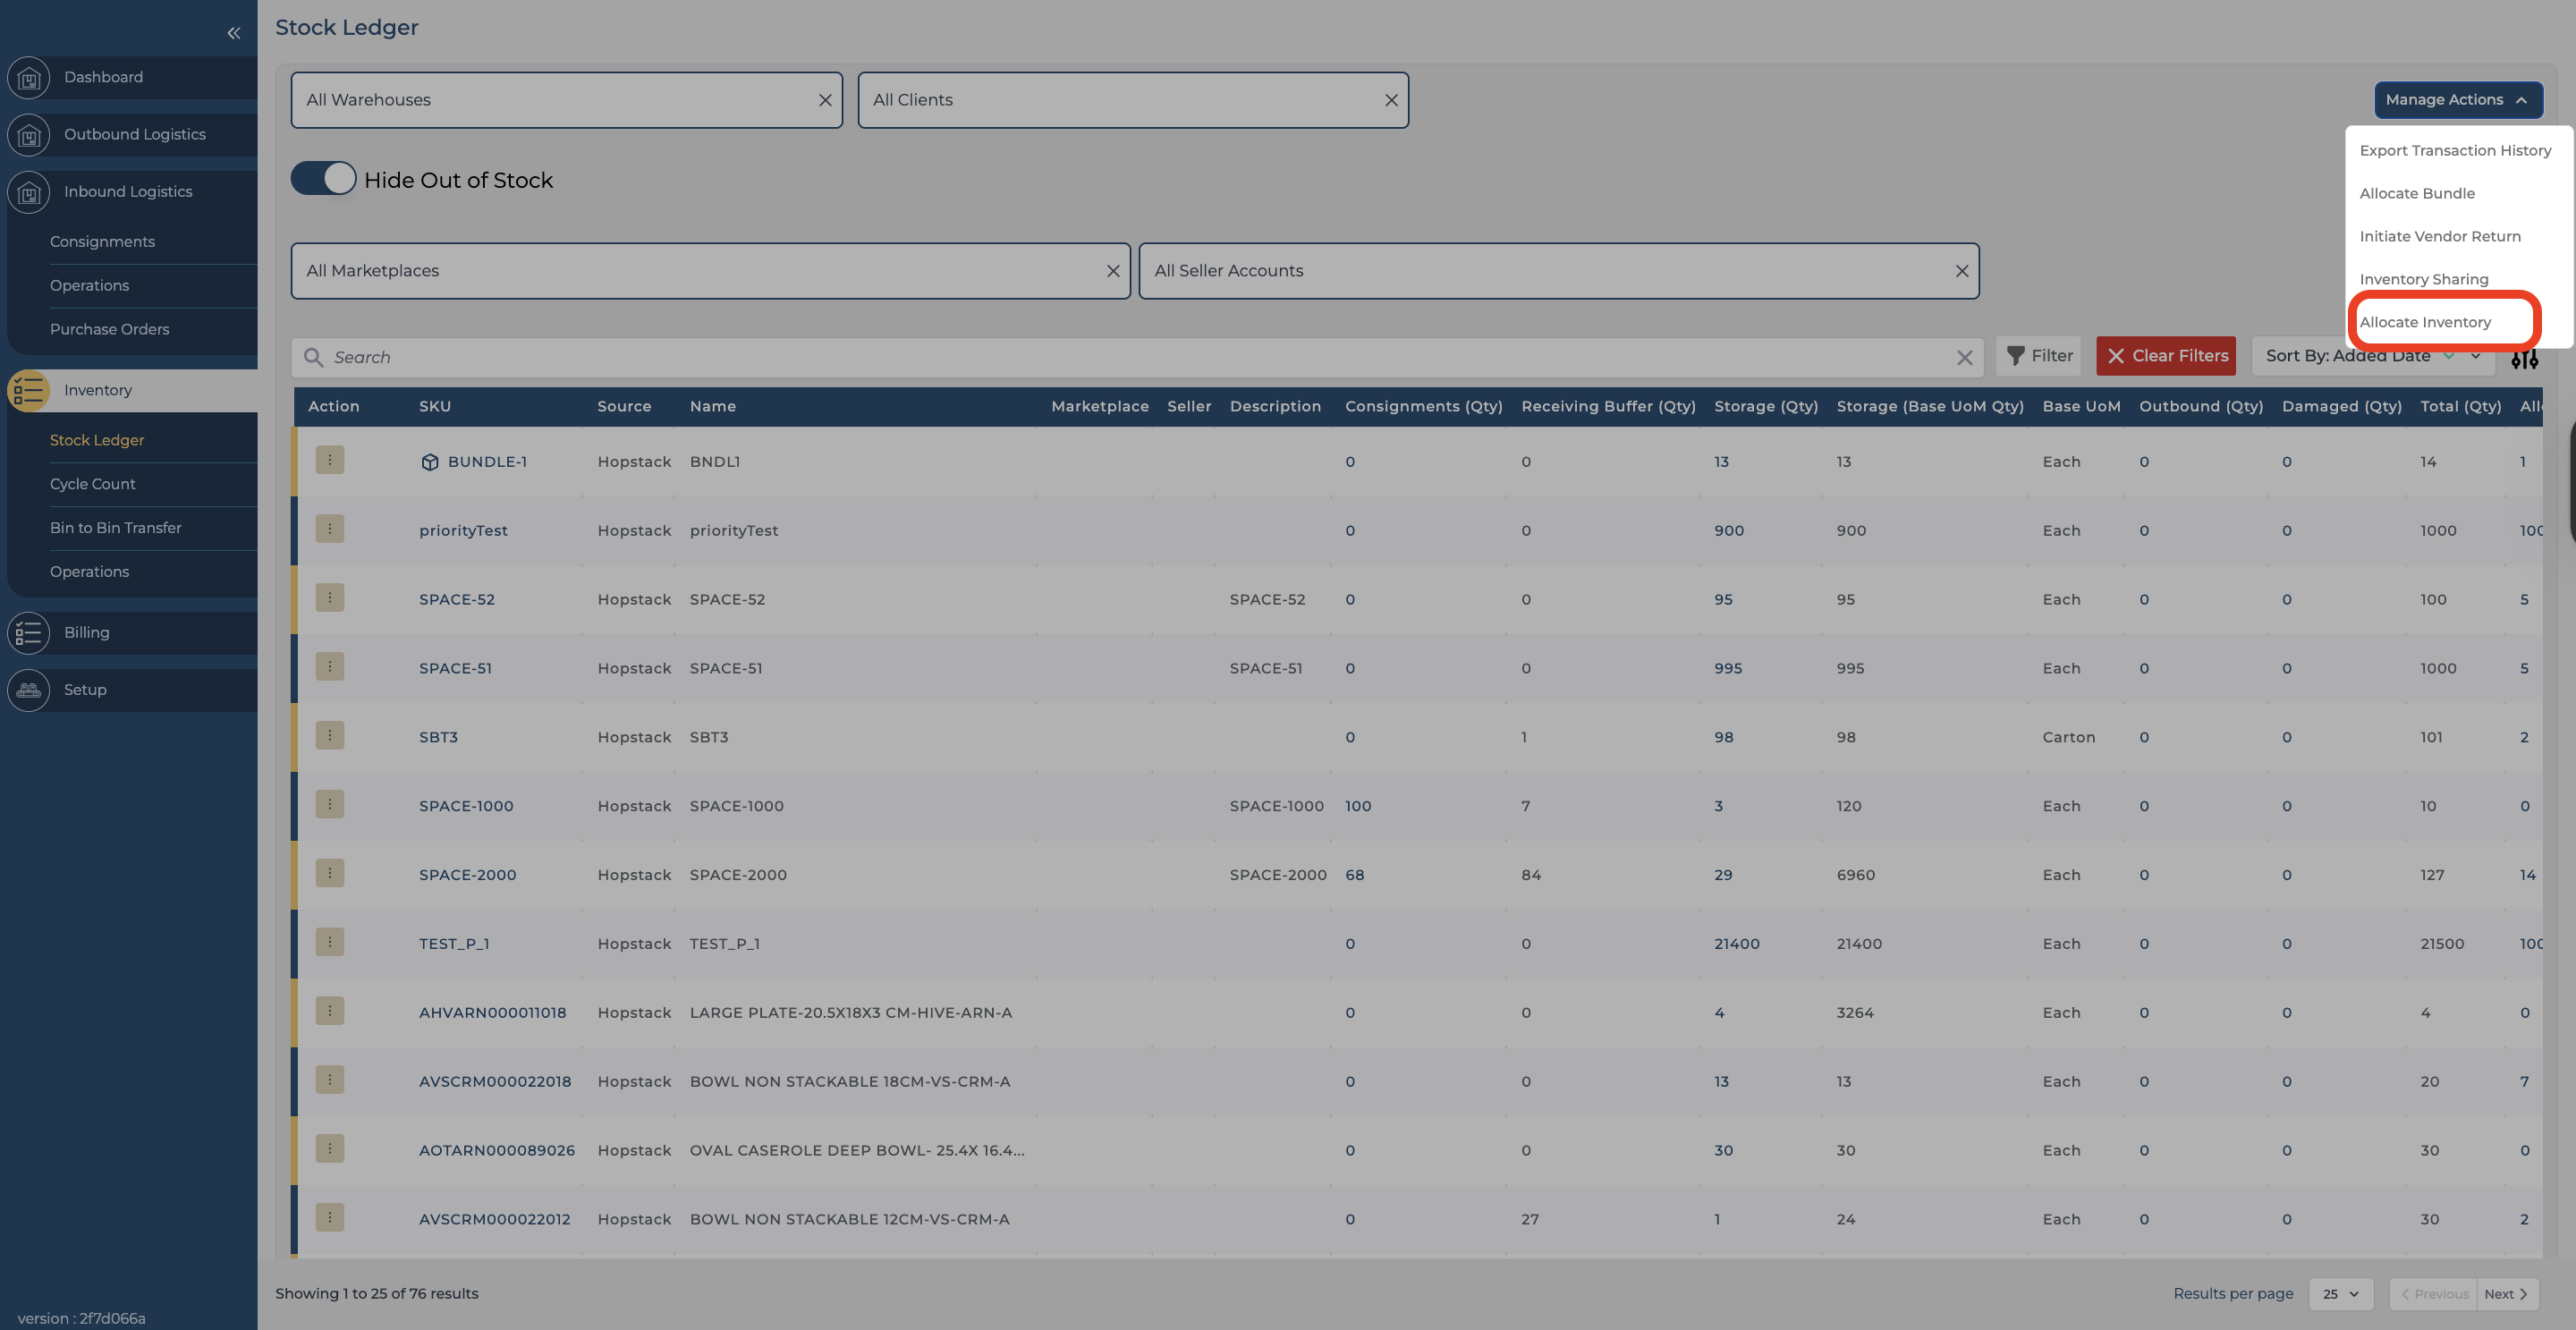
🔹 Accessing the Stock Ledger
-
Navigate to Inventory > Stock Ledger.
-
Select the appropriate Warehouse and Client from the dropdowns.
-
From the Manage Action dropdown, choose Allocate Inventory
✅ Allocation Process
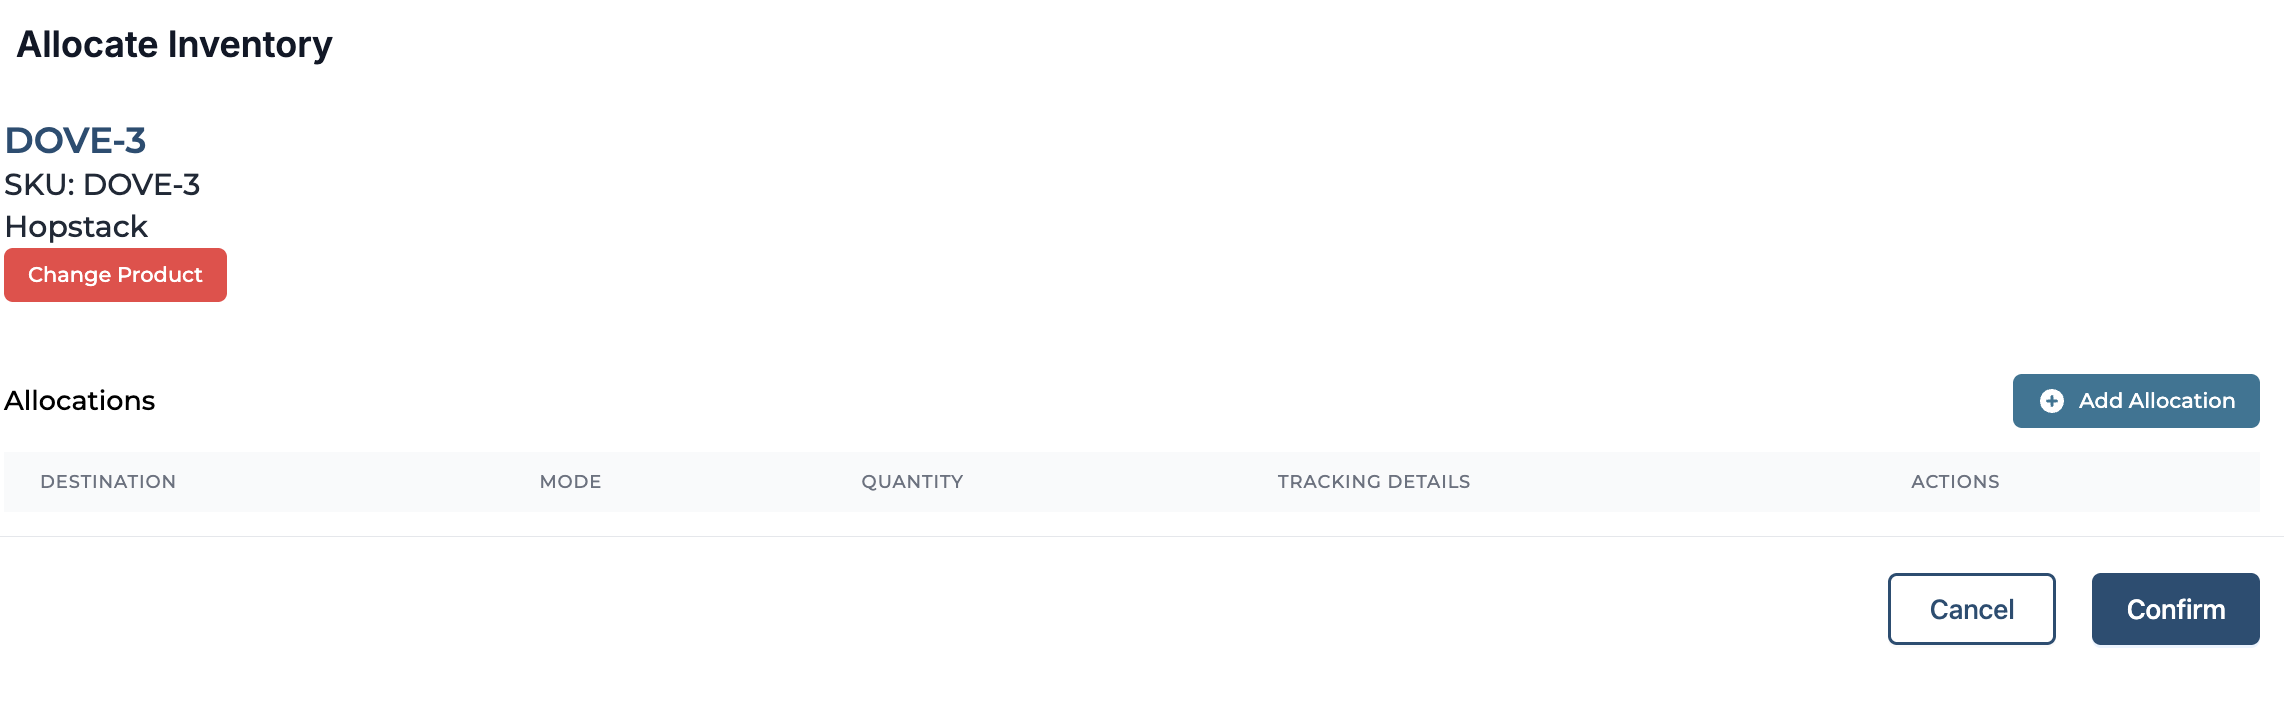
1. Select Source Product
-
Search for the source product from which the inventory will be allocated.
2. Add Allocation
-
Click on Add Allocation.
-
In the new row or pop-up:
-
Select the Client.
-
Select the Product you want to allocate inventory to.
-
Enter the Quantity to be allocated.
-
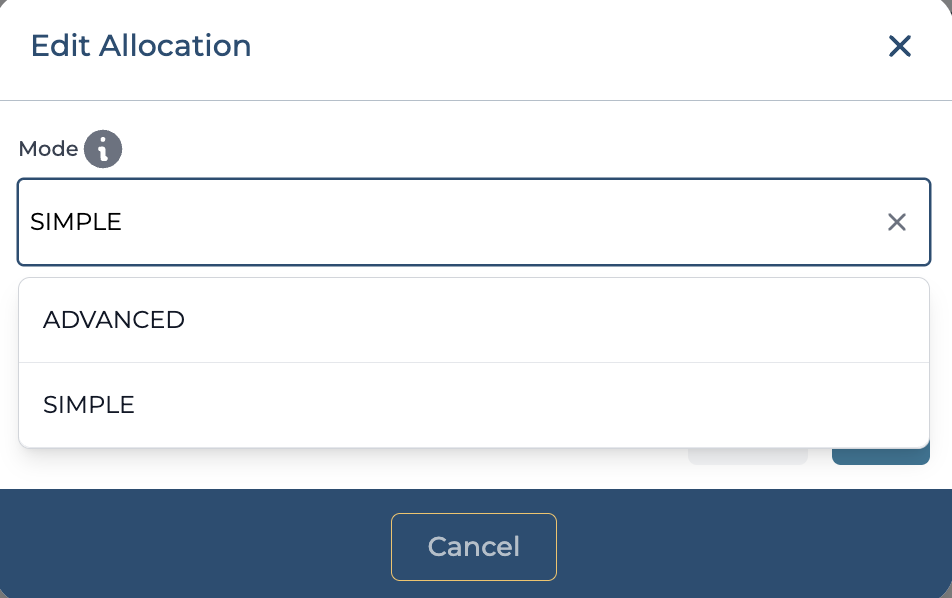
⚙️ Allocation Modes
There are two allocation modes available:
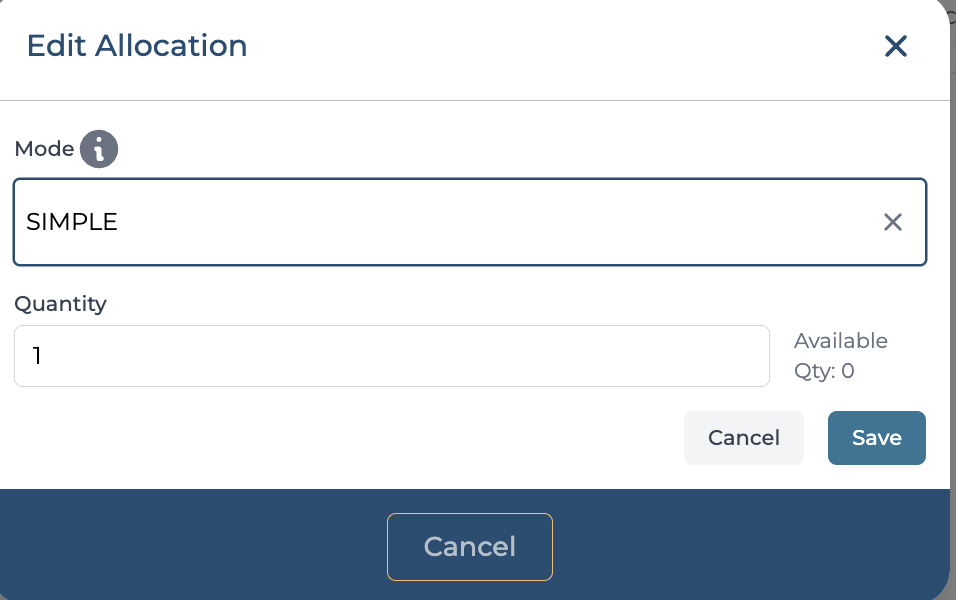
🔹 Simple Mode
-
This mode provides a quick and straightforward way to allocate inventory.
-
Suitable when you don’t need to track inventory at a granular level.
-
Just select the product and enter the quantity — allocation is completed directly.
🔹 Advanced Mode
-
Use this mode when allocation needs to be tied to a specific tracking identifier such as:
-
LPN (License Plate Number)
-
Best by date
-
-
Steps:
-
Select the tracking identifier.
-
Choose the quantity from that specific identifier.
-
-
Ideal for businesses that require precise tracking and auditability and fulfillment purposes.