
The Allocate Inventory feature lets you reassign existing stock to a different SKU without physically moving the goods. It is useful when the same product is listed under different SKUs, sold through multiple sales channels, or transferred between clients. By updating which SKU and client the stock belongs to, you can make it available where it is needed and keep inventory records accurate.
The Allocate Inventory feature allows users to transfer inventory from one SKU to another across the following scenarios:
-
Same client: Between different SKUs belonging to the same client.
-
Different clients: Between SKUs belonging to different clients.
-
Same client, different sales channels: Between different SKUs associated with different sales channels for the same client.
-
Different clients and sales channels: Between SKUs belonging to different clients and associated with different sales channels.
The Steps to Allocate Inventory are as follows:
-
Navigate to the Hopstack Platform.
-
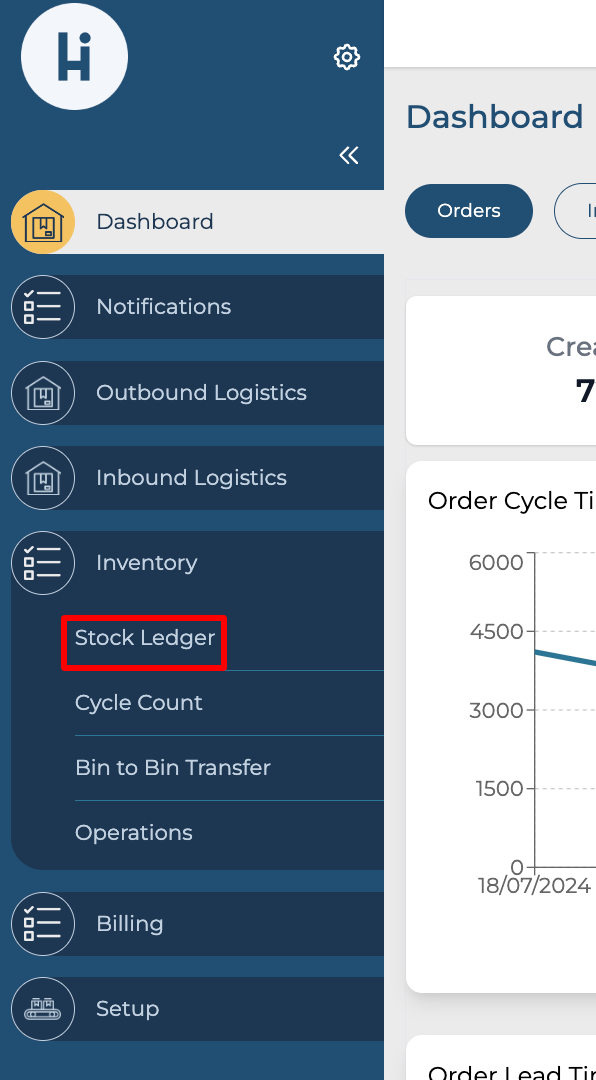
Click the "Stock Ledger" option under Inventory from the side menu.
-
The Stock Ledger opens with all warehouses and clients selected; clear the existing Warehouses and Clients selection. Select the Warehouse and the Client for the source product before proceeding to the Manage Action dropdown. Then choose Allocate Inventory.
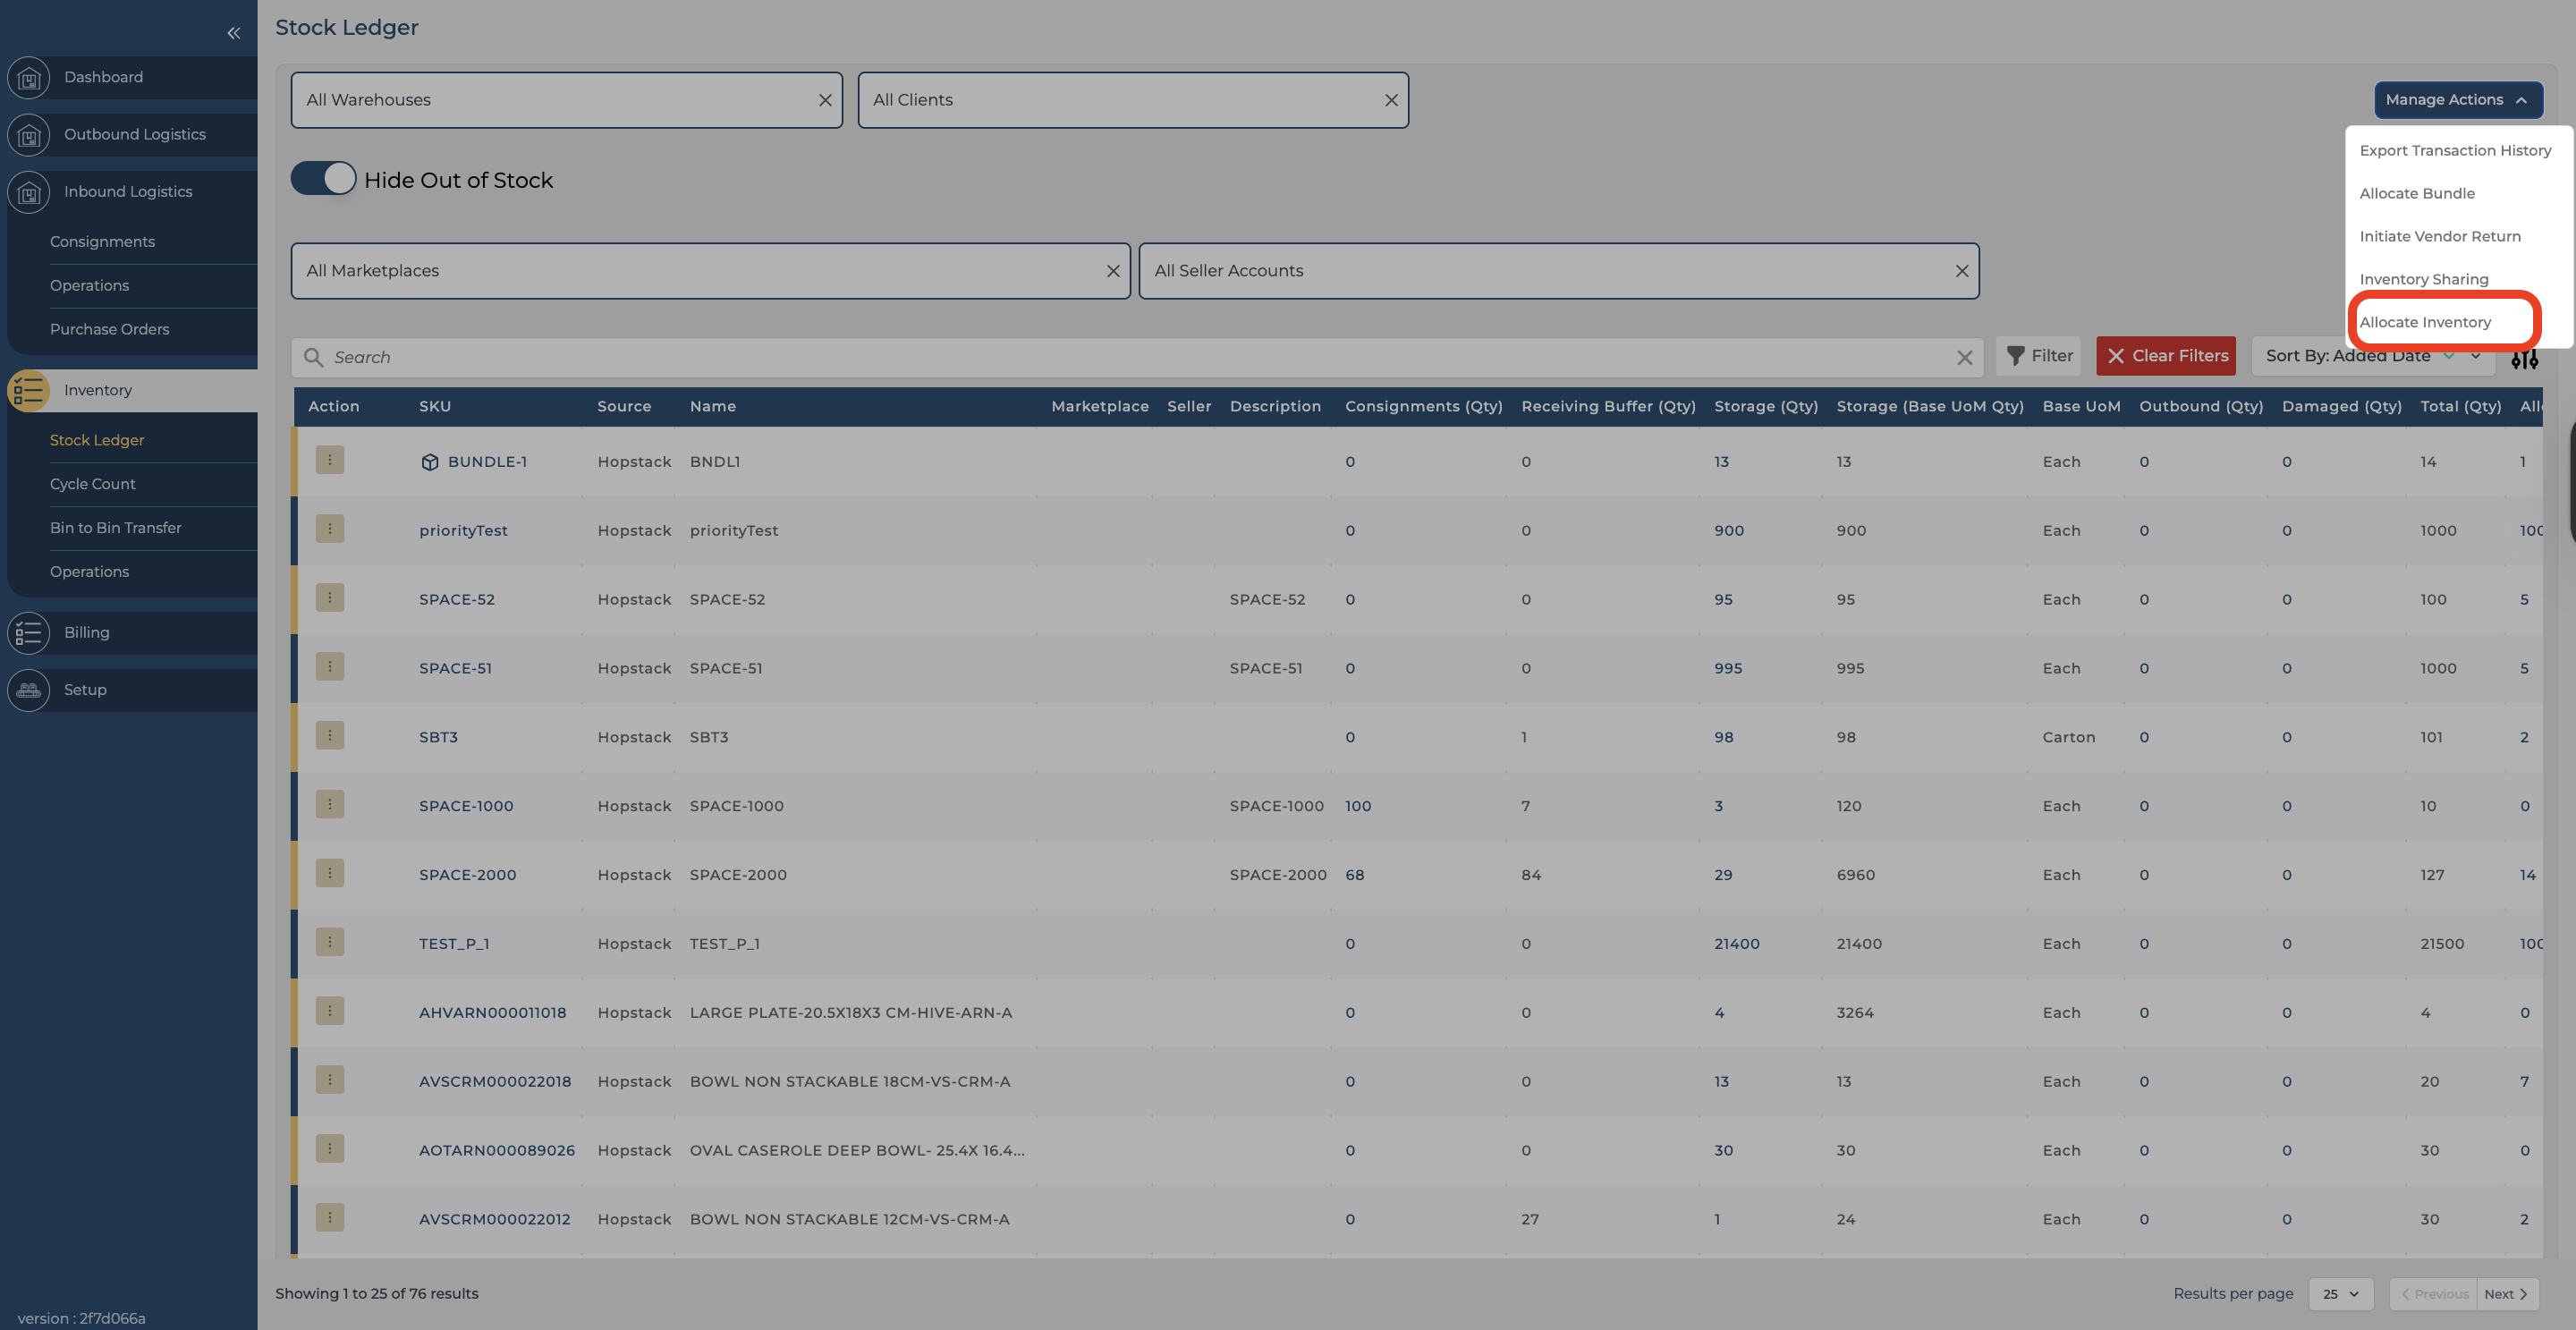
Note: Ensure both the warehouse and client are correctly selected before continuing, as this determines available inventory and destination details.
-
Selecting a Source Product:
-
Search for the SKU for which you want to transfer inventory from using the search bar. The search results will display the image, name and SKU.
-
The Channel is set to All Channels.
-
Search for the desired product to select it.
The search Displays the Name, SKU and the Source of the product.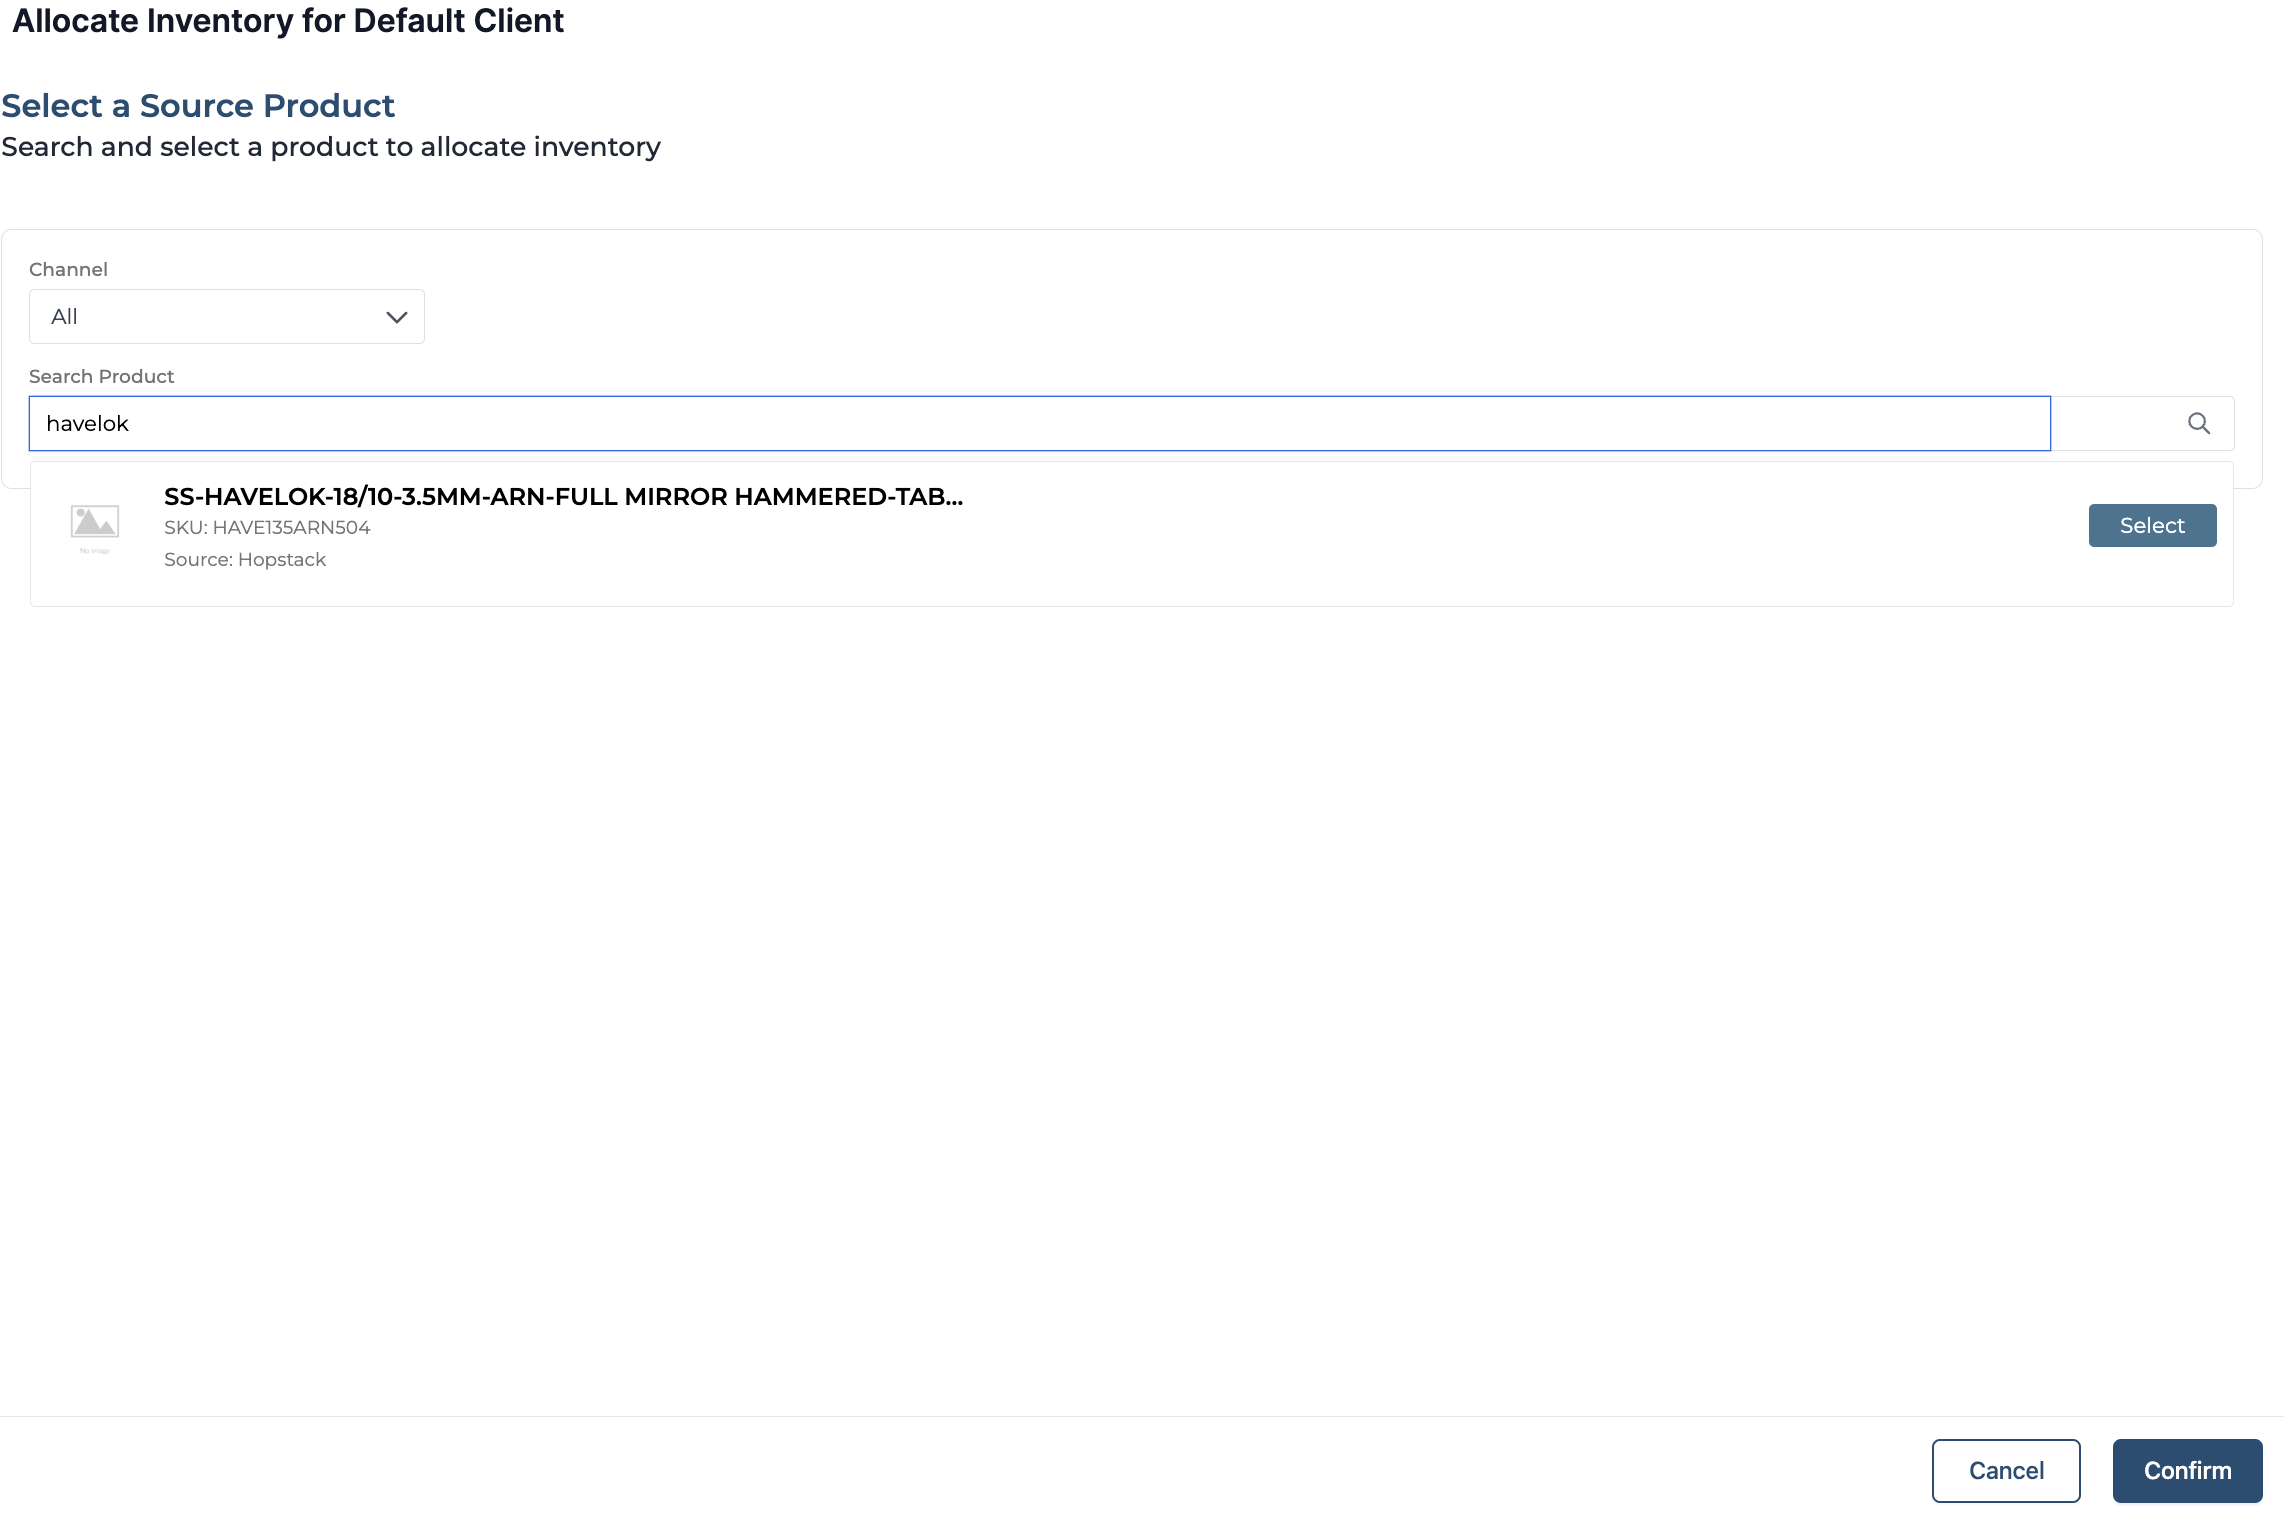
-
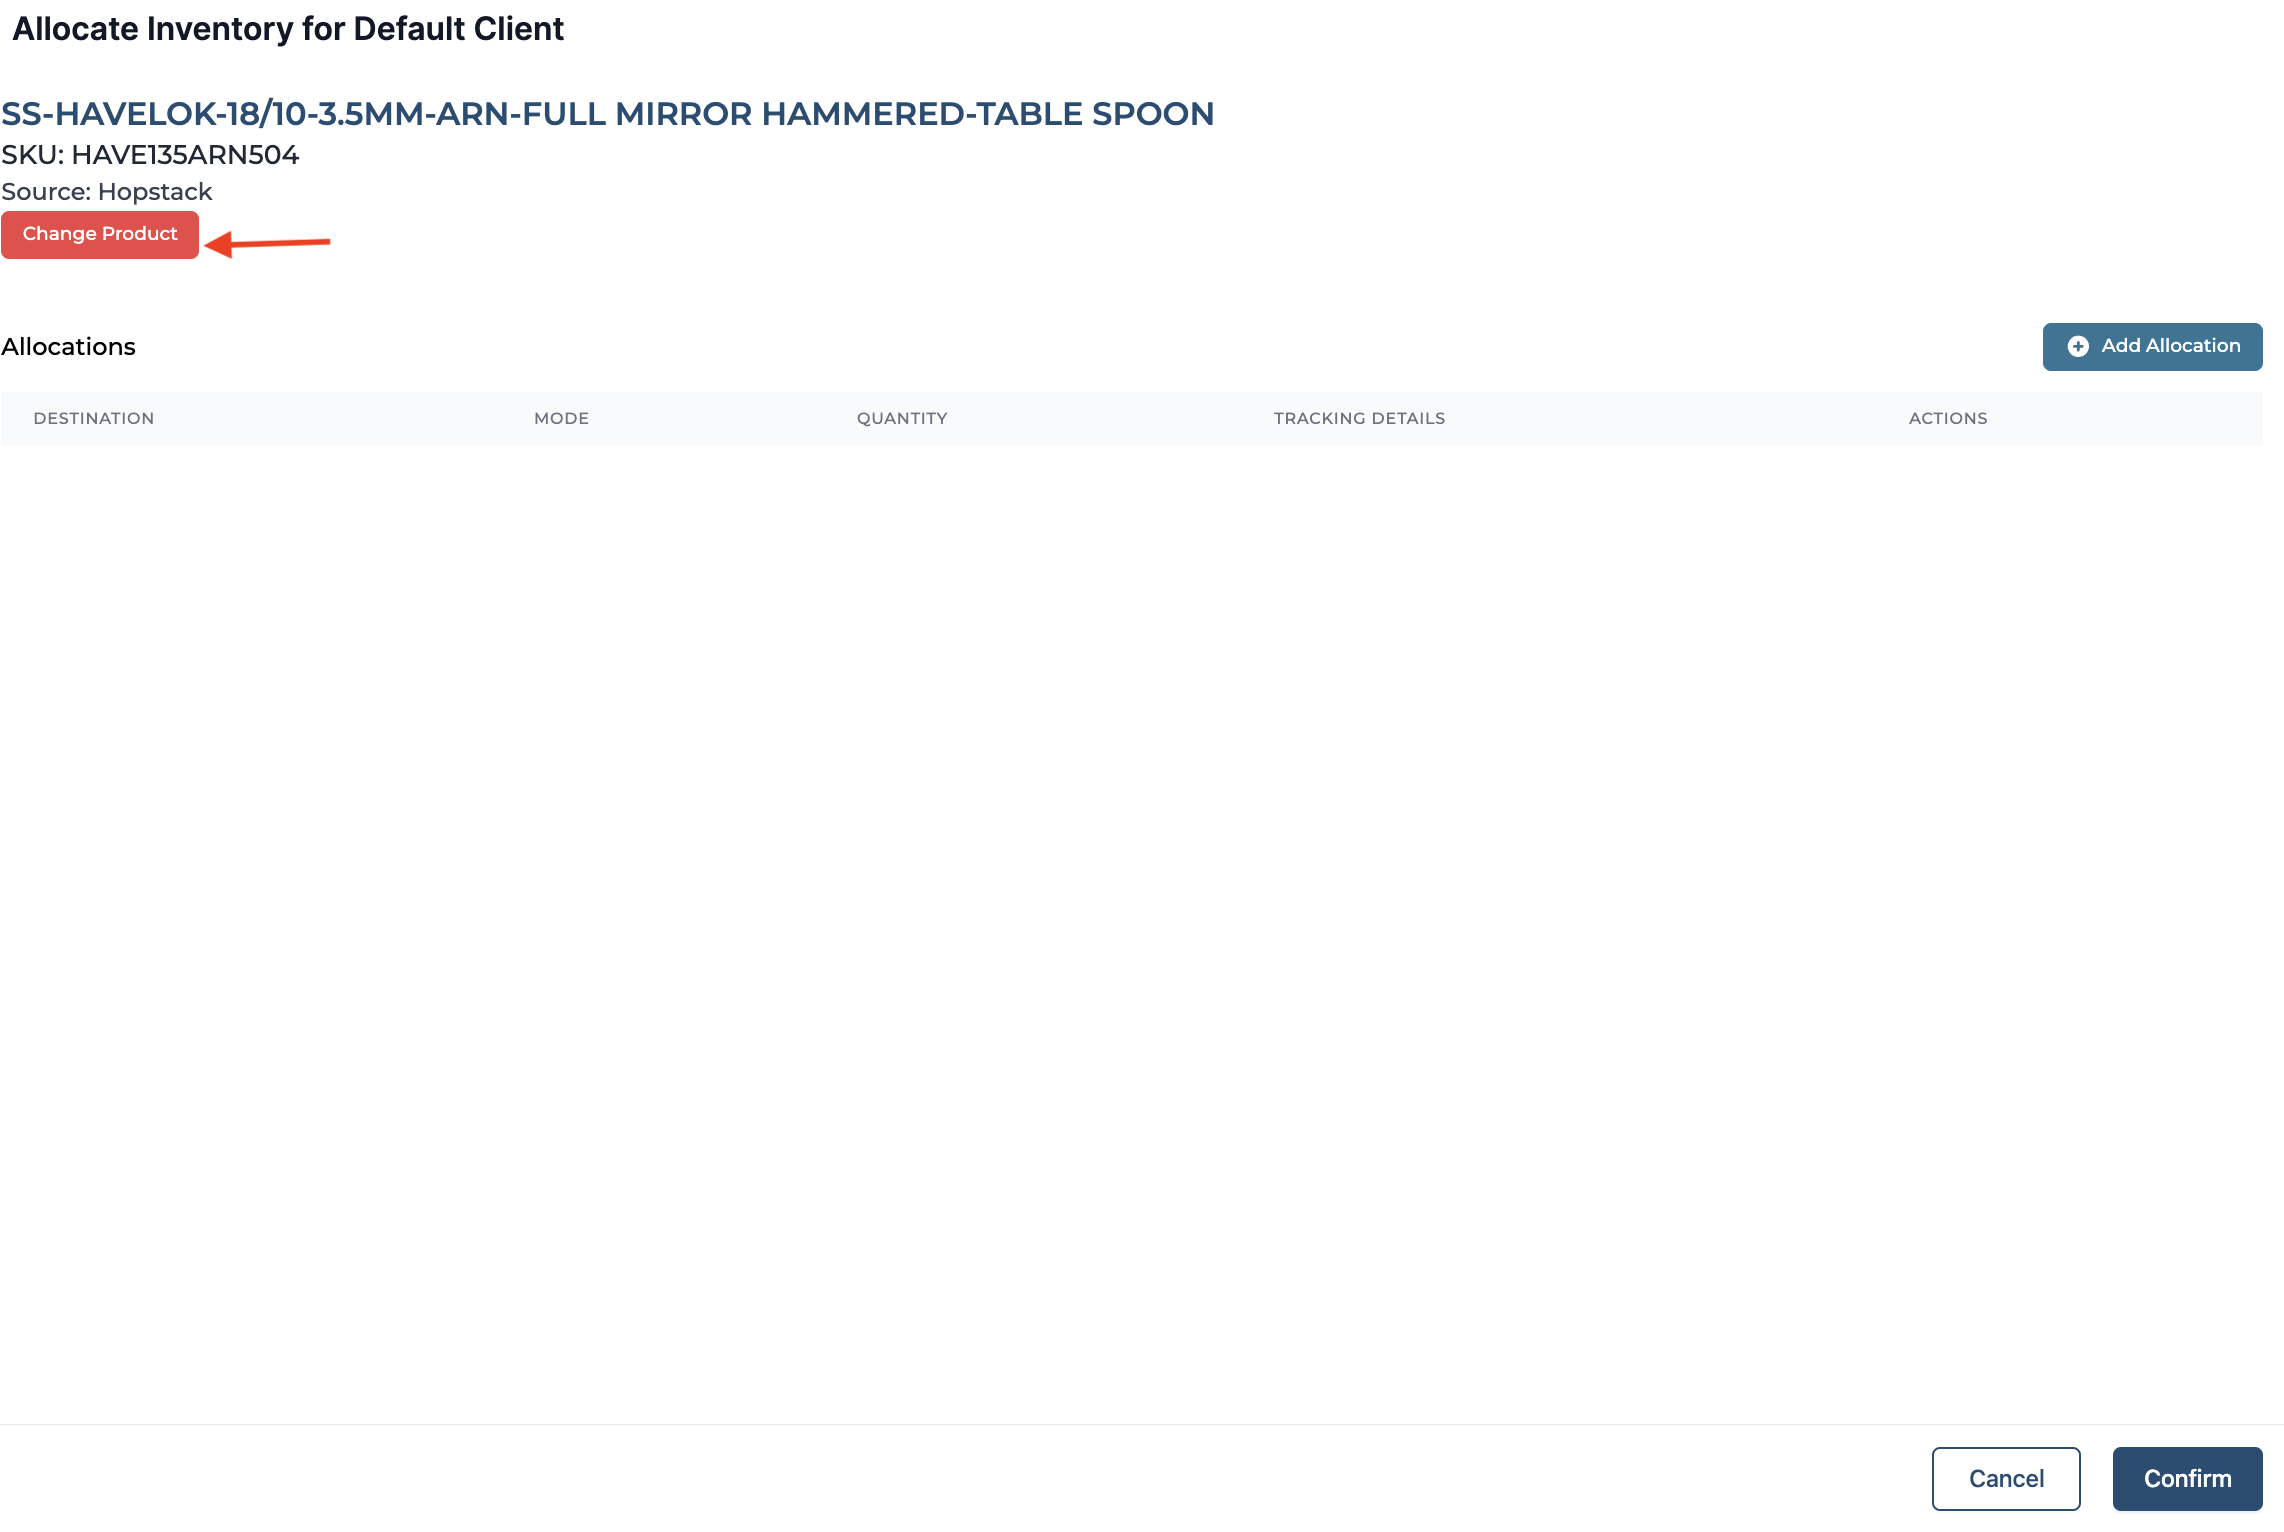
The user can change the selected product at any time by clicking on Change Product.
-
Allocation Management:
-
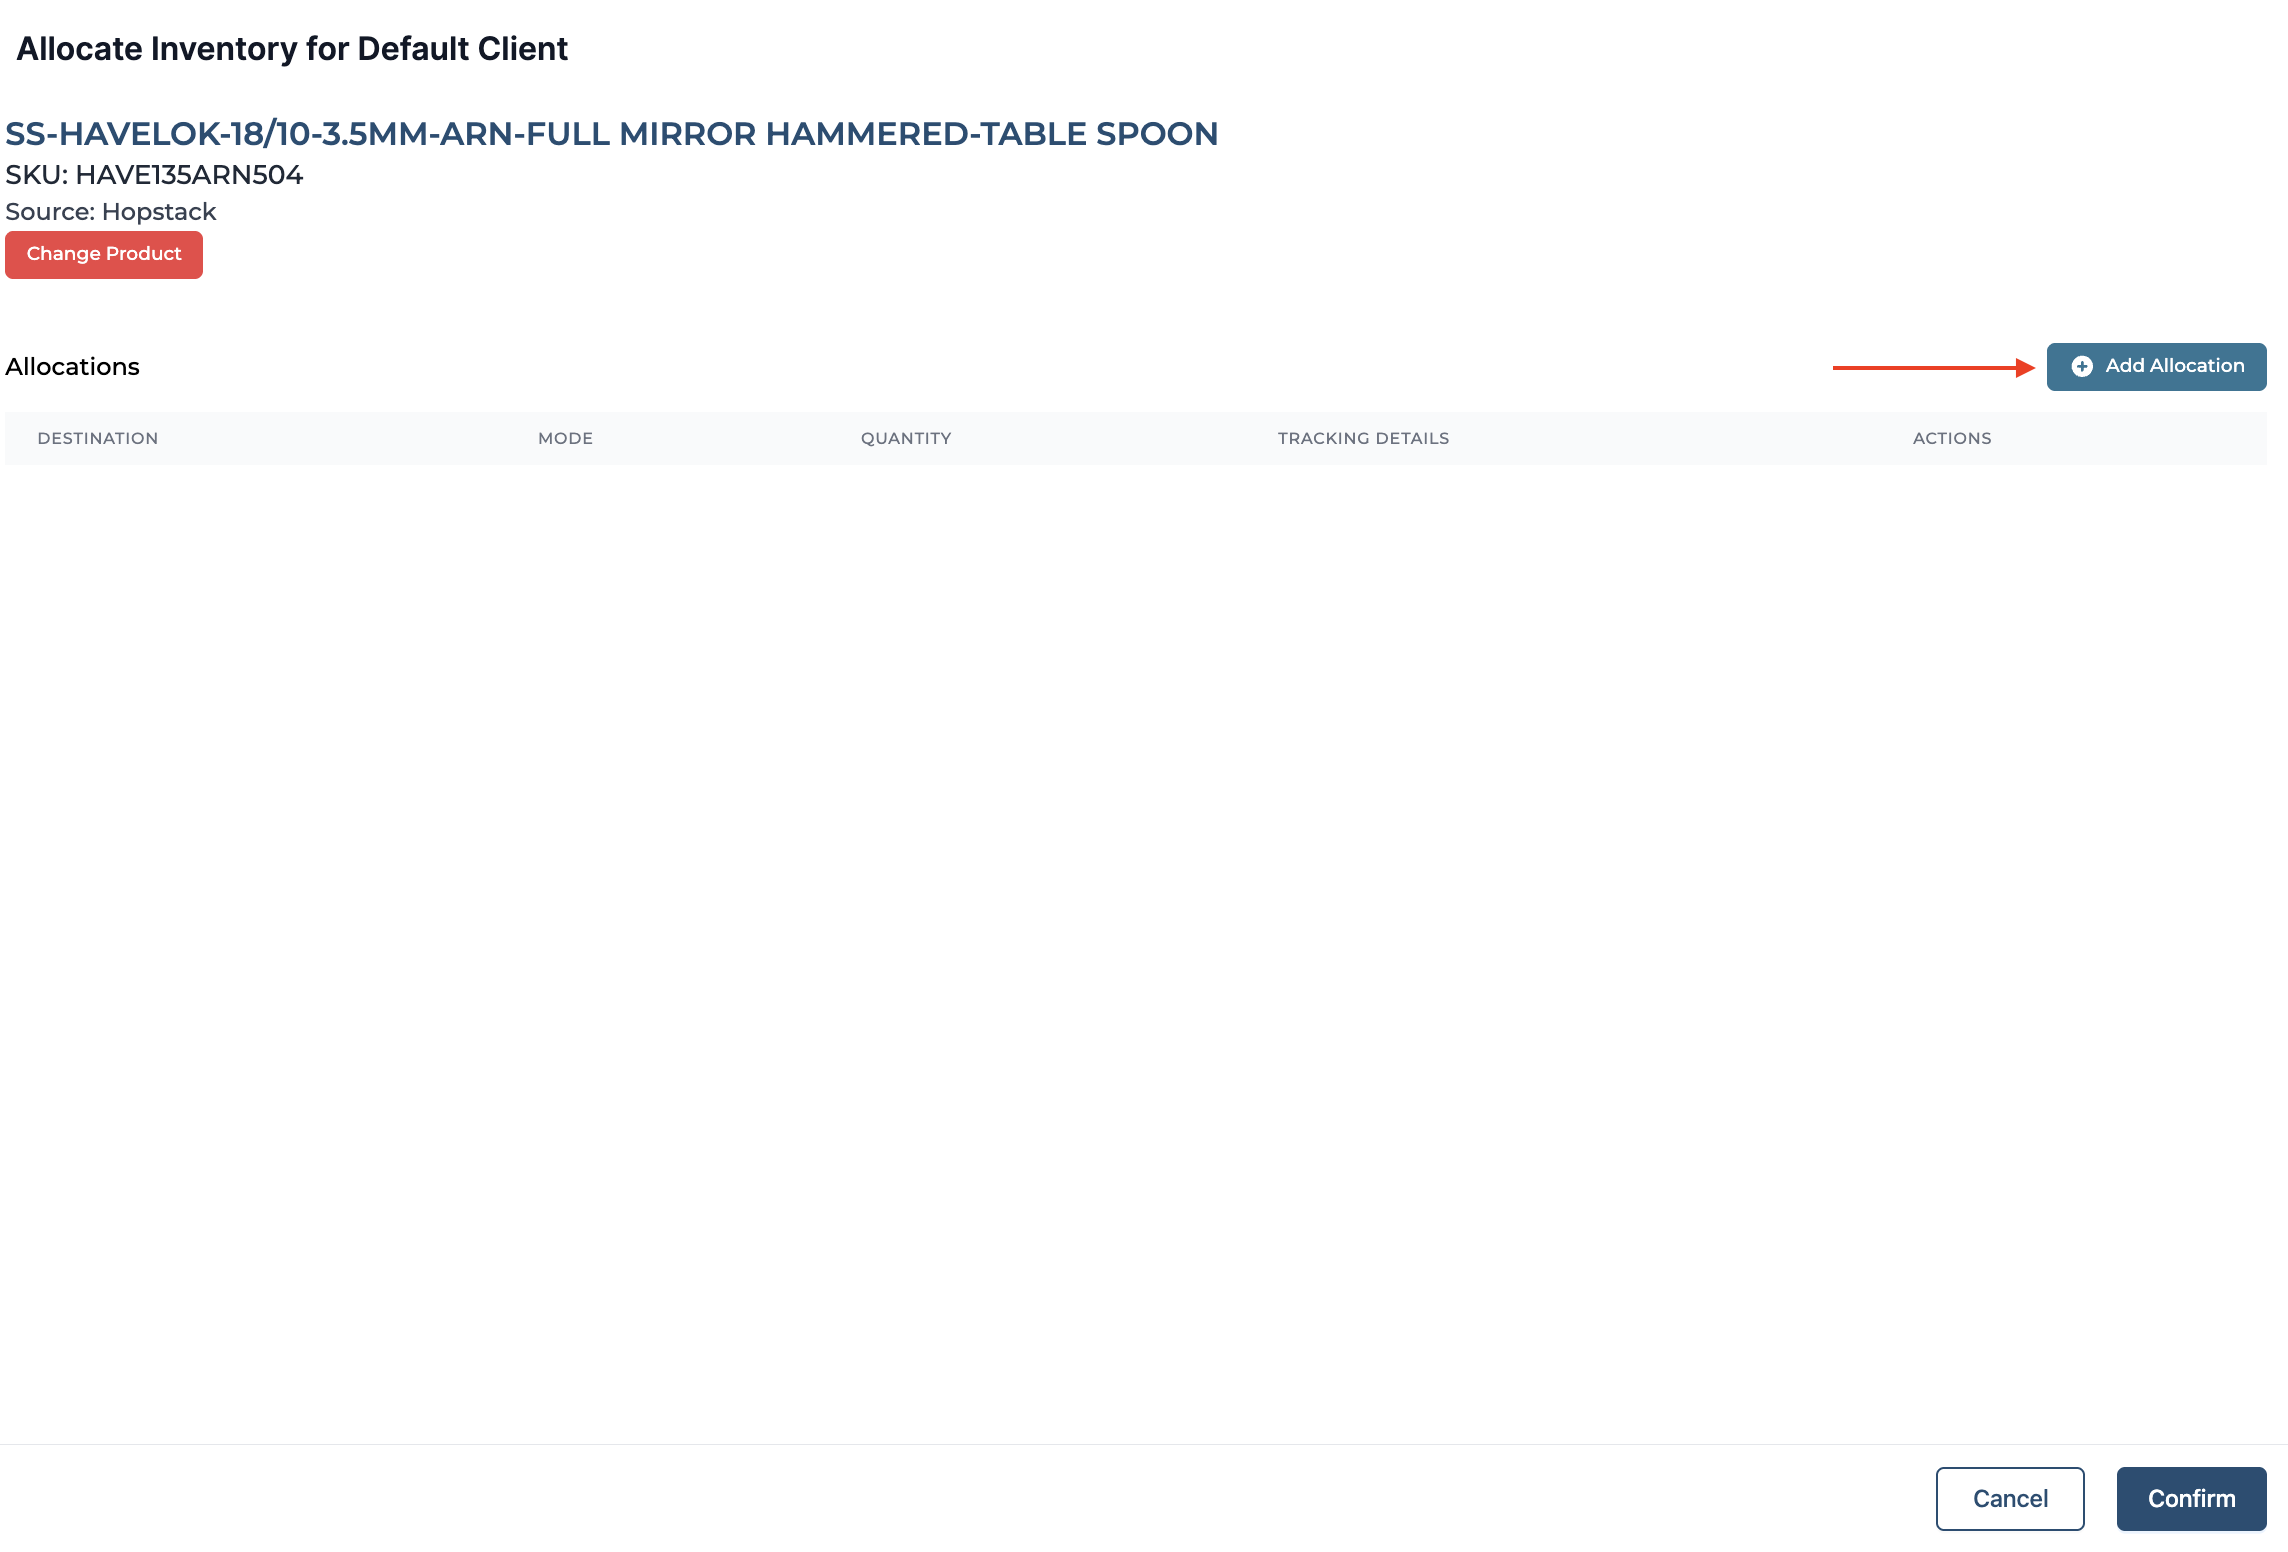
Once a source product is selected. Click on “Add Allocation” to proceed with destination product selection.
-
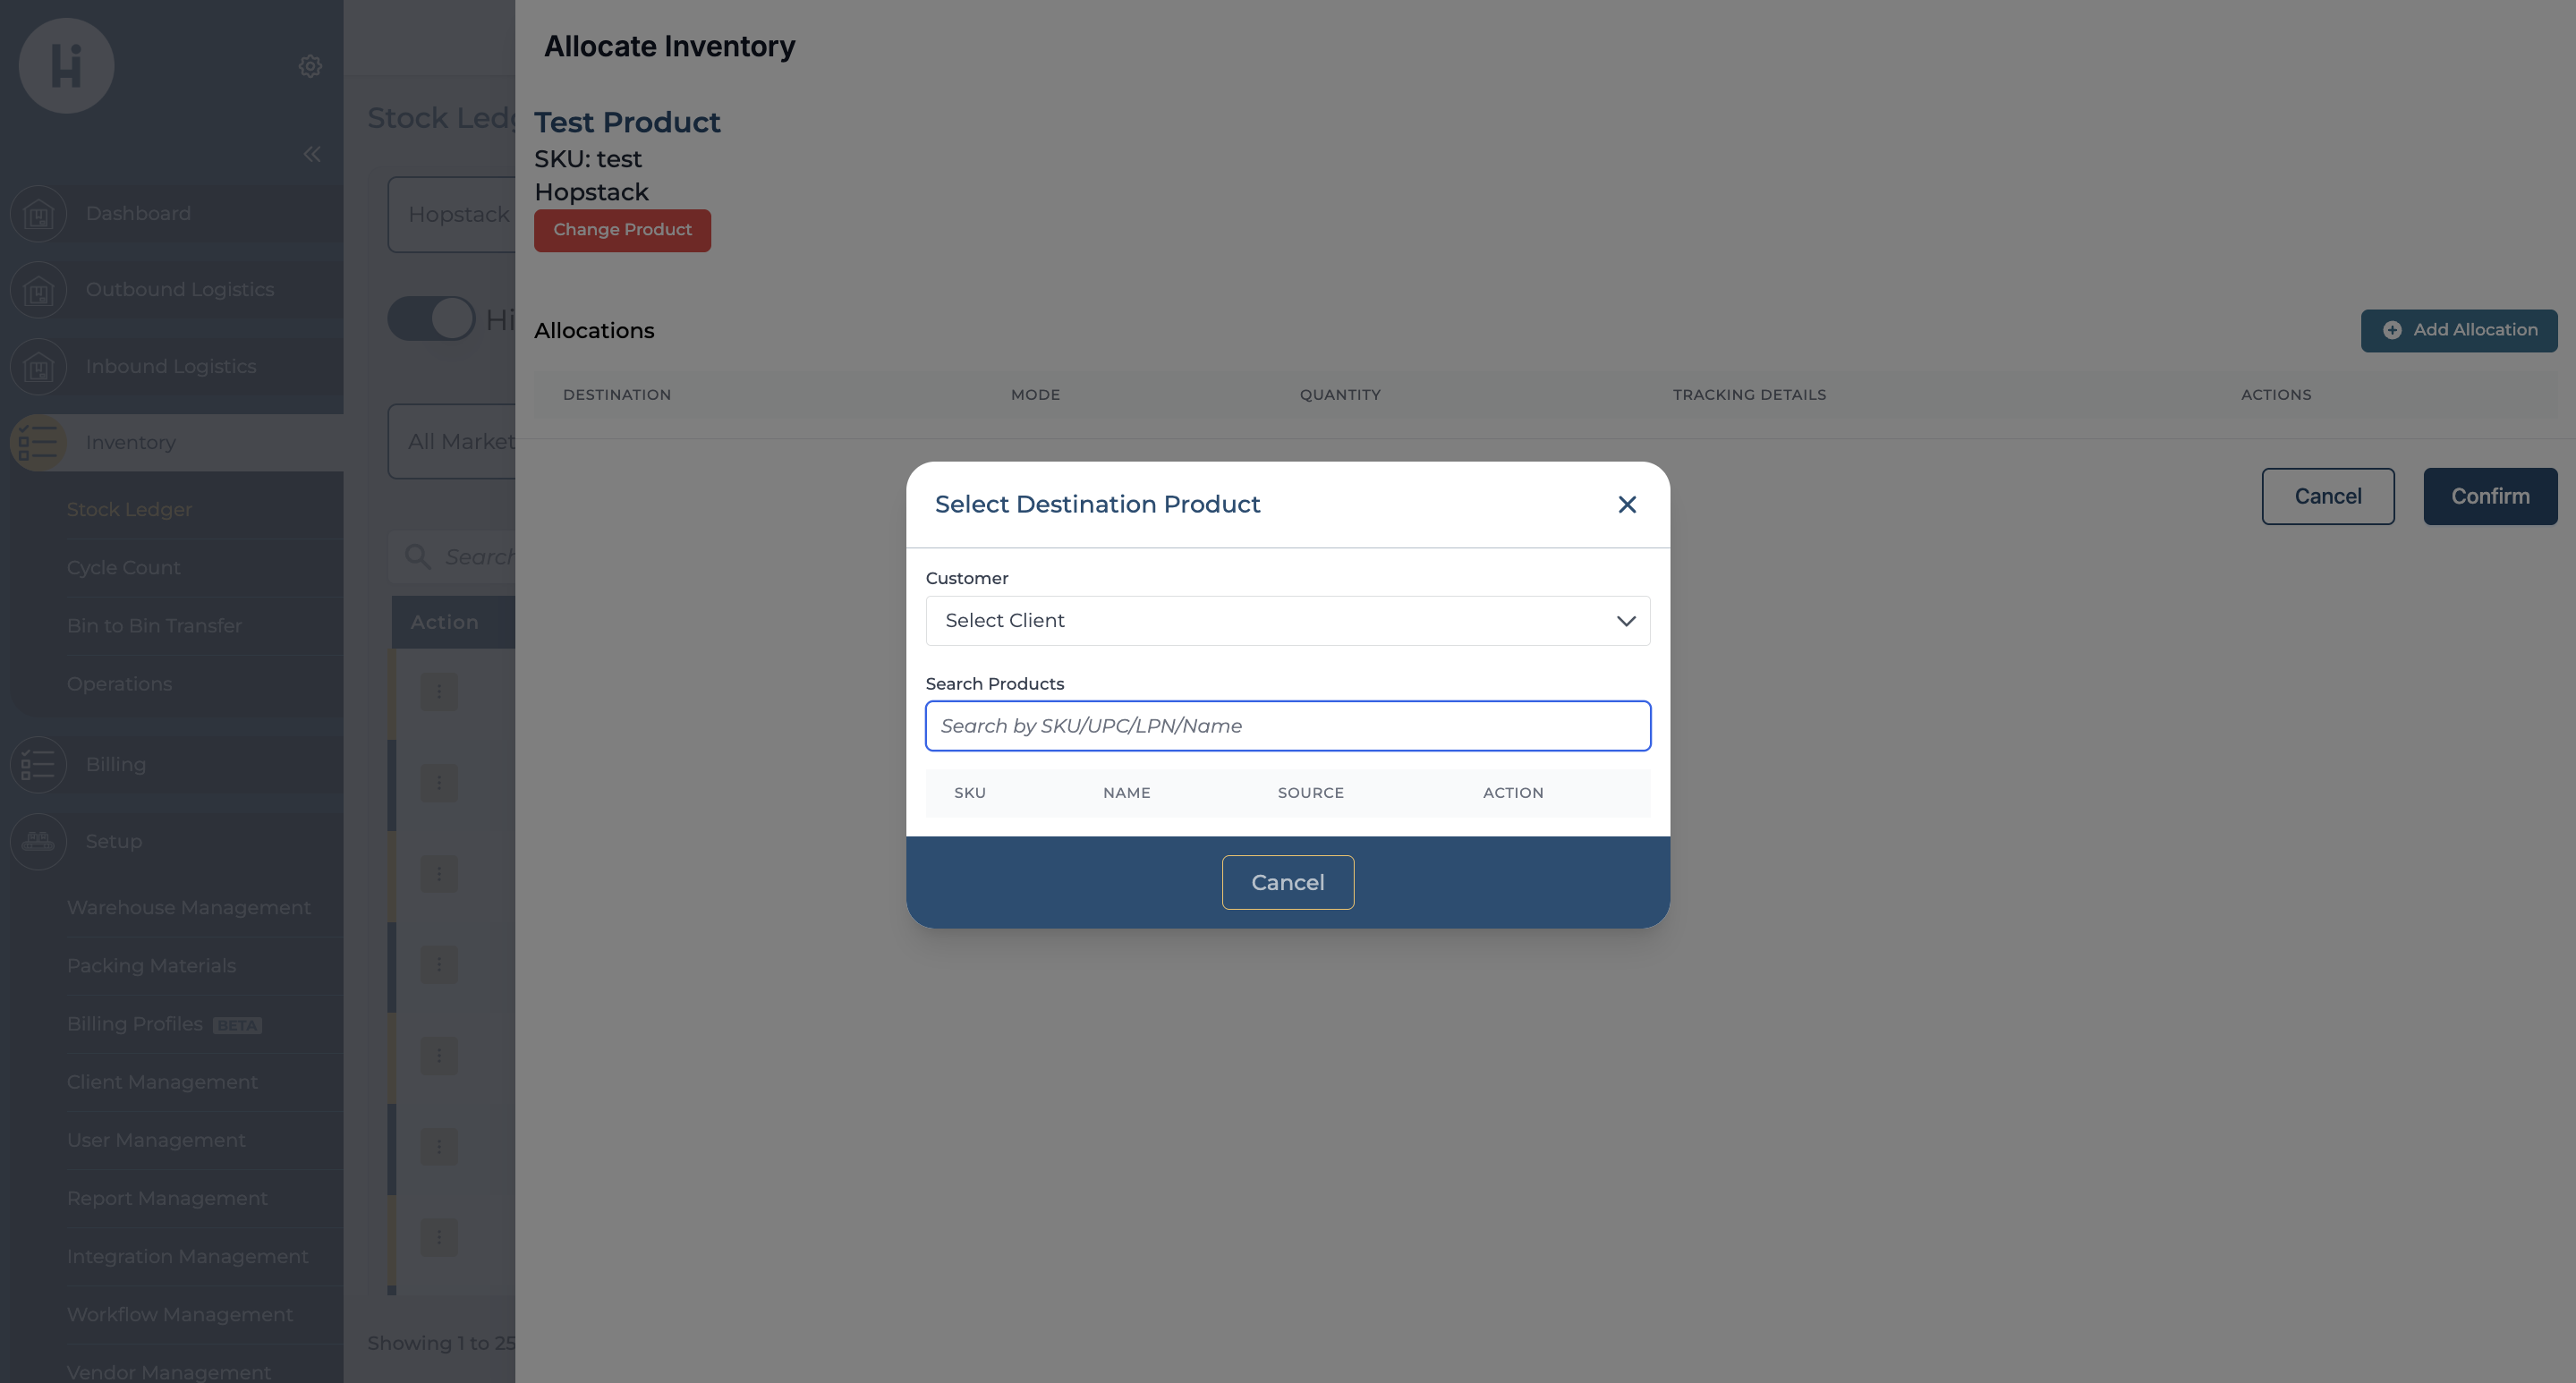
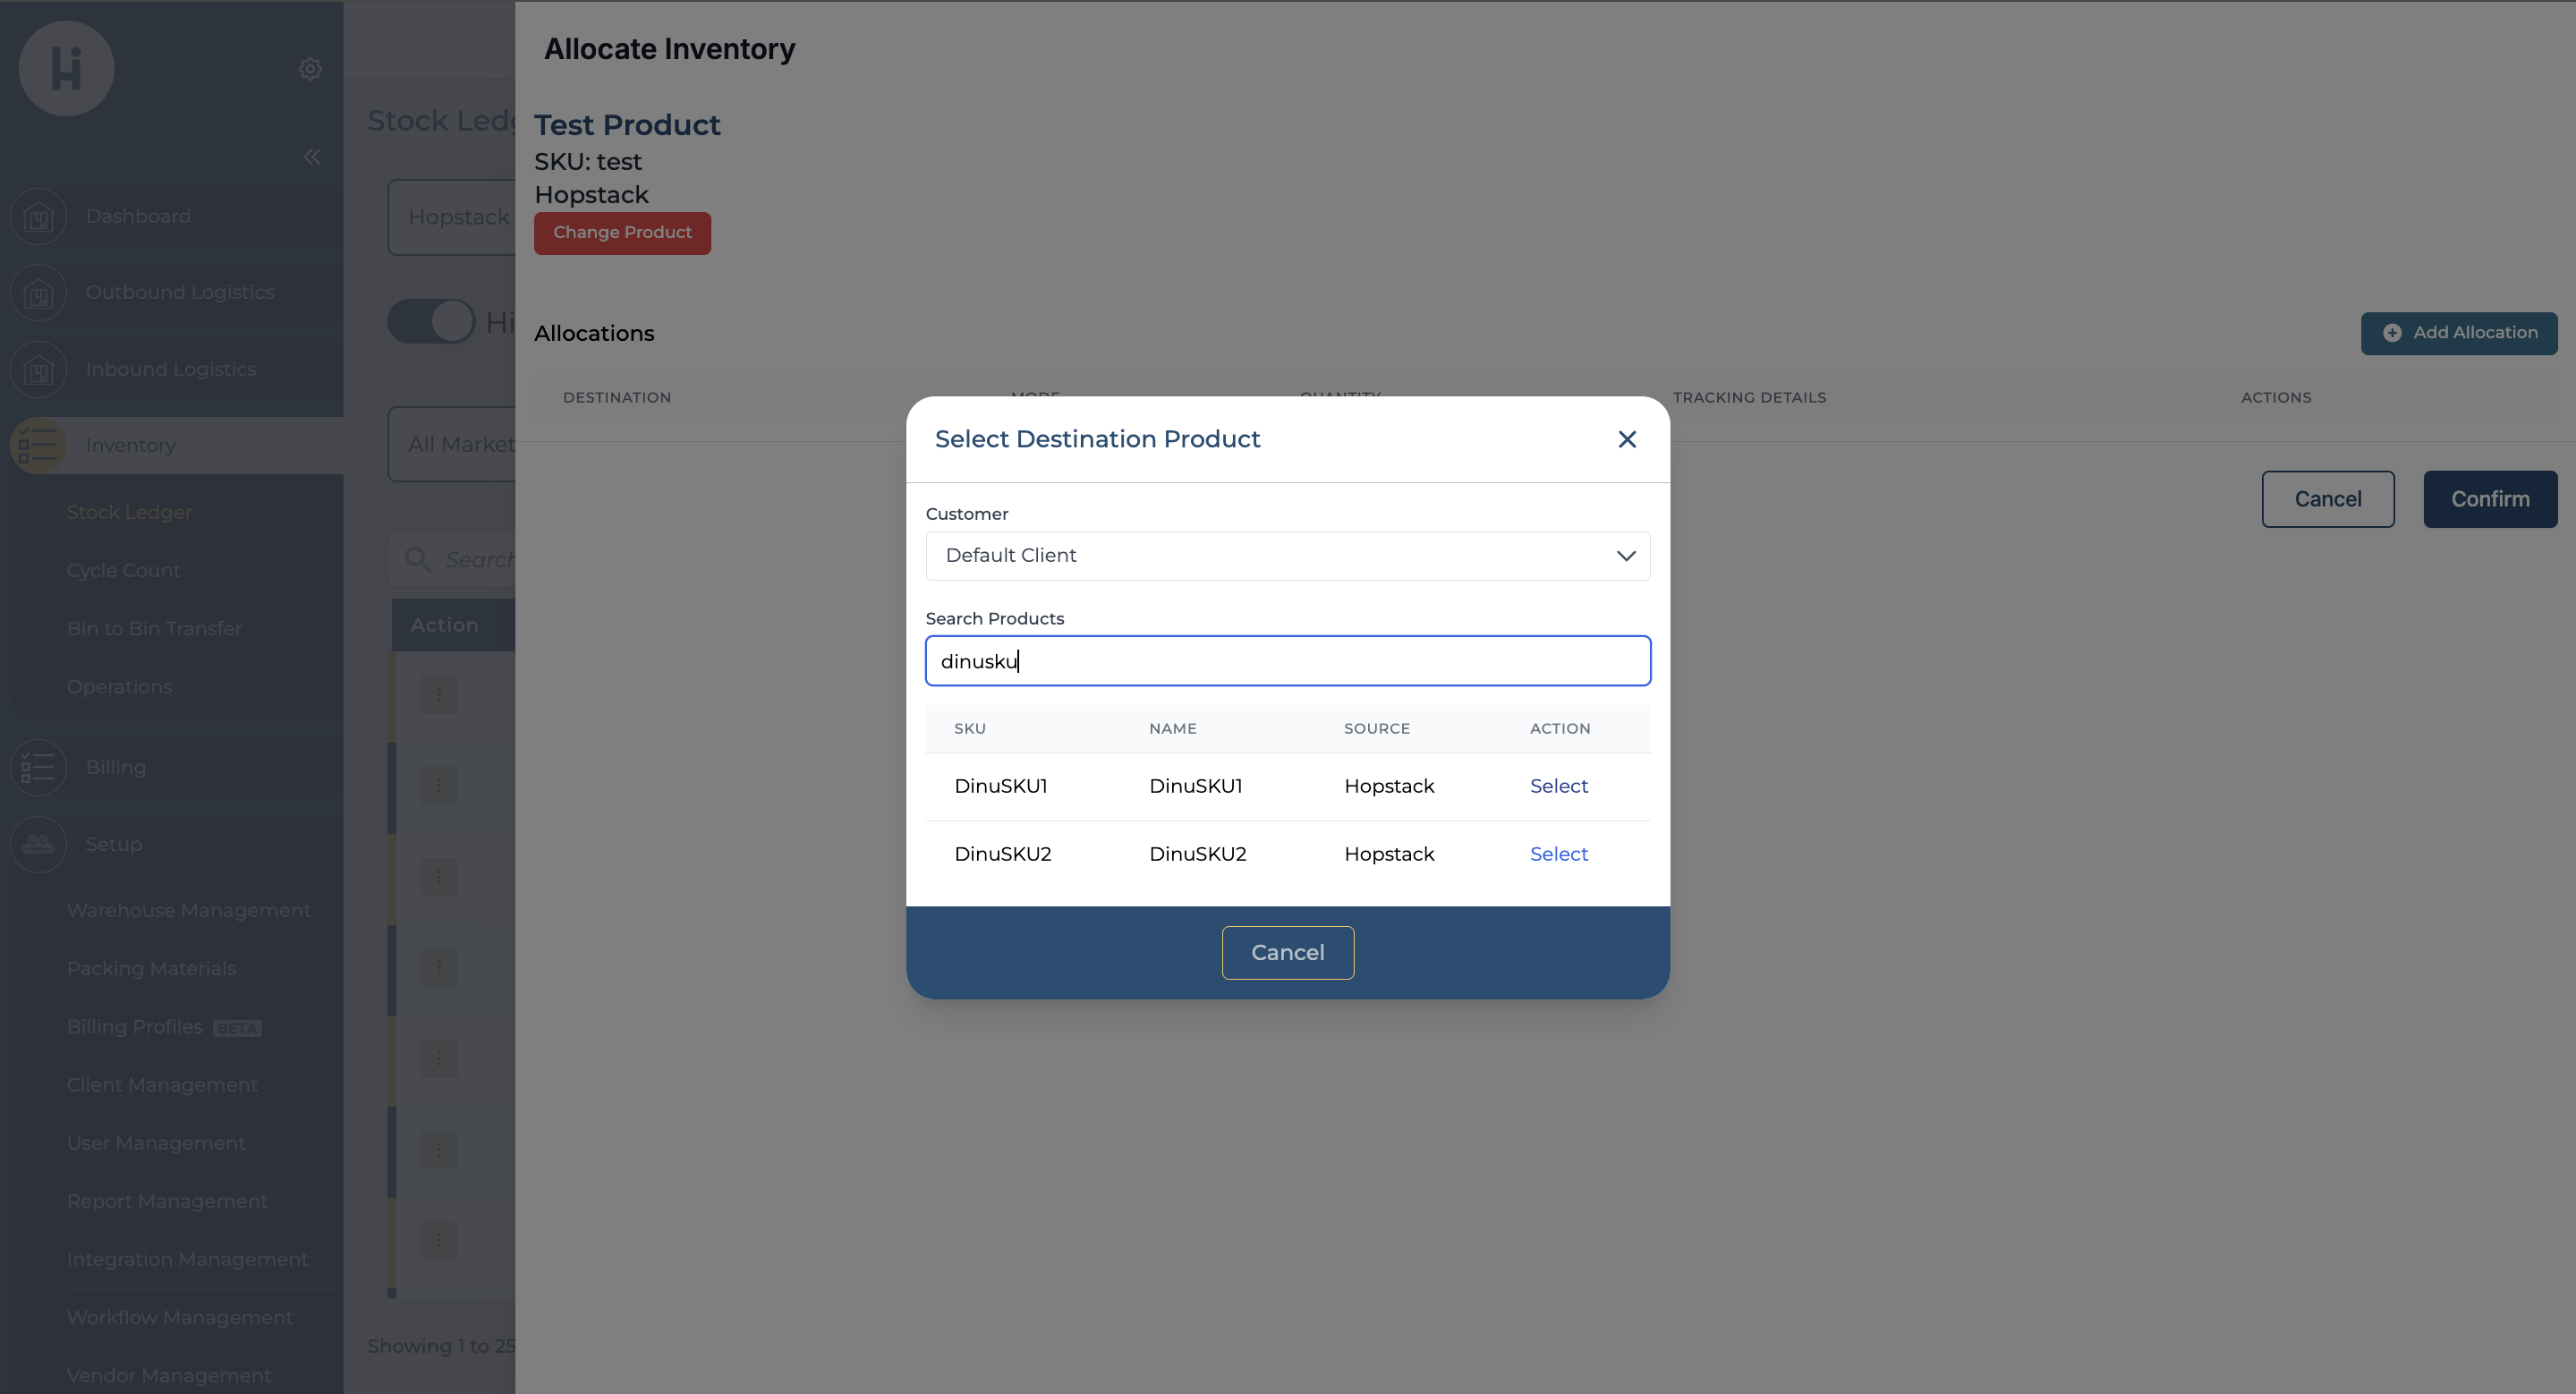
Select the destination product: In order to proceed with destination product selection, please select the client and search for the product that will receive the inventory.
-
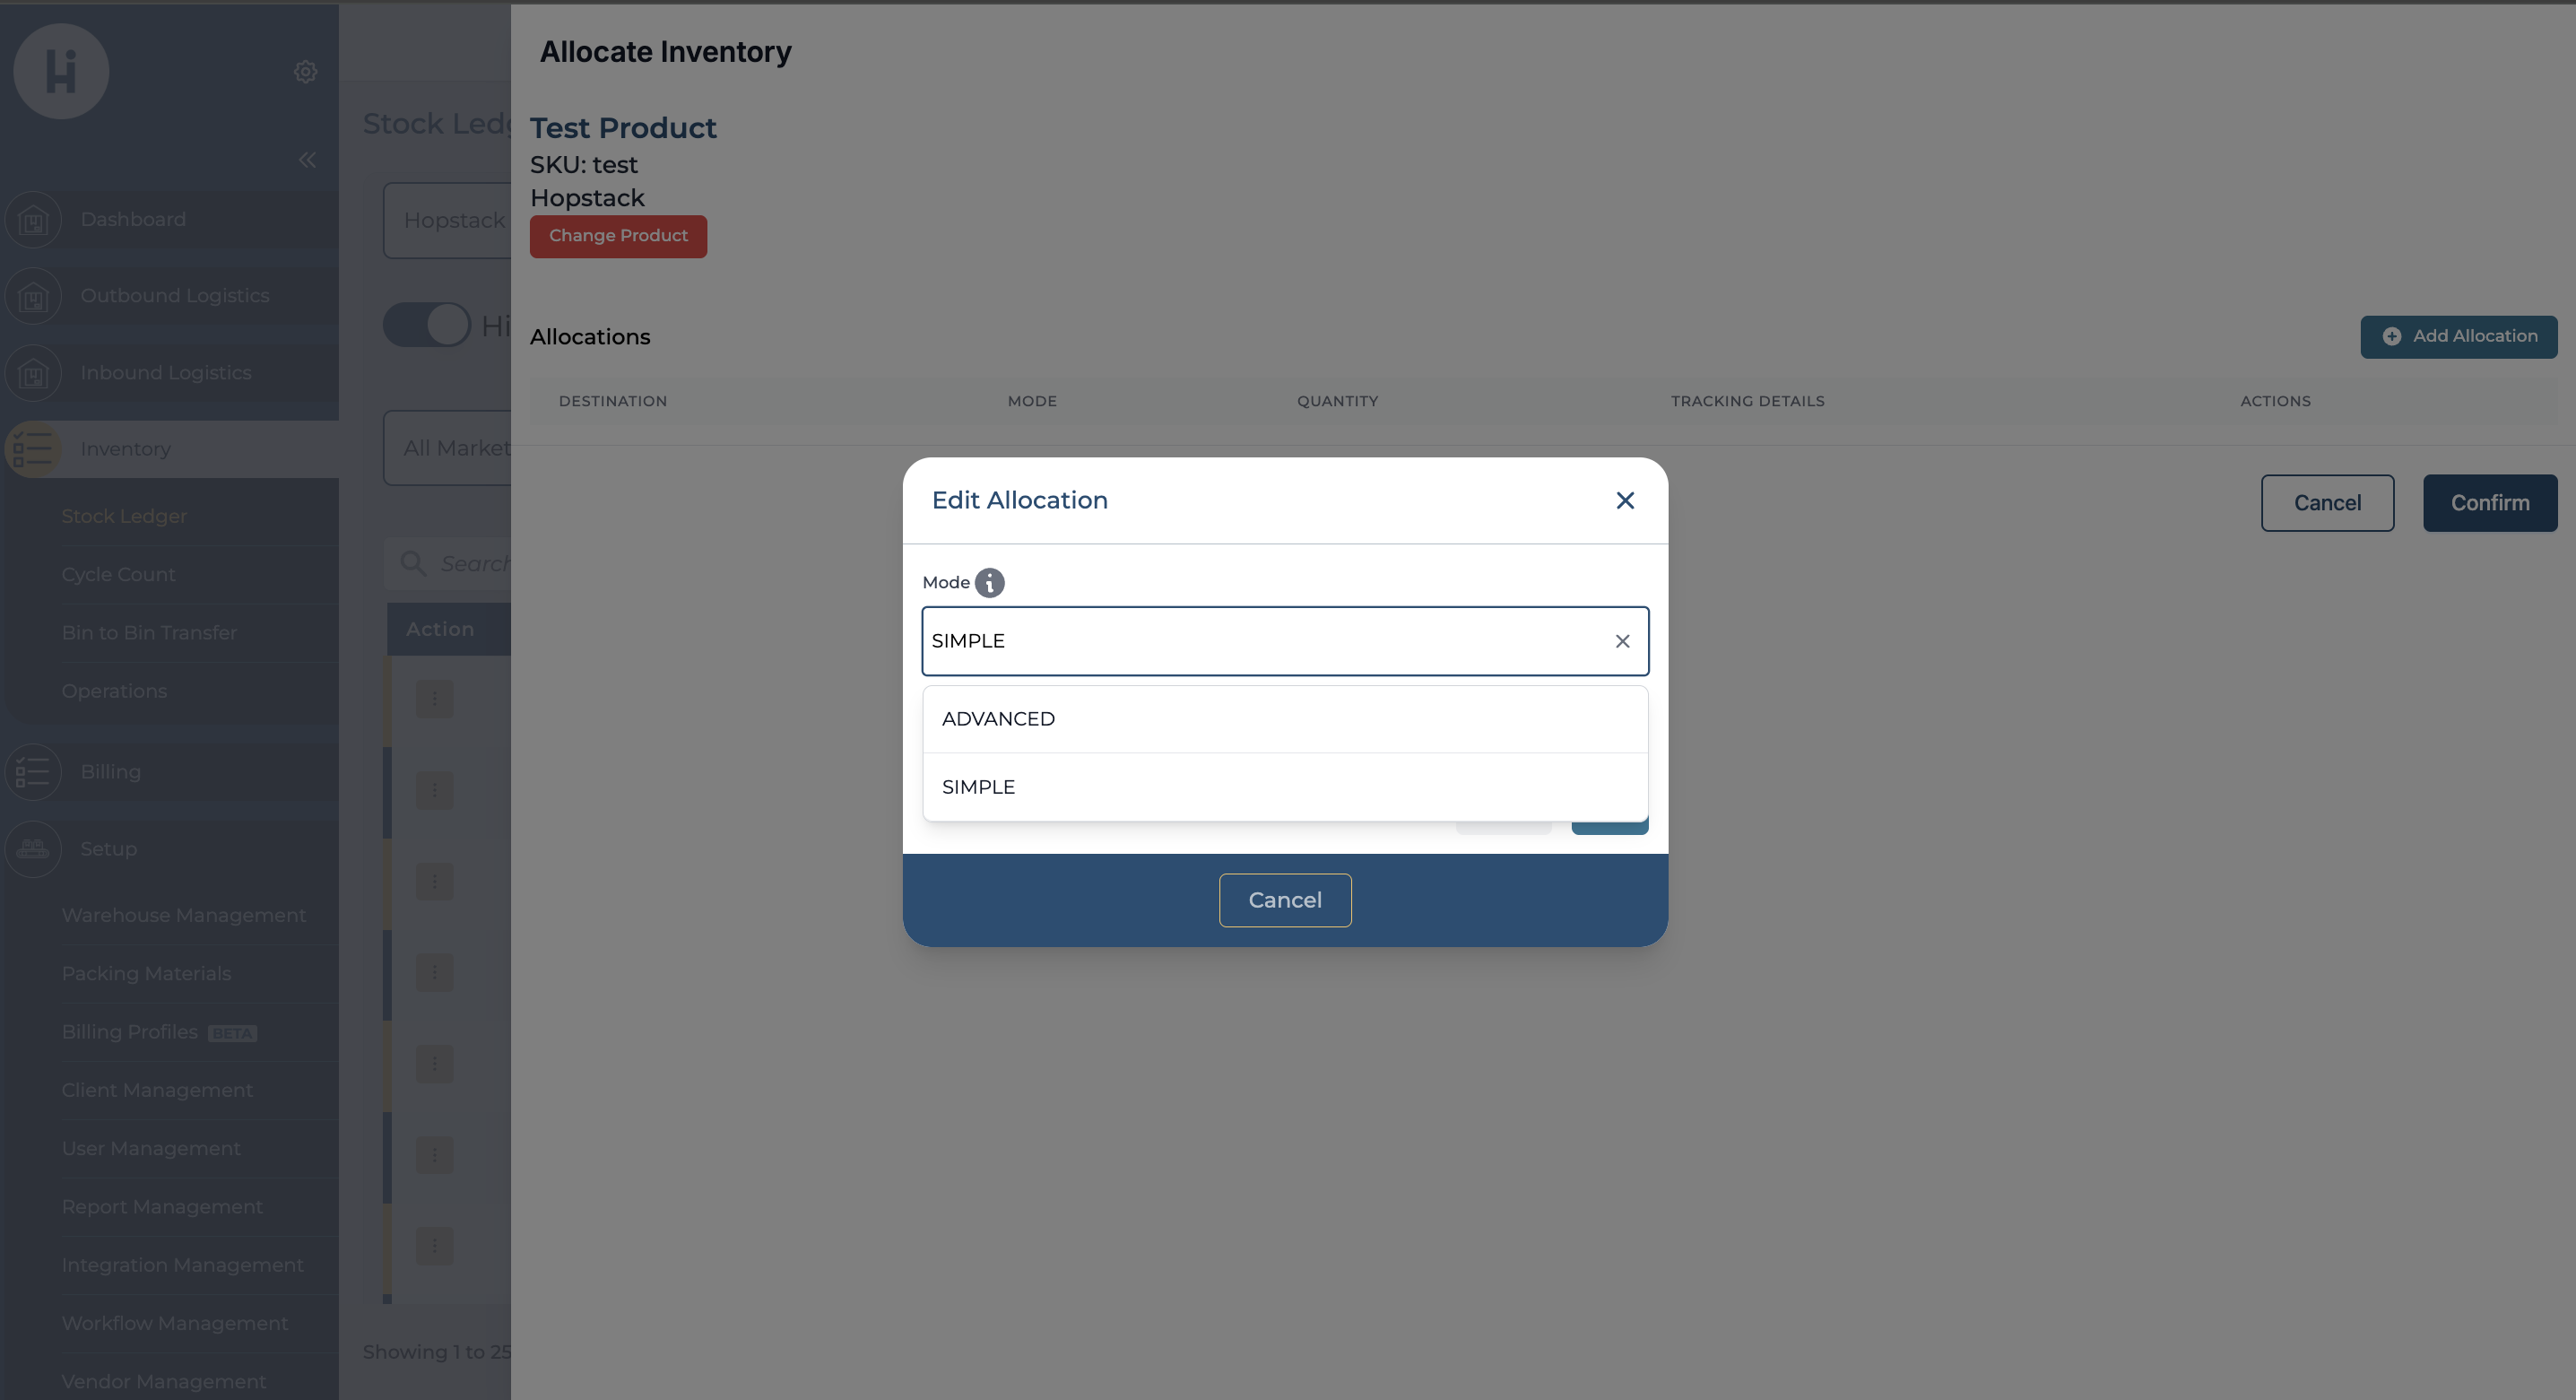
Once you select a destination product, the system will automatically navigate you to the Allocation Mode screen, where you can choose Simple or Advanced mode.
-
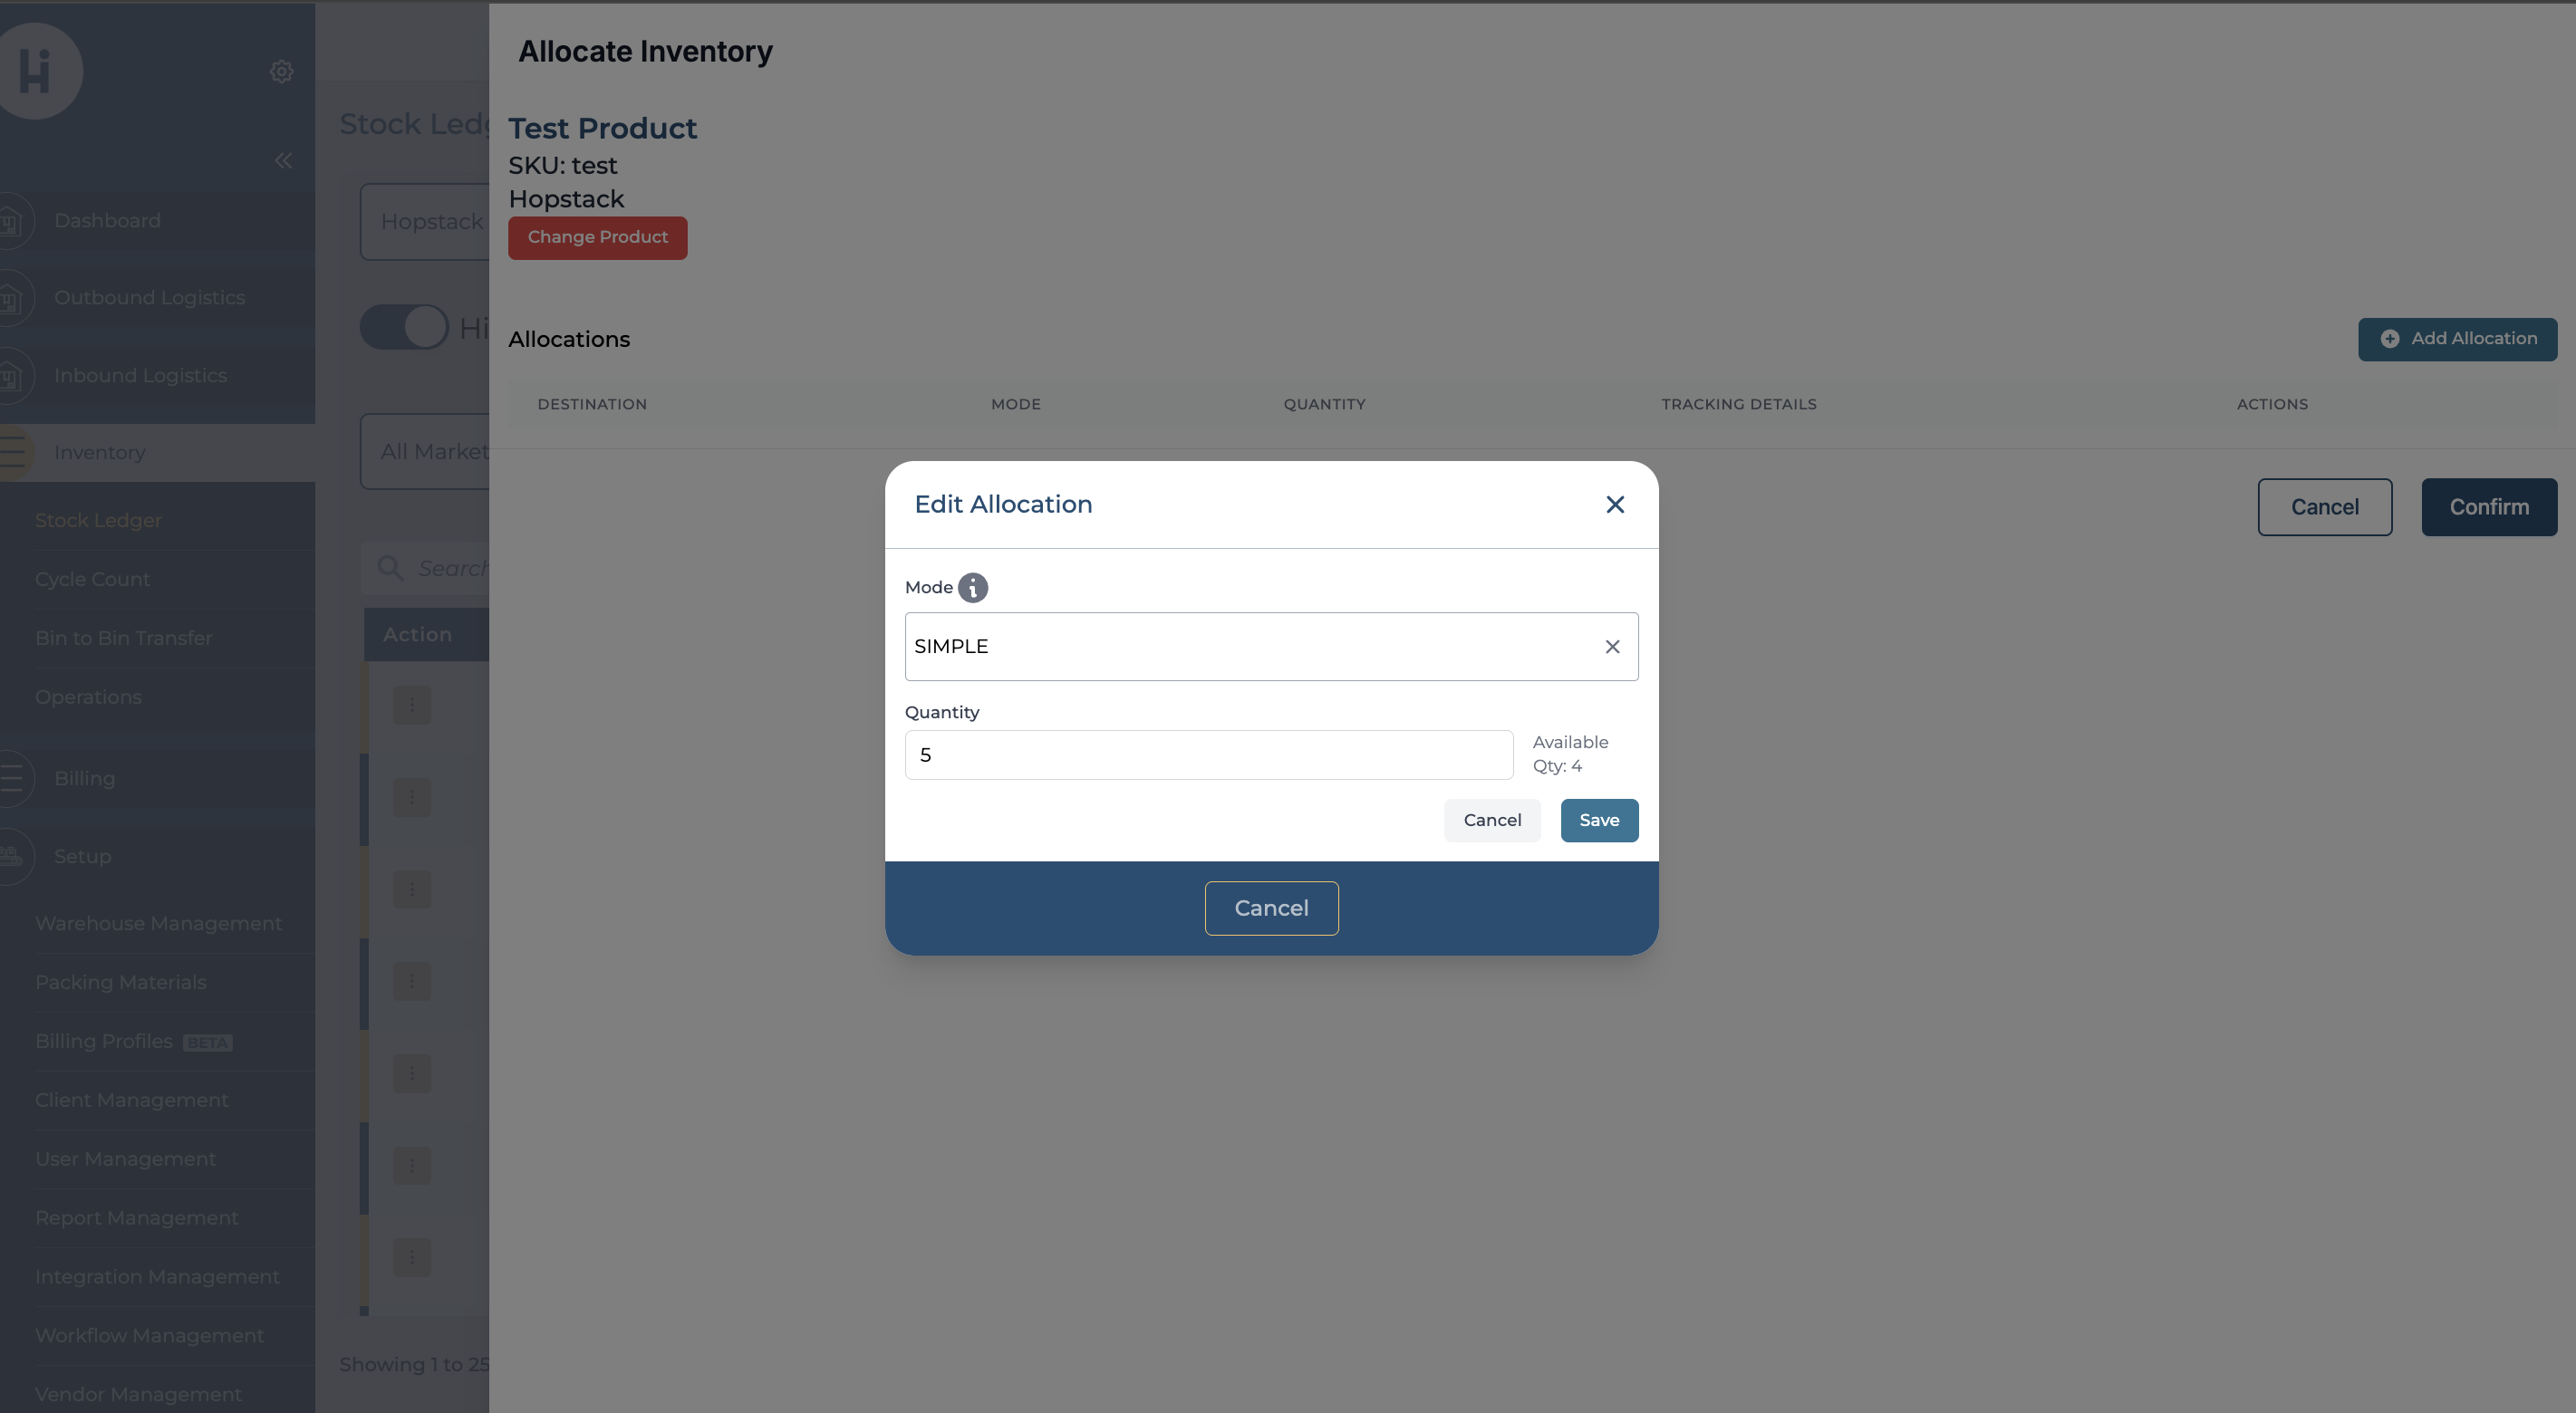
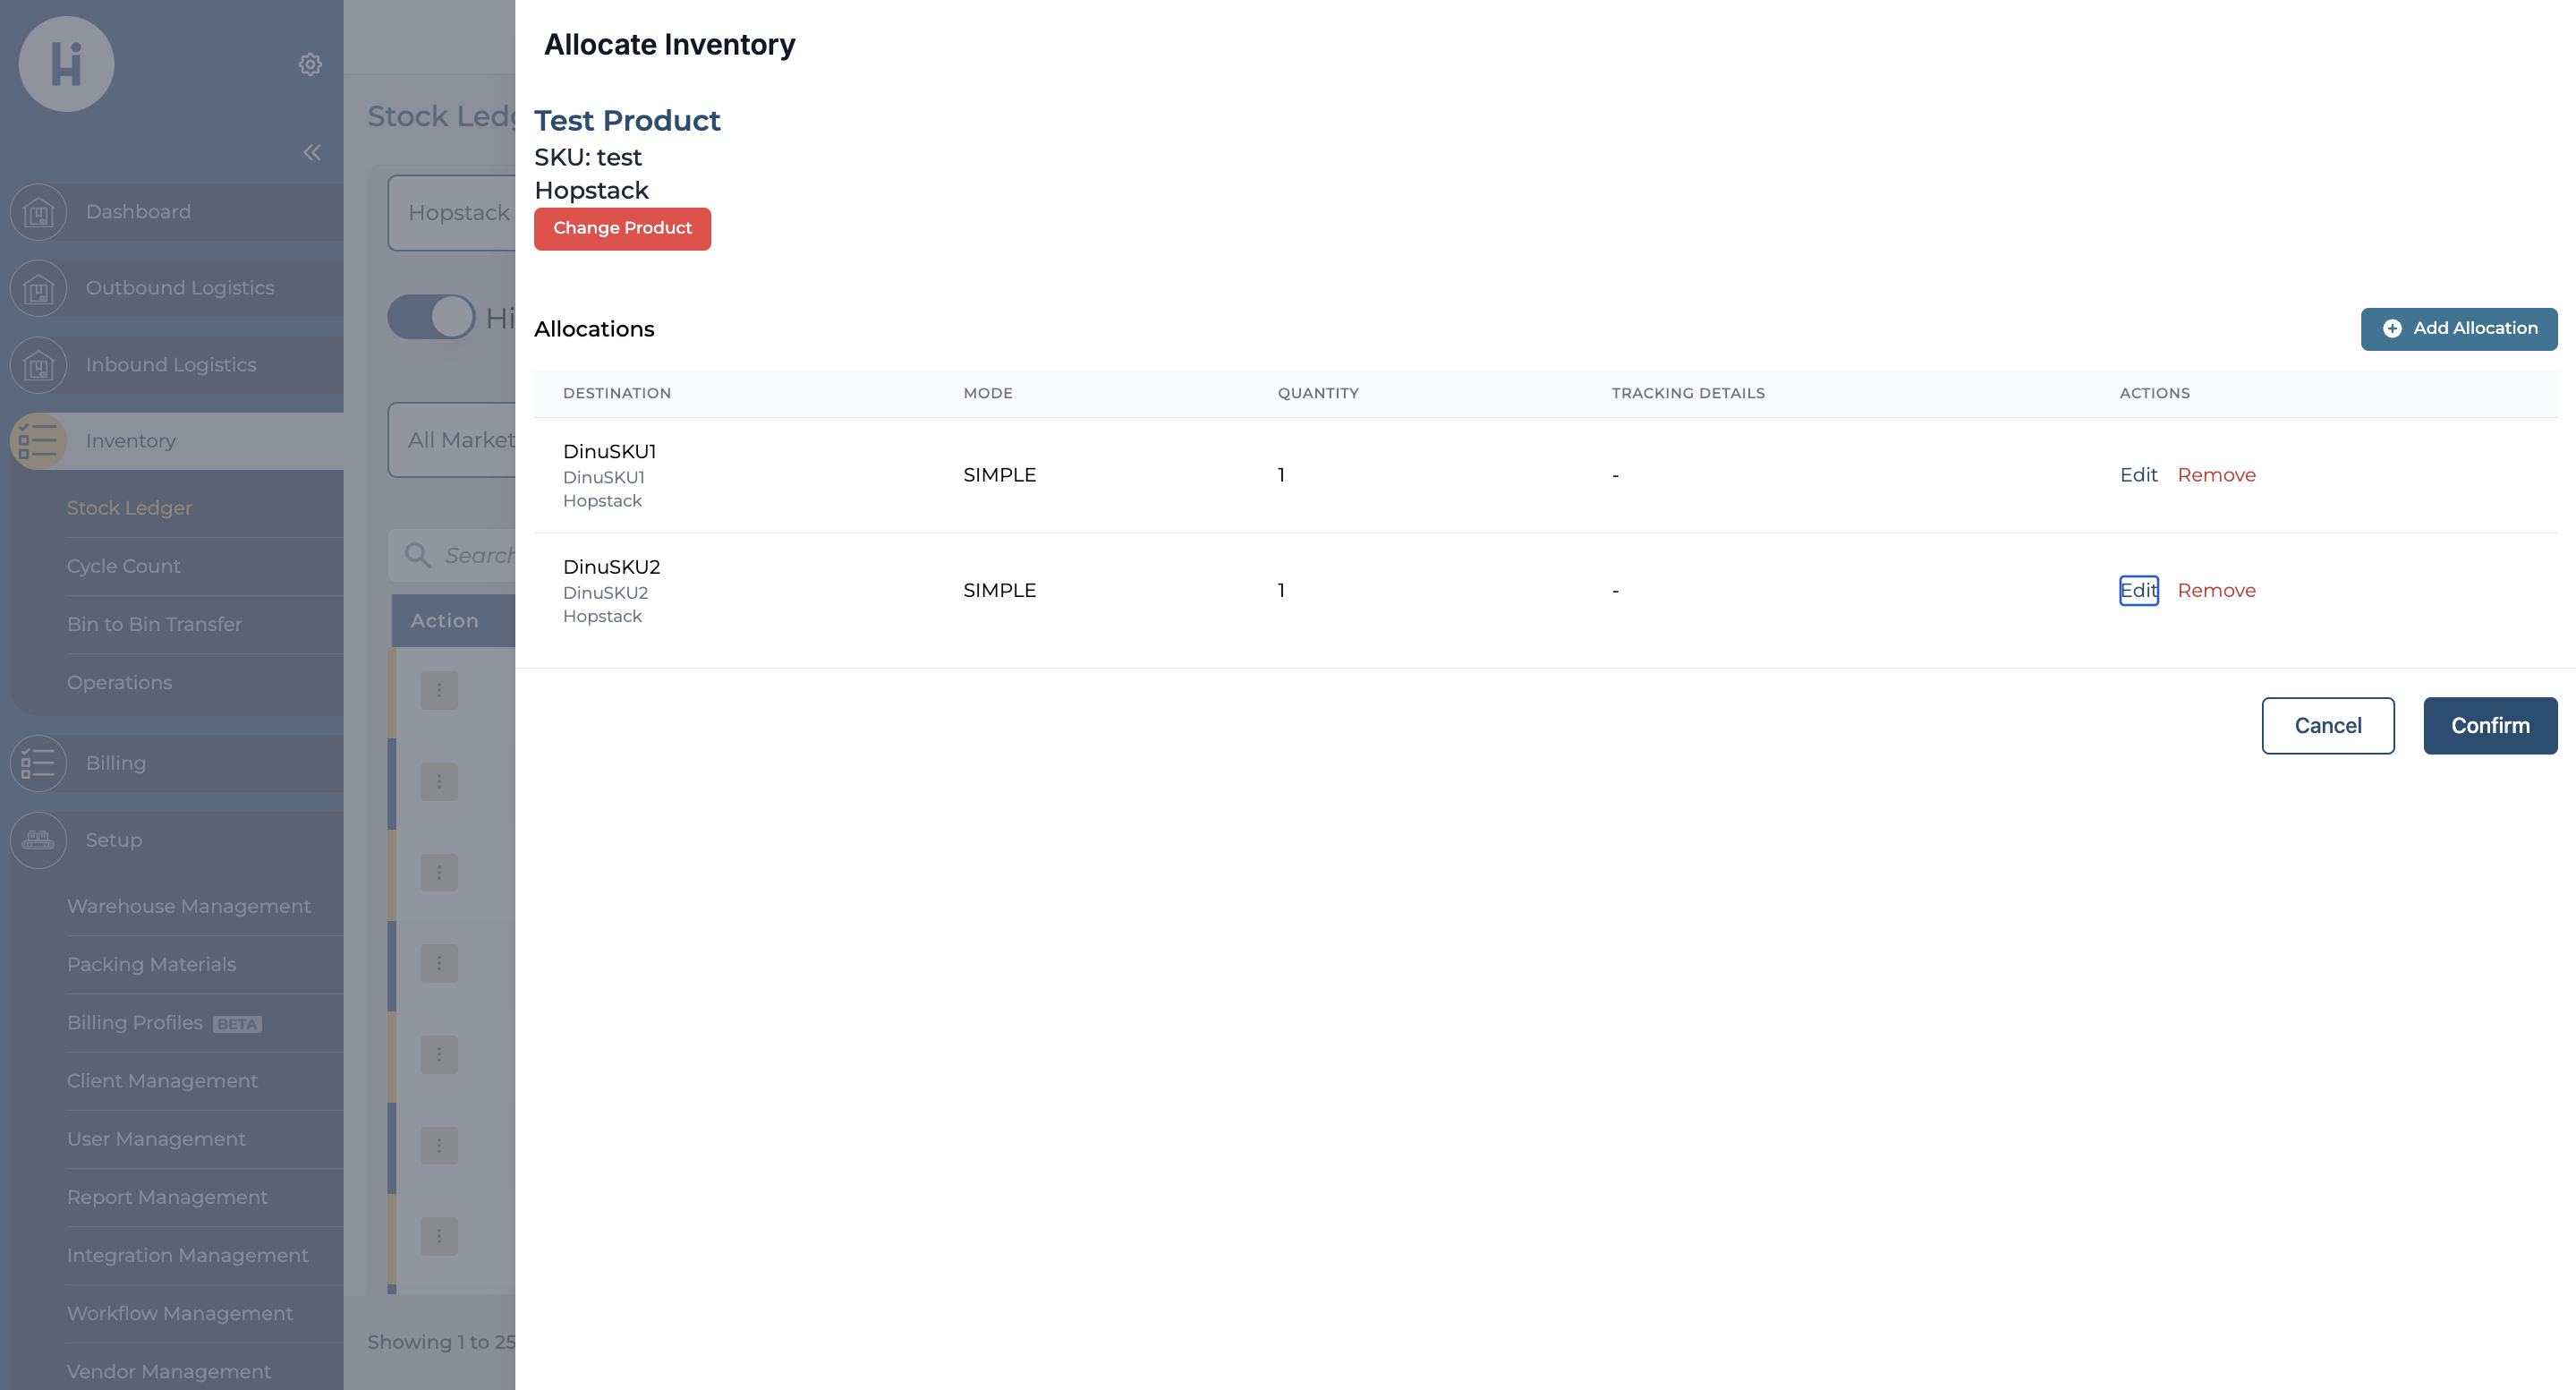
Simple Mode: This allows for quick and straightforward inventory transfers based on quantity. Enter the quantity that the user wants to transfer. The system automatically shows the total inventory available from the selected source product.
-
Advanced Mode: This allows the user to allocate inventory based on the tracking identifier by selecting LPN, LOT ID, BEST BY DATE and PALLET ID whichever is applicable for the Source SKU. The system displays the available inventory per tracking identifier, helping ensure accurate allocation.
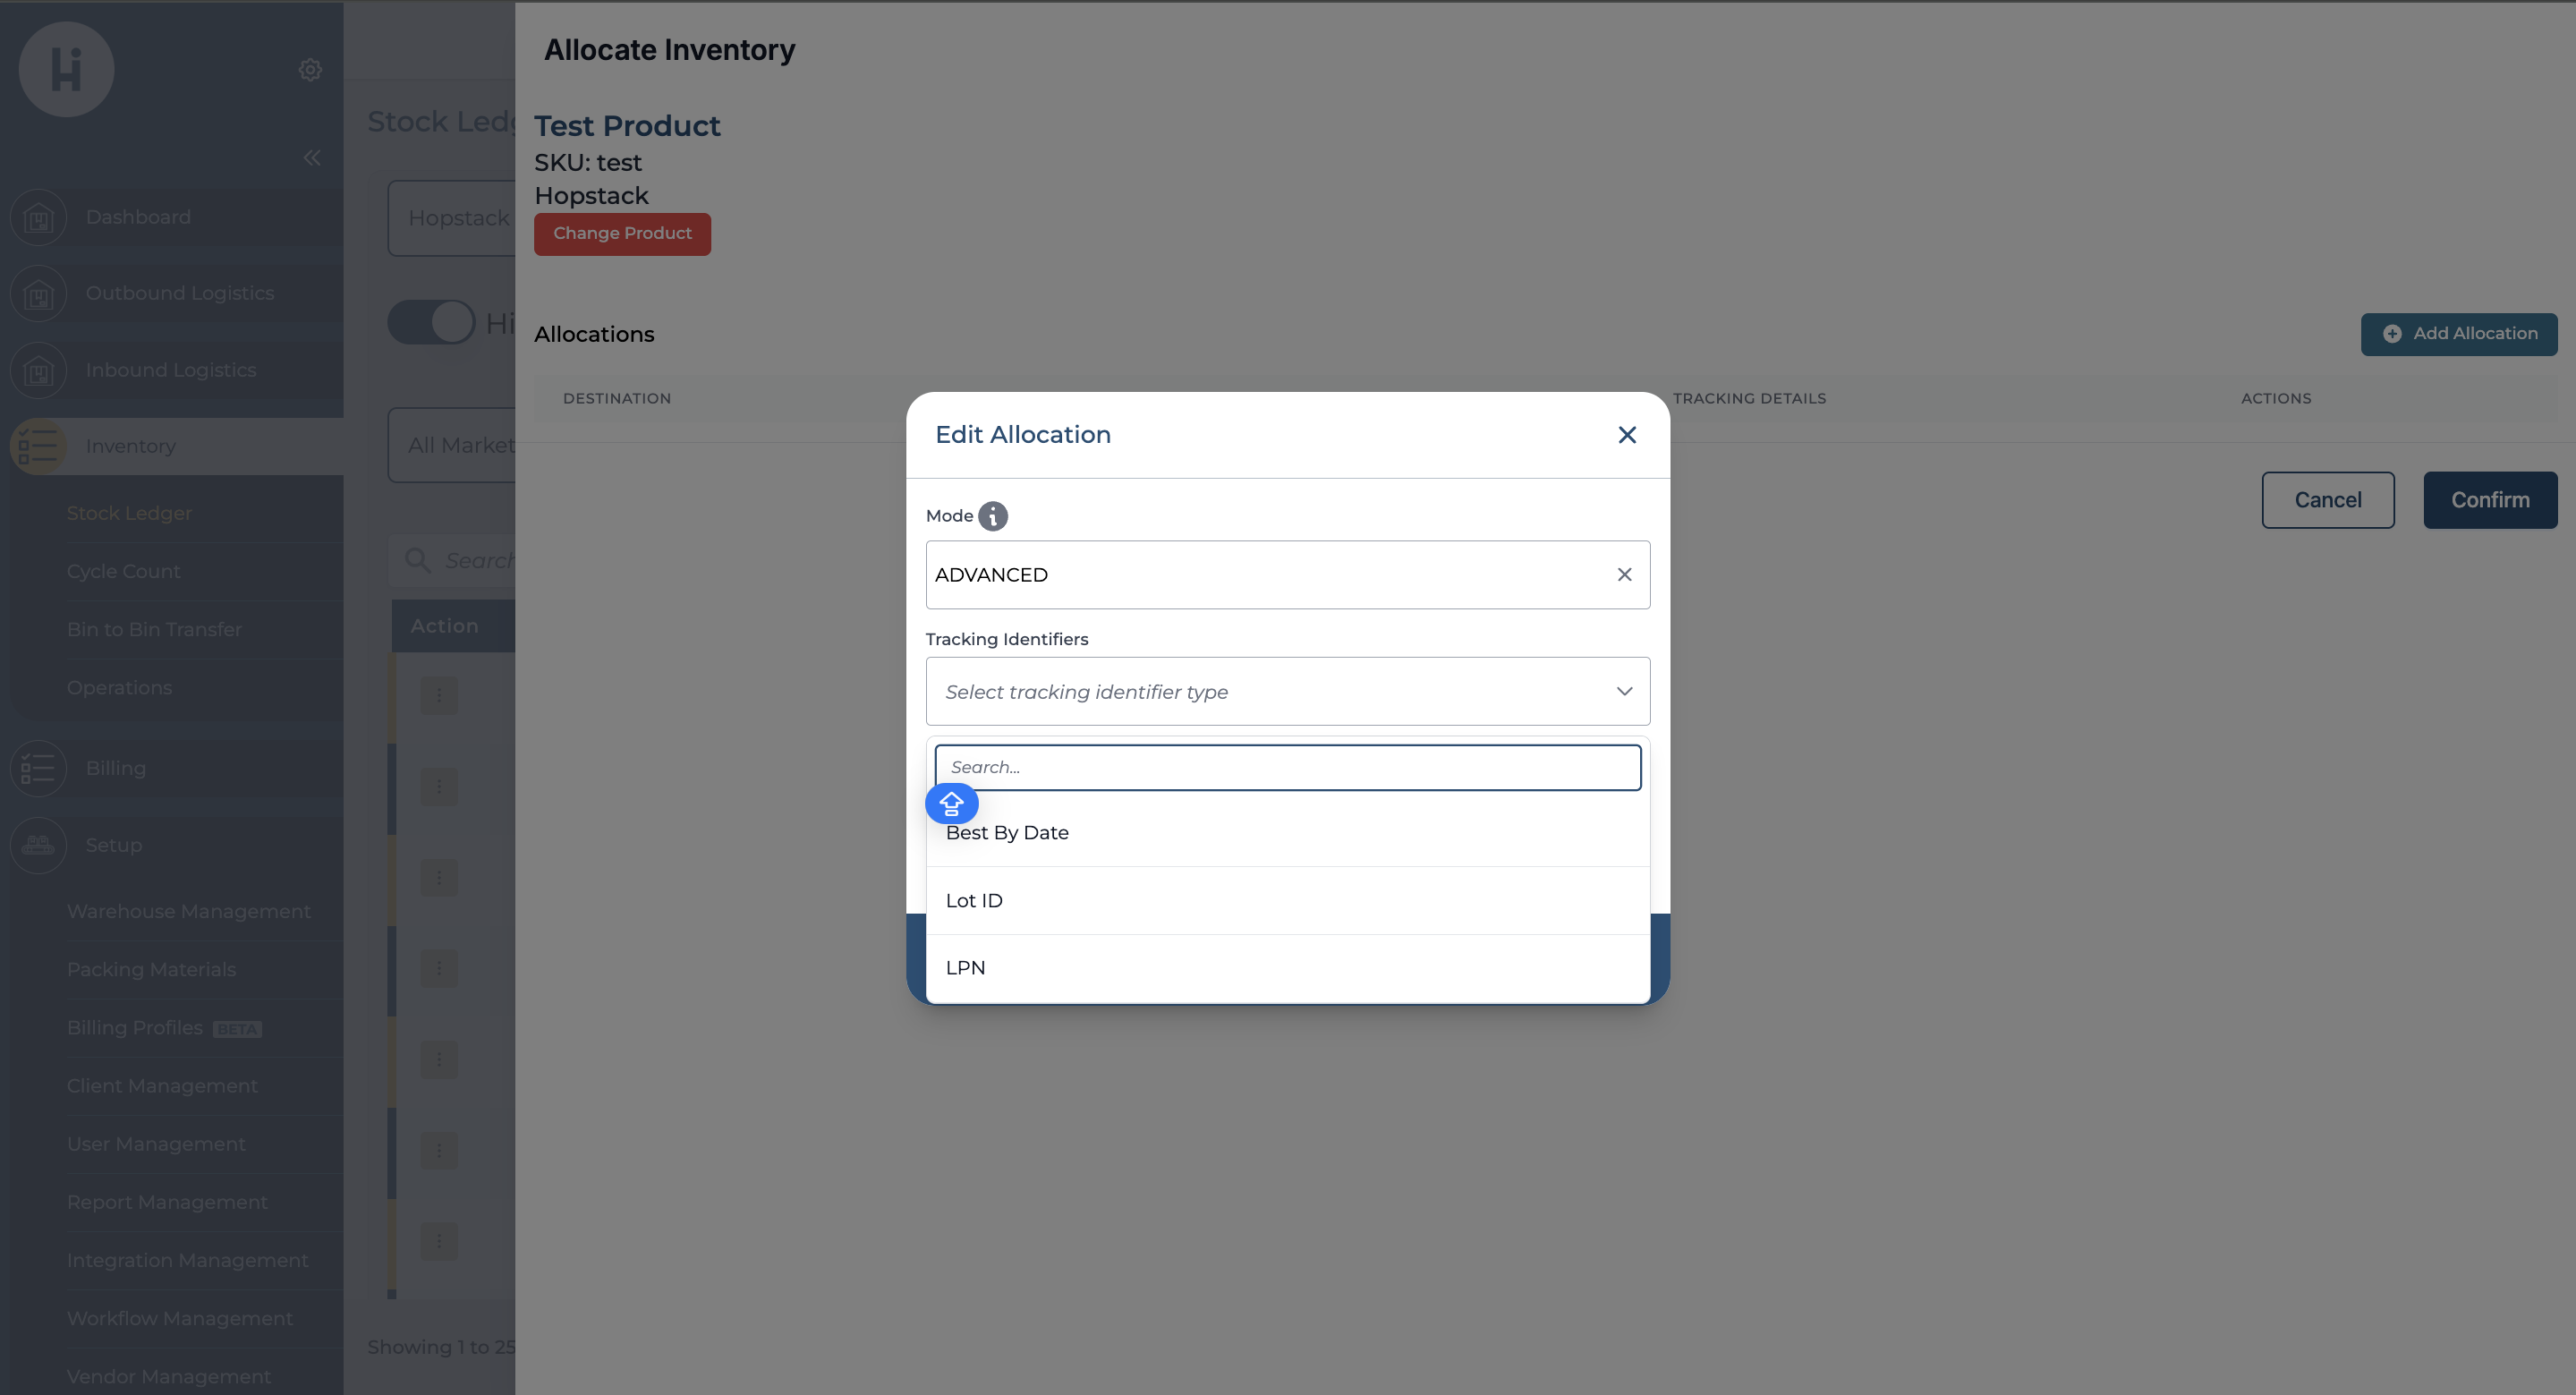
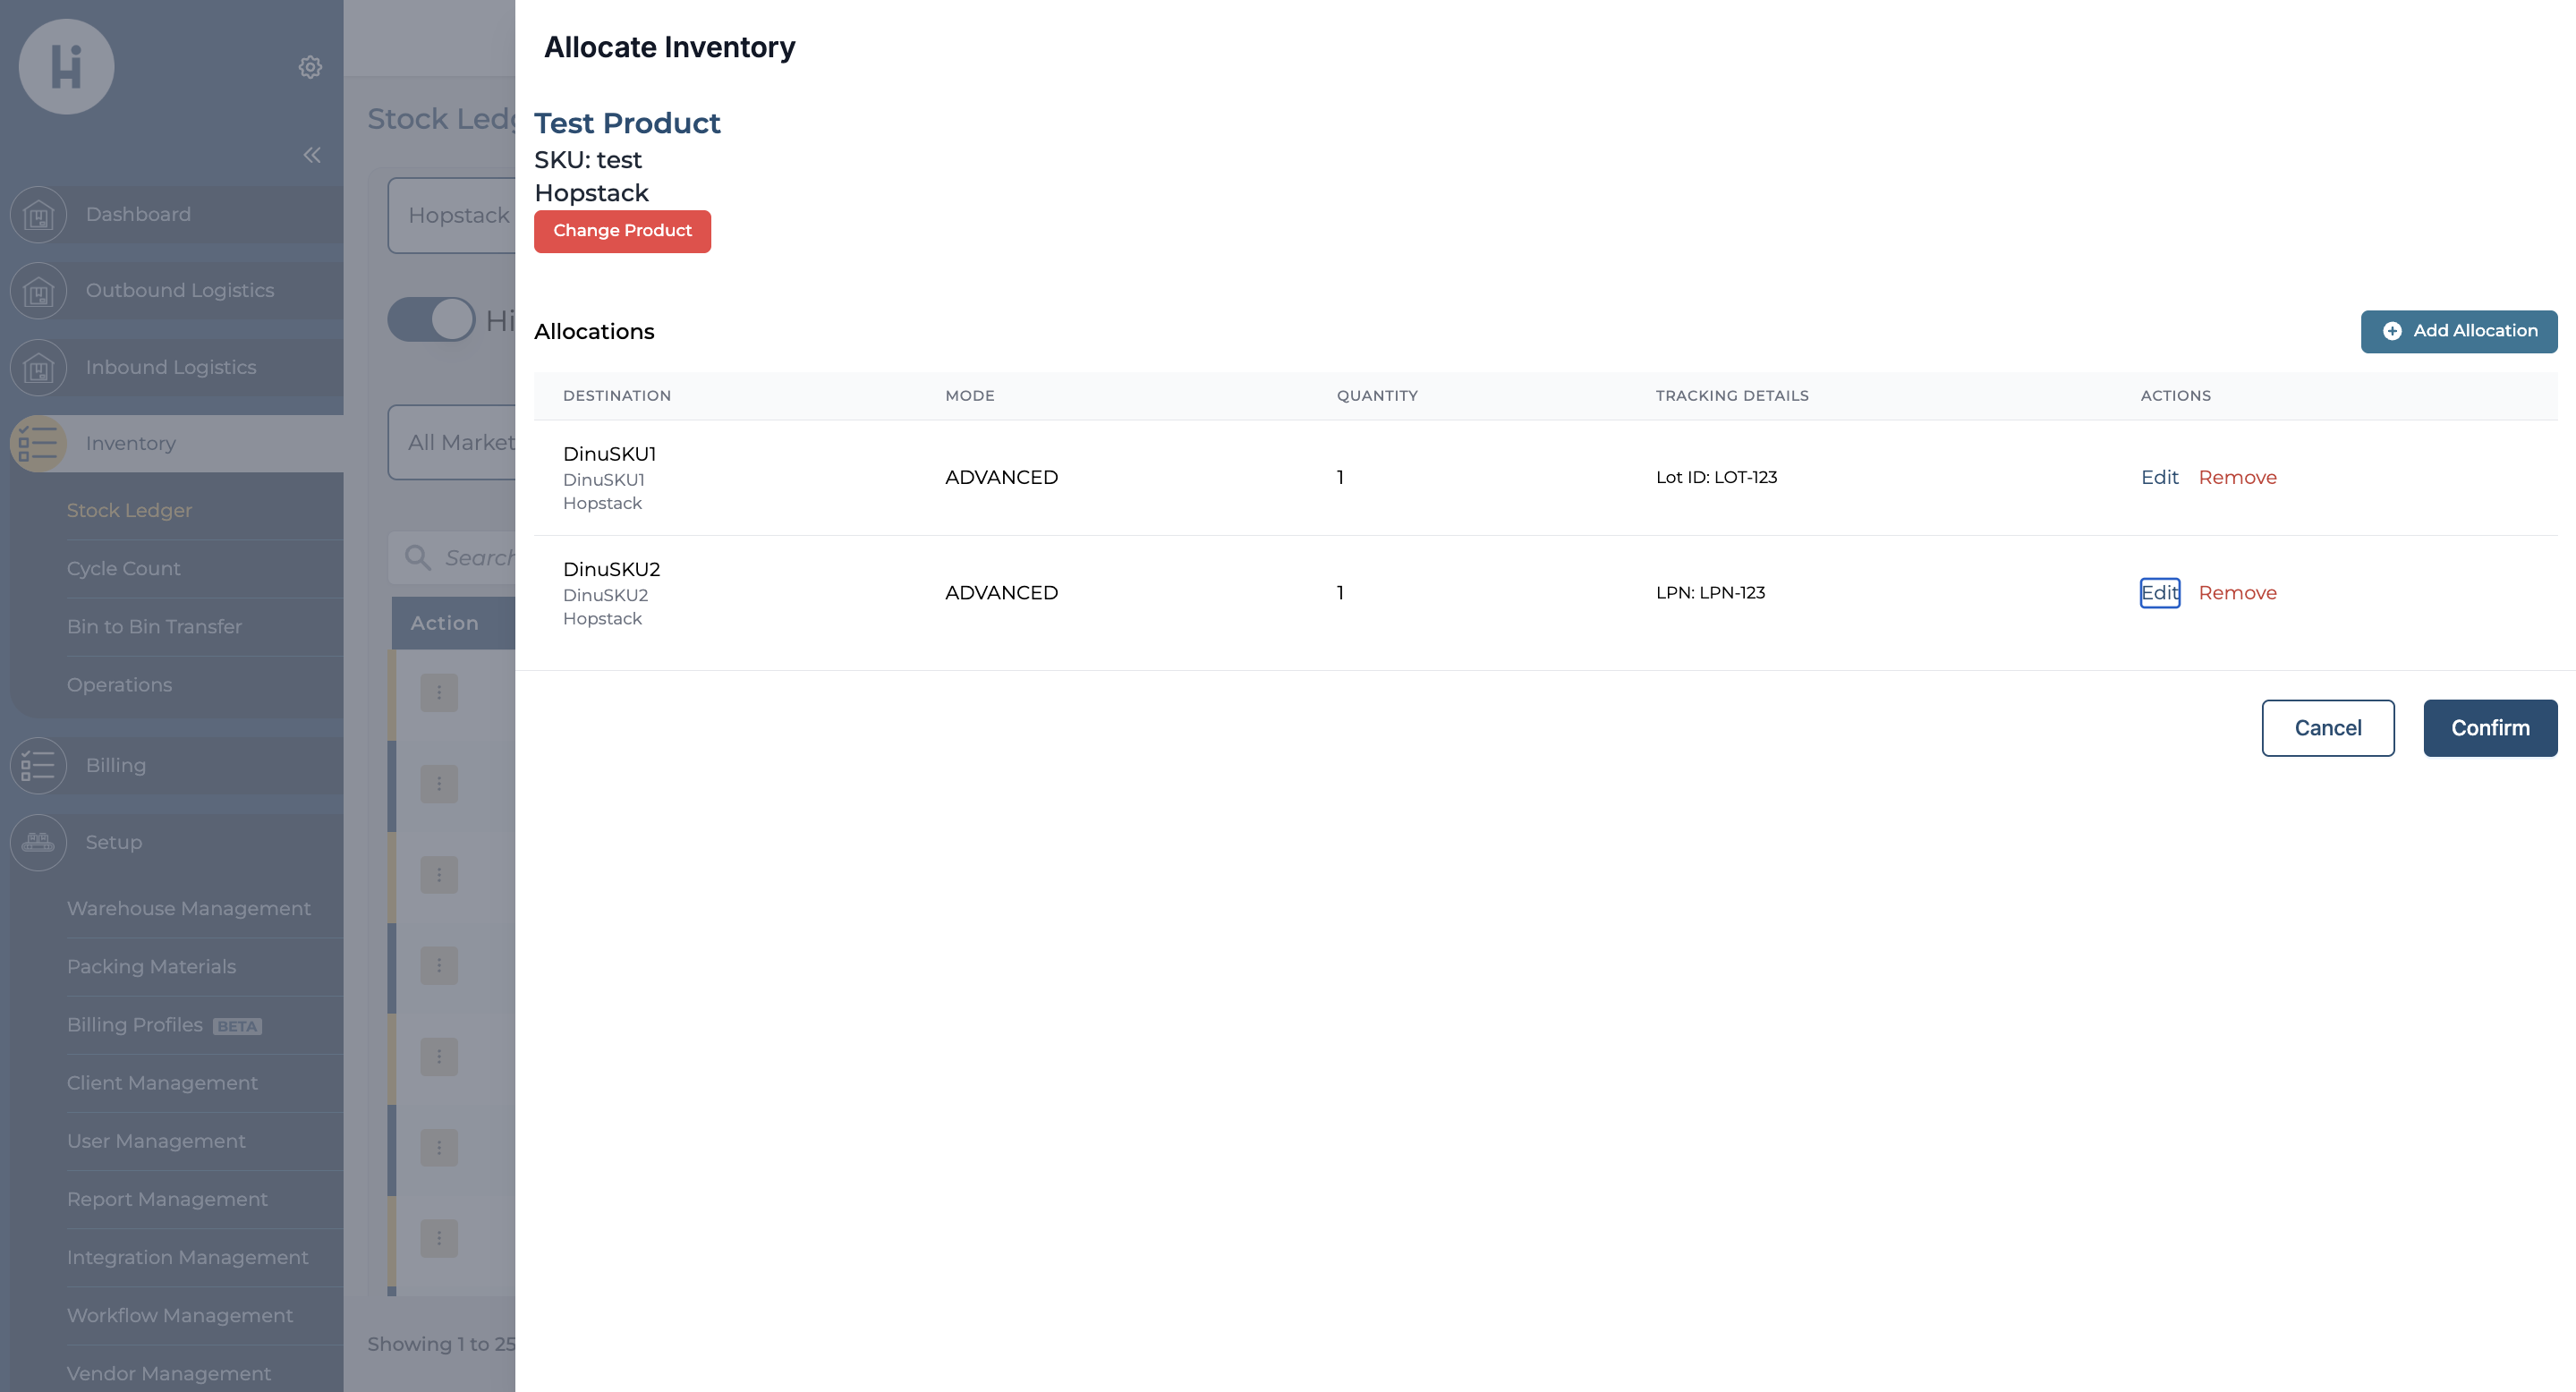
Note: The User can select only one type of tracking identifier per allocation
-
Lot ID
-
LPN
-
Best By Date
-
Manufacturing Date
-
Pallet ID
The system automatically prevents users from allocating more inventory than is currently available, whether in Simple or Advanced Mode.
-
Selecting multiple destination products: The user can create one or more inventory allocations at a time by selecting multiple destination products for both Simple and Advanced mode.
For any questions or concerns, please reach out to the Hopstack support team.