Adding and Assigning LPNs During Receiving
This guide provides step-by-step instructions for adding License Plate Numbers (LPNs) on both the desktop and mobile versions of our platform.
LPNs are crucial for tracking items through their lifecycle, specifying their form factor, and managing inventory efficiently.
This functionality supports manual entry of LPNs, specification of form factors (pallet, case, carton), selection of specific codes or automatic code generation, ensuring a seamless and consistent experience across devices.
Steps for Adding LPNs
The following steps are applicable for adding LPNs on both desktop and mobile versions of our platform, ensuring a uniform process across devices.
Step 1: Navigate to Receiving Screen
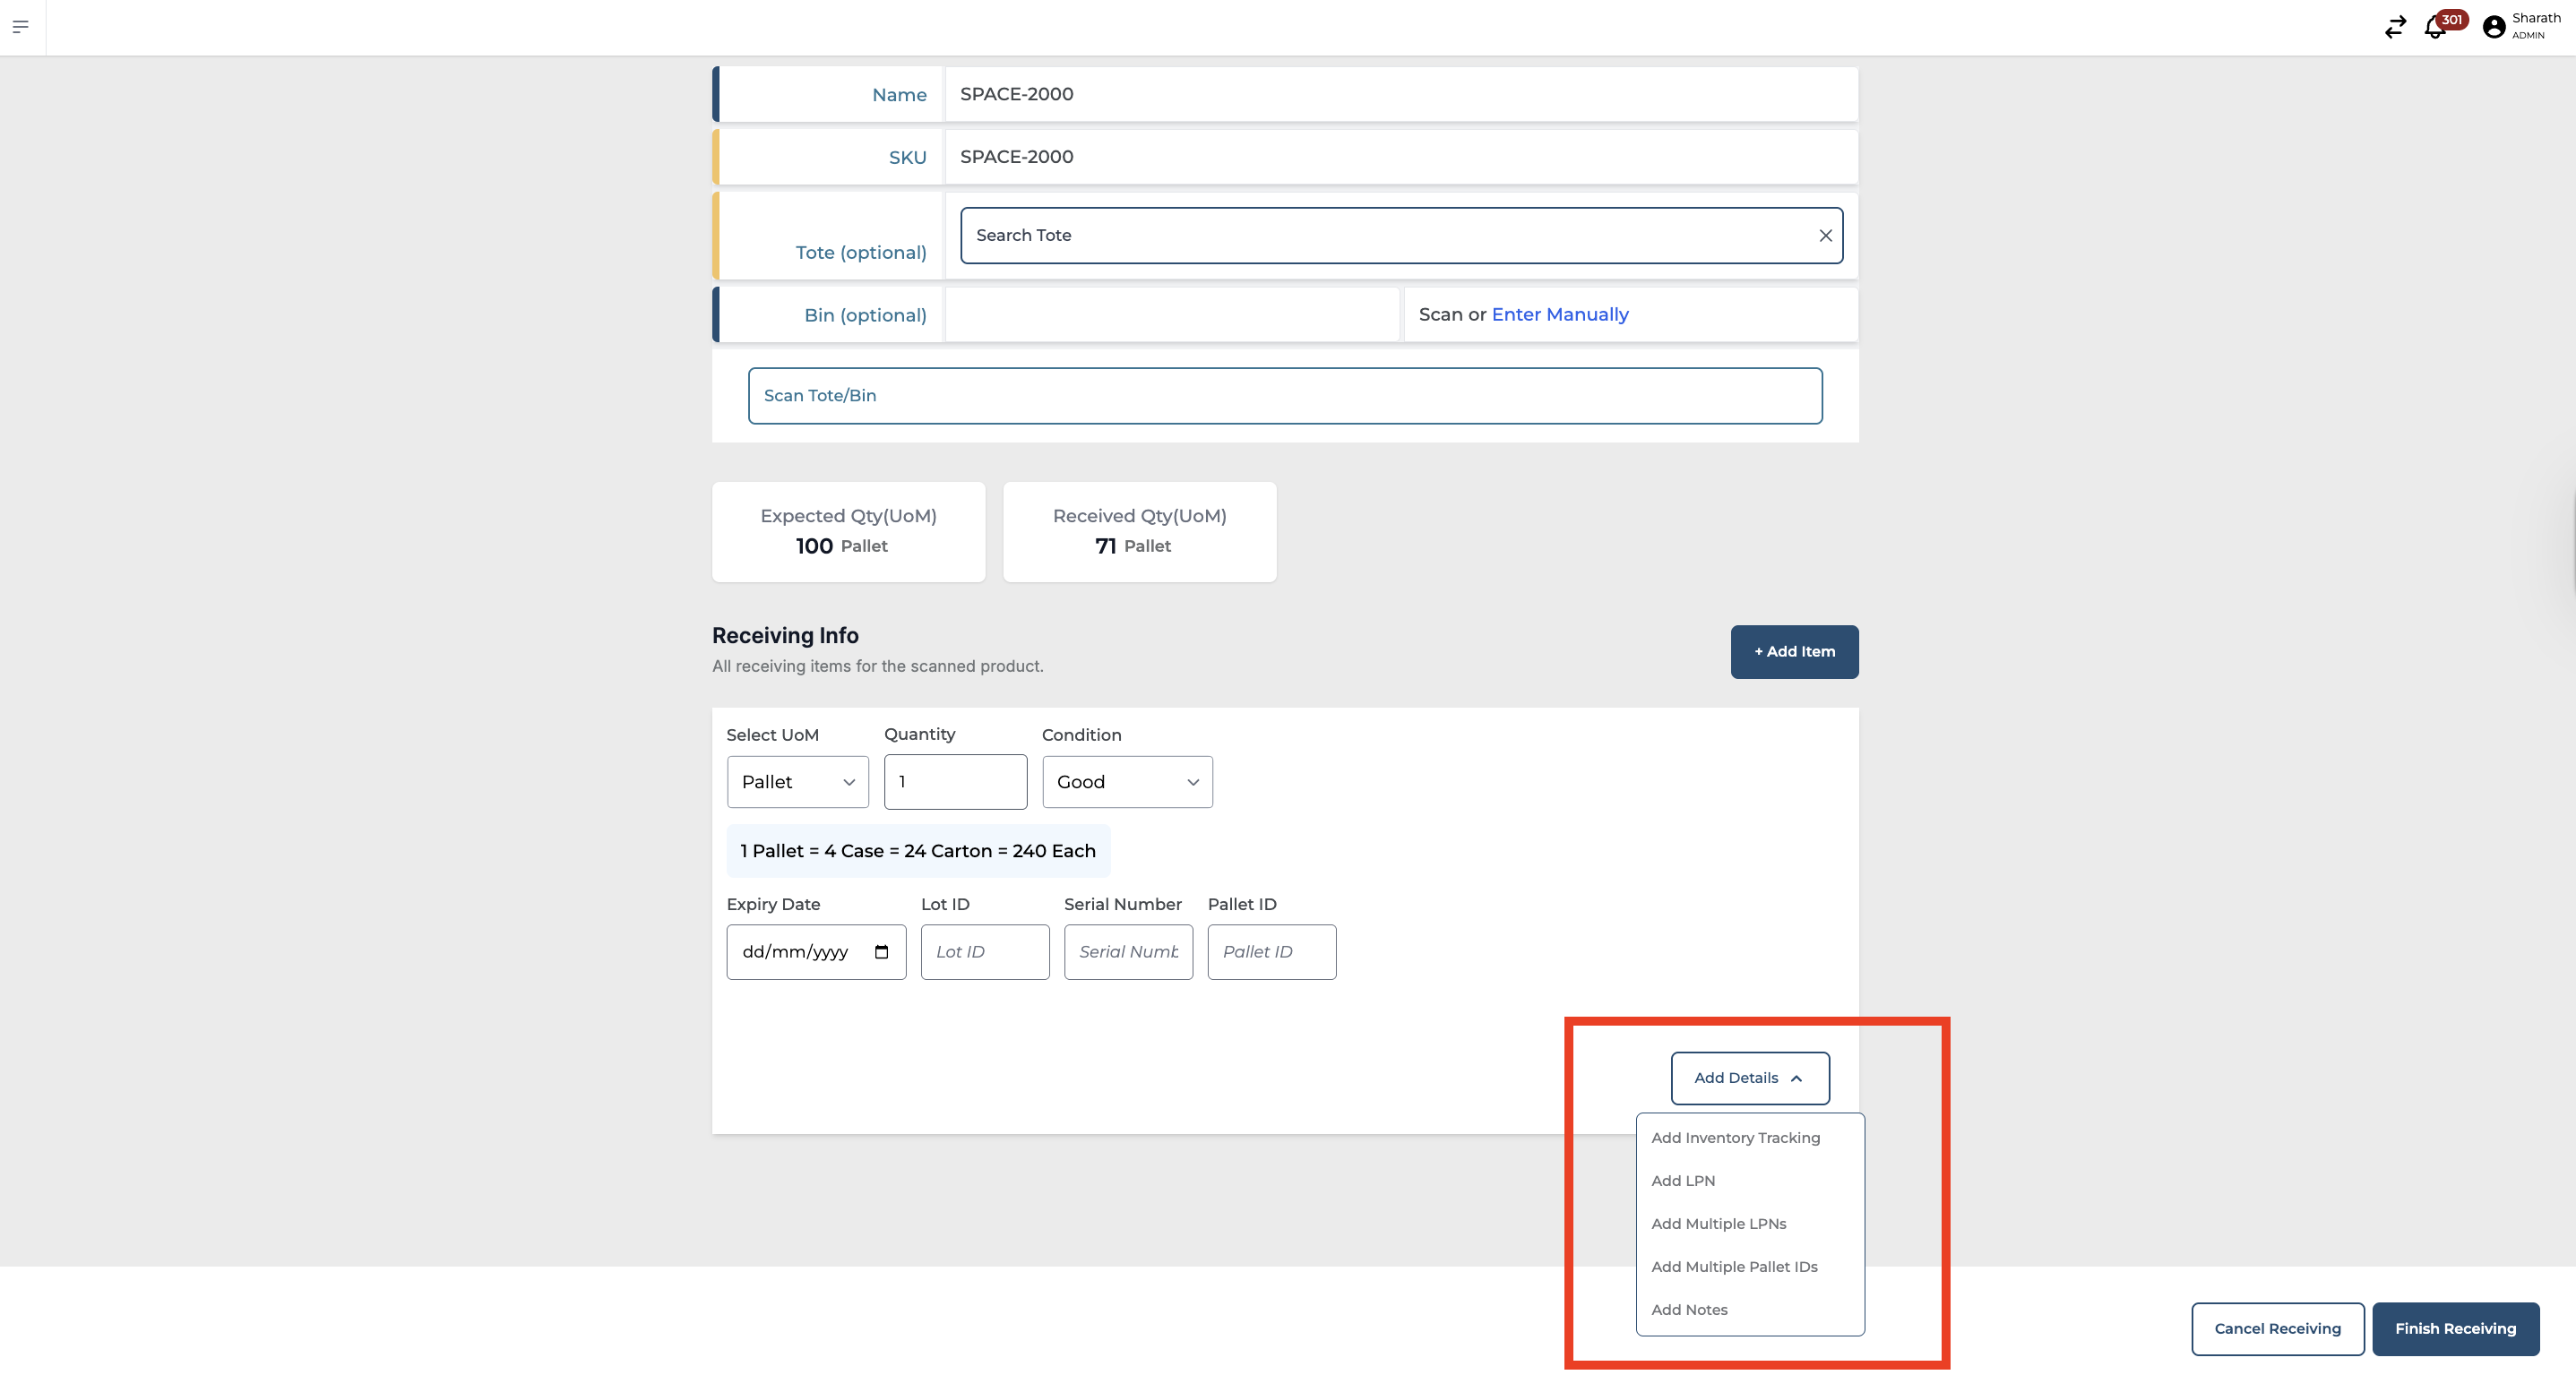
Desktop: Access the platform via your web browser, navigate to the product's receiving screen, and click on the "Add Details" option. Upon selecting this, you’ll see multiple options, including: Inventory Tracking, Add LPN, Add Multiple LPNs, Add Multiple Pallet IDs, and Notes."

Inventory Tracking: This gives us the ability to track individual inventory items with LPNs (License Plate Numbers) and support multi-level nesting for product UoMs and storage UoMs. This will provide greater visibility and control over high-value or specialised items in the warehouse, particularly for operations. This allows for granular tracking of inventory items, supporting multi-level nesting of product UoMs and storage UoMs, while maintaining compatibility with existing LPN and bin location tracking systems.
Add LPN: You now have the option to add an LPN (License Plate Number) under each item. LPNs are essential for tracking items throughout their lifecycle, specifying their form factor, and managing inventory efficiently.
Add multiple LPNs: During the receiving process, users have the ability to instantly add multiple LPNs, enabling more efficient handling and tracking of inbound inventory.
Add multiple Pallet IDs: During the receiving process, users can instantly add multiple Pallet IDs, enabling more efficient handling and tracking of inbound inventory.
Mobile: Open the platform's app, go to the product's receiving screen, and tap the "Add LPN" button.
Step 2: Input LPN Information
LPN Entry: Manually enter the LPN associated with the item in the provided field. This unique identifier is crucial for tracking and managing the item.
Form Factor Selection: Select the appropriate form factor for the LPN (e.g., pallet, case, or carton) from the dropdown menu. This helps categorise the item correctly within the inventory system.
Quantity of Codes: Specify the number of unique codes that you intend to generate for this LPN, facilitating accurate inventory tracking and management.
Step 3: Select a Code or Opt for Automatic Generation
Manual Code Selection: If you prefer to use a specific code for the LPN, choose it from the list of available options. This is useful for adhering to pre-defined coding systems or regulations.
Automatic Code Generation: For efficiency or when no specific code preference exists, allow the system to automatically generate a unique code for the LPN, ensuring each item is uniquely identifiable.
Step 4: Confirm and Save LPN and Pallet ID Details
Review the information you've entered for accuracy. This includes the LPN, selected form factor, the quantity of codes, and the code itself (if manually selected)
You can print the code.
Confirm and save the LPN to your inventory by clicking or tapping "Submit". This action will officially add the LPN to the system, integrating it into your inventory management workflow.
Note:
Double-check LPN entries for typos or errors to maintain accurate inventory tracking.
Familiarise yourself with form factors to ensure items are categorised correctly, facilitating easier management and retrieval.
Use the automatic code generation feature to streamline the addition process and guarantee unique item identification.
You can use Print option for Products that didn't come with any barcode.
