
Reassign Picker
Reassigning a picker is a crucial operation in outbound logistics, particularly when the original picker is unavailable or when there's a need to balance the workload among the team. This guide will walk you through the process of reassigning a picker for a specific batch.
Before you begin, ensure that you have the necessary permissions to edit picking assignments in the Outbound Logistics system.
Access the Outbound Logistics System: Log into the system using your credentials.
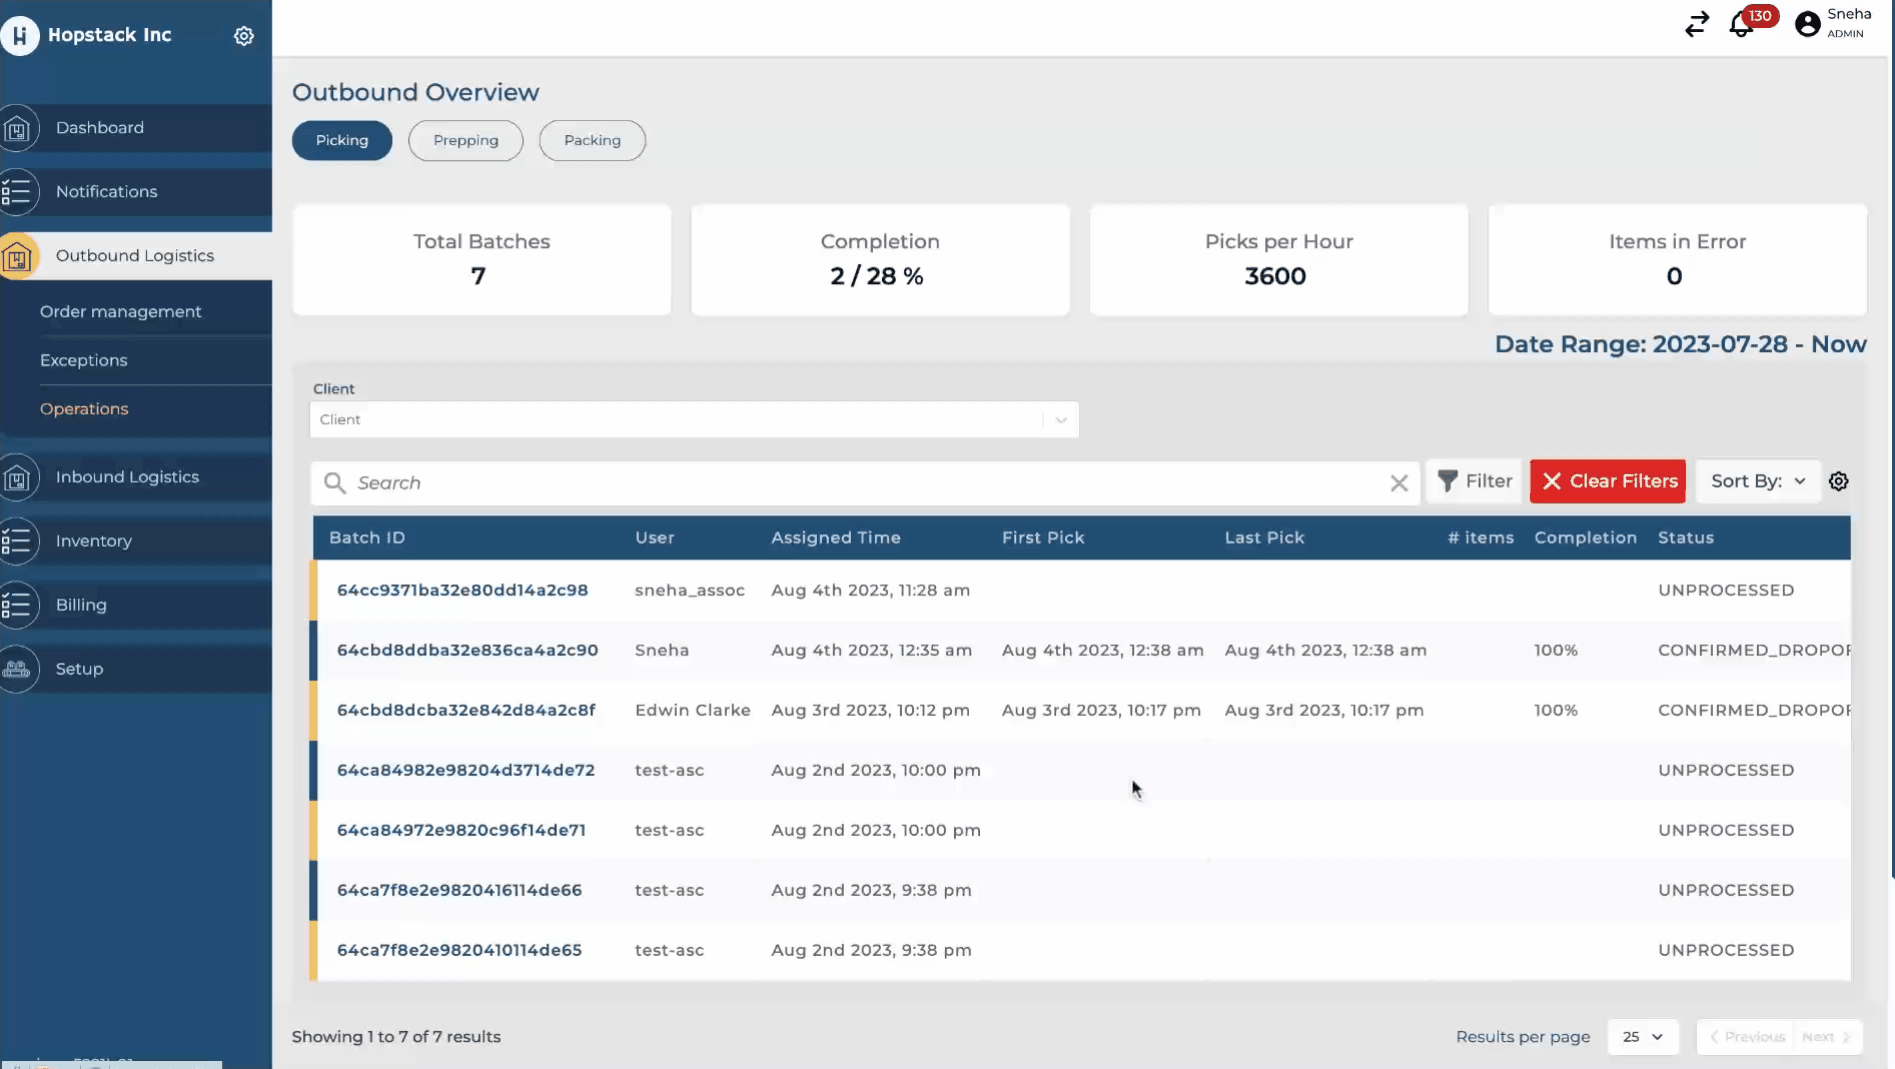
Navigate to the Picking Section: From the main dashboard, go to
Outbound Logistics > Operations > Picking. This is where you can view all the picking assignments.Find the Specific Batch: Scroll through the list or use the search function to find the specific batch you want to reassign. The batches can be identified by their unique batch numbers.
Edit the Batch: Once you've located the batch, click on the
Editbutton next to it. This will open a dropdown menu.Select a New Picker: In the dropdown menu, you'll see a list of all available pickers. Scroll through the list or use the search function to find the picker you want to assign to the batch. Click on the picker's name to select them.
Submit the Changes: After selecting the new picker, click on the
Submitbutton to save the changes.Confirm the Reassignment: A pop-up window will appear asking, "Are you sure you want to assign a different Picker?" Click on
Yes, I confirmto finalize the reassignment.
Please be aware that the reassignment of a picker can only be done for unprocessed batches. Once a batch has been processed, the picker assignment is locked and cannot be changed.
If you need to reassign a picker for a processed batch, you may need to consult with your system administrator or follow a different procedure.
Always ensure to check the status of the batch before attempting to reassign the picker.