
The new Outbound Planning feature empowers planners to take control early in the fulfillment process, enabling smarter decisions that streamline warehouse operations. By minimizing manual intervention for associates, this feature drives operational efficiency, reduces errors, and accelerates order processing.
Key Highlights of Outbound Planning
-
Intelligent Order Grouping Suggestions - Planners can optimize order consolidation for efficient picking and packing operations and increase throughput by selecting orders with similar SKU configurations.
-
Order Plan - Order Planning & Prioritization provides a real-time view of order details, fulfilment status, and inventory availability, allowing planners to prioritize shipments effectively.
-
Pick Plan - The Pick Plan optimizes picking workflows by defining batch sizes, and assigning pickers.
-
Pack Plan - The Pack Plan enhances packing efficiency by allowing predefined box selections and packing configurations, minimizing decision-making for packers and reducing unnecessary screens and clicks.
-
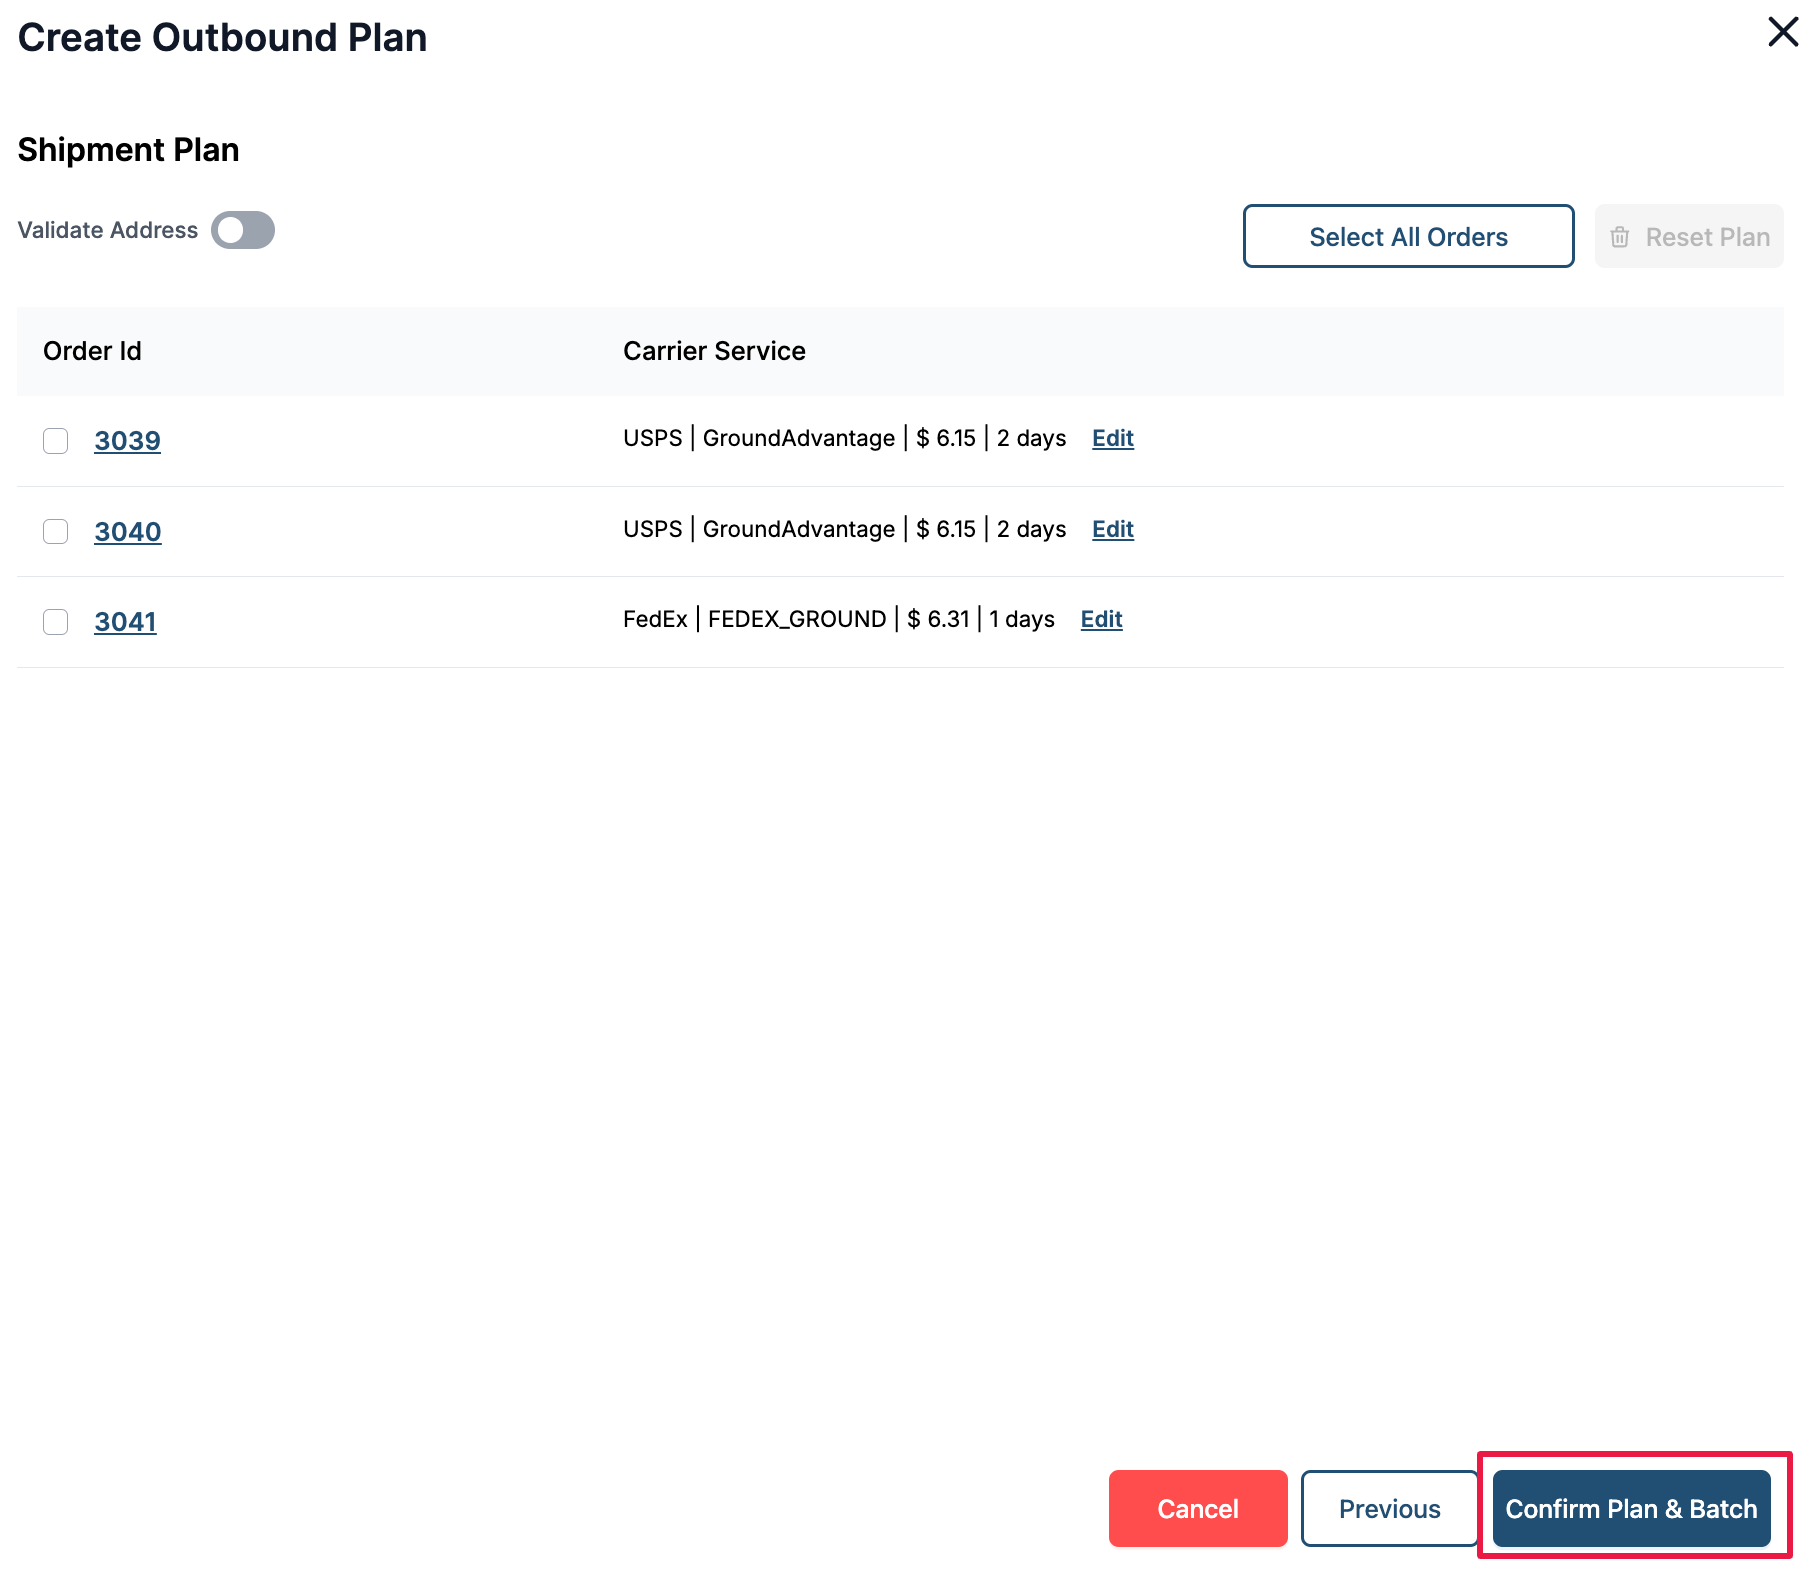
Shipment Plan - The Shipment Plan enables users to assign a specific shipping method to each order within the plan. Alternatively, the system can automatically select the appropriate method based on predefined shipping rules.
With Outbound Planning, you can increase fulfilment speed, reduce inefficiencies, and ensure accurate, on-time deliveries, ultimately improving customer satisfaction and operational excellence.
Here is the step-by-step guide to outbound planning.
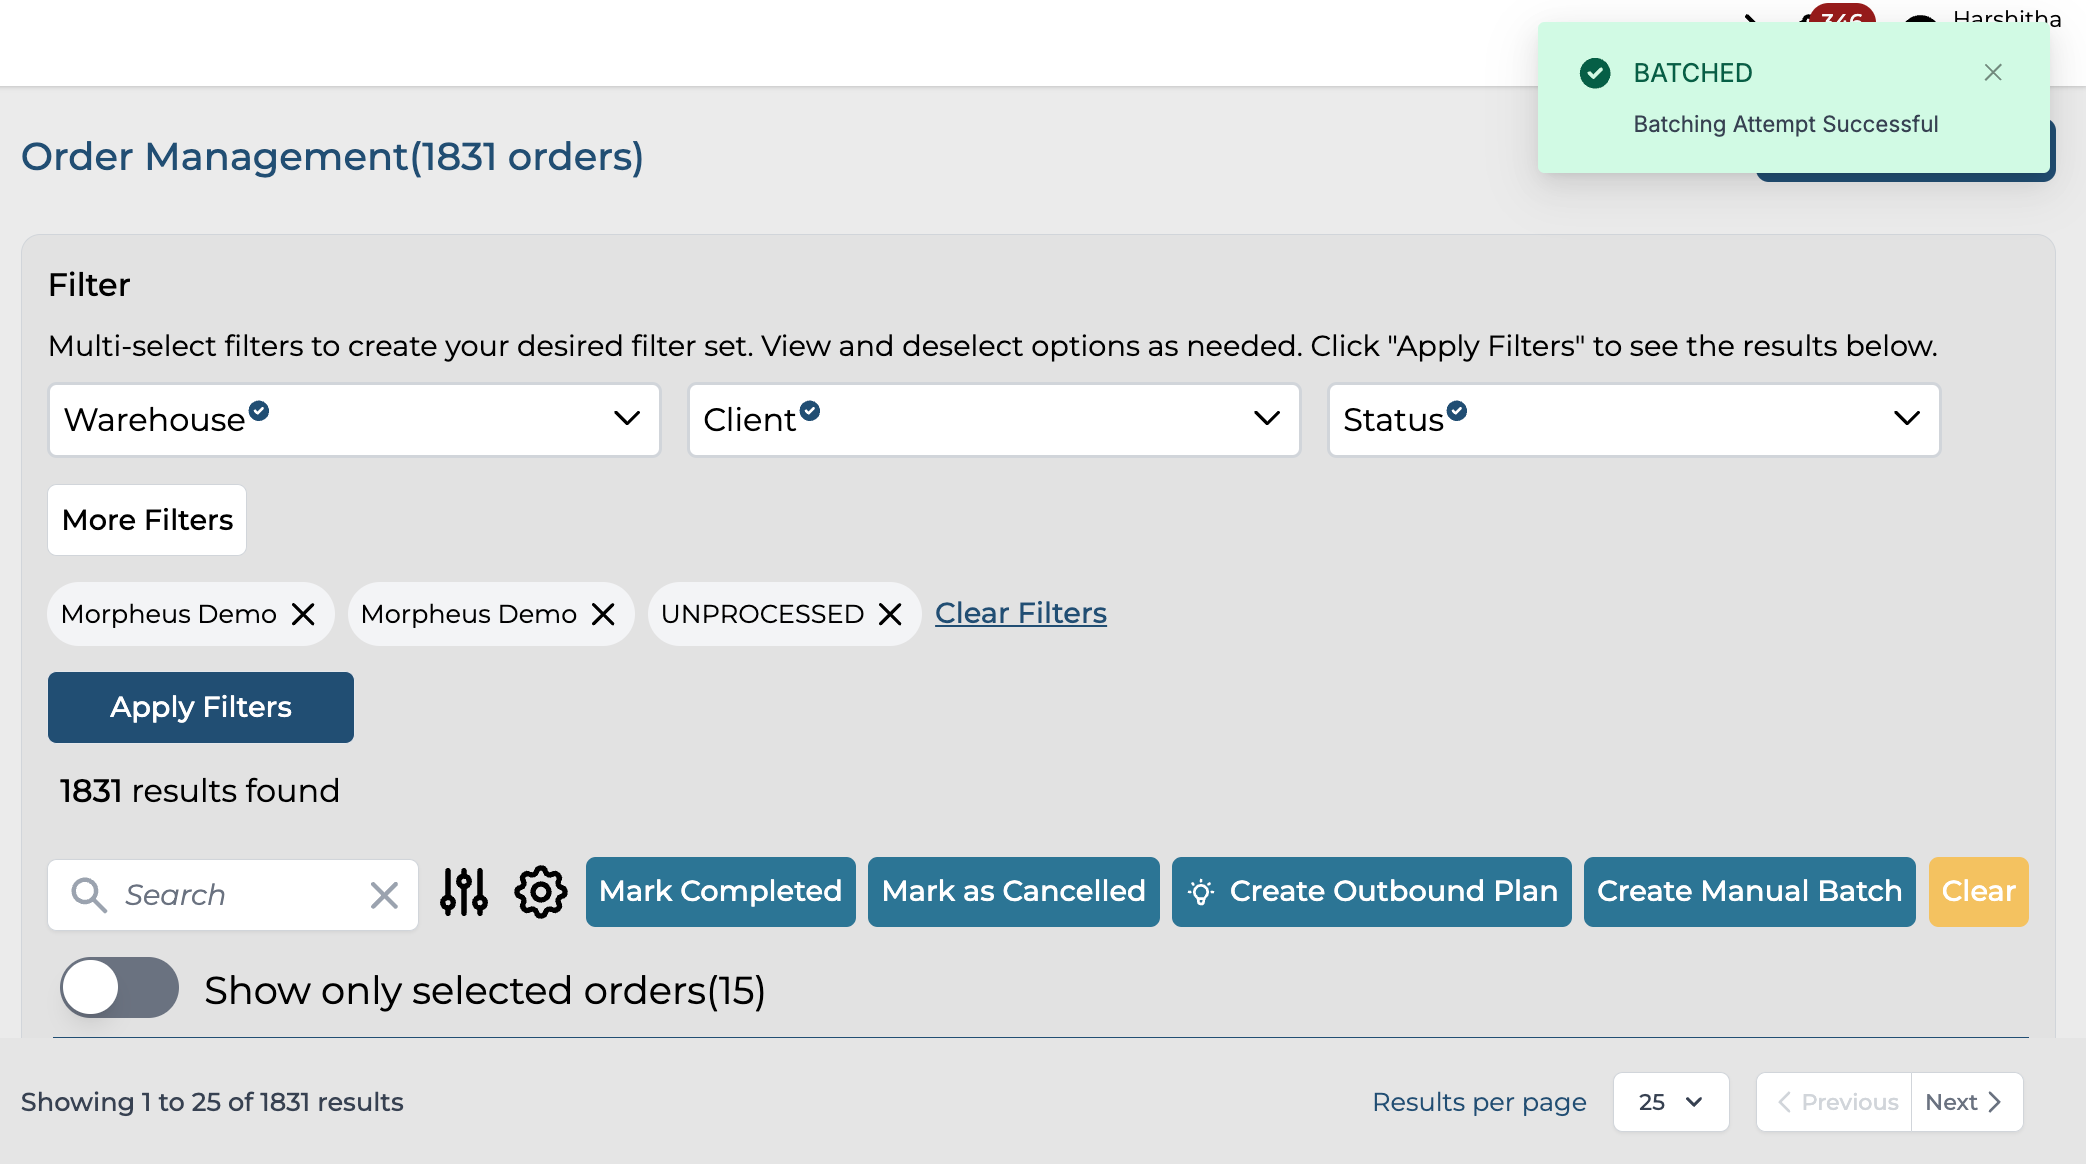
Step 1: Navigate to the Order Management screen under outbound logistics.
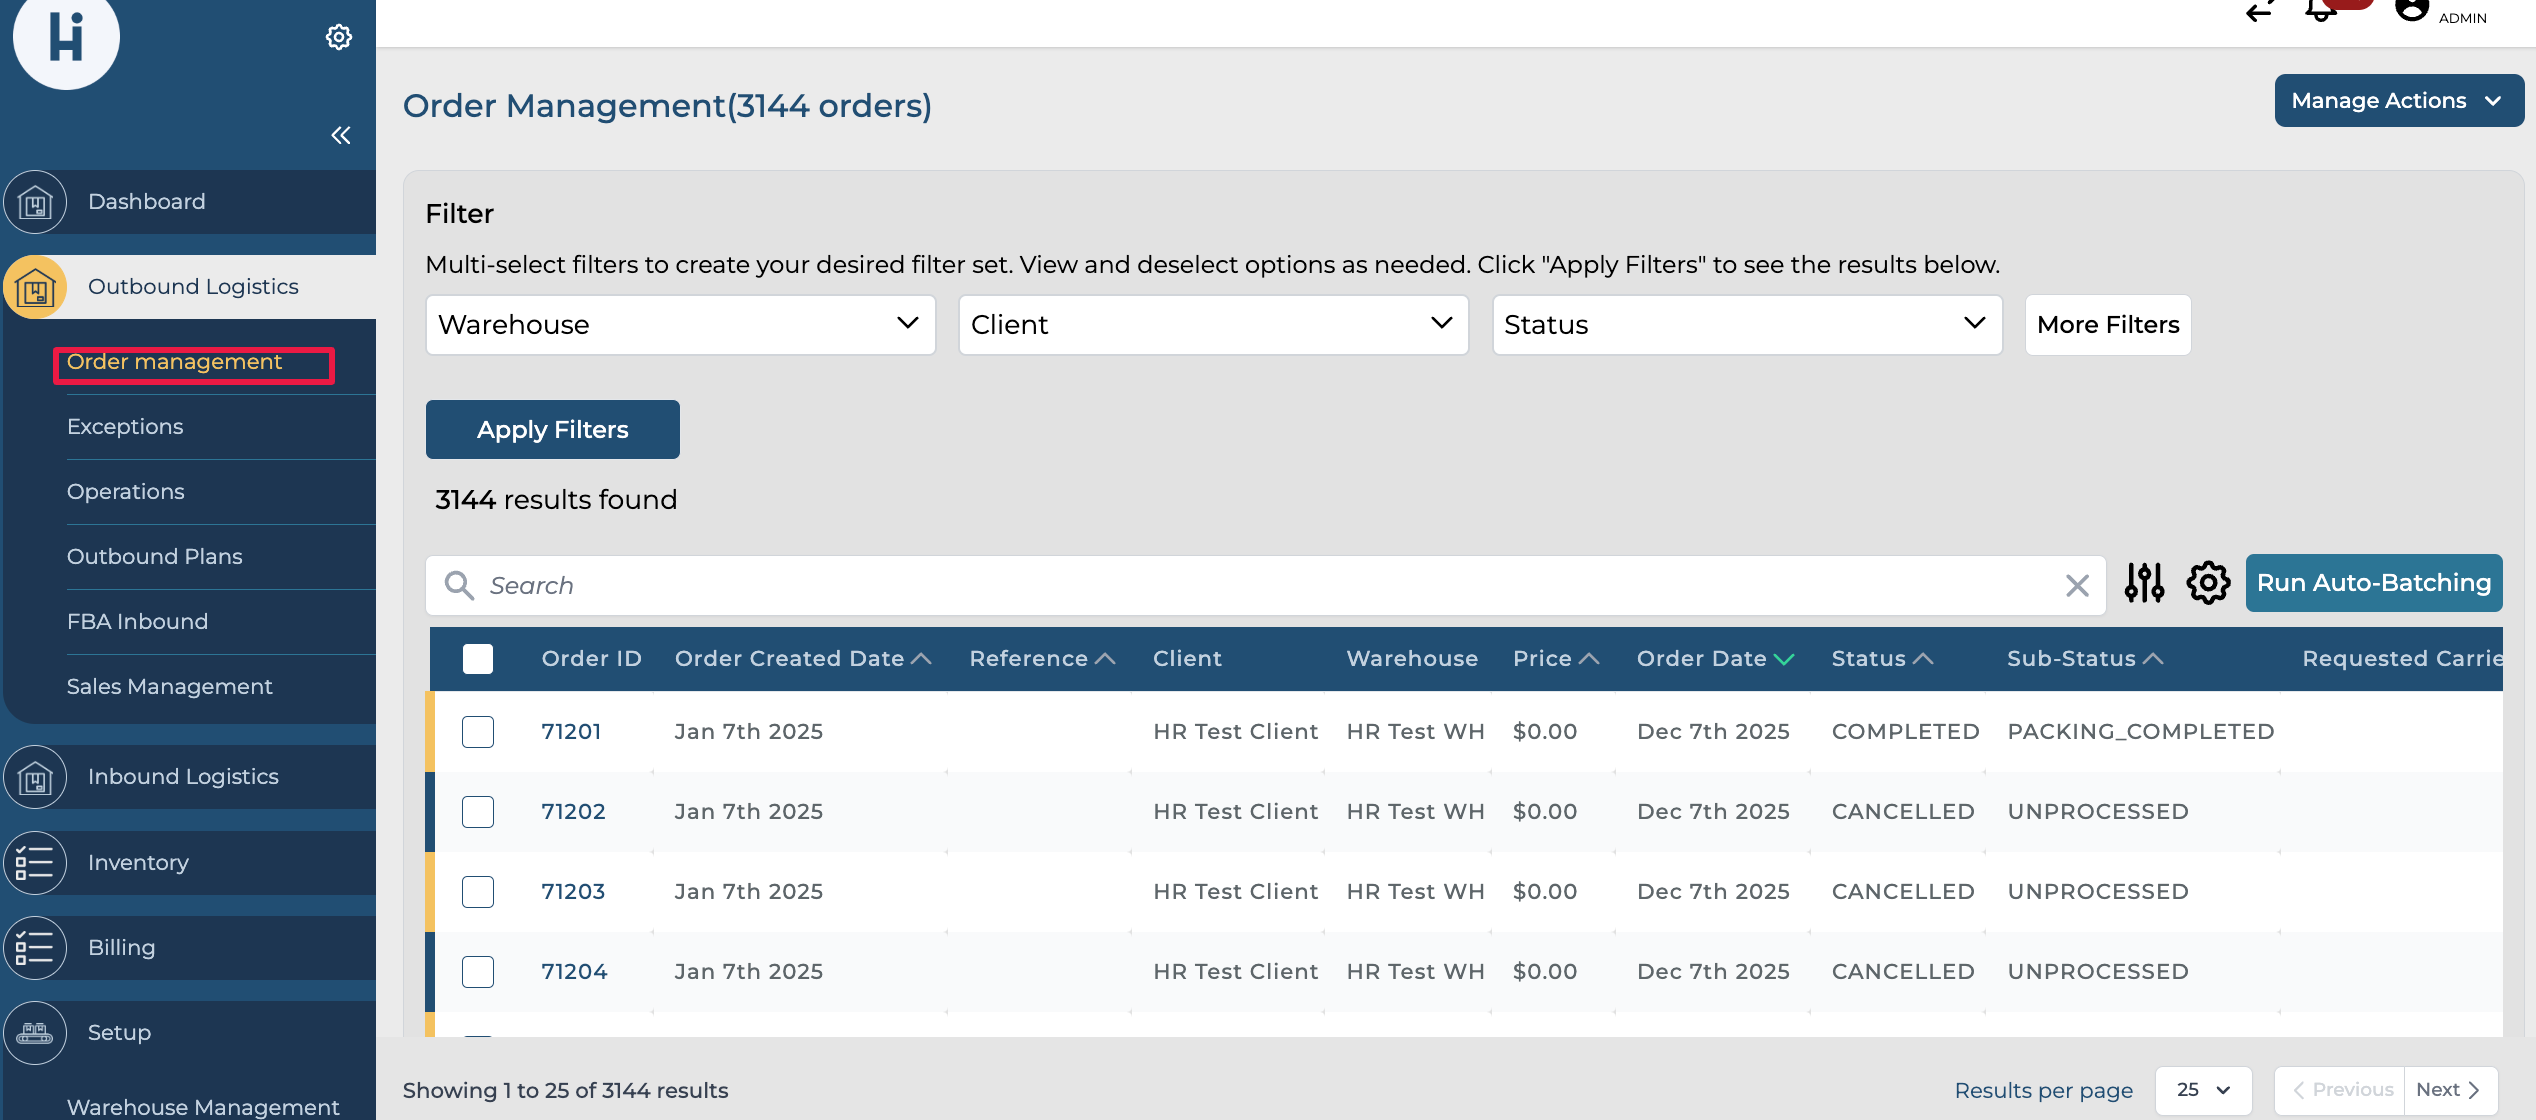
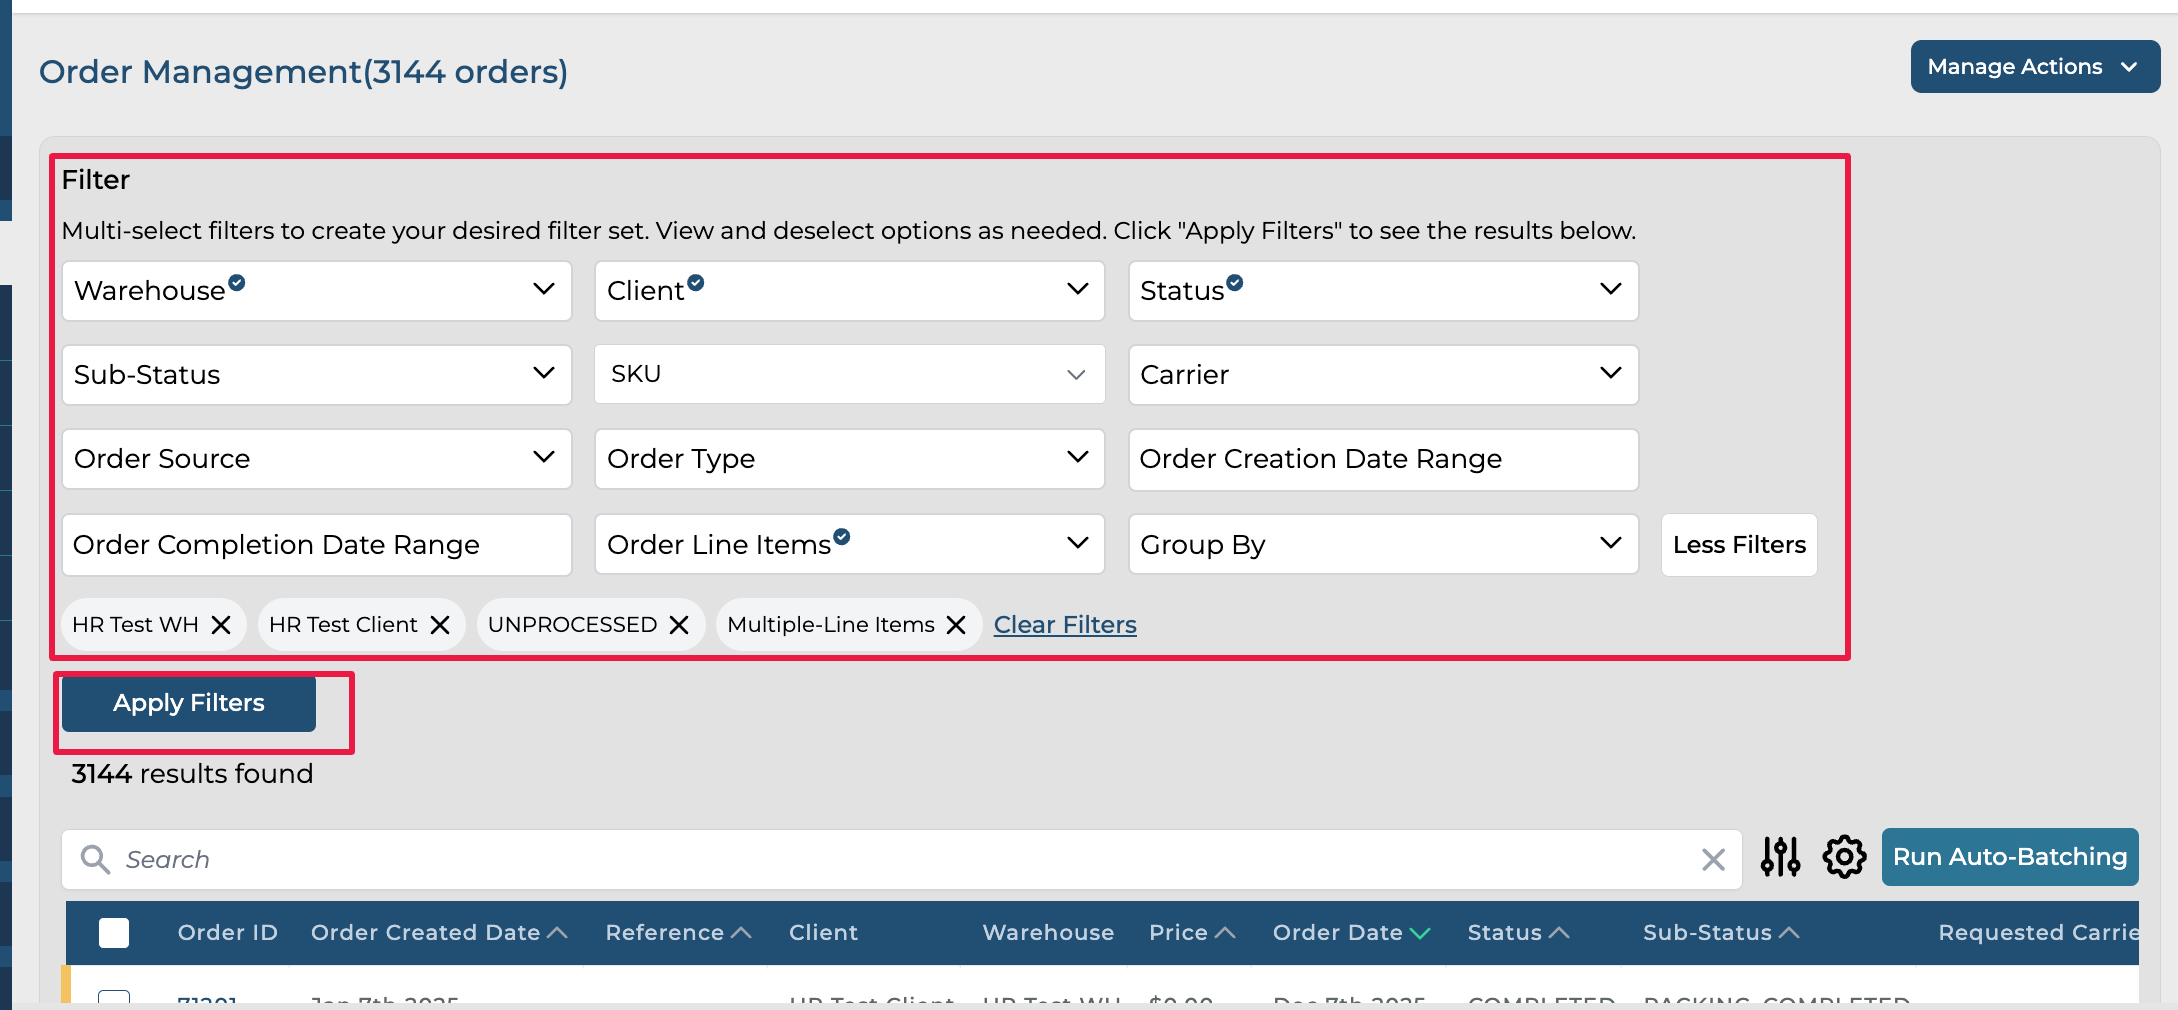
Step 2: Choose relevant filters and click on Apply filters.
Note: The outbound plan can only be created for orders that are in an unprocessed status, and all selected orders must belong to the same warehouse.
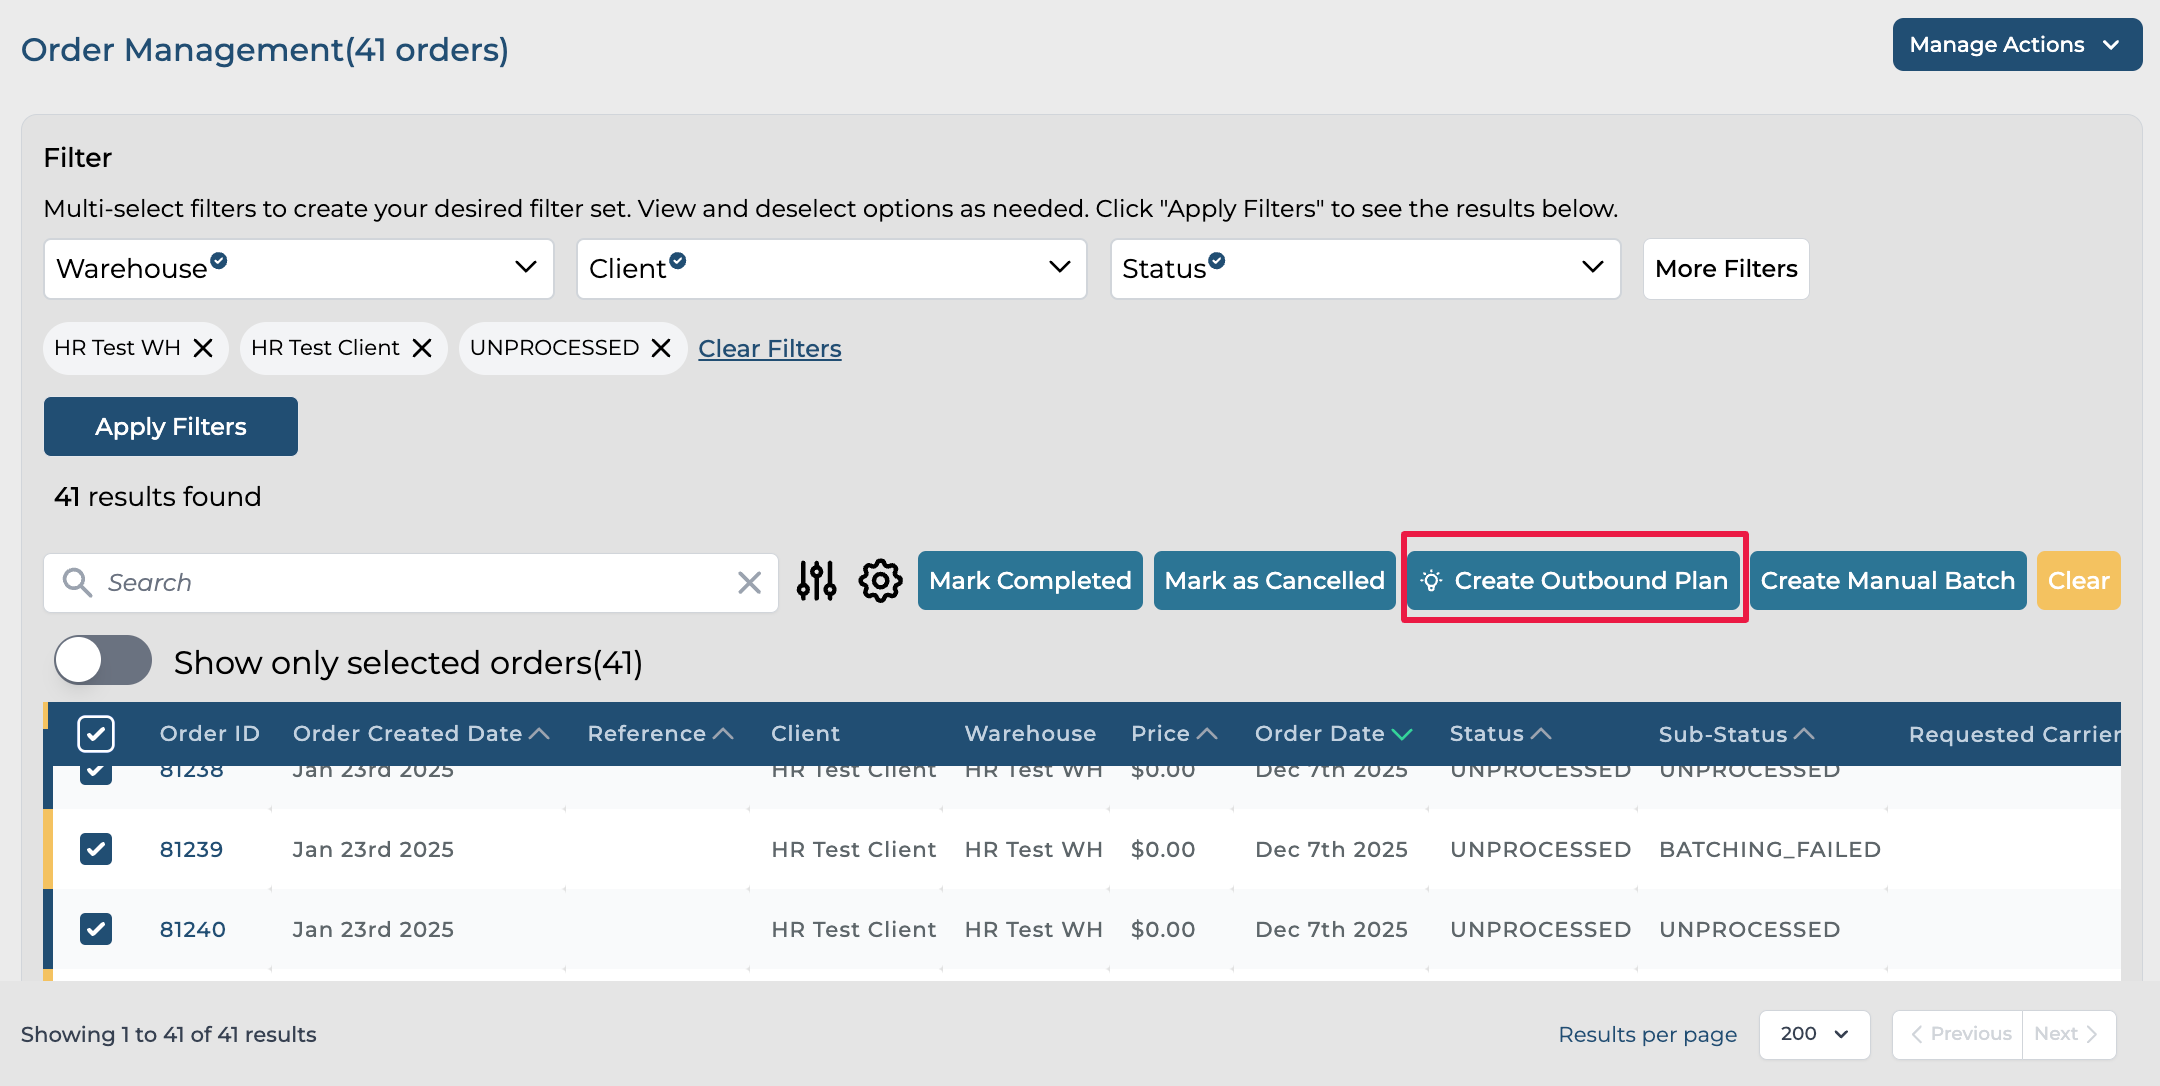
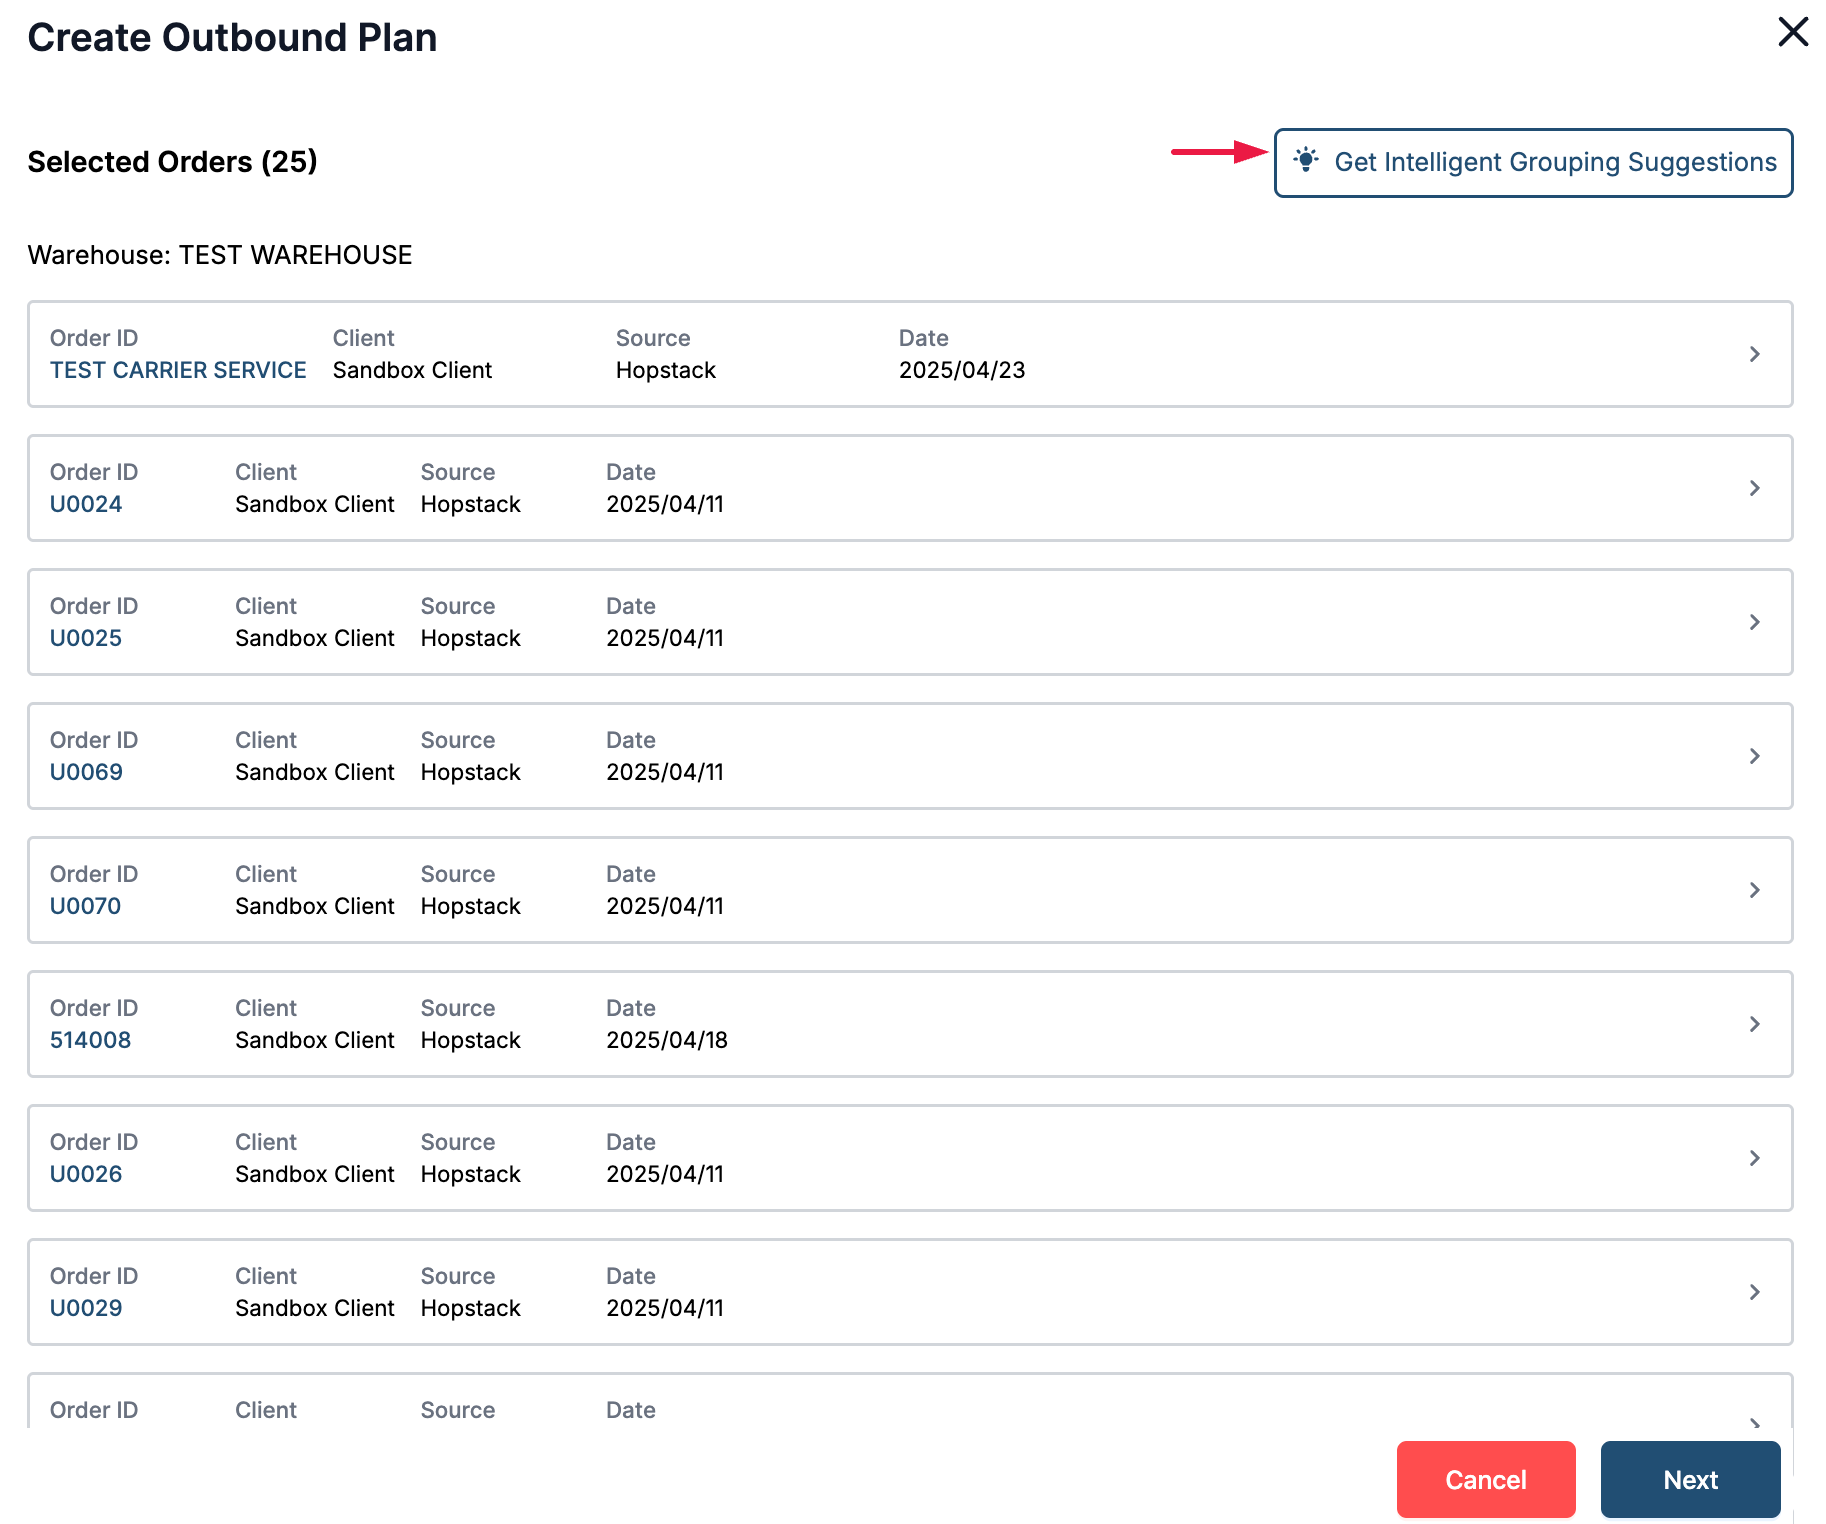
Step 3: Select orders by clicking on the check box on the blue line to select all orders on the page or the user can select individual orders by clicking on the check box next to the order ID. Users can change the number of orders they see on the page by choosing the results per page and also select orders across multiple pages.
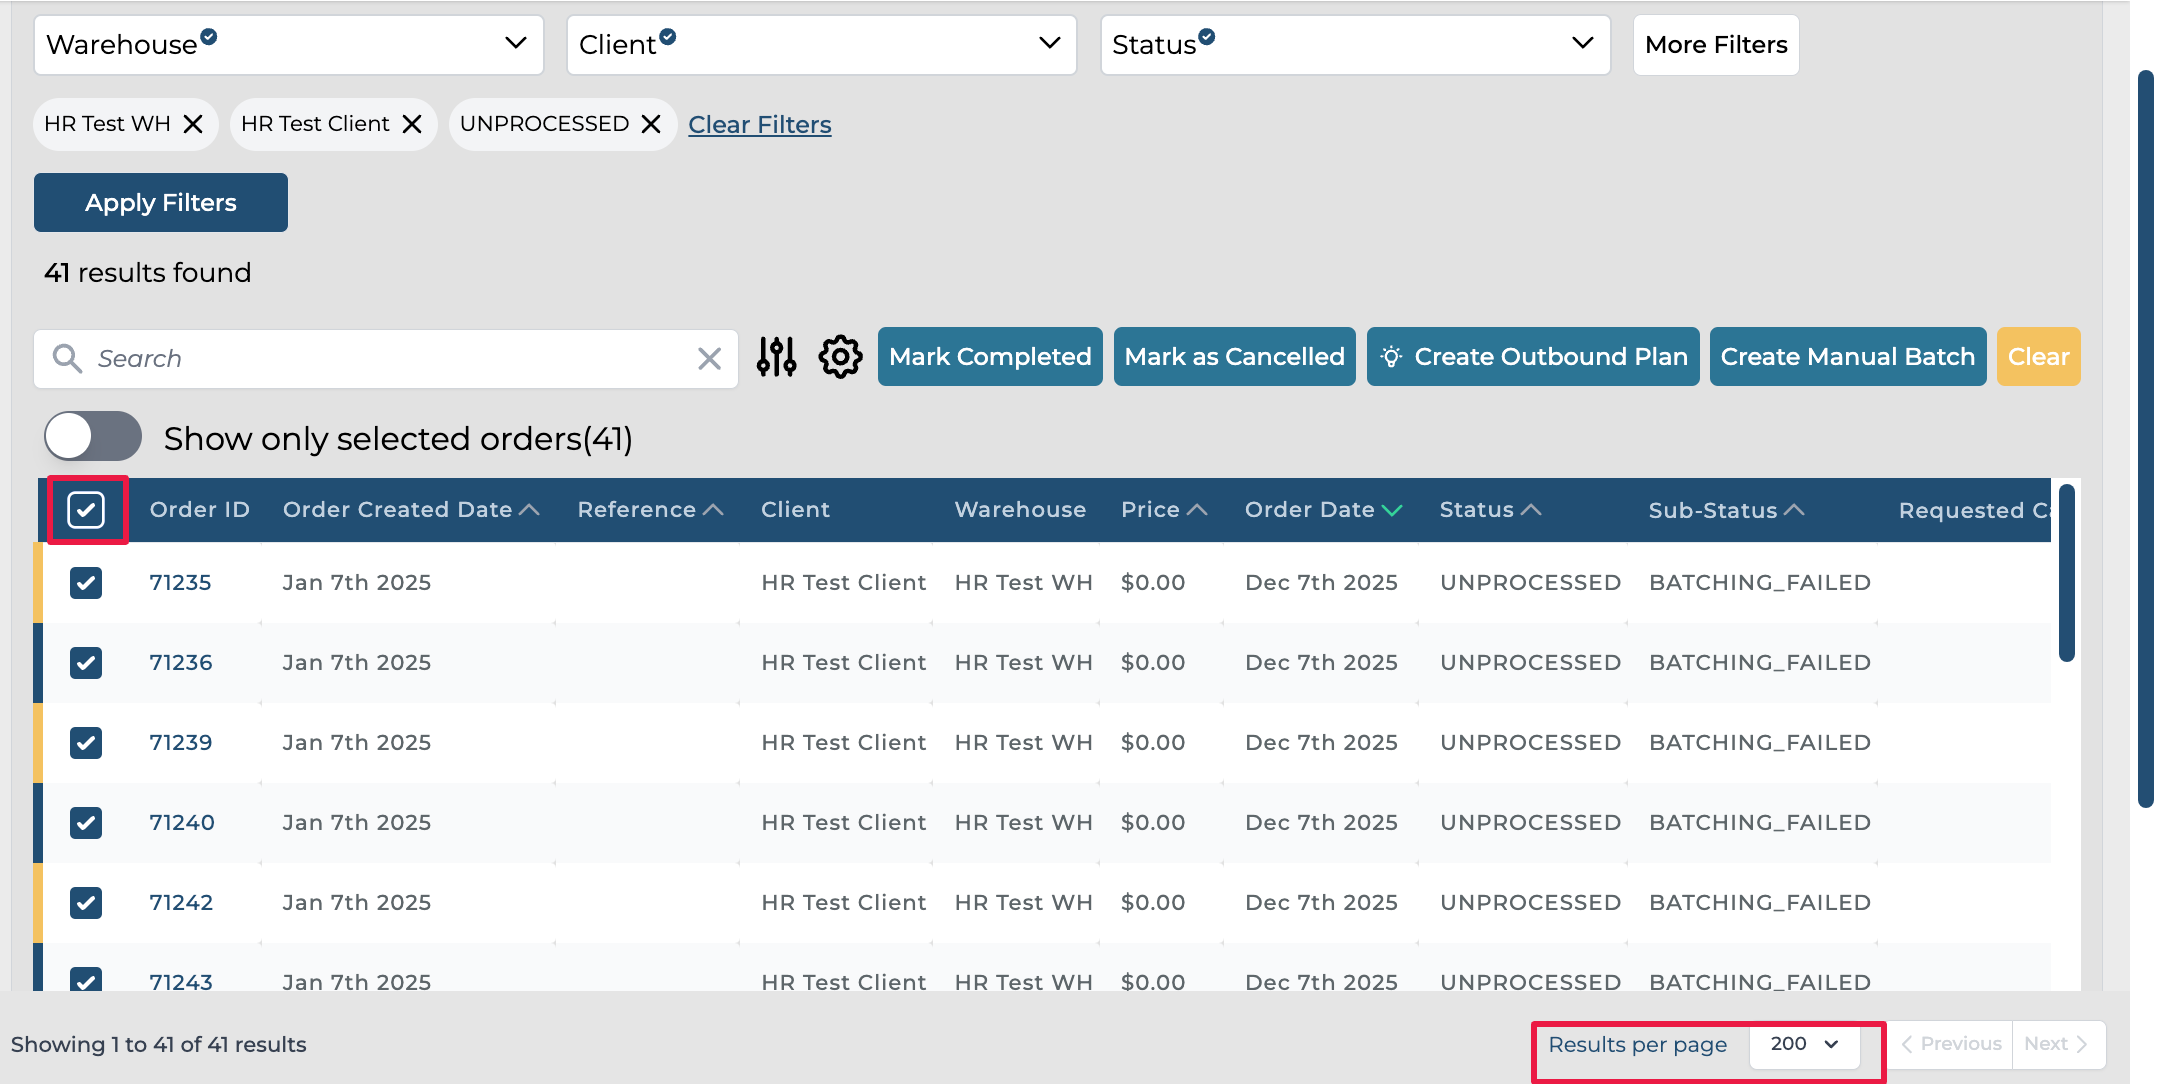
Step 4: Click on Create Outbound Plan.
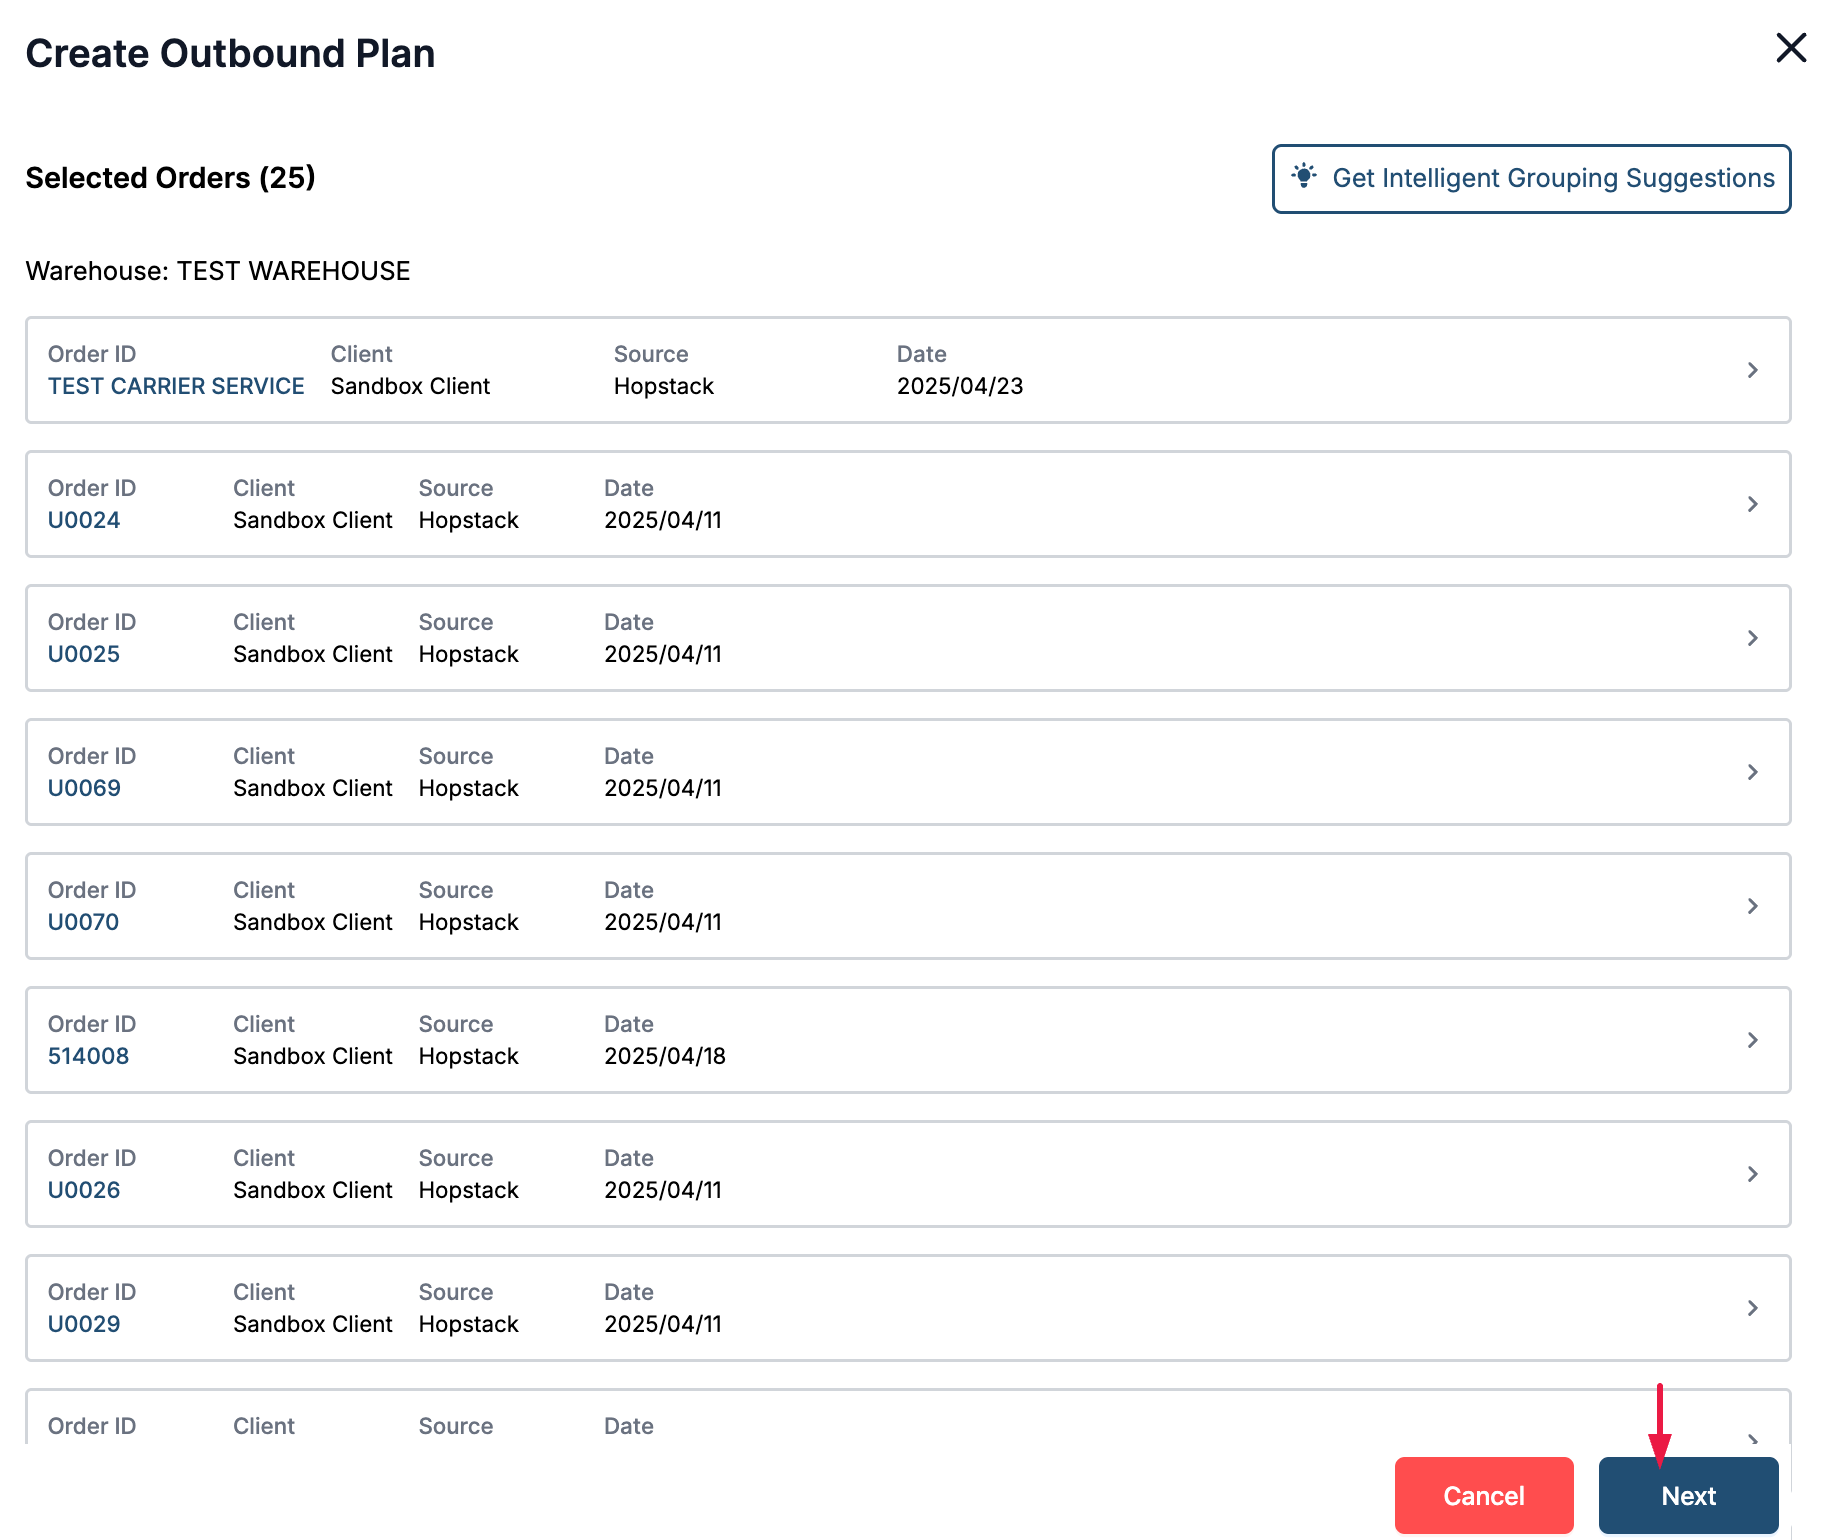
a) Selected orders are displayed. If the user would like to view intelligent order grouping suggestions, the user may click on “Get Intelligent Grouping Suggestions”.
b) If the user doesn’t want to view intelligent grouping suggestions, they can click on Next and continue with Step 7.
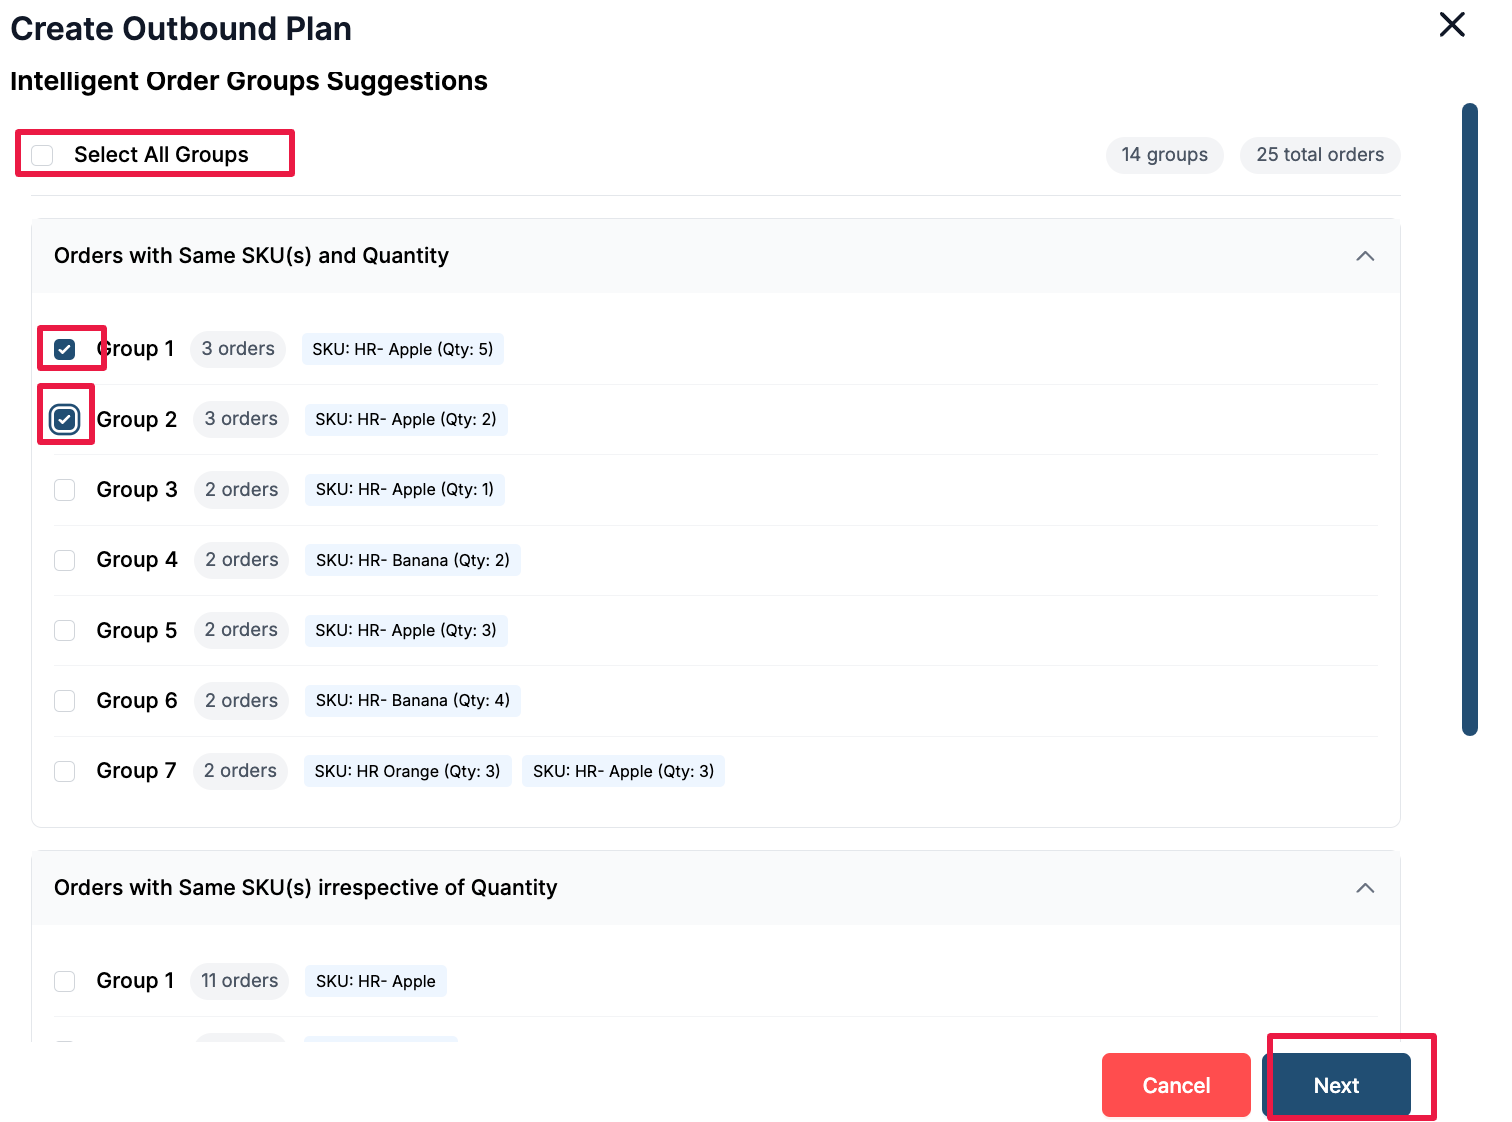
Step 5: The intelligent order grouping suggestions are listed.
The group categories are as follows:
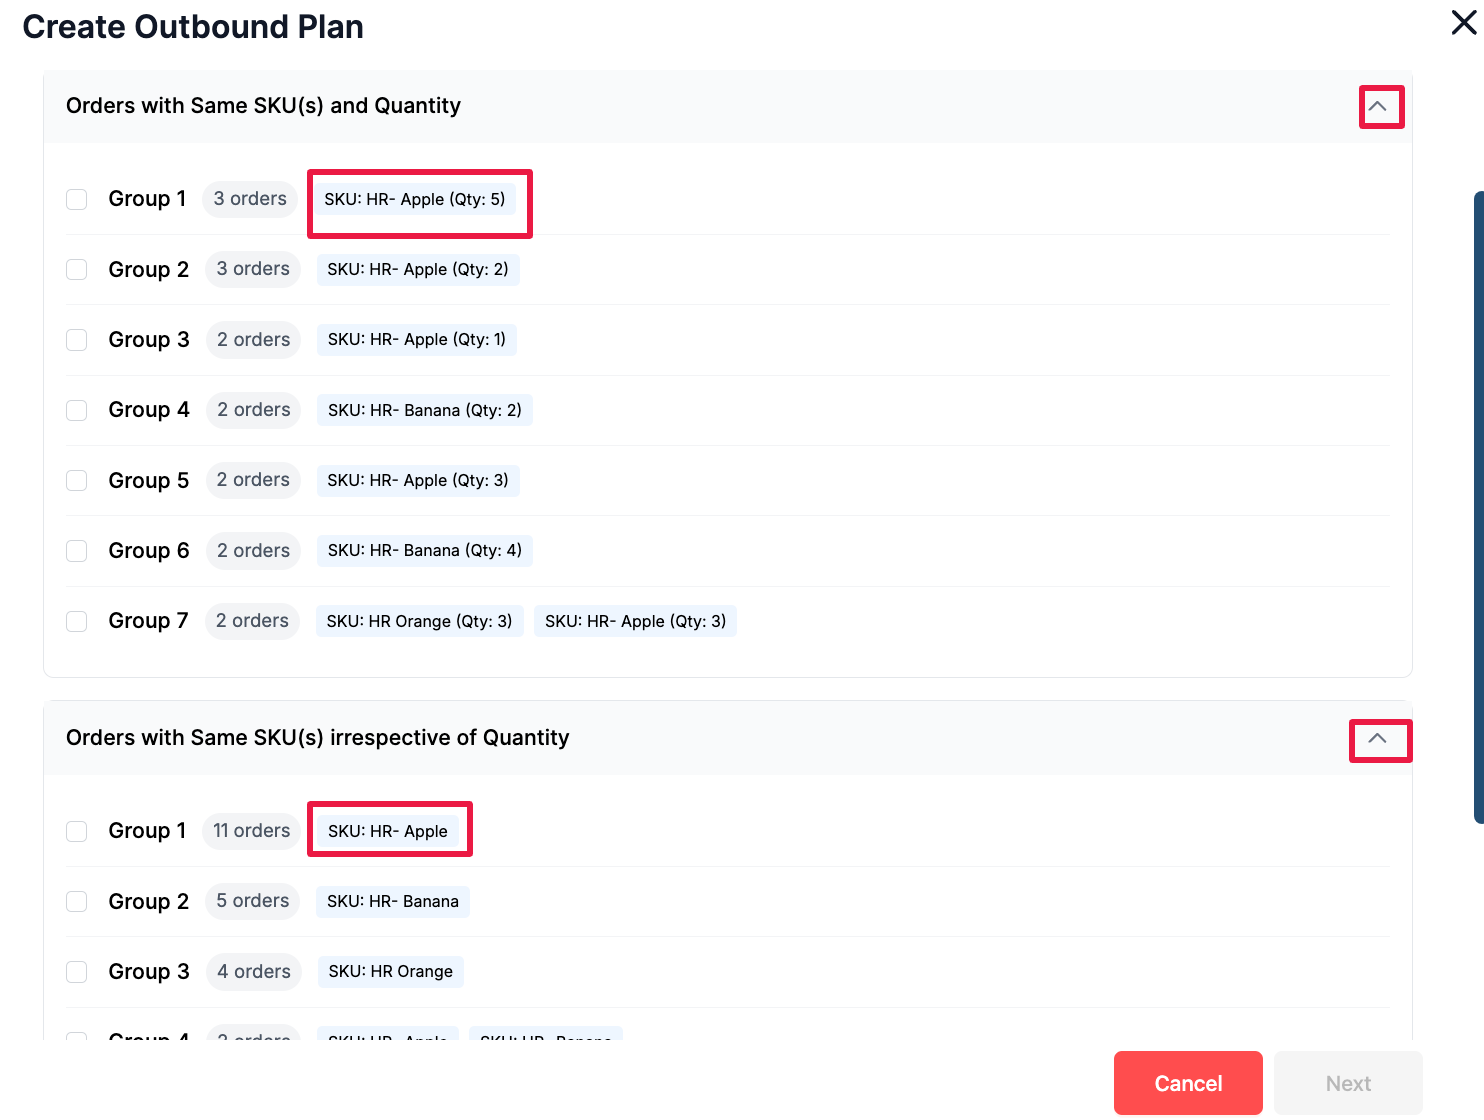
a) Orders with Same SKU(s) and Quantity - This category contains groups of orders containing the same SKU or SKUs with the same quantity per SKU
b) Orders with Same SKU(s) irrespective of Quantity - This category contains groups of orders containing the same SKU or SKUs but may have different quantities per SKU
c) Orders with Same SKU Intersection - This category contains orders that contain a specific SKU and may contain multiple other SKUs.
d) Miscellaneous Orders - This category contains orders that have no specific SKU pattern.
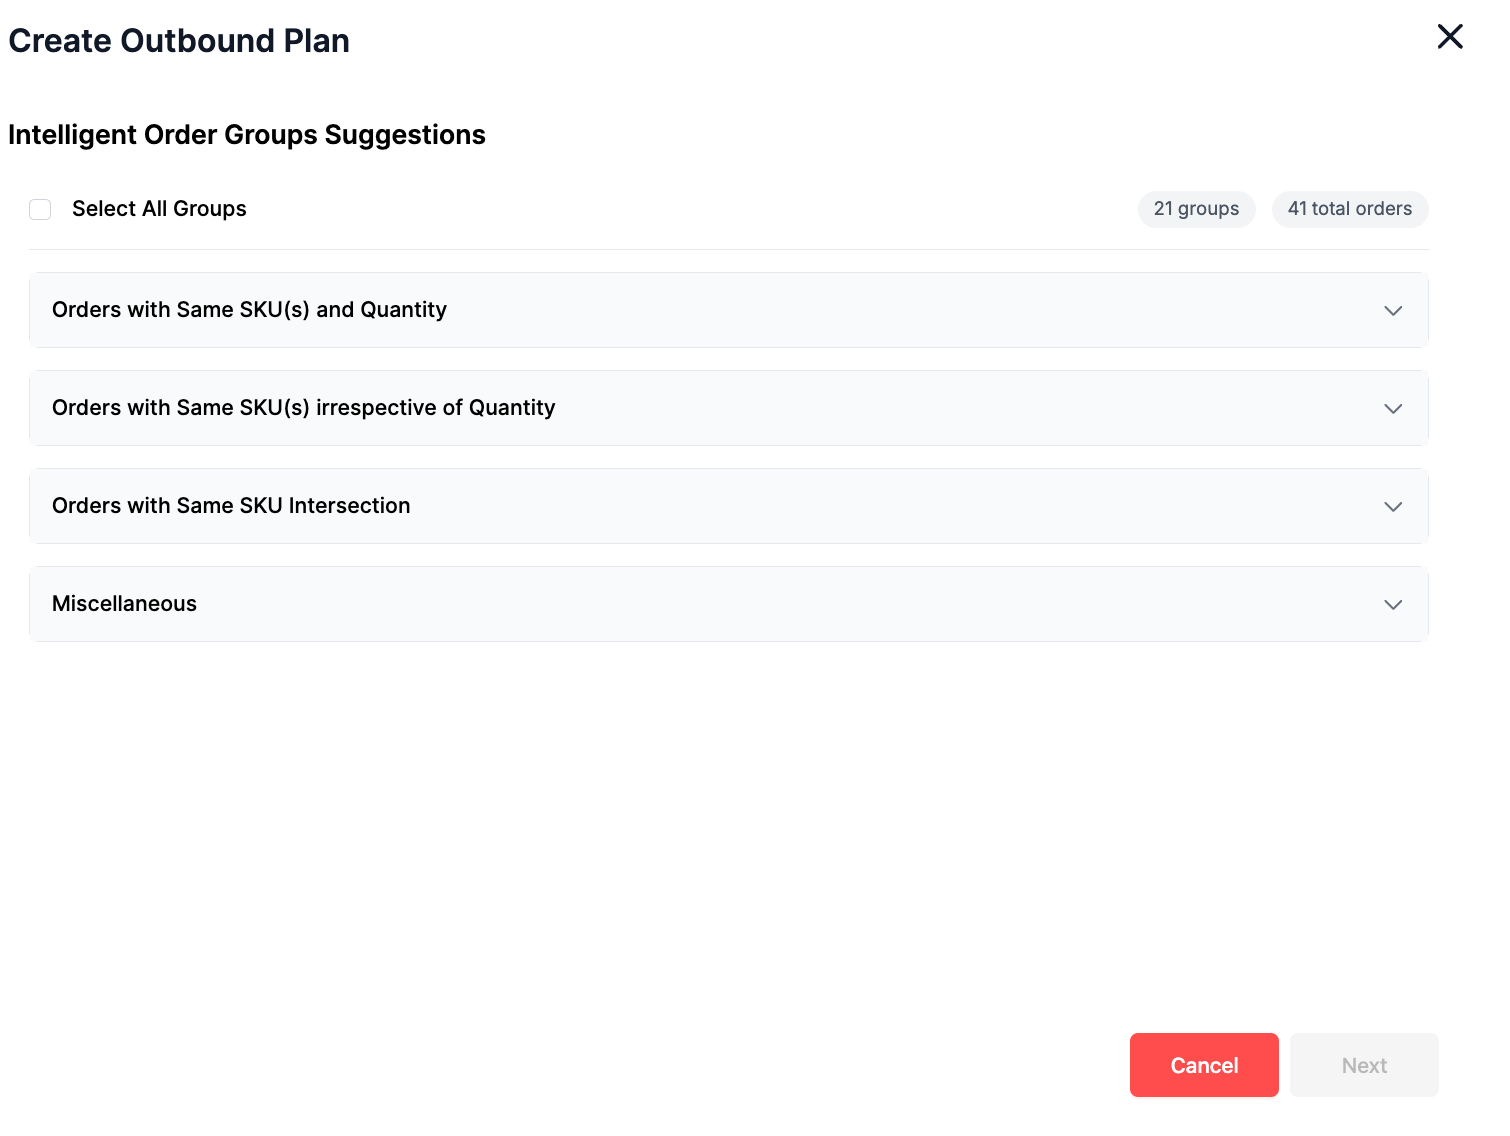
The groups of orders within each category can be viewed by expanding the category.
Step 6: Select the groups to proceed with for planning and click on Next. The user also has the option to select all groups.
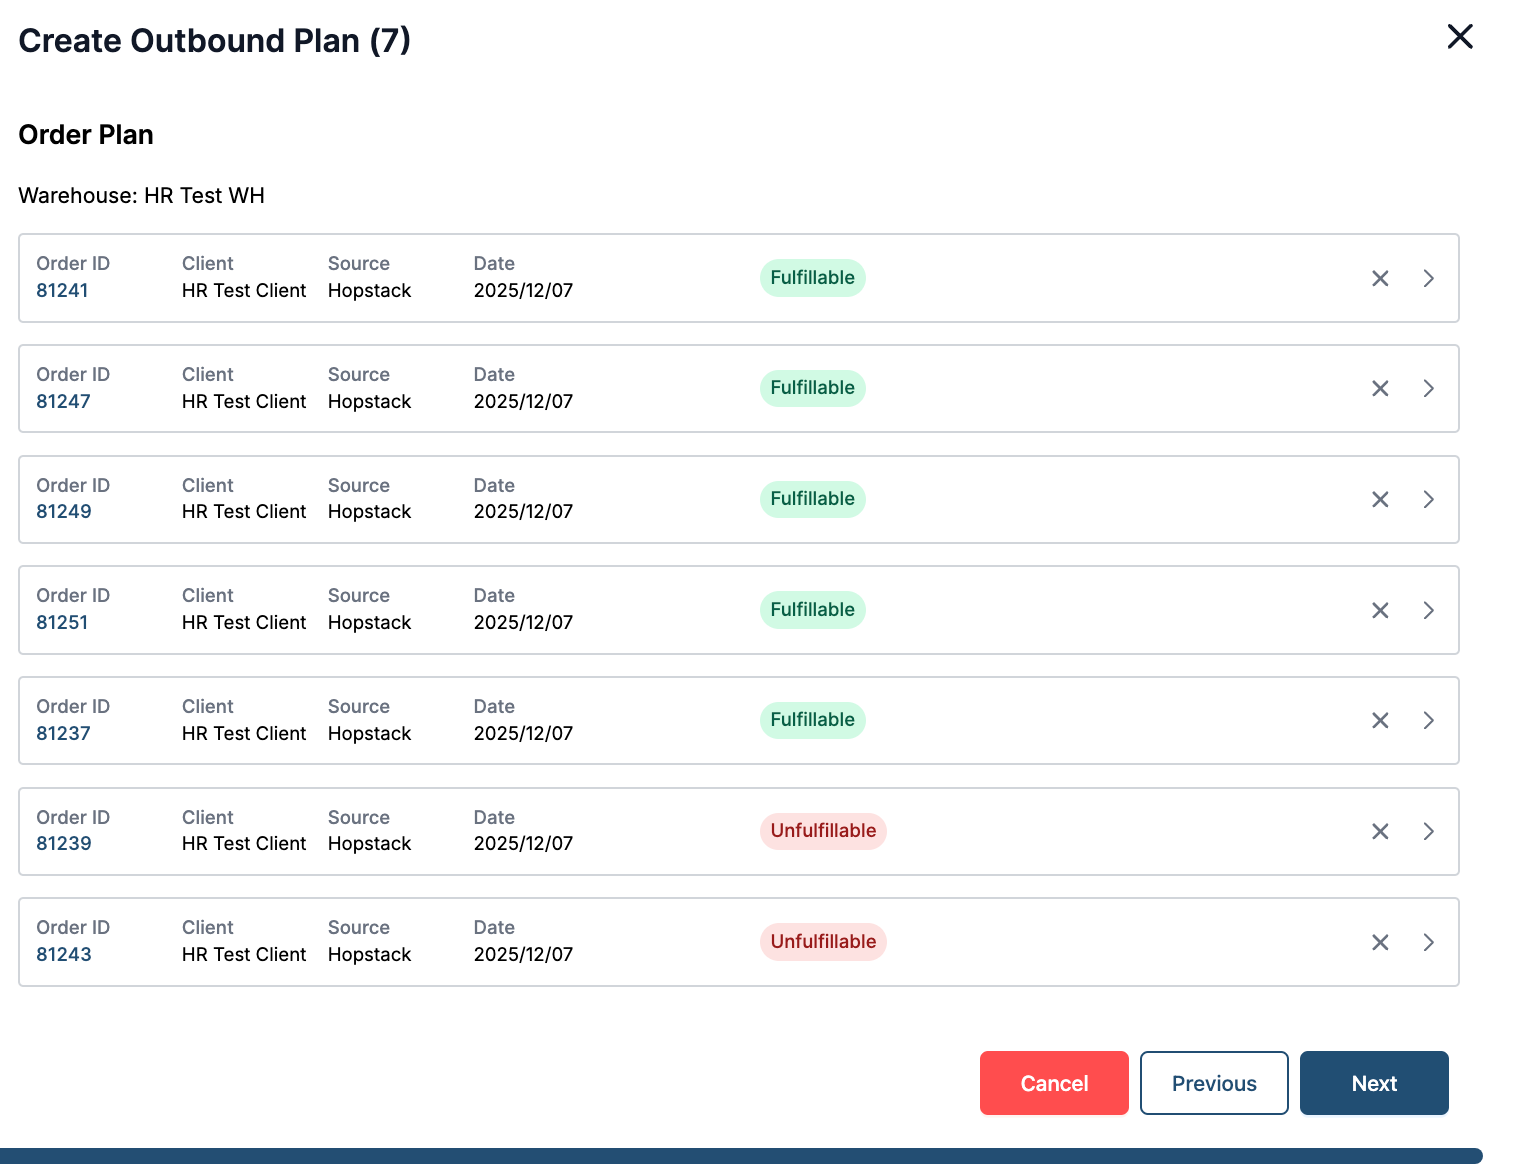
Step 7: In the order plan, the orders are listed along with the fulfilment status. This screen facilitates order planning. The orders can be expanded to see the Line Items and available inventory. The orders can be moved up or down to prioritize or de-prioritize inventory allocation and the status will dynamically update. The orders can also be removed by clicking on “X”. After Planning, click on Next.
Note: Only fulfillable orders will move to the next step.
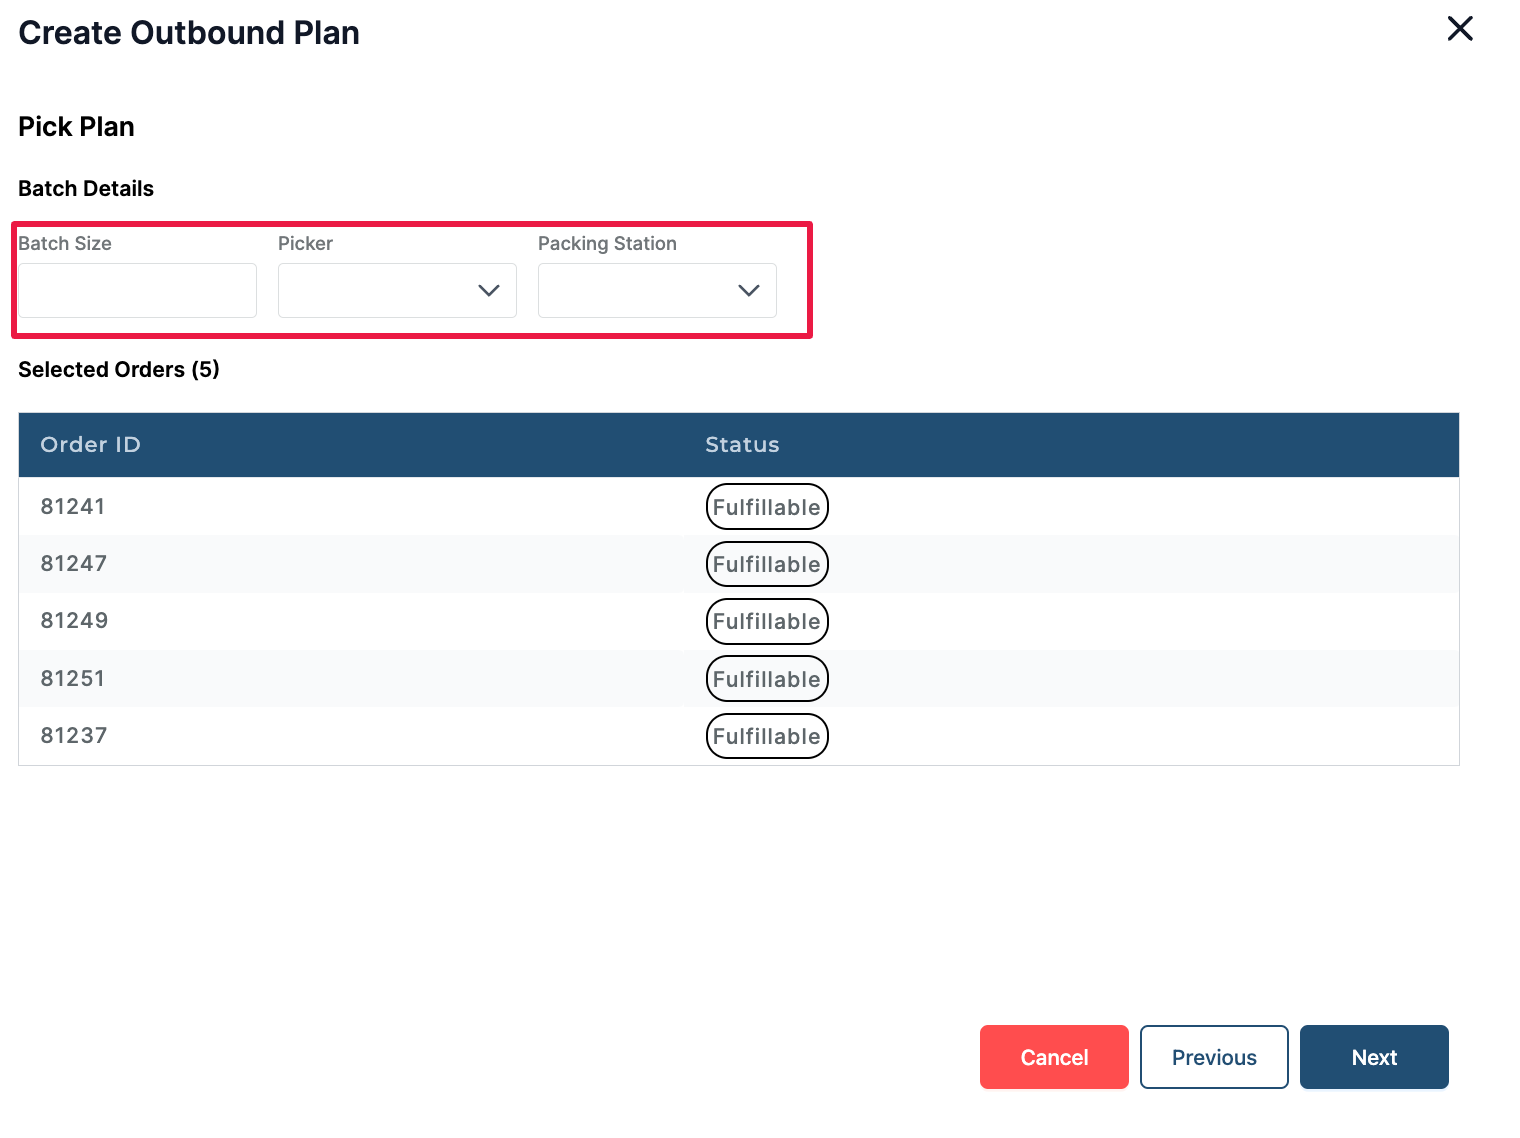
Step 8: Pick Plan Screen allows the user to select a batch size for the picking batches, assign a picker and assign a packing station for the picking batches in the plan. Click on Next to proceed.
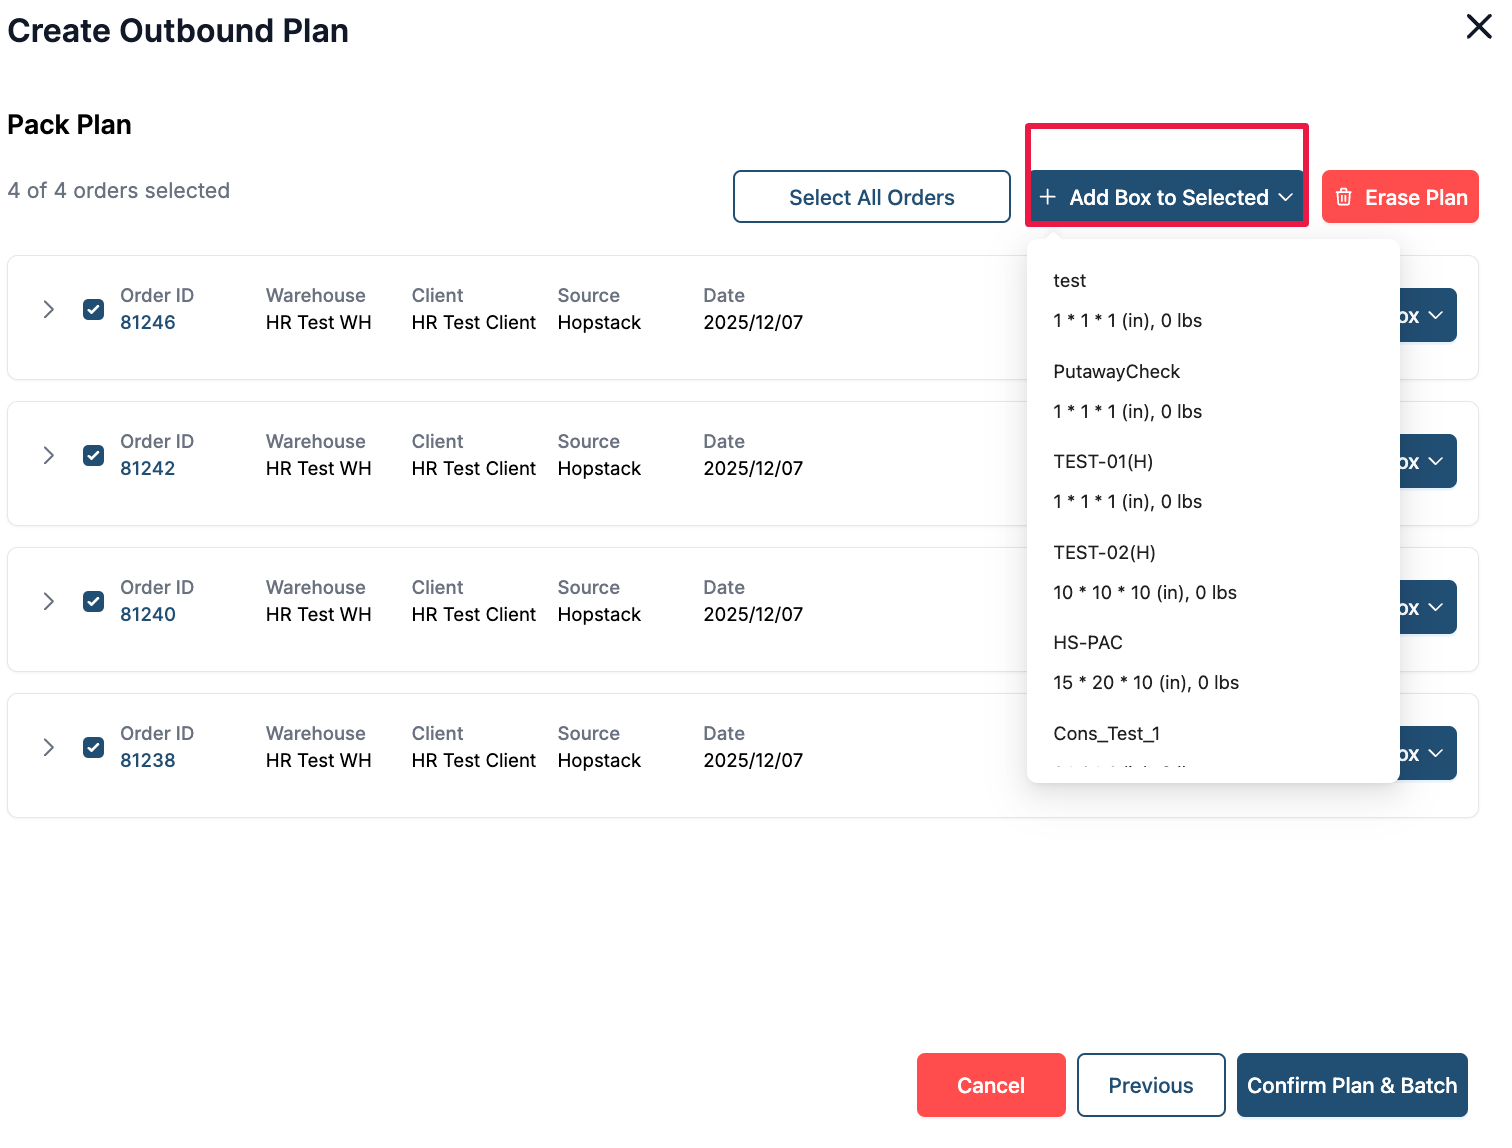
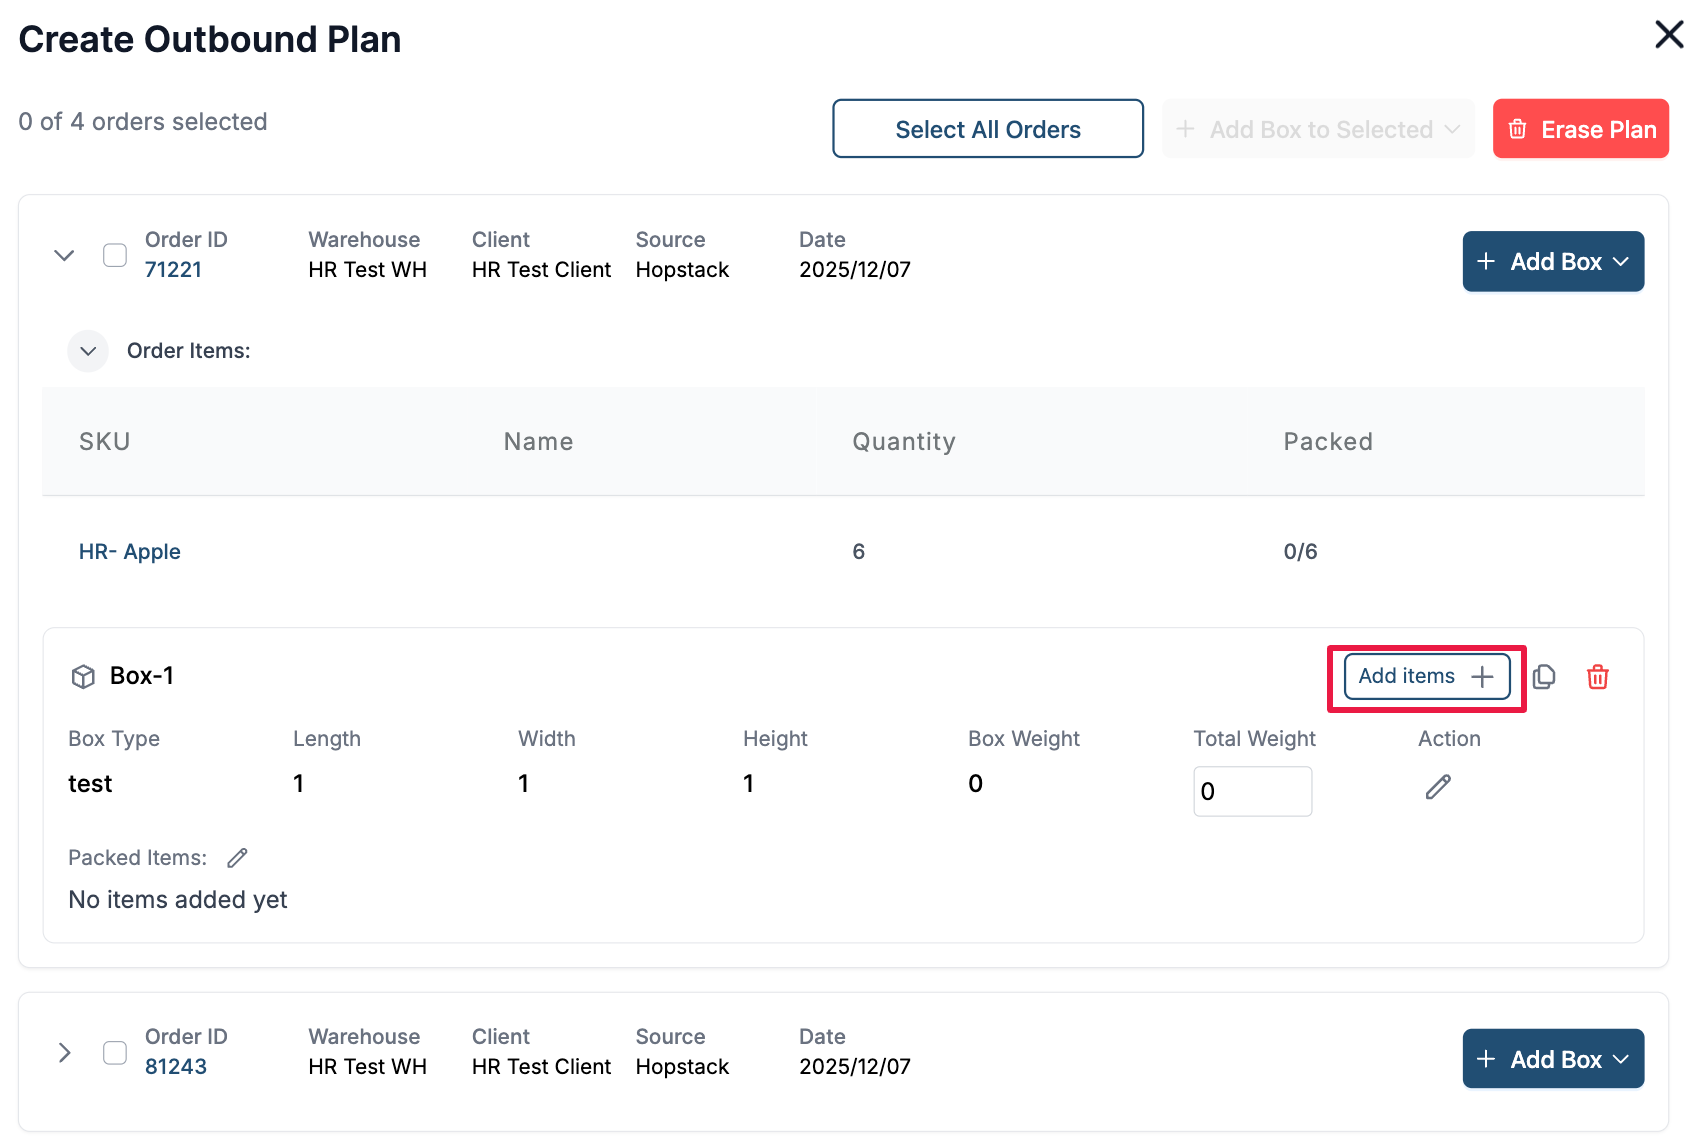
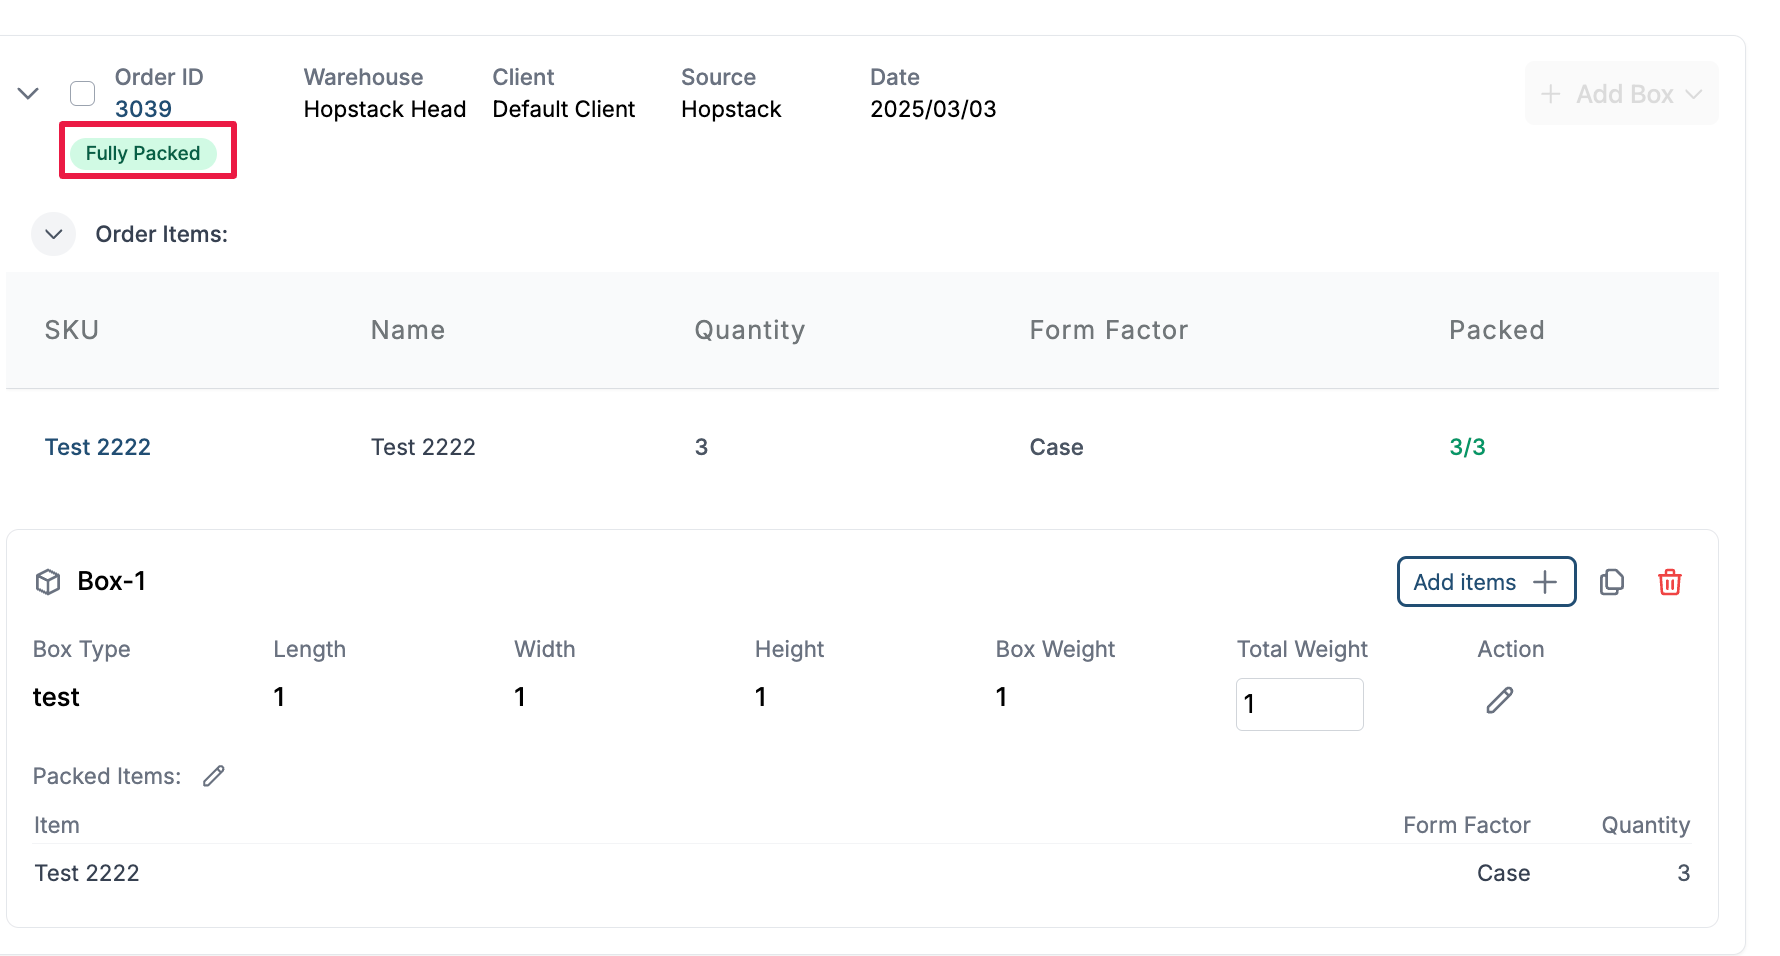
Step 9: In the pack plan screen user can define the packing configuration for the orders.
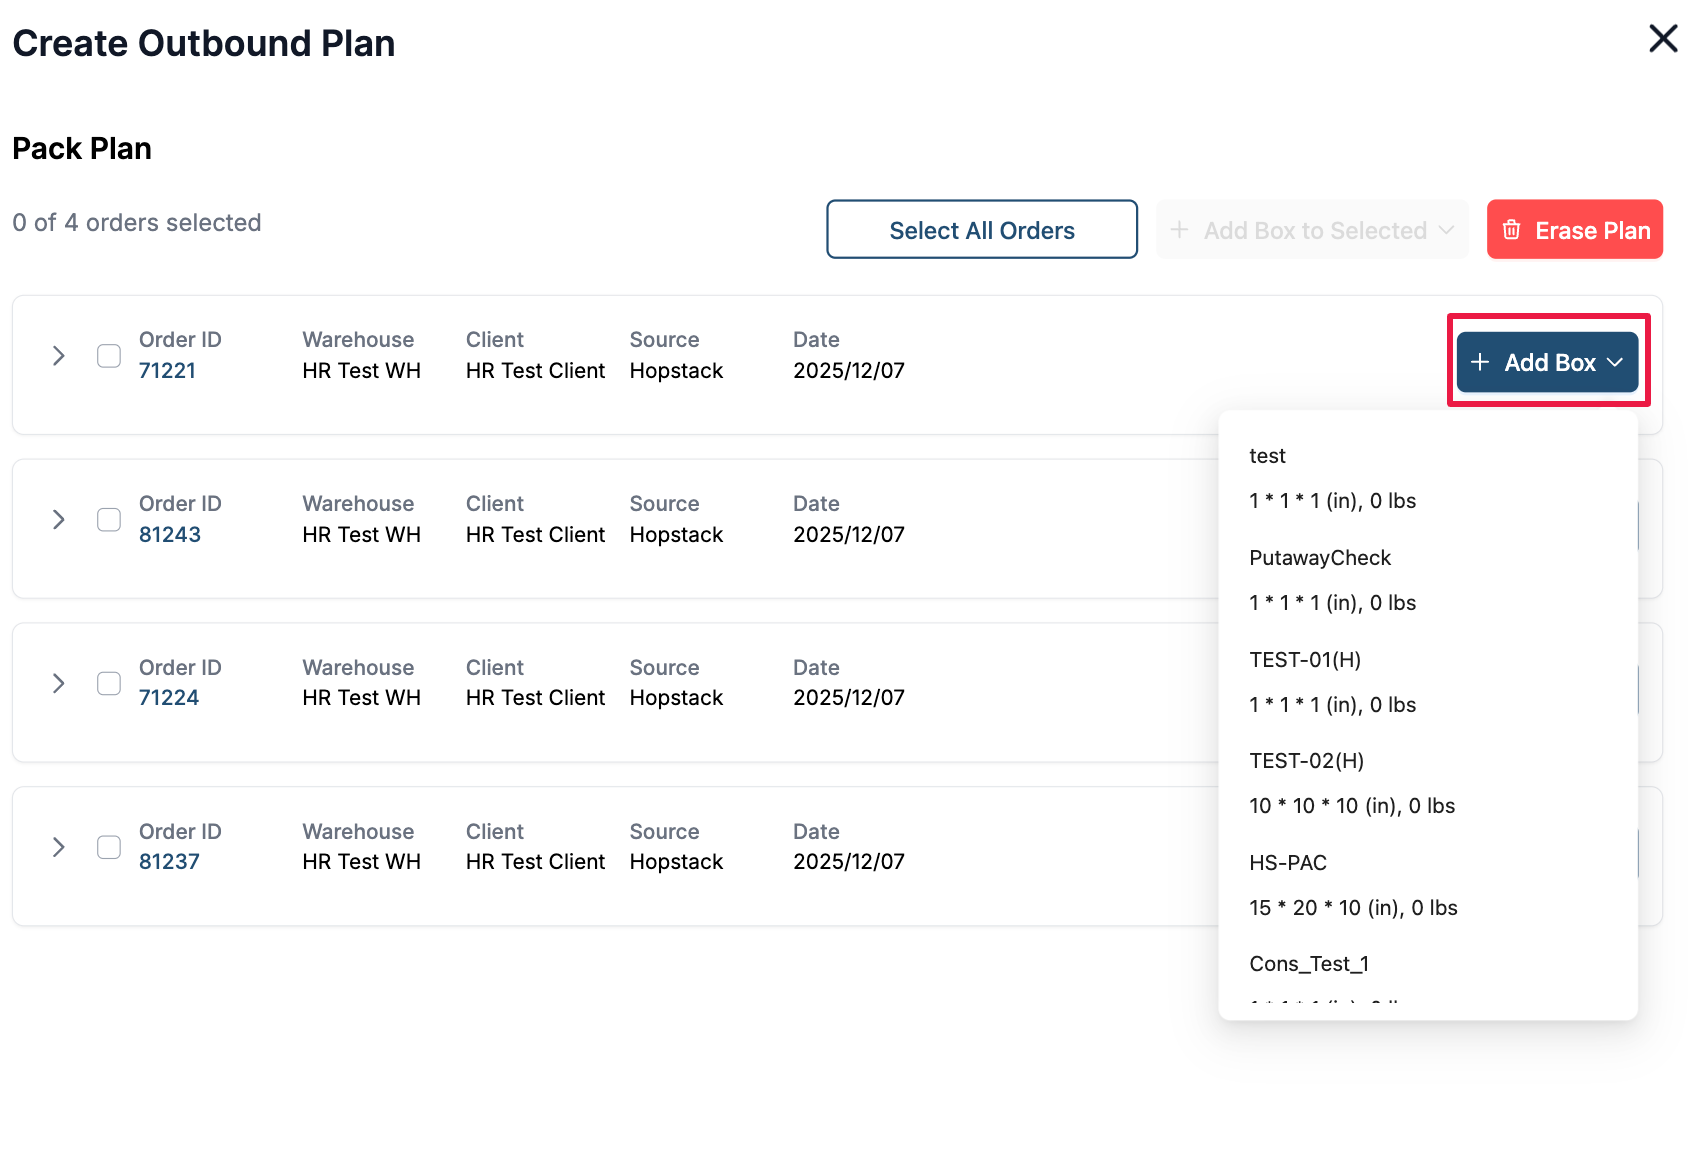
If all the orders in the Plan require the same packing configuration, then the user can click on “Select All Orders” or Select Orders individually by clicking on the check box next to the order → Add box → Select the box type → Click on “Yes, Add all items can be added into one box”. This completes the pack plan for all orders in the batch.
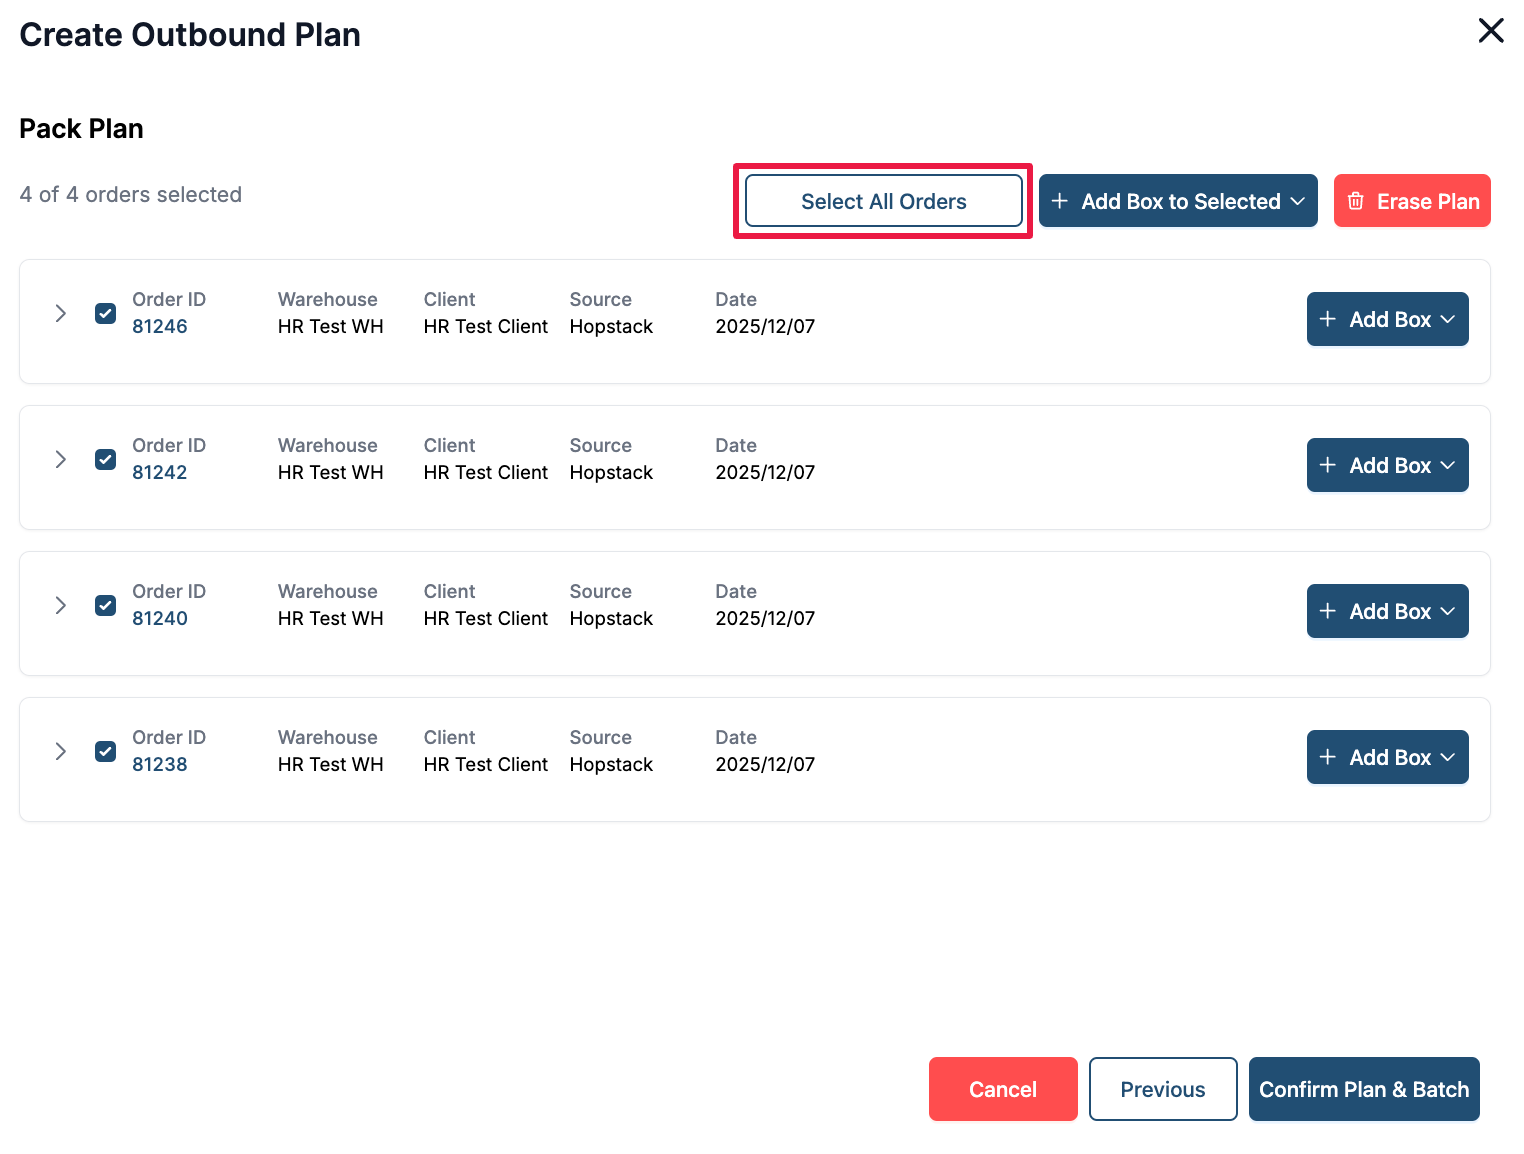
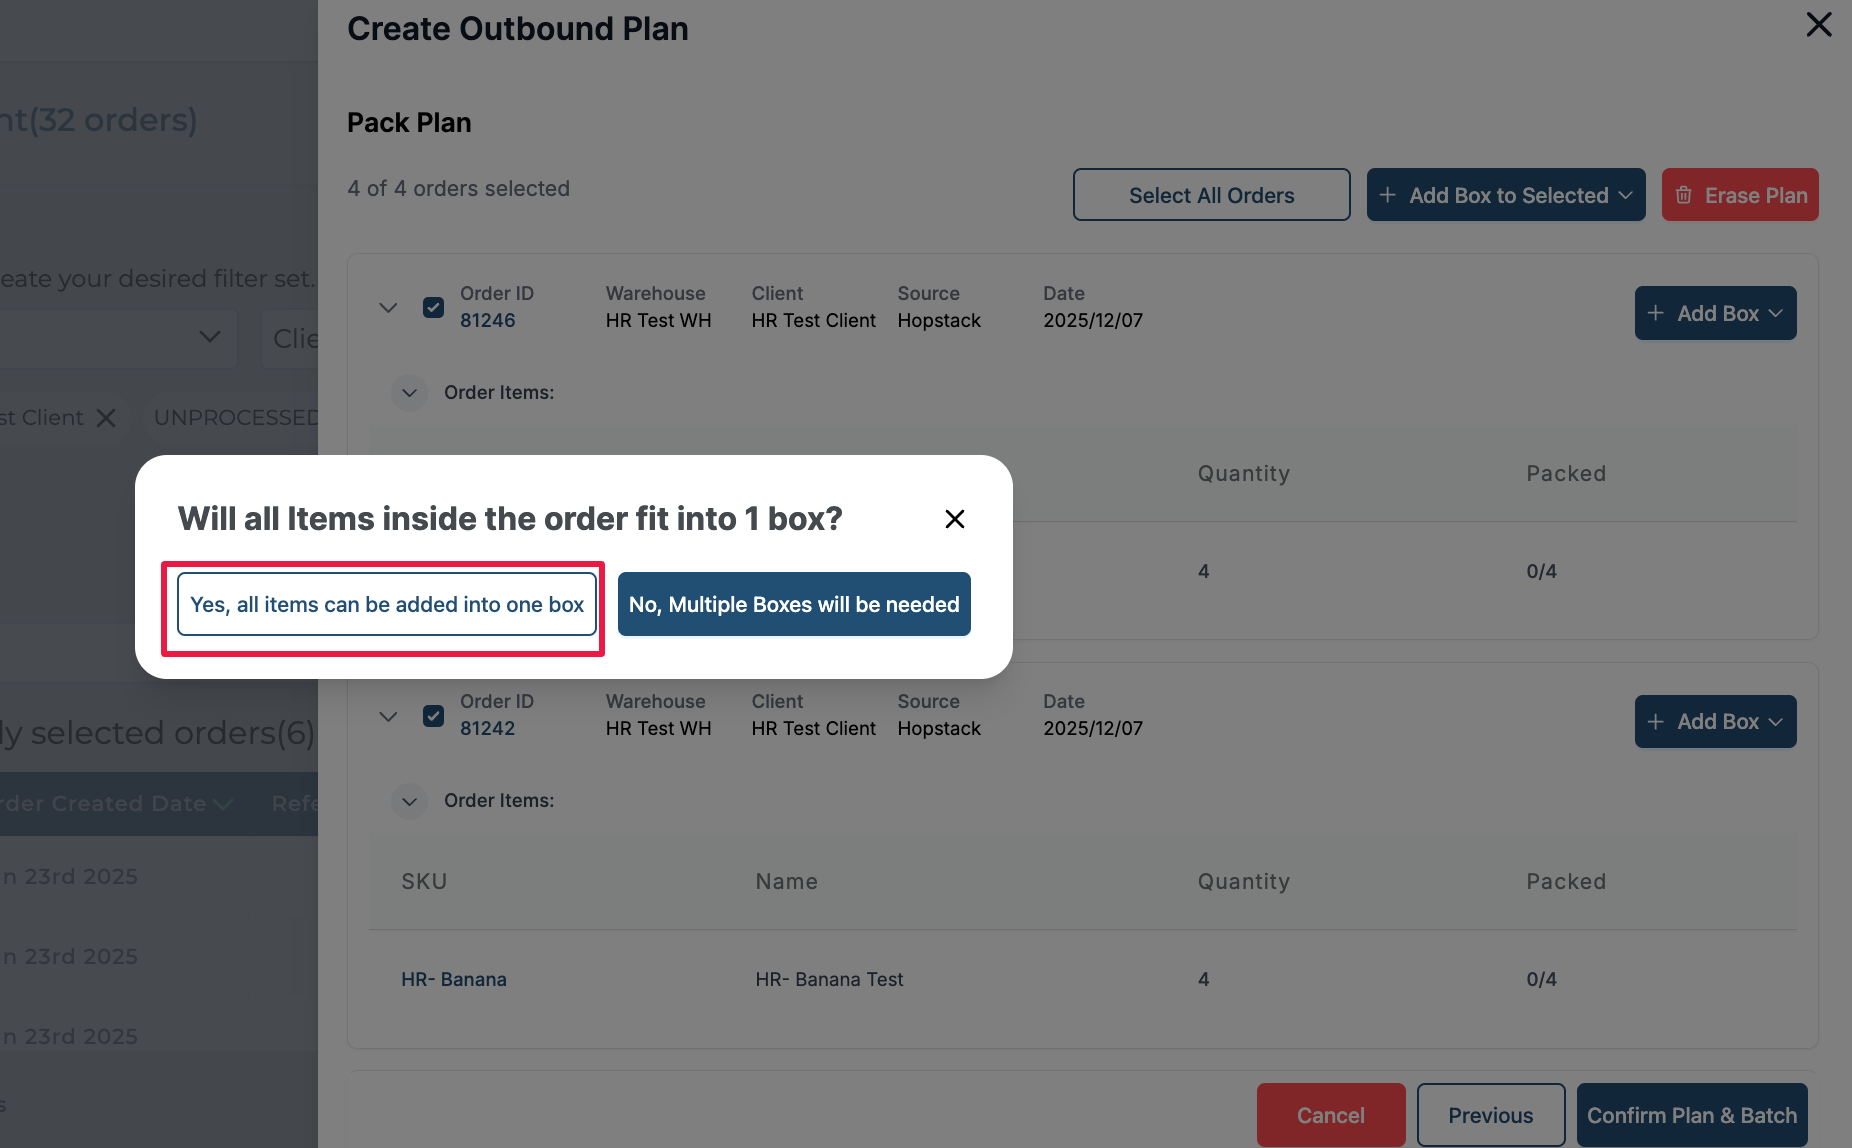
Clicking on “No, Multiple Boxes will be needed” will allow the user to add multiple boxes to all the selected orders.
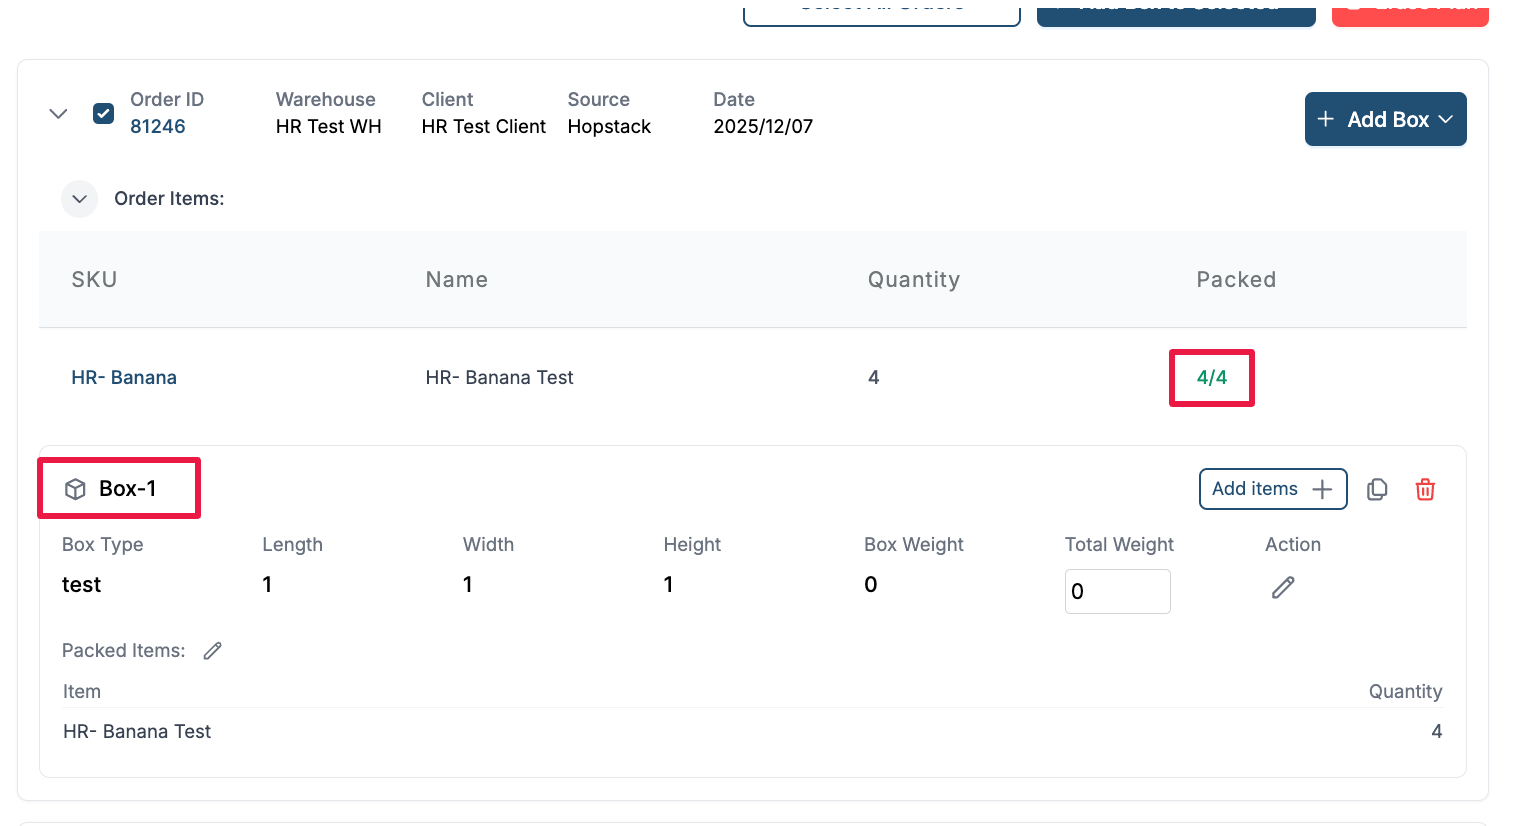
The user also has the flexibility to plan packing at the order level. For each order, the user can add a box or multiple boxes and add items to the box.
Click on Add Box in the order line.
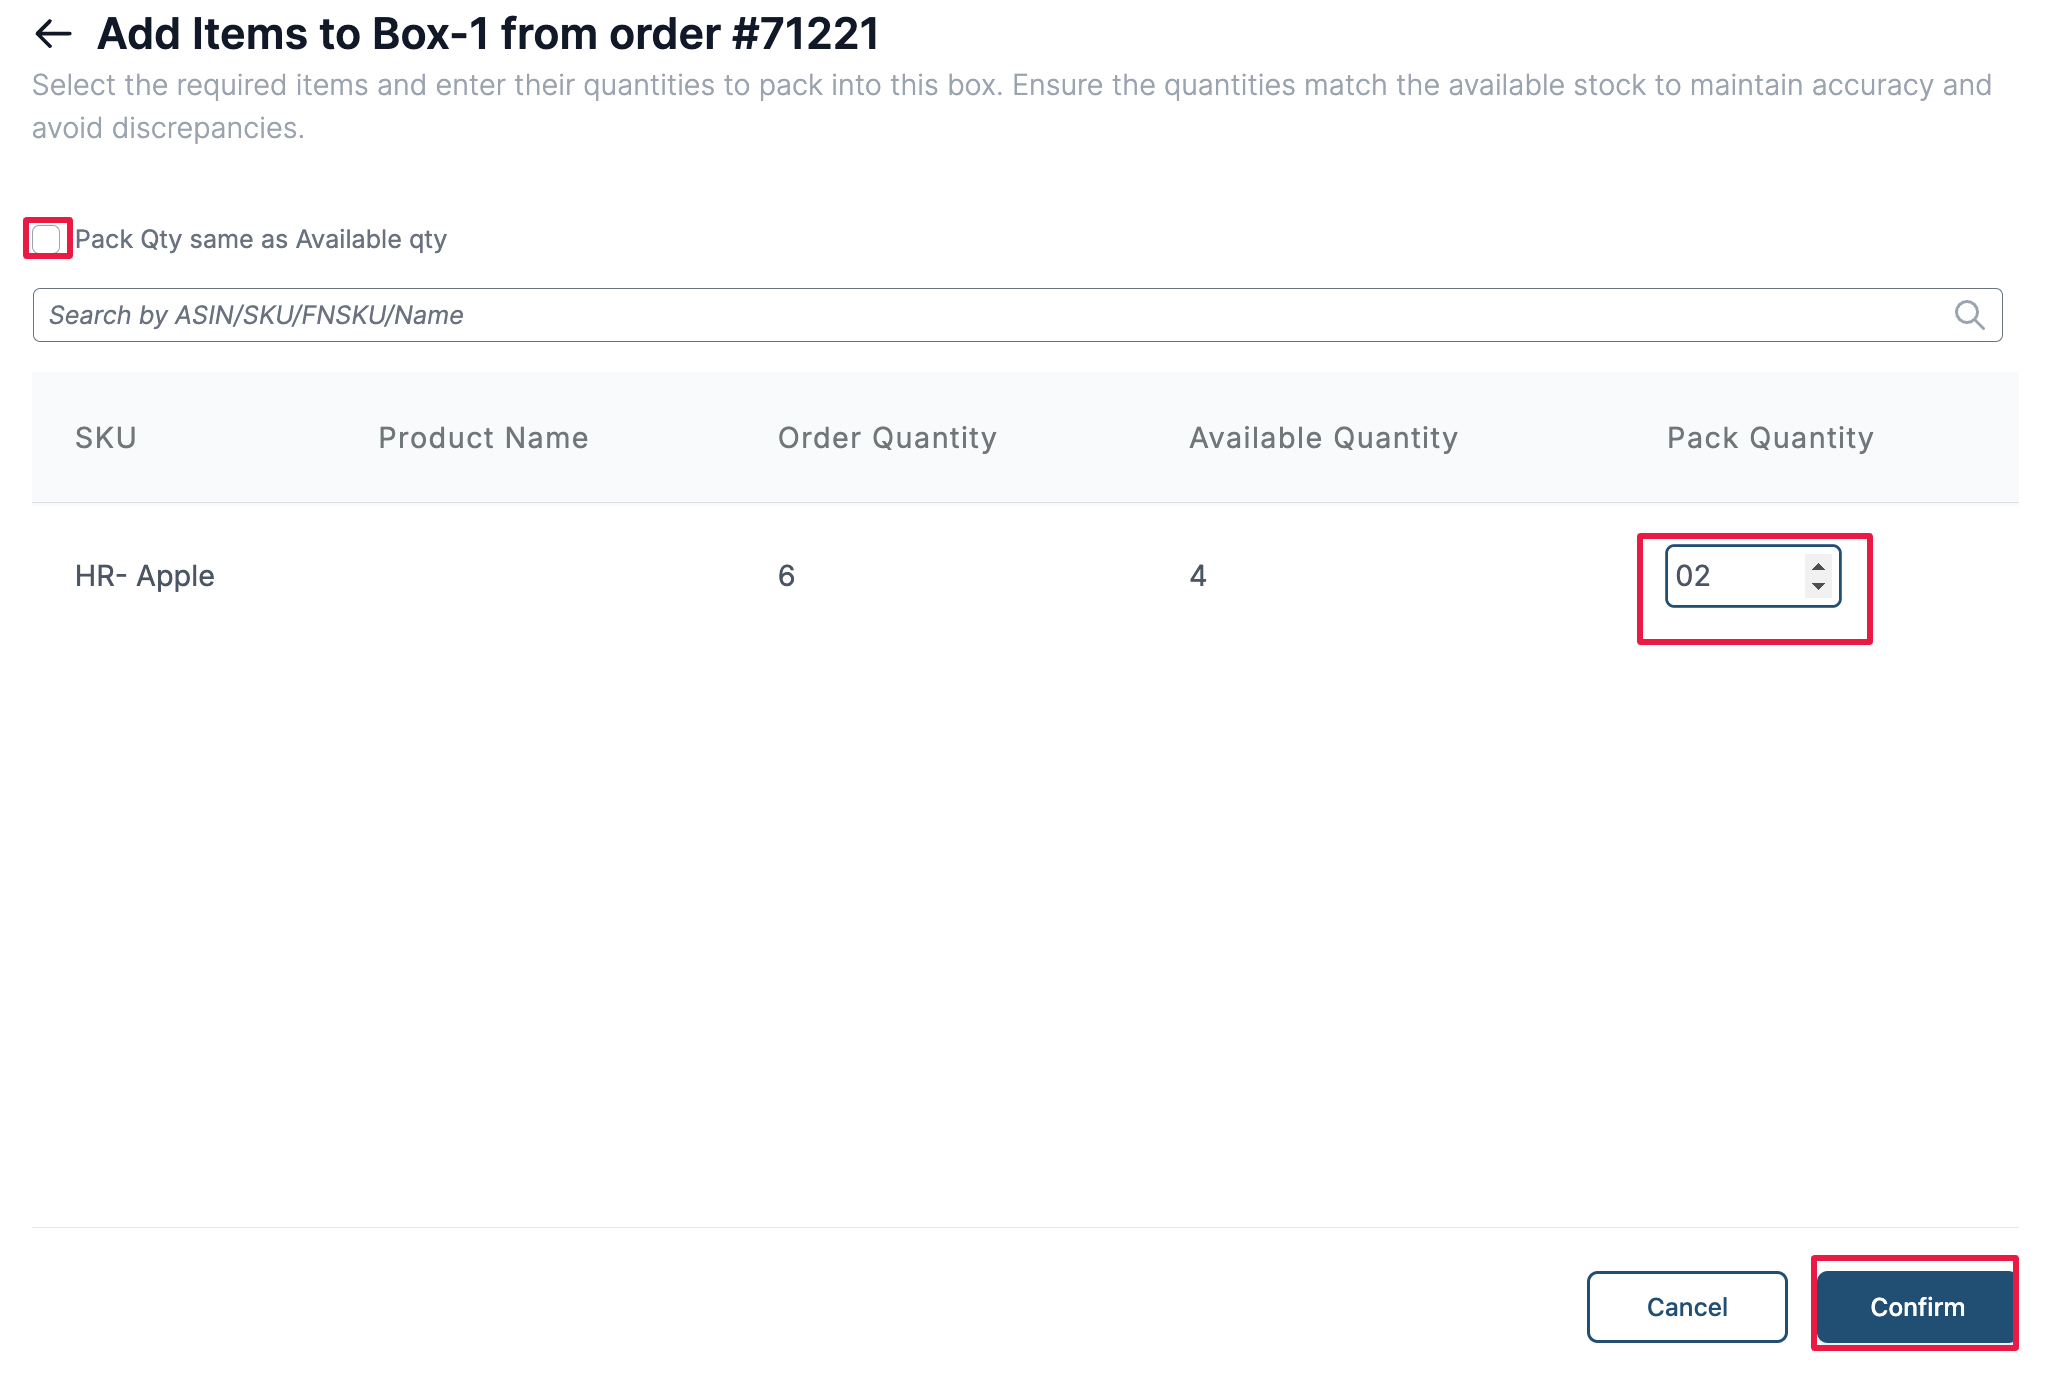
Click on add items
Specify the quantity to be added to the box and click on Confirm. If the user clicks on the pack Qty same as Available qty check box, the Pack Quantity will be auto-filled to match the Available Quantity.
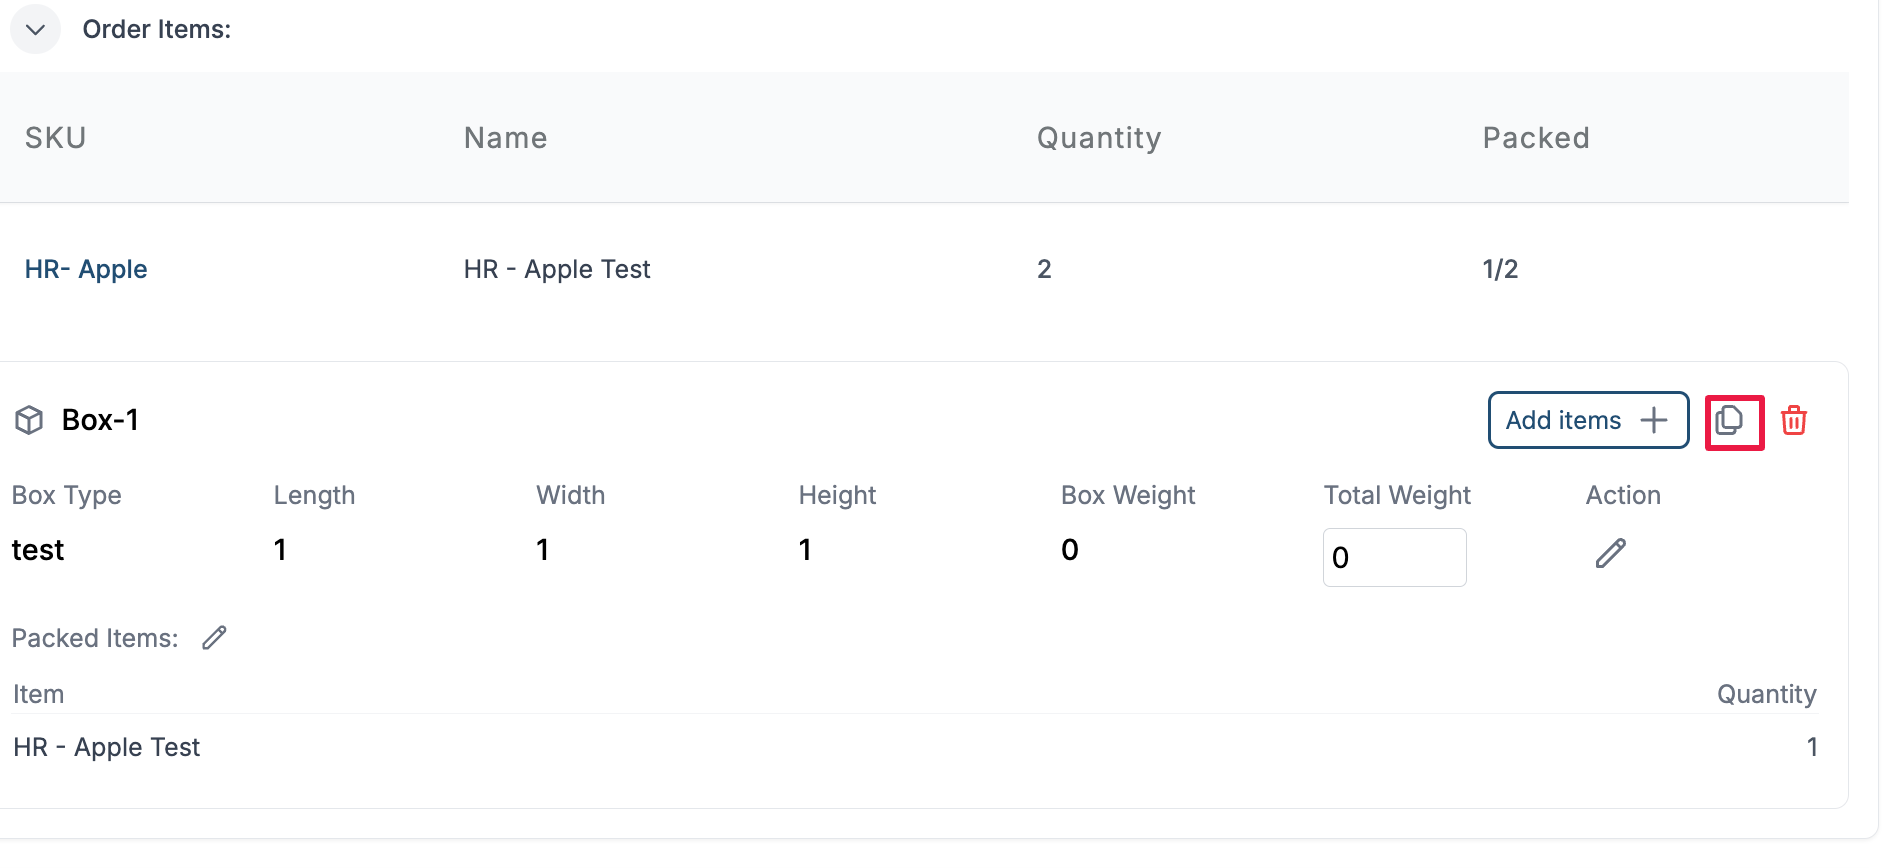
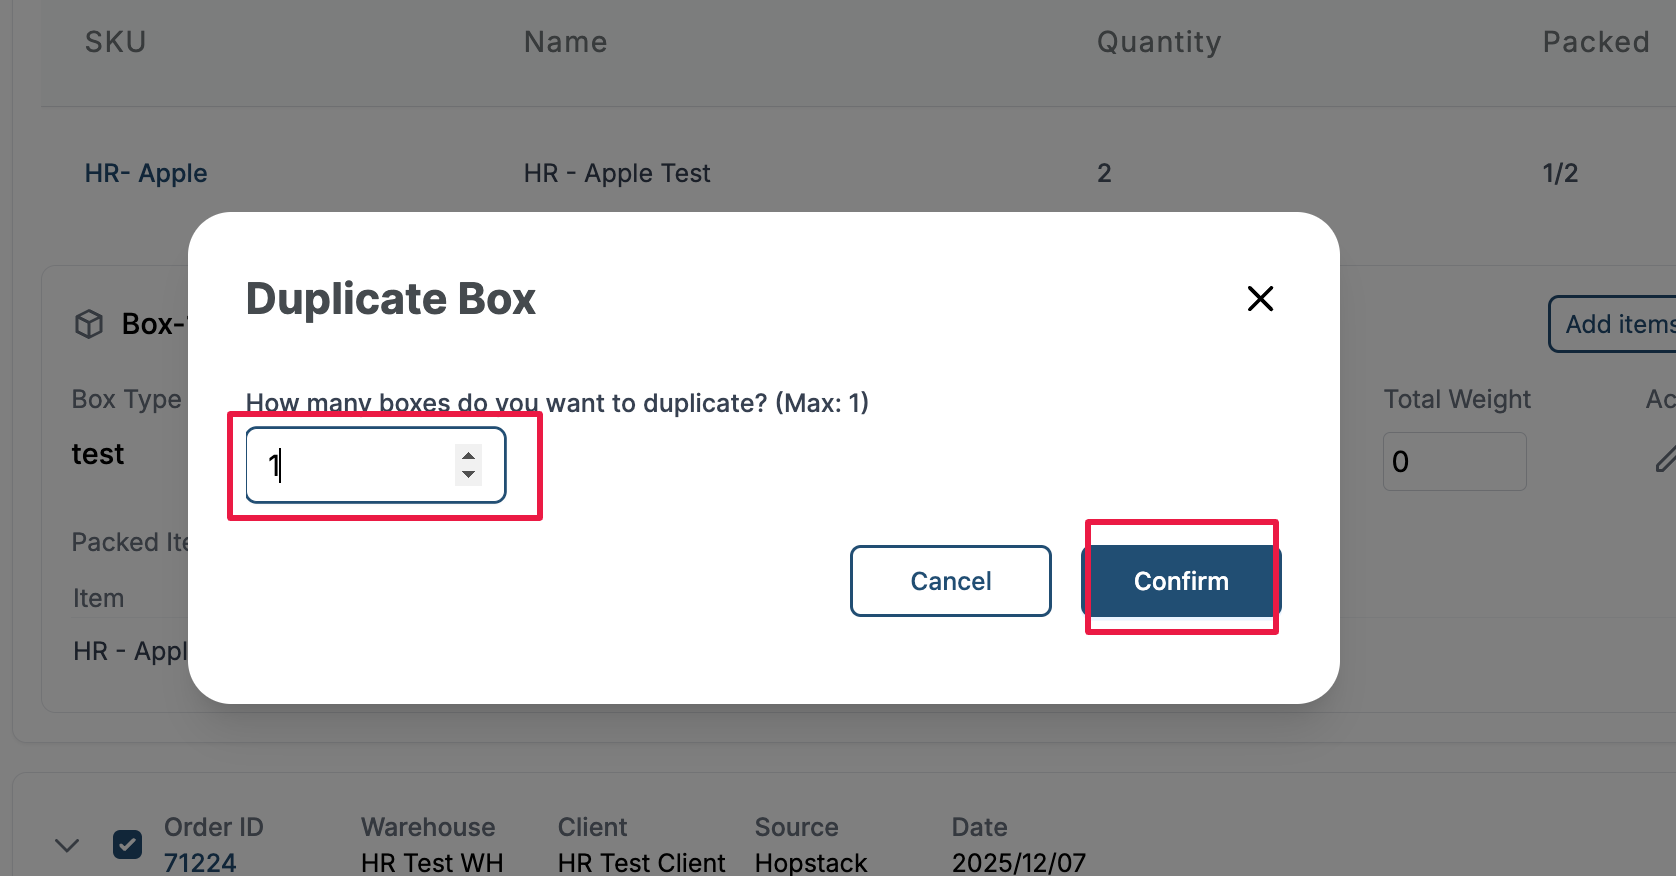
The user also has the option to duplicate the box to have the same packing configuration for the remaining items in the order by clicking on the duplicate button.
Specify the number of duplicates required and click on confirm.
User can select all orders and click on Erase Plan to delete the pack plan for all orders or delete boxes at each order.
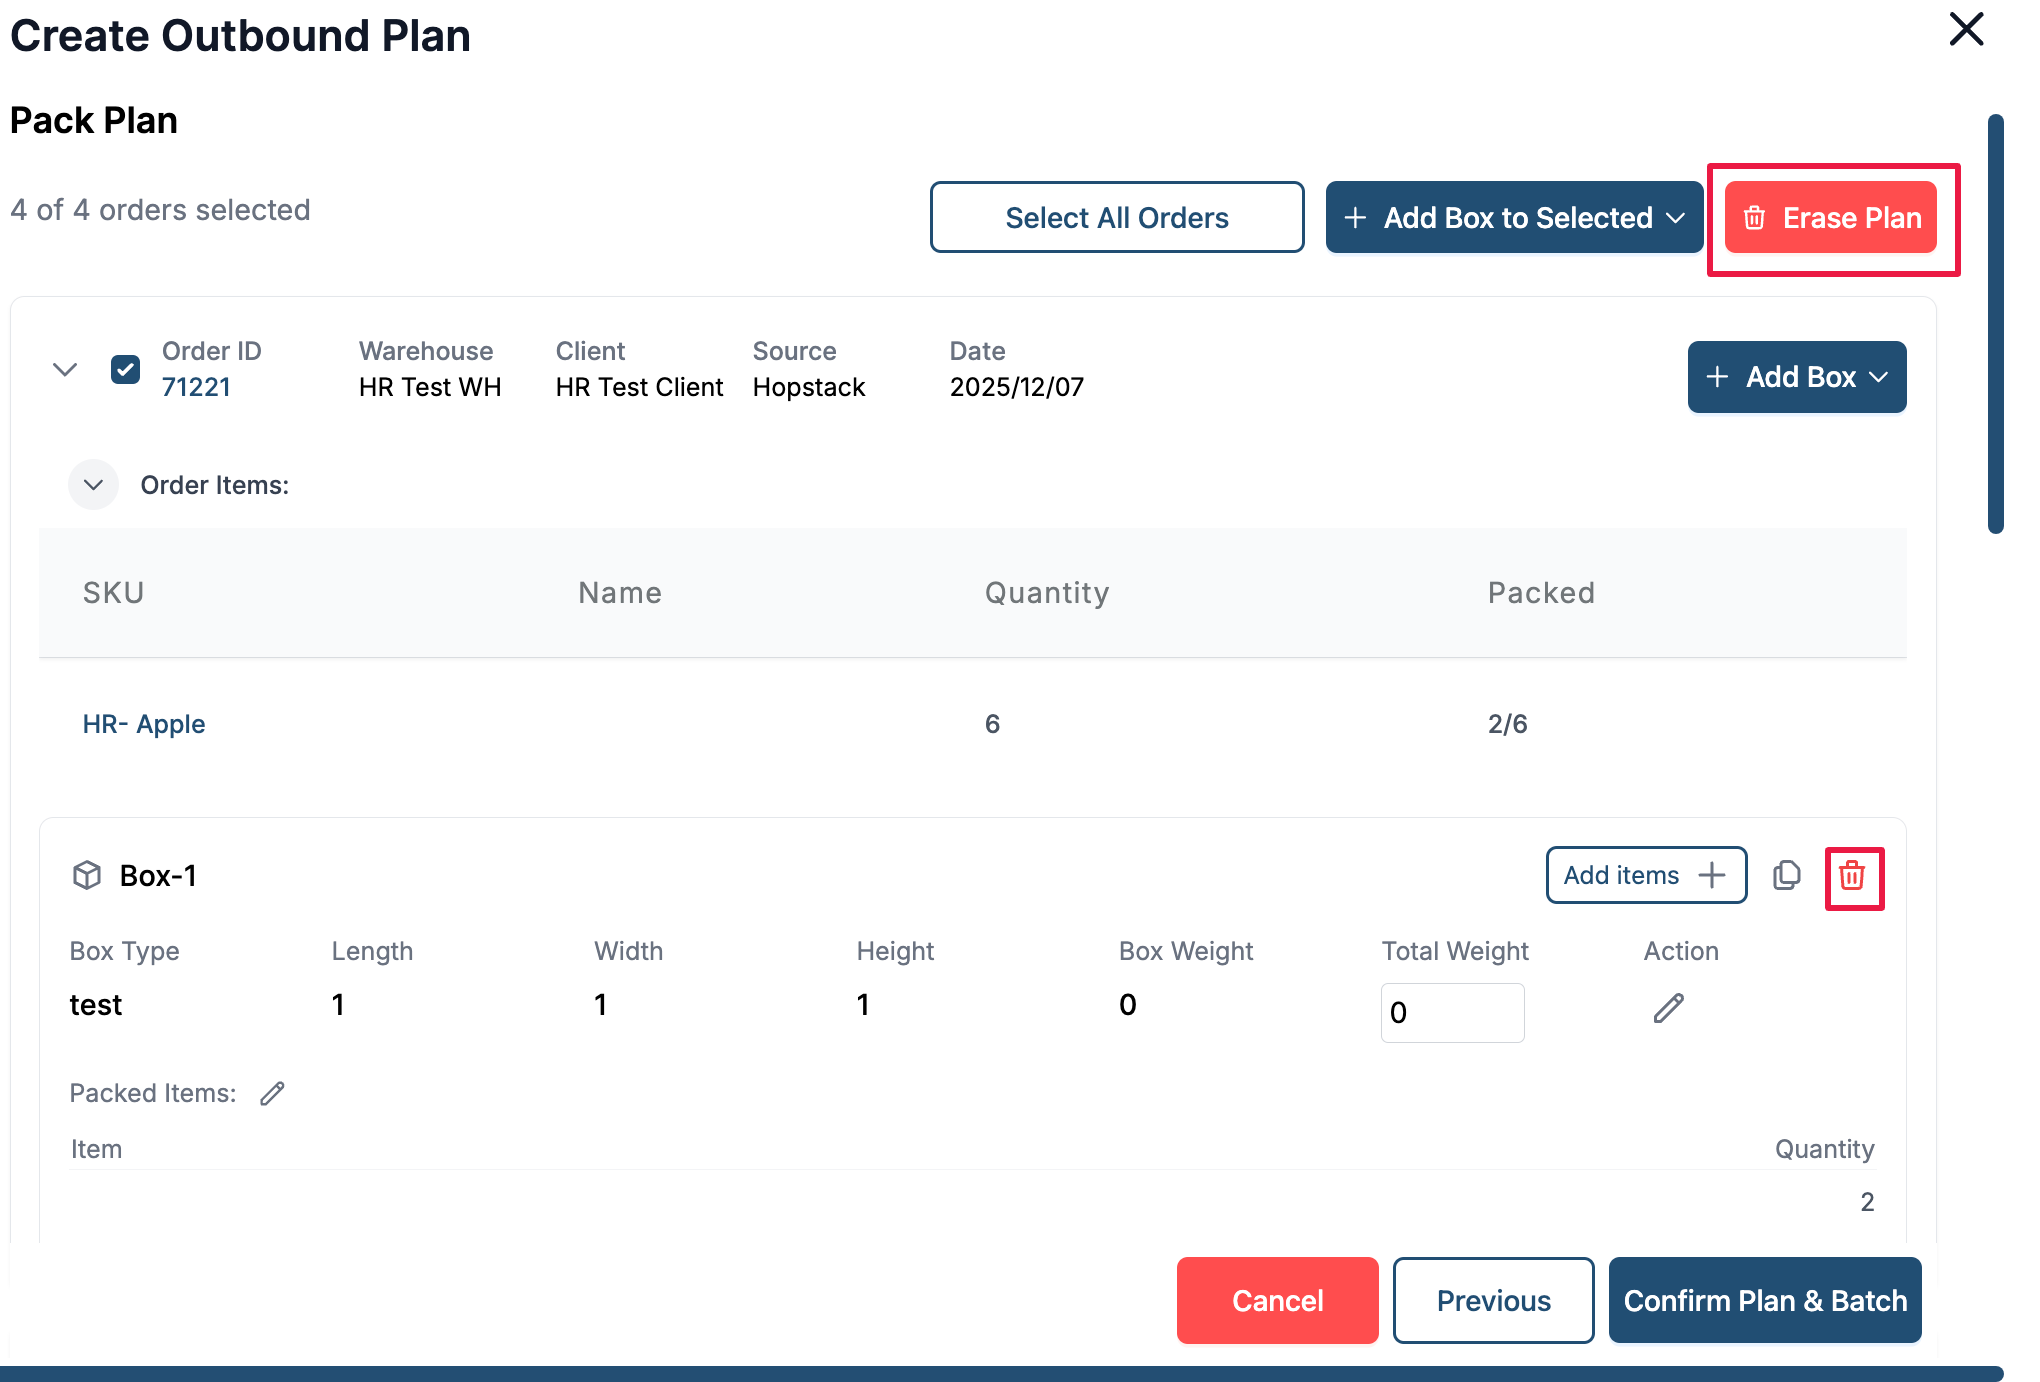
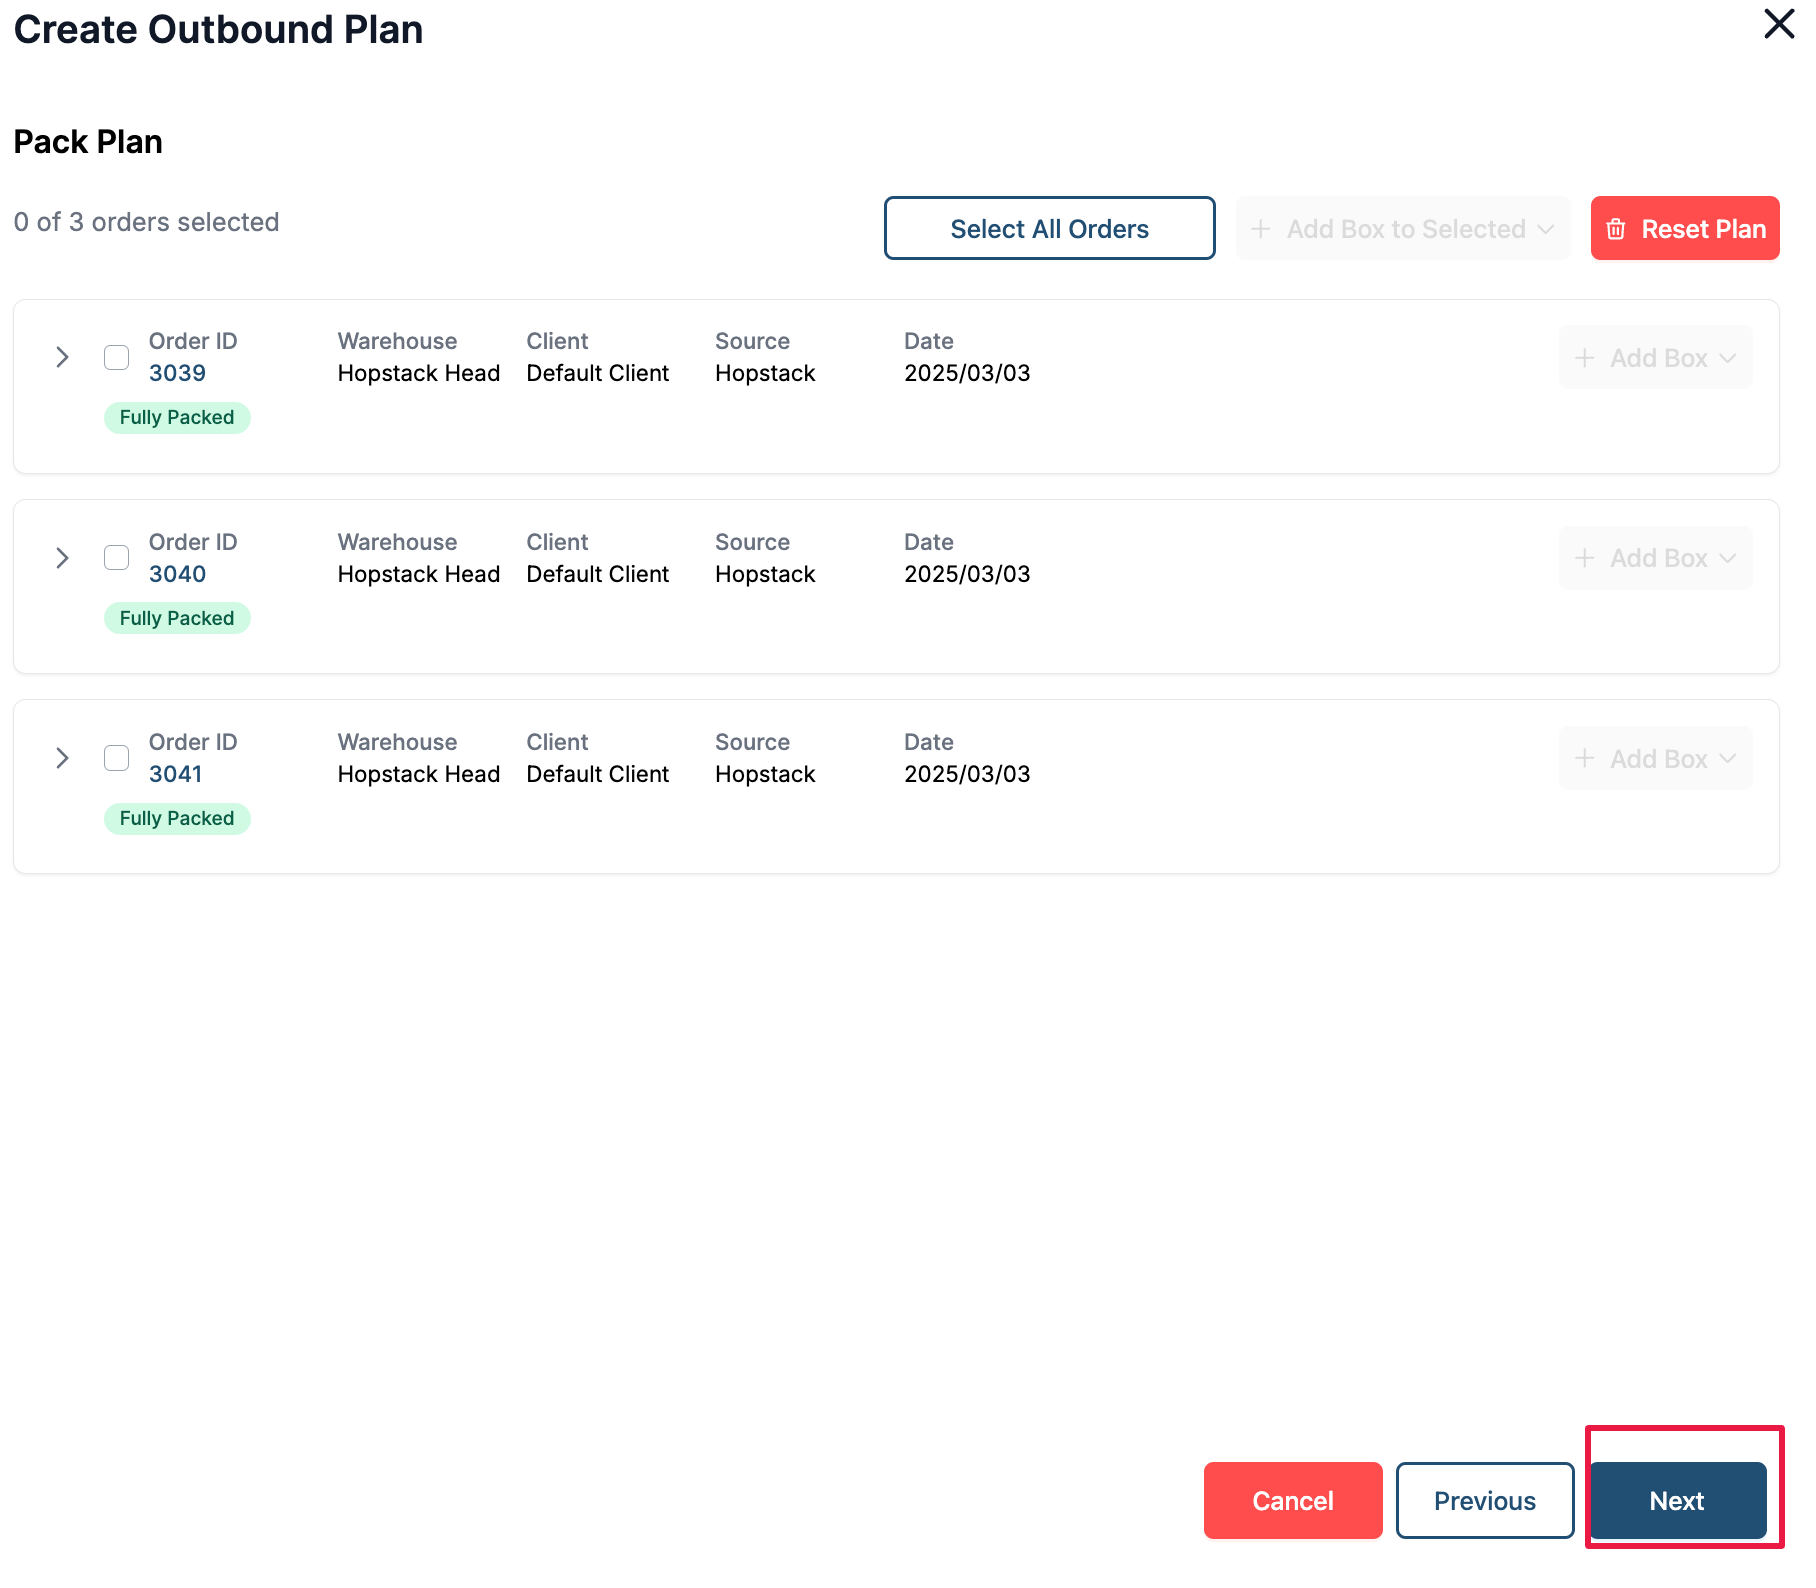
Step 10: Once the pack plan for an order a fully packed badge appears to indicate that the pack plan for an order is complete. Click on Next when the pack plan for all orders is complete.
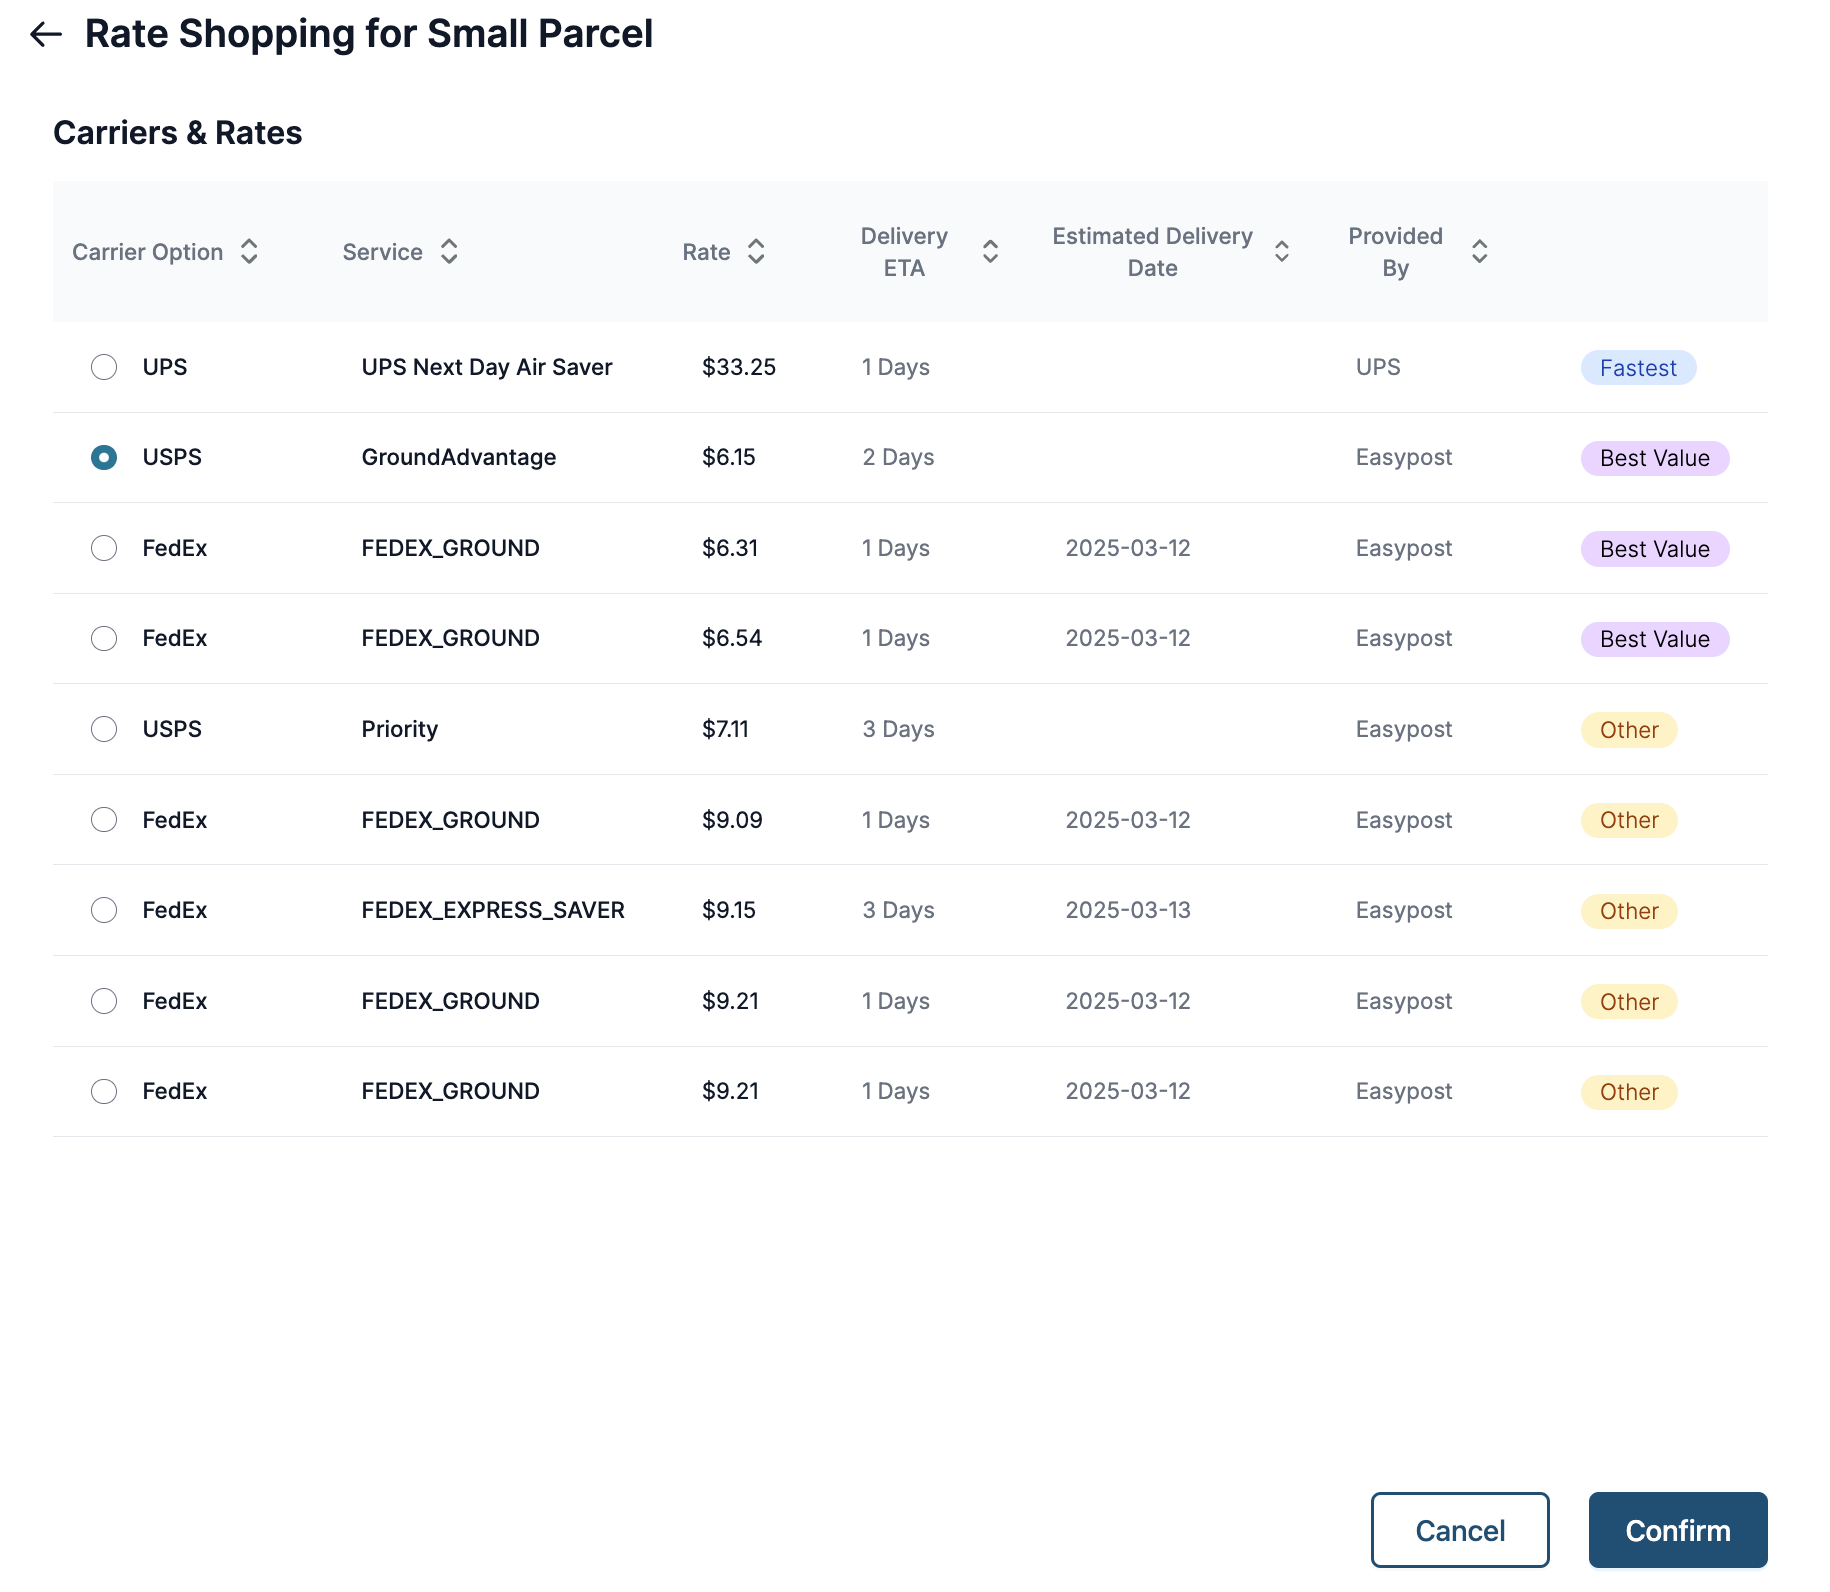
Step 11: In the Shipment Plan Screen, if carriers are preselected in order and/or if shipping rules defined in the shipping rule engine apply to the order, the selected carrier service pre-populates. The user has the option to change the selection by clicking on Edit and performing rate shopping. If no default selection is applied, then the user can click on Enter rate-shopping details to perform rate shopping to select a carrier and service for the order.
Shipping rules can be set up for the selection of shipment method based on order attributes. Please reach out to your implementation lead or sales liaison to learn more about this.
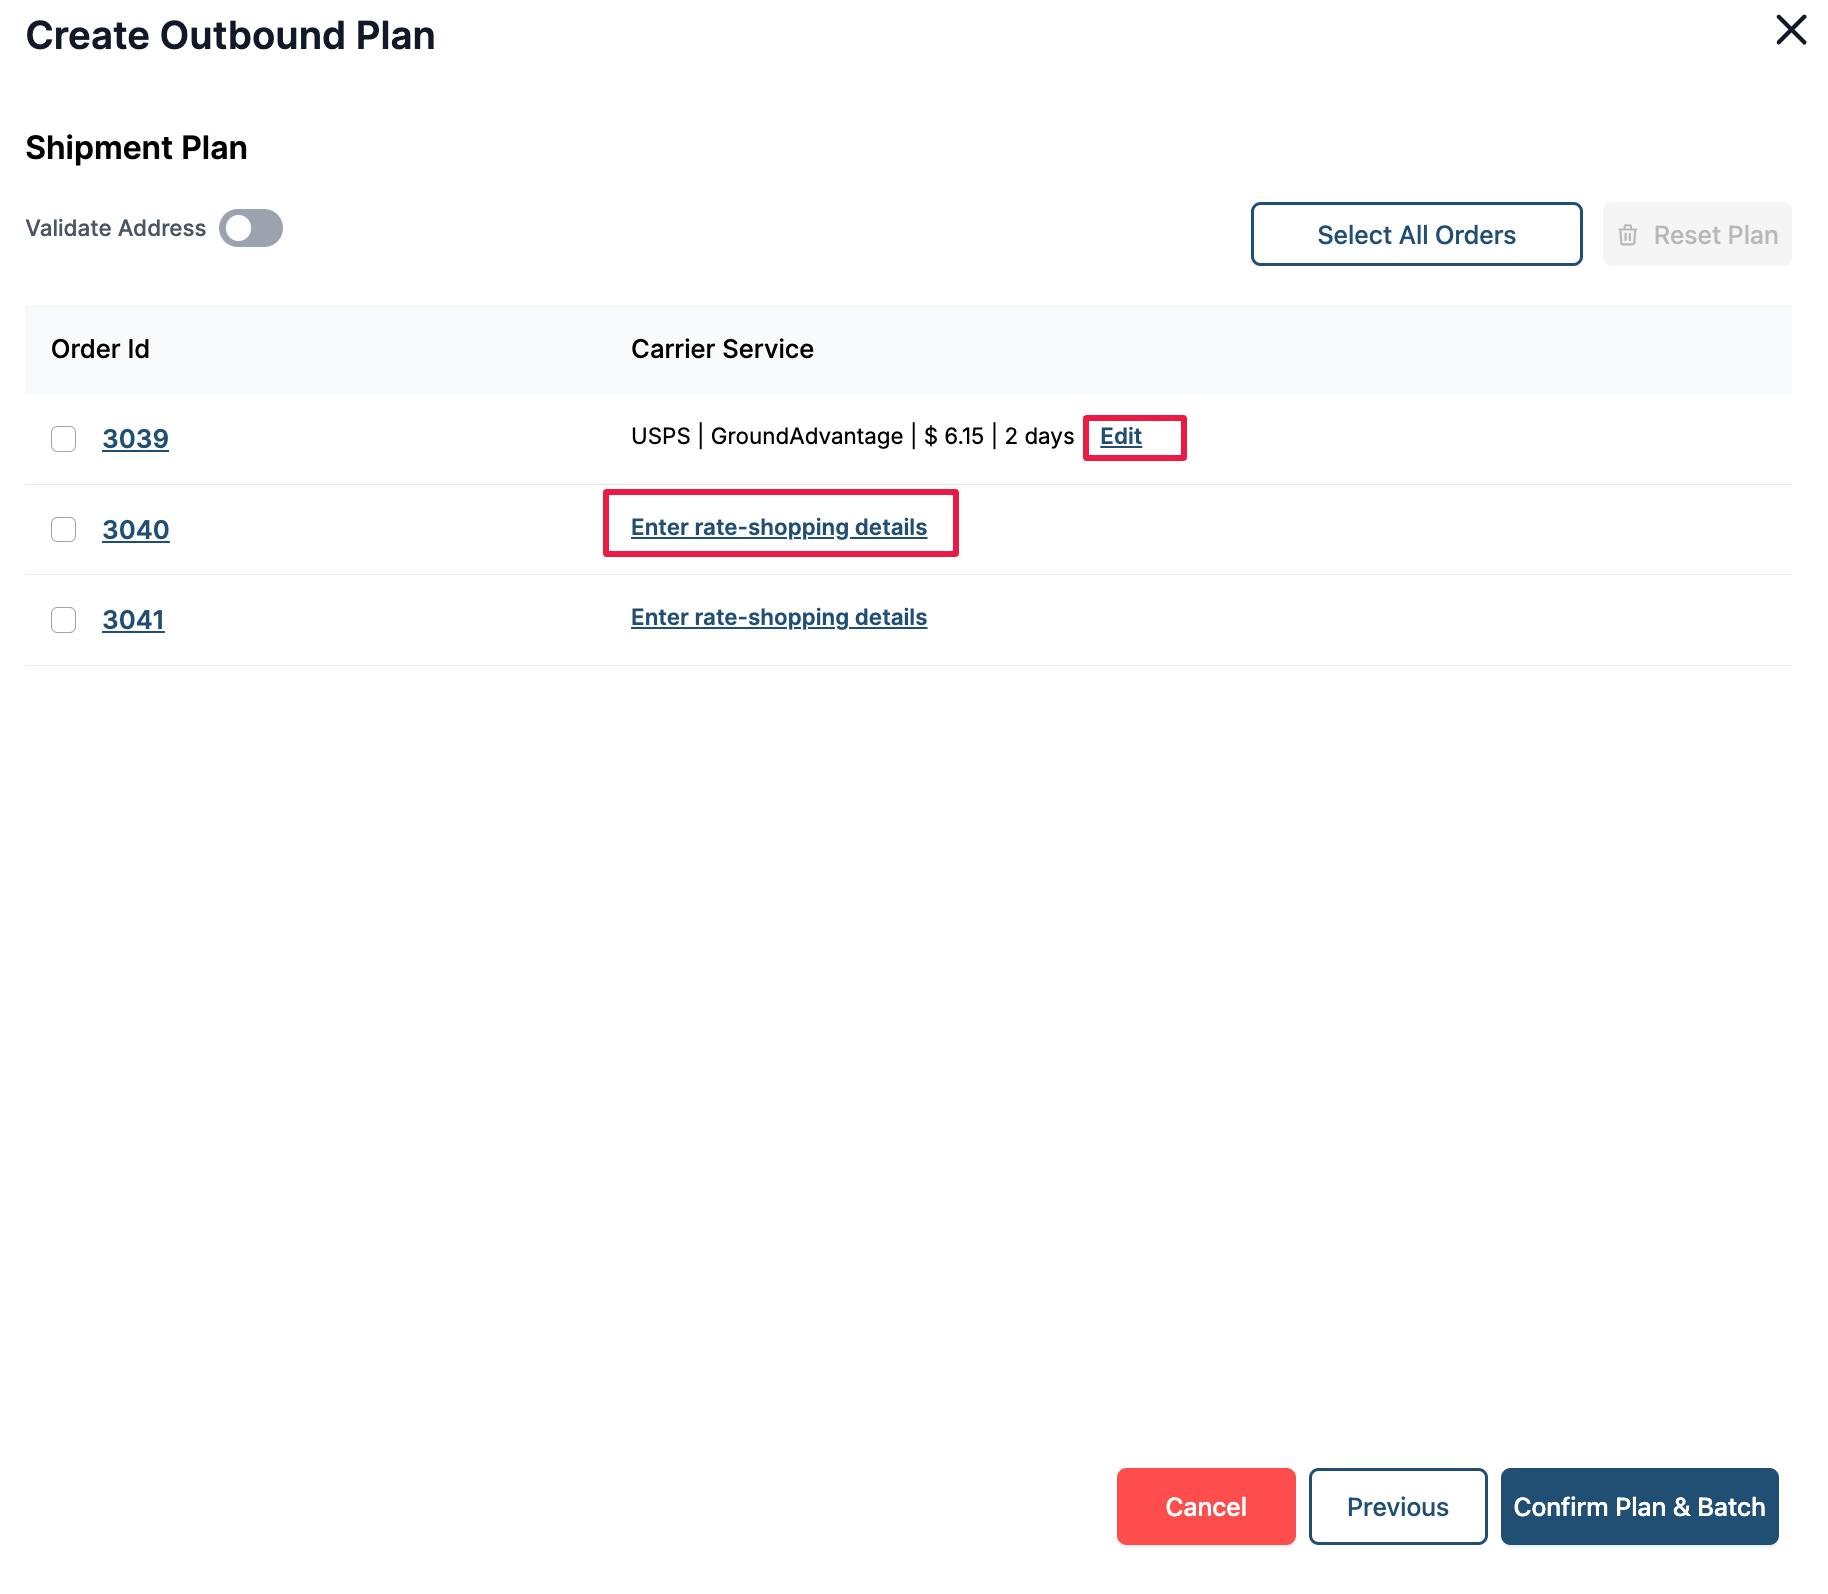
Step 12: Once the carrier service is selected for the orders in the plan, user should click on confirm to confirm the outbound plan.
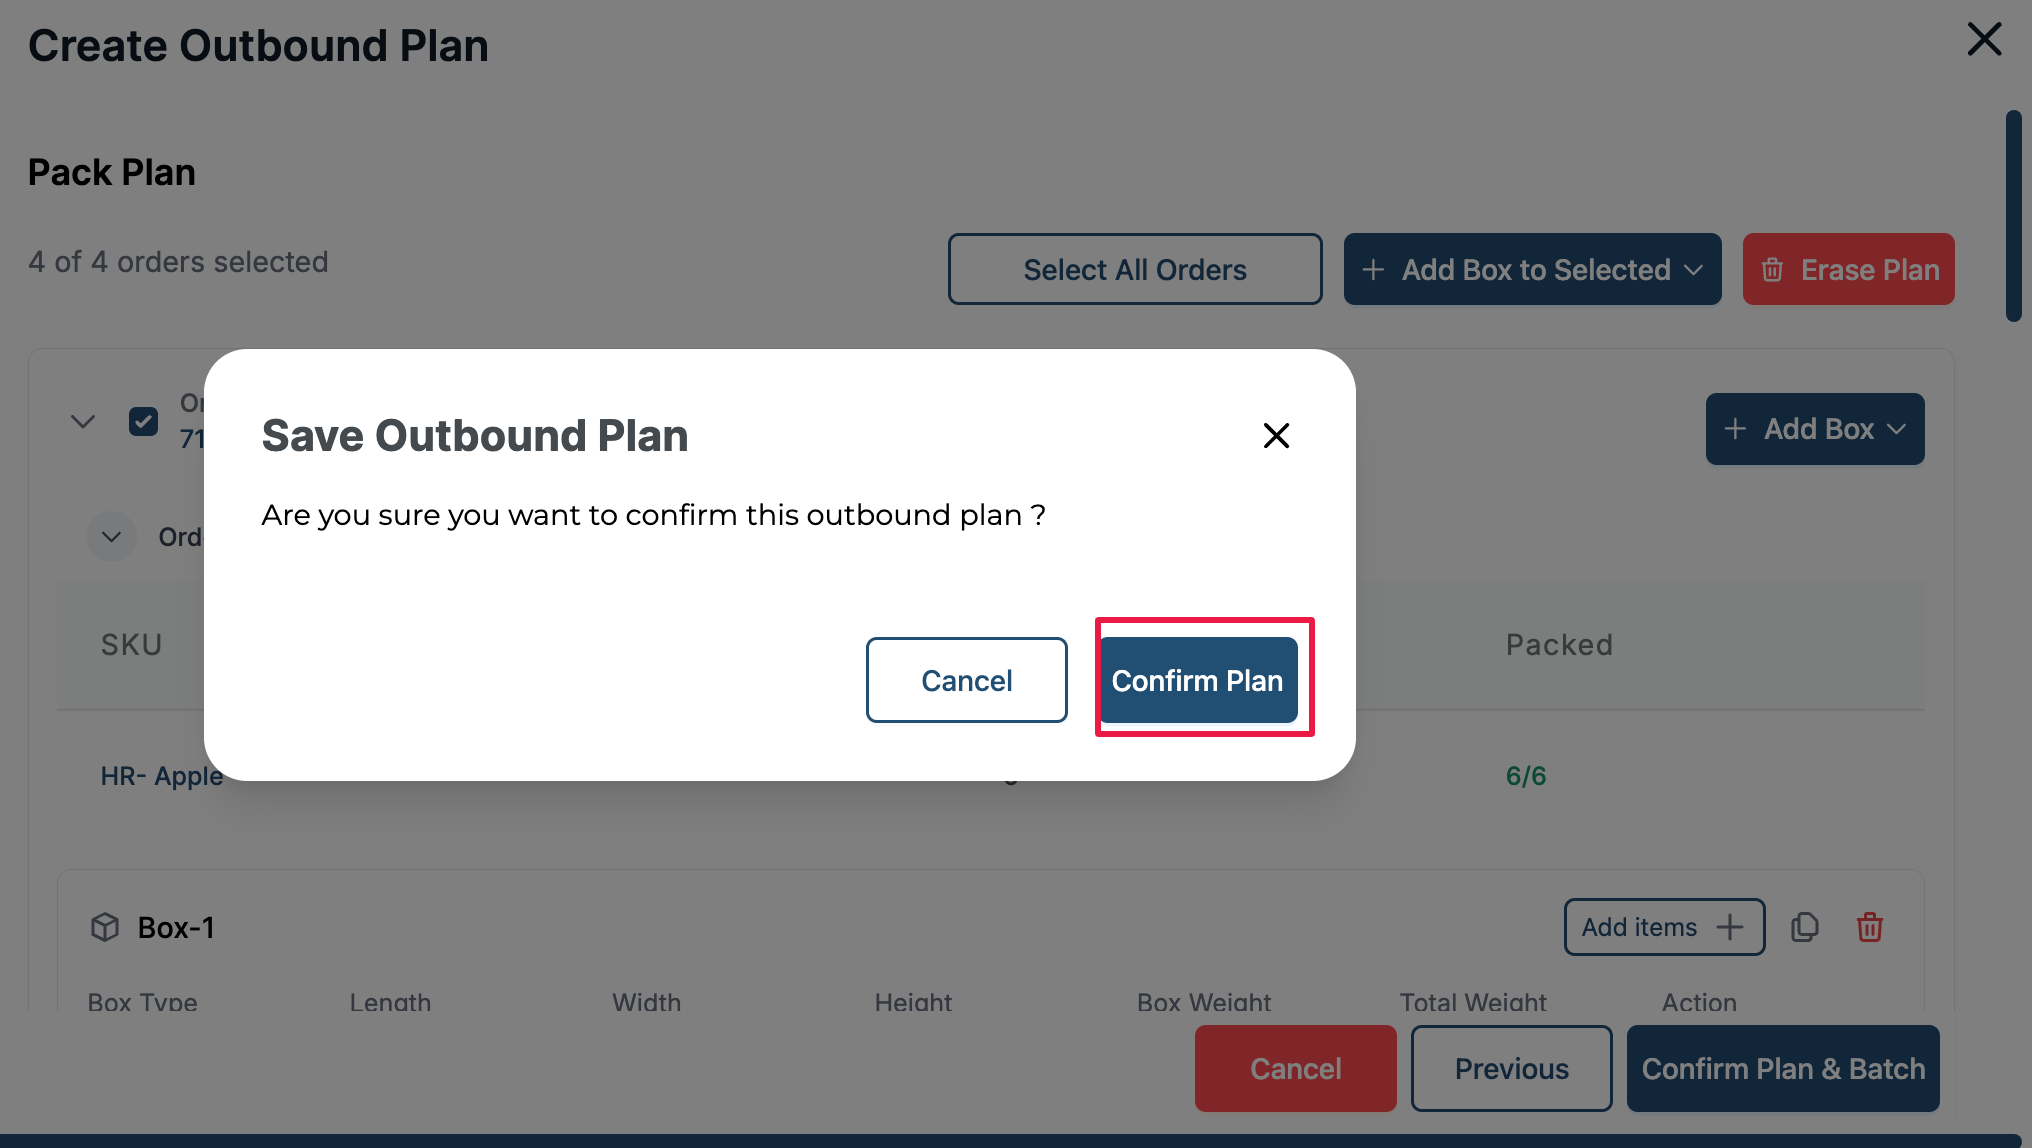
Step 13:The user gets a pop-up asking if they are sure about saving the outbound plan, click on Confirm Plan.
Step 14: The plan gets saved and the batching process occurs. The user gets notifications for these.
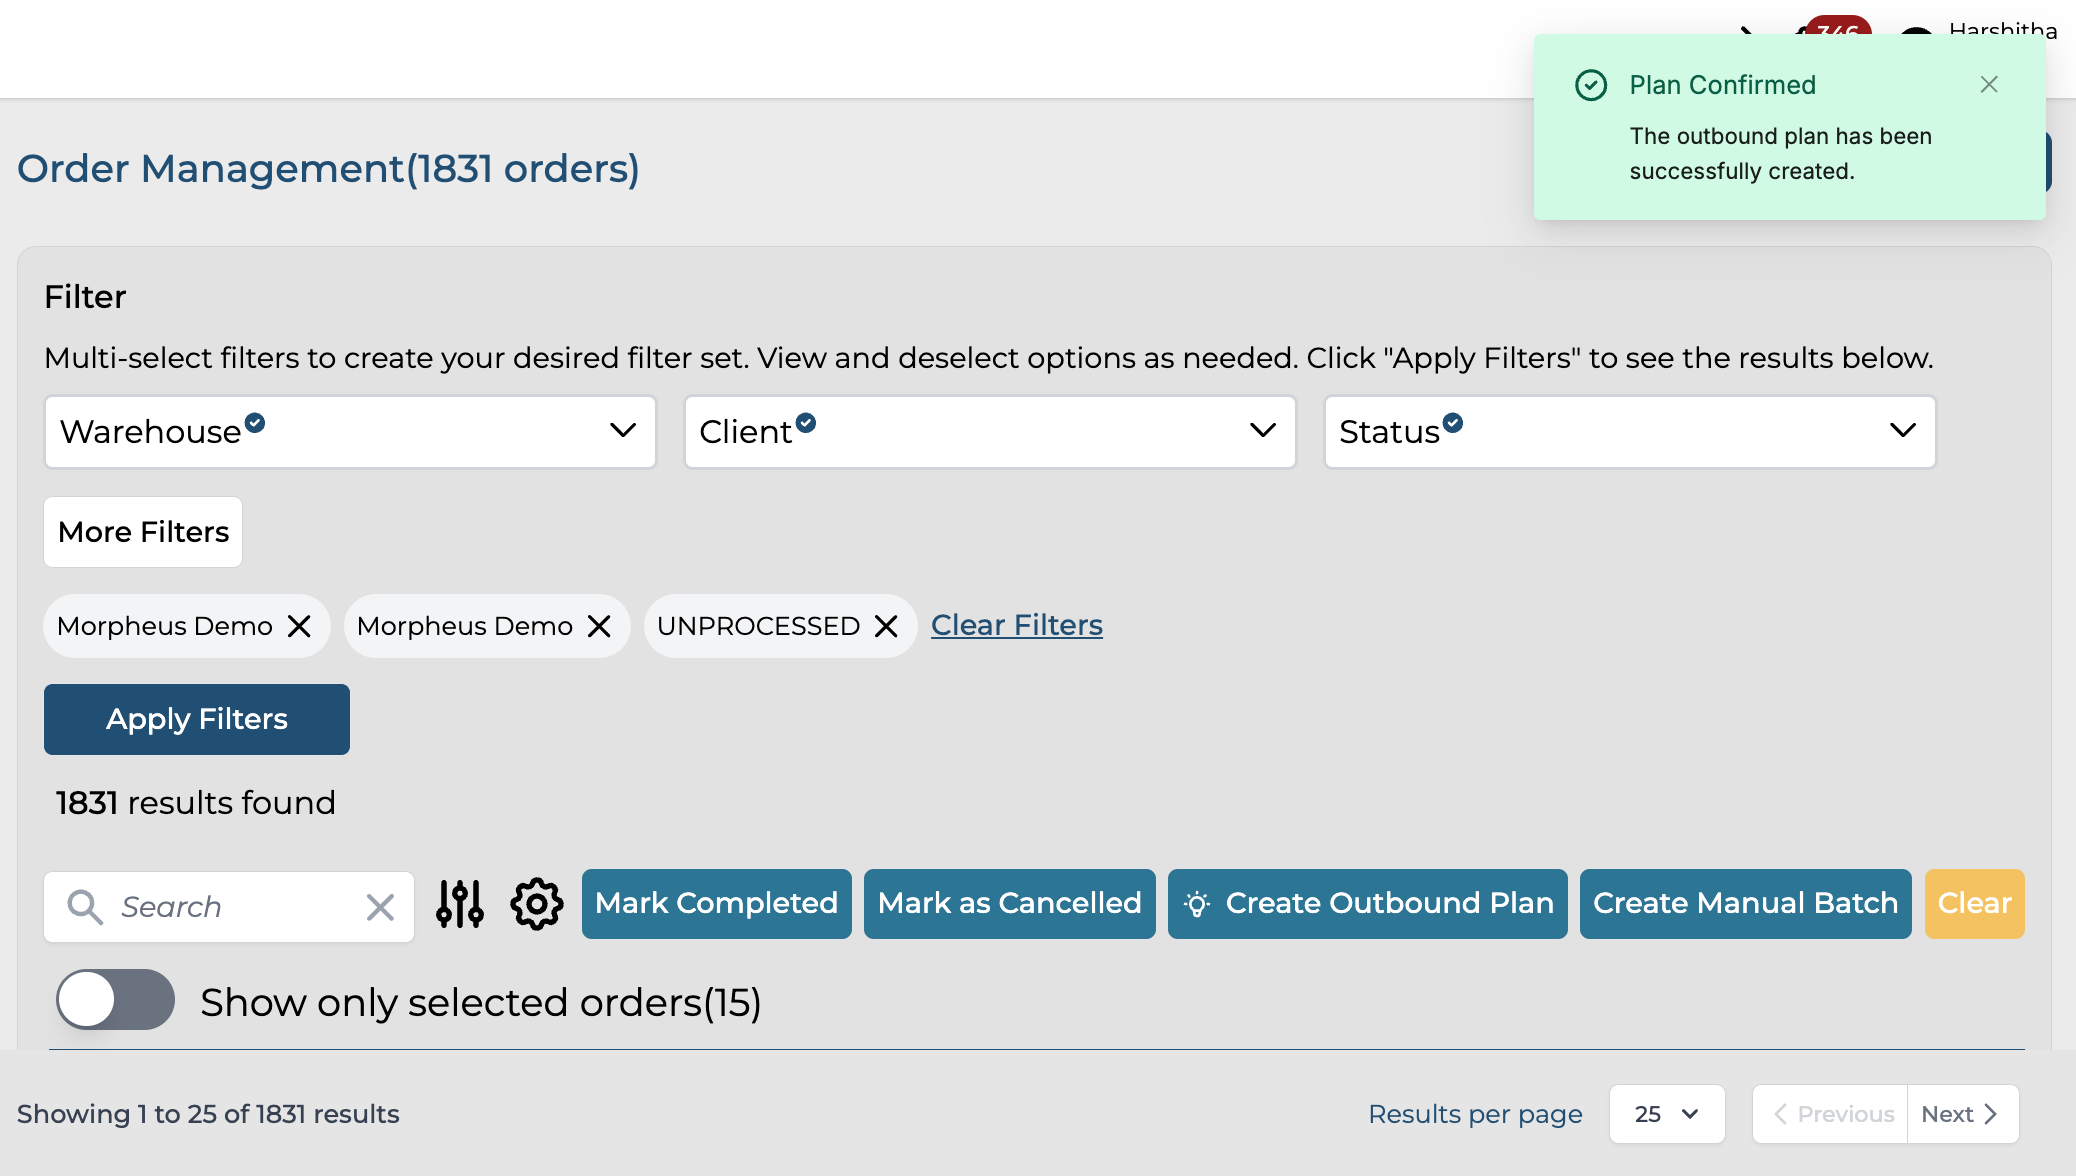
The outbound plans created will be available in the Outbound Plans screen.
This feature is gated and only available to certain customers. Please reach out to your implementation lead or sales liaison to know more about this.