
This document explains the enhanced “Mark Complete” workflow for orders, including how to accurately adjust picked quantities, select alternative expiry dates and locations, and ensure correct FIFO compliance before completing an order.
Step 1: Open the Batched Order Details
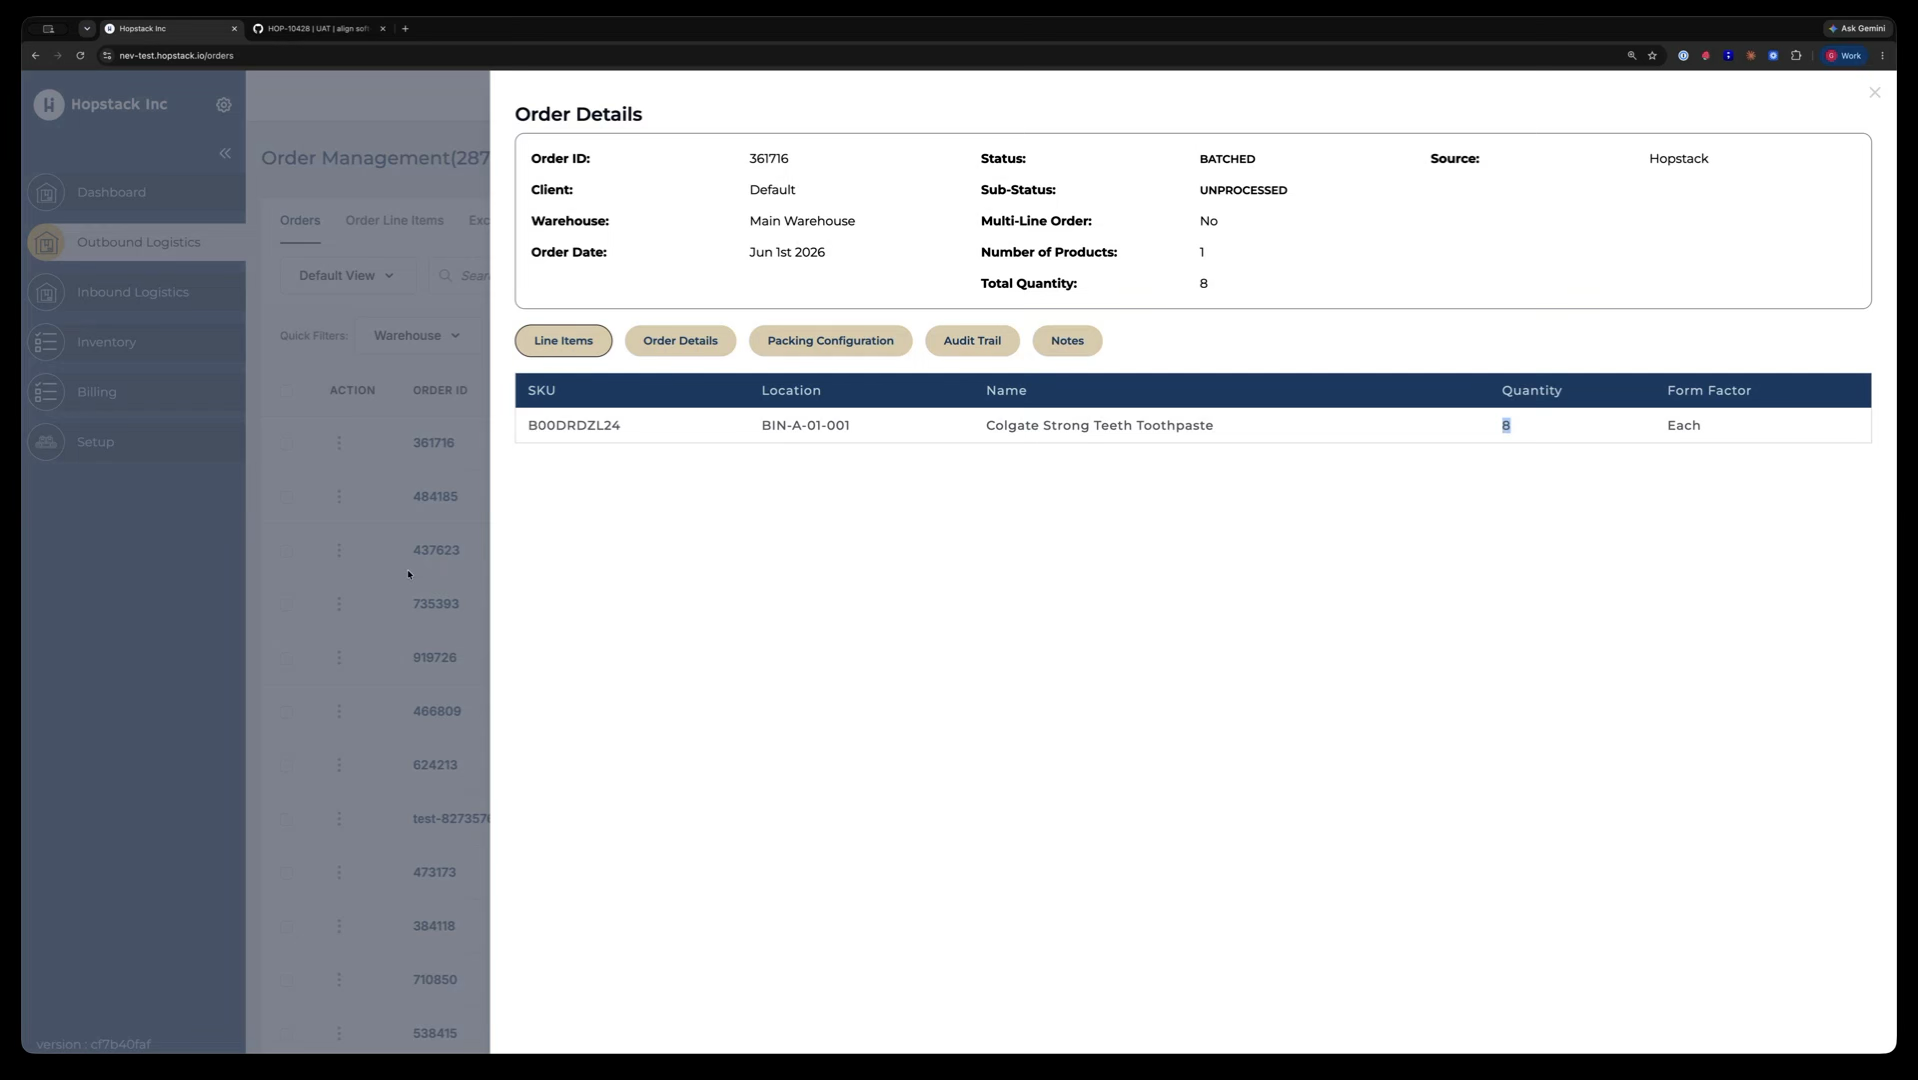
Open the batched order whose completion you want to manage. Review the product details (e.g., toothpaste), its allocated bin/location, and the quantity to pick (e.g., 8 units) as per the current allocation logic.

In the previous workflow, these 8 units would be automatically deducted from the allocated location, regardless of the actual on-hand quantity or whether FIFO (expiry-based) rules were followed.
Step 2: Launch the Enhanced Mark Complete Panel
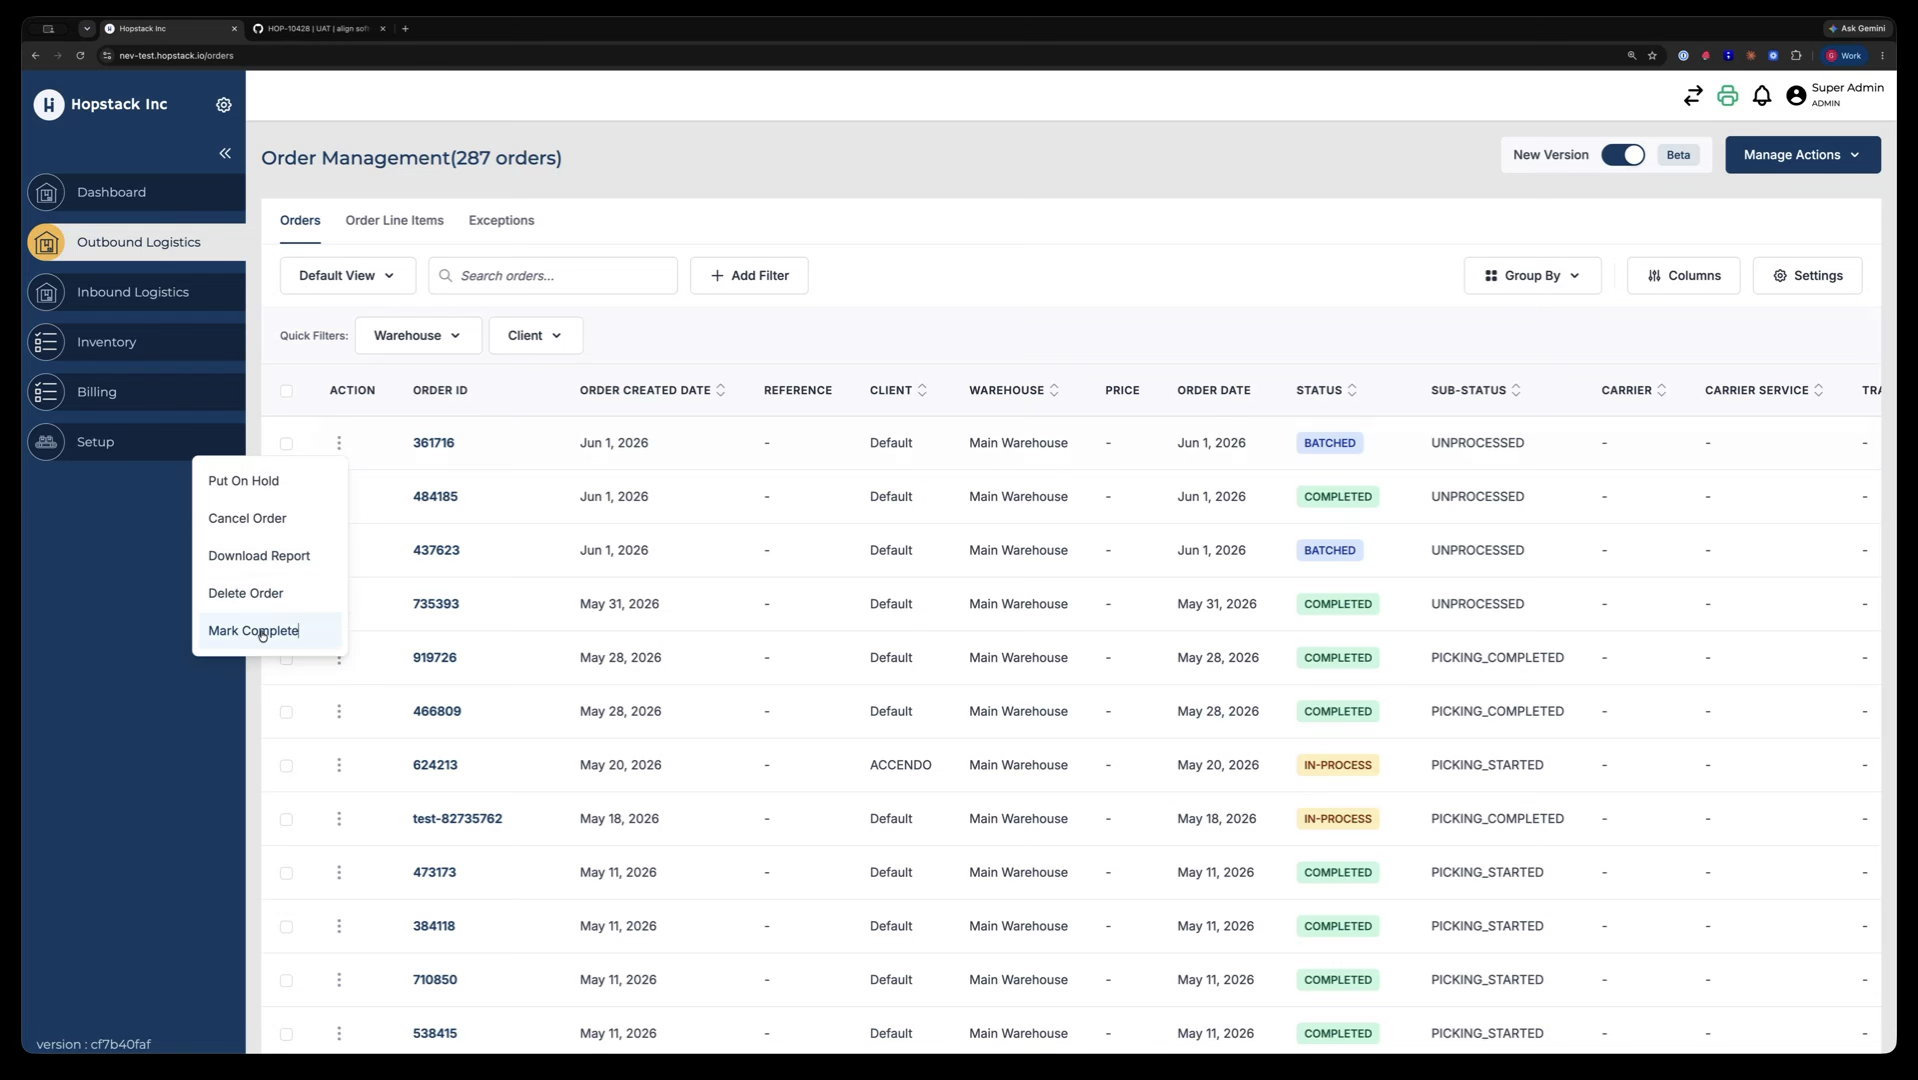
From the order screen, select the option to Mark Complete.
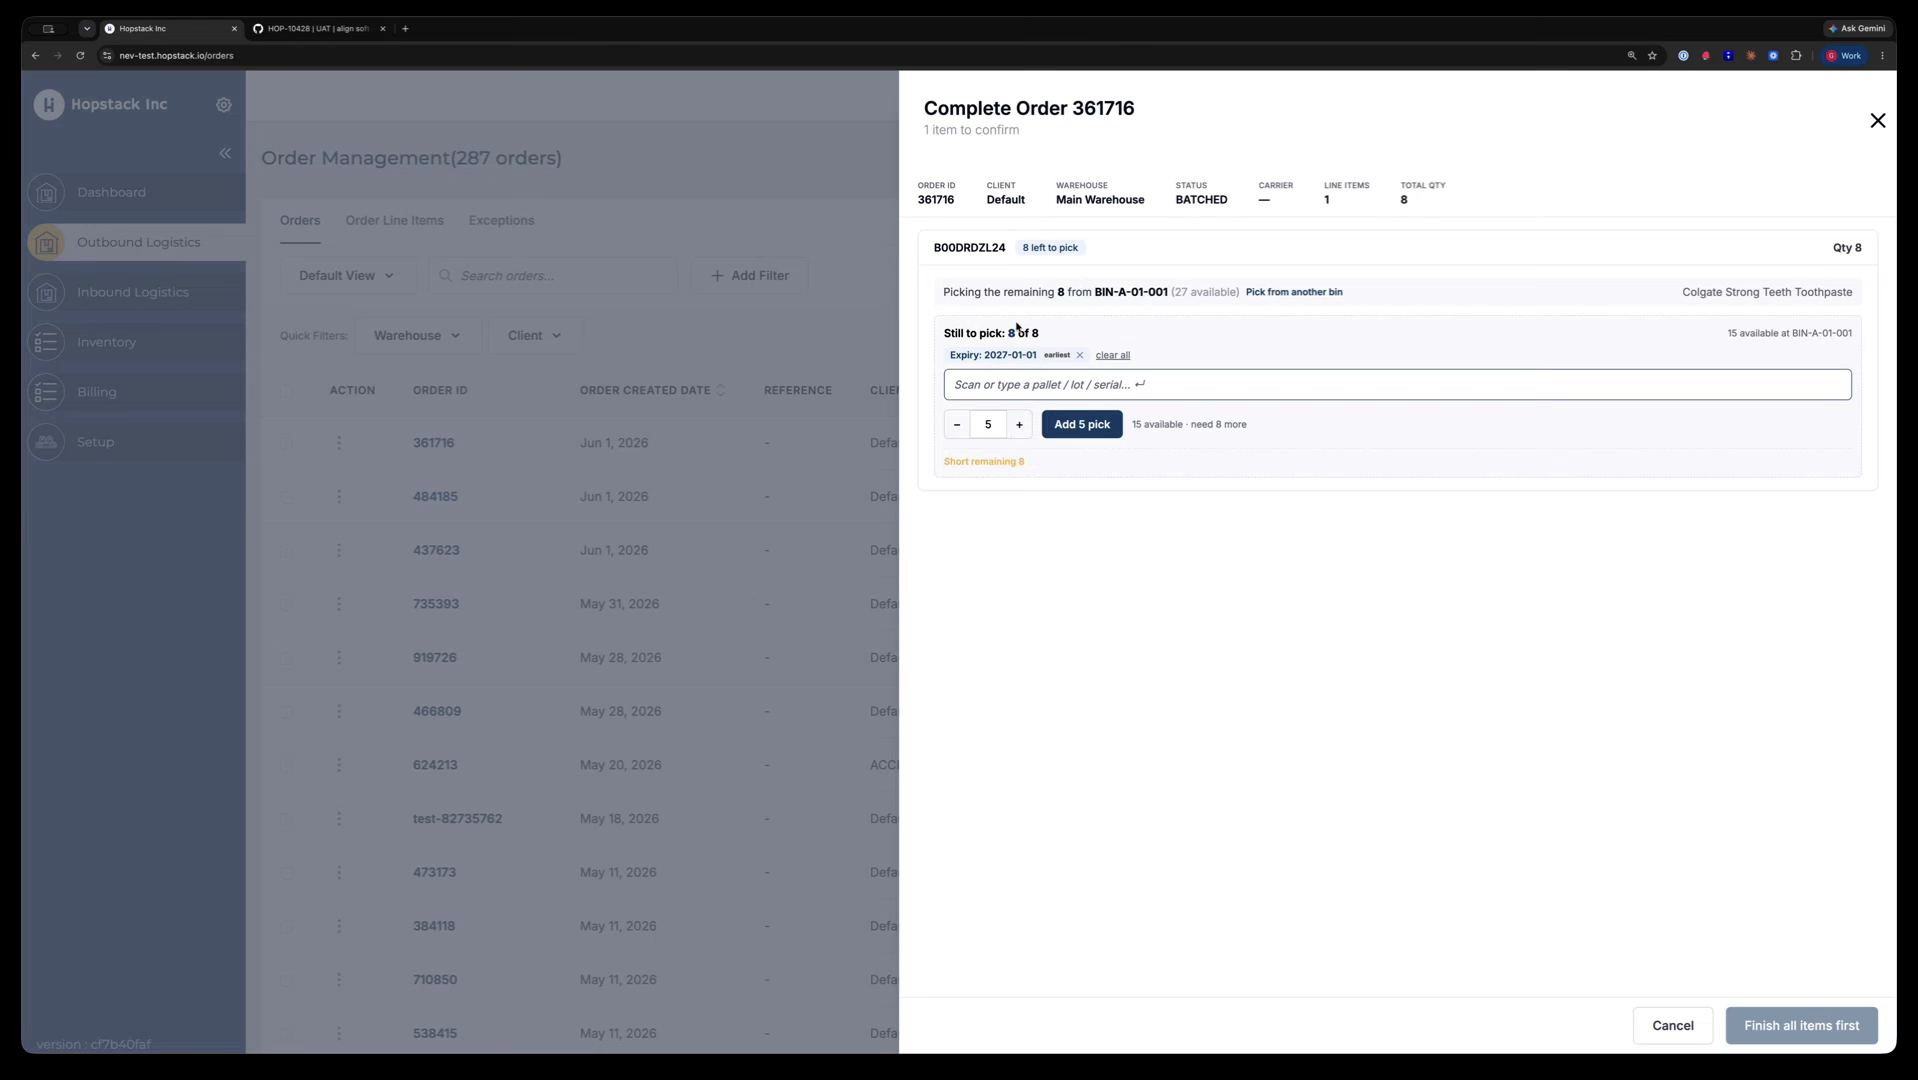
A new panel opens, summarising how the order will be completed. It shows:
-
The location chosen by the system
-
The expiry date used (auto-picked based on the earliest expiry for FIFO)
-
A clear explanation of why a given product, location, and expiry were selected
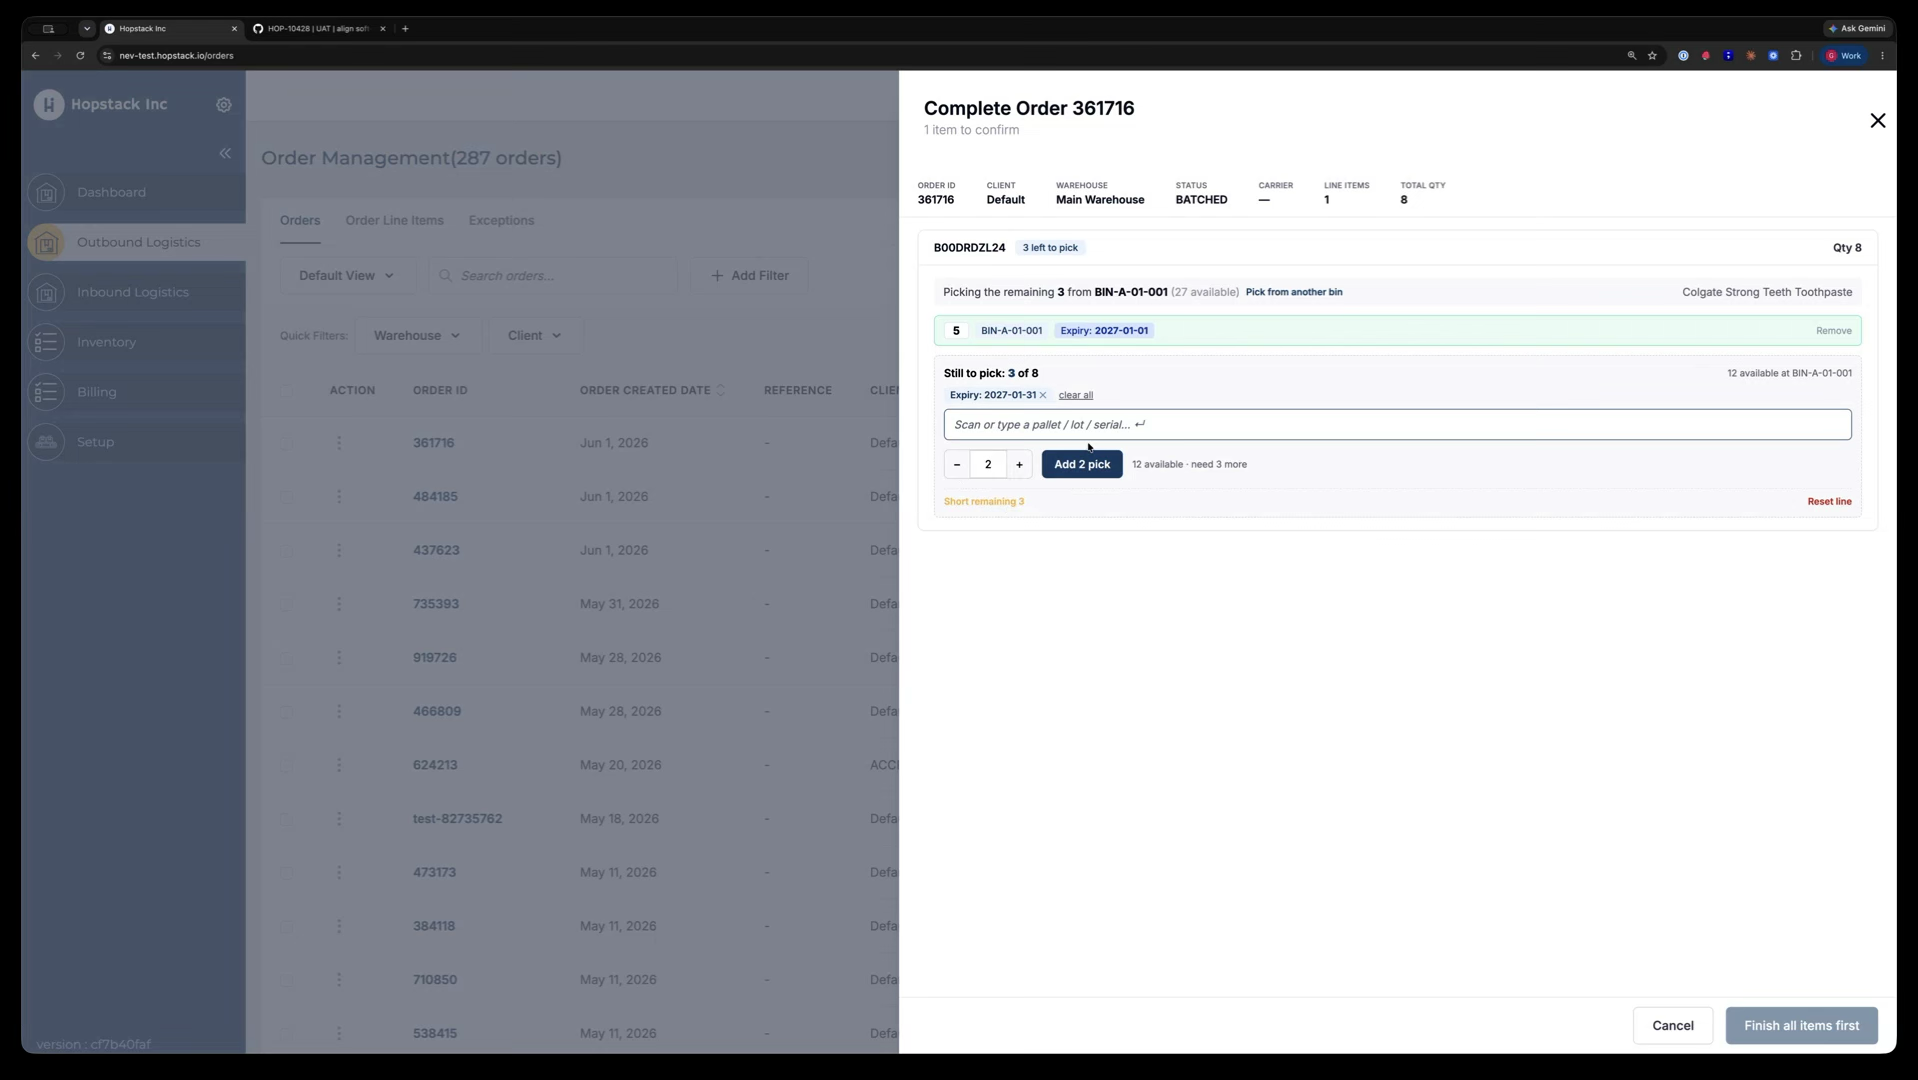
Step 3: Adjust Picked Quantity When Full Stock Is Not Available
If the full required quantity (e.g., 8 units) is not actually available at the suggested location:
-
Click the Remove or edit option for that allocation row.
-
Enter the actual quantity picked from that location (e.g., change from 8 to 5 picked).
-
Confirm that 5 units have been picked from that expiry.
You now have a remaining quantity (e.g., 3 units) that still needs to be picked.
Step 4: Select a Different Expiry or Mark Remaining as Short
For the remaining quantity, you can pick from a different expiry or mark it as short:
-
To pick from a different expiry, disable or clear the current expiry filter in the panel.
-
Review the list of available expiries and stock (e.g., another expiry with 12 units in storage).
-
Select the desired expiry, and specify how many units will be picked from it.
-
If no additional stock is available, mark the remaining quantity as short instead.
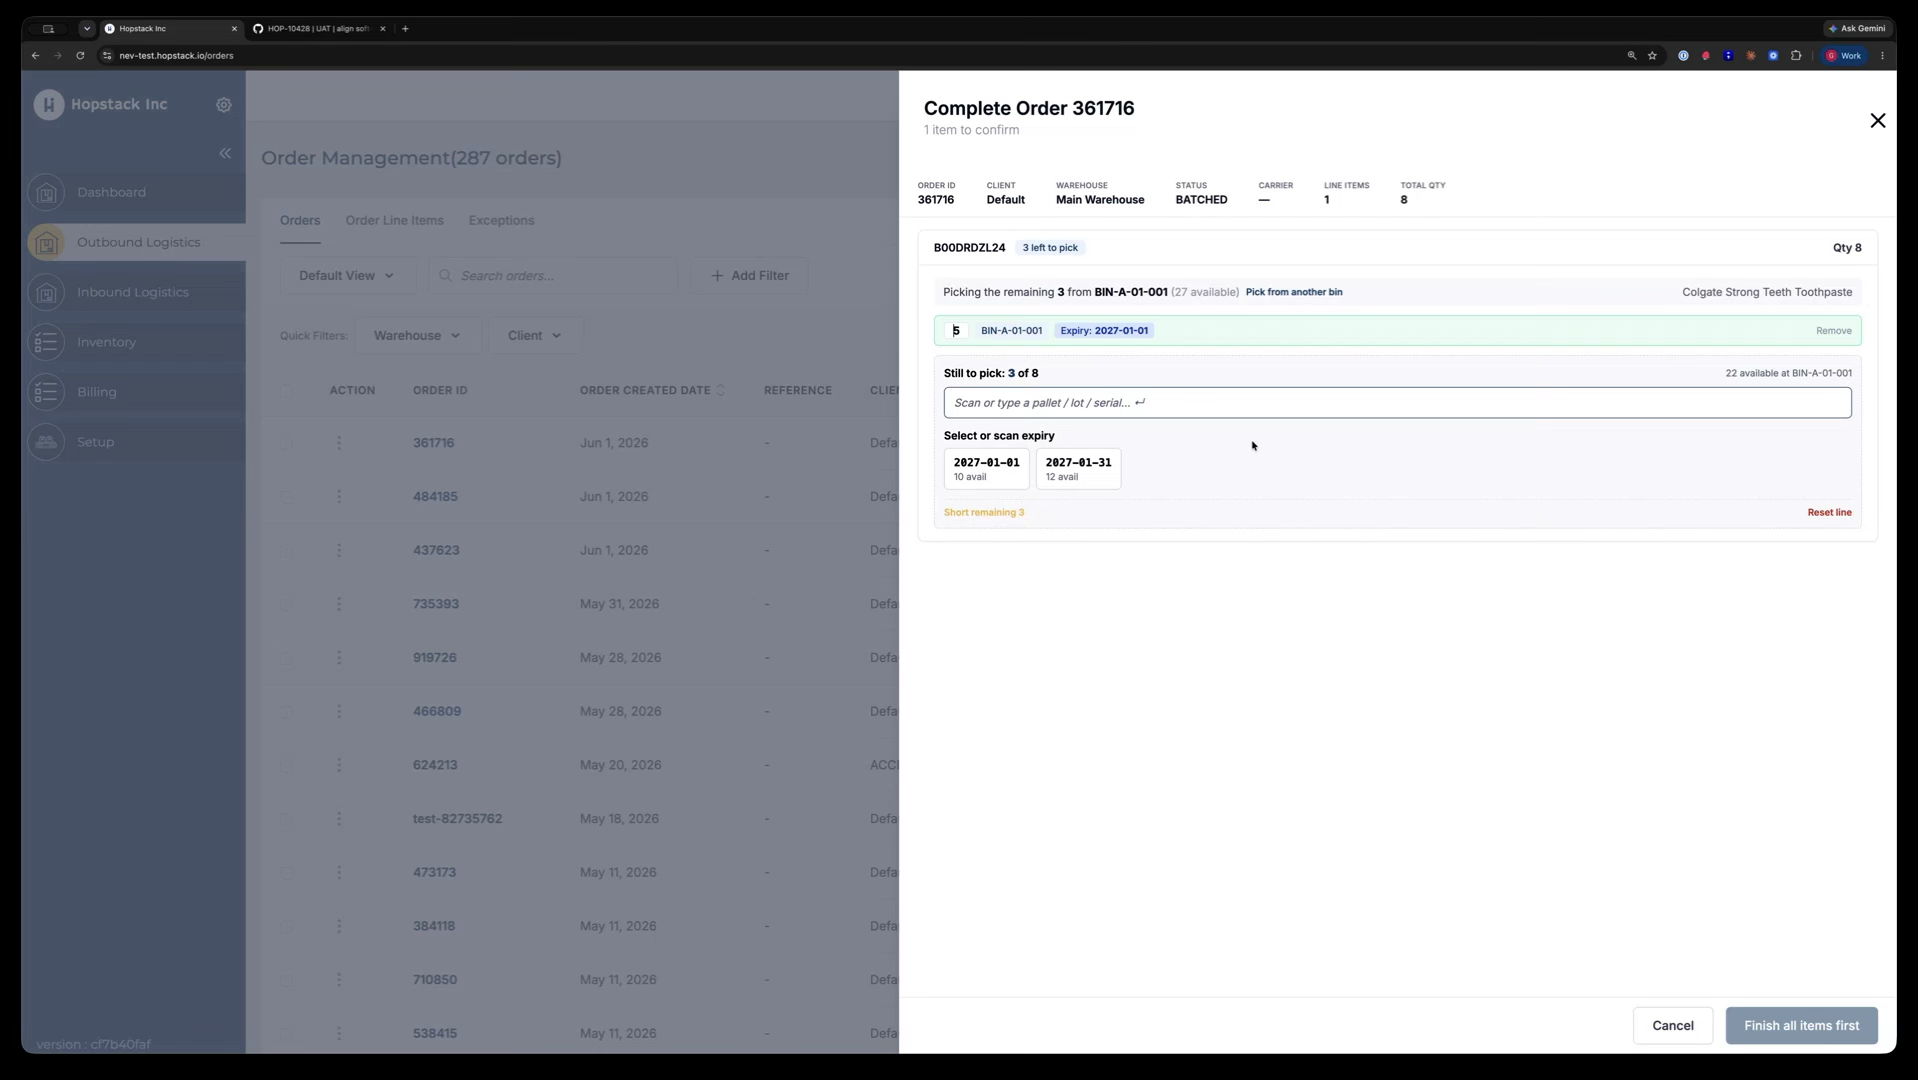
For example, you might decide that 2 units will be picked from this new expiry.
Step 5: Change Location for Any Remaining Items
If there is still a remaining quantity after the above allocations, you can change the location for the balance:
-
Choose the option to change the location for the remaining item(s).
-
Review the list of locations where the product is available (e.g.,:
-
Current location: 01001
-
Other locations: 00002 with 16 units, 00004 with 29 units)
-
Select the new location you want to pick from (e.g., 00002).
-
When prompted, enter how many units you want to pick from this new location (e.g., 1 unit).
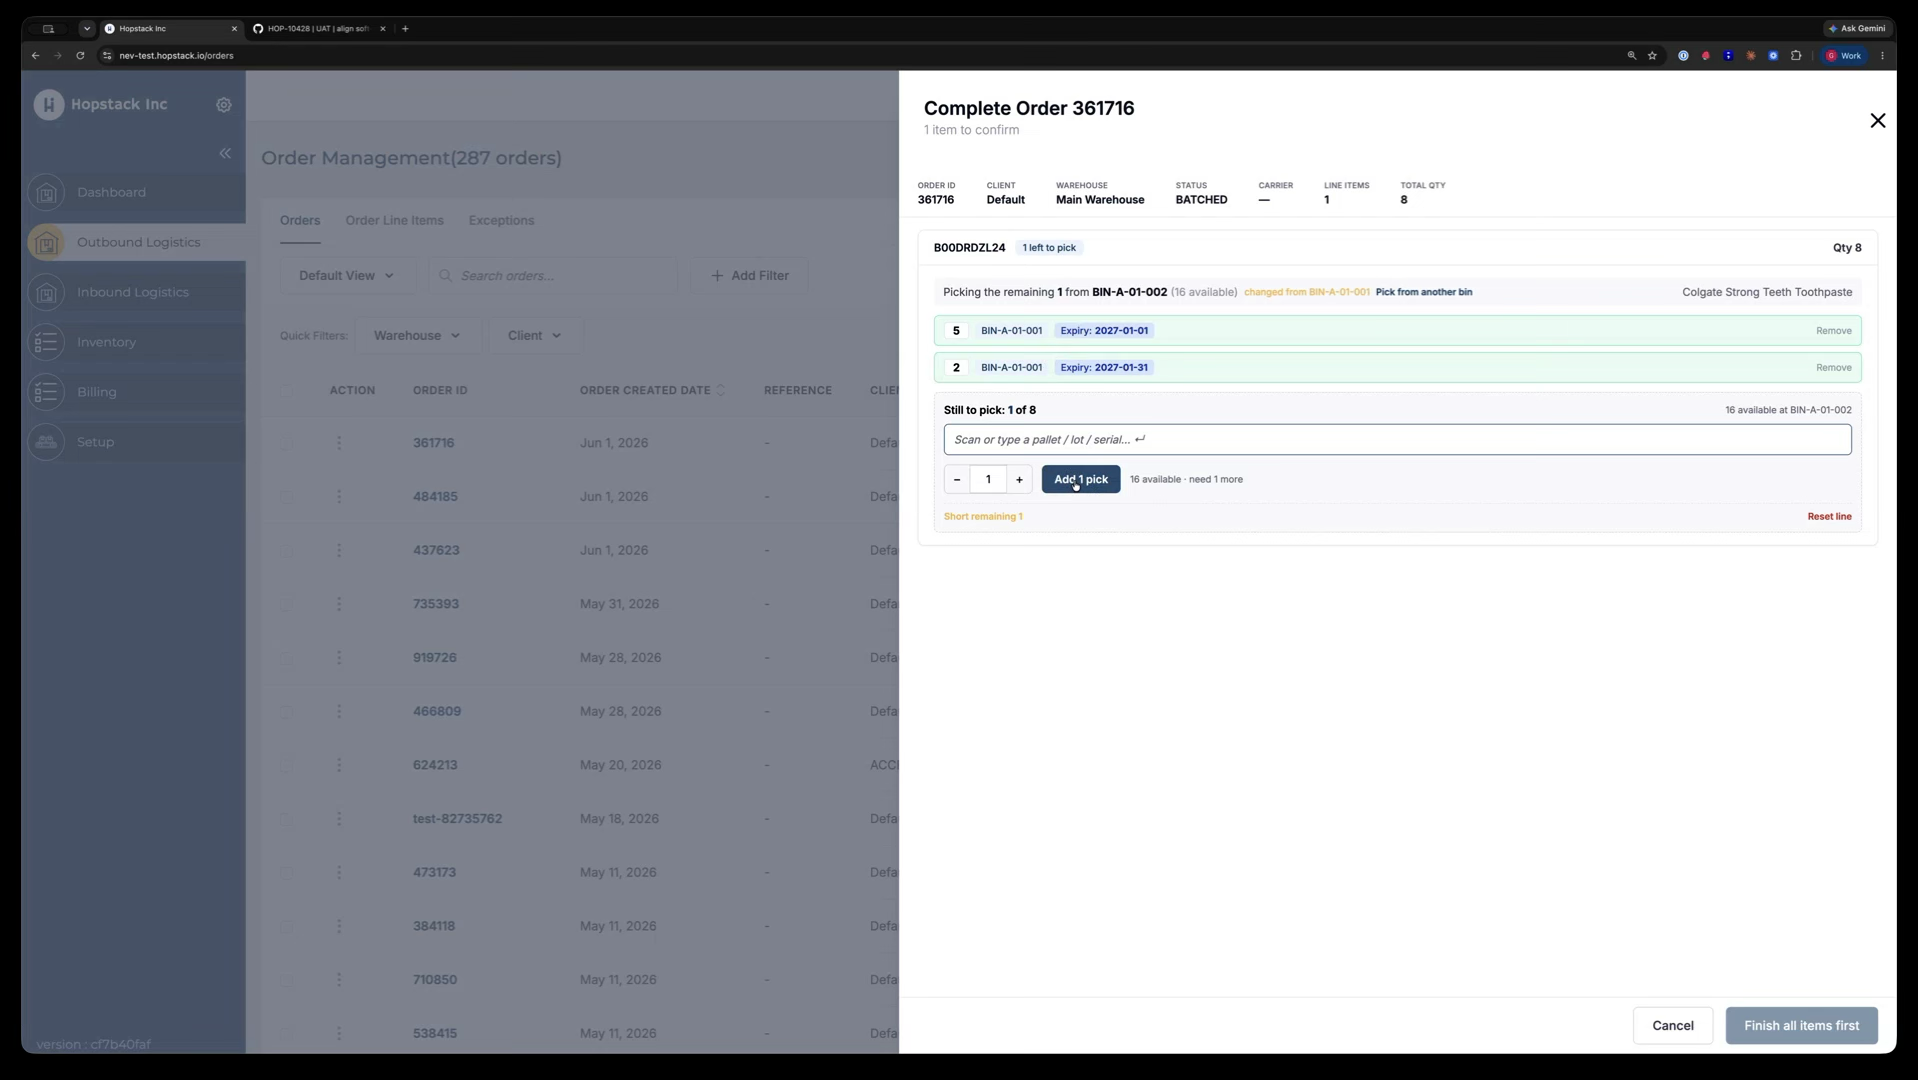
The system automatically assigns the appropriate expiry date for the quantity picked from the new location.
At this point, you might have a split like:
-
5 units from the original bin with expiry 1 January
-
2 units from a second expiry
-
1 unit from a third expiry
Step 6: Confirm Completion and Review the Resulting Line Split
Once all quantities are correctly allocated across locations and expiries, click Confirm and Complete to finalise the order.
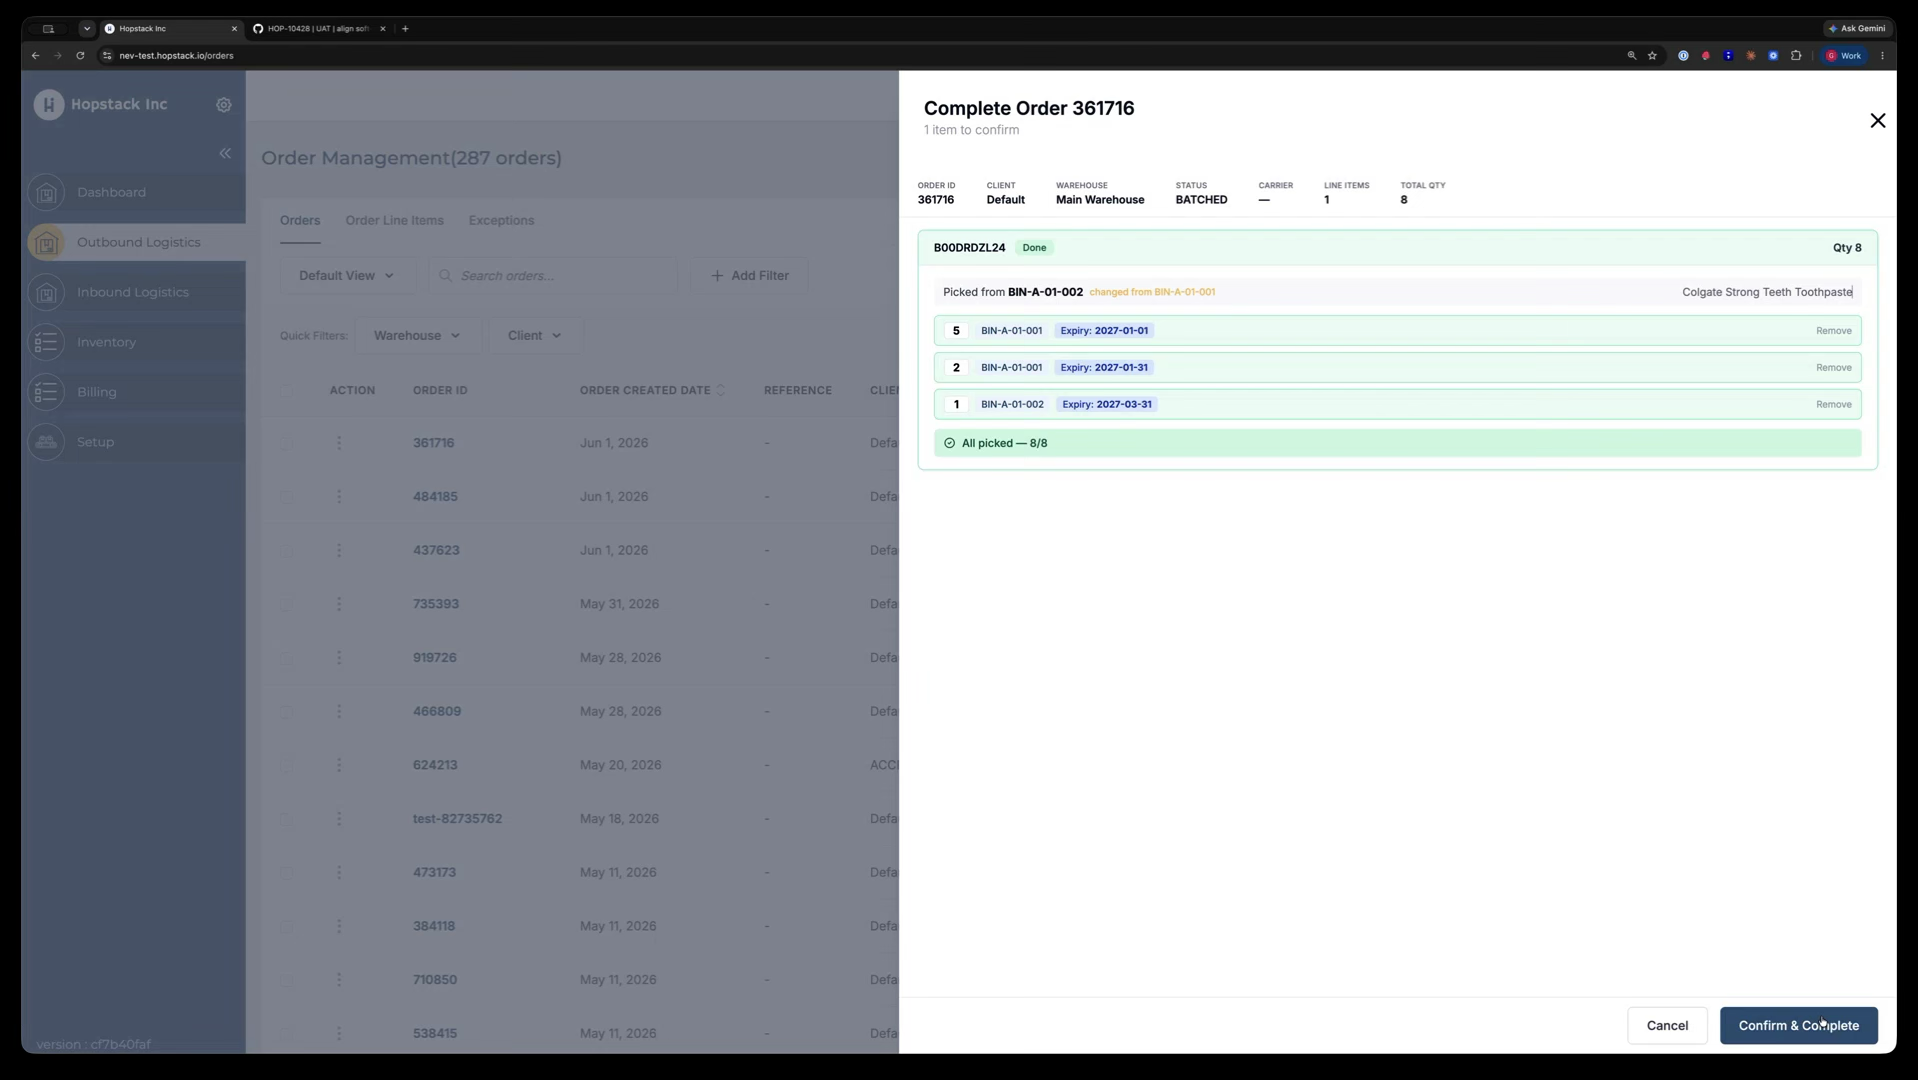
After completion, open the order to review the outcome:
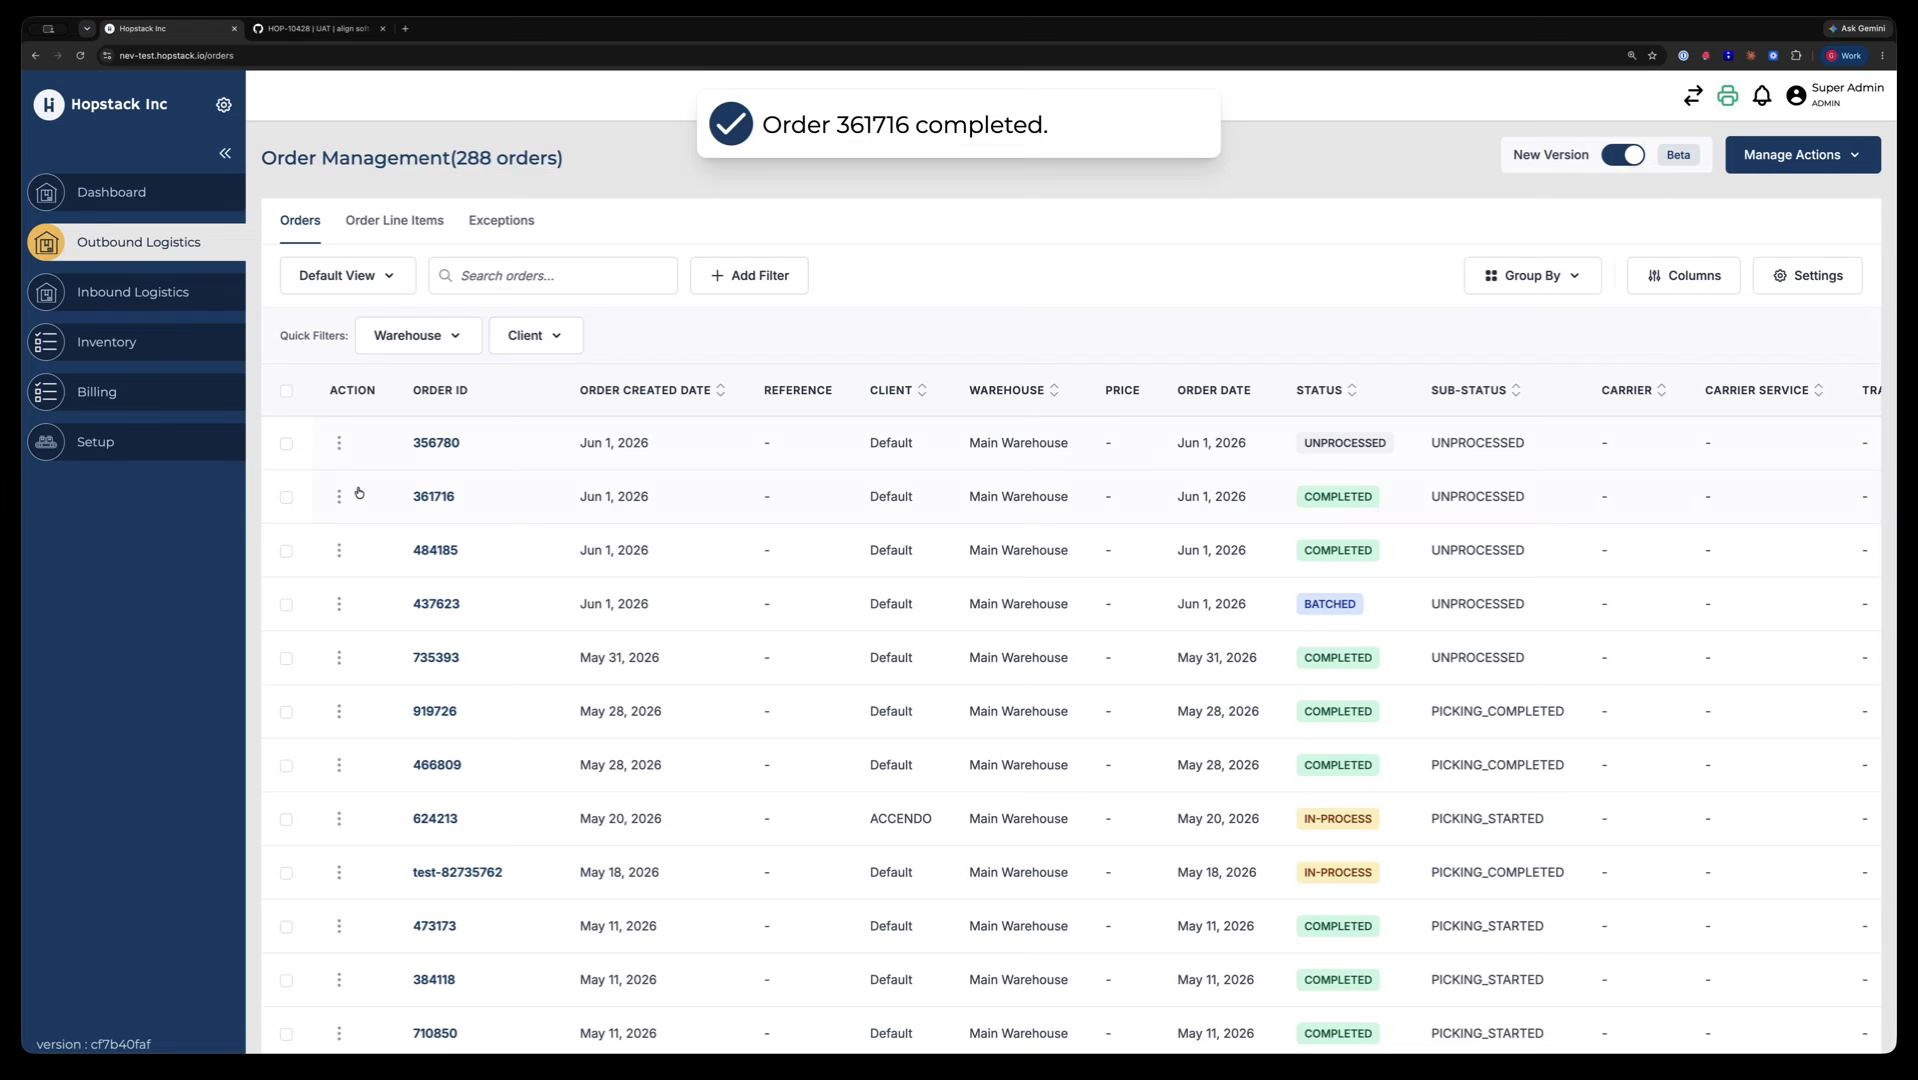
You will see that the original line has been split into multiple line items (e.g., 5, 2, and 1 units), each with its own expiry and location information accurately tracked.