
Create Purchase Order from Catalog
As an admin, you can create a Purchase Order from Catalog Management. If you have access to the Catalog and the necessary permissions, you can create a Purchase Order.
Create Purchase Order:
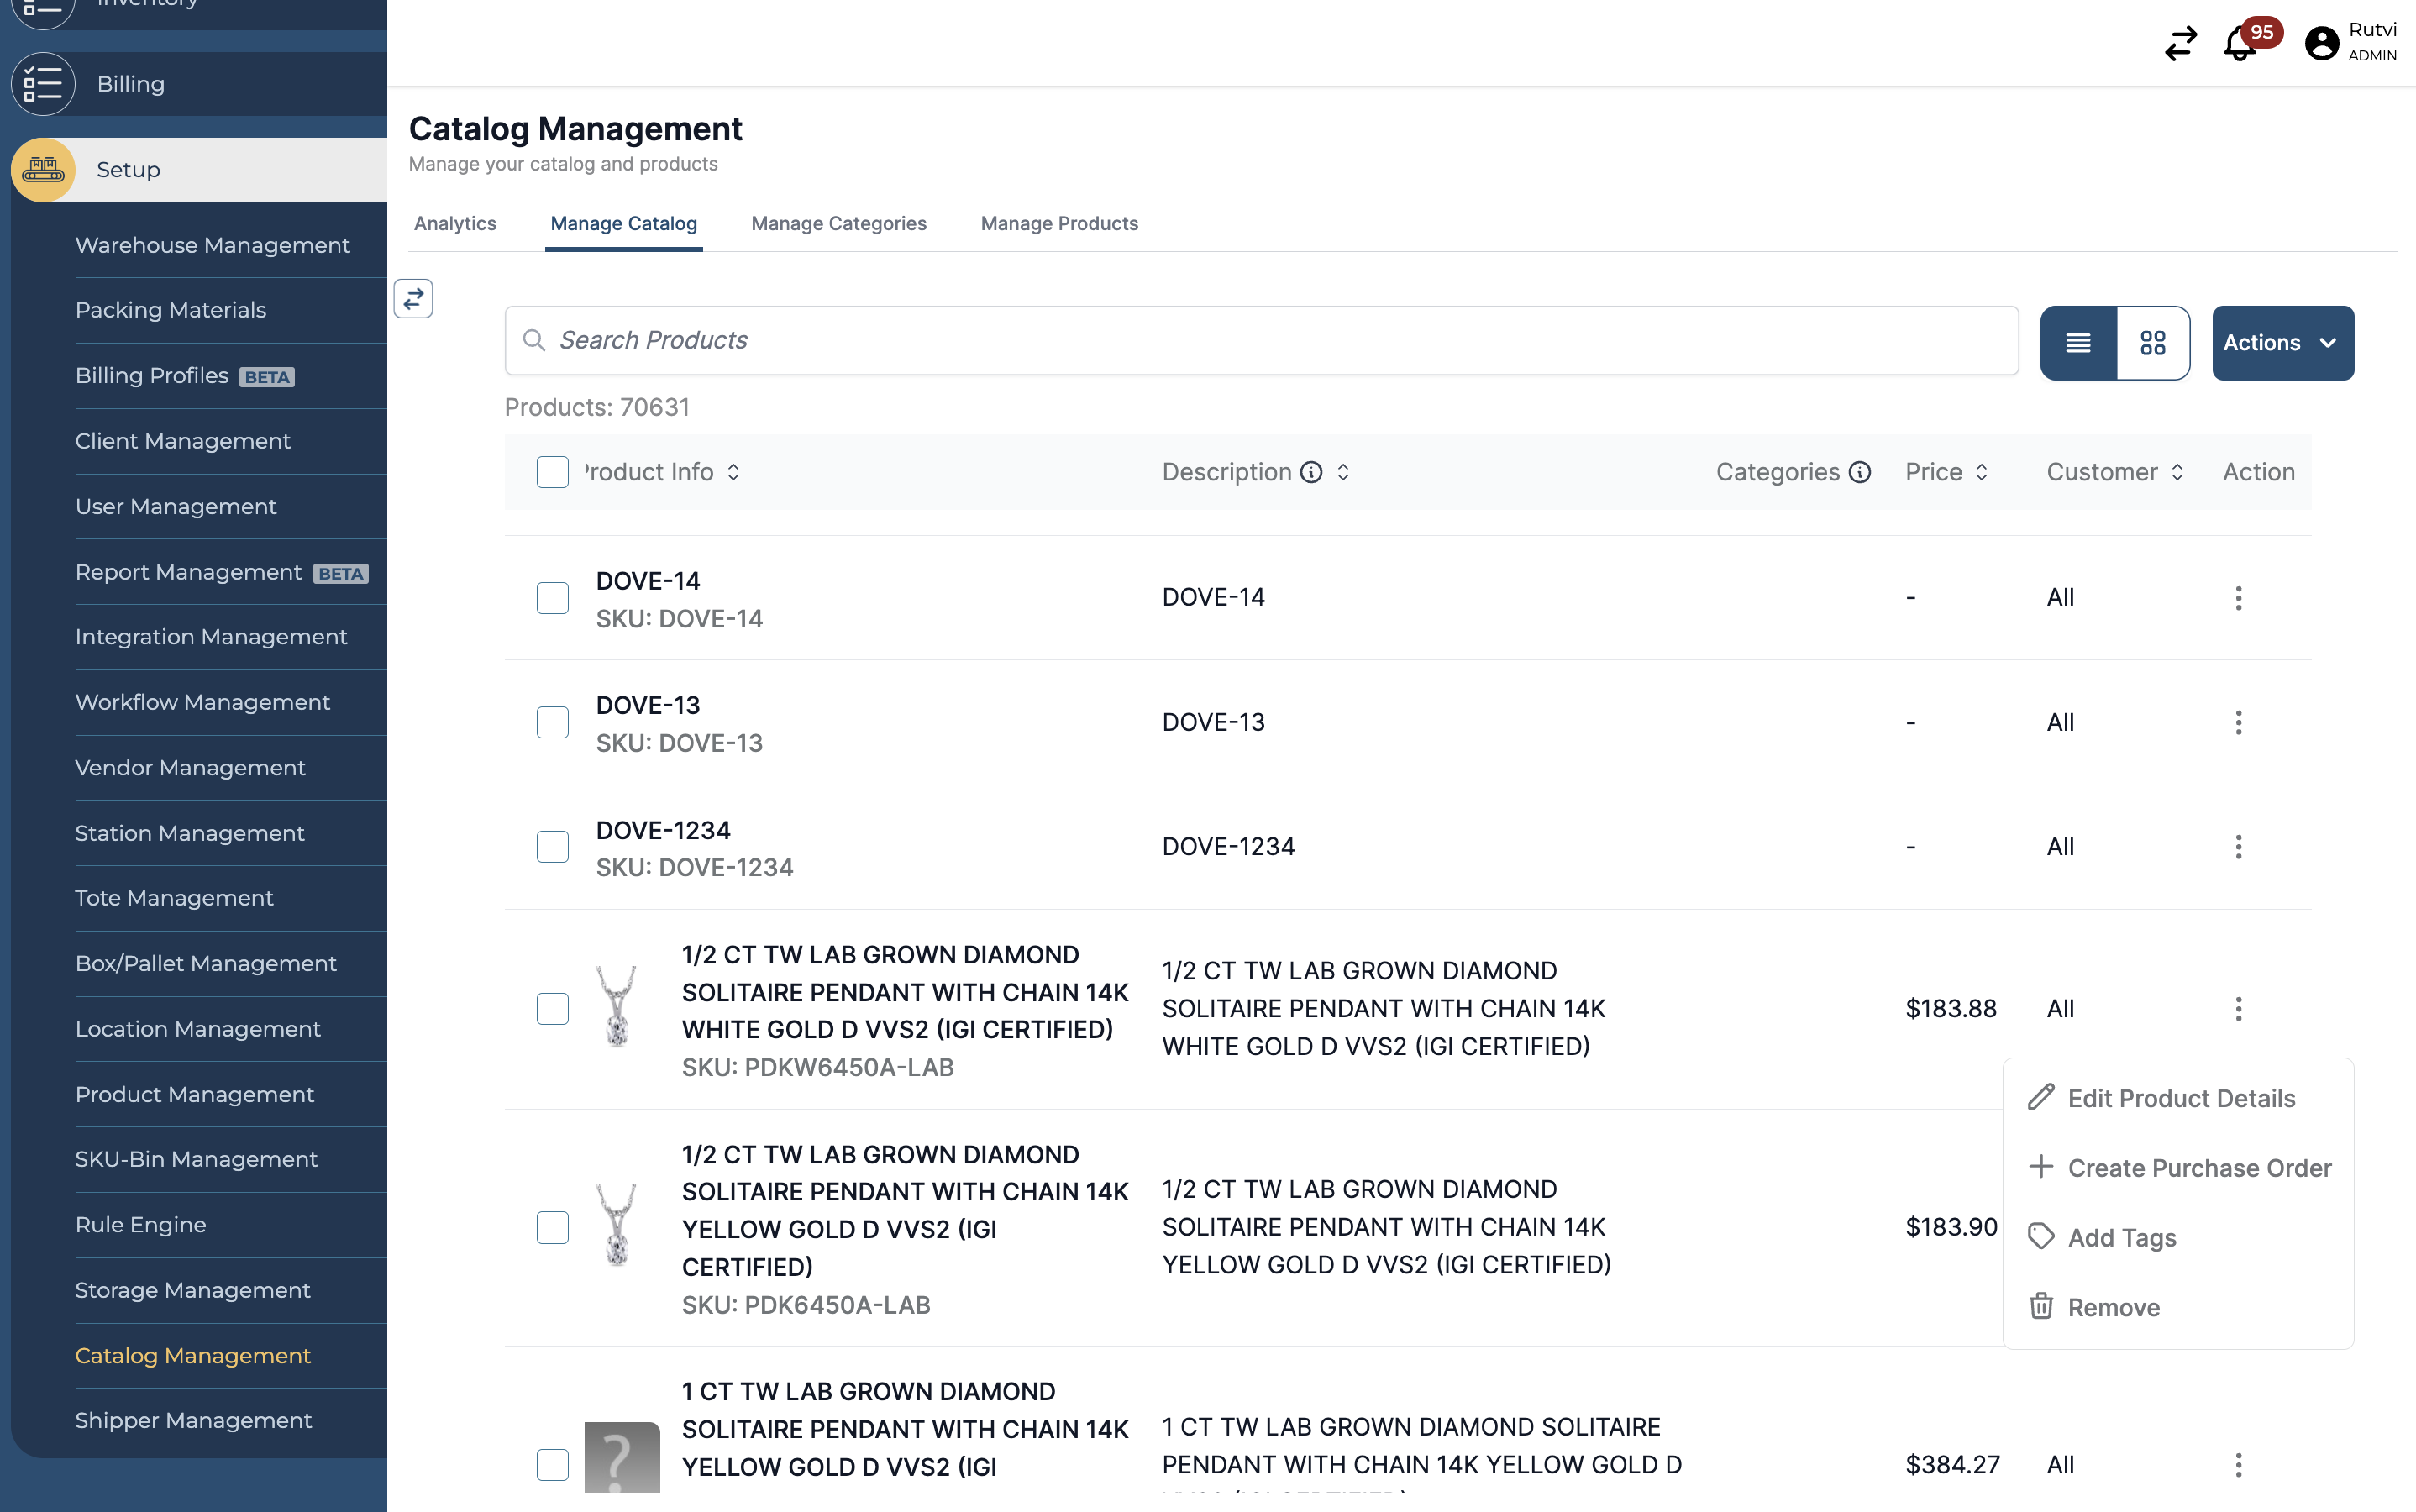
Under Set-up, navigate to Catalog Management, and search for a Product for which you would like to create a “Purchase Order”
For the selected Product, under Actions, click “Create Purchase Order” as depicted in the image.
Clicking Create Purchase Order will open the Purchase Order Form, allowing you to begin the purchase order creation process.
Vendor Selection:
You can search for and select a vendor for this PO. Each PO can be created for only one vendor.
Vendor Selection is a Mandatory field for Purchase Order Creation.
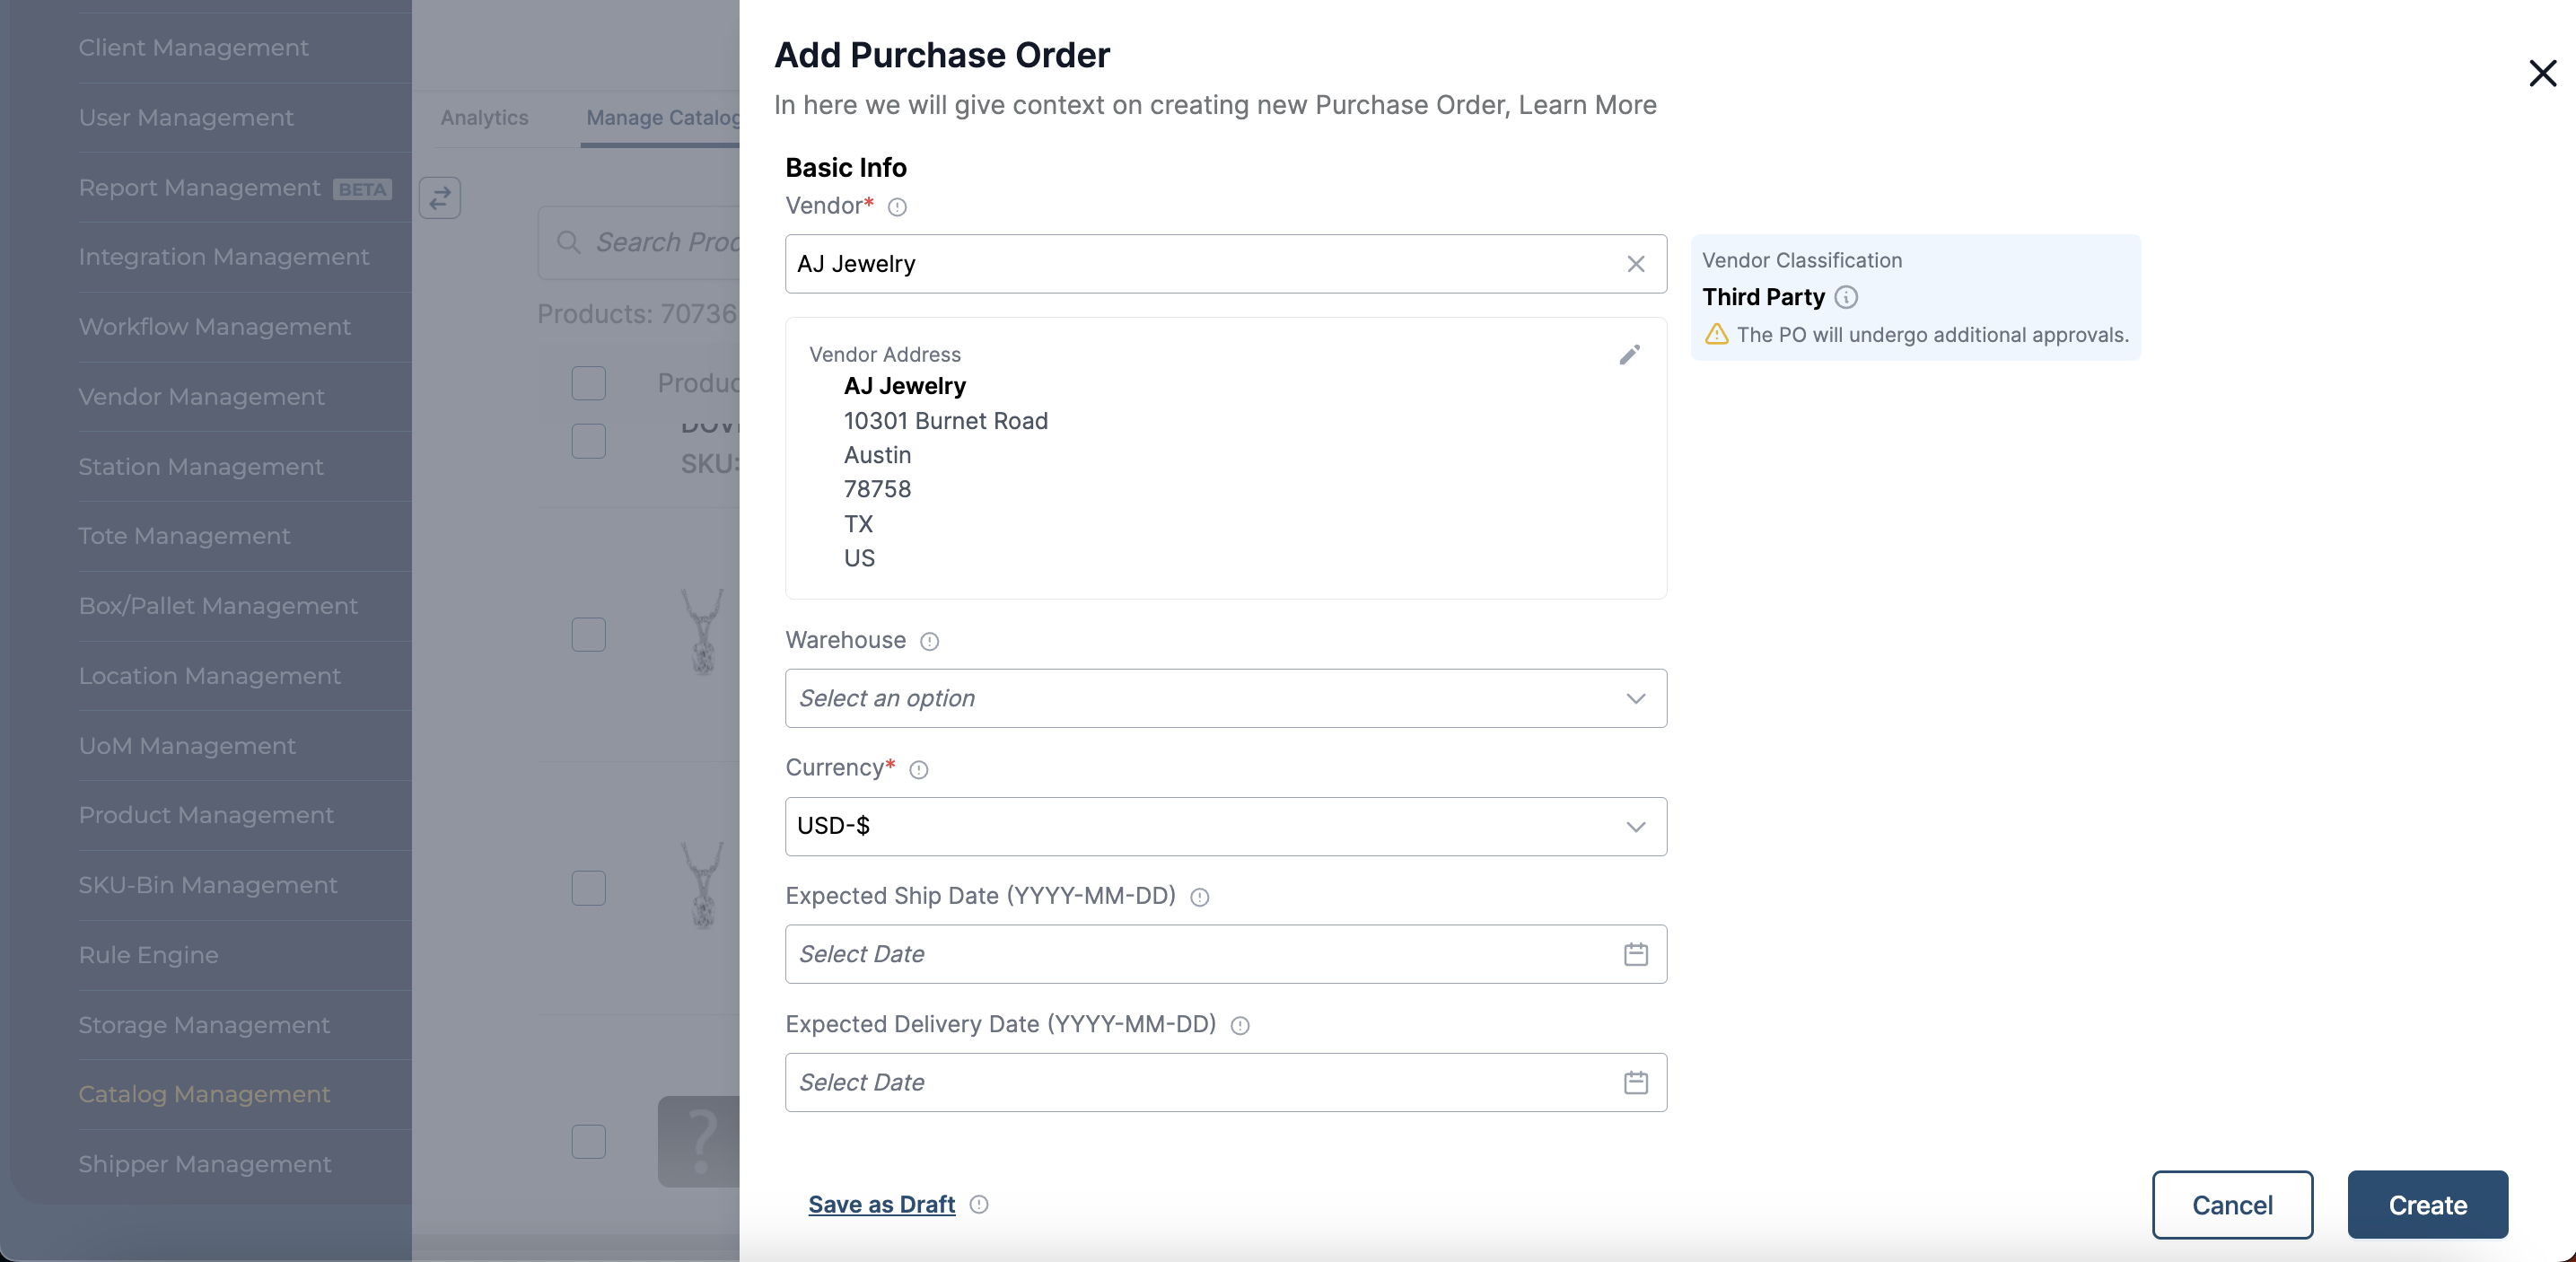
Once a vendor has been selected, if there is an address that was entered, you will be able to view that address.
As a user you will have the ability to update the address for the PO.
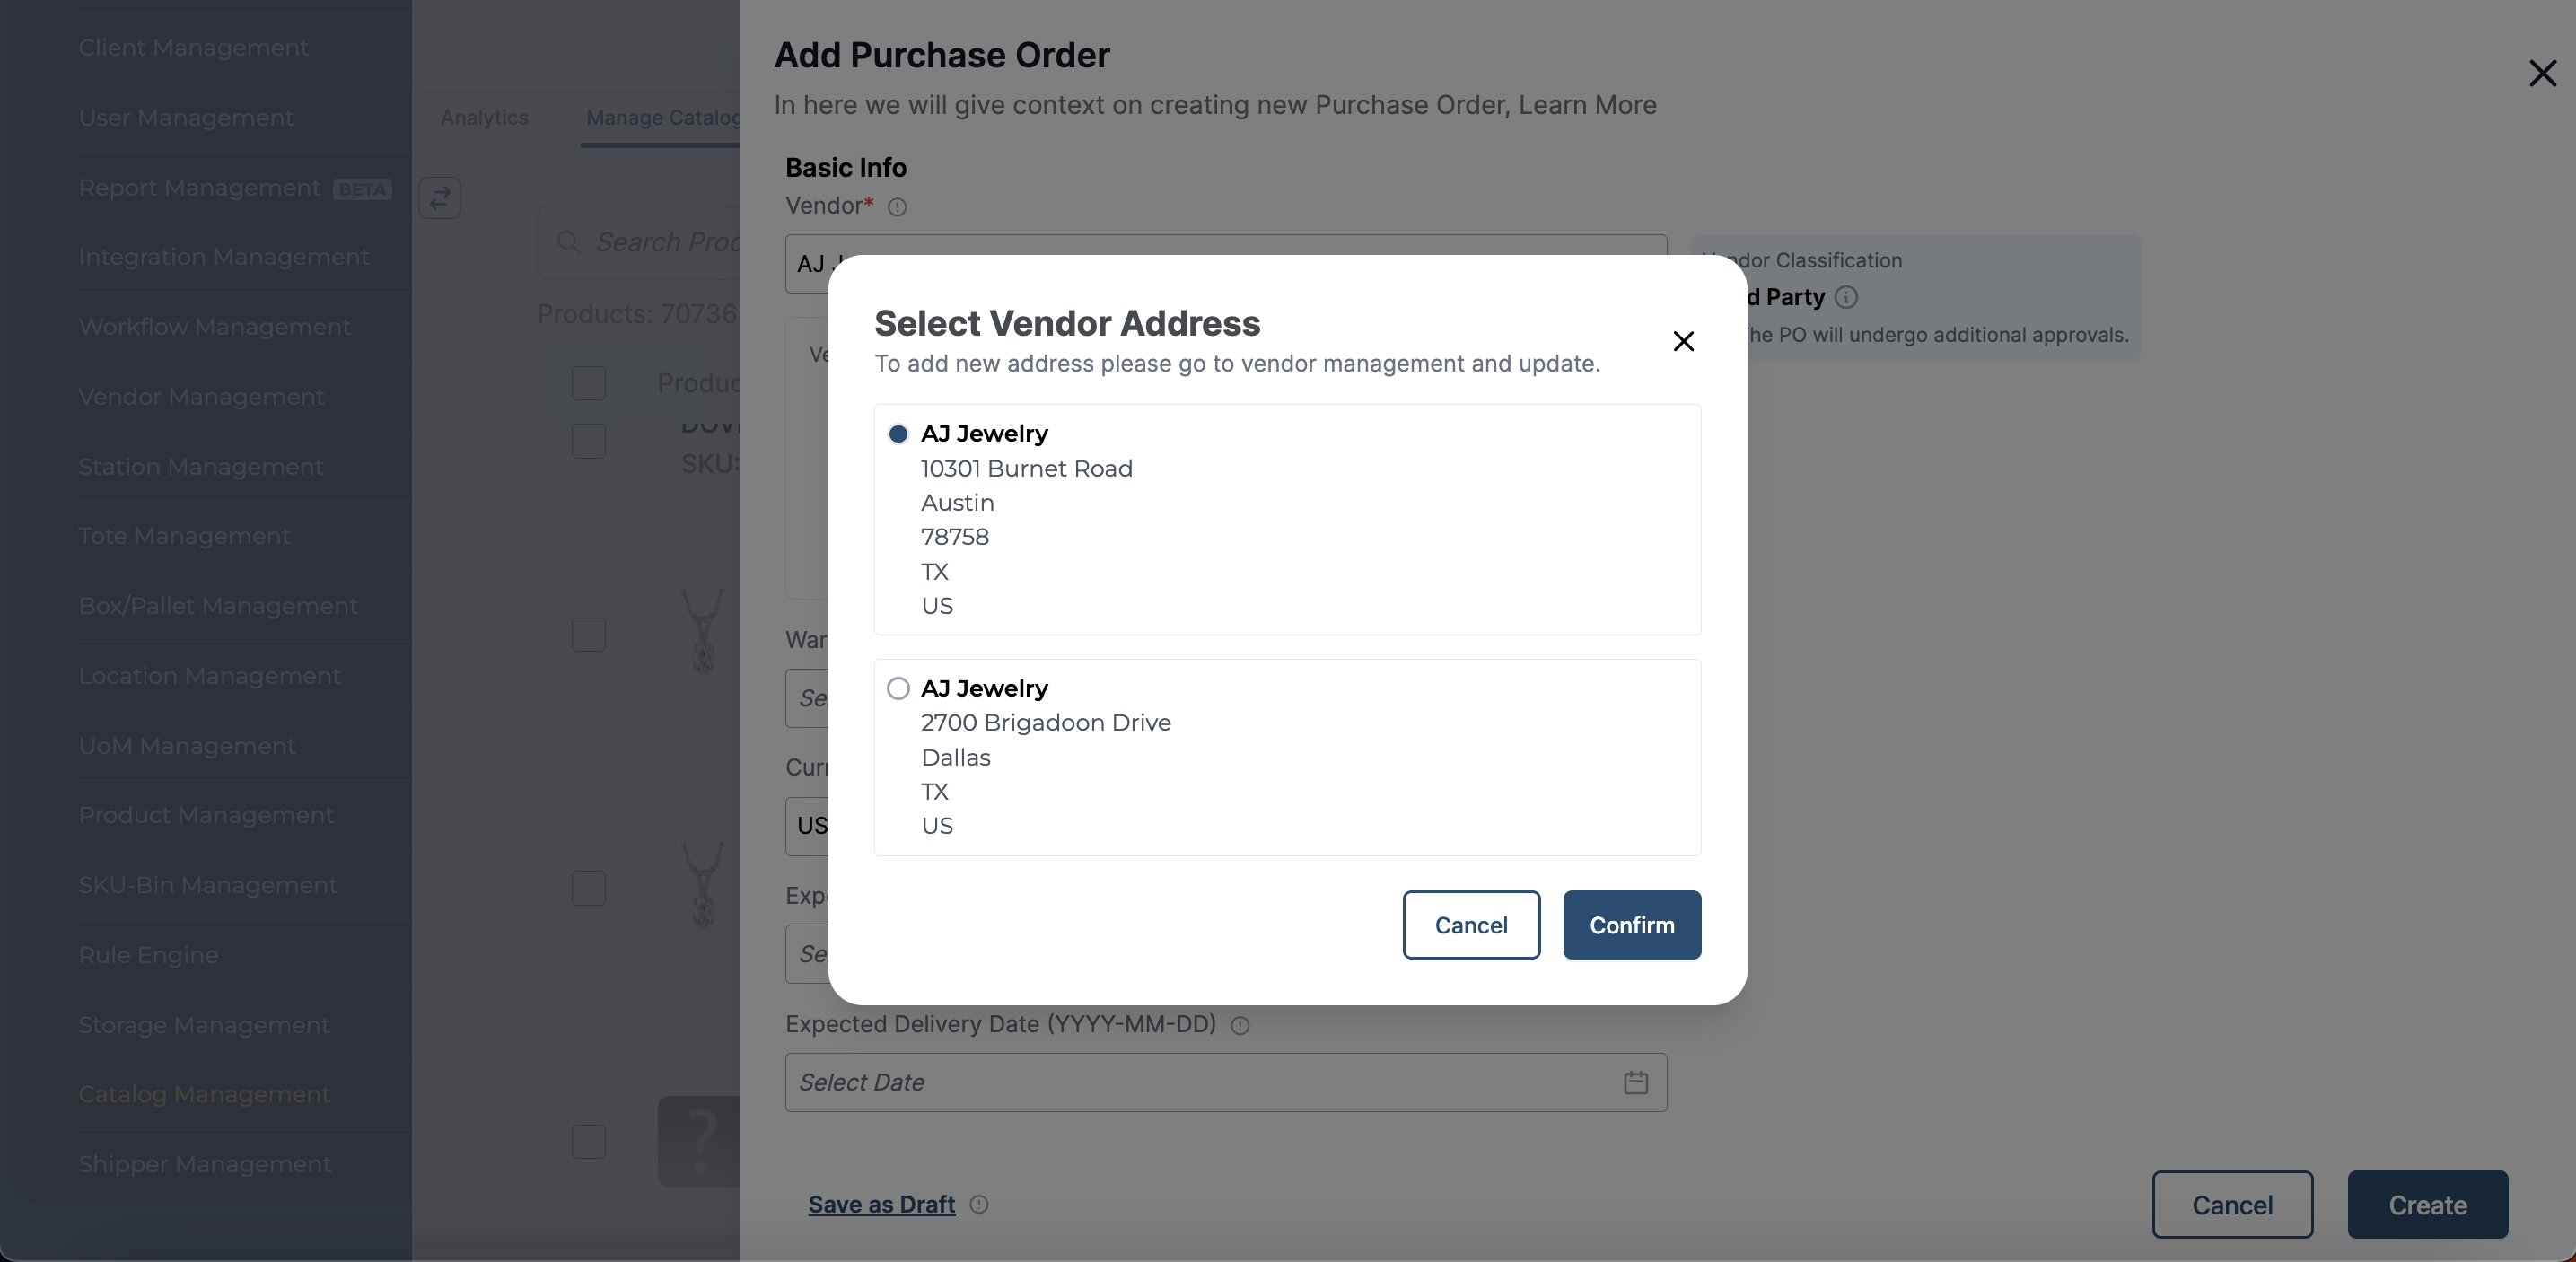
If the Vendor has been classified as Third-Party, it will be indicated, as there will be additional approval for them before the Vendor sends the shipment
Additional Details for PO Creation:
Select Warehouse: As a user you will be able to select Warehouse from the drop-down, if there are multiple warehouses that you have access to.
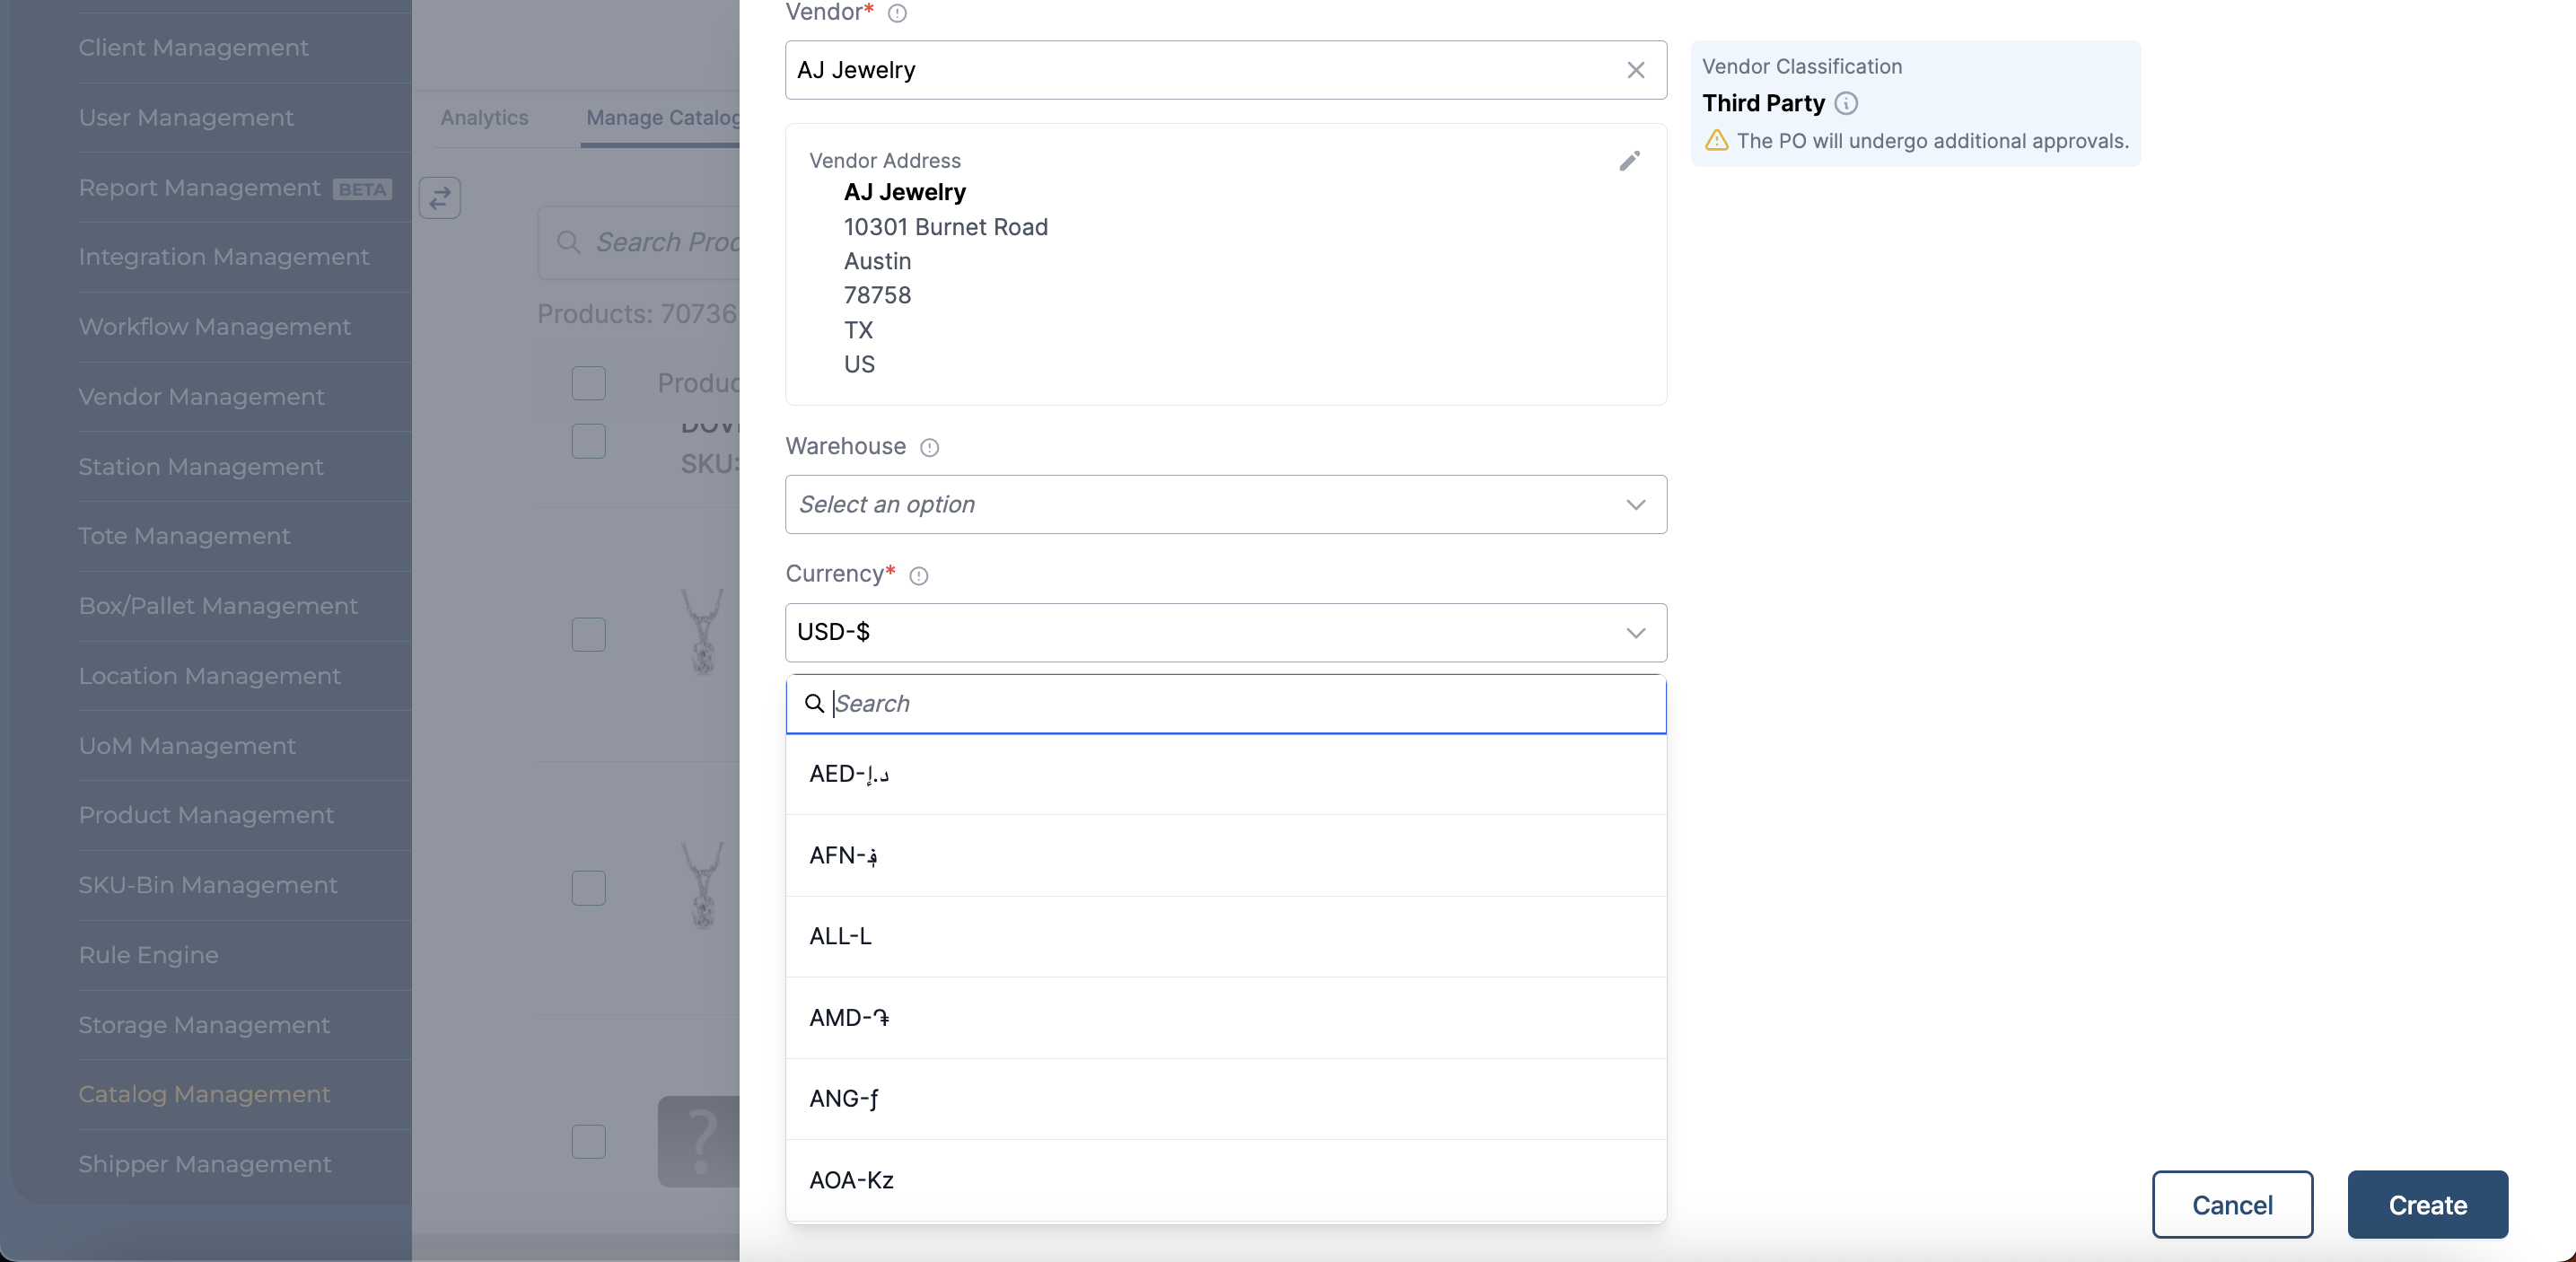
Select Currency: Hopstack has USD as the default currency, but we provide flexibility to the user to select a different currency for the specific PO.
Please Note: The Product’s and its components price will be reflected if the currency and the prices match.
Enter Expected Ship Date: You will have the ability to enter or select the expected ship date so that the Vendor can view this information.
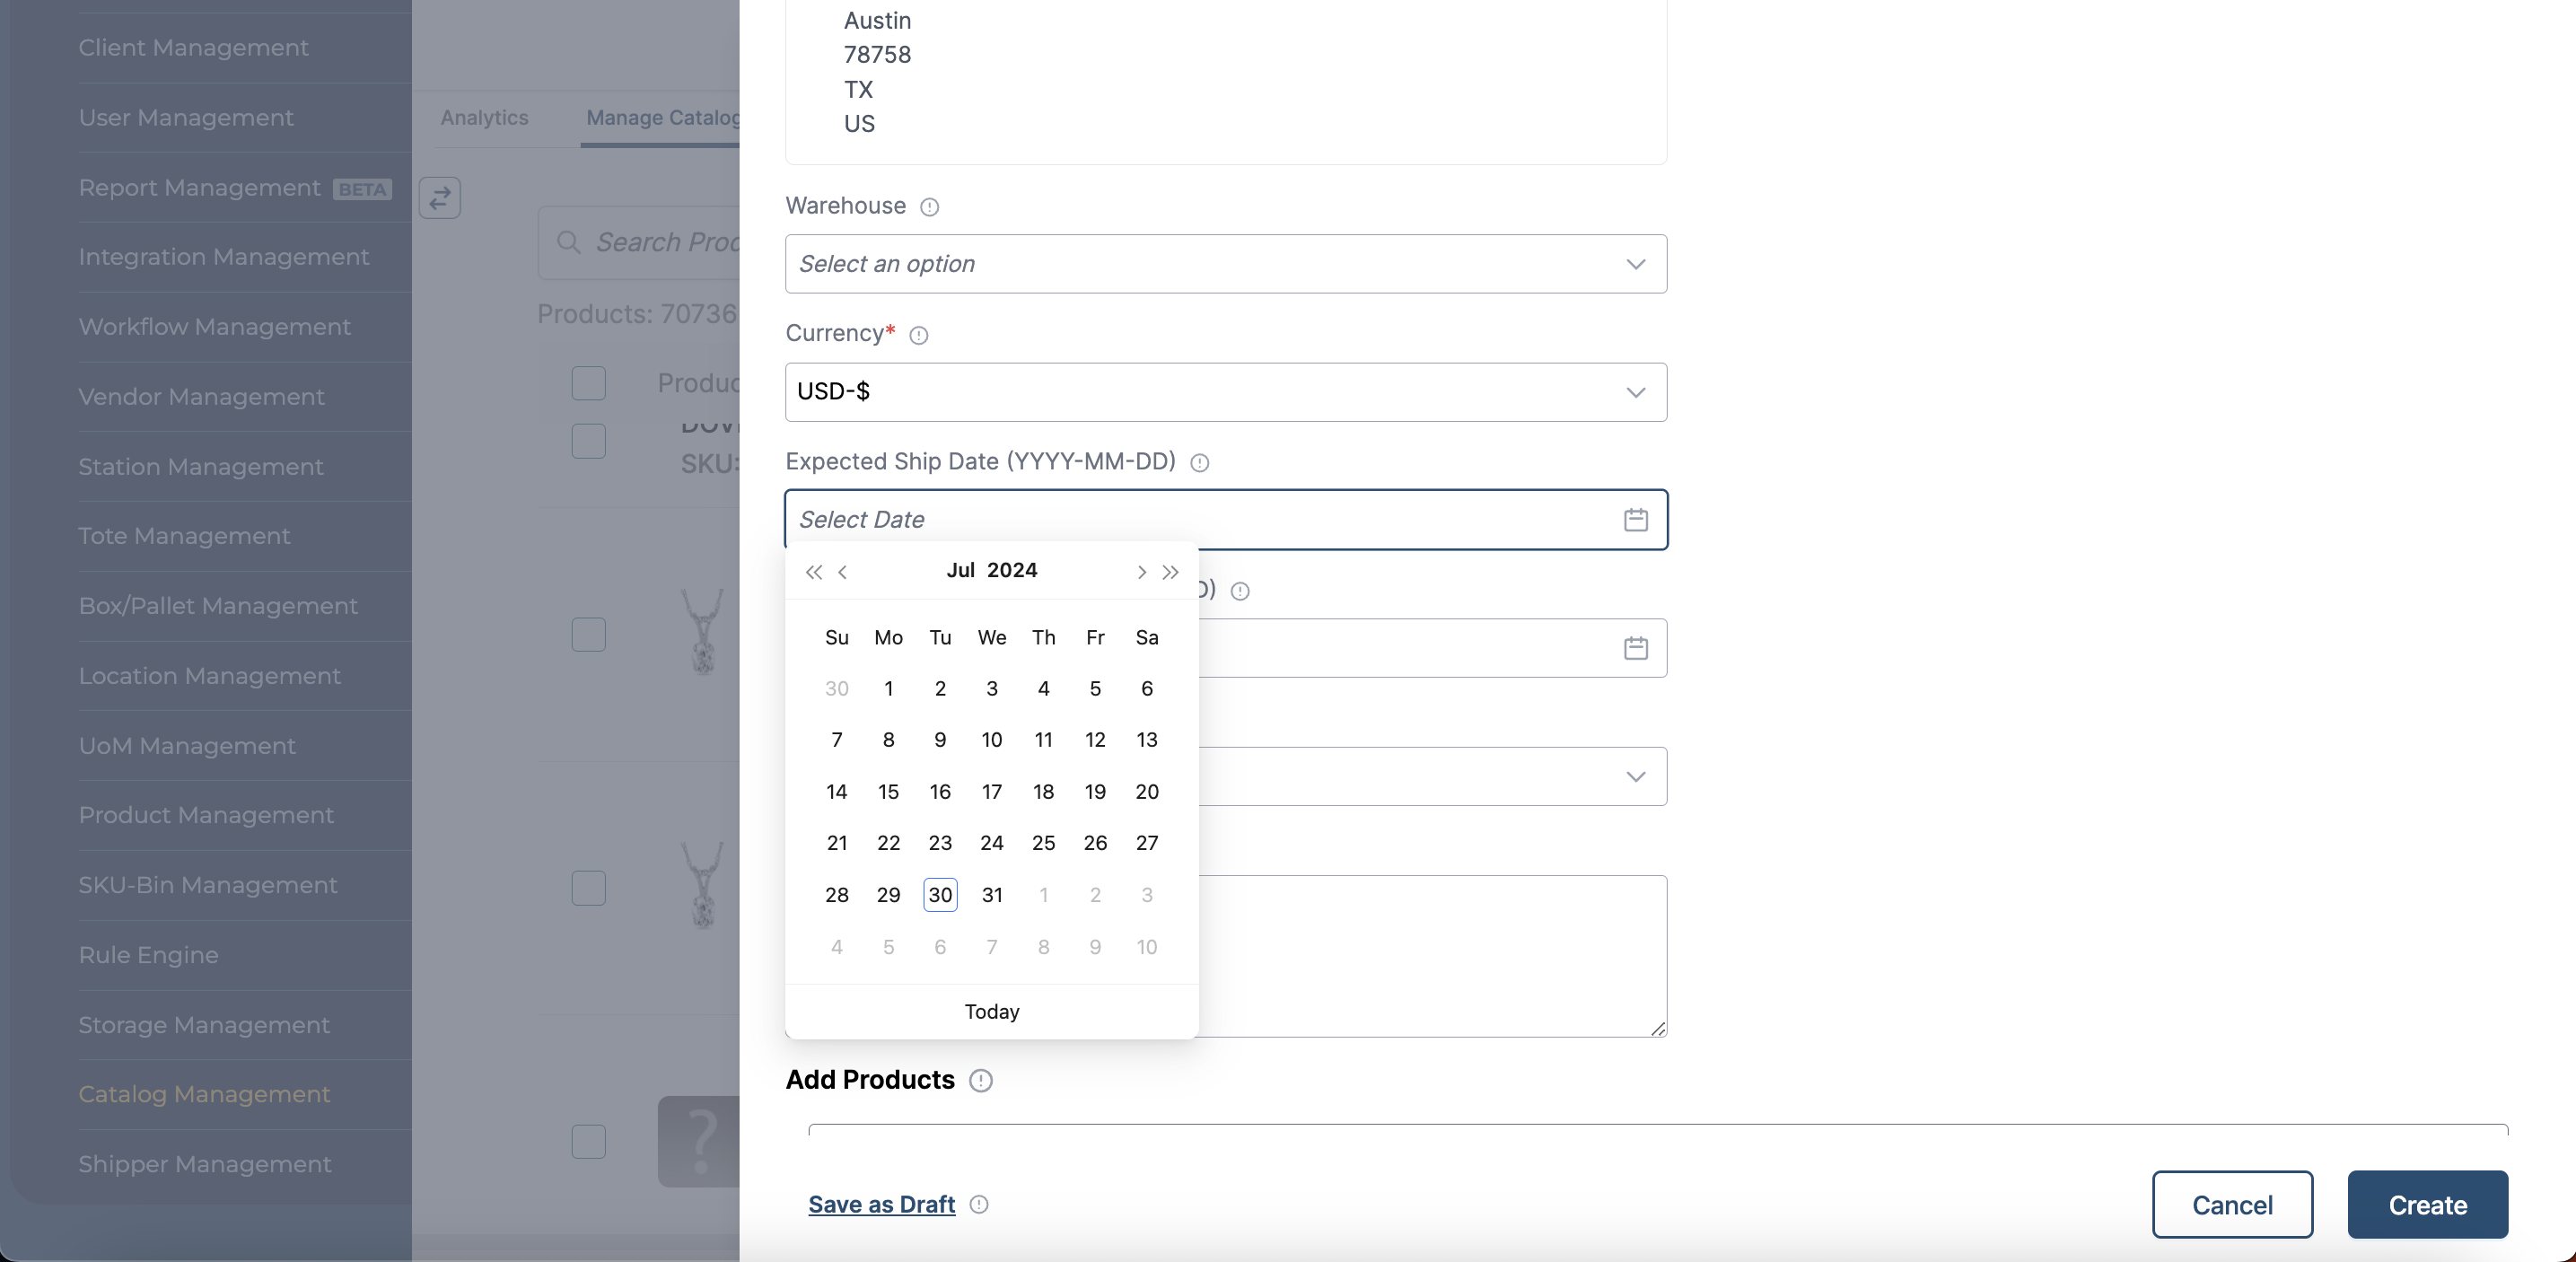
Select Expected Delivery Date: You will be able to select Expected Delivery Date as well. Neither of the dates are mandatory Field
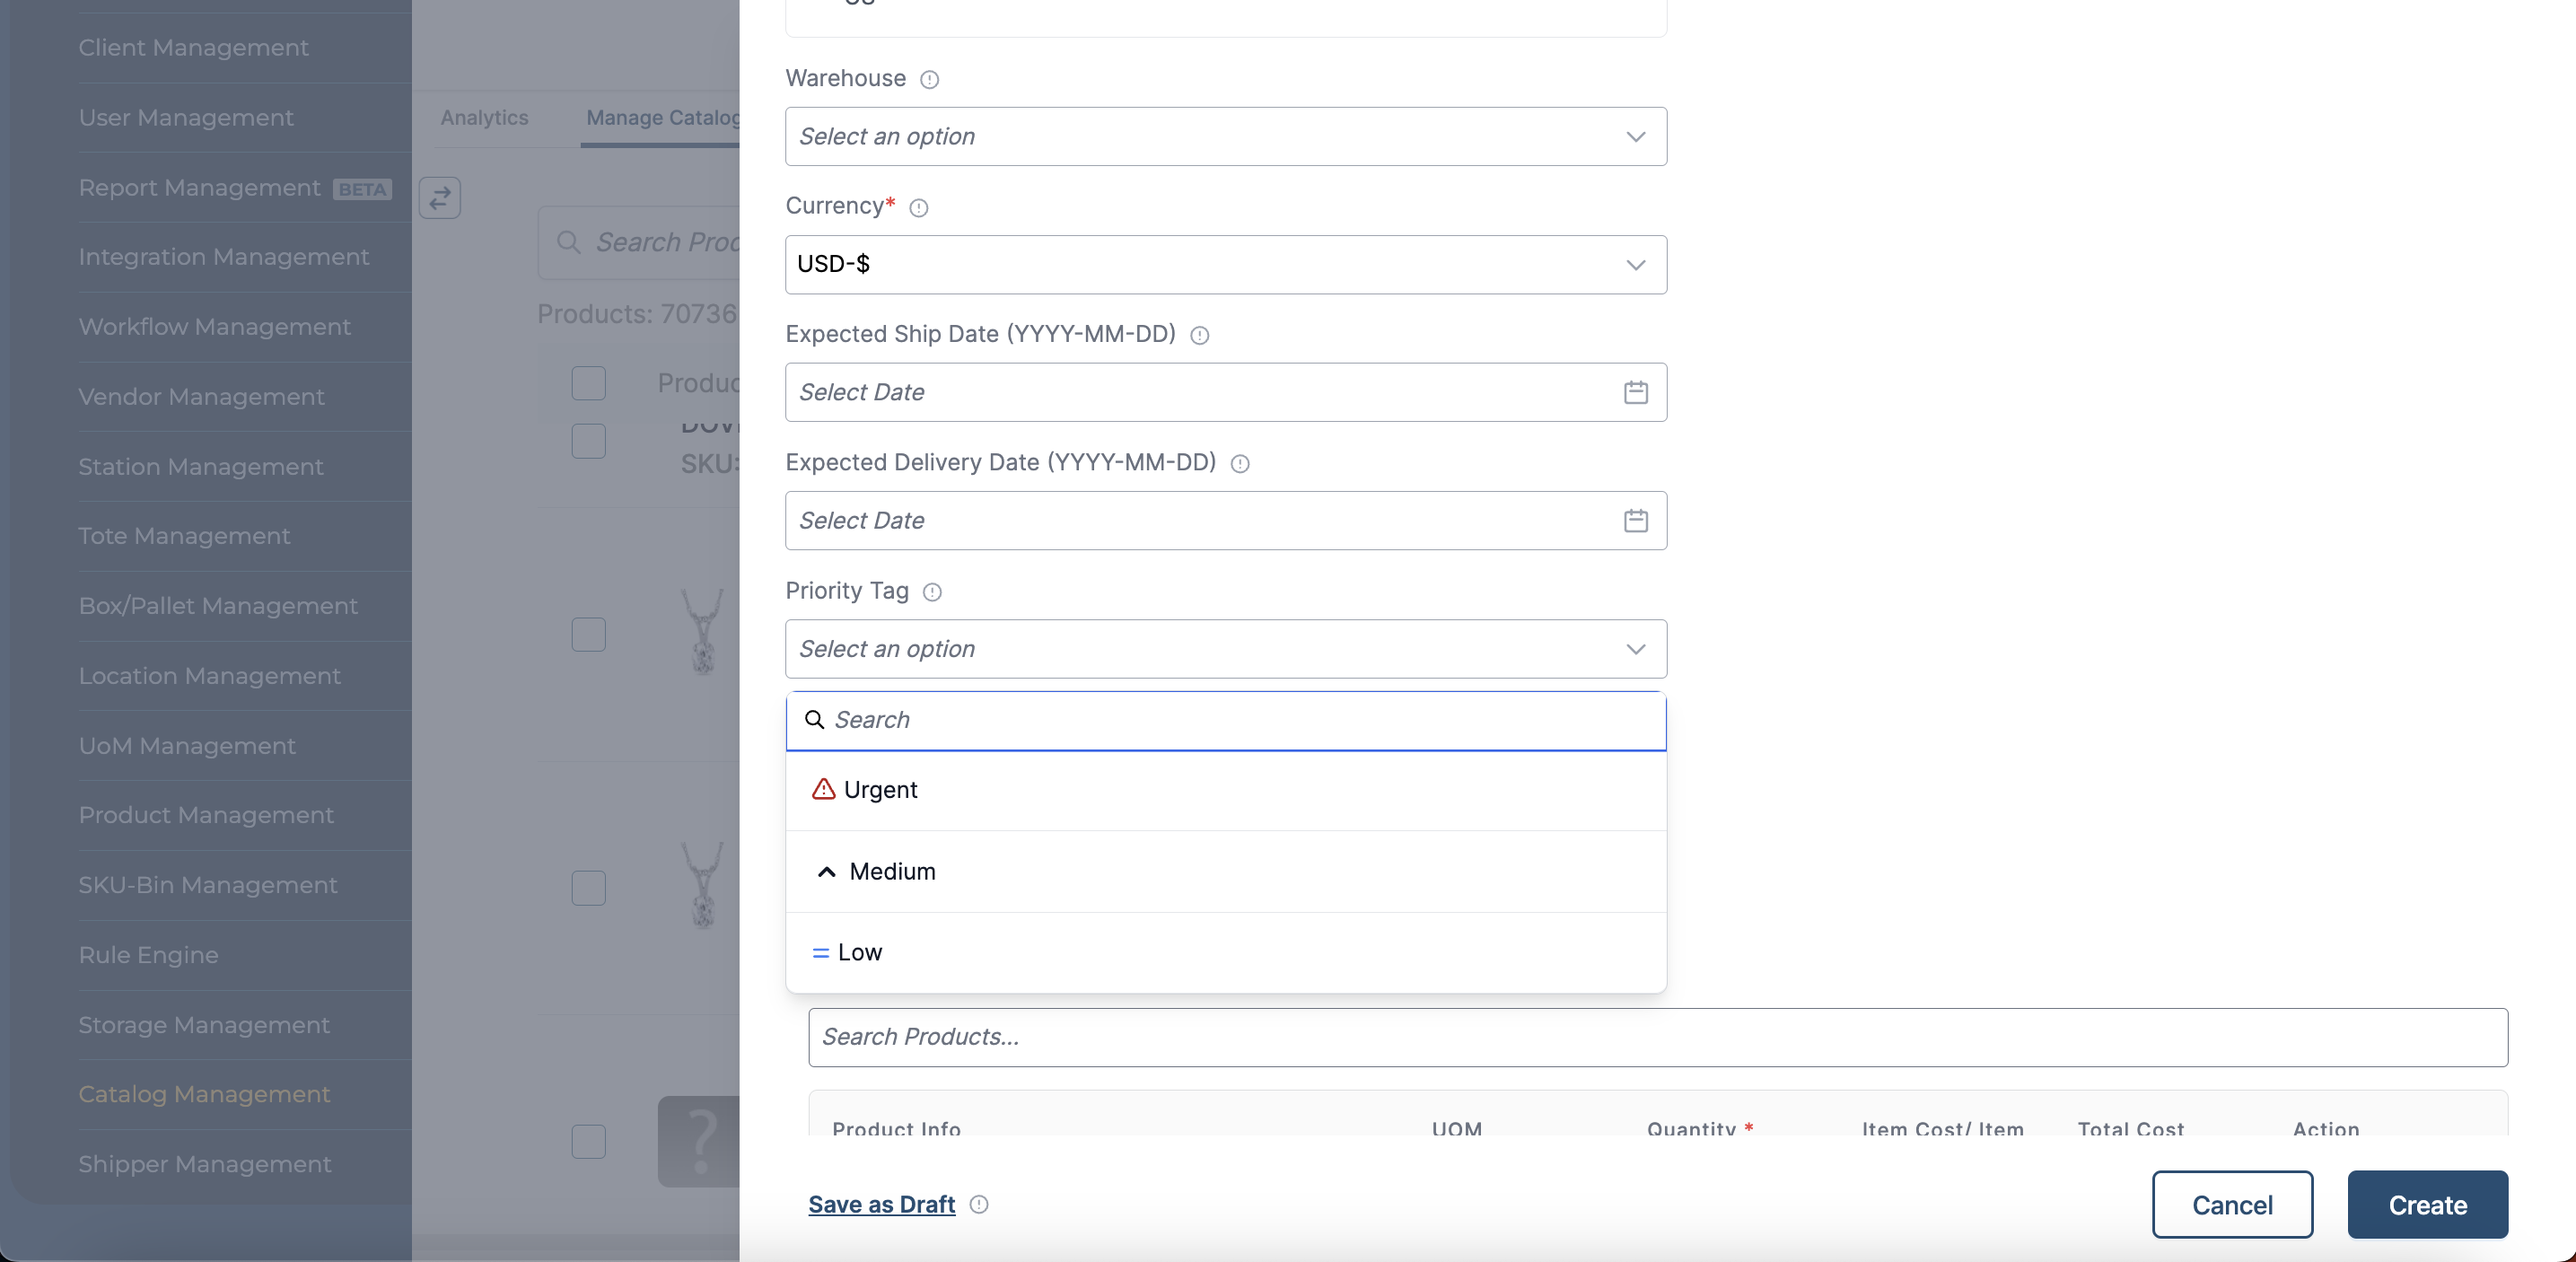
Select Priority: You will have the option to prioritise your PO, so that Vendor understands which ones they need to work based on your needs. We have a drop-down that provides the easiest options for you to prioritise your Purchase Order.
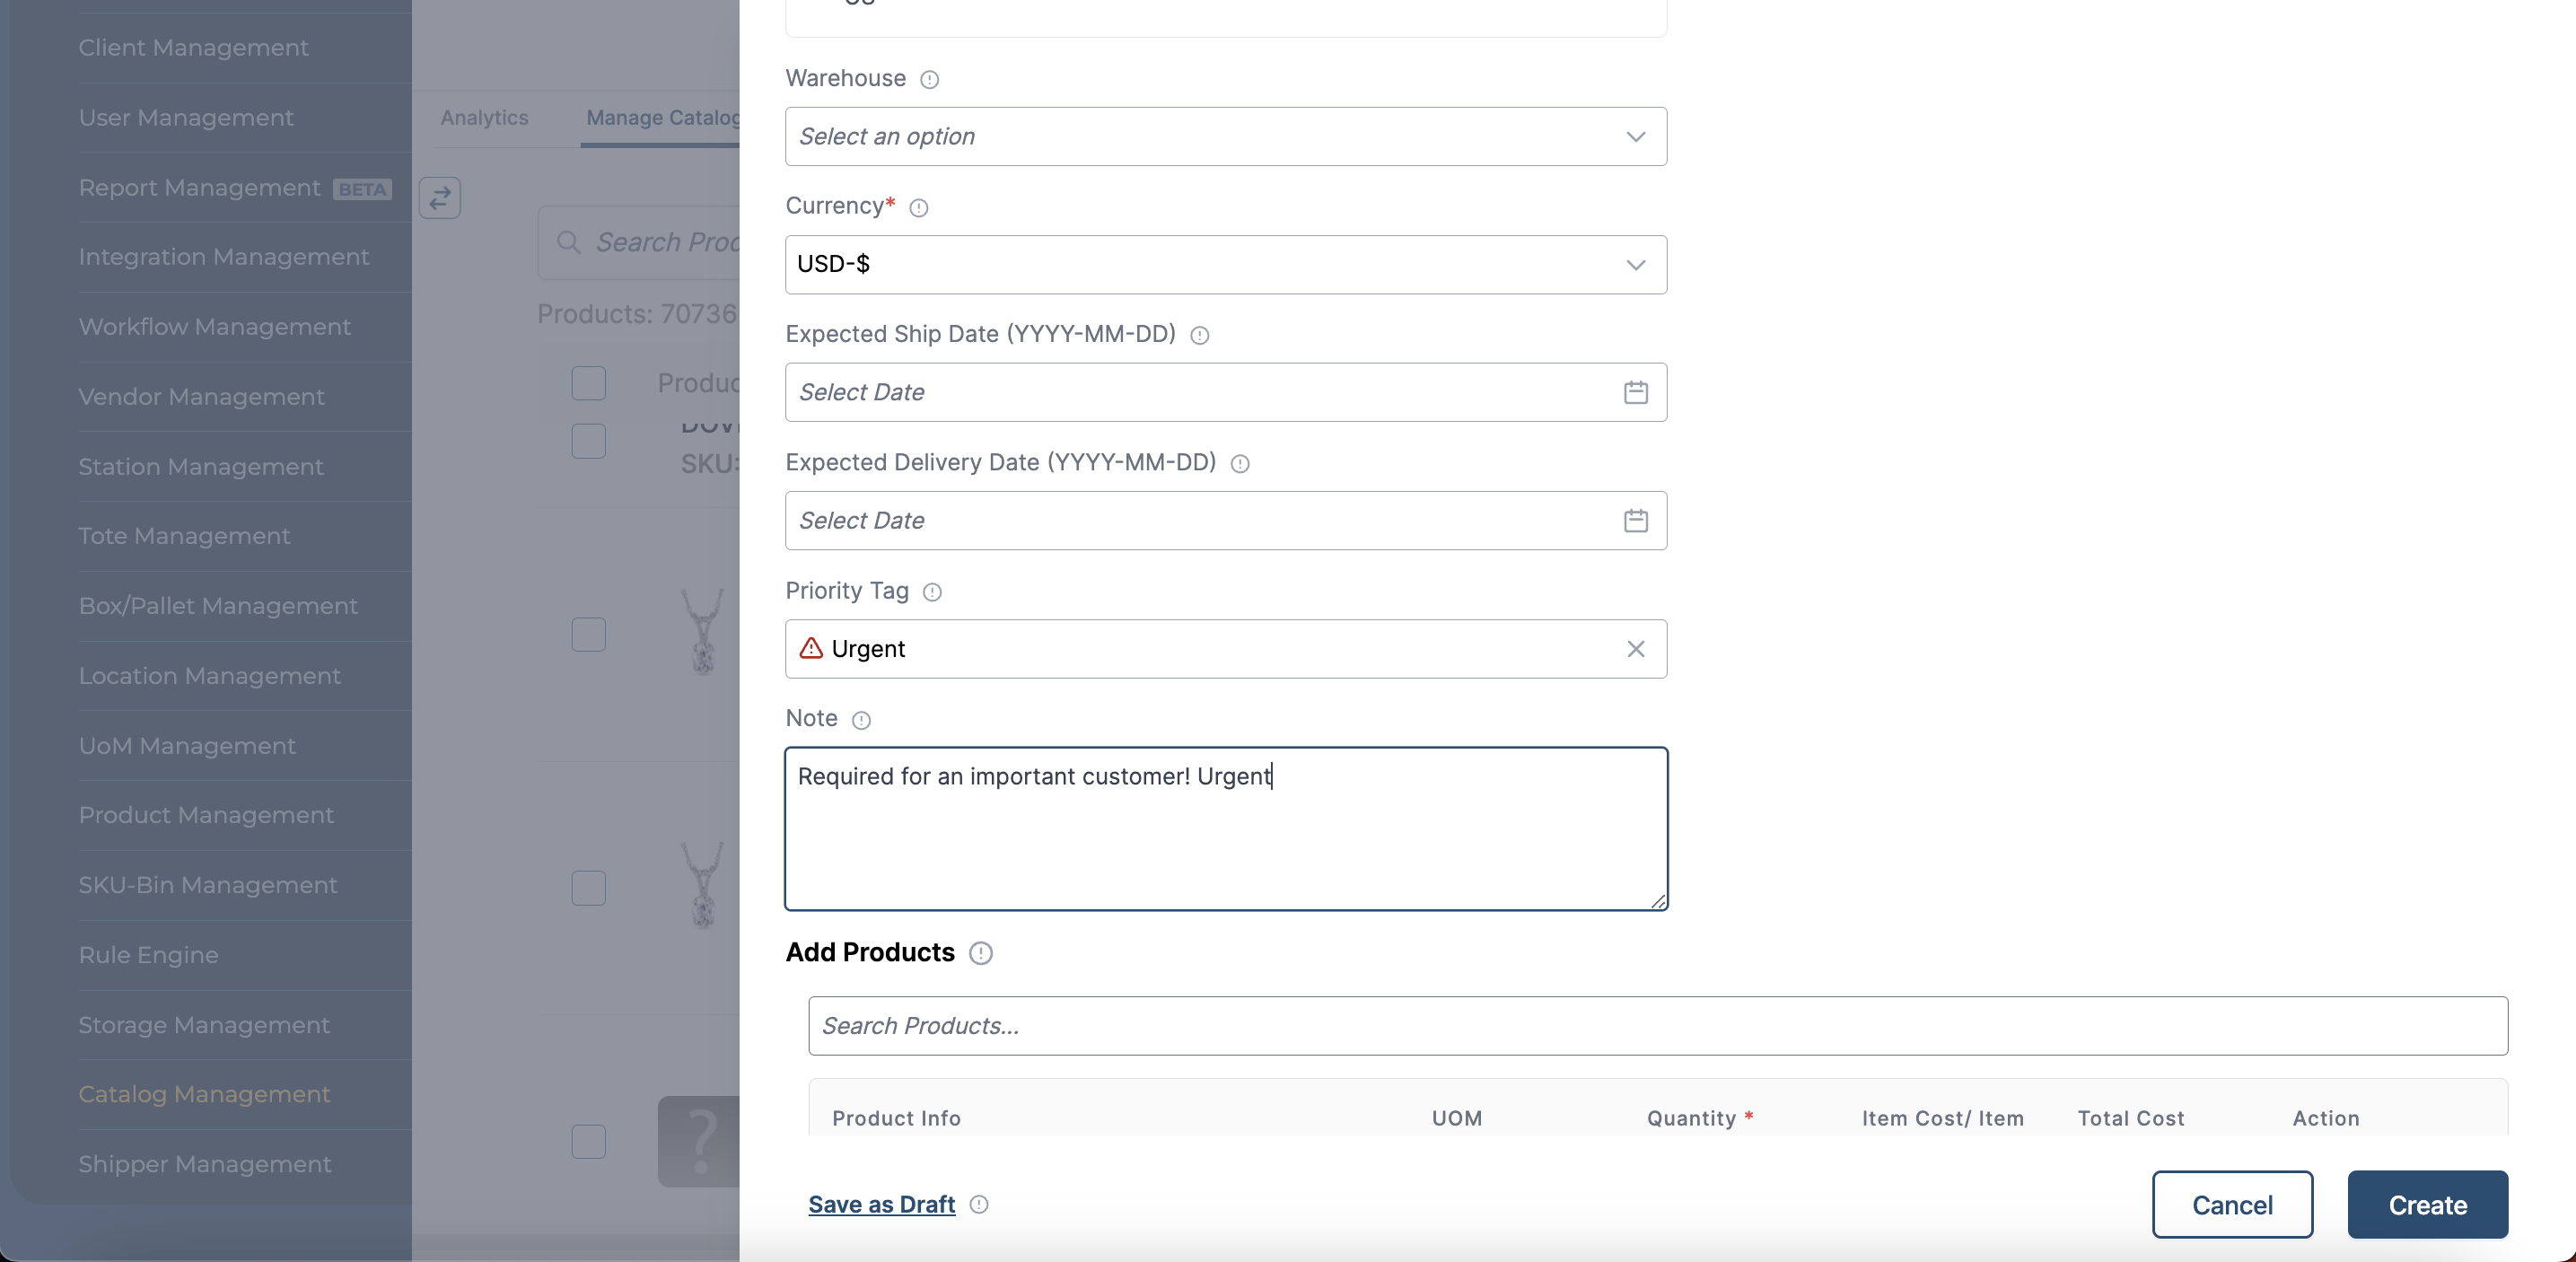
Enter Notes: You will be able to enter Notes for your Vendor’s reference here.
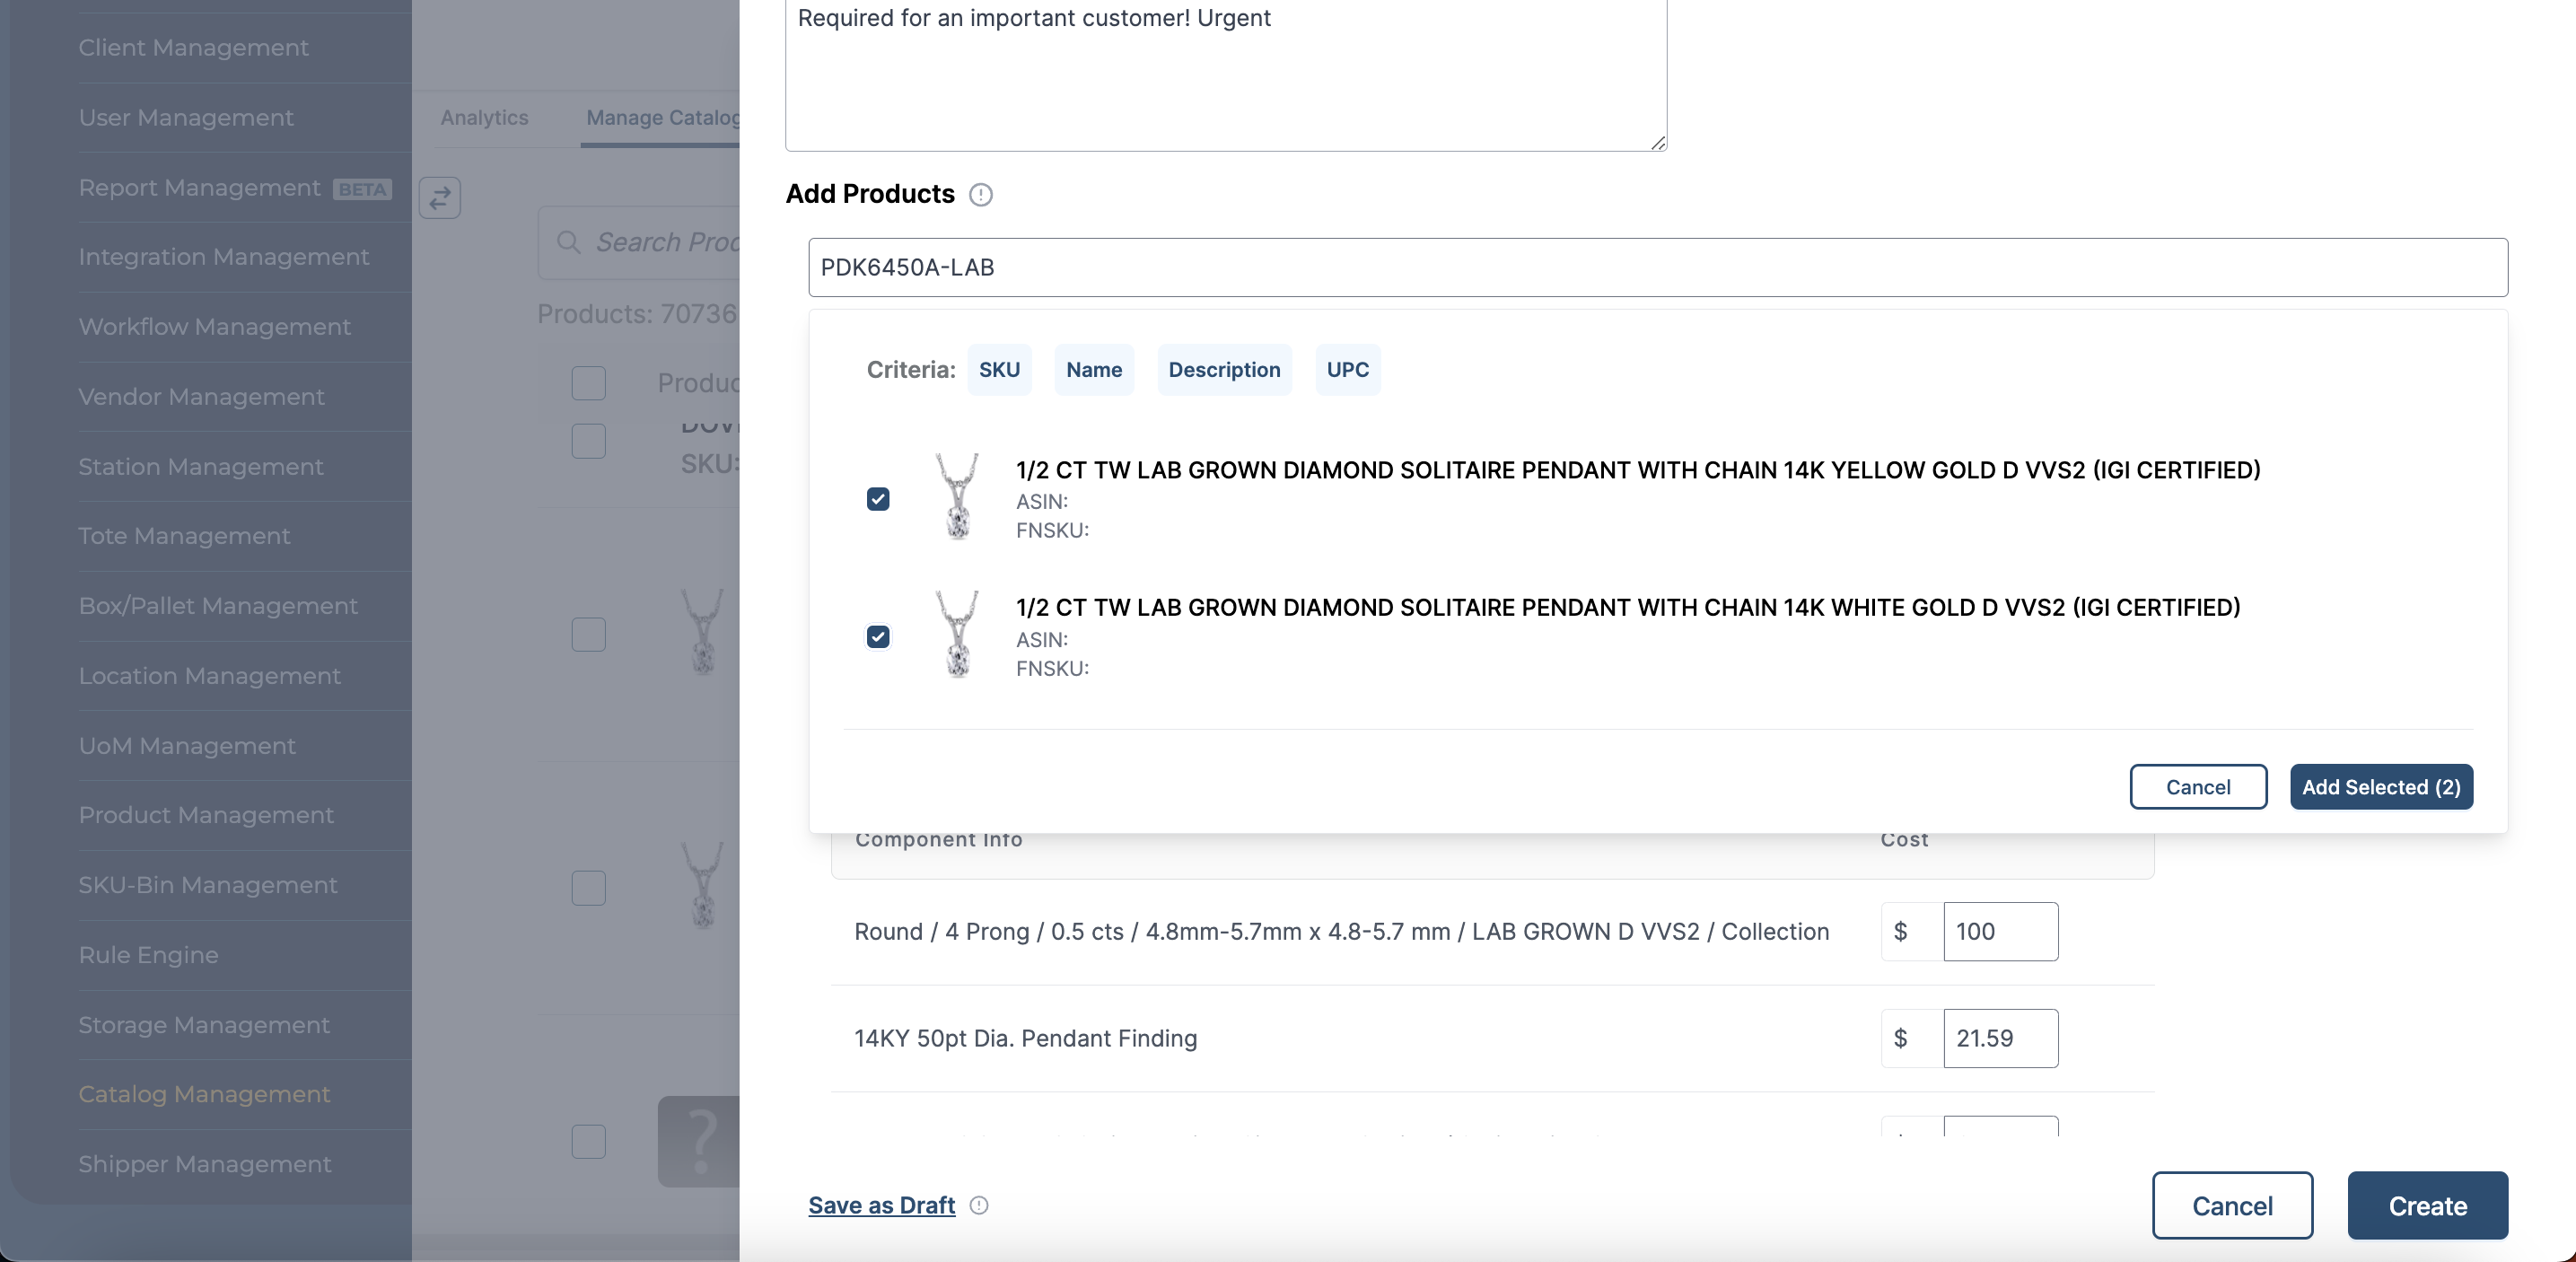
Add Products:
The Product that you had selected on Catalog, for which you started to create the Purchase Order will already be reflected on the screen.
Products & Components:
If the Product has components, on clicking “ View Components”, you will be able to view them.
Note: Product’s components can not be edited during the Purchase Order creation
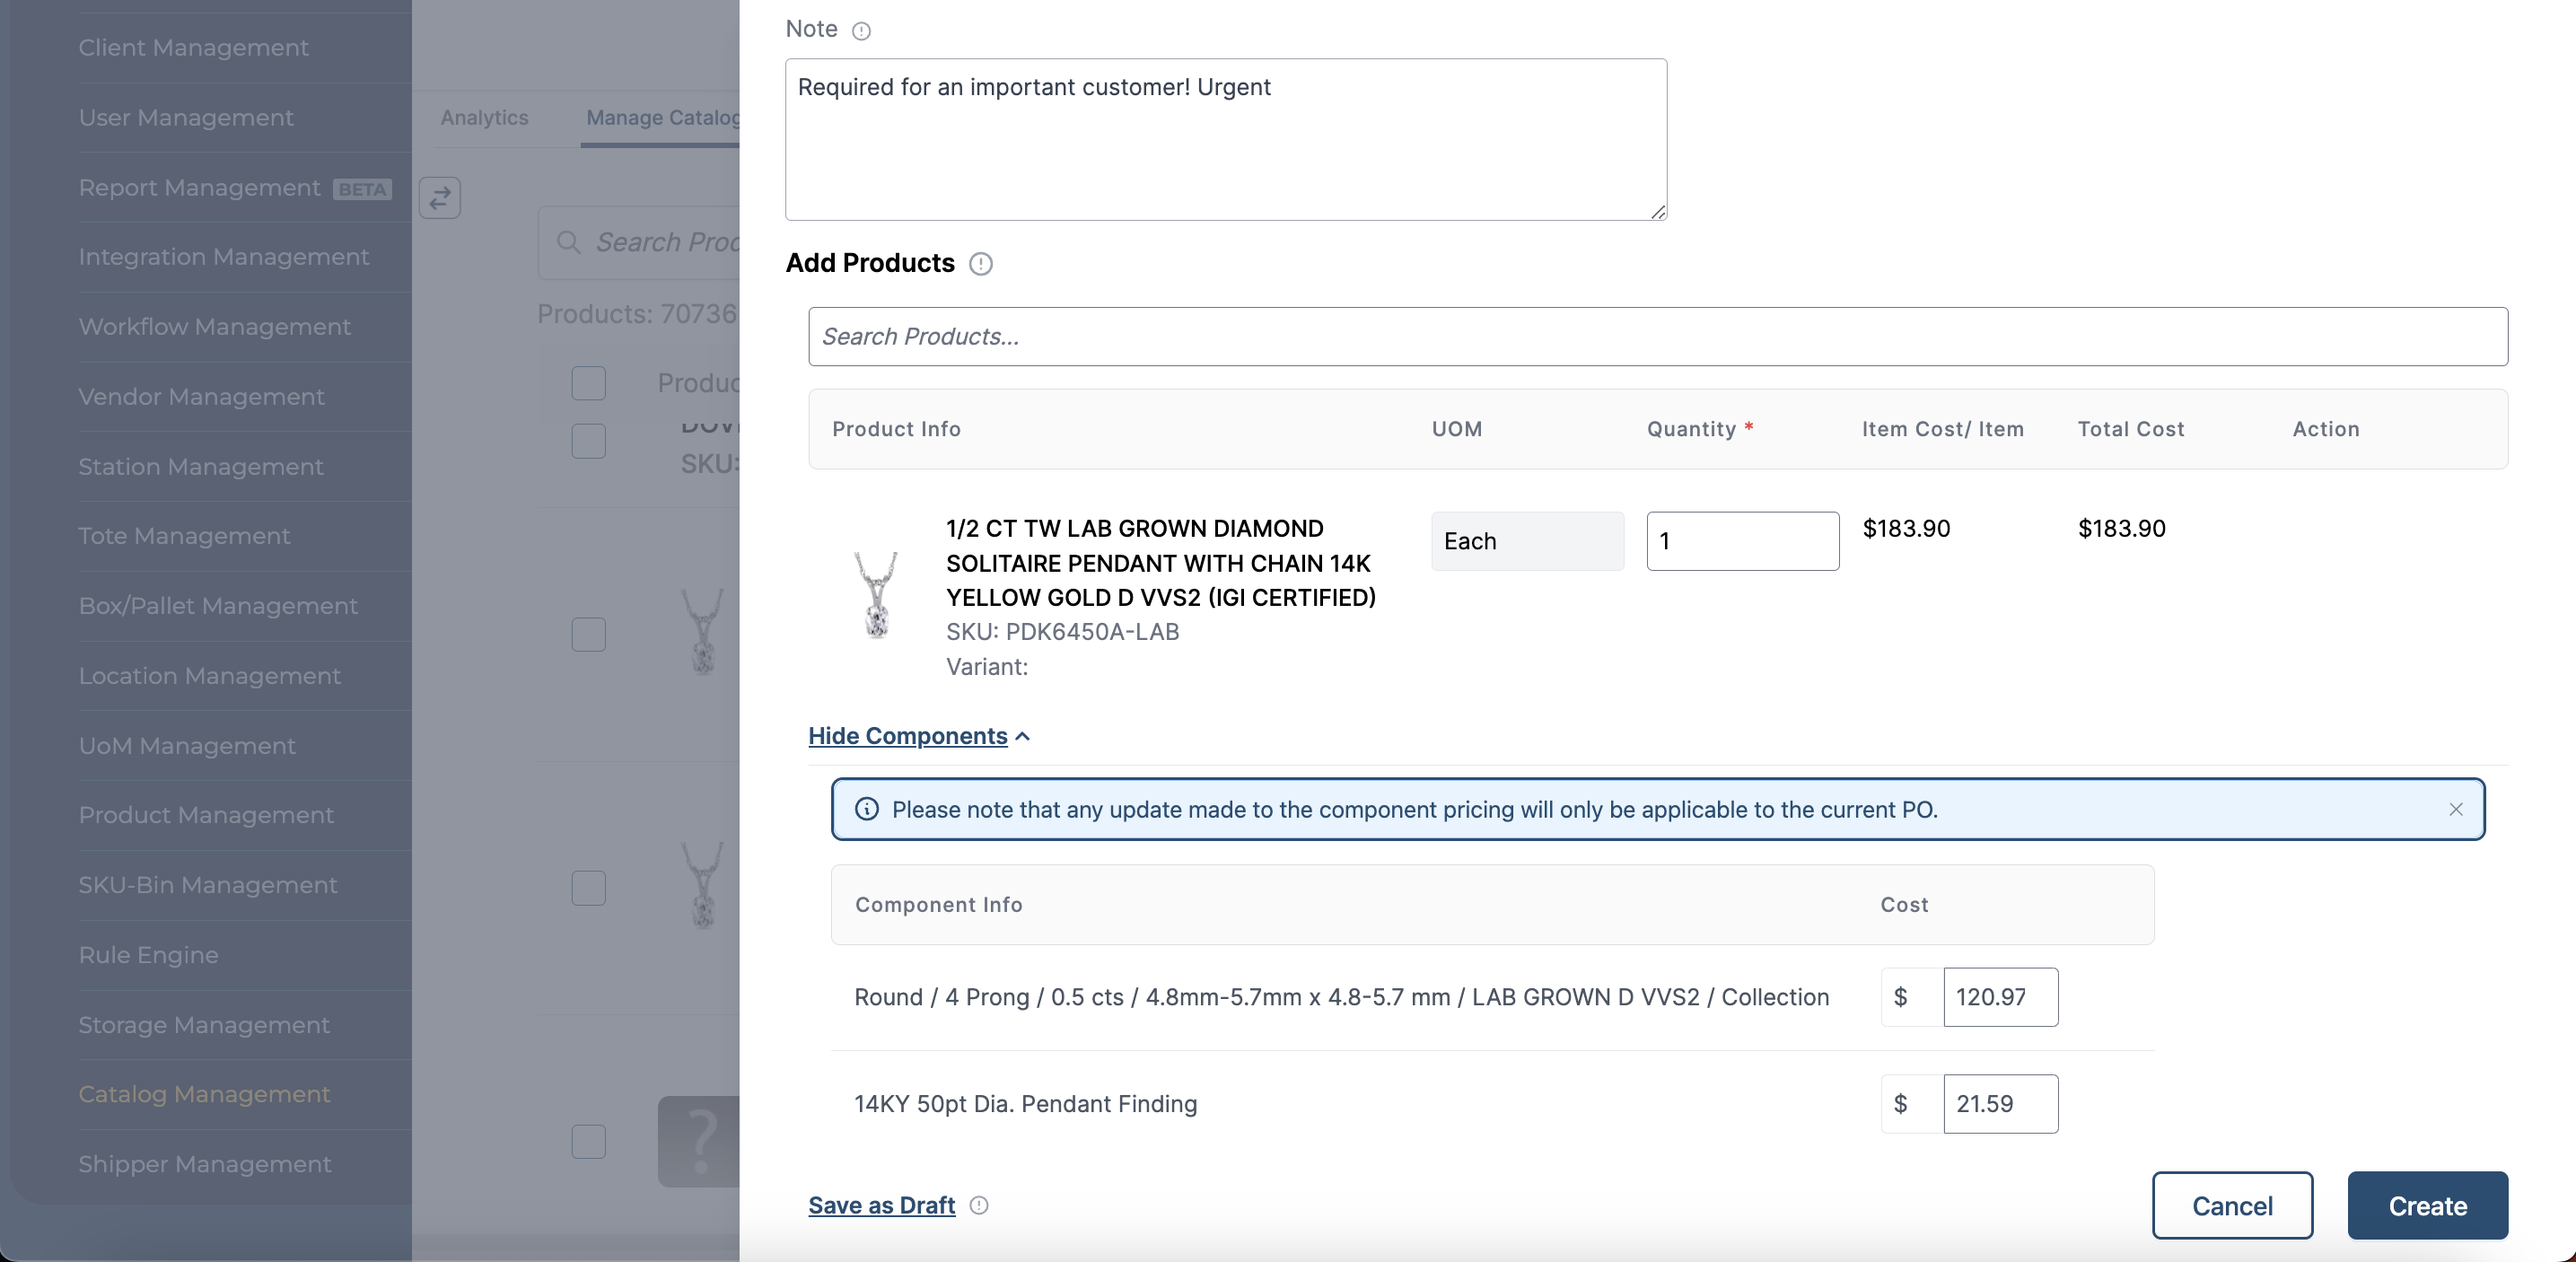
As this product was already selected, the default quantity on the Product will be 1, and you will be able to update that field to how many are required.
Pricing:
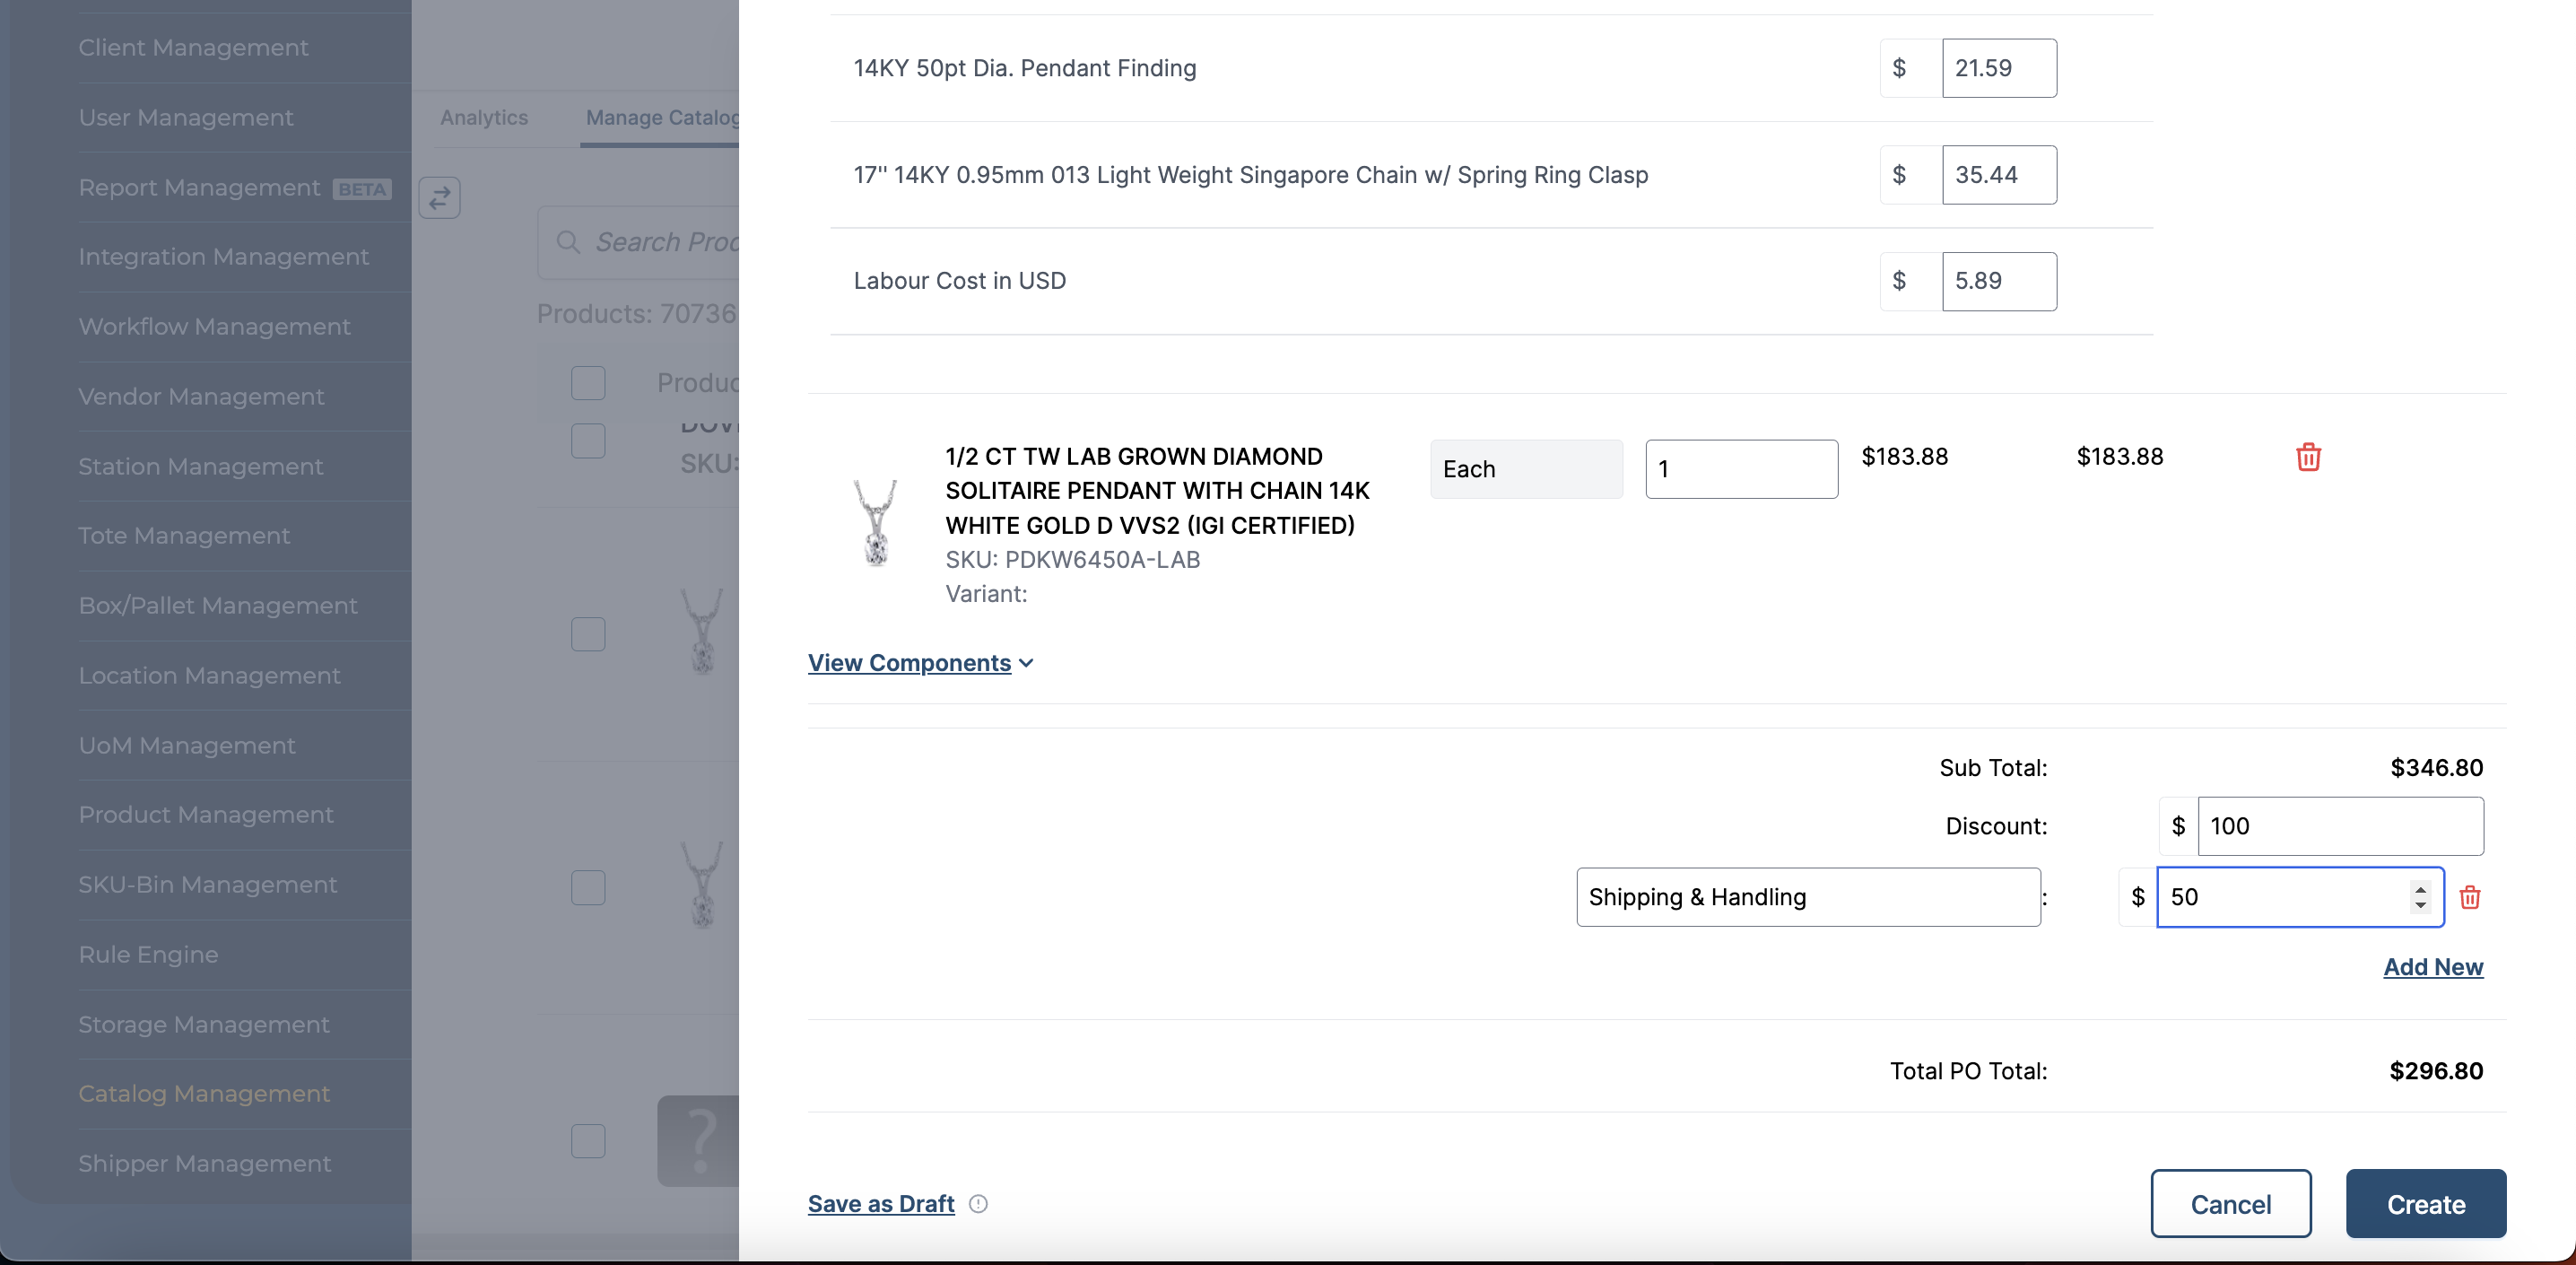
If the Product and its components have pricing based on the currency that was selected, you will be able to edit the component prices, and you will view the updated computation on the Item Cost/Item.
Total Cost will be a computation of Item Cost/Item and the no. of items that you have entered.
If there is no Pricing on the Product and its components, you will still be able to edit the components cost, to view the updated cost on the “Item Cost/Item” value.
Products without Components:
If there are no components that have been created within a Product, you will be able to enter the no. of quantities you would like and edit the Product’s Item Cost/Item value
As a user you will be able to search and select as many products as you would like to be able to include in a single PO.
A simple search in the search bar, by different parameters such as SKU, Name and so on.
You will be able to view the results, where you will be able to do multi-select and further click the “Add Selected” to enter all of the selected Products into the PO
Additional Charges:
You will be able to view Purchase Order Sub-Total, which will be the summation of the Products Total Cost, that you have selected for this specific PO.
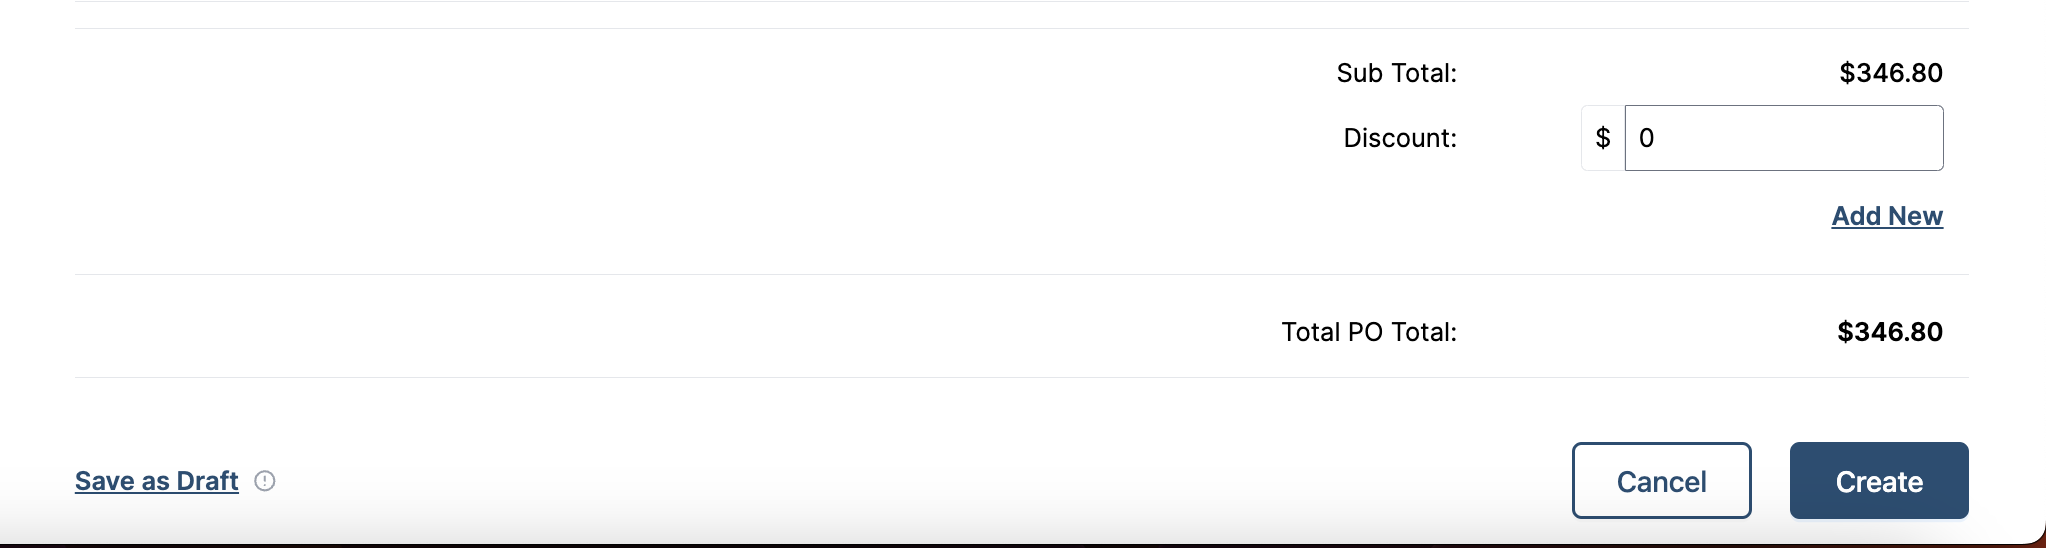
Hopstack provides the ability to enter discount value such as $200, and you will see the Order Total Value being updated.
Hopstack also provides additional flexibility of entering “additional Charges” by clicking “Add new', where you will be able to enter the description for the charge, and the value. You will notice that the Order total value will be updated.
All of the additional charge values you enter, they will be added to get the Purchase Order Total.
Save as Draft:
On clicking “Save as Draft”, the Purchase Order is in Draft status for you to update, edit and work on it before you want to send it for Approval.
To make the PO creation more coherent, the “Save as Draft” needs the mandatory field to be entered before it can be saved in Draft.
Create:
On clicking Create, the Purchase Order moves to “Pending Approval” state, where an approver from your team can approve before it is sent to the Vendors.
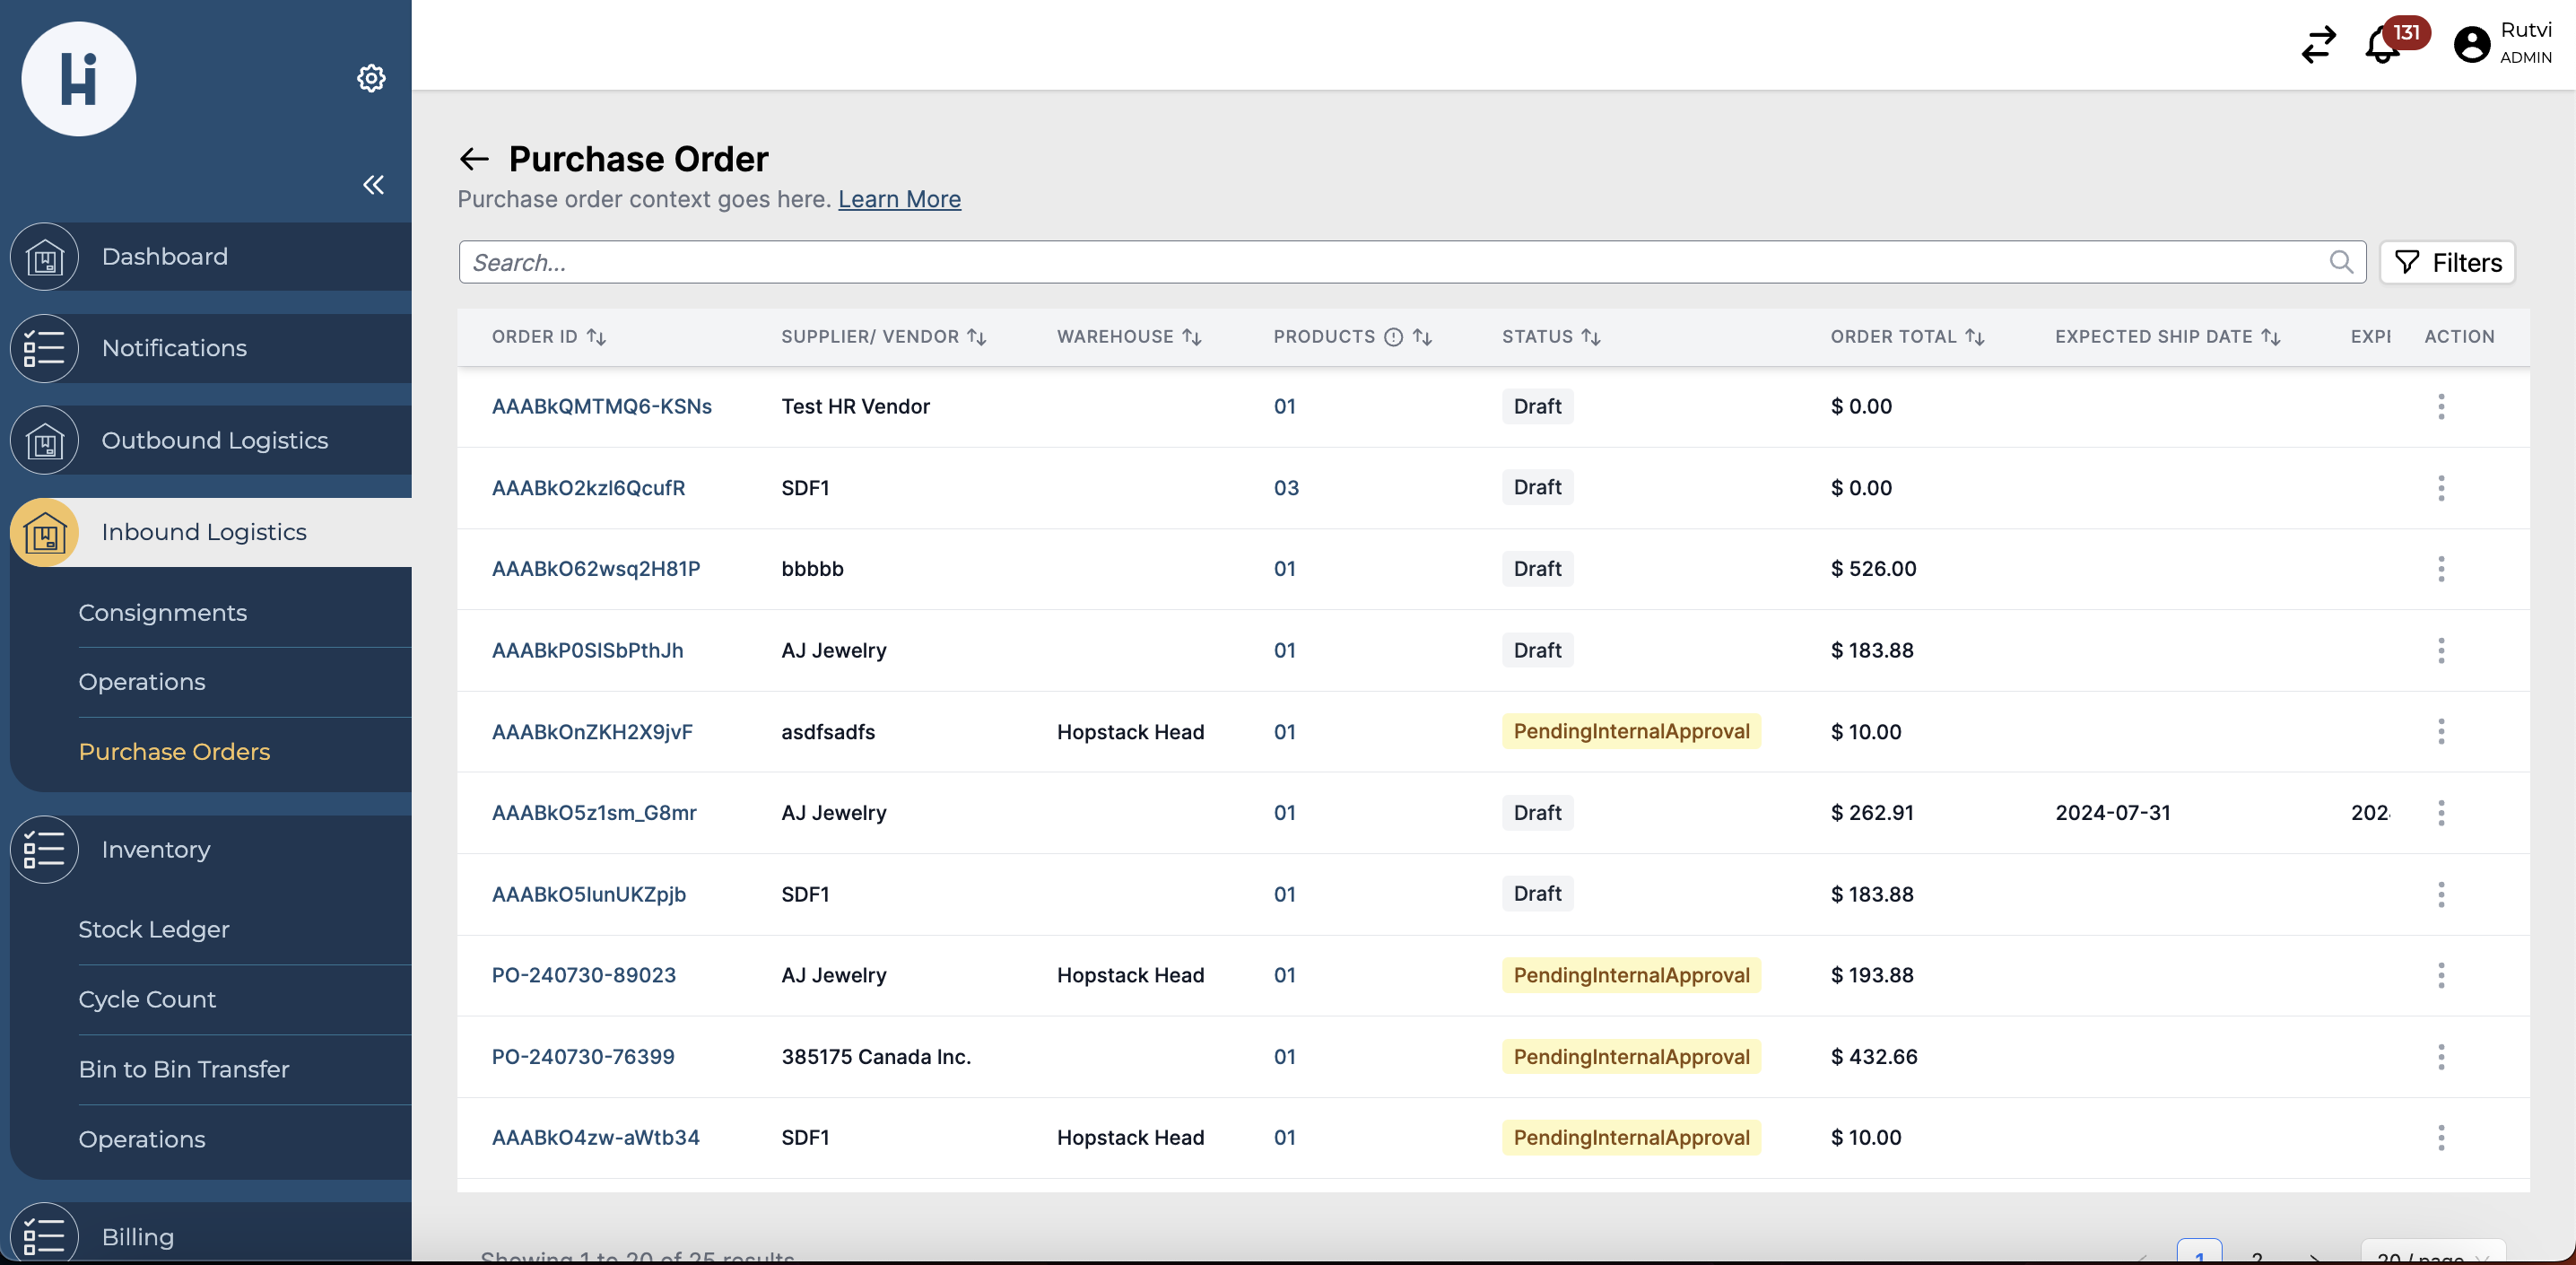
View the Created PO:
As a user once you have created a PO either in Draft Status or in Pending Approval, the user will be able to navigate to Inbound Logistics, and click “Purchase Order” to view the list.
Note:
Pricing with Product Component’s: If Products do have components, the costs will be edited at the components level, and those will be computed to view the Item Cost/Item for that Product. The Total Cost for the Product will be computed by Item Cost/Item * Quantity
Pricing without Product Component’s: If Products don’t have components, the costs will be edited at the Product level, user will be able to edit Item Cost/Item. The Total Cost for the Product will be computed by Item Cost/Item * Quantity
Currency and Pricing: Pricing will only be displayed if the currency and pricing match. For example, if USD is selected and pricing is available in USD, it will be shown.
Any Edits on the PO will be limited to that PO only.